Archives for November 2008

lime meltaways

copy-of-img_8545

I’ve gotten into the annoying habit of buying a bag of limes when I only need one lime because they’re so darn expensive if you buy them singularly. And then I have to get creative trying to use up the rest of the limes. See, I was practically forced to make lime cookies.

copy-of-img_8446

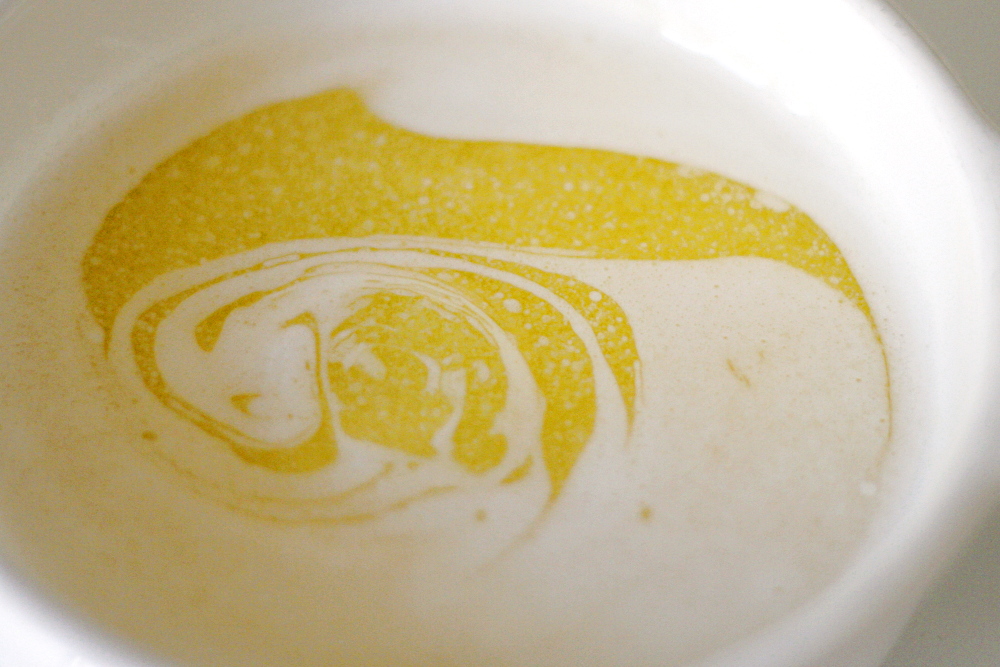
There’s nothing complicated about the recipe, although for a few seconds, I wasn’t sure whether the lime juice was going to mix with the butter. You know, fat and water repelling and all. It mixed in.

copy-of-img_8447

Once the cookies come out of the oven, the recipe recommends putting them in a bag with powdered sugar and doing some shaking, until they’re evenly coated with sugar. I don’t know about this. They’re pretty fragile. Seems like you’re asking for broken cookies with this method. I just gave each one a quick dip in a bowl of powdered sugar.

copy-of-img_8480

I love lime-flavored stuff, and these were no exception. I wouldn’t have minded if they had been a little more limey – I might add just a little extra lime zest next time. Another great thing about these – this is one of those convenient recipes where you can leave the dough in the freezer until you need it. Fresh cookies with no effort!

copy-of-img_8542

Key Lime Meltaways (adapted from Martha Stewart via Smitten Kitchen)

Makes 5 dozen

You can use either regular or Key limes.

The dough, shaped into logs, can be kept in the freezer for up to 2 months.

12 tablespoons (1½ sticks) unsalted butter, room temperature
1 cup (4 ounces) powdered sugar
grated zest of 4 tiny or 2 large key limes
2 tablespoons freshly squeezed lime juice
1 tablespoon pure vanilla extract
1¾ cup plus 2 tablespoons (9.375 ounces) all-purpose flour (a.k.a. 2 cups minus 2 tablespoons)
2 tablespoons cornstarch
¼ teaspoon salt

1. In the bowl of an electric mixer fitted with the whisk attachment, cream butter and ⅓ cup (1.33 ounces) powdered sugar until fluffy. Add lime zest, juice, and vanilla; beat until fluffy.

2. In a medium bowl, whisk together flour, cornstarch, and salt. Add to butter mixture, and beat on low speed until combined.

3. Between two 8-by-12-inch pieces of parchment paper, roll dough into two 1¼-inch-diameter logs. Chill at least 1 hour.

4. Heat oven to 350F. Line two baking sheets with parchment. Place remaining ⅔ cup sugar in a resealable plastic bag. Remove parchment from logs; slice dough into ¼-inch-thick rounds. Place rounds on baking sheets, spaced 1 inch apart.

5. Bake cookies until barely golden, about 15 minutes. Transfer cookies to a wire rack to cool slightly, just three or four minutes. While still warm, place cookies in the sugar-filled bag; toss to coat. Bake or freeze remaining dough. Store baked cookies in an airtight container for up to 2 weeks.

copy-of-img_8549

chocolate chip cookie comparison

copy-of-copy-of-img_7109

Everyone is always talking about what the best chocolate chip cookie recipe is. Last year, it seemed like everyone was making the Best Big Fat Chewy Chocolate Chip Cookie. A few months ago, Cooks Illustrated’s Thick and Chewy Chocolate Chip Cookie was all the rage. These days, people are testing out the New York Times recommendation to chill the dough for 36 hours before baking.

Until recently, I stayed out of this discussion. I knew that my favorite was unpopular among food bloggers – good ol’ Tollhouse, with just a bit more flour. I’ve made it so often that I don’t bother getting out the recipe anymore. When I lived alone, I made it nearly once a week. I would eat two cookies each night with tea, and then give the rest to Dave when I saw him over the weekend. He’d eat the rest of the batch in one day.

copy-of-img_5775

But eventually, curiosity got the best of me. It was the New York Times recipe that did it. I can never seem to resist making things more complicated – a required 36 hour rest was just up my alley, right? And then once I tried one new recipe, it was like a dam opened, and suddenly I wanted to be part of this quest to find the perfect recipe.

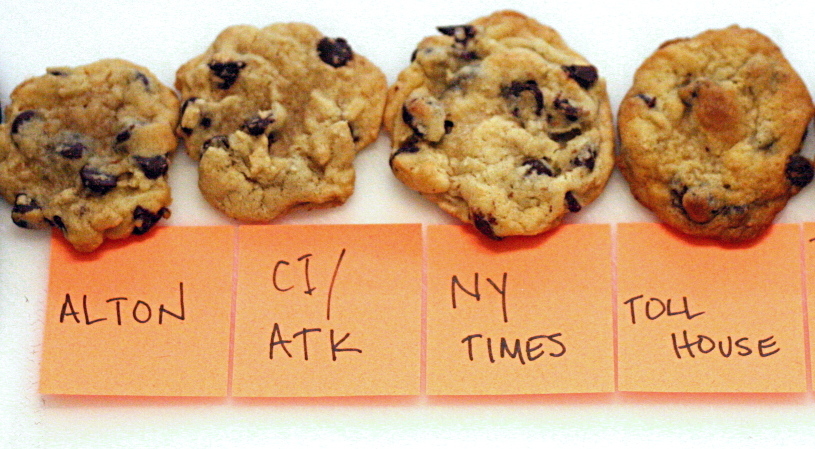
Because, let’s face it, just about all chocolate chip cookies are good (and certainly the ones I was making would be), Dave and I decided we would need to do side-by-side comparisons to discern differences between the recipes. I decided to try four of the most popular recipes – Tollhouse, NY Times, Cooks Illustrated, and Alton Brown’s The Chewy.

copy-of-img_8405

I wanted to publish this entry with conclusive results. I wanted to come to you and say “This recipe is the one you should make. It is the best. The most butterscotchy, the most tender, the best dough, the most fun to bake.” I wanted to let you know unequivocally that the overnight rest was or was not important.

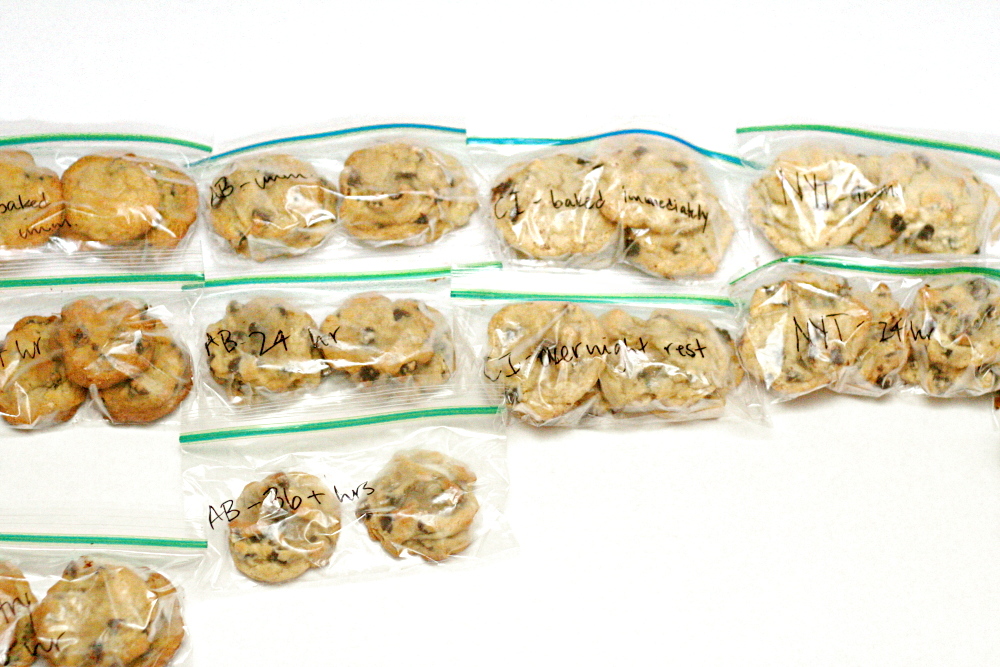
But I just don’t think it’s going to happen. The more cookies I eat, the more indecisive I get. I even made each recipe again, hoping to try again with fresh cookies. (Thank god for BakingGALS.) I had bags and bags of carefully labeled cookies in my freezer. It’s out of control. It’s time to stop the insanity and tell you what I did learn from this.

copy-of-img_7103

Regarding the overnight rest – it certainly doesn’t hurt, and I find it pretty convenient actually. You can bake one cookie sheet of cookies at a time, and you have fresh cookies every night. (You also have dough in the fridge available at all times, and I have no self-control.) Does it make a difference? Maybe. I think it gives cookies a more pronounced butterscotch flavor, and sometimes I think it helps even out the texture. But it’s pretty subtle.

copy-of-img_5082

Of the four recipes, Dave and I had two favorites, and the bake-off between those two was inconclusive.

My favorite was Alton Brown’s The Chewy. I am, sadly, not kidding when I say that I ate ten of these the first time I made them. <blush> Self-control-wise, I’m usually pretty good with cookies once they’re baked. This must have been a bad morning. It had a great butterscotch flavor, and a nice soft texture – tender without being too chewy or crisp. However, Dave had a few complaints about them being greasy, and I see his point, although I’m not bothered by this as much.

copy-of-img_5086

We were also very fond of the New York Times recipe. It was soft, with just a bit of crispness to the edges, which I like. However, they were a little dry and bready, and didn’t have as much flavor as Alton’s. They definitely weren’t greasy though.

I definitely wanted to like Cook Illustrated’s Thick and Chewy recipe. Over and over, I hear people say that it’s their absolute favorite, and usually I love CI. But not this time. These took chewy to the extreme. It was like cookie flavored bubble gum, although the cookie flavor was weak. I made them again, convinced that I must have done something wrong the first time, but I still couldn’t get excited about these cookies.

copy-of-img_8409

Dave wasn’t a fan of the Tollhouse cookies at all – too greasy, he says. I still like their flavor, which is intensely buttery. I also like the crispy edges and tender middles. But they could definitely benefit from some extra flour (which is how I made them for years, but I followed the recipe exactly this time).

This shouldn’t be, but is, an issue to consider as well – the doughs made from melted butter (Alton’s and CI’s) were not nearly as good as those made from softened butter. That’s sad. Tollhouse’s dough is the best, but NY Time’s is nothing to scoff at. The NY Times recipe is the most fun to make – lots of mixer use with that one.

copy-of-img_8417

I wish I could provide a solid answer to the “which is best” chocolate chip cookie question, but I’m not sure it’s that easy. For one thing, every one has their own preferences – I only had two testers and we couldn’t agree! However, keep in mind that chocolate chip cookies are pretty much always good. Any of these recipes will give you something delicious. But if I have to recommend one, it would be Alton Brown’s The Chewy.

copy-of-copy-of-img_5789

Since this original post, I have also made Cooks Illustrated’s Perfect Chocolate Chip Cookies.

The Chewy (from Alton Brown)

2 sticks unsalted butter
2¼ cups bread flour
1 teaspoon kosher salt
1 teaspoon baking soda
¼ cup sugar
1¼ cups brown sugar
1 egg
1 egg yolk
2 tablespoons milk
1½ teaspoons vanilla extract
2 cups (12 ounces) semisweet chocolate chips

Hardware:
Ice cream scooper (#20 disher, to be exact)
Parchment paper
Baking sheets
Mixer

Heat oven to 375F.

Melt the butter in a heavy-bottom medium saucepan over low heat. Sift together the flour, salt, and baking soda and set aside.

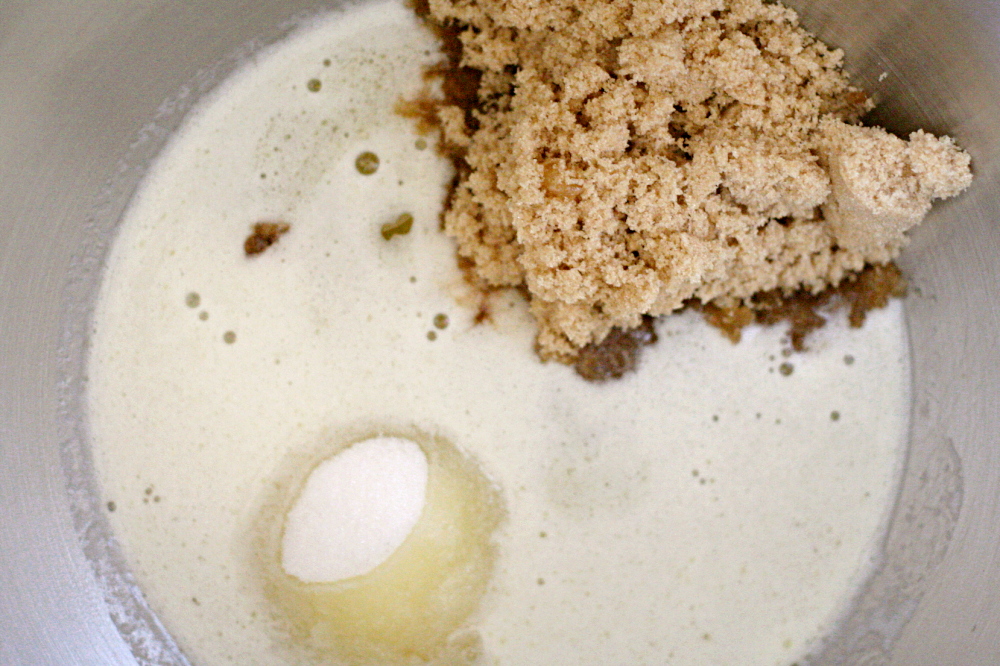
Pour the melted butter in the mixer’s work bowl. Add the sugar and brown sugar. Cream the butter and sugars on medium speed. Add the egg, yolk, 2 tablespoons milk and vanilla extract and mix until well combined. Slowly incorporate the flour mixture until thoroughly combined. Stir in the chocolate chips.

Chill the dough, then scoop onto parchment-lined baking sheets, 6 cookies per sheet. Bake for 14 minutes or until golden brown, checking the cookies after 5 minutes. Rotate the baking sheet for even browning. Cool completely and store in an airtight container.

Chocolate Chip Cookies (from the New York Times)

1½ dozen 5-inch cookies.

2 cups minus 2 tablespoons (8½ ounces) cake flour
1⅔ cups (8½ ounces) bread flour
1¼ teaspoons baking soda
1½ teaspoons baking powder
1½ teaspoons coarse salt
2½ sticks (1¼ cups) unsalted butter
1¼ cups (10 ounces) light brown sugar
1 cup plus 2 tablespoons (8 ounces) granulated sugar
2 large eggs
2 teaspoons natural vanilla extract
1¼ pounds bittersweet chocolate disks or fèves, at least 60 percent cacao content
Sea salt

1. Sift flours, baking soda, baking powder and salt into a bowl. Set aside.

2. Using a mixer fitted with paddle attachment, cream butter and sugars together until very light, about 5 minutes. Add eggs, one at a time, mixing well after each addition. Stir in the vanilla. Reduce speed to low, add dry ingredients and mix until just combined, 5 to 10 seconds. Drop chocolate pieces in and incorporate them without breaking them. Press plastic wrap against dough and refrigerate for 24 to 36 hours. Dough may be used in batches, and can be refrigerated for up to 72 hours.

3. When ready to bake, preheat oven to 350 degrees. Line a baking sheet with parchment paper or a nonstick baking mat. Set aside.

4. Scoop 6 3½-ounce mounds of dough (the size of generous golf balls) onto baking sheet, making sure to turn horizontally any chocolate pieces that are poking up; it will make for a more attractive cookie. Sprinkle lightly with sea salt and bake until golden brown but still soft, 18 to 20 minutes. Transfer sheet to a wire rack for 10 minutes, then slip cookies onto another rack to cool a bit more. Repeat with remaining dough, or reserve dough, refrigerated, for baking remaining batches the next day. Eat warm, with a big napkin.

Thick and Chewy Chocolate Chip Cookies (from Cooks Illustrated)

Makes 1½ dozen 3-inch cookies

CI note: These truly chewy chocolate chip cookies are delicious served warm from the oven or cooled. To ensure a chewy texture, leave the cookies on the cookie sheet to cool. You can substitute white, milk chocolate, or peanut butter chips for the semi- or bittersweet chips called for in the recipe. In addition to chips, you can flavor the dough with one cup of nuts, raisins, or shredded coconut.

2⅛ cups bleached all-purpose flour (about 10½ ounces)
½ teaspoon table salt
½ teaspoon baking soda
12 tablespoons unsalted butter (1½ sticks), melted and cooled slightly
1 cup brown sugar (light or dark), 7 ounces
½ cup granulated sugar (3½ ounces)
1 large egg
1 large egg yolk
2 teaspoons vanilla extract
1-2 cups chocolate chips or chunks (semi or bittersweet)

1. Heat oven to 325F. Adjust oven racks to upper- and lower-middle positions. Mix flour, salt, and baking soda together in medium bowl; set aside.

2. Either by hand or with electric mixer, mix butter and sugars until thoroughly blended. Mix in egg, yolk, and vanilla. Add dry ingredients; mix until just combined. Stir in chips.

3. Form scant ¼ cup dough into ball. Holding dough ball using fingertips of both hands, pull into two equal halves. Rotate halves ninety degrees and, with jagged surfaces exposed, join halves together at their base, again forming a single cookie, being careful not to smooth dough’s uneven surface. Place formed dough onto one of two parchment paper-lined 20-by-14-inch lipless cookie sheets, about nine dough balls per sheet. Smaller cookie sheets can be used, but fewer cookies can be baked at one time and baking time may need to be adjusted. (Dough can be refrigerated up to 2 days or frozen up to 1 month – shaped or not.)

4. Bake, reversing cookie sheets’ positions halfway through baking, until cookies are light golden brown and outer edges start to harden yet centers are still soft and puffy, 15 to 18 minutes (start checking at 13 minutes). (Frozen dough requires an extra 1 to 2 minutes baking time.) Cool cookies on cookie sheets. Serve or store in airtight container.

Original Nestle Toll House Chocolate Chip Cookies (slightly adapted)

Makes 60 cookies

2¼ cups all-purpose flour
1 teaspoon baking soda
1 teaspoon salt
1 cup (2 sticks) butter, softened
¾ cup granulated sugar
¾ cup packed brown sugar
1 teaspoon vanilla extract
2 large eggs
2 cups (12-ounces) chocolate chips

Preheat oven to 375° F.

Combine flour, baking soda and salt in small bowl. Beat butter, granulated sugar, brown sugar and vanilla extract in large mixer bowl until creamy. Add eggs, one at a time, beating well after each addition. Gradually beat in flour mixture. Stir in morsels. Drop by rounded tablespoon onto ungreased baking sheets.

Bake for 8 to 11 minutes or until golden brown. Cool on baking sheets for 2 minutes; remove to wire racks to cool completely.

rice pudding

copy-of-img_8780

I thought Tuesdays with Dorie was going to mutiny this week. Isabelle chose rice pudding for us to make, but the recipe has a mistake in it regarding the cooking time, and Dorie was traveling without an internet connection and wasn’t able to give us a heads up until many of us had already had frustrating experiences.

copy-of-img_8720

Even worse, the recipe was suspicious from the beginning. Dorie uses just ¼ cup of rice to thicken 3¼ cups of milk, far less rice than most rice pudding recipes use. Plus, the instructions actually say that the pudding will be thin when it’s taken off of the stove, but it’ll thicken once it chills. I don’t think Dorie meant that it should be quite this thin.

copy-of-img_8674

Unsurprisingly, my “pudding” never thickened. I left it in the fridge for two days, too irritated to think about it, until I realized that I could just put it back on the stove and try cooking it longer and maybe it would thicken. And eventually it did. Once Dorie was able to let the group know about the typo, I realized that the cooking time was indeed supposed to be longer than what the book says.

copy-of-img_8713

In the end, the rice pudding was pretty good. I wouldn’t say that it was any better or worse than the only other time I’ve had rice pudding. At least there was chocolate this time.  Rice pudding just isn’t really my thing though. I kept thinking to myself, “why is there rice in my pudding?” Dave wondered why anyone would eat rice pudding when they could be eating tapioca pudding. He has a good point.

Isabelle has posted Dorie’s rice pudding recipe. Keep in mind that you’ll need to cook it for 55 minutes or so, until the texture is pudding-like. The ratio of rice to milk does work.

copy-of-img_8785

baked eggs with spinach and mushrooms

copy-of-img_8611

There’s nothing not to like about this recipe. It’s eggs-on-stuff, and I love eggs-on-stuff, especially when the stuff is onions, mushrooms, and spinach. And then it’s sprinkled with parmesan. What a perfect flavor combination.

copy-of-img_8608

You know the only thing this recipe is lacking? Carbs. Ah, starch. Carbs in any form would be good, but I’m thinking especially of either adding cubed parboiled potatoes with the onions, or serving the whole thing on top of toast. Or hash browns.

And that gives me an excuse to make this again…soon.

copy-of-img_8610

Baked Eggs with Spinach and Mushrooms (from Gourmet June 2004 via Smitten Kitchen)

Serves 4

10 ounces baby spinach leaves
¼ cup finely chopped onion
1 garlic clove, finely chopped
2 tablespoons unsalted butter
5 ounces mushrooms, thinly sliced (2 cups)
⅓ cup heavy cream
¼ teaspoon salt
¼ teaspoon black pepper
⅛ teaspoon freshly grated nutmeg
4 large eggs
2 tablespoons finely grated parmesan

Put oven rack in upper third of oven and preheat oven to 450F.

Bring ½ inch water to a boil in a 10- to 12-inch ovenproof heavy skillet (not cast-iron), then add half of spinach and cook, turning with tongs, until wilted, about 30 seconds. Add remaining spinach and wilt in same manner, then cook, covered, over moderately high heat until spinach is tender, about 2 minutes. Drain in a colander and cool under cold running water. Gently squeeze handfuls of spinach to remove as much liquid as possible, then coarsely chop.

Wipe skillet dry, then cook onion and garlic in butter over moderately low heat, stirring, until softened, 2 to 3 minutes. Add mushrooms and increase heat to moderate, then cook, stirring, until mushrooms are softened and have exuded liquid, about 3 minutes. Stir in cream, salt, pepper, nutmeg, and chopped spinach and bring to a simmer. Remove skillet from heat and make 4 large indentations in spinach mixture. Break an egg into each indentation and bake, uncovered, until egg whites are set but yolks are still runny, 7 to 10 minutes. Lightly season eggs with salt and pepper, then sprinkle with cheese.

stuffed sandwich rolls (aka monsters)

copy-of-img_8071

This is a recipe that has drastically changed throughout the years. Six years ago, I got the idea for sandwich filling sealed in biscuits from a book of backpacking recipes. I originally followed the recipe exactly, making biscuits with whole wheat and soy flour. They were so dense that they earned the name “monsters” with my group of backpacking friends. Every time I’ve made them since, I’ve adjusted the biscuit recipe slightly, making it lighter and adding flavor. Still, the biscuits always seem dry and dense.

copy-of-copy-of-img_7731

I finally had an epiphany this last time – the fundamental flaw in this recipe is that biscuits are used at all. Biscuits are best fresh out of the oven, not carried around in a backpack for three days. I’m guessing the backpacking recipe book developed the recipe with biscuits because they assumed that the average backpacker wasn’t comfortable baking with yeast. But as far as food preparation goes, I am not the average backpacker.

copy-of-img_7735

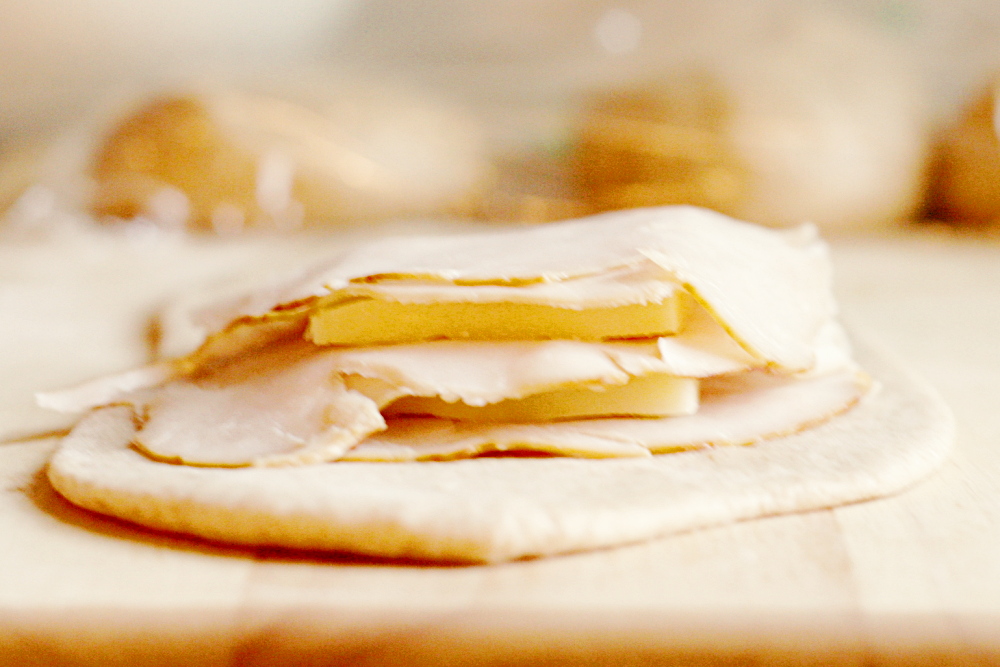
That led to Monsters 2.0 – meat and cheese sealed in my favorite sandwich bread. These were far better than the original Monsters. They stayed sealed better – the biscuit versions tended to pop open. They’re healthier, since biscuits usually contain high amounts of fat. And although yeast bread requires more patience than biscuits, I don’t think this new version involves any more actual effort than the biscuit version.

copy-of-img_7943

But the main advantage was, of course, in the eating. We ate these four days after I made them, and they still tasted fresh. And while food always tastes better in the woods, I think Monsters have their place at home as well. You can make a batch, bake them, freeze them, and then have a delicious sandwich ready whenever you need it.

copy-of-img_8066

Monsters 2.0 (Stuffed Sandwich Rolls) (bread recipe pieced together from Betty Crocker, Cooks Illustrated, and Peter Reinhart)

Makes 12 sandwiches

I apologize for the vagueness of “sandwich fillings” as an ingredient. You can use whatever you want, although cheese and meat is the obvious choice. I think ham makes the best filling because it keeps well. That being said, I always use turkey because one of my friends who I often make these for doesn’t eat red meat. I don’t know how we get away with eating turkey that hasn’t been refrigerated for days, but no one has ever had a problem with it. As far as how much to use – as much as possible. I’ll update this next time I make these with something more precise, but I never use enough filling. Definitely use more than you see in the photos.

3-3½ cups (15-17½ ounces) unbleached flour, plus extra for work surface
1½ teaspoons table salt
1 cup water, warm (110 degrees)
1 egg
2 tablespoons vegetable oil or unsalted butter, melted
¼ cup (1.75 ounces) granulated sugar or 3 tablespoons honey
1 package (2¼ teaspoons) rapid-rise yeast (also called instant)
Sandwich fillings (see note above)
2 tablespoons milk

1. Adjust an oven rack to middle position and heat the oven to 200 degrees. Once the oven temperature reaches 200 degrees, maintain heat for 10 minutes, then turn off the oven.

2. Mix flour, salt, and yeast in the bowl of a standing mixer fitted with the dough hook. Mix water, egg, butter, and honey in 1-quart Pyrex liquid measuring cup. Turn machine to low and slowly add liquid. When dough comes together, increase speed to medium (setting number 4 on a KitchenAid mixer) and mix until dough is smooth and satiny, stopping machine two or three times to scrape dough from hook if necessary, about 10 minutes. Turn dough onto lightly floured work surface; knead to form smooth, round ball, about 15 seconds.

3. Place dough in very lightly oiled bowl, rubbing dough around bowl to lightly coat. Cover bowl with plastic wrap; place in warm oven until dough doubles in size, 40 to 50 minutes.

4. Divide the dough into 12 equal pieces. Form the pieces into smooth balls. Cover the balls with plastic wrap and allow them to rest for 10 minutes.

5. On a lightly floured work surface, roll out each ball to form an oval ⅛-inch thick. Layer sandwich filling on one side of each oval, leaving a ½-inch border. Fold dough over filling, stretching it a bit if absolutely necessary. Seal the edges with the tines of a fork.

6. Cover the rolls loosely with plastic wrap. Let rise until puffy, 30-45 minutes.

7. Heat oven to 350F. Use the tines of a fork to re-seal the edges of the rolls. Using a pastry brush, brush the rolls with the milk.

8. Bake until rolls are golden, 25-40 minutes. Transfer the rolls to a cooling rack. Wait at least 30 minutes before serving.

mashed potatoes

copy-of-copy-of-img_8991

I have a pet peeve about mashed potatoes. I hate when they’re boiled after they’re peeled. It drives me crazy when people peel them, slice them really thin, and then boil them. I think they absorb so much water and then, after being mashed, they just can’t get their flavor back.

Clearly, based on how many of their recipes are my favorites, I’m a big fan of Cooks Illustrated, and their recipe for mashed potatoes was the start of that. My friend had checked The New Best Recipe out of the library, and I was at her place flipping through it when I saw the recipe for mashed potatoes, which called for the potatoes to be boiled in their skins. I loved the idea – how it maximizes the flavor of the potatoes. But, I hated peeling hot just-boiled potatoes.

copy-of-img_8983

This new recipe improves upon that idea by steaming the potatoes – so it’s just the tiniest bit more effort (because the potatoes need to be rinsed halfway through steaming) as a normal mashed potato recipe, but it makes such a difference! Seriously, I tasted these potatoes, before butter or salt or any of that goodness was added, and the flavor was – it was pure potato! Exactly what you want!

Adding melted butter first, before the liquid, coats the starch with fat so it can’t absorb the liquid, and liquid absorption is what leads to gluey mashed potatoes. Heating the milk before adding it to the potatoes just makes good sense – it keeps the potatoes from getting cold.

I know most people don’t use a recipe when they make mashed potatoes. But they should! Don’t you want amazing mashed potatoes every single time you make them? And all you have to do to get there is steam the potatoes instead of boiling them, and add melted butter before adding liquid. There’s no excuses!

copy-of-img_8989

Fluffy Mashed Potatoes (from Cooks Illustrated)

CI note: This recipe works best with either a metal colander that sits easily in a Dutch oven or a large pasta pot with a steamer insert. To prevent excess evaporation, it is important for the lid to fit as snugly as possible over the colander or steamer. A steamer basket will work, but you will have to transfer the hot potatoes out of the basket to rinse them off halfway through cooking. For the lightest, fluffiest texture, use a ricer. A food mill is the next best alternative. Russets and white potatoes will work in this recipe, but avoid red-skinned potatoes.

Bridget note: I don’t have a metal colander or a pasta pot, but a cheapo steamer seems to work just fine. I also don’t have a ricer or a food mill, but I actually like the texture that a potato masher provides. Really, the key is the steaming.

2 pounds Yukon Gold potatoes (4 to 6 medium), peeled, cut into 1-inch chunks, rinsed well, and drained
4 tablespoons unsalted butter, melted
table salt
⅔ cup whole milk, warm
ground black pepper

1. Place metal colander or steamer insert in large pot or Dutch oven. Add enough water for it to barely reach bottom of colander. Turn heat to high and bring water to boil. Add potatoes, cover, and reduce heat to medium-high. Cook potatoes 10 minutes. Transfer colander to sink and rinse potatoes under cold water until no longer hot, 1 to 2 minutes. Return colander and potatoes to pot, cover, and continue to cook until potatoes are soft and tip of paring knife inserted into potato meets no resistance, 10 to 15 minutes longer. Pour off water from Dutch oven.

2. Set ricer or food mill over now-empty pot. Working in batches, transfer potatoes to hopper of ricer or food mill and process, removing any potatoes stuck to bottom. Using rubber spatula, stir in melted butter and ½ teaspoon salt until incorporated. Stir in warm milk until incorporated. Season to taste with salt and pepper; serve immediately.

pumpkin ravioli

copy-of-img_8867

I didn’t start making fall foods, including anything with pumpkin, until October, but now I can’t seem to get enough. I’m pumpkin crazy. In the last few weeks, I’ve made pumpkin pancakes (several times), pumpkin cheesecake, pumpkin whoopee pies, pumpkin black bean soup, and pumpkin ravioli, plus a bunch of stuff with other types of squash. And I want more cheesecake, and I wouldn’t mind more pumpkin ravioli. Or pancakes. Oh, and I haven’t had pie yet… And doesn’t this and this and this look good?  (Ack, and another one, updated while I was writing this!)

copy-of-img_8854

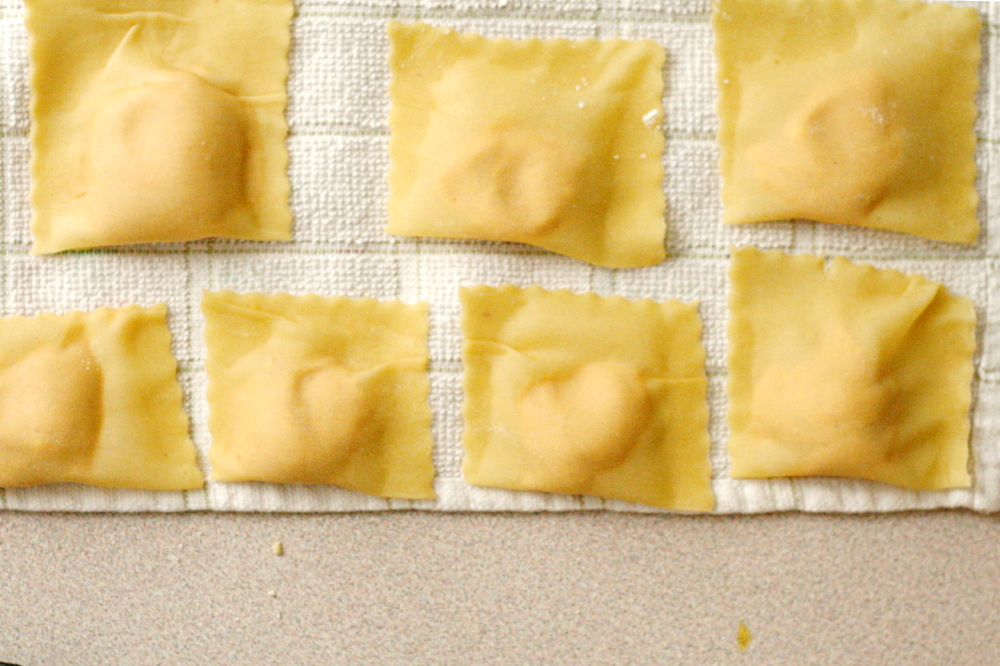
Making ravioli is one of the most fun (and work-intensive) aspects of having a pasta roller. The first couple ravioli recipes I made had fairly standard cheese fillings, but what’s the point of going through all the effort for homemade ravioli when I could buy almost the same thing at the grocery store? Pumpkin filling makes far more sense.

The recipe was one of the first I ever saved from a food blog, about a year ago. (Of course I didn’t record the source and had to scramble to find it later.) Before I made the ravioli, I did some searching to look at other pumpkin ravioli recipes, but none used the goat cheese that this one does, and I love goat cheese. It doesn’t hurt that this filling is really easy to put together, which at least in part makes up for all the work involved with the pasta.

copy-of-img_8859

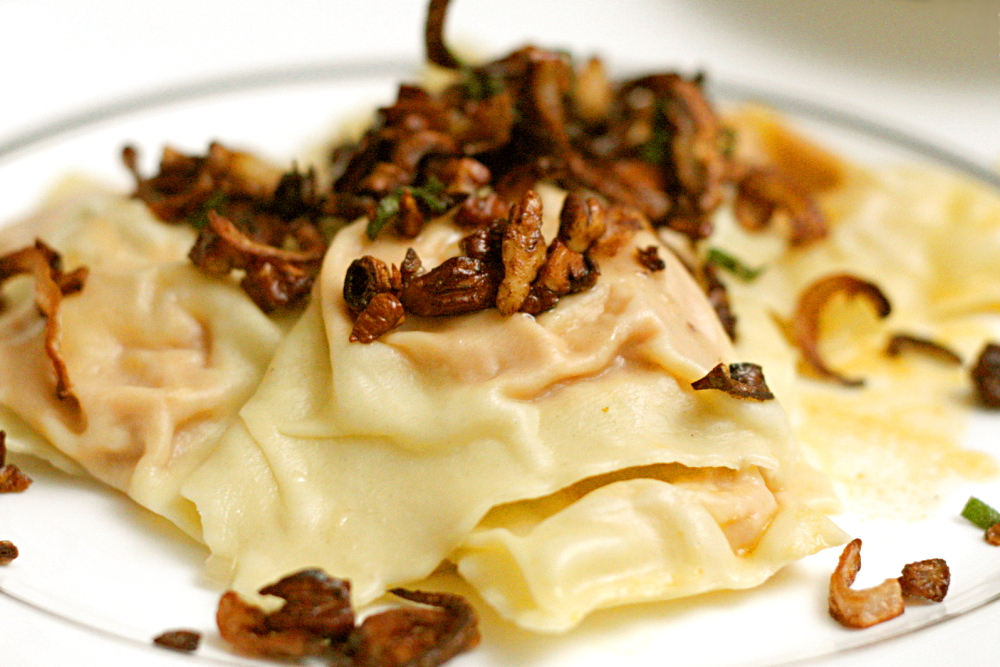
Cara gave some instructions for a sauce to go with the ravioli, but I really wanted to serve it with sage browned butter. I found a recipe that looked pretty good, but then I got lazy and half-assed it, and it didn’t come out great. So I’m not going to provide a sauce recipe to go with the ravioli, instead leaving it to you to find something that looks good. I still recommend sage browned butter, either following that recipe correctly, or just browning some butter and adding minced sage, salt and pepper.

copy-of-img_8865

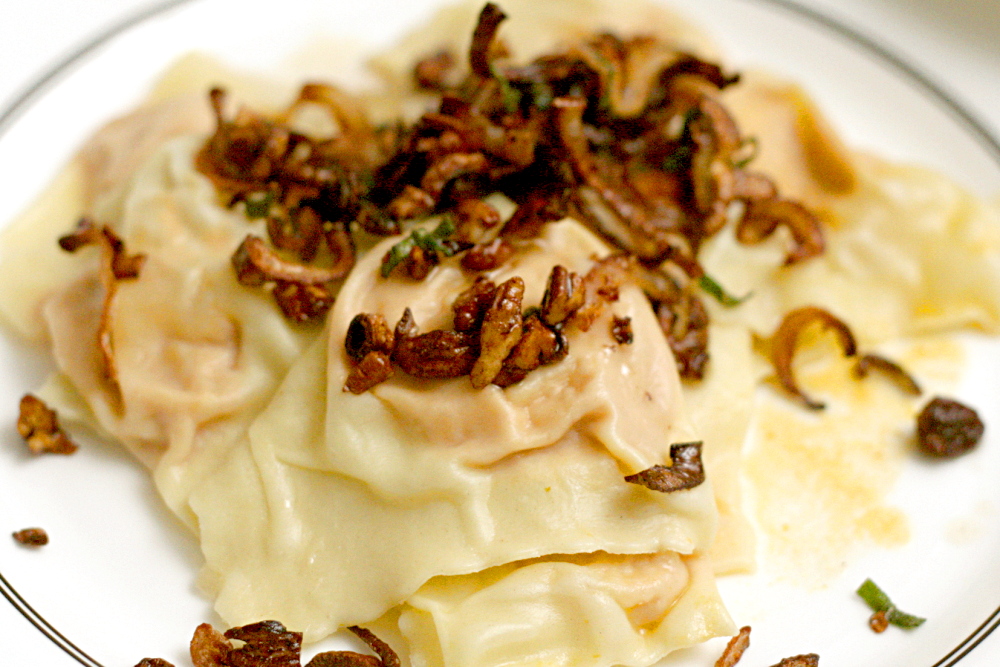
The ravioli were great. I love the pumpkin and goat cheese combination, and the maple syrup gave it just a bit of complimentary sweetness. Cara recommended a pinch of cinnamon, but I used nutmeg instead, because I love it in savory recipes, and it’s one of Dave’s favorite spices. I’m getting much better and faster at making ravioli, so I’m looking forward to trying more recipes.

copy-of-img_8866

Pumpkin Ravioli (dough ingredients and ravioli forming instructions from Cooks Illustrated; dough mixing and rolling method from Marcella Hazan; filling recipe adapted from Cara’s Cravings)

Please keep in mind that the recipe looks so long only because Marcella Hazan, whose pasta recipe I use, gives incredibly detailed instructions.

Filling:
1 (15-ounce) can pumpkin puree
4 ounces goat cheese, softened
1 tablespoon maple syrup
pinch nutmeg
salt and pepper to taste

Dough:
2 cups (10 ounces) unbleached flour
3 large eggs
For the filling:
Stir together all ingredients until smooth (or at least very close to smooth).

For the pasta:
Pour the flour onto a work surface, shape it into a mound, and scoop out a deep hollow in its center. Break the eggs into the hollow.

Beat the eggs lightly with a fork for about 2 minutes as though you were making an omelet. Draw some of the flour over the eggs, mixing it in with the fork a little at a time, until the eggs are no longer runny. Draw the sides of the mound together with your hands, but push some of the flour to one side, keeping it out of the way until you find you absolutely need it. Work the eggs and flour together, using your fingers and the palms of your hands, until you have a smoothly integrated mixture. If it is still moist, work in more flour.
When the mass feels good to you and you think it does not require any more flour, wash your hands, dry them, and run a simple test: Press you thumb deep into center of the mass; if it comes out clean, without any sticky matter on it, no more flour is needed. Put the egg and flour mass to one side, scrape the work surface absolutely clear of any loose or caked bits of flour and of any crumbs, and get ready to knead.

Return to the mass of flour and eggs. Push forward against it using the heel of your palm, keeping your fingers bent. Fold the mass in half, give it a half turn, press hard against it with the heel of your palm again, and repeat the operation. Make sure that you keep turning the ball of dough always in the same direction, either clockwise or counterclockwise, as you prefer. When you have kneaded it thus for 8 full minutes and the dough is as smooth as baby skin, it is ready for the machine.

Cut the ball of dough into 6 equal parts.

Spread clean, dry, cloth dish towels over a work counter near where you’ll be using the machine.
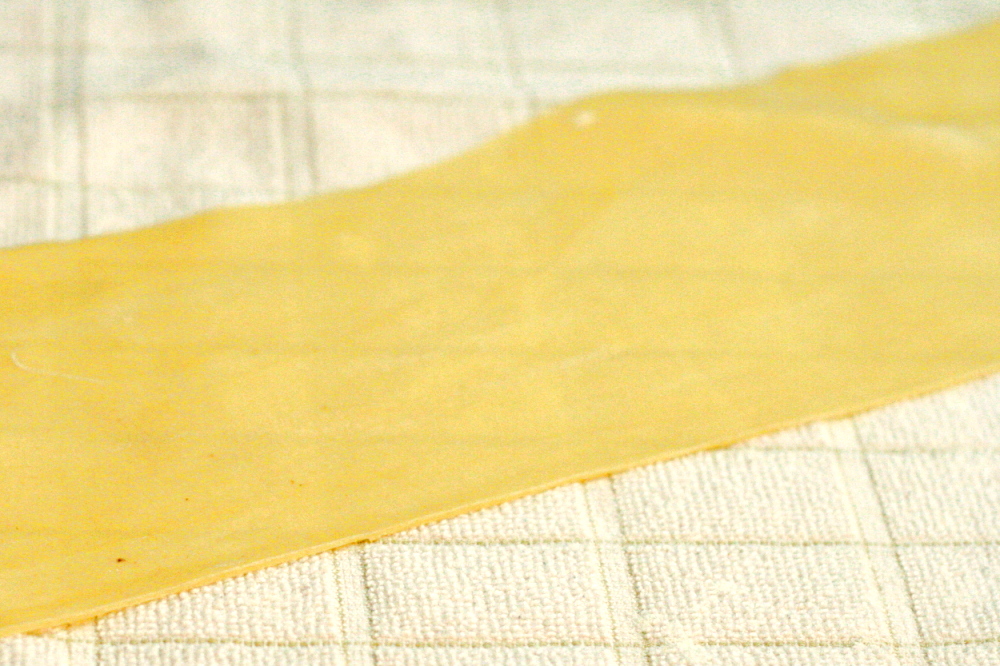
Set the pair of smooth cylinders, the thinning rollers, at the widest opening. Flatten one of the pieces of dough by pummeling it with your palm, and run it through the machine. Fold the dough twice into a third of its length, and feed it by its narrow end through the machine once again. Repeat the operation 2 or 3 times, then lay the flattened strip of pasta over a towel on the counter. Since you are going to have a lot of strips, start at one end of the counter, leaving room for the others.

Take another piece of dough, flatten it with your hand, and turn it through the machine exactly as described above. Lay the strip next to the previously thinned one on the towel, but do not allow them to touch or overlap, because they are still moist enough to stick to each other. Proceed to flatten all the remaining pieces in the same manner.

Close down the opening between the machine’s rollers by one notch. Take the first pasta strip you had flattened and run it once through the rollers, feeding it by its wider end. Do not fold it, but spread it flat on the cloth towel, and move on to the next pasta strip in the sequence.

When all the pasta strips have gone through the narrower opening once, bring the rollers closer together by another notch, and run the strips of pasta through them once again, following the procedure described above. You will find the strips becoming longer, as they get thinner, and if there is not enough room to spread them out on the counter, you can let them hand over the edge. Continue thinning the strips in sequence, progressively closing down the opening between the rollers one notch at a time. This step-by-step thinning procedure, which commercial makers of fresh pasta greatly abbreviate or skip altogether, is responsible, along with proper kneading, for giving good pasta its body and structure.

Continue thinning the pasta until the second-to-last setting.

Your sheets should be approximately 4 inches across. Place small balls of filling (about one rounded teaspoon each) in a line one inch from the bottom of the pasta sheet. Leave one and one-quarter inches between each ball of filling. Fold over the top of the pasta and line it up with the bottom edge. Seal bottom and the two open sides with your finger. Use fluted pastry wheel to cut along the two sides and bottom of the sealed pasta sheet. Run pastry wheel between balls of filling to cut out the ravioli.

To cook ravioli:
Bring 4 quarts water to boil in a large stockpot. Add salt and half the pasta. Cook until doubled edges are al dente, 4-5 minutes. With a slotted spoon, transfer ravioli to warmed bowls or plates; add sauce of choice. Meanwhile, put remaining ravioli in boiling water and repeat cooking process. (Or bring two pots of water to boil and cook both batches simultaneously.) Serve immediately.

bourbon pumpkin cheesecake

copy-of-img_9023

For years, I didn’t make cheesecake, because I only had a 9-inch springform pan, and I rarely had anyone around to eat 12-16 servings of cheesecake. I know cheesecake freezes well, but it sounded like a hassle, with the slicing and packaging correctly to avoid freezer burn. Then I got this little 4-inch springform pan, which has come in handy a few times, and which led to the fantastic Brown Sugar Apple Cheesecake. But a 4-inch springform cheesecake is really only big enough to whet my appetite. Dave and I had two tiny servings each of the apple cheesecake, and it wasn’t near enough.

copy-of-img_8998

The solution, of course, is more cheesecake. Pumpkin cheesecake is not only seasonal, but one of my favorite cheesecake flavors. I’ve tried a couple different recipes, all of which were good, but none struck me as the best pumpkin cheesecake ever, so I saw no reason not to try a new recipe. I chose the one on epicurious that had the most positive reviews.

copy-of-img_9004

I used a different recipe for the crust, because I didn’t have pecans, and I’m not sure I’d want them in the crust anyway. The recipe also includes a sour cream topping that I skipped because I didn’t have sour cream. And, again, it seems unnecessary.

copy-of-img_9013

I made one third of the recipe, which was a little too much for my mini springform pan, so I did some googling and figured out how to make cup-cheesecakes. I love it! They’re so cute and perfectly sized. I think next time I’ll just press the crust in the bottom of the muffin cup and not up the sides, but other than that, I was really pleased with this method. I followed Clare’s instructions and let the cheesecakes chill in the freezer for a few minutes before popping them out with a butter knife, and they came out fine, even though I had underbaked the centers.

copy-of-img_8999

One problem with pumpkin cheesecake is that it tends to look plain. This recipe recommends a sour cream topping, and I’ve seen some accompanied by recipes for bourbon whipped cream, but cheesecake is so rich that I can’t see topping it with something else that’s so rich. I think what I want to do is make a marbled cheesecake. I’m going to try separating out some of the batter before adding the pumpkin, then swirling the plain batter in the pumpkin base. I might have to tweak the filling ingredients just slightly, but I want to keep the recipe similar.

copy-of-img_9018

As is though, the flavor and texture of this cheesecake more than makes up for its lackluster appearance. It was perfect – dense and creamy with just the right balance of pumpkin and cream cheese. We finished the third of the recipe that I made in an embarrassingly short time, and it was all I could do to resist making more just two days later.

copy-of-img_9178

Update 10.14.09: The cheesecake can be successfully and easily dressed up with some swirling!  You just need to add the pumpkin to the batter last, removing some plain batter before adding the pumpkin.  Here’s what I recommend: If you want only the top to be marbled, remove 1/4 cup of plain batter before adding the pumpkin to the remaining batter.  Pour the pumpkin batter into the prepared pan, then dot the plain batter over the top and use a knife to make a marble pattern.  If you’d like the swirling to continue throughout the entire cheesecake, separate out 3/4 cup batter before adding the pumpkin to the rest, then add 1/3 of the pumpkin batter to the pan, then 1/3 of the plain batter, and swirl.  Repeat twice more.  When I tried it, I separated out the larger amount of batter before adding the pumpkin, and I didn’t notice that the texture was compromised by the higher concentration of pumpkin.

Copy of IMG_0239

Printer Friendly Recipe
Bourbon Pumpkin Cheesecake
(crust from Cooks Illustrated, filling adapted from Gourmet via epicurious.com)

To bake cheesecakes in a muffin pan, line each muffin cup with the crust mixture. Pour in the filling and bake 20-25 minutes at 350F. Cool on a rack until room temperature, then freeze for 15 minutes before using a butter knife to prop the cheesecakes out of the pan.  I’m thinking this amount of filling will made about 24 cup-cheesecakes.  You’ll probably need to increase the crust to 12 crackers, 4 tbsp sugar, 8 tbsp butter (and a teensy bit more of each spice).

Crust:
5 ounces graham crackers (9 whole crackers), broken into large pieces
3 tablespoons granulated sugar
½ teaspoon ground ginger
½ teaspoon ground cinnamon
¼ teaspoon ground cloves
6 tablespoons unsalted butter, melted

Filling:
3 (8-ounce) packages cream cheese, at room temperature
½ cup (3.5 ounces) packed light brown sugar
½ cup (3.5 ounces) granulated sugar
1 tablespoon cornstarch
1½ teaspoons cinnamon
½ teaspoon freshly grated nutmeg
½ teaspoon ground ginger
½ teaspoon salt
1½ cups canned solid-pack pumpkin
3 large eggs
2 tablespoons heavy cream
1 teaspoon vanilla
1 tablespoon bourbon liqueur or bourbon (optional)

1. Adjust oven rack to lower-middle position and heat oven to 350F. Spray bottom and sides of 9-inch springform pan evenly with nonstick cooking spray. Pulse crackers, sugar, and spices in food processor until evenly and finely ground, about fifteen 2-second pulses. Transfer crumbs to medium bowl, drizzle melted butter over, and mix with rubber spatula until evenly moistened. Turn crumbs into prepared springform pan and, using hand, spread crumbs into even layer. Using flat-bottomed ramekin or drinking glass, press crumbs evenly into pan bottom, then use a soup spoon to press and smooth crumbs into edges of pan. Bake until fragrant and browned about the edges, about 12 minutes. Cool on wire rack while making filling.

2. Working with a stand mixer fitted with a paddle attachment, or with a hand mixer in a large bowl, beat the cream cheese on medium speed, scraping down the bowl as needed, until smooth, about 2 minutes. Add the brown and granulated sugars, cornstarch, cinnamon, nutmeg, ginger, and salt to the cream cheese and beat for another 2 minutes. Mix in the pumpkin, then add the eggs one at a time, mixing until incorporated. Add the cream, vanilla, and bourbon (if using) and mix until just combined.

3. Pour the filling into the crust, smoothing the top. Bake until the center is just set and measures 155 degrees on an instant-read thermometer, 55 to 65 minutes.

4. Cool the cheesecake completely in the pan on a rack, about 3 hours. Chill, covered, until cold, at least 4 hours. Remove the sides of the pan and bring the cheesecake to room temperature before serving.

copy-of-img_9172

asian peanut dip

copy-of-copy-of-img_80881

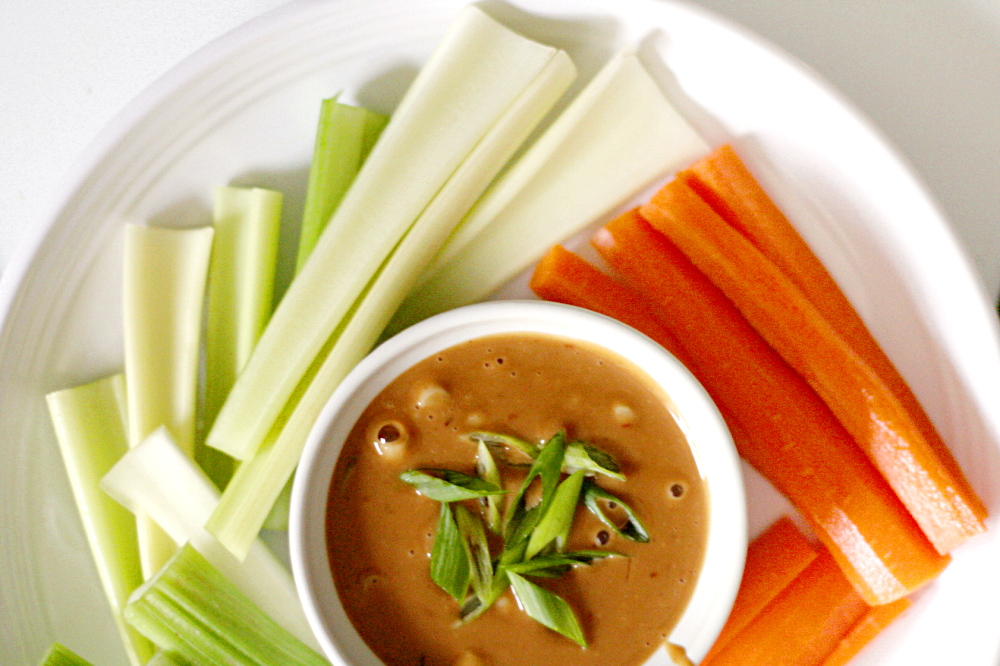
I keep my eye out for vegetables dips that aren’t ridiculously unhealthy. The thing is, when I serve some sort of meat that’s finger food, I don’t like to serve a vegetable that requires silverware. The perfect accompaniment is crudité (snobby way of saying vegetables eaten as a snack) with a dip, but most dips are nothing more than seasoned mayonnaise and sour cream. Not that I don’t love mayonnaise and sour cream, but I don’t always want to think of the dip as a treat.

copy-of-img_8078

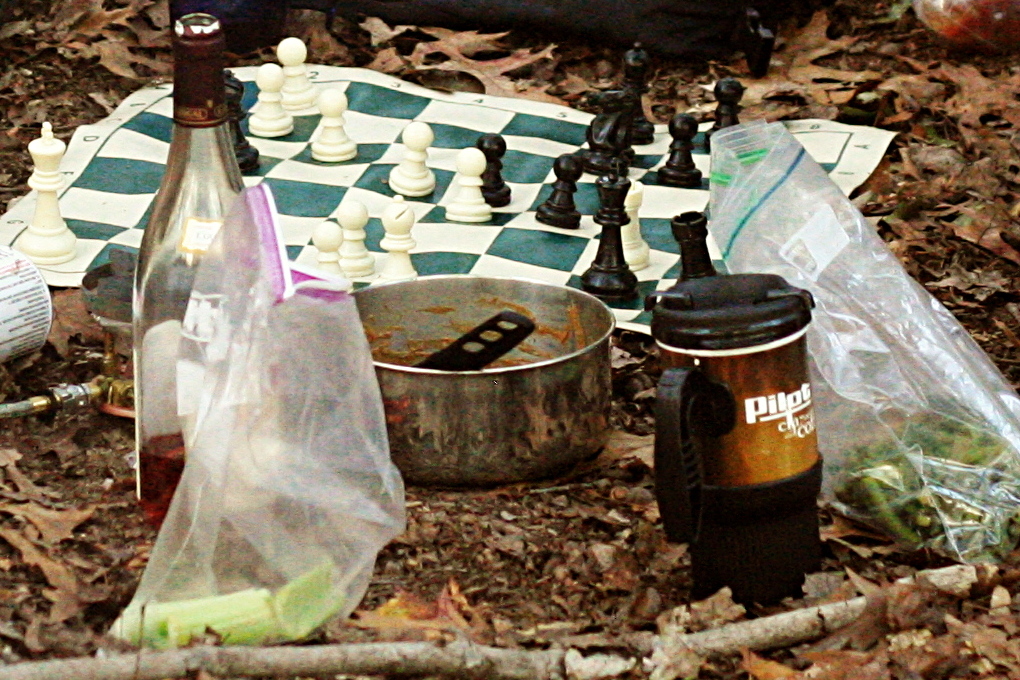
I’ve found one vegetable dip that’s a little healthier, and now I have another one. When struggling to figure out what to serve with the shrimp tempura recipe I was testing for Cooks Illustrated, I remembered that my friend had recently made this great spicy peanut dip on a camping trip. She got the recipe from Backpacker magazine, but when I searched on the internet, I saw that there were many similar recipes, most just as easy as the one we had the on the trip. There were slight variations between each, and I decided to stick with the Backpacker magazine one because it uses rice vinegar instead of lime juice for its acidity, which I’d really enjoyed.

copy-of-img_8020

(Clearly at the time I didn’t realize I’d blog about this at some point, or I would have taken a more flattering/interesting photo.)

The recipe, designed as it is to be made outdoors on a single-burner backpacking stove, is simple. I’ve tweaked the instructions just slightly, to bring the most flavor out of the red pepper and to tame the bite of the garlic. I also increased the seasoning and decreased the amount of red pepper flakes. It seemed far spicier when I made it at home than it did on the trip, maybe because I heated the flakes in oil first. And of course we didn’t add the scallions when we were camping – who brings scallions on a multi-day canoeing trip?

copy-of-img_8080

Usually, we adapt our favorite meals to be appropriate outdoors. I think this is the first time I’ve adapted a backpacking recipe for home, but this is a great recipe to have. I know peanut butter isn’t exactly a low-fat ingredient, but it’s a heck of a lot healthier than mayonnaise or sour cream, and this dip is just as good as more decadent vegetable dips.

copy-of-img_8086

Asian Peanut Dip (adapted from Backpacker Magazine)

Serves 4

1 teaspoon canola or vegetable oil
1 garlic clove, minced
½ teaspoon red pepper flakes
½ cup water
½ cup peanut butter, creamy or chunky
4 tablespoons soy sauce
2 tablespoons rice vinegar
1 scallion, sliced
salt to taste

In a small saucepan over medium heat, heat oil, garlic, and red pepper flakes. Cook, stirring frequently, until garlic is fragrant, 1-2 minutes. Add water, increase heat to high, and bring to boil. When water boils, remove pan from heat and add peanut butter, stirring until smooth. Stir in remaining ingredients (saving some scallion slices for garnish, if desired). Return to heat and continue stirring for 2-4 minutes until mixture is thickened. Serve warm or cold with crackers or crudité.

kugelhopf

copy-of-img_8885

This is the second Tuesdays with Dorie recipe in a row that I didn’t even know what it was before I made it. I had to wikipedia it to find out if I was supposed to serve it as dessert or what. I ended up serving it with some healthy omelets for breakfast.

This was not the most popular recipe we’ve made in the group. It seems like a lot of people had problems with the consistency of the dough and its rising times, and I’m wondering if some of those problems can be attributed to unfamiliarity working with yeast. A few people were surprised by how much time the recipe required, but almost all of that is spent waiting for the dough to rise. I didn’t think this was any more effort than any other yeast bread recipe.

copy-of-img_8833

I didn’t have any problems putting the recipe together. I can’t say I followed the directions exactly – I kept forgetting about it after I put it in the refrigerator, even though I was supposed to punch it down every once in a while. But I find that yeast breads are pretty forgiving.

copy-of-img_8879

I liked the texture of the bread quite a bit. It was very tender and light. The raisins were a nice addition. I wonder if it would be tasty to soak the raisins in rum instead of hot water to plump them? Or is a rum soak inappropriate for something that’s generally served for breakfast? (And do I care if it is? Probably not.)

copy-of-img_8883

The only problem I had with the kugelhopf is that it tasted totally flat. I was actually wondering if I had forgotten to add the salt, but now I see that quite a few people thought the bread was bland. Looking at the recipe, I can why – ¼ teaspoon of salt is a not a lot for a loaf this size. I would expect to use about three times that amount. I really need to be more careful with the salt amounts in Dorie’s recipes – I find that she tends to use less than I prefer. It’s just hard not to trust the professional in these matters.

Overall though, I enjoyed the little kugelhopf rolls, and I’m a better baker for knowing what the heck kugelhopf is. You can find the recipe on Yolanda’s blog.

copy-of-img_8890