Archives for December 2009

thai-style chicken soup (tom kha gai)

Copy of IMG_1760

Cooking and eating, I think I manage to do ambitiously. I just really like food, and I want to enjoy it as much as absolutely possible. That means I need to eat whatever is offered to me with an open mind. My desire to try new foods is driven by curiosity, but my desire to cook new recipes is about challenging myself. How much can I learn? How good can I be?

Copy of IMG_1703

But I have a weakness when it comes to food, and that is in the shopping. I go to the store with a plan and a list. Occasionally the store will have some seasonal item – long beans, meyer lemons, kaffir lime leaves – but I never buy it. Because what would I make with it? What other ingredients would I need to use it? I never know, and I’m not willing to make more grocery store trips than necessary, so I miss a lot of opportunities to try new ingredients.

Copy of IMG_1704

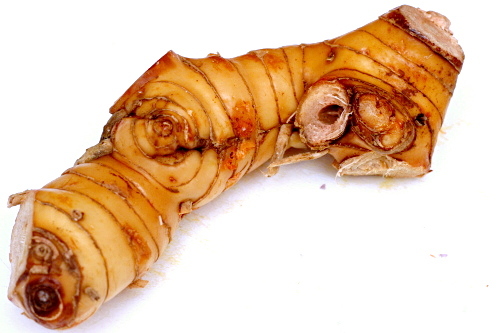
Finally I decided there was at least one produce item that there was no excuse not to try, and that is galangal. It’s often compared to ginger. Ginger has a long shelf life, so I assumed that galangal did too. I could buy it one of those rare times when it was available and ignore it for a week or two until I found a recipe to use it in.

Copy of IMG_1708

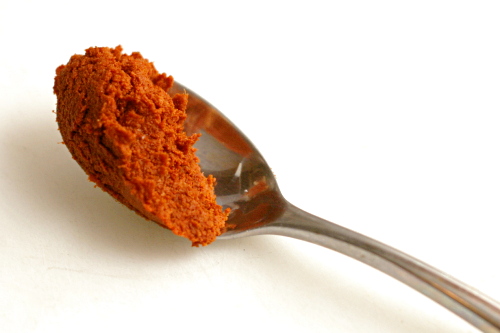
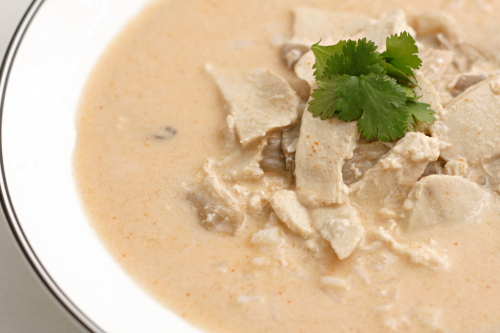
In the end, I used it in a recipe that doesn’t even require galangal. Cooks Illustrated’s Thai-style chicken soup (their version of tom kha gai) bypasses the need for ingredients that are difficult to find – like galangal – by designing the recipe around readily available prepared red curry paste.

Copy of IMG_1748

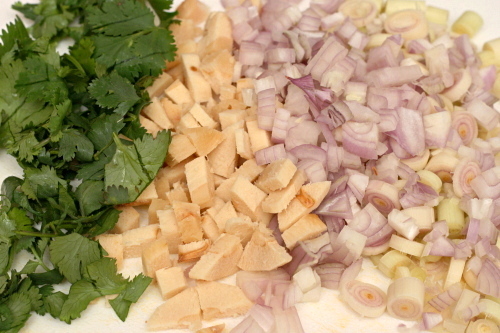
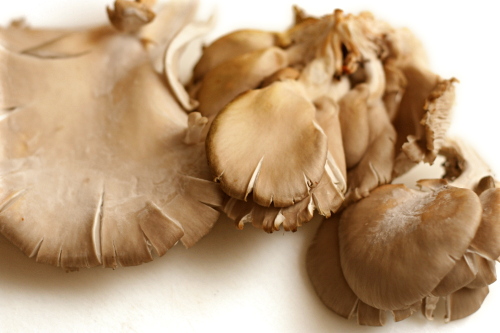
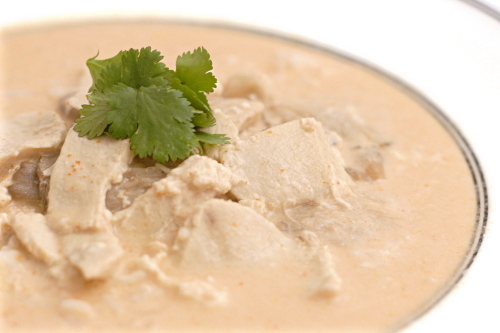
The curry paste already has galangal in it, but I figured it couldn’t hurt to sweat fresh galangal with the lemongrass, cilantro, shallots and fish sauce. Coconut milk and chicken broth are steeped in the vegetables, and then they’re strained out, leaving you with a sweet, deeply flavored coconut broth, in which thinly sliced mushrooms and chicken are briefly cooked.

Copy of IMG_1753

I’ve made this soup for years, and it is good. Really, exceptionally good. The kind of good where I spend the whole meal saying “oh my gosh this is so good!” (which I’m sure is just as annoying as you’d expect). I don’t think adding fresh galangal made a significant difference in the end product, but that’s okay – I got to play around with a new ingredient, and that makes me almost as happy as this soup does.

Copy of IMG_1762

Printer Friendly Recipe
Thai-Style Chicken Soup (from Cooks Illustrated)

6-8 as an appetizer, 4 as a main course

I like to skip the serrano chile garnish (and a rarely bother with the scallion and lime garnishes) and add just one chile to the vegetables in step 1. It makes the soup a bit spicy.

This is great as a first course with pad Thai served afterward, or as a simple main dish served over rice.

Cooks Illustrated recommends Chaokoh coconut milk, which is what I’ve always used. For a lighter option, they like A Taste of Thai’s Lite Coconut Milk, but I’ve never been able to find it.

1 teaspoon vegetable oil
3 stalks lemon grass, tough outer leaves removed, bottom 5 inches halved lengthwise and sliced thin crosswise
3 large shallots, chopped
8 sprigs fresh cilantro leaves, chopped coarse
3 tablespoons fish sauce
4 cups low-sodium chicken broth
2 (14-ounce) cans coconut milk, well-shaken
1 tablespoon sugar
½ pound white mushrooms, cleaned, stems trimmed, cut into ¼-inch slices
1 pound boneless, skinless chicken breasts, halved lengthwise and sliced on bias into ⅛-inch-thick pieces
3 tablespoons fresh lime juice from 2 to 3 limes
2 teaspoons red curry paste (Thai)

Garnish:
½ cup fresh cilantro leaves
2 serrano chiles, sliced thin
2 scallions, sliced thin on bias
1 lime, cut into wedges

1. Heat the oil in a large saucepan over medium heat until just shimmering. Add the lemon grass, shallots, cilantro, and 1 tablespoon fish sauce; cook, stirring frequently, until the vegetables are just softened, 2 to 5 minutes (vegetables should not brown). Stir in the chicken broth and 1 can of the coconut milk; bring to a simmer over high heat. Cover, reduce the heat to low, and simmer until the flavors have blended, 10 minutes. Pour the broth through a fine-mesh strainer and discard the solids in the strainer. Rinse the saucepan and return the broth mixture to the pan.

2. Return the pan to medium-high heat. Stir the remaining can of coconut milk and sugar into the broth mixture and bring to a simmer. Reduce heat to medium, add mushrooms, and cook until just tender, 2 to 3 minutes. Add chicken and cook, stirring constantly, until no longer pink, 1 to 3 minutes. Remove soup from heat.

3. Combine lime juice, curry paste, and remaining 2 tablespoons fish sauce in small bowl; stir into soup. Ladle soup into bowls and garnish with cilantro, chiles, and scallions. Serve immediately with lime wedges.
Copy of IMG_1757

brioche raisin snails

Copy of IMG_6438

I’m very comfortable cutting recipes in half. Some people say that they don’t like to deal with the math, but I come from a family of three engineers and a math teacher, so I can handle math. Plus, I’m cooking for just two people now, and I lived alone for six years before that, so my options are either to make half-recipes, throw a lot of food away, or eat the same thing for weeks. Given those choices, I take fractions all the way.

Copy of IMG_6424

Even if a recipe specifically recommends making the full recipe because smaller amounts are harder to work with – eh. Whatever. I usually cut it in half anyway. Cakes, caramel, bread dough, whatever. You’d be surprised what you can get away with, although you might, as in this case, have to split the occasional egg in half.

Copy of IMG_6425

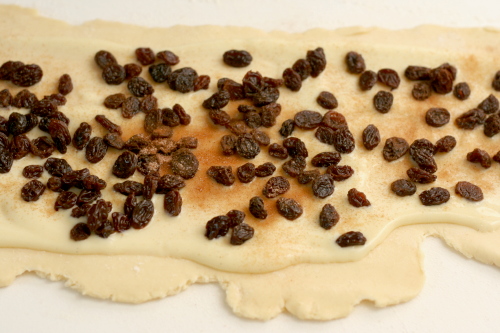
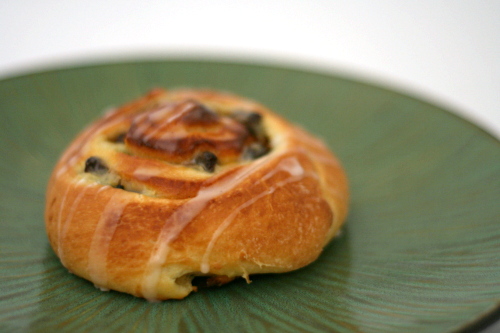
Dorie’s brioche raisin snails are a rich yeast dough with pastry cream and flambéed raisins rolled into it. It probably sounds like quite a bit of work, and frankly, it is, but it’s a nice change from cinnamon rolls if you find yourself making those often.

Copy of IMG_6426

If you follow the recipe exactly, you’ll end up with twice as much brioche as you need for the snails, so you can always make some of Dorie’s fantastic sticky buns too. Or, just cut the brioche recipe in half like I did. Does anyone really need two different kinds of buttery tender breakfast breads tempting them at once?

Copy of IMG_6429

One year ago: Pumpkin Ginger Muffins

Printer Friendly Recipe
Brioche Raisin Snails
(from Dorie Greenspan’s Baking: From My Home to Yours)

Makes about 12 snails

You’ll only need half of the brioche dough, and while Dorie recommends making the full recipe and saving half for later (the dough takes well to freezing), I found that I could successfully make half the recipe if I used a faster mixing speed than the recipe recommends. If you find that there isn’t enough dough for the dough hook to work effectively, knead with the paddle attachment, switching to the dough hook for just the last few minutes of kneading. The full recipe is presented below.

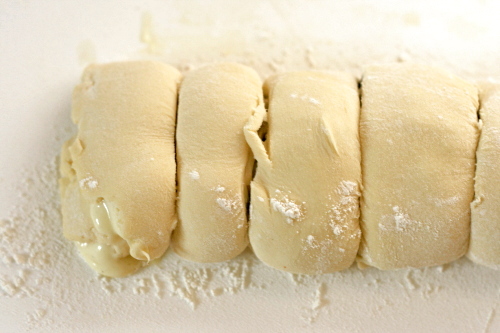
You can shape the rolls into a log and then wrap the log well and freeze it. When you’re ready to bake, let the log defrost in the refrigerator overnight, then cut the rolls and let them rise at room temperature.

Brioche:
2 packets (4½ teaspoons) instant yeast
⅓ cup warm water
⅓ cup warm milk
3¾ cups (27.6 ounces) all-purpose flour
2 teaspoons salt
3 large eggs, at room temperature
¼ cup sugar
24 tablespoons (3 sticks) unsalted butter, at room temperature but still slightly firm

Pastry cream:
1 cup whole milk
3 large egg yolks
¼ cup (1.75 ounces) sugar
2½ tablespoons cornstarch, sifted
¾ teaspoon pure vanilla extract
1½ tablespoons unsalted butter, at room temperature, cut into bits

Assembly:
1 cup moist, plump raisins
3 tablespoons dark rum
1½ teaspoons sugar
Scant ¼ teaspoon ground cinnamon

Glaze:
¾ cup confectioners’ sugar
about 1 teaspoon water
drop of pure vanilla extract

For the brioche: Put the yeast, water, and milk in the bowl of a stand mixer and, using a wooden spoon, stir until the yeast is dissolved. Add the flour and salt, and fit the mixer with the dough hook, if you have one. Toss a kitchen towel over the mixer, covering the bowl as completely as you can – this will help keep you, the counter and your kitchen floor from being showered in flour. Turn the mixer on and off in a few short pulses, just to dampen the flour (yes, you can peek to see how you’re doing), then remove the towel, increase the mixer speed to medium-low and mix for a minute or two, just until the flour is moistened. At this point you’ll have a fairly dry, shaggy mass.

Scrape the sides and bottom of the bowl with a rubber spatula, set the mixer to low and add the eggs, followed by the sugar. Increase the mixer speed to medium and beat for about 3 minutes, until the dough forms a ball. Reduce the speed to low and add the butter in 2-tablespoon-size chunks, beating until each piece is almost incorporated before adding the next. You’ll have a dough that is very soft, almost like a batter. Increase the speed to medium-high and continue to beat until the dough pulls away from the sides of the bowl, about 10 minutes.

Transfer the dough to a clean bowl (or wash out the mixer bowl and use it), cover with plastic wrap and leave at room temperature until nearly doubled in size, 40 to 60 minutes, depending upon the warmth of your room.

Deflate the dough b lifting it up around the edges and letting it fall with a slap into the bowl. Cover the bowl with plastic wrap and put it in the refrigerator. Slap the dough down in the bowl every 30 minutes until it stops rising, about 2 hours, then leave the covered dough in the refrigerator to chill overnight.

Divide the dough in half, reserving half for another use.

For the pastry cream: Bring the milk to a boil in a small saucepan.

Meanwhile, in a medium heavy-bottomed saucepan, whisk the yolks together with the sugar and cornstarch until thick and well blended. Still whisking, drizzle in about 2 tablespoons of the hot milk – this will temper, or warm, the yolks so they won’t curdle. Whisking all the while, slowly pour in the remainder of the milk. Put the pan over medium heat and, whisking vigorously, constantly and thoroughly (making sure to get into the edges of the pot), bring the mixture to a boil. Keep at a boil, still whisking, for 1 to 2 minutes, then remove the pan from the heat.

Whisk in the vanilla extract. Let sit for 5 minutes, then whisk in the bits of butter, stirring until they are fully incorporated and the pastry cream is smooth and silky. Scrape the cream into a bowl. You can press a piece of plastic wrap against the surface of the cream to create an airtight seal and refrigerate the pastry cream until cold or, if you want to cool is quickly, put the bowl into a larger bowl filled with ice cubes and cold water, and stir the pastry cream occasionally until it is thoroughly chilled, about 20 minutes.

To assemble: Line one large or two smaller baking sheets with parchment or silicone mats.

Put the raisins in a small saucepan, cover them with hot water and let them steep for about 4 minutes, until they are plumped. Drain the raisins, return them to the saucepan and, stirring constantly, warm them over low heat. When the raisins are very hot, pull the pan from the heat and pour over the rum. Standing back, ignite the liquor. Stir until the flames go out, then cover and set aside. (The raisins and liquor can be kept in a covered jar for up to 1 day.)

Mix the sugar and cinnamon together.

On a flour dusted surface, roll the dough into a rectangle about 12 inches wide and 16 inches long, with a short end toward you. Spread the pastry cream across the dough, leaving 1-inch strip bare on the side farthest from you. Scatter the raisins over the pastry cream and sprinkle the raisins and cream with the cinnamon sugar. Starting wit the side nearest you, roll the dough into a cylinder, keeping the roll as tight as you can. (At this point, you can wrap the dough airtight and freeze it up to 2 months; see Storing for further instructions. Or, if you do not want to make the full recipe, use as much of the dough as you’d like and freeze the remainder.)

With a bread knife or unflavored floss, trim just a tiny bit from the ends if they’re ragged or not well filled, then cut the log into rounds a scant 1 inch thick. Put the snails on the lined baking sheet(s), leaving some puff space between them.

Lightly cover the snails with wax paper and set the baking sheet(s) in a warm place until the snails have doubles in volume – they’ll be puffy and soft – about 1 hour and 30 minutes.

When the snails have almost fully risen, preheat the oven: depending on the number of baking sheets you have, either center a rack in the oven or position the racks to divide the oven into thirds and preheat the oven to 375ºF.

Remove the wax paper, and bake the snails for about 25 minutes (rotate the sheets, if you’re using two, from top to bottom and front to back after 15 minutes), or until they are puffed and richly browned. Using a metal spatula, transfer the snails to a cooling rack.

Copy of IMG_6434

rosy poached pear and pistachio tart

Copy of IMG_1364

I’m not really good with pears. I don’t know much about them, so I never buy them. And, of course, because I never buy them, I don’t learn much about them. Which types are best for baking and for eating? When are they in season? How do I know when they’re ripe? How long do they take to ripen after you buy them?

Copy of IMG_1336

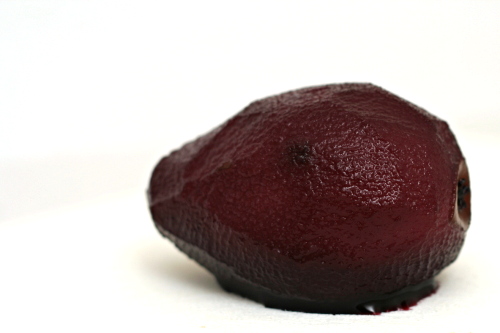
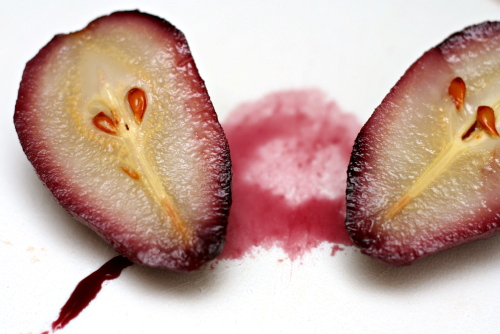
Due to my lack of pear knowledge, I was a little worried about how my tart would come out. I should have looked up what kind of pear to use, plus I forgot to buy mine early so it would have time to ripen before I needed to make the tart.

Copy of IMG_1352

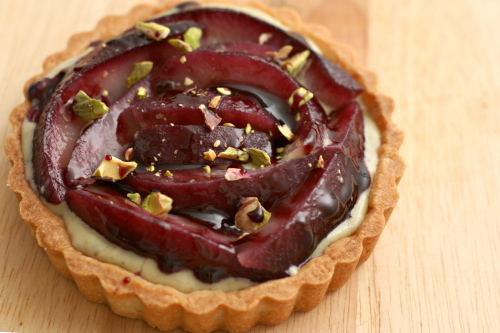
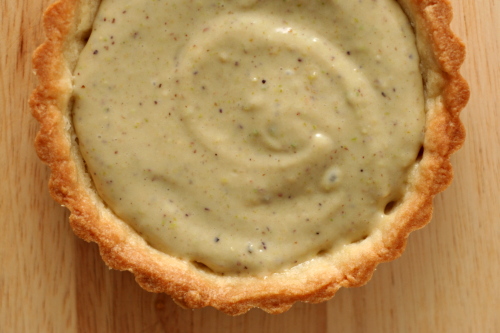
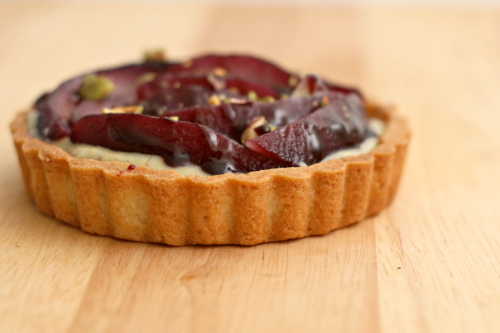
It probably would have been a little better if my pear had been softer, but, as it was, this was a pretty darn good tart. I mean, the pear is cooked in wine for over half an hour – how could that be bad? Plus, pastry cream is just delicious, although pistachio pastry cream resembles split pea soup a little too closely for my comfort. Good thing it’s covered by that beautiful purple poached pear!

Copy of IMG_1355

Lauren chose this for Tuesdays with Dorie and she has the recipe posted.

One year ago: Linzer Sablés

Copy of IMG_1361