Archives for April 2010

home corned beef

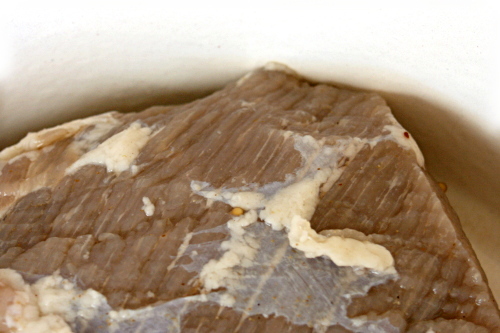
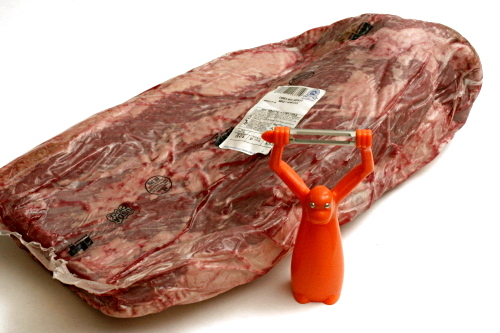
Can someone explain to me why the only way I can buy brisket in my tiny town is to get the whole brisket? (And why are there no dried currants? Or mini-cupcake liners?) I didn’t even know what a whole brisket looked like before last month. First off, it’s huge. Who needs to buy 15 pounds of meat at a time? Second, half of that 15 pounds is fat. I actually weighed the fat after I spent an entire hour aaaargh! trimming it off the brisket. An inch-thick layer of fat, yum.


monkey peeler for scale

And why is brisket so much more expensive to buy than prepared corned beef anyway? Corned beef is just seasoned brisket. I didn’t corn my own beef because I have a problem with the store-bought versions of corned beef; it’s just that…I can’t help myself. Homemade corned beef sounded fun.

I tried it a few years ago (back in the glorious days when I could buy pre-trimmed brisket in reasonable sized roasts), using Cooks Illustrated’s dry rub recipe. In that one, a mixture of salt and other seasonings is rubbed onto the brisket and left to set for several days. It was good, because it’s salty brisket, but I didn’t think it was significantly better than what I could buy.

I started out this time using Alton Brown’s recipe, which is a wet brine similar to what is often used for chicken. However, I balked when I was supposed to add 2 pounds of ice to 2 quarts of water to make the brine for four pounds of brisket. That seemed like an excessive amount of liquid per meat; I’m not sure I have the fridge space for all that. So I halved the liquid, but that means that my brine was far more concentrated, and the resulting corned beef was not-quite-inedibly salty.

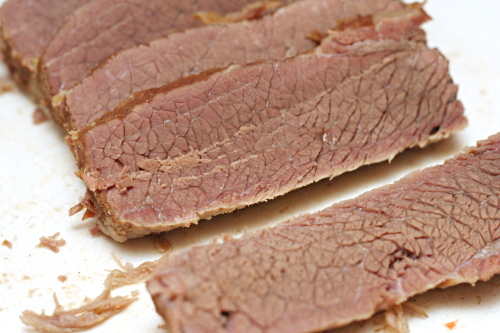
I tried again (after all, I still had plenty of brisket in the freezer), dialing back the amount of salt by half. And what do you know? Perfection. Dave is already requesting more reubens, so it looks like I’ll use up 15 pounds of brisket after all.  Maybe next time I can get the butcher to trim it for me.

One year ago: Roasted Baby Artichokes
Two years ago: Red Beans and Rice

Printer Friendly Recipe
Corned Beef (adapted from Alton Brown)

6 to 8 servings

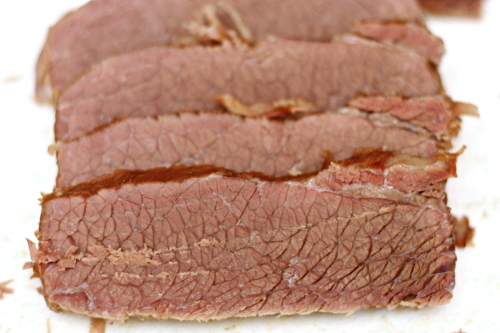
The use of saltpeter (potassium nitrate) is up to you. Its purpose is to make the meat pink; without it, it turns the purpley gray that you see in my pictures. Cooks Illustrated’s corned beef write-up reported chemical flavors whenever they used saltpeter, and I couldn’t find it anyway, so I left it out, and truthfully, I quite like the color of the meat at the end of cooking.

4 cups water
½ cup kosher salt
6 tablespoons brown sugar
1 tablespoon saltpeter (optional)
½ cinnamon stick, broken into several pieces
1 teaspoon mustard seeds
1 teaspoon black peppercorns
4 whole cloves
4 whole allspice berries
6 whole juniper berries
2 bay leaves, crumbled
¼ teaspoon ground ginger
4 quarts ice
1 (4 to 5 pound) beef brisket, trimmed

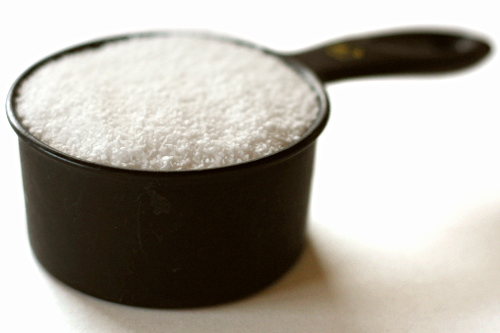
Place the water in a 5-quart pot along with the salt, sugar, saltpeter (if using), and spices. Cook over high heat until the salt and sugar have dissolved. Add the ice and let set the mixture until the ice is mostly melted. Once the liquid is cold, place the brisket in a 1-gallon zip-top bag and add the brine. Seal and lay flat inside a 9×13-inch pan. Refrigerate for 5 days, turning occasionally. After 5 days, remove the meat from the brine and rinse it under cool water. Cook using your favorite recipe. (I like to keep it very simple, just simmering the brisket in water for a few hours until it’s tender, adding potatoes, carrots and cabbage near the end.)
chockablock cookies

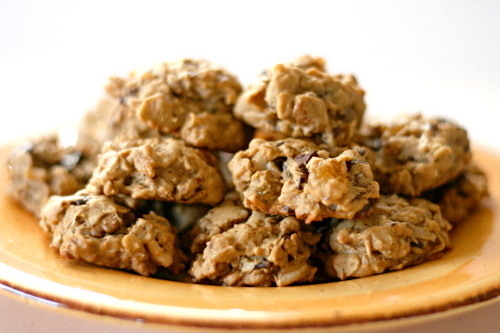
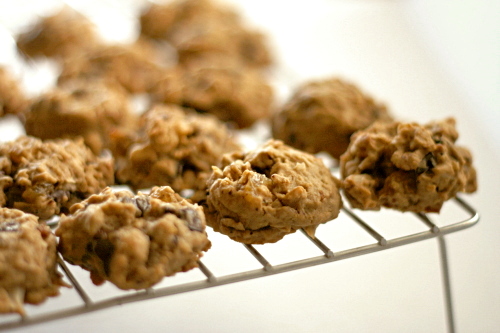
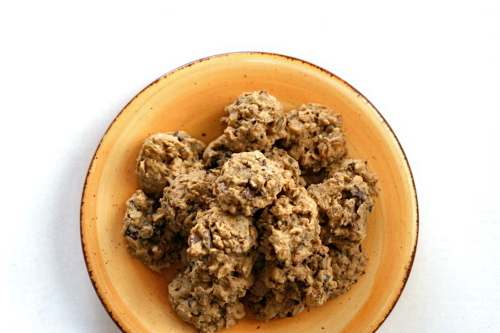
Hey, didn’t Tuesdays with Dorie already make these, a chocolate version, a long time ago? And didn’t I already lodge a complaint against cookies that are more add-in than dough? Seriously, sometimes the chocolate chips in chocolate chip cookies get in my way.

And wait, didn’t I already decide that, hey, add-ins maybe aren’t such a bad thing because these are some darn good cookies.

And you know what else about these cookies? There’s only eight tablespoons of butter/shortening in the whole batch! That’s about half as much as most cookies. Which makes it all the harder not to justify having just one more.

Mary chose these and she has the recipe posted. I quadrupled, yes, that’s right, quadrupled the salt. Seemed perfect to me.

One year ago: Chocolate Cream Tart
Two years ago: Fluted Polenta and Ricotta Cake

shrimp burgers

In retrospect, this probably wasn’t the best weeknight meal ever. The thing is, I eat very differently on weekdays and weekends. On weekdays, it’s all about the vegetables and the fruit and the light bean dips and all this healthy stuff, and that’s all very well and good, but by the weekend, I do not want to see a banana or a raw carrot. Also, I would like some meat. But seafood gets a pass for weekdays.

Mayonnaise, not so much. I think I’d forgotten how much mayonnaise this meal includes when I planned it. I’d kept in mind that the slaw had a mayonnaise-based dressing, but I cringed when I added more mayonnaise to the burgers – cringed, but did it anyway. I’d been looking forward to this meal all week and wasn’t taking any chances on messing it up.

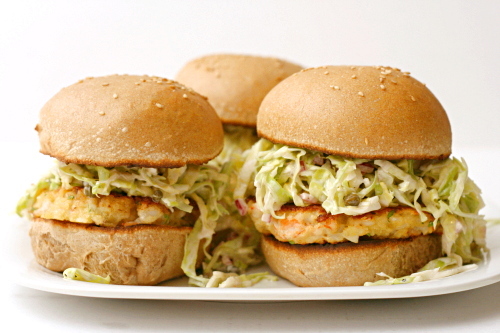
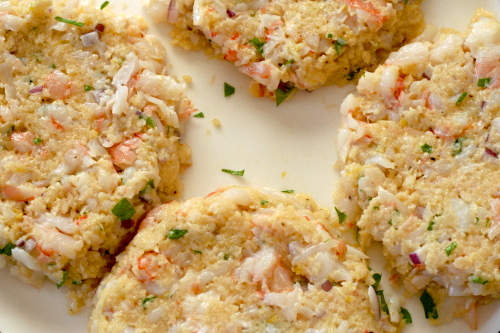
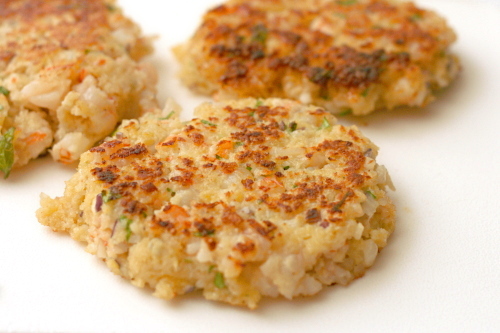
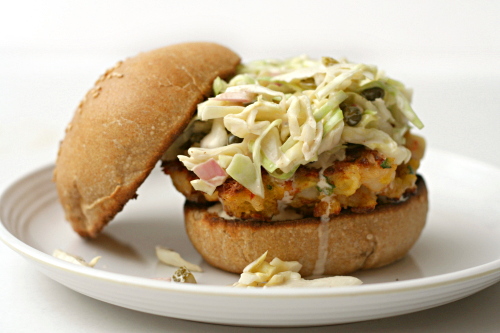
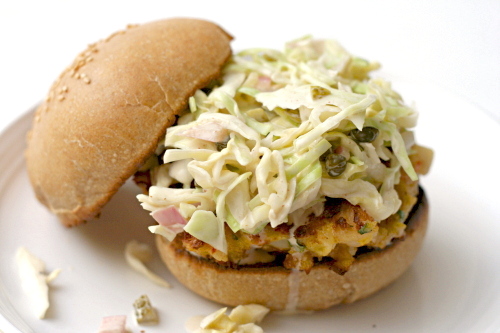
As Rebecca said, shrimp burgers are pretty much just like crab cakes, but cheaper and on a bun. Coarsely chopped shrimp, aromatics, binders to hold everything together, all pan-fried until browned and crisp on the outside – I can’t think of too many things tastier than that, especially when it’s topped with tangy, briny slaw tartare. No way was I going to let a bit of mayonnaise get in my way of enjoying this meal.

One year ago: Brownie comparison
Two years ago: Cheesecake Pops (for the Daring Bakers and ohmy was this ever a mess)

Printer Friendly Recipe
Shrimp Burgers
(adapted from Ezra Pound Cake who adapted it from Matt Lee and Ted Lee’s The Lee Brothers’ Southern Cookbook who adapted it from the Hominy Grill’s recipe; I think my version most resembles the original, as I’ve left out the ginger and corn that the Lee Brothers added)

Makes 4 burgers

I didn’t have fresh bread crumbs, so I used panko instead, moistened with a teaspoon or so of the shrimp cooking liquid.

2 quarts water
2 tablespoons Old Bay seasoning
1 pound headless large shrimp (26-30 per pound), shells on
2 tablespoons chopped scallions
2 tablespoons chopped fresh flat-leaf parsley
1½ teaspoons lemon zest
3 tablespoons mayonnaise
1 cup bread crumbs, preferably fresh (from about 2 slices bread)
kosher salt to taste
freshly ground black pepper to taste
1 egg, beaten
1½ tablespoons canola oil

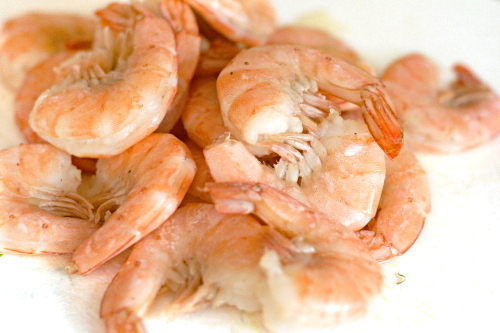
1. In a 3-quart saucepan, bring the water and Old Bay seasoning just to a boil over high heat. Turn off the heat, add the shrimp, and let stand until the shrimp are pink, about 2 minutes. Drain; peel and devein the shrimp, then chop it coarsely.

2. In a large bowl, mix the shrimp, scallions, parsley, and lemon zest. Stir in the mayonnaise and bread crumbs (see note), and season with salt and pepper. Gently fold the egg into the mixture.

3. Shape the mixture into 4 patties. Wrap the patties in plastic wrap, and refrigerate them for at least 30 minutes.

4. Heat the oil in a 12-inch skillet over medium-high heat. Remove the burgers from the refrigerator, unwrap them, and gently lay them in the pan. Cook until both sides are browned, about 3 minutes per side. Drain on a plate lined with a paper towel.

5. Serve on toasted hamburger buns with lettuce, thinly sliced Vidalia onion and tartar sauce (or combine all of those flavors into one delicious slaw).

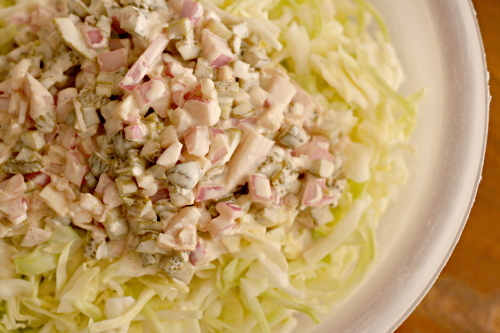
slaw tartare

“Here, taste this”, I requested, bringing Dave a cornichon.

He obliged, then made a face. “Euck, it’s a pickle.”

I sighed. Brined food is Dave’s single food hangup, but the cornichons had seemed relatively mild to me. I was hoping he wouldn’t mind them.

I went back into the kitchen to finish the salad, snacking on at least one cornichon for every one I chopped.

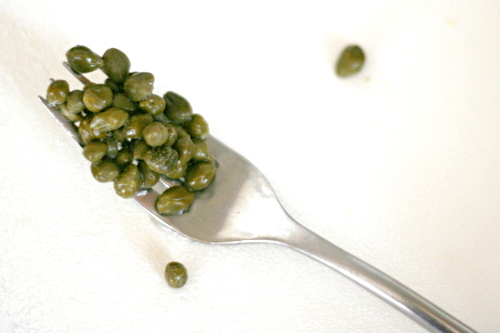
Before too long, I tried again, this time with capers. “Too briny”, he insisted.

I was starting to get worried about whether Dave would tolerate this slaw at all. Instead of coleslaw, he might be topping his shrimp burger with arugula and, uh…ketchup? We were out of mayonnaise; it had all gone into the dressing.

I forged on, but halved the capers and reduced the vinegar by even more. After mixing the dressing into the salad, I started tasting for seasoning. Results were inconclusive, so I tasted again. Seems okay, but I should take one more taste. When I realized that all my tasting was simply to keep eating, I decided the seasoning was just fine.

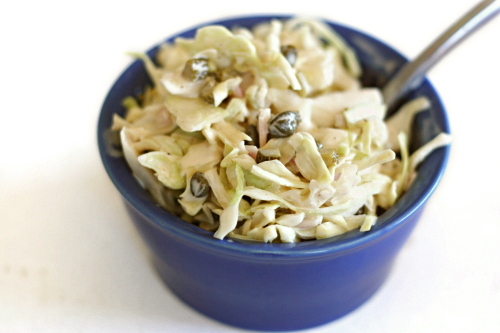
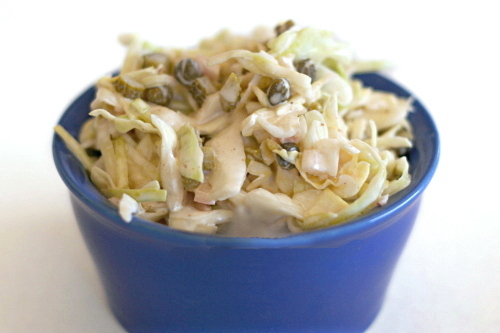
But it was time for the real test. I took a small bowl of the coleslaw to Dave. “Ooh, this is good slaw!” he exclaimed, finishing the bowl off in no time. I let out the breath I’d been holding. He was right. It is good slaw.

(The shrimp burgers were delicious.  They will be my next entry.)
One year ago: Pasta with Cauliflower, Walnuts, and Ricotta Salata
Two years ago: Creamy Buttermilk Coleslaw (okay, that’s kind of wierd)
Printer Friendly Recipe
Slaw Tartare (adapted from Smitten Kitchen who adapted it from Rebecca Charles’ and Deborah Di Clementi’s Lobster Rolls and Blueberry Pies)

Not a fan of watery coleslaw, these days I salt all of my cabbage destined for slaw.

Also, the recipe on Deb’s site, which reportedly already has less mayonnaise than the original, still seems to have a crazy amount of it. I’ve reduced it to about a third of what she recommends and thought the slaw was perfectly creamy. I’ve reduced some of the other dressing components accordingly.

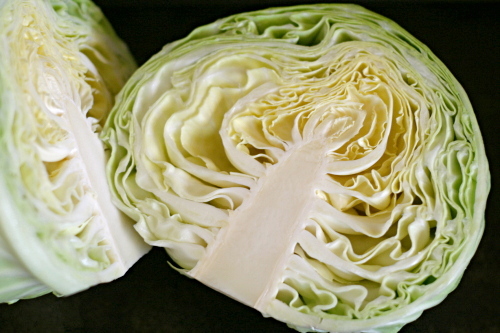
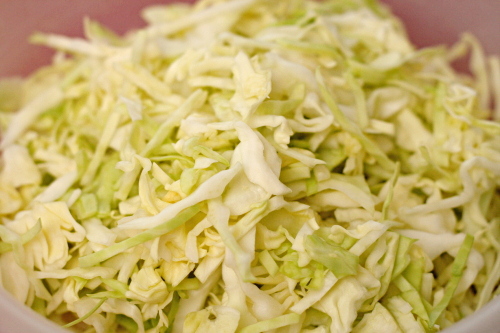
½ cabbage (about 1 pound), shredded fine (5-6 cups)
kosher salt
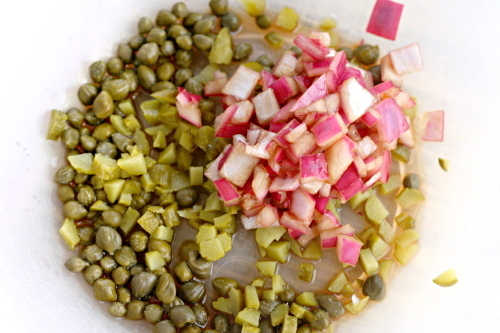
¼ cup chopped red onion
2 tablespoons sherry vinegar
½ teaspoon sugar
¼ cup capers
¼ cup chopped cornichons, plus 1 tablespoon of the juice
2 teaspoons Dijon mustard
6 tablespoons mayonnaise
½ teaspoon freshly ground black pepper

1. Toss the shredded cabbage and 1 teaspoon salt in a colander or large mesh strainer set over a medium bowl. Let it stand until cabbage wilts, at least 1 hour or up to 4 hours. Rinse the cabbage under cold running water. Spin the cabbage in a salad spinner until it’s dry or press, but do not squeeze, to drain it; pat dry with paper towels. Place the wilted cabbage in a large bowl.

2. Mix the onions, sherry vinegar, and sugar together in a small bowl. Let it set for about 15 minutes, then mix in the capers, cornichons, cornichon juice, mustard, mayonnaise, and pepper. Fold the dressing into the cabbage and serve, or refrigerate for several hours for serving.

sweet cream biscuits

I was all set to make the tiniest portion of this recipe and serve little bitty biscuits with salad for dinner. And then Dorie mentioned ham sandwiches in the headnote and I started thinking about adding eggs and cheese to that and suddenly I was making extra dough to freeze. Breakfast sandwiches are on my Favorite Foods Ever List. (Let us not discuss how long that list is.)

There are all sorts of biscuits – flaky from cutting in butter, layered from multiple pastry turns, tender from stirring in cream – and I love them all. And they all make one mean breakfast sandwich.

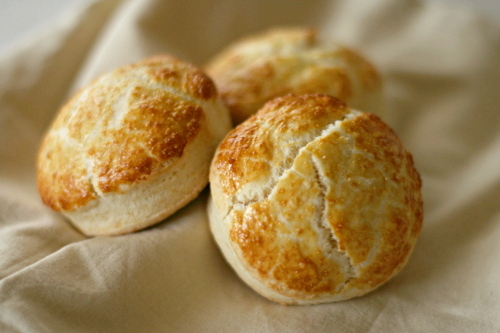
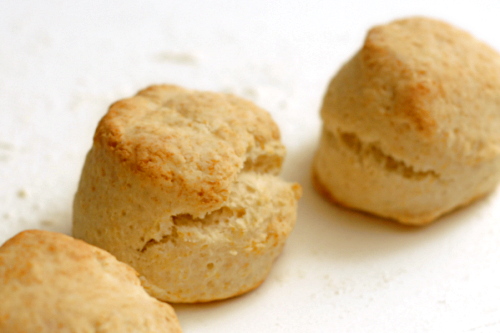
Melissa, who chose these biscuits for Tuesdays with Dorie, has the recipe posted on her site. You might be able to tell from the photos that my tiny biscuits rose higher than my bigger biscuits. I mixed, cut, and rolled the dough at the same time; the only difference is that the larger ones were baked straight from the freezer instead of right after the dough was made like the smaller ones. Also, I brushed the larger biscuits with an egg wash because I happened to have eggs available. It makes for a pretty biscuit, but they’re great either way.

One year ago: Chocolate Bread Pudding
Two years ago: Carrot Cake

pizza with figs, prosciutto, gorgonzola, balsamic, and arugula

I went to dinner at a fancy pizza place with my parents and Dave a few months ago, and my dad ordered a pizza that seemed appropriate for him – cheeseburger.  Because the more meat, the better!  Hold the vegetables please, is generally his motto.  Oh, I laughed and laughed when his pizza arrived covered in lettuce.  He scraped it right off.

Not that I’ve been much better about the idea of salad on pizza.  It’s a pretty popular concept, but so far I’ve wanted to keep my bread and cheese unadulterated by large amounts of greenery.

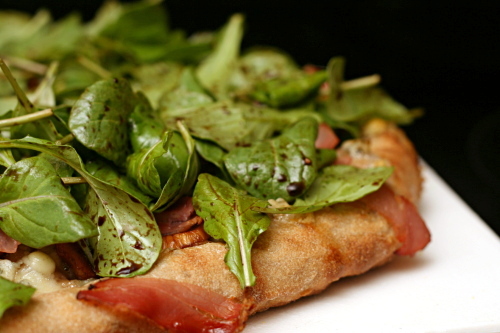
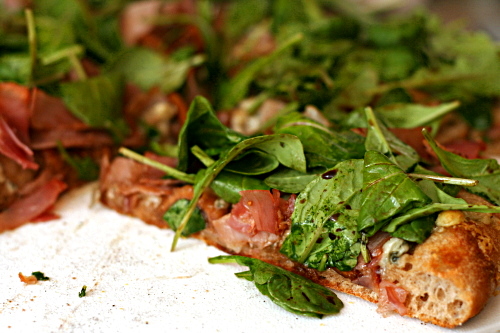
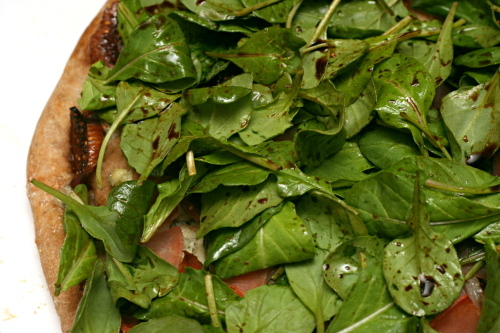
I guess when you’re already putting figs on pizza (oh, how I’d love to see my dad’s face if there were figs on his pizza!), arugula doesn’t seem so weird by comparison.  It turns out that the figs and arugula work really well together.  The figs add sweetness, the prosciutto saltiness, the arugula freshness, and the blue cheese…um…stinky-feetiness?  But in a good way.  In a very, very good way, in fact.

One year ago: Brandied Berry Crepes
Two years ago: Breakfast Strata with Sausage, Mushrooms, and Monterey Jack

Printer Friendly Recipe
Pizza with Figs, Prosciutto, Gorgonzola, Balsamic, and Arugula (adapted from Bon Appetit via epicurious)

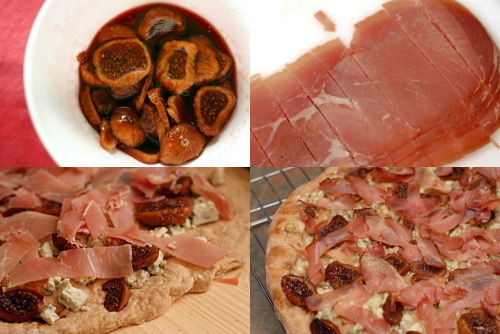
The original recipe calls for fresh figs; since I used dried, I soaked them in port for a while to plump them.  However, I’m not sure this is necessary.

Makes 1 12-inch pizza, serving about 3 people

6 small fresh figs, cut into thin slices
2 tablespoons balsamic vinegar, divided
cornmeal (for sprinkling)
12 ounces (¾ pound) pizza dough (⅓ of this recipe), after its first rise
1 cup crumbled Gorgonzola cheese (about 4 ounces)
3 ounces thinly sliced prosciutto, cut into strips
2 teaspoons extra-virgin olive oil
3 ounces stemmed arugula

1. Place a pizza stone on the bottom rack of the oven and preheat the oven to 500ºF. Put the figs in a medium bowl and drizzle 1 tablespoon of the vinegar over them. Set aside.

2. Gently flatten the dough, then pick it up and stretch it out, keeping it as circular as possible. Curl your fingers and let the dough hang on your knuckles, moving and rotating the dough so it stretches evenly. If it tears, piece it together. If the dough stretches too much, put it down and gently tug on the thick spots.

3. Dust a pizza peel with cornmeal and transfer the round of dough to the peel. Rearrange the dough to something reasonably circular; stab it several times with a fork. Top the pizza with the cheese, figs, and prosciutto.

4. Transfer the pizza from the peel to the hot stone. Bake for 8-10 minutes, until the crust is spotty brown. Let the pizza cool on the peel for about 5 minutes.

5. Meanwhile, whisk the remaining 1 tablespoon vinegar with the oil and a pinch of salt and pepper; toss the arugula with the dressing. Spread the salad evenly over the pizza. Slice and serve.

brown sugar cookies

Do you know where the name for my blog came from? I mean, besides Dave kind of just blurting it out and me realizing it was perfect. I was looking for something that at least somewhat related to my science background – I kind of wanted to be discussing not just the outcome of recipes, but also the way (get it?! huh huh huh do you?) things worked.

Plus, I had a professor in graduate school who used to bring us cookies, and in fact, he spent a portion of his first lecture talking about crumbly cookies. It all related to gravity and physics and stuff, but mostly I remember the cream cheese chocolate chip cookies he brought that day.

So now I’m the professor, and I bring my students cookies. Is that weird? Probably, but I need someone to offload treats to, and who better than college students? I kept to safe, familiar recipes in the beginning, chocolate chip cookies, snickerdoodles, brownies, but now I’ve started to get a little experimental.

It’s also nice to get feedback from a larger audience besides, you know, myself and sometimes Dave. Not that you want to be telling the person who grades your exams that their cookies totally suck or anything, but I can generally get a vibe.

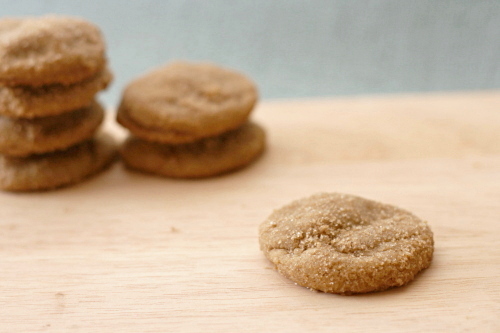
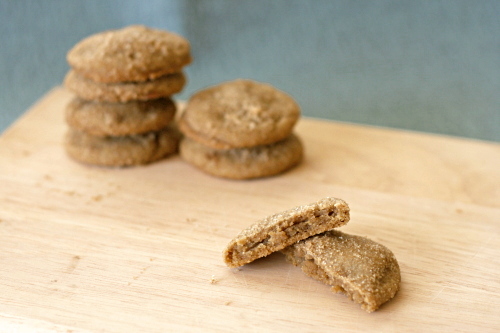
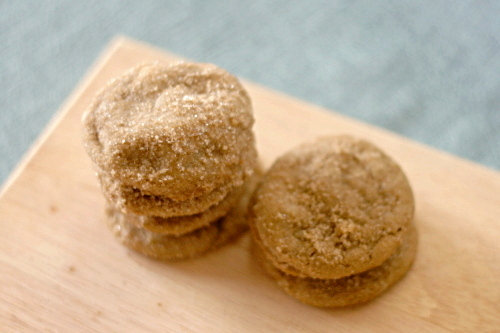
I actually wasn’t completely sold on these cookies. Oh, they were good, of course – what’s not to like about brown sugar and butter? And they were pretty difficult to resist, but still, I think I was expecting something transcendent. I actually think the one seemingly insignificant place I went wrong was rolling the doughballs too thickly in the sugar coating. Too much raw sugar!

My students though, gave rave reviews – more so than normal, so I’m guessing they’re not just trying to get on my good side. So what do I know. Other than a whole lot of sciencey stuff, that is.

One year ago: Pan-Roasted Asparagus
Two years ago: Almond Biscotti (and Hazelnut Dried Cherry variation) – Dave’s favorite biscotti recipe

Printer Friendly Recipe
Brown Sugar Cookies
(from Cooks Illustrated)

Makes 2 dozen cookies

CI note: The most efficient way to bake these cookies is to portion and bake half of the dough. While the first batch is in the oven, the remaining dough can be prepared for baking. Avoid using a nonstick skillet to brown the butter. The dark color of the nonstick coating makes it difficult to gauge when the butter is sufficiently browned. Use fresh brown sugar, as older (read: harder and drier) brown sugar will make the cookies too dry.

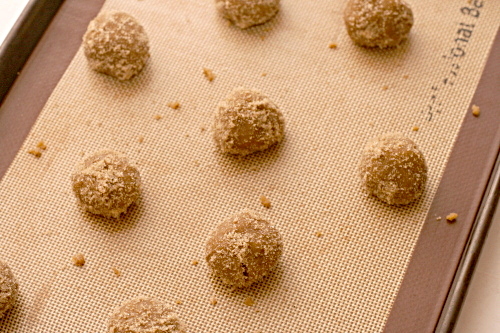
My note: I made the cookies smaller, about 1-inch round balls. I baked them for 7-9 minutes. Even with the smaller cookies (and therefore more surface area), I still had far more of the sugar coating mixture than I needed.

14 tablespoons (1¾ sticks) unsalted butter
¼ cup (about 1¾ ounces) granulated sugar
2 cups (14 ounces) packed brown sugar
2 cups plus 2 tablespoons (10.625 ounces) unbleached all-purpose flour
½ teaspoon baking soda
¼ teaspoon baking powder
½ teaspoon table salt
1 large egg
1 large egg yolk
1 tablespoon vanilla extract

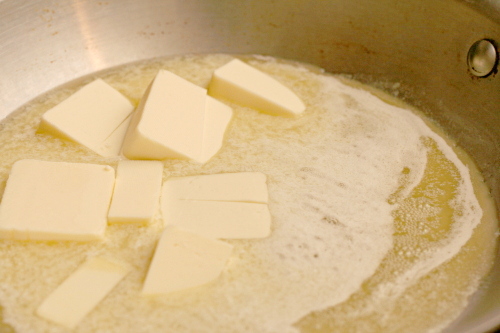
1. Heat 10 tablespoons of the butter in a 10-inch skillet over medium-high heat until its melted, about 2 minutes. Continue to cook the butter, swirling pan constantly until it is dark golden brown and has a nutty aroma, 1 to 3 minutes. Remove the skillet from the heat and transfer the browned butter to a large heatproof bowl. Stir the remaining 4 tablespoons of the butter into the hot butter to melt; set aside for 15 minutes.

2. Meanwhile, adjust an oven rack to the middle position and heat the oven to 350 degrees. Line 2 large baking sheets with parchment paper. In a shallow baking dish or pie plate, mix the granulated sugar and ¼ cup (1.75 ounces) packed brown sugar, rubbing between fingers, until well combined; set aside. Whisk the flour, baking soda, and baking powder together in a medium bowl; set aside.

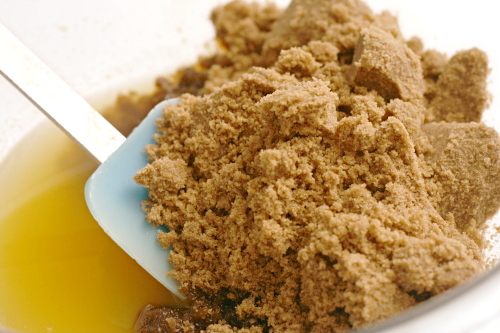
3. Add the remaining 1¾ cups (12.25 ounces) brown sugar and the salt to the bowl with the cooled butter; mix until no sugar lumps remain, about 30 seconds. Scrape down the sides of the bowl with a rubber spatula; add the egg, yolk, and vanilla and mix until fully incorporated, about 30 seconds. Scrape down the bowl. Add the flour mixture and mix until just combined, about 1 minute. Give the dough a final stir with a rubber spatula to ensure that no flour pockets remain and the ingredients are evenly distributed.

4. Divide the dough into 24 portions, each about 2 tablespoons, rolling between your hands into balls about 1½ inches in diameter. Working in batches, toss the balls in the reserved sugar mixture to coat and set them on the prepared baking sheet, spacing them about 2 inches apart, 12 balls per sheet. (Smaller baking sheets can be used, but it will take 3 batches).

5. Bake one sheet at a time until the cookies are browned and still puffy and their edges have begun to set but the centers are still soft (cookies will look raw between the cracks and seem underdone), 12 to 14 minutes, rotating baking sheet halfway through baking. Do not overbake.

6. Cool the cookies on the baking sheet for 5 minutes; using a wide metal spatula, transfer the cookies to a wire rack and cool to room temperature.

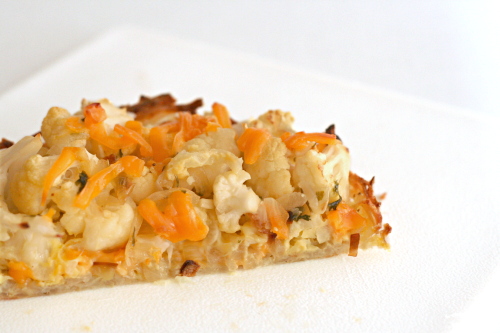
cauliflower cheese pie with grated potato crust

I have a hard time figuring out where I fit on the healthy eating spectrum. Some things are obvious. I eat a lot of fresh fruits, vegetables, and lean proteins: good. I also eat dessert often, although not necessarily a lot of it: still, bad. But everything in between, I’m not so sure.

For example, I love these bran muffins, and I consider them very healthy, as they’re completely whole grain, have a large portion of pure bran, a good dose of dried fruit, and less than 1 teaspoon fat per muffin. But someone commented, “it would be interesting to know the calorie/fat/carb ratios and that way know exactly how healthy these are…” Well, I don’t know; to me, they’re considered healthy. Maybe others disagree based on their versions of what healthy means.

Branny often “brannifies”, as she calls it, recipes by reducing the cheese and other fat, increasing the vegetables, substituting whole grains for refined, using egg whites instead of whole eggs, and choosing less saturated fats than butter. She used many of those tricks when she made this pie, but then when I made it, I…well, I unbrannified it, making the original Moosewood recipe instead of Branny’s healthier adaptation.

I like healthy foods too, and I have no problem decreasing fat and increasing vegetables when it seems reasonable, but by my standards, the original version of this recipe was healthy enough, with just a couple tablespoons of butter in the whole pie and 1 ounce of cheese per main course serving.  Perhaps milk, eggs, and potatoes are all questionable ingredients, but by my standards, they’re all fine in moderation.

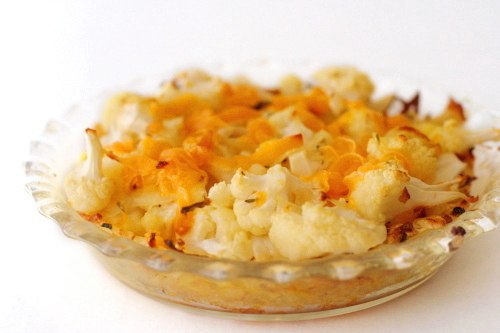
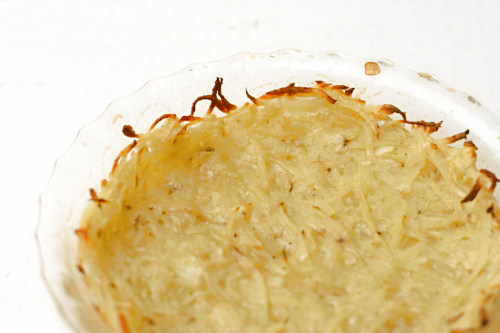
But while we may disagree on just how healthy this is, I think we can all agree that it tastes great. And if you don’t like cauliflower, I think it would be at least as good with broccoli. The crust in particular is a revelation – made of grated potatoes and held together by an egg, there is no butter or oil anywhere. How about that for a flaky delicious pie crust? I can’t wait to use it with a quiche. Because even I know that buttery regular pie crust is decadent.

One year ago: Anadama Bread (another Moosewood recipe)
Two years ago: Sichuan Green Beans (still one of my favorites)

Printer Friendly Recipe
Cauliflower Cheese Pie with Grated Potato Crust (adapted from Moosewood via Branny Boils Over)

Serves 8 as a side dish; 4 as a main course

Looking at online versions of this recipe now, I’m seeing that most call for the shredded potatoes to be salted and drained. I didn’t do this, and in fact, I thought the starch from the potatoes would help form a cohesive crust. I was very happy with how my crust turned out without the draining step.

I recommend using a food processor to shred the potatoes, grate the onion, and shred the cheese.

Crust:
2 cups packed shredded raw potatoes, preferably russet
¼ cup grated onion
½ teaspoon salt
1 egg, beaten

Filling:
2 tablespoons butter
½ onion, diced small
1 garlic clove, minced
1 dash thyme
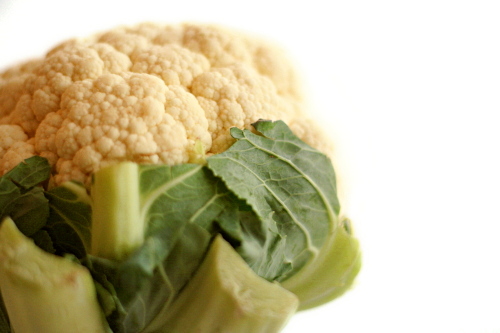
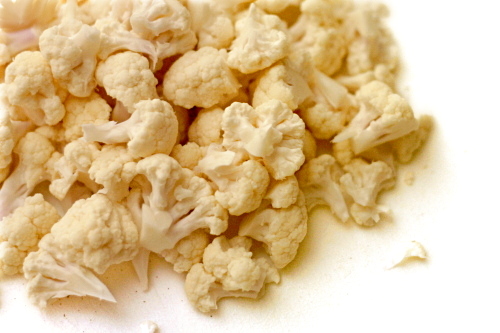
1 medium cauliflower, broken into small florets
1 cup packed grated strong cheddar cheese
½ teaspoon salt
2 eggs
¼ cup milk
black pepper
paprika

1. Adjust a rack to the middle position and heat the oven to 400ºF. Spray a 9-inch pie pan with nonstick spray.

2. Combine the shredded potatoes, onion, salt, and egg. Pat the potato mixture into an even layer over the bottom and up the sides of the prepared pan. Bake for 30 minutes, then give the crust a spritz with nonstick spray. Continue baking for another 10 to 15 minutes, until browned. Lower the oven temperature to 375ºF.

3. Meanwhile, melt the butter in a medium saucepan over medium heat. When the foaming subsides, add the onion and cook just until they start to brown at the edges, about 5 minutes. Add the garlic and cook, stirring constantly, until fragrant, about 30 seconds. Add the thyme, cauliflower, and salt; cover the pan, and cook, stirring occasionally, until the cauliflower is just tender, about 8 minutes.

4. In a small bowl, whisk the eggs, a pinch of salt and another of black pepper, and the milk until evenly colored.

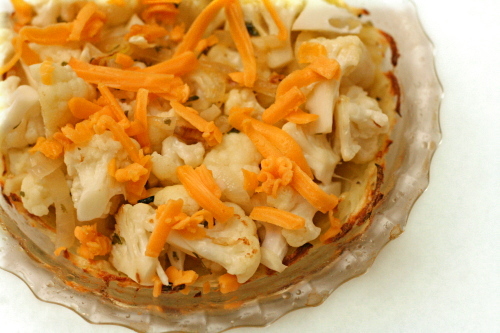
5. Spread half of the cheese on the baked crust. Top with the cauliflower mixture and the rest of the cheese. Pour the egg mixture over the pie. Dust with paprika.

6. Bake the pie until the custard is set and the top is slightly browned, 35 to 40 minutes. Let it cool for about 5 minutes before serving.

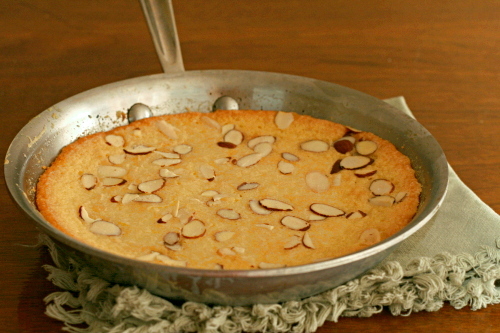
swedish visiting cake

This cake fit so seamlessly into my weekend that I hardly know what to say about it. I mixed it up and baked it early Friday evening, and I grabbed a bite here and another there throughout the weekend until there was nothing left.

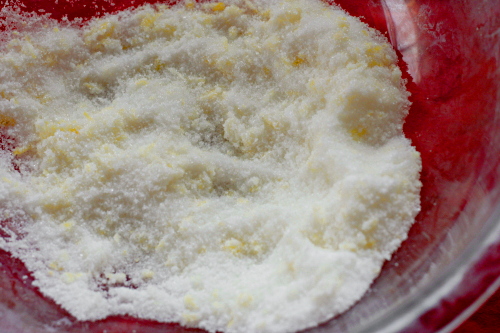
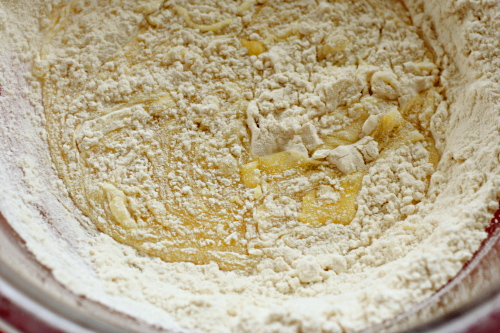
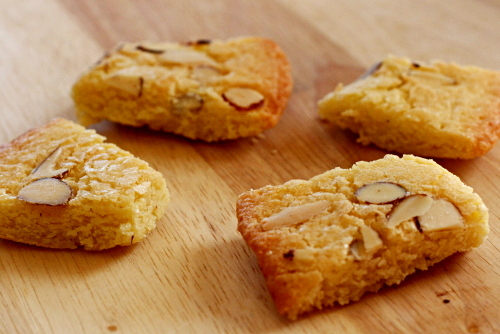
With the ingredients stirred by hand, and the light lemony almond flavor, it was easy to bake and just as easy to eat.

Nancy chose this for Tuesdays with Dorie, and she has the recipe posted. I doubled the salt (of course).

One year ago: Chocolate Ameretti Torte
Two years ago: Marshmallows

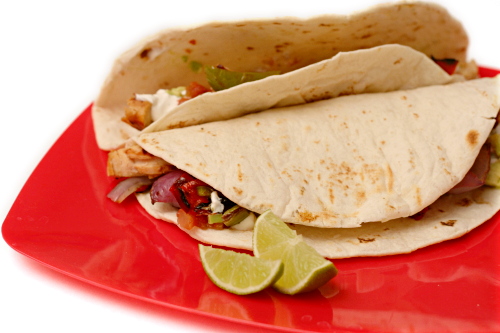
chicken fajitas

I guess they don’t call it “manning” the grill for nothing. Why is it that so many men who have no interest in cooking inside are willing to stand outside and grill? I really thought I’d be the one doing the grilling around here, just like I do the ovening and the stoving, but so far, it’s all Dave. I kind of feel like I should get some practice cooking over fire too, but I can never resist the opportunity to clean up the kitchen or work on the sides or, let’s be honest, mix up my favorite cocktail, while Dave takes care of the cooking.

But while he does enjoy the actual grilling, he really isn’t into the reading the recipe part of the procedure. That means there are constant calls asking me what the next step is. Is there any funny business with the coals? How long does everything cook? What should be on the hotter and on the cooler sides of the grill? And on and on.

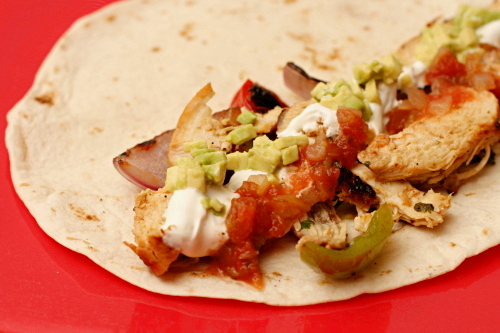
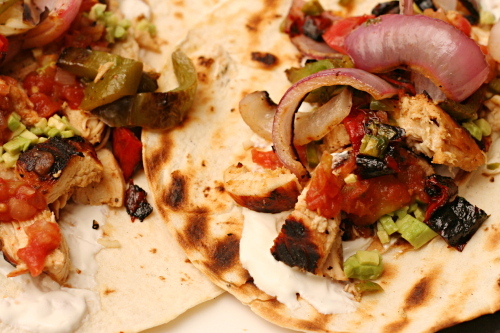
And since this is a Cooks Illustrated recipe, there are a fair amount of details to straighten out. But with only 15 minutes of marinating and 10 minutes of grilling, this really is an easy recipe. And what’s so great about it, besides the obvious – charred flavor on everything from the chicken to the vegetables to the tortillas, is the hit of marinade everything gets after it’s cooked. You marinate the meat beforehand, like you’d expect, and then when it comes off the grill, you dump some more flavor on it, as well as on the vegetables. It makes the whole thing taste fresh and citrusy.

One of the things that makes Dave and I such a great team is that we tend to love the same recipes, like this one. Plus, while he mans the grill, I can rush in to wash his tongs for him, bring a clean plate, or, maybe, if the sides are done and the kitchen is reasonably clean and my cocktail is mixed up, stand over the fire and admire the sunset with my husband. Grilling has more advantages than just great food.

One year ago: Pasta with Roasted Red Pepper Sauce
Two years ago: Cinnamon Rolls

Printer Friendly Recipe
Chicken Fajitas (from Cooks Illustrated)

Serves 4 to 6

CI’s note: The chicken and vegetables in these fajitas are only mildly spicy. For more heat, include the jalapeno seeds and ribs when mincing. When you head outside to grill, bring along a clean kitchen towel or a large piece of foil in which to wrap the tortillas and keep them warm as they come off the grill. Although the chicken and vegetables have enough flavor to stand on their own, accompaniments (guacamole, salsa, sour cream, shredded cheddar or Monterey Jack cheese, and lime wedges) can be offered at the table.

My note: I think the oil can be significantly reduced, especially in the part of the marinade used to flavor the vegetables and chicken after they’re cooked.

⅓ cup juice from 2 to 3 limes
6 tablespoons vegetable oil
3 medium garlic cloves, minced
1 tablespoon Worcestershire sauce
1½ teaspoons brown sugar
1 jalapeno, seeds and ribs removed, minced
1½ tablespoons minced fresh cilantro leaves
table salt and ground black pepper
3 boneless, skinless chicken breasts (about 1½ pounds), trimmed of fat, tenderloins removed, pounded to ½-inch thickness
1 large red onion (about 14 ounces), peeled and cut into ½-inch-thick rounds (do not separate rings)
1 large red bell pepper (about 10 ounces), quartered, stemmed, and seeded
1 large green bell pepper (about 10 ounces), quartered, stemmed, and seeded
8-12 (6-inch) flour tortillas

1. In a medium bowl, whisk together the lime juice, 4 tablespoons oil, garlic, Worcestershire, brown sugar, jalapeno, cilantro, 1 teaspoon salt, and ¾ teaspoon pepper. Reserve ¼ cup marinade in a small bowl; set aside. Add another teaspoon salt to the remaining marinade. Place the chicken in the marinade; cover with plastic wrap and refrigerate 15 minutes. Brush both sides of the onion rounds and the peppers with the remaining 2 tablespoons oil and season with salt and pepper.

2. Meanwhile, using a large chimney starter, ignite 6 quarts of charcoal briquettes and burn until the coals are fully ignited, about 20 minutes. Empty the coals into the grill, spreading them in a single layer; place an additional 20 unlit coals over the lit coals on one side of grill to create a two-level fire. Position the grill grate over the coals and heat the grate for 5 minutes; scrape clean with a grill brush. (For a gas grill, light all burners and turn to high, cover, and heat the grill until hot, about 15 minutes; scrape the grill grate clean with a grill brush. Leave one burner on high heat while turning the remaining burner(s) down to medium.)

3. Remove the chicken from the marinade and place it smooth side down on the hotter side of the grill; discard the remaining marinade. Place the onion rounds and peppers (skin side down) on the cooler side of the grill. Cook the chicken until it’s well browned, 4 to 5 minutes; using tongs, flip the chicken and continue grilling until it’s no longer pink when cut into with a paring knife or an instant-read thermometer inserted into the thickest part registers about 160 degrees, 4 to 5 minutes longer. Meanwhile, cook the peppers until spottily charred and crisp-tender, 8 to 10 minutes, turning once or twice as needed; cook the onions until tender and charred on both sides, 10 to 12 minutes, turning every 3 to 4 minutes. When the chicken and vegetables are done, transfer them to a large plate; tent with foil to keep warm.

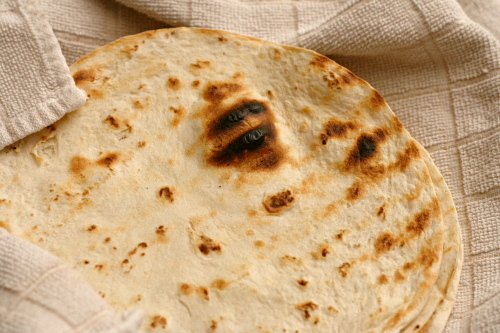
4. Working in 2 or 3 batches, place the tortillas in a single layer on the cooler side of the now-empty grill and cook until warm and lightly browned, about 20 seconds per side (do not grill too long or the tortillas will become brittle). As the tortillas are done, wrap them in a kitchen towel or a large sheet of foil.

5. Separate the onions into rings and place them in a medium bowl; slice the bell peppers lengthwise into ¼-inch strips and place them in the bowl with the onions. Add 2 tablespoons reserved unused marinade to the vegetables and toss well to combine. Slice the chicken into ¼-inch strips and toss with the remaining 2 tablespoons reserved marinade in another bowl; arrange the chicken and vegetables on a large platter and serve with the warmed tortillas.