Archives for April 2010

vodka gimlet

Why should food be the only thing I think I can make better than most restaurants? Let’s move on to cocktails!

Vodka gimlets are a good, basic drink, and they’ve come in handy for me a number of times – at a wedding with a terrible wine selection, at another wedding with inexperienced bartenders (“…a gimlet…what’s in that again?”), at cheap bars where the beer isn’t worth drinking.  Oh hi! I’m a snob about alcohol!

At its most basic, a vodka gimlet is simply vodka and Rose’s lime juice. (A gimlet – no ‘vodka’ qualifier – is made with gin instead of vodka.) Rose’s lime juice is bottled sweetened lime juice. This is what makes it such a great drink for when there are limited alcohol choices – there are only two ingredients and the strong lime flavor drowns out the taste of cheap alcohol.

But why use cheap alcohol when I can just as easily – if not as, ahem, cheaply – use the good stuff? And why would I use bottled lime juice when I’m committed to using the freshest ingredients possible in everything I make, whether it be food or drink?

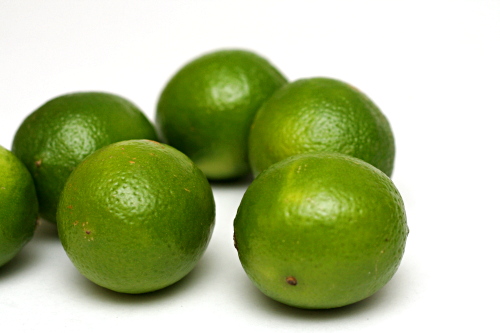
Rose’s lime juice just needs to be replaced by fresh-squeezed limes and simple syrup. That means there are three ingredients instead of two to get in balance in order to make the perfect drink, but I was happy to do some trial and error. Then when I bought a new type of vodka, I found that I needed to tweak my ratios a bit. Both vodkas had the same alcohol content, but the new brand (Ciroc) was apparently a bit smoother than the previous one (Effen).

Both vodkas make one heck of a drink. Be warned: with high quality vodka, you need a fair amount of it to balance the sour lime. Don’t drink this like you would beer or even wine. But definitely do drink it, because it is oh so good. I’m so glad it’s Friday afternoon and I’ve only got a few hours to go before I can mix myself up one of these!

One year ago: Black Bean Squash Burritos
Two years ago: Blueberry Poppy Seed Brunch Cake

Printer Friendly Recipe
Vodka Gimlet

This is the ratio I use with Ciroc vodka. With Effen vodka, I found it was best to use slightly less vodka. I like my drinks to be strong, both in alcohol flavor and in acidity. You might end up tweaking the ratios slightly to get a drink that’s perfect for you. (Trust me that good alcohol does actually taste good. Don’t equate it with the crap you got drunk on in college. Okay, the crap your friends got drunk on. You were far too mature for those shenanigans.)

4 parts good vodka
2 parts freshly squeezed lime juice
1 part simple syrup (recipe below)
ice

Combine all ingredients in a cocktail shaker, attach the lid and shake shake shake. Strain into a glass. Sip slowly or pay the price.

Simple Syrup

½ cup water
½ cup granulated sugar

Combine water and sugar in a small saucepan and heat over medium-high heat until boiling, stirring until the sugar melts. Remove from the heat and cool completely before using. Store in the refrigerator indefinitely.

mocha walnut marbled bundt cake

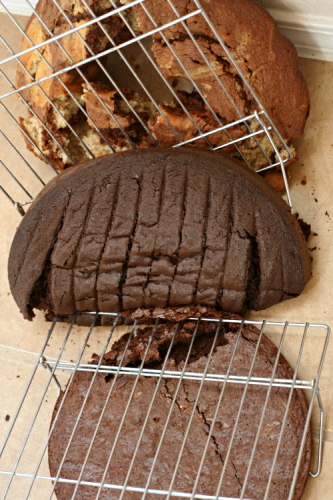
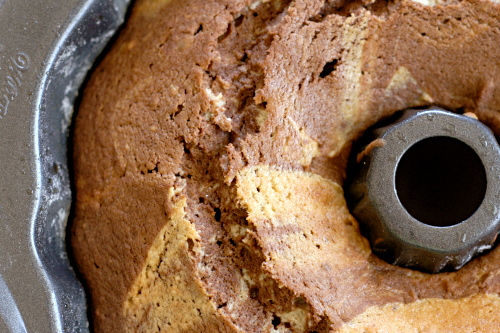
Somehow with all of my random kitchen junk, I didn’t have a full-size bundt pan for the longest time, but I finally got one recently. This was its first use, and I was so excited about my perfectly browned, beautifully scalloped, marbled bundt cake. Too bad I didn’t take any pictures of it before this:

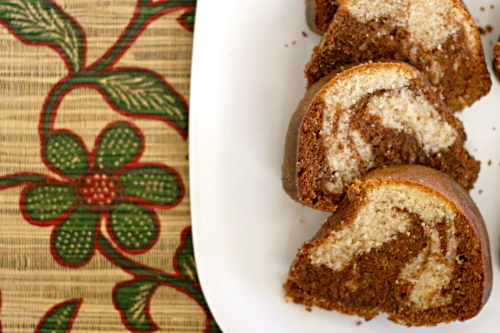
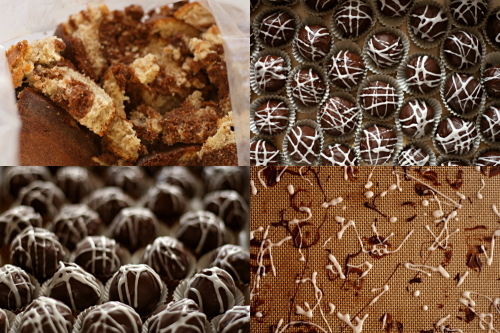
Fortunately, enough of the cake was intact to cut some slices, not that I have any problems eating cake bits. And the cake bits, they were good – rich and dense with contrasting vanilla and chocolate bites.

However, one thing I’ve learned is that if dessert isn’t divided into neat portions, it’s all too easy to grab a bite here and another there until I’ve eaten far more than just one serving.

So I took that ziploc bag full of broken cake, crushed it up with the other two cakes I’d dropped at the same time, added some cream cheese frosting, and dipped everything in chocolate. Yes, I added frosting and chocolate in order to eat less dessert. So far it hasn’t worked.

Erin chose this cake for Tuesdays with Dorie, and she has the recipe posted.

One year ago: Banana Cream Pie
Two years ago: Lemon Cream Tart

artichoke ravioli

Spring break was last week. I miss it already.

On the other hand, I’m apparently bad at spring break. I had plans to do all these big things, and then when I didn’t get every single one of them done, to perfection, every day, I got all annoyed. Plus, you know what I did instead of work? Chores. I hate chores, and I like my job, so…forget what I said about missing spring break.

I’m sure it’s a surprise to no one that the one thing I did find time for was cooking. I kept to the mostly-healthy, mostly-vegetarian routine we normally stick to on weekdays instead of going for the all-out, life-is-a-celebration, let’s-eat-meat-and-drink-wine routine we tend toward on the weekends. And I realized that another reason I often stick to vegetarian meals on weekdays is that they’re easier.

Not so with ravioli, of course. Once you mix and knead the pasta dough, roll it out, make your filling, fill the ravioli, cook the ravioli, make your sauce – well, that adds up to a nice project for a day off from work.

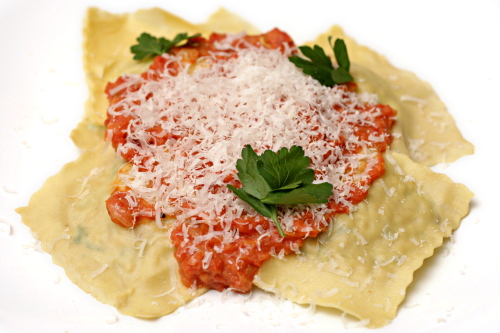
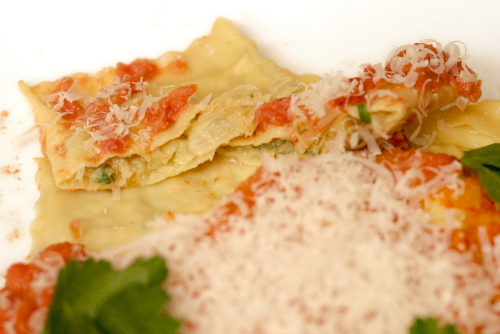
Fortunately, the end result of this one is definitely worth avoiding chores over. The artichokes are subtle, but not invisible. The sauce is rich, but not heavy. And the fresh pasta – well, it’s fresh pasta. You can’t go wrong.

It’s meals like this that make me miss spring break.

One year ago: Cooks Illustrated’s Perfect Chocolate Chip Cookies
Two years ago: Spinach Feta Pine Nut Tart

Printer Friendly Recipe
Artichoke Ravioli With Tomatoes
(adapted from Gourmet via Smitten Kitchen)

4 to 6 servings

This is a good time to utilize your food processor if you have one. I think the best order to process the ingredients in (to avoid cleaning the bowl in between uses) is parmesan, onions, artichoke mixture, tomatoes. You could also make the pasta dough in the food processor, although I’ve had better luck using the stand mixer or kneading by hand.

Ravioli take well to freezing.  Just freeze them in a single layer on a flour-dusted baking sheet.  Once they harden on the pan, transfer them to freezer bags.

Pasta:
6 ounces (1¼ cups) all-purpose flour, plus more for dusting the work surface
2 large eggs

Filling:
2 tablespoons unsalted butter, cut into pieces
1 onion, chopped (½ cup)
2 (14-ounce) cans quartered artichoke hearts, drained
2 ounces (1 cup) finely grated Parmigiano-Reggiano
½ cup chopped fresh flat-leaf parsley
1 large egg
½ teaspoon salt
½ teaspoon black pepper
½ teaspoon freshly grated nutmeg

Sauce:
2 tablespoons unsalted butter
1 onion, minced
1 (28-ounce) can diced tomatoes
½ teaspoon salt
¼ teaspoon black pepper
2 ounces (1 cup) finely grated Parmigiano-Reggiano
2 tablespoons heavy cream

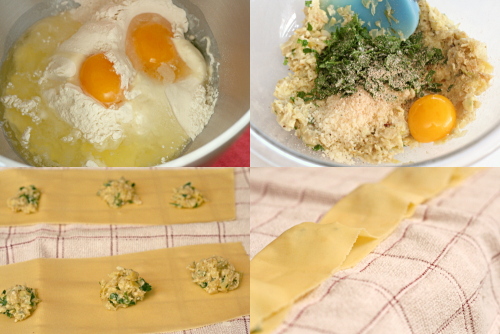
1. For the pasta: Add the flour and egg to the bowl of a stand mixer fitted with the paddle attachment. Mix on low speed until thoroughly incorporated. Change to the dough hook and knead for 5-6 minutes, until smooth. Add flour as necessary – the dough shouldn’t be sticky.  Shape the dough into a ball and wrap it in plastic wrap. Let the dough rest for at least 30 minutes. (You can also mix and knead the dough by hand. It’s easiest – less messy – in a large, wide bowl.)

2. For the filling: In a 12-inch skillet over medium heat, melt the butter. When the foam subsides, add the onion and sauté, stirring occasionally, until golden, about 6 minutes. Add the artichoke hearts and continue cooking while stirring occasionally, until they’re tender, 8 to 10 minutes. Transfer the artichoke mixture to the food processor (scraping but not washing the pan), and process in pulses until the artichokes are coarsely chopped. Stir in the parmesan, parsley, yolk, salt, pepper, and nutmeg.

3. Divide the dough into 6 balls. Work with one ball of dough at a time and leave the others covered with a damp dishtowel. Flatten the dough slightly, then roll it through the widest setting on a pasta roller. Fold it in thirds like a piece of paper going into an envelope, then roll it through the pasta roller again, feeding it with one of the open sides first. If at any point the dough is sticky, brush it with flour. Repeat the folding into thirds and rolling a few times. Without folding, run the pasta through the widest setting once more. Adjust the pasta roller to the next-thinner setting and roll the dough through the machine. Continue to gradually thin the dough until the second-to-last setting. Brush it with flour if the dough starts to stick at all. If the strip of dough becomes too long to handle, cut it into two shorter strips and work with each strip separately. Repeat the rolling, folding, and thinning with the remaining balls of dough, laying the sheets of pasta on dishtowels.

4. For the sauce: Melt the butter in the now-empty skillet over medium heat. When the foaming subsides, add the onion and sauté until just golden around the edges, about 5 minutes. Add the tomatoes with their juice and the salt and simmer over low heat until the sauce is thickened, 15-20 minutes. Stir in the pepper, most of the parmesan and the heavy cream. Set aside.

5. The pasta sheets should be approximately 4 inches across. Place small balls of filling (about one rounded teaspoon each) in a line one inch from the bottom of the pasta sheet. Leave one and one-quarter inches between each ball of filling. Fold over the top of the pasta and line it up with the bottom edge. Seal the bottom and the two open sides with your finger. Use a fluted pastry wheel to cut along the two sides and bottom of the sealed pasta sheet. Run pastry wheel between balls of filling to cut out the ravioli.

6. Bring 4 quarts of water to boil in a large stockpot. Add about a tablespoon of salt and half of the pasta. Cook until doubled edges are al dente, 3-4 minutes. With a slotted spoon, remove the ravioli from the pot and transfer them to warmed bowls or plates. Keep warm in a warm oven while the remaining ravioli are boiled. Top the ravioli with sauce and the remaining parmesan; serve immediately.