Archives for November 2010

devilish shortcakes

While I’m grateful to the recent Tuesdays with Dorie recipe choosers for picking seasonal recipes, I miss chocolate. It’s been months – almost four! – since chocolate has played a starring roll in a recipe – and December isn’t looking any better. A few chips here and there in cookies just isn’t going to cut it for the long term.

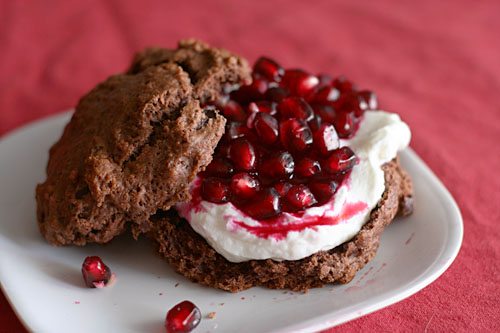
After Caitlin’s warning that these are “very subtly chocolate”, I decided that the solution was to add chunks of bittersweet chocolate into the biscuit dough. I considered filling the biscuits with ganache instead of whipped cream, but decided that after a holiday weekend dedicated largely to eating, I couldn’t afford either.

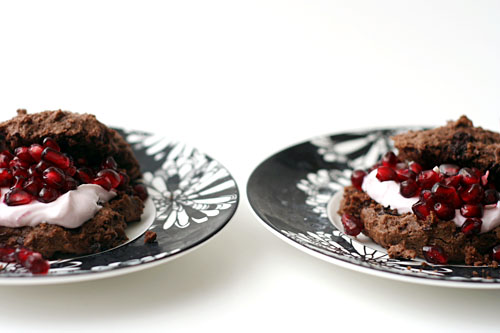
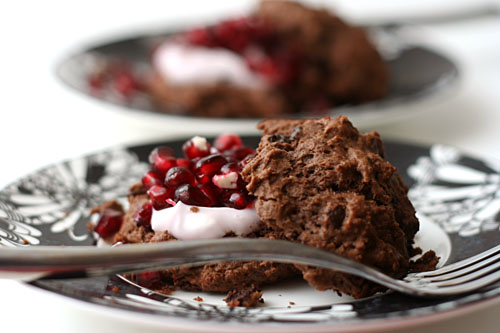
Greek yogurt with pomegranate seeds made the perfect compromise. But my favorite bites are still the ones that include bits of pure chocolate.  It’s just been too long.

Tania chose these chocolate shortcakes for the group, and she has the recipe posted. I made half the recipe using 1 whole egg yolk instead of ½ an egg. I split my halved recipe into 8 portions. I mixed 2 ounces of chopped bittersweet chocolate into the dry ingredients (but even more chocolate would have been welcome).

One year ago: All-in-One Holiday Bundt Cake
Two years ago: Linzer Sablés
pumpkin oatmeal cookies

One of my coworkers offered me a cookie recently, and while I try to be on my best eating behavior at work, I figured I had to be polite, right? And then he offered to leave the rest of the batch with me, clearly displaying the difference between the metabolism of an active male in his early thirties and that of a female of the same age. The whole container? Just one cookie first thing in the morning was a splurge.

No, when someone offers me a delicious cookie, I don’t eat the whole batch. I ask for the recipe.

Although these pumpkin cookies don’t make that easy. They aren’t the kind of cookie that you eat one of, savoring every bite, and then feel sated. All that fiber makes them feel more like a snack, like they should be healthy and you should be able to eat a few at a time. Alas, a petite (aka short) thirty-something moderately-active female can never forget all that butter. That’s why I prefer to be on the giving side of cookies instead of the receiving side.

One year ago: Chicken Empanadas, Bacon-Wrapped Scallops with Port Reduction, Slice-and-Bake Brown Sugar Cookies
Two years ago: Hershey’s Perfectly Chocolate Chocolate Cake, Roasted Brussels Sprouts, Multigrain Pancakes

Printer Friendly Recipe
Pumpkin Oatmeal Cookies (adapted from allrecipes)

2½ cups (12 ounces) all-purpose flour
1 cup rolled oats
1 teaspoon baking powder
1 teaspoon ground cinnamon
¾ teaspoon salt
16 tablespoons (2 sticks) unsalted butter, softened
1 cup (7 ounces) white sugar
1 cup (7 ounces) packed brown sugar
1 egg
1 teaspoon vanilla extract
1 cup pumpkin puree

1. Preheat the oven to 350 degrees F (175 degrees C). Line two baking pans with parchment paper or a silicone mat. In a medium bowl, mix the flour, oats, baking powder, cinnamon and salt.

2. In the bowl of a stand mixer fitted with the paddle attachment (or a large bowl with a hand mixer), beat the butter and both sugars until fluffy, about one minute. Add the egg, beating until incorporated, then mix in the vanilla and pumpkin. With the mixer on the lowest speed, add the flour mixture, mixing until just incorporated.

3. Drop heaping teaspoons of dough onto the prepared baking pans. Bake 12 to 15 minutes or until lightly browned around edges. Let the cookies cool slightly on the pans before transferring to wire racks to cool completely.

almost-fudge gateau

If I’m not careful, my sister is going to start to associate visiting me with having to find time for extra workouts after she gets back, and then she won’t visit. Or maybe she’ll associate her visits down here with exceptionally rich desserts, and she’ll bring my nephews here more often. These are things I need to consider.

After the cheesecake extravaganza of her last visit, I resisted my very strong desire to make pumpkin cheesecake this time. Instead, I considered my brother-in-law’s preferences, which are chocolate chocolate chocolate.

So, after the park, after dinner, after bath time, after stories, it was time for grown-up dessert. And it’s just possible that almost-fudge gateau – topped with ganache one evening and raspberry coulis the next – might draw them back here soon. And not just because the kids want to climb on the rocket ship in the playground.

One year ago: Sugar-Topped Molasses Spice Cookies
Two years ago: Thanksgiving Twofer Pie

Almost-Fudge Gateau (adapted from Dorie Greenspan’s Baking: From My Home to Yours)

5 large eggs
9 ounces bittersweet chocolate, coarsely chopped
1 cup (7 ounces) sugar
5 tablespoon unsalted butter, cut into chunks
2 tablespoons coffee or water
⅓ cup (1.6 ounces) all-purpose flour
pinch salt

Glaze:
4 ounces bittersweet chocolate, coarsely chopped
½ cup heavy cream
2 teaspoons light corn syrup

1. Preheat the oven to 350 degrees F. Butter a 9-inch springform pan, line the bottom with parchment paper, butter the paper, dust the inside of the pan with flour, and tap out the excess. Place the pan on a baking sheet lined with parchment or a silicone mat.

2. Separate the eggs, putting the whites in a large bowl and the yolks in a small bowl.

3. Set a heatproof bowl over a saucepan of simmering water, and add the chocolate, sugar, butter and coffee. Stir occasionally, until the chocolate and butter are melted. Transfer the bowl to the counter, and let the mixture sit for 3 minutes.

4. Using a rubber spatula, stir in the yolks, one by one, then fold in the flour.

5. Using a mixer with a whisk attachment, beat the egg whites with the pinch of salt until they hold firm, glossy peaks. Using the spatula, stir about one quarter of the beaten whites into the batter, then gently fold in the rest. Scrape the butter into the pan, and jiggle the pan from side to side to even the batter.

6. Bake for 35 to 45 minutes, or until the cake has risen evenly (it might rise around the edges, and you’ll think it’s done, but give it a few minutes, and the center will puff, too) and the top has firmed (it will probably be cracked) and doesn’t shimmy when tapped; a thin knife inserted into the center should come out just slightly streaked with chocolate. Transfer the pan to a cooling rack, and let the cake rest for 5 to 10 minutes.

7. Run a blunt knife gently around the edges of the cake, and remove the sides of the pan. Carefully turn the cake over onto a rack, and remove the pan bottom and the parchment paper. Invert the cake onto another rack, and cool to room temperature right side up. As the cake cools, it may sink.

8. For the Glaze: First, turn the cooled cake over onto another rack, so you’ll be glazing the flat bottom, and place the rack over a baking sheet lined with parchment or wax paper to catch any drips.

9. Put the chocolate in a small heatproof bowl. Melt the chocolate in a microwave or over a pan of simmering water.

10. Meanwhile, bring the cream to a boil in a small saucepan. Pour the hot cream over the chocolate, and stir very gently with a rubber spatula until the mixture is smooth and shiny. Stir in the corn syrup.

11. Pour the glaze over the cake, and smooth the top with a long metal icing spatula. Allow the glaze to set at room temperature, or slip the cake into the refrigerator for about 20 minutes. If the glaze dulls in the fridge, give it a little gentle heat from a hairdryer.

butternut squash and pancetta phyllo cigars

I’m always a little disappointed that, living 300 miles away from my family and half a country away from Dave’s, we’ll always be traveling for Thanksgiving and I’ll never get to host. So when the grocery store offered me a free turkey just for doing my normal shopping, I got to thinking that maybe instead of donating it to a food bank or cooking it to shred for leftovers, I could make a full turkey dinner just for me and Dave. I had a grand ol’ time choosing recipes, and then I went through each and tweaked them until they hardly resembled the originals.

This one was originally a pizza, but I wanted cute little individual servings. Scallions didn’t seem like a good match for the squash, and when I thought on it more, neither did the crunch of red onions, but sweet caramelized onions sounded good.  Then I needed something tart to counter the sweetness, and goat cheese was the answer. I exchanged the bacon for pancetta because pancetta’s hint of fall spice would compliment the squash.

Obviously, the main reason I make turkey dinners just for the heck of it is because it’s fun. But it doesn’t hurt to get practice, because someday, one way or another, I know I will get a chance to host. And practice is important when you’re talking about cooking a huge finicky chunk of meat, and, speaking of finicky, how about phyllo. Phyllo takes practice, but, due to its association with lots of butter and with a delicious squash goat cheese pancetta filling, it is never bad; it is always very, very good.

One year ago: Sopaipillas, Cranberry Nut Dessert, Mashed Potatoes with Root Vegetables, Pumpkin Yeast Bread
Two years ago: Chocolate Chip Cookie comparison, Lime Meltaways, Chanterelle Salad with Speck and Poached Eggs (ugh, I’m trying not to dwell on the days when I was able to buy ingredients like chanterelles and speck – or when I had time to post every day for a month, for that matter), European-Style Hearth Bread

Printer Friendly Recipe
Butternut Squash and Pancetta Phyllo Cigars (adapted from Gourmet via epicurious)

Makes about 16 appetizers

6 ounces pancetta, diced into ¼-inch cubes
1 onion, chopped fine
1 small butternut squash, peeled, diced into ½-inch cubes
1 tablespoon fresh rosemary leaves, minced
4 ounces goat cheese
8 ounces phyllo, defrosted
6 tablespoons unsalted butter, melted
2 ounces (1 cup) parmesan, grated

1. Heat the oven to 425 degrees. Line a baking sheet with parchment paper or a silicone mat.

2. In a 12-inch nonstick skillet over medium heat, cook the pancetta until crisp, about 8 minutes. Using a slotted spoon, transfer the pancetta to a large bowl. Drain the fat in the pan into a small bowl. Transfer 1 tablespoon of fat back to the pan and add the onions. Cook, stirring occasionally, until the onions are lightly browned around their edges, about 8 minutes. Transfer the onions to the bowl with the pancetta. Add another 1 tablespoon reserved pancetta fat to the pan; add the squash. Cover the pan and cook, stirring occasionally, until the squash is browned and tender, about 15 minutes. Use a potato masher to lightly mash the squash, then transfer it to the bowl with the onions and pancetta. Add the rosemary and goat cheese to the bowl; stir to combine.

3. Unroll the phyllo and place it between two damp dishtowels. Lightly spray a second baking sheet with nonstick spray. Lay a sheet of phyllo on the oiled pan; brush lightly with butter and sprinkle with parmesan. Fold the phyllo in half parallel to the short end to form a 7-by 9-inch rectangle; spray with nonstick spray. Scoop 2 generous tablespoons of the squash filling onto the phyllo; spread the filling about 1 inch from the folded edge, leaving ½-inch free on either end. Roll the long end of the phyllo over the filling; fold the edges in; continue rolling to form a cigar shape. Transfer the cigar to the lined baking sheet. Repeat with the remaining phyllo and filling, including spraying the baking pan work surface with nonstick spray, spacing the cigars about 1-inch apart on the parchment-lined baking sheet.

4. Bake until golden brown and crisp, about 15 minutes. Let cool about 15 minutes before serving.

bacon egg toast cups

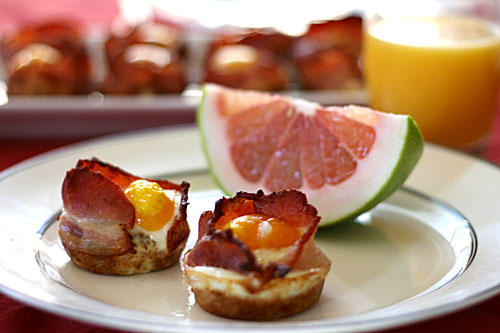
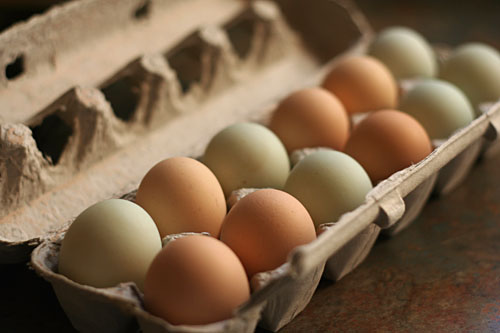
I came face to face with my pickiness last weekend. I’ve been buying eggs from a coworker of Dave’s, which is great because I can finally feel confident that the chickens that hatched my eggs weren’t grossly mistreated, for far cheaper than the supposedly cage-free eggs at the grocery store. When he had duck eggs to sell, I figured it would be a fun new thing to try. Plus, I knew I was making these bacon-egg-toast cups soon, and I mistakingly believed that duck eggs were smaller than chicken eggs, so they would fit perfectly into the muffin cups with all the other goodies.

Not only are duck eggs usually larger, not smaller, than chicken eggs, but they’re different in other ways. For one, the shells are thicker, so it takes a bit of hammering the egg on the counter to break through it. The whites are whiter. Have you ever noticed that the white of a chicken egg is actually kind of yellow? Not so a duck egg.

Also, the white is extremely stretchy; it really never breaks. That means that if you crack an egg into a small bowl and then move it to your muffin cup, bits of white will stick to the bowl and stretch across the counter, and basically your whole kitchen will be coated in egg white by the time you’re done.

But once you’re eating – who cares? Who cares what color the white was when you broke the egg? Who cares if it was extra super freakily stretchy? Once the eggs were cooked, I wouldn’t have known I was eating duck eggs if I hadn’t cracked them open myself. Because I did know, I noticed that the white was firmer. But who cares?

I tried not to, but I have two more duck eggs left, and yet I hard-boiled chicken eggs to bring to work this week. It’s so stupid, because there’s nothing worse about duck eggs compared to chicken eggs; they’re just different. If I was used to duck eggs and someone gave me chicken eggs, I’d think the white was too watery and yellow. The lesson here is one I think we all need reminded of occasionally: Pickiness is all in your head. Still, I’m not sure I’ll be buying duck eggs again anytime soon.

One year ago: Croissants, Pumpkin Biscotti, African Pineapple Peanut Stew, Apple Tart, Vegatarian LasagnaCarne Adovada
Two years ago: Bourbon Pumpkin Cheesecake, Pumpkin Ravioli, Mashed Potatoes, Stuffed Sandwich Rolls, Baked Eggs with Spinach and Mushrooms

Bacon-Egg-Toast Cups (adapted from The Noshery via Annie’s Eats)

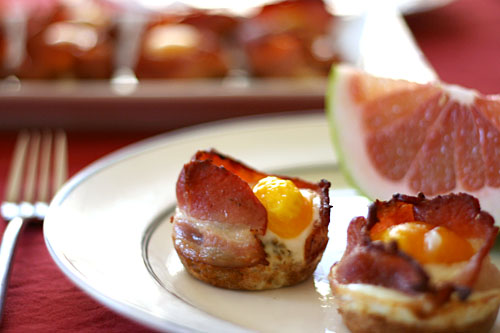
I was making these for kids because I thought they’d have a good time with it, but instead they were all, “um, there’s egg on my toast; that’s where I put my jelly.” And then they ate nearly as much as the adults did.

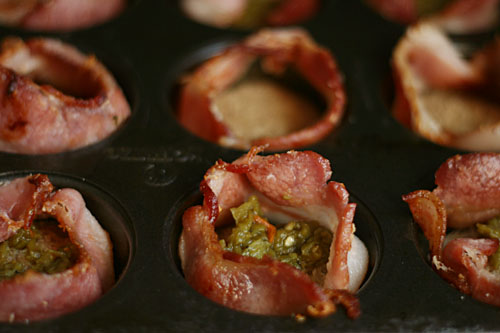
I skipped the cheese and added green chile. Because I live in New Mexico, and that is what we do.

I realized after the fact that I arranged my toast a little differently than the original recipe, by lining just the bottom of the muffin cup with toast instead of the sides as well. I liked my way, so I’ll provide that in the recipe.

Serves 6

6 slices of bread
12 slices of bacon (about 1 pound)
12 eggs
½ cup of shredded cheese (or other flavoring)
salt and pepper

1. Preheat oven to 400 degrees. Spray a 12-cup muffin pan with nonstick spray.

2. Heat a 12-inch skillet over medium-high heat. Arrange the bacon in the skillet in a single layer and cooked until its fat is mostly rendered but it’s still pliable, 4-5 minutes.

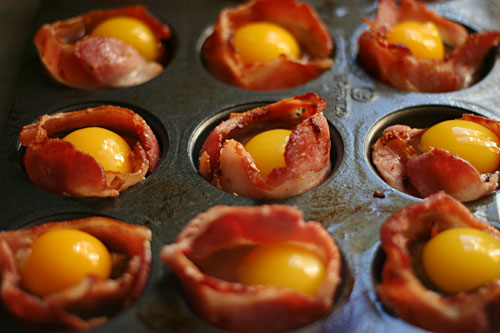
3. Using a cookie cutter, cut two 2-inch circles out of each slice of bread. Place a bread circle in the bottom of each muffin cup. Wrap a slice of bacon around the edge of each muffin cup; sprinkle cheese or other flavorings onto the bread in the space lined by the bacon. One by one, crack the eggs into a small bowl and transfer the yolk and some of the white on top of the cheese. (Unless you’re using small eggs, using all of the white will cause the eggs to overflow the muffin cups.) Season with salt and pepper.

4. Bake until the egg white is set, 8 – 10 minutes (longer if you like your yolks firm). Using a thin knife or offset spatula, remove the bacon-toast-egg cups from the pan. Serve warm.

cranberry apple galette

I used to have a friend who always served steamed broccoli with her lasagna. “Everyone does salad with their lasagna”, she scoffed. But it seems to me that everyone does it because it works so well.

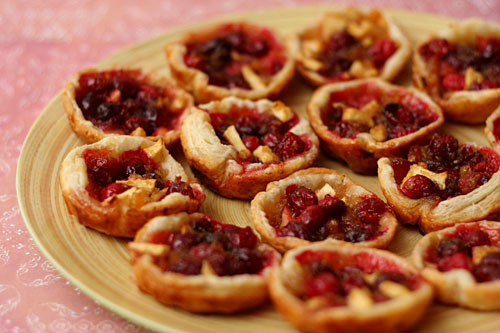
Cranberry and orange are another combination that is classic simply because it’s good. Cranberry and lime…well, I don’t know, because I wasn’t brave enough to try it. I do love tart foods, but since I knew I’d be sharing these, I took the safe and familiar route with cranberry and orange.

And it tasted just as good as I expected. I’m almost positive the cranberry-lime variation would have been wonderful too. Of course I can’t be sure, having taken the safe route.

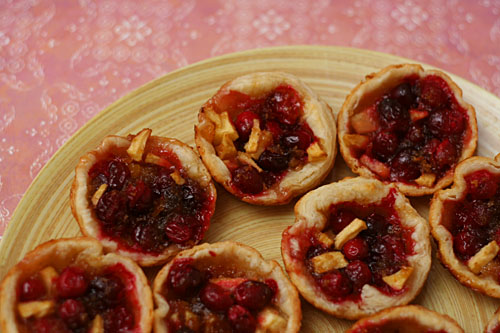
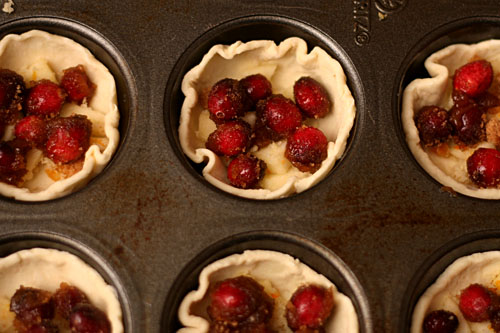
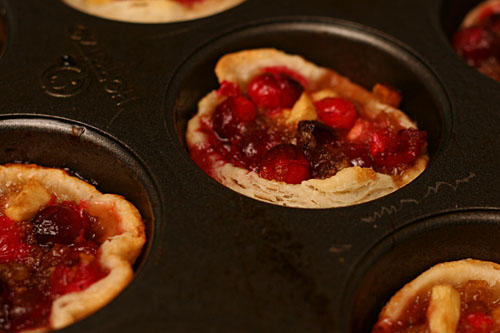
The sisters of Celestial Confections chose this galette for Tuesdays with Dorie, and they have the recipe posted. Make minis at your own time-consuming risk, by cutting 3-inch circles from the rolled dough and stuffing them in muffin cups before filling. Don’t bother trying to fold the sides in. Bake until bubbling and browned, 18-20 minutes.  Also, I used this galette dough, because I already had some in the freezer.  I suspect its malleability helps with maneuvering the dough circles into muffin cups.

One year ago: Cran-Apple Crisps
Two years ago: Rice Pudding

green chile mayonnaise

Jen calls this New Magic Awesome Sauce, but I would beg to differ. I like to think of it as New Mexico Awesome Sauce. After all, it’s based on our signature ingredient, the green chile.

To be honest, I was worried about Dave’s reception of this stuff. Dave and green chile is like me and chocolate chip cookie dough. When we were peeling our mountain of roasted chiles back in September, he had a one-for-the-freezer-one-for-my-belleh mentality.

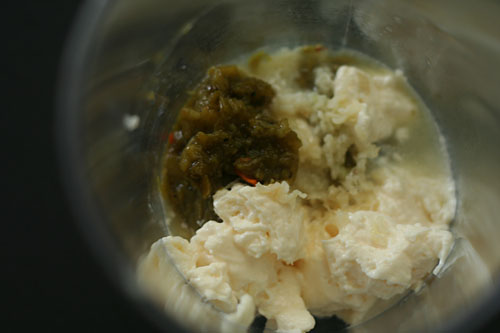
When I mixed green chile with mayonnaise, garlic, and lime juice, I diluted it from its pure state. How dare I! I gave Dave a bit to taste, and his opinion was, of course, more green chile! In the end, I ended up doubling the green chile in the sauce, but this is really a to-taste kind of thing.

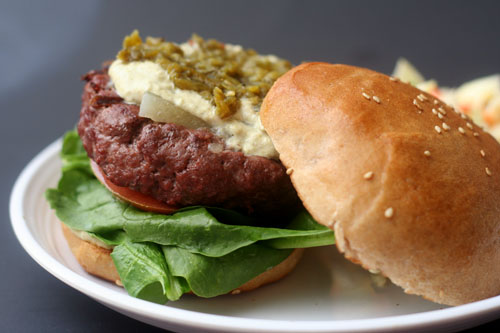
What I forgot to consider in my concern over Dave’s opinion was that he’s happy whenever green chile is added to something. The same goes with garlic. The lime juice rounds out the flavors in this gutsied up mayonnaise, and besides, what’s to stop us from smearing more green chile right on top our New Mexico Awesome Sauce to make the ultimate green chile cheeseburger?

One year ago: Buffalo Chicken Pizza, Glazed Lemon Cookies, Wheat Berries with Caramelized Onions and Feta
Two years ago: Gallitos, Wheatmeal Shortbread Cookies, Bacon-Wrapped Pork Tenderloin Medallions

Green Chile Mayonnaise (adapted from The Border Cookbook via Use Real Butter)

Makes about ½ cup

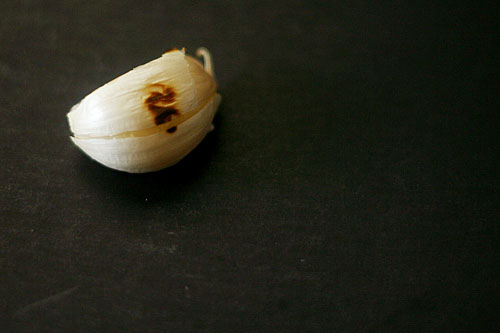
I realized when I went to mix up the sauce that I hadn’t roasted any garlic. Not interested in heating the oven for one or two cloves, I toasted it instead. Simply heat a dry not-nonstick pan over medium to medium-high heat and place the unpeeled garlic in it. Turn the cloves every few minutes until the peels are blackened in spots. It softens the flavor, although it won’t be as sweet as fully roasted garlic.

What, your local grocery store doesn’t sell bushels of Hatch green chiles in the fall, with a drum grill in the parking lot for roasting? Poor you. There are several good online sources, or you could perhaps try the little 4-ounce cans, or you could try using roasted and peeled Anaheim or poblano chiles instead. It won’t be the same, but it won’t be bad.

¼ cup roasted green chile, skinned and de-seeded
1 clove garlic, toasted and peeled
2 tablespoons fresh lime juice
½ cup mayonnaise

Add all of the ingredients into the bowl of a food processor or blender; puree. Chill for at least an hour before serving.

cranberry shortbread cake

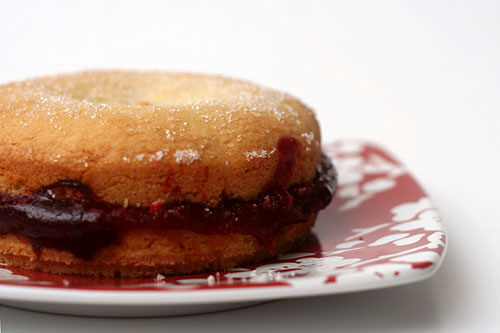
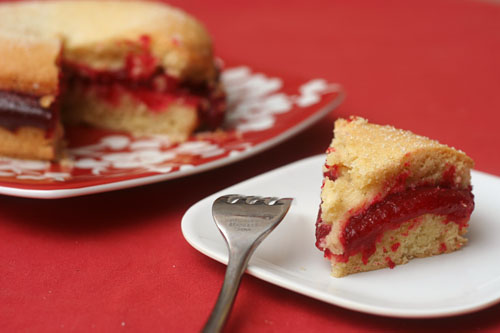
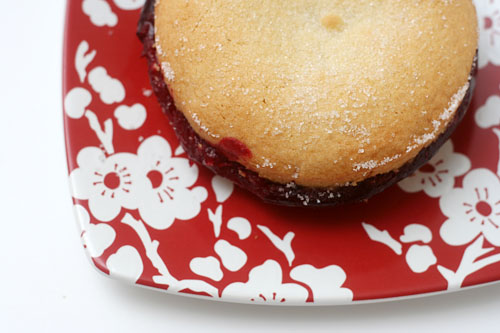
I finally figured out this cake. Before I saw the whole recipe title, I thought it was cranberry shortbread, and I was picturing something like lemon squares but with cranberry sauce on top – which, by the way, is a great idea. Then I realized it was a cake and pictured fluffy layers below and on top of the jam.

Once I was eating it, I realized that it’s like strawberry shortcake – except in cake form! Which really explains why it’s called shortbread cake, doesn’t it?

It’s a fun concept, even if isn’t my brilliant lemon-but-actually-cranberry-squares idea. In fact, I think it tastes kind of like Christmas. I hadn’t realized that Christmas tasted like a sweet-tart cranberry jam paired with a flaky light sweet biscuit/cake/cookie. But I’m not surprised.

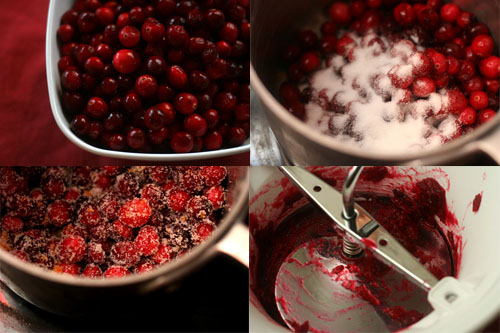
Jessica chose this for Tuesdays with Dorie, and she has the recipe posted. I skipped the orange segments in the cranberry jam (but did use the zest and juice). I strained my cranberries through a food mill, mostly because I don’t get to use my food mill very often but also because I think cranberry skins are irritating. I increased the salt in the cake too, and I added a pinch of salt to the cranberry jam.

One year ago: Chocolate Caramel Chestnut Cake
Two years ago: Kugelhopf

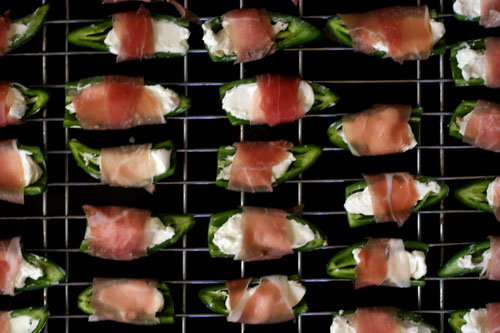
prosciutto-wrapped, neufchatel-stuffed jalapenos

I think it’s about time to pack up my garden for the year. The last month has felt like borrowed time. Homegrown tomatoes on Halloween? Well, yes; in fact, the last few months have been the most successful in my garden because the grasshoppers who I’d been sharing my tomatoes with all summer have flown the coop. But our night lows are starting to drop to near freezing, so I’ll be lucky to get some nice red tomatoes for my burgers tonight.

It’s no problem to use up tomatoes. If I found myself with more than I’d expected, I just made some sauce and froze it. But what easy solution is there for at least ten jalapenos per week? Jalapenos are rarely a primary flavor, and even a good batch of pico de gallo only uses a couple.

Bacon-wrapped cream cheese-stuffed jalapenos certainly use up the jalapeno bounty, but I can’t be eating a plate of cream cheese and bacon every week, even if there are vegetables hidden under all that fattening flavor. But is the fat necessary?

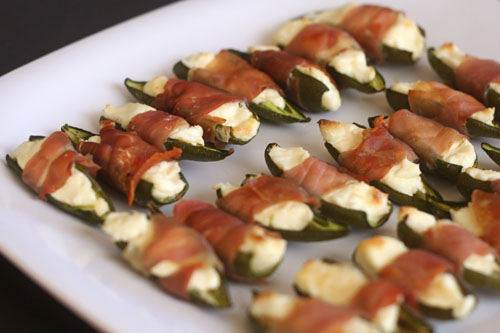
It turns out it isn’t. Well, some of it is, but by replacing the bacon with prosciutto and the cream cheese with (American, not French) Neufchâtel, these snacks lose a lot of fat but very little of the flavor. In fact, I preferred the prosciutto to the bacon; it’s easier to work with and bakes up crisper. I’m already looking forward to next year’s gardening season – and not just for the tomatoes this time!

One year ago: Pork Chops Loco Moco, Pumpkin Mushroom Soup, Cranberry Orange Scones, Buttermilk Scones, Pumpkin Scones
Two years ago: Chickpea and Butternut Squash Salad, Brown Sugar Apple Cheesecake, Gratin Dauphinois

Prosciutto-Wrapped, Neufchâtel-Stuffed Jalapenos

Makes 24 appetizers

If you keep gloves in the kitchen, use them when handling jalapenos.

12 jalapenos
4 ounces Neufchâtel
6 ounces prosciutto, sliced lengthwise into 24 strips

1. Adjust a rack to the middle position and heat the oven to 400 degrees. Place an oven-safe baking rack on a baking sheet.

2. Cut the stems off the jalapenos; slice them in half lengthwise and use a spoon to scoop out the seeds. Divide the cheese evenly between the jalapenos, then wrap strips of prosciutto around the jalapenos. Arrange the stuffed jalapenos on the prepared baking pan on the rack.

3. Bake for 20 minutes, until the cheese is browned in places and the prosciutto is crisp. Cool slightly before serving.

shredded beef tacos

The first few months when I moved out of my parents’ house and across the country were exciting and lonely and intense. I was lucky that I made some great friends right away. I remember the first time someone invited me over for dinner. I’d asked what he and his wife were serving, and I thought he said pea stew. I went, but I was so relieved when it was actually beef stew.

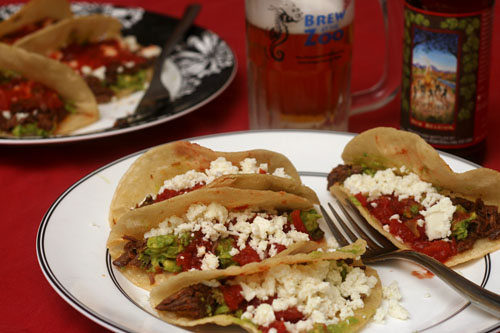
That meal turned into a weekly dinner tradition that lasted for as long as we all lived near each other. We took turns cooking and rarely made the same thing twice, but there was one favorite meal that was requested more than any other – tacos. My friend’s taco filling and accompaniments were good, but the real treat was the shells – freshly fried, still hot, and, frankly, a little greasy. I had never had home-fried taco shells before, and it was a revelation.

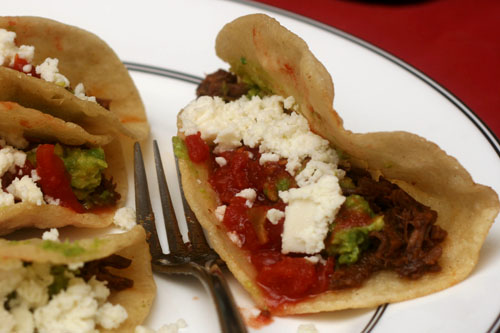
These days, tacos are still one of my favorite meals, but I can’t enjoy them as much without those fried shells. Even better is when they’re stuffed with this shredded beef. It’s marinated in vinegar, lime juice, and spices, then baked for hours until it falls into shreds. I’m thankful for those friends not just for helping me feel comfortable on my own, but for teaching me about the perfection of fried corn tortillas. Nothing else would be good enough accompany this intensely flavorful filling.

One year ago: Sandwich Rolls
Two years ago: Pumpkin Pancakes

Shredded Beef Tacos (slightly adapted from Use Real Butter who slightly adapted it from The Border Cookbook)

Jen discusses the cut of beef that is preferred for this recipe. Her recommended eye of chuck was not available, so I chose chuck steak. I have no complaints. Plus I didn’t need to slice it before marinating, which was a nice bonus.

You could always go with the classic cheddar-sour cream-lettuce combination for toppings, but I really love the queso fresco-avocado-salsa direction that Jen recommends.

6 servings

2 tablespoons vegetable oil
2 tablespoons white vinegar
2 tablespoons lime juice
1½ teaspoons ground cumin
1½ tsps chili powder
1 teaspoon salt
3 garlic cloves, peeled and smashed
1½ pounds chuck steak
1 cup vegetable oil
24 corn tortillas
toppings: lettuce, queso fresco, salsa, guacamole, etc.

1. In a gallon-size zip-top bag, combine the oil, vinegar, lime juice, salt, spices and garlic. Add the meat and squish the bag around to make sure the meat is fully coated. Refrigerate for at least 4 hours or overnight.

2. Adjust an oven rack to the middle position and heat the oven to 350 degrees. Dump the contents of the bag into a baking dish just large enough to fit the meat in a single layer. Cover the pan with foil; bake until the meat is tender enough to shred easily, about 2 hours. Use two forks to pull the meat into shreds. Lower the oven temperature to 250 degrees.

3. Heat the oil in an 8-inch skillet over medium heat. Slide a tortilla into the oil; use tongs to fold the tortilla in half and hold it partially open. Flip after about 1 minute. Fry for an additional minute, until the tortilla is slightly crisp. Continue with the remaining tortillas, storing the fried tortillas in the warm oven. Serve with shredded meat and desired toppings.