Archives for December 2011

kid’s thumbprints

kids thumbprints 7

I have now cooked all* of the recipes in Dorie Greenspan’s Baking: From my Home to Yours. Every week, for the last four years, I have baked whatever recipe someone else picked. I was late a few times but never missed a week. I also managed to make up all of the recipes that the group made before I joined a few months after it started.

kids thumbprints 1

It’s been challenging, I will tell you that. That’s a lot of baking, and it’s a lot of baking that has to be done by a deadline. It often included recipes that were complex, recipes that I knew I wouldn’t love, and in worse case scenarios, complex recipes that I knew I wouldn’t love.

kids thumbprints 2

But, there were far more recipes that I thought I knew I wouldn’t love only to be pleasantly surprised. There were lessons learned, friendships made, and so much confidence gained. Now I have a generous handful of favorite new recipes in my arsenal.

kids thumbprints 3

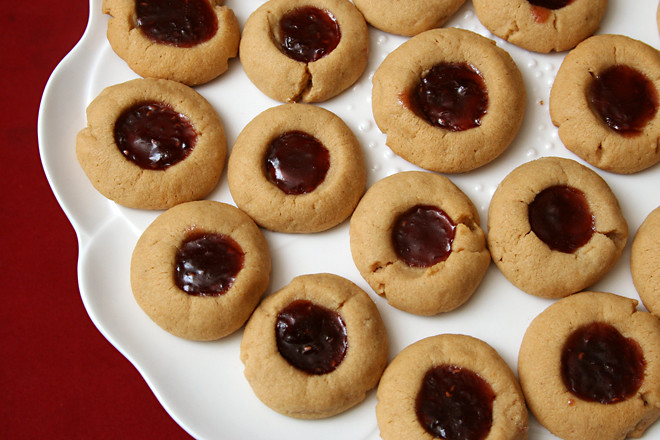
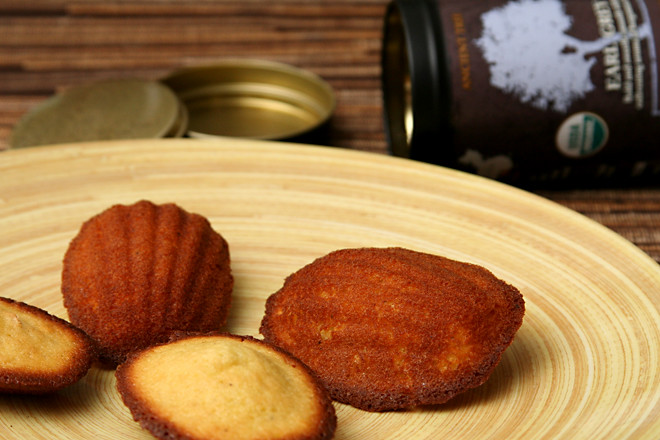
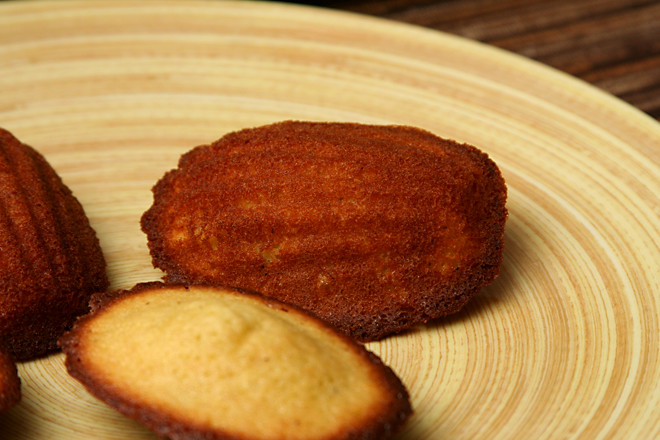
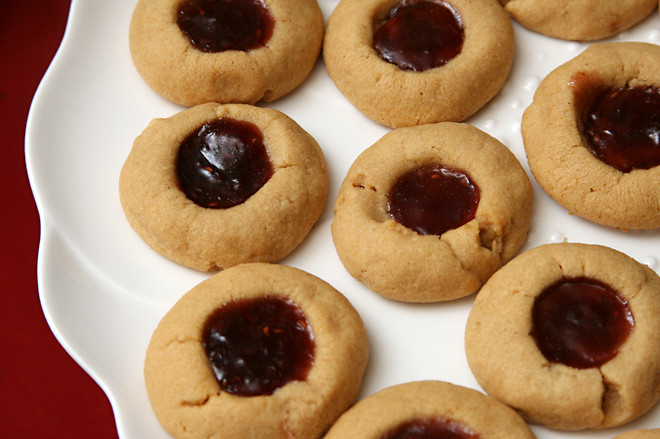
And what a huge goal to be reached – checking an entire* cookbook off the list. I don’t know what I’ll do now, as I’m not joining the spinoff group.  I might relearn how to choose my own dessert recipes.  I might get into those healthified desserts.  Maybe I won’t bake at all, although I suspect my coworkers, spoiled after months of weekly Dorie treats, would protest.  These cookies, rushed to work on my day off because I was enjoying them a little too much myself for breakfast, were the last in a long line of sweets that quickly disappeared from the office kitchen.  Tuesdays with Dorie is over, but I suspect the baking will continue.

kids thumbprints 6

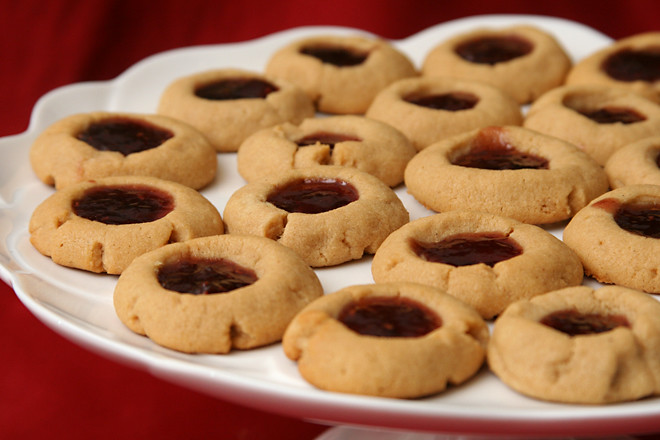
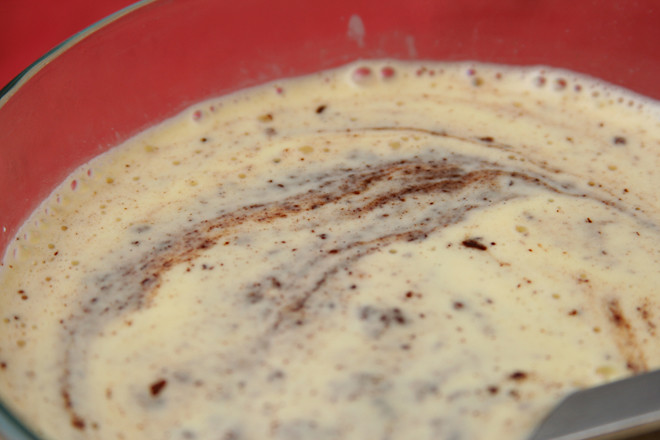
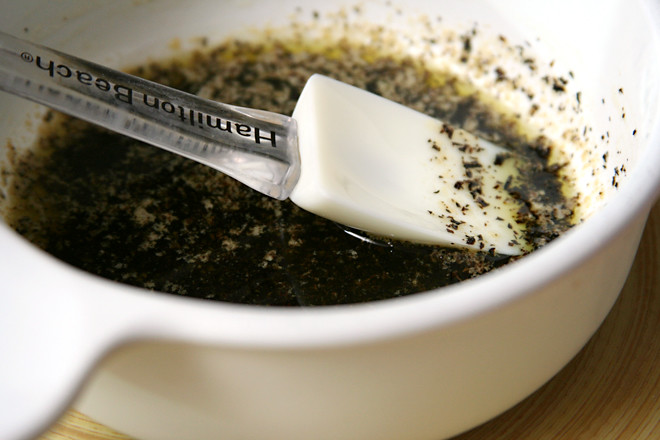
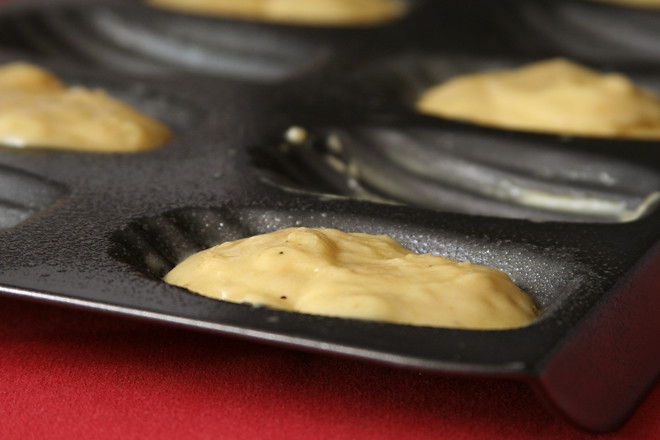
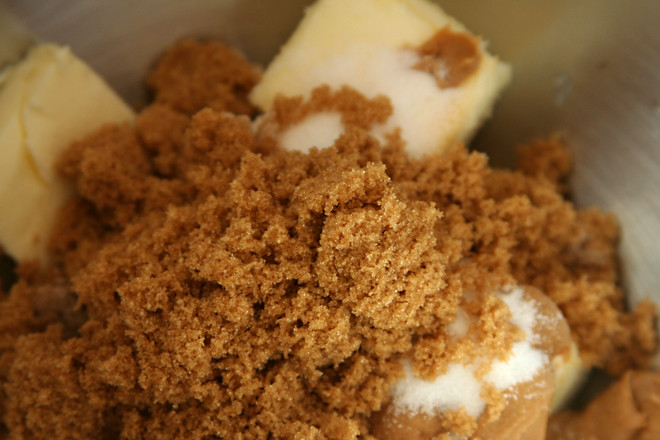
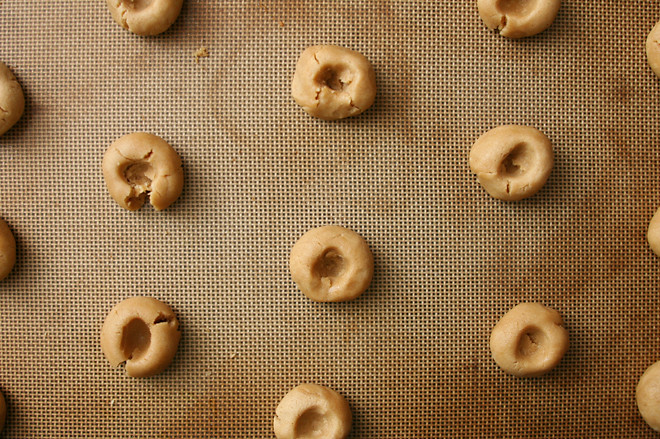
This final recipe of Tuesdays with Dorie is posted on Dorie’s blog, along with her own reflections on the group. I was too lazy to deal with the egg white and chopped peanut coating but kept to the recipe otherwise.

*Okay, I haven’t made really all of the recipes. I skipped the two fresh fig recipes, and there’s a handful of garnishes and toppings in the last chapter that never came up as part of other recipes.

Final note: My favorite recipes from this book are marked with an asterisk in my blog page that lists posts associated with baking groups.

One year ago: Quintuple Chocolate Brownies
Two years ago: Pecan Pie
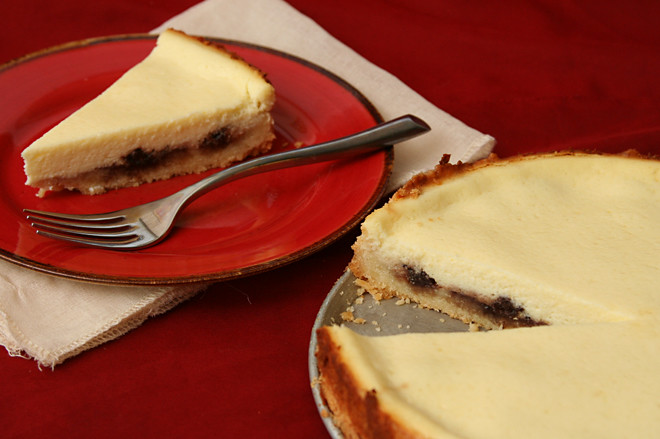
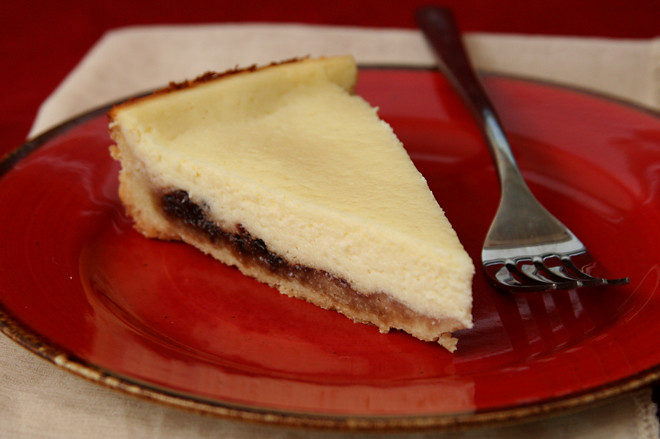
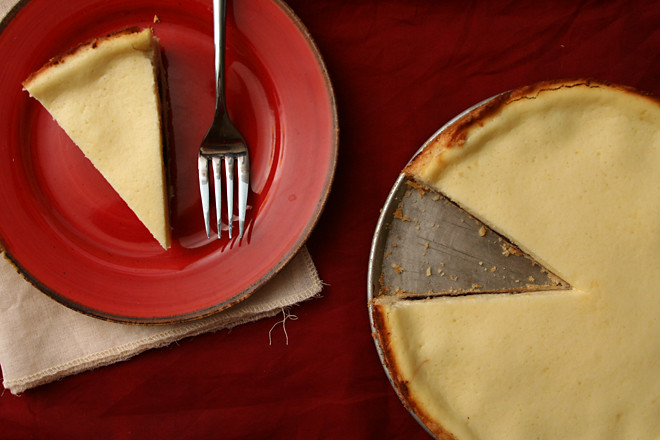
Three years ago: Tall and Creamy Cheesecake

kids thumbprints 5

herb roasted pork loin

herb roasted pork loin 6

Like I believe most moms do, mine would make my favorite meals for me when I came home from college. That usually involved a pork loin roasted over potatoes, so that the potatoes not only become crisp from the oven, they soak up any pork drippings for extra flavor. My mom’s homemade applesauce would round out the meal.

herb roasted pork loin 1

Simple as it is, I’ve never tried to replicate this meal. It wouldn’t be quite the same, I’m sure. Still, I love pork roast. It doesn’t seem like a popular cut of meat, and while I know it can easily dry out since it’s so lean, when it’s cooked right, it can be really special.

herb roasted pork loin 2

Surely smothering the pork with shallots and mustard and surrounding it with herbs is “cooked right”, and it’s certainly special. Making a winey sauce from the browned bits leftover after roasting the pork can’t hurt matters either. I was surprised, and pleased, by how much herb flavor the meat absorbed. Maybe it can’t beat one of my childhood favorite meals, but it can certainly compete.

herb roasted pork loin 3

One year ago: Pumpkin Cinnamon Rolls
Two years ago: Twice-Baked Potatoes

Printer Friendly Recipe
Herb-Roasted Pork Loin (from Gourmet via epicurious)

For pork:
1 (4 to 4½-pound) boneless pork loin roast, trimmed
2 tablespoons plus 1 teaspoon olive oil, divided
6 rosemary sprigs, divided
8 large thyme sprigs, divided
8 sage sprigs, divided
8 savory sprigs (optional), divided
4 shallots, finely chopped
2 tablespoons finely chopped garlic
3 tablespoons Dijon mustard

For sauce:
⅓ cup dry vermouth
2 teaspoons Dijon mustard
1¾ cups reduced-sodium chicken broth
1½ tablespoons unsalted butter
1½ tablespoons all-purpose flour

1. Preheat the oven to 350°F with a rack in the middle position.

2. Pat the pork dry and season with 1¾ teaspoons salt and 1½ teaspoons pepper. Straddle a flameproof roasting pan over 2 burners, then heat 1 tablespoon oil over medium-high heat until it shimmers. Brown the pork on all sides; transfer to a large plate.

3. Put a metal rack in a pan and arrange half of the herbs down the middle of the rack. Stir together the shallots, garlic, mustard, and 1 tablespoon of the oil and smear over top and sides of roast. Place the roast, fat side up, on top of the herbs. Roast 1 hour. Toss the remaining herbs with the remaining teaspoon of oil and arrange on top of roast.

4. Continue roasting until an instant-read thermometer registers 140 to 145°F, 5 to 15 minutes more (temperature will rise 5 to 10 degrees as it rests). Transfer the pork to a cutting board and let it rest for 15 to 25 minutes.

5. While the pork rests, make the sauce. Remove the roasting rack from the pan; discard the herbs from the rack. Straddle the pan across 2 burners over medium heat. Add the vermouth and mustard and deglaze by boiling, stirring and scraping up the brown bits on the pan, until the liquid is reduced by half. Add the broth and simmer the 3 minutes. Strain through a fine-mesh sieve into a 2-cup measure. If you have more than 1½ cups, boil to reduce; if less, add water.

6. Melt the butter in a heavy medium saucepan over medium heat. Whisk in the flour and cook, whisking, until pale golden, about 3 minutes. Whisk in the vermouth mixture and simmer until slightly thickened, about 3 minutes. Serve pork with sauce.

herb roasted pork loin 5

fresh orange cream tart

orange cream tart 5

I’ve come full circle. The second recipe I made as part of Tuesdays with Dorie was a lemon cream tart; the alternative offered for that recipe for lemon haters was this fresh orange cream tart, and now this is the second-to-last thing I baked for the group. I swore after that lemon tart that I was done with citrus creams, because, as good as they are, a full pound of butter in a 9-inch tart is extreme. But it was a never say never situation, because I made a lemon cream as part of this lemon meringue cake and now I’m making an orange cream to say I baked every single dessert recipe in the book.

orange cream tart 1

Fortunately, this time I was smart enough to give them all away without telling my guests that they were eating orange-flavored butter on a cookie. Plus I made them tiny, so each little tartelette only contained maybe one tablespoon of butter. Which is still a lot. It’s good enough that it might be worth the calories. But what I can say for sure is that making this one very rich dessert was worth it to say I finished off an entire cookbook.

orange cream tart 3

Three years ago, one very busy day of candy-making: Candied Orange Peels, Buckeyes, White Chocolate Lemon Truffles, Pumpkin Seed Brittle, Vanilla Bean Caramels

Printer Friendly Recipe
Fresh Orange Cream Tart (from Dorie Greenspan’s Baking: From my Home to Yours)

I skipped both the orange segments and the jelly garnishes.

For the Orange Filling:
1 cup (7 ounces) sugar
Grated zest of 3 oranges
Grated zest of 1 lemon
4 large eggs
Scant ¾ cup fresh blood-orange or Valencia orange juice
3 tablespoons fresh lemon juice
1¼ teaspoons unflavored gelatin
1 tablespoon cold water
2¾ sticks (22 tablespoons) unsalted butter, cut into tablespoon-size pieces, at cool room temperature

1 9-inch tart shell (round or square) made with Sweet Tart Dough or Sweet Tart Dough with Nuts, fully baked and cooled

3 orange segments, for decoration
⅓ cup quince or apple jelly mixed with ½ teaspoon of water, for glazing

Getting Ready: Have an instant-read thermometer, a strainer and a blender (first choice) or food processor at hand. Bring a few inches of water to a simmer in a saucepan.

Put the sugar and orange and lemon zest in a large heatproof bowl that can be set over the pan of simmering water. Off the heat, rub the sugar and zests together between your fingertips until the sugar is moist, grainy and very aromatic. Whisk in the eggs, followed by the orange and lemon juice.

Set the bowl over the pan and start stirring with the whisk as soon as the mixture feels tepid to the touch. You want to cook the cream until it reaches 180 degrees F. As you whisk – you must whisk constantly to keep the eggs from scrambling – you’ll see that the cream will start out light and foamy, then the bubbles will get bigger and then, as it gets closer to 180 degrees F, it will start to thicken and the whisk will leave tracks. Heads up at this point – the tracks mean the cream is almost ready. Don’t stop whisking or checking the temperature, and have patience – depending on how much heat you’re giving the cream, getting to temp can take as long as 10 minutes.

As soon as it reaches 180 degrees F, remove the cream from the heat and strain it into the container of the blender (or food processor); discard the zest.

Soften the gelatin in the cold water, then dissolve it by heating it for 15 seconds in a microwave oven (or do this in a saucepan over extremely low heat). Add the gelatin to the filling and pulse once just to blend, then let the filling cool to 140 degrees F, about 10 minutes.

Turn the blender to high (or turn on the processor) and, with the machine going, add the butter about 5 pieces at a time. Scrape down the sides of the container as needed as you incorporate the butter. Once the butter is in, keep the machine going – to get the perfect light, airy texture, you must continue to blend the cream for another 3 minutes. If your machine protests and gets a bit too hot, work in 1-minute intervals, giving the machine a little rest between beats.

Pour the cream into a container, press a piece of plastic wrap against the surface and refrigerate for at least 4 hours. (The cream can be refrigerated, tightly covered, for up to 5 days or frozen for up to 2 months; thaw overnight in the fridge.)

When you are ready to construct the tart, whisk the cream vigorously to loosen it. Spread the cream evenly in the crust. Arrange the orange segments in the center of the tart and prepare the glaze: bring the jelly and water to a boil. Use a pastry brush or pastry feather to lightly spread the jelly over the orange segments and cream. Serve now or refrigerate the tart until needed.

Sweet Tart Dough

1½ cups (7.2 ounces) all-purpose flour
½ cup (2 ounces) confectioner’s sugar
¼ teaspoon salt
1 stick plus 1 tablespoon (9 tablespoons) very cold (or frozen) unsalted butter, cut into small pieces
1 large egg yolk

Put the flour, confectioner’s sugar and salt in a food processor and pulse a couple of times to combine. Scatter the pieces of butter over the dry ingredients and pulse until the butter is coarsely cut in – you should have some pieces the size of oatmeal flakes and some the size of peas. Stir the yolk, just to break it up, and add it a little at a time, pulsing after each addition. When the egg is in, process in long pulses – about 10 seconds each – until the dough, which will look granular soon after the egg is added, forms clumps and curds. Just before you reach this stage, the sound of the machine working the dough will change – heads up. Turn the dough out onto a work surface and, very lightly and sparingly, knead the dough just to incorporate any dry ingredients that might have escaped mixing.

To Press the Dough into the Pan: Butter a 9-inch fluted tart pan with a removable bottom. Press the dough evenly over the bottom and up the sides of the pan, using all but one little piece of dough, which you should save in the refrigerator to patch any cracks after the crust is baked. Don’t be too heavy-handed – press the crust in so that the edges of the pieces cling to one another, but not so hard that the crust loses its crumbly texture. Freeze the crust for at least 30 minutes, preferably longer, before baking.

To Fully Bake the Crust: Center a rack in the oven and preheat the oven to 375 degrees F.

Butter the shiny side of a piece of aluminum foil and fit the foil, butter side down, tightly against the crust. (Since you froze the crust, you can bake it without weights.) Put the tart pan on a baking sheet and bake the crust for 25 minutes. Carefully remove the foil. If the crust has puffed, press it down gently with the back of a spoon. For a partially baked crust, patch the crust if necessary, then transfer the crust to a cooling rack (keep it in its pan).

Bake for another 8 minutes or so, or until it is firm and golden brown. Transfer the tart pan to a rack and cool the crust to room temperature before filling.

orange cream tart 4

hidden berry cream cheese torte

berry cream cheese torte 7

I don’t think of myself as much of a shopper. The majority of the clothes I’ve bought over the last year have been thrifted, I rarely buy books or CDs since we moved to a town without a big bookstore, I have no interest in cars beyond dependability and gas mileage, and the only decorations in my office at the place I’ve worked for a year and a half are a bird-shaped mirror that makes me smile every time I see it and three posters on local geology that a coworker was trying to get rid of.

berry cream cheese torte 2

But ingredients are becoming a weakness. I blame living in a small isolated town; because there are so many foods I can’t buy here, when I do have access to a fun new ingredient, I snatch it up. This is why I have a container of truffle salt I’ve only used once and several types of ground and whole mustard seeds which I never got around to using in homemade mustard recipes. It’s probably a good thing Dave rushed me out of the Middle Eastern market we went to for lunch in Albuquerque, so I only had time to buy a container of za’atar and a jar of boysenberry preserves.

berry cream cheese torte 1

I haven’t used the za’atar yet, but the jam was perfect in this light, creamy cheesecake. I added a little more than the recipe called for, and I wished I had used even more. This is one impulse buy I don’t regret one bit.

berry cream cheese torte 4

One year ago: Cardamom Crumb Cake
Two years ago: Cafe Volcano Cookies
Three years ago: Buttery Jam Cookies

Printer Friendly Recipe
Hidden Berry Cream Cheese Torte (from Dorie Greenspan’s Baking: From my Home to Yours)

8 servings

I used 8 ounces of cream cheese, since that’s the normal size of the packages. I also left out the spices.

Crust:
1¾ cups all-purpose flour
½ cup (3.5 ounces) sugar
¼ teaspoon salt
1½ sticks (12 tablespoons) unsalted butter, cut into small pieces and chilled
2 large egg yolks
1 teaspoon pure vanilla extract

Filling:
⅓ cup thick berry or cherry jam
9 ounces cream cheese, at room temperature
8 ounces (1 cup) cottage cheese, at room temperature
¾ cup sugar
¼ teaspoon salt
Pinch of ground cinnamon
Pinch of freshly grated nutmeg
2 large eggs, preferably at room temperature
Confectioners’ sugar, for dusting (optional)

Getting ready: Butter a 9-inch springform pan, dust the inside with flour, and tap out the excess. Place on a baking sheet lined with parchment or a silicone mat.

To make the crust: Put the flour, sugar and salt in a food processor and pulse just to blend. Toss in the pieces of butter and pulse until the mixture resembles coarse meal. Stir the egg yolks and vanilla together with a fork, and, still pulsing the machine, add them and continue to pulse until the dough comes together in clumps and curds—restrain yourself, and don’t allow the dough to form a ball.

Turn the dough out onto a work surface. If you want to roll the dough, gather it into a ball, wrap it in plastic wrap and refrigerate it for about 20 minutes before rolling. (I like to roll this, and all sweet crusts, between sheets of plastic wrap.) Or simply press the dough into the pan. The dough should come about 1½ inches up the sides of the springform. Refrigerate for at least 30 minutes.

Center a rack in the oven and preheat the oven to 375 degrees. Fit a piece of buttered aluminum foil against the crust, covering it completely. Fill the crust lightly with rice, dried beans or pie weights and slide the pan into the oven. Bake the crust for 20 minutes, then carefully remove the foil and weights and bake for another 5 minutes or so—you don’t want the crust to get too brown. Transfer to a rack to cool while you make the filling. Lower the oven temperature to 350 degrees.

To make the filling: Stir the jam and spread it over the bottom of the crust—it’s okay to do this while the crust is still warm.

Put the cream cheese and cottage cheese into the food processor and process, scraping down the sides of the bowl a few times, for 2 minutes, until you’ve got a smooth, satiny mix. Add the sugar, salt and spices and process for another 30 seconds. With the machine running, add the eggs and process, scraping the bowl as needed for a final minute. Pour the filling over the jam.

Bake the cake for 60 to 70 minutes, or until the filling is uniformly puffed and no longer jiggly. Gently transfer the springform pan to a cooling rack and allow the torte to cool to room temperature, during which time the filling will collapse into a thin, elegant layer.

Run a blunt knife between the crust and the sides of the pan, then open and remove the sides of the springform. If the sides of the crust extend above the filling and you don’t like this look, very gently saw off the excess crust using a serrated knife. Chill the torte slightly or thoroughly before serving and dust with confectioner’s sugar.

berry cream cheese torte 5

mushroom farro soup

mushroom farro soup 6

What a difference a few drops of vinegar make. I sat down to eat my soup and couldn’t shake the thought that it was missing something. It seemed like enough salt, but I thought maybe if I dribbled in some umami-y soy sauce, that would do the trick. On the way to the cabinet, I saw the bottle of sherry vinegar that I’d put on the counter to add to the soup and forgotten about it. It turns out, that’s exactly what the soup needed.

mushroom farro soup 3

It isn’t that the soup is so bad without it, not by any means. With a flavor base of browned onions and carrots, then garlic and tomato paste, and finally a pile of sliced fresh mushrooms, there’s plenty of sweet and meat flavors (although no actual meat). A pinch of truffle salt didn’t hurt matters either, and porcini mushrooms along with their rehydrating broth take the mushroominess up another notch.

mushroom farro soup 4

Farro gives the soup substance, and altogether it adds up to a dark, deeply flavored soup that is, nonetheless, missing something. A spoonful of sherry (or red wine) vinegar adds a touch of brightness that balances the rich flavors of the mushrooms. And then the soup is just right.

mushroom farro soup 5

One year ago: Red Pepper Risotto
Two years ago: Brussels Sprouts Braised in Cream
Three years ago: Sausage Apple Hash

Printer Friendly Recipe
Mushroom Farro Soup (adapted from The New York Times via Smitten Kitchen)

4 servings

I added a stalk of celery too, because I had some in the fridge. I wouldn’t buy it just for this recipe though.

Feel free to substitute barley or wheat berries for the farro, but you’ll need to adjust the cooking time for different grains.

The photos of the final soup are of leftovers. Overnight, the farro soaks up some of the broth, making a thicker soup with softer grains. The soup is wonderful fresh, but I might even prefer it leftover.

¼ ounce dried porcini mushrooms, rinsed
1 tablespoon olive oil
1 medium onions, diced fine
1 medium carrot, diced fine (or 1 carrot and 1 stalk of celery)
2 cloves garlic, minced
2 teaspoons tomato paste
1 pounds cremini mushrooms, sliced ⅛-inch thick
¼ cup sherry
2 cups broth (I prefer chicken)
½ cup farro, rinsed
Salt and black pepper
2 teaspoons sherry vinegar

1. Place the dried mushrooms in a small bowl with ½ cup water; cover the bowl with plastic wrap, use a paring knife to make about 5 holes in the plastic wrap, and microwave on high for 30 seconds. Set aside for 10 minutes to let the mushrooms soften. Use a fork to lift the softened mushrooms out of the liquid. Mince the mushrooms and strain the liquid through a coffee filter to remove grit, reserving the strained liquid. (This is the official method; I never do it this way, I just let the grit settle to the bottom of the liquid and leave the bit of gritty liquid behind when I use the liquid later in the recipe.)

2. In a large saucepan, heat the oil over medium heat. Add the onions and carrots and cook, stirring occasionally, until the onions just start to brown around the edges, about 8 minutes. Add the garlic and tomato paste; cook, stirring constantly, until fragrant, about 30 seconds.

3. Add the fresh mushrooms; cook, stirring occasionally, until they release their liquid, 3-5 minutes. Increase the heat to medium-high and cook until the liquid evaporates and the mushrooms just begin to brown, about 10 minutes. Add the sherry; scrape up any browned bits on the bottom of the pan. Add the broth, farro, minced porcini, the liquid leftover from soaking the mushrooms, 2 teaspoons salt, and ½ teaspoon pepper. Bring to a simmer over high heat, then reduce the heat to medium and simmer for about 40 minutes, until the farro is tender. (The soup can be stored at this point for up to 5 days. Heat on the stove over medium heat just before serving.) Stir in the sherry vinegar. Add more salt and pepper if necessary; serve.

mushroom farro soup 7

squash kale pizza

squash kale pizza 6

This recipe knocked me out of a months-long pizza rut. At about two homemade pizza dinners a month, that’s a lot of green chile-turkey pepperoni-mushroom pizza. Not that anyone around here was complaining.

squash kale pizza 1

It’s the complimentary earthy flavor that squash and kale both have, combined with the contrasting sweetness of the squash and slight bitterness of the kale that make this pizza work so well. Onions with savory centers and caramelized tips bridge the gap, then the whole thing is topped with plenty of cheese, which is what really matters. I don’t know if it’s going to rival green chile-turkey pepperoni-mushroom for our next rut, but it was definitely a nice diversion.

squash kale pizza 3

One year ago: Beef in Barolo
Two years ago: Steak au Poivre
Three years ago: Red Velvet Whoopie Pies

Printer Friendly Recipe
Kale and Butternut Squash Pizza (from Bev Cooks via Cate’s World Kitchen)

I used acorn squash the first time I made this and delicata squash the second time. So technically, I haven’t made butternut squash and kale pizza yet!

Dough for two 10-inch pizza crusts (half of this recipe)
1½ tablespoons olive oil, divided
salt and freshly ground pepper
1 medium butternut squash, peeled, seeded and cut into bite-sized cubes
2 small red onions, cut into wedges
3 cups kale (from about 1 bunch), cut in thin ribbons
2 garlic cloves, sliced
2 cups (8 ounces) shredded mozzarella cheese

1. Place a pizza stone on the bottom rack of the oven and preheat the oven to 400 degrees. Divide the dough in two and shape each portion into a ball. Set the balls of dough aside for 10 to 30 minutes, loosely covered, to allow the gluten to relax.

2. Transfer the squash and onions to a large baking sheet; season with a generous pinch of salt and pepper and coat with 1 tablespoon of oil. Bake, stirring once halfway through, until softened and browned, about 30 minutes.

3. Heat the remaining ½ tablespoon of oil with the garlic in a large skillet; add the kale and a pinch of salt; cook, stirring constantly, until wilted, about 2 minutes. Remove from the heat.

4. Work with one ball of dough at a time on a lightly floured surface or a damp cloth. Flatten the dough, then pick it up and gently stretch it out, trying to keep it as circular as possible. Curl your fingers and let the dough hang on your knuckles, moving and rotating the dough so it stretches evenly. If it tears, piece it together. If the dough stretches too much, put it down and gently tug on the thick spots. Transfer the round of dough to a large square of parchment paper; slide onto a pizza peel.

5. Top the dough with half of each of the roasted vegetables, kale, and cheese. Slide the pizza with the parchment onto the hot baking stone. Bake for 8-10 minutes, until the crust is browned around the edges. Transfer the pizza to a cooling rack without the parchment. Let the pizza rest for 5 minutes before serving. Repeat with the remaining ingredients.

squash kale pizza 4

berry chocolate ice cream

chocolate berry ice cream 6

I’m not a big ice cream lover. When I saw how rich and thick and chocolately this custard was right before being churned into ice cream, I was tempted to leave it just like that. The only thing that stopped me was knowing I wouldn’t be able to resist something so like chocolate mousse.

chocolate berry ice cream 2

So I poured it into the ice cream maker. After a few minutes, I tested a spoonful to see how it would taste when it was partially frozen. And then I tested more and more spoonfuls, until it became clear that any claims I might want to make about not loving ice cream are wishful thinking.

chocolate berry ice cream 3
pre-frozen, like smooth rich chocolate pudding

Laurie chose this for Tuesdays with Dorie, and she has the recipe posted. Other than adding a pinch of salt to bring out the flavors and using the boysenberry preserves I had in my fridge instead of buying blueberry preserves, I followed the recipe exactly.  I’m glad I did, because Dorie is right about how well the dark chocolate and bright berries compliment each other.

One year ago: Oreo Cheesecake Cookies
Two years ago: English Muffins
Three years ago: Cranberry Orange Muffins

chocolate berry ice cream 4

puffed poached pear tart

puffed pear tart 5

Just a handful of recipes left, and I’ll have baked every single dessert in the Dorie Greenspan’s Baking: From my Home to Yours!

Or at least I’ll have baked something vaguely resembling Dorie’s recipes. These stragglers at the end call for unseasonal unavailable ingredients, so I’ve had to make some significant substitutions. I was actually surprised to find that the plums I needed for this recipe weren’t available at all at my store, not even tasteless rockhard specimens shipped in from another continent.

puffed pear tart 2

But when I saw that the plums in the original recipe are poached in wine, I immediately thought of pears. I exchanged the red wine for white and the prunes for dried apples. Raisins might have been a better choice for the dried fruit, because the whole thing ended up looking pale and plain. But it was nothing that a dusting of powdered sugar couldn’t solve, and anyway, after a bite of the buttery flaky crust and sweet winey pears, I wasn’t at all concerned about whether this delicious dessert was a little on the monochrome side.

puffed pear tart 3

Julie chose the Puffed Double Plum Tart for Tuesdays with Dorie. I replaced the prunes with dried apples and the fresh plums with pears. I poached the two in a mixture of 1 cup white wine, 1 cup water, and ⅔ cup sugar for about 20 minutes, then arranged them on top of the puff pastry and baked according to the recipe.

One year ago: Apple Coconut Family Cake
Two years ago: Sablés
Three years ago: Buttery Jam Cookies

puffed pear tart 6

earl grey madeleines

earl grey madeleines 3

Coffee makes me feel like bees are buzzing in my head, so I save it for the weekends. At work, I stick to tea, and I’ve developed a little ritual with my electric kettle, collection of looseleaf teas, and steeper that drips from below when I set it onto my mug. I’m picky about my teas too; I don’t like any teas with weird fruity flavors, and I prefer my black tea with some bitter bite to it.

earl grey madeleines 1

I like Earl Gray tea, but it can’t be too orangey. I once bought one that tasted like a creamsicle, and I threw the whole tin away. Rishi makes my favorite black tea, but their Earl Grey is too strong for me. For months, I’ve been mixing Rishi Earl Grey tea leaves with another black tea I have that isn’t as bitter as I like. My morning mug of tea is an art.

earl grey madeleines 2

Overly strong tea leaves are perfect for putting into dessert though, where they have to battle to be noticed past the sugar and butter. The batter for these madeleines smelled and tasted noticeably of Earl Grey, but the flavor was muted once baked. They smelled more tea-y than they tasted. Clearly, the perfect way to really taste your Earl Grey with your Earl Grey madeleines is to have a mug of tea alongside your tea cake.

earl grey madeleines 4

Nicole chose these madeleines for Tuesdays with Dorie and has the recipe posted. Watch them carefully if you make them! I baked mine for 9 minutes, and it was definitely too long.

One year ago: Maple Tuiles
Two years ago: All-Occasion Sugar Cookies
Three years ago: Rosy Poached Pear and Pistachio Tart

earl grey madeleines 5

spelt crackers

spelt crackers 5

I’ve had one of those weekends that make people say goofy things about how they need another weekend to recover from their weekend. I’m blaming the holidays, although not all of my extra projects are holiday-related. In particular, the dinner party I’m co-hosting on Thursday is dominating a lot of my kitchen time this week, since it’s on a weekday so everything I’m in charge of needs to be done in advance.

spelt crackers 1

But I still managed to squeeze in time to make these crackers – twice. Not only do they only have three ingredients – water, salt, and fancy flour – those ingredients don’t require any complicated steps. There’s no kneading and no resting, just a quick stir before the dough is ready to be rolled out.

spelt crackers 3

Twenty minutes in the oven and just like that, you have crackers. Crackers so good that Dave said, “These are homemade? But they’re just like real crackers!” Fresh crisp crackers, baked brie topped with roasted red peppers and garlic, and a glass of wine make the perfect break from weekend chores.

spelt crackers 7

One year ago: Comparison of 3 Bolognese Sauce recipes
Two years ago: Bourbon Pound Cake

Printer Friendly Recipe
Spelt Crackers (barely adapted from The New York Times Magazine via Smitten Kitchen)

4-6 servings

The original recipe calls for white spelt flour, but I don’t know what I used. In fact, I bought my spelt flour in the bulk section at the same time I bought barley flour, and I mixed them up and don’t know which I used. The crackers turned out great regardless.

I didn’t flour the pan generously enough the first time and had some issues with the dough and then the baked crackers sticking. I tried spraying the pan with oil the second time instead of flouring, which made rolling a lot easier, but the crackers weren’t as crisp. From now on, I’ll stick with flour but be sure to use plenty of it.

¼ teaspoon salt
½ cup water
1½ cups spelt flour, plus more for flouring surface
Coarse sea salt, dried onion bits, poppy seeds and sesame seeds, or a seed combination of your choice

1. Adjust an oven rack to the middle position and heat the oven to 350 degrees.

2. Dissolve the salt in the water. Stir in the spelt flour until a ball forms.

3. Generously flour an overturned 12-by-17-inch cookie sheet and roll out the dough on top of it, using as much flour as needed to prevent sticking, until the dough covers the sheet from edge to edge. Using a spray bottle filled with water, spray the dough to give it a glossy finish. Prick the dough all over with a fork. If you choose, sprinkle with sea salt or seeds. For neat crackers, score the dough into grids.

4. Bake until the dough is crisp and golden, 15 to 25 minutes. Break into pieces and serve.

spelt crackers 4