Archives for January 2012

black bean avocado brownies

black bean brownies 13

I have developed an extensive spreadsheet of calculations in an effort to address to issue of brownies that aren’t bad for you, and what I have discovered is that brownies are bad for you. The problem is the chocolate. Chocolate on its own doesn’t taste good, as you’re probably aware. It needs sugar to taste good. Fat is nice too. Sugar and fat aren’t good for you.

black bean brownies 4

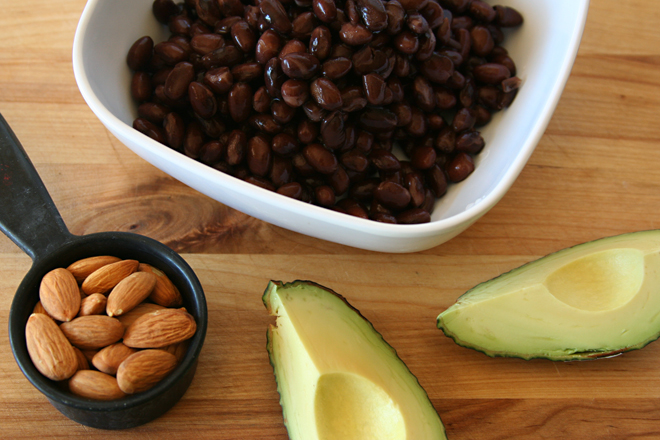
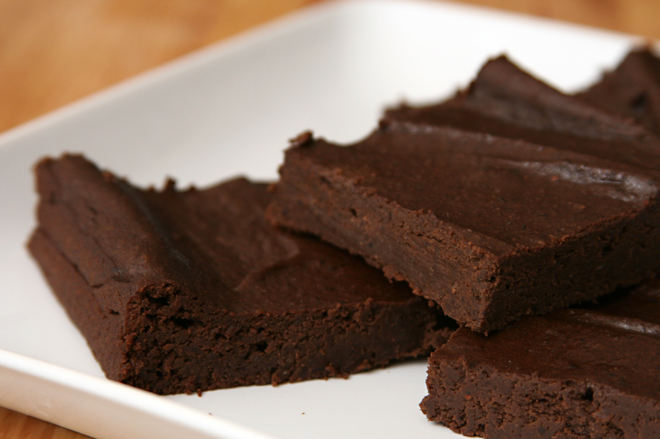
Sure, the internet is rife with recipes for black bean brownies, in which beans replace the flour, cocoa powder is the only source of chocolate, and, in Cara’s recipe, avocado adds some fat, but the healthy kind. I made Cara’s recipe, exchanging 2 tablespoons of cocoa for 1 ounce of bittersweet chocolate to add oomph to the chocolateliness in a compromise between health and flavor that I thought was worthwhile. The brownies were very, very edible. They didn’t taste like beans or like avocado. They also didn’t taste much like chocolate.

black bean brownies 7

This is when I started calculating calories, trying to see how much chocolate I could add to black bean brownies before it defeats the purpose of making a healthier brownie. I started by looking at Cook’s Illustrated’s Lighter Brownies recipe, replacing the flour with beans and the butter with avocado. I also added some ground almonds, because the original brownies needed something dry to absorb some of the moisture and bulk up the batter.

black bean brownies 8

Once you add more chocolate and fatty nuts to the recipe, it has just as much fat as Cook’s Illustrated butter-containing light brownie recipe. It has twice the fat of Cara’s recipe – but half the fat of my favorite regular brownie recipe (for the same size square). It has about the same amount of fiber and protein as Cara’s recipe, and two or three times the protein of a regular brownie recipe. (Regular brownies don’t contain any fiber to speak of.)

black bean brownies 10

What these brownies have going for them is that they’re chock full of fiber, high in protein, gluten-free, and full of good fats. What they have working against them is that they still have a significant amount of refined sugar, and they have more fat and therefore more calories than other black bean brownie recipes. They also have more flavor, more chocolate flavor, that is; in fact, so much chocolate flavor that this won’t just satisfy a chocolate craving, but it’ll cause a craving – for black bean brownies.

black bean brownies 3
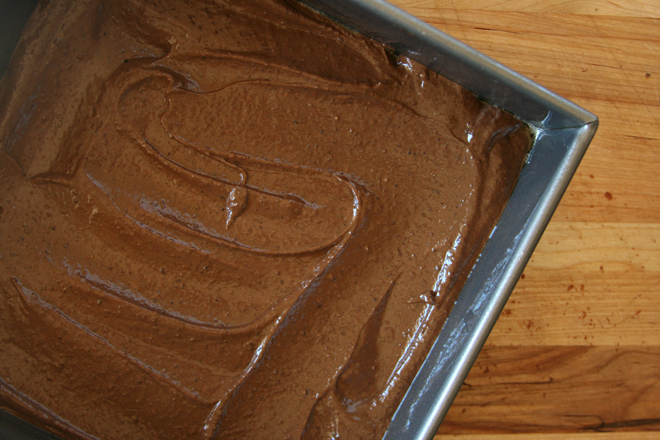
first batch (all other photos are of second batch)

One year ago: Great Grains Muffins
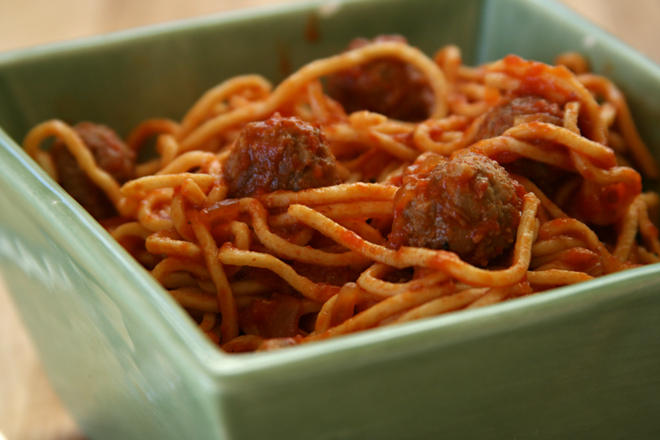
Two years ago: Butternut Squash Macaroni and Cheese
Three years ago: Tofu Croutons
Four years ago: Potstickers

Printer Friendly Recipe
Black Bean Avocado Brownies (adapted from Cara’s Cravings and Cook’s Illustrated’s Lighter Brownies)

12 medium squares

¼ cup almonds
½ cup (3.5 ounces) sugar
⅛ teaspoon table salt
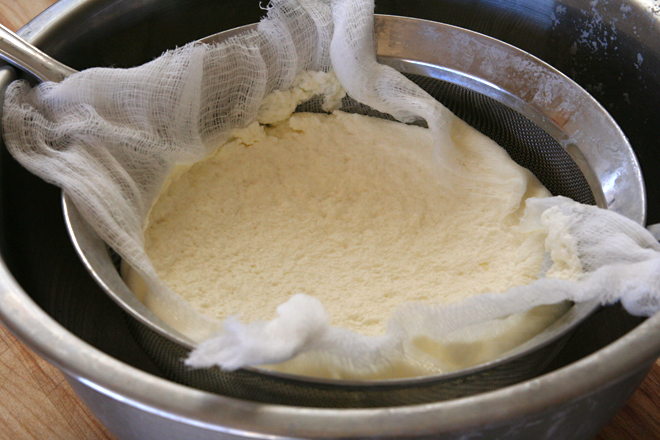
1 (15-ounce black) beans, rinsed and drained
2 ounces avocado flesh (about ½ an avocado)
3 ounces semisweet chocolate, coarsely chopped
2 tablespoons Dutch-processed cocoa powder
1 tablespoon boiling water
1 tablespoon vanilla extract
½ teaspoon instant espresso powder
½ teaspoon baking powder
2 large eggs

1. Adjust an oven rack to the middle position and heat the oven to 350 degrees. Coat an 8-inch square baking pan with vegetable oil spray.

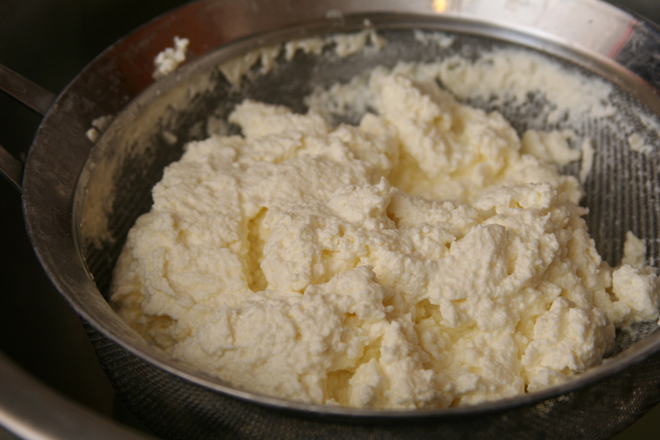
2. Process the almonds, sugar, and salt in a food processor until the almonds are finely ground, about 2 minutes. Add the beans and avocado; process until the beans are smoothly pureed, 4-5 minutes (some flecks of bean skins may remain).

3. Set a heatproof bowl over a saucepan containing one inch of simmering water. Add the chocolate; stir frequently until the chocolate is smooth, then remove from the heat. In a separate small bowl, whisk the cocoa, water, vanilla, and espresso powder together. Add the chocolate, cocoa mixture, and baking powder to the bean mixture in the food processor; pulse to combine. Add the eggs; process for 30 seconds, stopping twice to scrape the sides of the bowl.

4. Pour the batter into the prepared pan and smooth the top. Bake until a toothpick inserted into the center comes out clean, about 25 minutes. Cool completely on a wire rack, at least 1 hour. Store leftovers, tightly wrapped, in the refrigerator for up to 5 days.

black bean brownies 11

chickpea and rosemary soup

chickpea rosemary soup 7

I confess that this soup came out through a series of blunders. I had originally planned to make African coconut curry soup, with the belief that it was a new recipe and I could submit it to Branny’s SouperBowl charity fundraiser for ASPCA. It turns out though, that it’s the exact same recipe I submitted last year. Whoops.

chickpea rosemary soup 1

I started jotting down what I had in mind instead, a tomato broth with lots of garlic, red pepper flakes, and rosemary, reminiscent of this braised white bean recipe. It also included the chickpeas I’d bought for the curry soup and pasta, which I’d been craving. But then that soup starting sounding familiar too.

chickpea rosemary soup 3

Apparently I wouldn’t be striking bold new soup ground. But that’s okay. I didn’t want something new, I wanted something warm and comforting and easy, easier than my favorite pasta e fagioli recipe. This simple chickpea and pasta soup, infused with piney rosemary, hit the spot perfectly – maybe even better than the originally planned curry soup would have.  I have no regrets for all my blunders that led me to this soup.

chickpea rosemary soup 4

Participation in Branny’s fundraiser requires that the blog post be dedicated to a pet. I dedicate mine to my cat, Daisy, who is also warm and comforting and easy, at least when she isn’t puking on the carpet.

daisy

One year ago: Almond Biscotti
Two years ago: Banana Cream Pie
Three years ago: Crispy Baked Chicken Strips
Four years ago: Fish Tacos

Printer Friendly Recipe
Rosemary Chickpea Soup

Serves 4 to 6

I used 8 ounces of pasta. It seemed like a lot, but I didn’t mind. Still, if you’d like less pasta, 4 ounces (or anywhere in between) would work well.

1 tablespoon olive oil
8 cloves garlic, minced
½ teaspoon red pepper flakes
1 (28-ounce) can diced tomatoes
2 (15-ounce) cans chickpeas, rinsed and drained
4 cups broth (chicken or vegetable)
½ teaspoon salt
2 sprigs fresh rosemary
Parmesan rind, if you have one
4-8 ounces small pasta, such as ditalini or macaroni

In a large saucepan over medium heat, heat the oil, garlic, and red pepper flakes. Once the oil starts to sizzle, stir for about 1 minute, then add the tomatoes with their juices, the chickpeas, broth, salt, rosemary, and parmesan rind (if using). Increase the heat to medium-high; once the liquid comes to a lively simmer, add the pasta, return the mixture to a boil, then reduce the heat to medium and simmer until the pasta is tender. Remove the rosemary sprigs, adjust the salt if necessary, and serve.

chickpea rosemary soup 6

pasta with tiny meatball sauce

tiny meatball sauce 15

I haven’t been this excited about a cookbook in a while. This is the type of cookbook that makes me eager to get into the kitchen, particularly because I want to make every recipe in the book. I thought I would start with one of the most involved recipes, one of those “choose your own adventure” recipes that has you page flipping to find all the different components.

tiny meatball sauce 11

The first is fresh pasta, which I’ve made before, but the recipe in the book differed from my usual with the inclusion of semolina, salt, nutmeg, and, most significantly, oil. Once the pasta was cooked and sauced, I didn’t notice the extra flavorings, but the oil seemed to make rolling easier. I also made a new shape that required less rolling and cooked up pleasantly toothsome.

tiny meatball sauce 1

The second part is the sauce, which is a slow-cooked meat sauce, but with a twist. Instead of simmering the sauce with ground meat, or with beef meant to be shredded and added back to the sauce, the meat is kept in this sauce through hours of simmering, and then is removed. And not added back in. The meat is not part of the sauce, it’s just there to infuse it with flavor. It’s like you’re making tomato broth.

tiny meatball sauce 2

The last part, then, is the tiny meatballs. It’s a simple mixture, no bread for tenderizing, just meat, seasoning, and an egg to bind it. The recipe instructs you to form the meatballs “just larger than a chickpea”, but I’m not insane and would prefer to stay that way, so my tiny meatballs were about twice that size, and still plenty tiny for me. Twelve ounces of meat turned into 72 tiny meatballs.

tiny meatball sauce 7

I loved the tiny meatballs. I can see myself making them again sometime, even though I do not love forming tiny meatballs. I’ve also started to add a dribble of olive oil into my pasta dough, although I skip the semolina, nutmeg, and salt for simplicity’s sake.

tiny meatball sauce 8

While I enjoyed everything about the sauce – the flavor, the plateful of tomatoey meat we ate as an appetizer, the fun of braising – I’ll make it differently in the future. The original recipe calls for three types of meat, and it’s impractical for most home cooks to buy small portions of a variety of meats. Instead, I’ll just stick to our favorite – lamb – and I’ll use a bony cut like blade chops, because I suspect the bone will add even more flavor to the sauce than the meat did.

tiny meatball sauce 9

Obviously making a slow-braised sauce, homemade pasta, and forming 72 tiny meatballs is not an insignificant amount of effort. But it was the most fun I’ve had in the kitchen in months, with the added bonus that I learned some new tricks. I can’t wait to choose another recipe from my favorite new cookbook and do it again.

tiny meatball sauce 14

One year ago: Curry Coconut Chickpea Soup
Two years ago: Baked Ziti
Three years ago: Fresh Ginger and Chocolate Gingerbread
Four years ago: Deviled Eggs with Tuna

Printer Friendly Recipe
Maccheroni alla Chitarra with Ragù all’Abruzzese and Palottine, aka Pasta with Tiny Meatball Sauce (completely rewritten but hardly changed from Domenica Marchetti’s The Glorious Pasta of Italy)

Serves 8

I went ahead and bought three different types of meat for this, but I don’t think it’s necessary. Pick your favorite and buy just that one cut.

I don’t usually cook with veal, so I used 8 ounces ground beef plus 4 ounces ground pork plus ⅛ teaspoon gelatin, dissolved in the egg, in the meatballs instead.

Ragù:
2 (28-ounce) cans whole tomatoes with their juice
2 tablespoons olive oil
6 ounces boneless beef chuck roast, cut into four equal pieces
6 ounces boneless pork shoulder, cut into three equal pieces
6 ounces boneless lamb shoulder cut into three equal pieces
Salt
Freshly ground black pepper
1 onion, finely diced

Pasta:
4 cups (18 ounces) all-purpose flour
2 tablespoons semolina flour
1 teaspoon table salt
Pinch ground nutmeg
6 large eggs
2 tablespoons extra virgin olive oil

Meatballs:
12 ounces ground veal
½ teaspoon salt
Pinch freshly grated nutmeg
1 large egg, lightly beaten
Vegetable oil for cooking

1. For the ragù: If you have a food mill, press the tomatoes through the disk with the smallest holes, discarding the solids. If you don’t have a food mill, puree the tomatoes in a food processor or blender.

2. Generously season the meat with salt and black pepper. In a 5-quart Dutch oven over medium-high heat, heat the oil until it just starts to smoke. Add the meat and cook, without moving, until deeply browned on one side, about 2 minutes. Rotate the meat and brown on the second side. Transfer the meat to a plate.

3. Reduce the heat to medium, add the onion, and cook, stirring occasionally, until the onion softens but does not brown, about 4 minutes. Add the tomatoes, raise the heat to medium-high, and bring to a simmer. Add the meat back to the pot, reduce the heat to medium-low, and simmer, uncovered, for about 3 hours, until the meat is tender and the sauce is thickened. Remove the meat before using the sauce; reserve for another use (or just eat it right then, because it’s delicious).

4. For the pasta: Place the flours, salt, and nutmeg in the bowl of a food processor; pulse to combine. Add the eggs and oil; process until the mixture clumps together in large crumbs. Form a small portion of dough into a ball; if it’s too dry to stick together, add up to 2 tablespoons more oil; if it’s sticky, add up to ½ cup more flour. Wrap the dough in plastic wrap and set it aside for 30 minutes to rest.

5. Divide the dough into 8 portions. Work with one at a time, keeping the others covered with plastic wrap or a damp dishtowel. Flatten the dough and pass it through a pasta roller on the widest setting. Fold the dough in thirds, like a letter, and roll it through the widest setting again. Repeat the rolling and folding 3-4 more times, until the dough is smooth. Flour the dough (with semolina flour if you have it) as much as needed to prevent sticking. Adjust the pasta roller to the next-thinnest setting and roll the dough through twice, then repeat on the third-thinnest setting. Thin the dough to the fourth-narrowest setting on your pasta roller. Repeat the rolling, folding, and thinning with the remaining balls of dough. Pass each strip of dough through the thin cutters on the pasta roller to form long noodles that are approximately square in cross section.

6. For the meatballs: Use your hands to evenly combine the veal, salt, nutmeg, and egg. Form the mixture into balls about ½-inch in diameter.

7. In a 12-inch skillet, heat 3 tablespoons oil over medium-high heat until almost smoking. Add the meatballs, and cook until well browned a couple sides, about 4 minutes, turning about once a minute with a spatula. Transfer to the pot with the ragù; keep warm.

8. Bring a large pot of water to a boil. Add about a tablespoon of salt and the pasta and cook until al dente, about 5 minutes. Drain, reserving about a cup of the cooking water.

9. Return the drained pasta to the pot; toss with about two-thirds of the sauce and meatballs, adding some of the reserved cooking water if the sauce is too thick. Transfer the pasta to a warmed serving bowl (or individual bowls) and spoon the remaining sauce over the top. Serve immediately, with parmesan and crushed red pepper flakes to pass.

tiny meatball sauce 13

lentil salad with squash and goat cheese

lentil squash salad 4

The Great Cookie Craze that is December perplexes me. I understand that with various holiday-related celebrations, there are more opportunities for feasts and drinks than at other times of the year, but the cookie mania goes beyond parties. People send dozens of treats out to families and friends, most of whom are making their own dozens of cookies. The number of cookies in the world exponentially increases for a month.

lentil squash salad 2

The tide turns in January, which, without any significant celebration of its own, becomes the Undo the Holidays month. Poor January, but really, it isn’t such a bad thing. After all, healthy food tastes good too, particularly healthy food that includes goat cheese.

lentil squash salad 3

Tart goat cheese mixed with sweet winter squash is becoming one of my favorite flavor combinations, and kale, with its bitter notes, and lentils, with its meatiness, make it even better. Or, if kale isn’t your thing, arugula adds some freshness to the plate. Nothing about this salad feels like punishment for the past month’s excesses.  But have a cookie afterward anyway; December shouldn’t get to have all the fun.

lentil squash salad 5

One year ago: Nutty Chocolately Swirly Sour Cream Bundt Cake
Two years ago: Chocolate Oatmeal Almost Candy Bars
Three years ago: Herbed Lima Bean Hummus
Four years ago: Pissaladiere

Printer Friendly Recipe
Lentil Salad with Squash and Goat Cheese (adapted from Bon Appétit via Smitten Kitchen)

Serves 4

The original recipe calls for arugula, which I used the first time I made this. (Actually, the pictures seem to indicate I used mixed greens.) The second time, I used kale, which I like even more. I wrote the directions for kale into the recipe; if you use arugula instead, simply add it to the salad at the end. You can also use a smaller pot to cook the lentils if you’re not adding the kale.

¾ cup green lentils
salt
1 butternut squash, peeled and cut into ½-inch cubes, seeds reserved
1 tablespoon plus 1 teaspoon olive oil, divided
1 teaspoon ground cumin
1 teaspoon paprika
1 bunch kale, ribs removed, leaves coarsely chopped
4 ounces goat cheese, crumbled
1 tablespoon red wine vinegar, plus additional to taste

1. Place the butternut squash on a sheet pan. Add 1 tablespoon of the olive oil, the spices, and ½ teaspoon salt; toss to coat. Roast the squash for 25 minutes, turning once. In a small bowl, mix the cleaned squash seeds with the remaining 1 teaspoon oil and a pinch of salt. Add the seeds to the baking sheet with the squash and continue to roast until the squash is tender and the seeds are browned.

2. Combine the lentils, ½ teaspoon salt, and 3 cups of water in a 3- to 4-quart saucepan; bring to a boil over medium-high heat. Reduce the heat, cover, and simmer until the lentils are tender, 18-20 minutes. Add the kale to the pot during the last 2-3 minutes of simmering. (The kale will overwhelm the size of the pot at first but will quickly wilt.)

3. Combine the lentils, squash, kale, goat cheese, and vinegar. Season with salt, pepper, and extra vinegar, if desired. Serve.

lentil squash salad 6

asian lettuce wraps

asian lettuce wraps 5

I try not to order dishes in restaurants that I can easily make at home, but PF Chang’s lettuce wraps had so many raving reviews that I had to get them the first time I ate there. They were just as good as I was hoping, but were also simple – too simple to pay someone else to make them for me. I made a mental note to try these at home.

asian lettuce wraps 3

That was years ago, but I still hadn’t gotten around to making this easy dish that promised to be just as tasty as it was healthy. That is why this recipe, which requires no great skill or time-investment, no new ingredients or techniques, made the list. Sometimes I just need a little extra push, even if it’s from myself.

asian lettuce wraps 4

I don’t think I’ll need that extra push to make these again. It will be hard to forget how well the savory filling compliments the crisp mild lettuce and sweet hoisin sauce. I can’t compare them to the restaurant’s version, since it’s been years since I’ve had theirs. I won’t wait so long before I eat lettuce wraps again, not after this reminder of how good they are, and how easy they are to make myself.

asian lettuce wraps 6

One year ago: Stromboli
Two years ago: Maple Oatmeal Scones
Three years ago: Twice-Baked Potatoes with Broccoli, Cheddar and, Scallions
Four years ago: Mandarin Pancakes

Printer Friendly Recipe
Asian Lettuce Wraps (adapted from Rasa Malaysia)

Serves 4

I used a combination of ground pork and lean ground beef, but many recipes call for ground chicken. Use whatever lean ground meat you want; I particularly recommend chicken or pork.

Marinade:
2 tablespoons soy sauce
1 tablespoon dry sherry
½ teaspoon sugar
1 teaspoon cornstarch
1 green onion, finely chopped
chile-garlic sauce (optional)

Filling:
1 pound lean ground meat
1 tablespoon oil
1 shallot, minced
1 clove garlic, minced
1 tablespoon minced fresh ginger
5 ounces shiitake mushrooms, stems discarded, caps thinly sliced
1 (5-ounce) can water chestnuts, chopped
2 green onions, thinly sliced

1 small head of Boston or Bibb lettuce, leaves separated, rinsed, and dried

Dipping sauce:
2 tablespoons hoisin sauce
1 tablespoon soy sauce
1 tablespoon water
½ teaspoon sriracha (optional)

1. In a large bowl, combine all of the marinade ingredients. Add the ground meat; use a fork or your hands to coat the meat with the marinade, breaking up large chunks. Set aside for 15 minutes.

2. Heat the oil in a 12-inch nonstick skillet over medium-high heat until it flows like water when the pan is tilted. Add the shallot, garlic, and ginger; cook, stirring constantly, until fragrant, about one minute. Add the mushrooms and a pinch of salt and continue cooking, stirring occasionally, until the mushrooms soften. Add the chicken with its marinade and the water chestnuts; cook, breaking the meat into small pieces, until no pink remains, about 6 minutes. Stir in the green onions.

3. Combine all of the dipping sauce ingredients in a small bowl. Serve with the meat and lettuce leaves, filling the lettuce just before serving to prevent wilting.

asian lettuce wraps 8

grapefruit margaritas

grapefruit margarita 4

If 2010 was the year of the vodka gimlet, 2011 was dedicated to margaritas. It started with these, and then when grapefruits went out of season, we tried strawberry margaritas, pineapple margaritas, classic lime margaritas, and, most recently, cranberry margaritas. I love them all, but nothing holds a candle to the grapefruit version.

grapefruit margarita 2

It’s perfectly balanced – not too sweet, not too sour, not too strong. The light grapefruit mellows any harshness from the lime and alcohol, and the result is perfectly refreshing. As an added bonus, one grapefruit yields enough juice for four drinks – which is just the right amount to split between two people.

grapefruit margarita 3

One year ago: Feta and Shrimp Macaroni and Cheese
Two years ago: Apple Muffins
Three years ago: Twice Baked Potatoes with Broccoli, Cheddar, and Scallions
Four years ago: Maple Walnut Cupcakes

Printer Friendly Recipe
Grapefruit Margaritas (adapted from Confections of a Foodie Bride)

Technically 4 servings, but you’ll be sad if you only get one

Of the many grapefruits I have juiced for margaritas, one grapefruit has always resulted in 4 shots of juice. Two limes will usually give two shots of juice, but not always, so it’s best to buy a third just in case.

As with all things, alcohol quality matters. I’ve used Cointreau, Gran Marnier, Gran Gala, Controy (which can only be purchased in Mexico), and Patron Citronge in these, all with good results. I’ve never used a bargain triple sec. For tequila, I tend to buy whatever is on sale in the $20-25 range.

2 shots lime juice
4 shots grapefruit juice
3 shots orange liqueur
3 shots tequila

In a pitcher or 4-cup measuring cup, mix all of the ingredients. Pour over crushed ice in individual glasses; serve immediately.

grapefruit margarita 5

ricotta

ricotta 12

Here are some things you need to know about making ricotta at home:

1) It really is as easy as they say. The process involves nothing more than heating milk and salt, stirring in lemon juice or vinegar, and straining the mixture.

2) It requires a lot of milk for a relatively small amount of cheese – you’ll start with about four times more volume of milk than you’ll end up with of cheese.

ricotta 3
right after adding the acids

3) About that milk – you can use the regular ol’ stuff from the grocery store, ultrapasteurization and all. That’s all I have access to, and I’ve made some nice ricotta with it.

4) If you’re feeling decadent, you can substitute some of the milk with cream. I started out using about seven times more milk than cream, but in the pictures you see here, I was almost out of cream and used about twenty times more milk than cream. I like this batch just as much as the others.

ricotta 4
right before straining

5) You can use either regular white vinegar or lemon juice. I read here that using all lemon juice gives the cheese a lemony flavor and vinegar is more neutral. However, I was worried about my cheese tasting like vinegar, which would be gross, so I always use a mixture of the two.

ricotta 5
after 5 minutes of straining with no cheesecloth or paper towel liner

6) The pH of the acid you add to curdle the milk matters. That’s one reason vinegar is more dependable than lemon juice; the acidity of lemons varies. It also means you can’t substitute other vinegars, because they might not be as acidic as white vinegar. I learned this the hard way when I realized I was out of regular vinegar and tried to use white wine vinegar instead; the milk didn’t form many curds.

ricotta 6
after 15 minutes of straining with no cheesecloth or paper towel liner

7) You don’t need cheesecloth. The first two times I made this cheese, I strained the mixture in my fine-mesh strainer. Worried that I was losing too much of good stuff, I tried using a double layer of paper towels, but it was draining too slowly and I got impatient and went back to just the strainer. That being said, I really am trying to remember to buy cheesecloth.

ricotta 7
after 15 minutes of straining with no liner, stirred

8 ) You’ll feel wasteful throwing all that whey down the drain, but the bit of internet research I did indicated that it isn’t good for bread dough, because the acid breaks the gluten molecules, weakening the dough’s structure.

9) It isn’t technically ricotta, which is made from the whey leftover from making other cheeses. (The word ricotta, in Italian, means re-cooked.) When I first heard this, I wondered why anyone would call it ricotta, since it isn’t made the same way. Then I made it myself and realized that it looks and tastes just like real ricotta.

ricotta 8
after 2 hours of straining with no liner

10) Homemade ricotta is better than the stabilizer-filled tubs you’ll find in most grocery stores. However, if you do happen to have access to real fresh ricotta, it’s probably cheaper to buy that rather than using half a gallon of milk to make 2 cups of cheese. As for which is better, the last time I bought fresh ricotta from an Italian market was a couple years ago, too long to remember the details of how good it was. I know it was really good, but I know this is really good too.

ricotta 10
finally bought cheesecloth; after 1 hour of straining with double layer of cheesecloth; smoother, creamier cheese

One year ago: Beef Short Ribs Braised in Tomato Sauce
Two years ago: Maple Oatmeal Scones
Three years ago: Chopped Salad
Four years ago: Country Crust Bread

Printer Friendly Recipe
Ricotta (adapted from Smitten Kitchen and Serious Eats)

Makes about 1 cup

You can adjust the amount of cream down (to 4 cups milk and no cream) or up (to 3 cups milk and 1 cup cream), depending on how rich you want the ricotta to be.

3½ cups whole milk
½ cup heavy cream
½ teaspoon salt
2 tablespoons white vinegar
1 tablespoon lemon juice

1. In a 2-quart saucepan over medium-high heat, heat the milk, cream, and salt to 190 degrees. Remove the pot from the heat, add the vinegar and lemon juice, stir once, and set aside for 5 minutes.

2. Place a fine-mesh strainer over a large bowl. Line the strainer with a double layer of cheesecloth or a single layer of paper towels. Pour the curdled milk mixture into the strainer. Set aside for about an hour. It will get thicker the longer it sits to drain.

ricotta 11

2012 goals

2012 goals 5

I basked in the glory of not being required to bake anything on a schedule for about two weeks, and then I got bored. What can I say? I like to set goals.

The key is to find goals that push without demanding too much. I need enough structure to keep me accountable, but not so much that I feel resentful. I hope I’ve found that balance.

2012 goals 7

What I’ve decided to do is choose 24 dishes – 12 cooked and 12 baked – that have been marinating in the back of my brain for too long. These are recipes that I thought “YES!!! I want to make that, and as soon as possible”, when I first saw them, but then something has gotten in the way, time and again, sometimes for years. How many times am I going to think to myself that I should try making a dish at home before I just finally do it?

2012 goals 1

Not all of the recipes are difficult. Not all of them are even new to me; I’ve made versions of some of these dishes before, but haven’t found a recipe I think is The One. In some cases, I have specific recipes chosen; in others, only an ingredient or flavor.

I’ve assigned the dishes to months so I pace myself. (I’m not much of a procrastinator in projects like this; I would do the opposite and stress myself out by trying to finish them all by March.) And sometime, anytime, during that month, I’ll blog about those two recipes.

2012 goals 2

And that’s it. Two recipes per month, chosen by me, of dishes I’ve always wanted to make. How hard can this be?

Here’s the schedule:
January – asian lettuce wraps and black bean avocado brownies
February – ranch dressing and peanut butter butterscotch fudgy crisp rice sandwich bars
March – mozzarella and whole wheat chocolate chip cookies
April – dolmades and gougeres
May – mustard and focaccia
June – barbecued ribs and gelato
July – paella and honey ice cream
August – general tso’s chicken and creamsicle whoopie pies
September – tomato mozzarella tart with basil crust and pop-tarts
October – quinoa fritters and macarons
November – meatloaf and something chai-flavored
December – something with miso and gingerbread cookies

2012 goals 9

smoked salmon kale carbonara

salmon kale carbonara 7

When we were in Italy, we tried to eat whatever the local specialty was. That means that in the first few days when we were on the Mediterranean coast, and then the next couple of days on the Adriatic coast, we ate a lot of spaghetti ai frutti di mare – pasta with a bunch of different types of seafood, basically. We ate it three days in a row, and on one of those days, we also had risotto ai frutti di mare.

salmon kale carbonara 3

In Tuscany, we ate more red meat, and in Rome, every dinner included some version of pasta with fatty pork, whether carbonara, amatriciana, or gricia, the difference between them being whether the sauce includes eggs, onions and tomatoes, or nothing but meat and cheese, respectively. I remember enjoying the gricia and amatriciana, but the carbonara I got was overly sauced in a rich cream and wasn’t at all what I thought it should be.

salmon kale carbonara 4

Of course, I had no other traditional carbonara experiences to compare it to, and I still don’t. While I can’t guarantee that the creamy carbonara I had in Rome wasn’t authentic, I know for sure that this one isn’t. Instead of smoky pork, this recipe includes smoky fish, which, if you’re going to be unauthentic, is kind of a perfect way to do it. And while we’re at it, why not throw in some bitter greens? I probably shouldn’t say this out loud, but this carbonara was better than any of the similar pastas I had in Italy.

salmon kale carbonara 5

One year ago: Roasted Chicken Thighs with Root Vegetables
Two years ago: Lamb Stew
Three years ago: German Apple Pancake
Four years ago: Banana Cream Pie

Printer Friendly Recipe
Smoked Salmon Kale Carbonara (adapted from Cara’s Cravings and Gilt Taste)

Serves 4

12 ounces dried pasta
salt
1 tablespoon olive oil
½ small red onion, minced
2 clove of garlic, minced
¼ teaspoon crushed red pepper
2 large bunches of kale (about 12 ounces), thick stems removed, leaves cut into 1-2 inch pieces
2 eggs
2 ounces (1 cup) grated parmesan cheese
freshly ground black pepper
6 ounces smoked salmon, torn into small pieces
1 tablespoon lemon juice

1. Bring 4 quarts of water to a boil; add about 1 tablespoon of salt and the pasta. Cook, according to the package instructions, until just tender. Drain the pasta, reserving 1 cup of the cooking water.

2. Meanwhile, heat the oil in a large skillet over medium heat. Add the onion and a pinch of salt; cook, stirring occasionally, until it just starts to brown around the edges, about 5 minutes. Add the garlic and red pepper; cook, stirring constantly, until fragrant, about 30 seconds. Add the kale; cover the pan and cook until tender, 3-5 minutes, stirring about once a minute. Set aside.

3. Beat together the eggs, cheese, ¼ teaspoon salt, and a pinch of black pepper.

4. Transfer the cooked pasta back to the cooking pot; stir in the kale mixture and salmon. Stirring vigorously, add the egg mixture, then the lemon juice. Serve immediately.

salmon kale carbonara 6

rice noodle salad with peanut dressing

rice noodle peanut butter salad 5

I was going through a protein rut recently, where I seemed to be cooking with beans more weeknights than not. We try not to eat meat on weekdays, we take hard-boiled eggs to work everyday as snacks, and cheese has too much fat. So what does that leave me? I’d completely forgotten about soy.

rice noodle peanut butter salad 1

Think of tofu as a sponge that soaks up flavor. True, on its own, it tastes like water and has a jello-like squishiness, but when you sauté it and soak it in sauce, it’s hardly discernible from chicken, except cheaper and easier to work with. Plus, it won’t dry out like boneless skinless chicken breasts.

rice noodle peanut butter salad 3

This sauce has plenty of flavor for the tofu to absorb. Ginger, garlic, soy sauce, sugar, rice vinegar, and sesame oil, all mixed into creamy peanut butter, make for one heck of a combination. There are plenty of vegetables to provide brightness and crunch.  This was so good we had it two weeks in a row – alternating with dinners involving beans, of course.

rice noodle peanut butter salad 4

One year ago: Pasta Puttanesca
Two years ago: Asian-Style Chicken Noodle Soup
Three years ago: Pasta with Broccoli, Sausage, and Roasted Red Peppers

Printer Friendly Recipe
Rice Noodle Salad with Peanut Dressing (adapted from Cate’s World Kitchen)

My noodles stuck together in one big clump, so I chopped them up after cooking. I know that’s against standard noodle procedure, but in the end, it worked perfectly.

Serves 4-6

Having made this a bunch more times, I’ve found that it’s even better with the juice of a lime squeezed into the sauce.

2 teaspoons olive oil
1 pound tofu
salt
8 ounces rice noodles (linguine shape)
½ inch fresh ginger, peeled and finely chopped
4 cloves garlic, chopped
½ cup creamy peanut butter
3 tablespoons soy sauce
2 teaspoons brown sugar
3 tablespoons rice vinegar
1 tablespoon sesame oil
¼ cup warm water
chili garlic sauce to taste (optional)
1 medium cucumber, sliced into half moons
1 red bell pepper, cut into matchsticks
2 green onions (green parts only), sliced
¼ cup chopped fresh cilantro

1. Heat the oil in a medium nonstick skillet over medium-high heat. Slice the tofu lengthwise into ½-inch thick slabs; pat dry on a dishtowel. Transfer the tofu to the oil and cook, without moving, for 4-6 minutes, until browned on the bottom. Flip the tofu and brown the second side. Remove the tofu from the skillet and cut into bite-sized cubes.

2. Bring a large pot of water to a boil. Add a large pinch of salt and the rice noodles; cook until tender. (Check the package instructions for exact cooking times.) Drain and rinse the pasta.

3. In a large bowl, whisk together the peanut butter, soy sauce, ginger, garlic, sugar, rice vinegar, sesame oil, water, and chili garlic sauce until smooth. Fold the tofu into the sauce, then add the remaining ingredients, reserving some of the green onions and cilantro for a garnish.

rice noodle peanut butter salad 6