eggplant rollatini

The only thing I can remember cooking for the last several years that turned out so badly that not only did I refuse to eat it, but even Dave did, is grilled eggplant. I don’t remember what went wrong – cook time too long? cook temp too low? too high? salt, don’t salt, cut thicker cut thinner, I don’t know – but the resulting mush of eggplant goo is all too vivid still.

I hadn’t eaten eggplant since. I’ve seen recipes in which every other component sounded like something I would enjoy, but as soon as I spotted that nefarious eggplant in the ingredient list, I scrolled right on past. I knew I’d have to try eggplant again someday. But I wasn’t ready then.

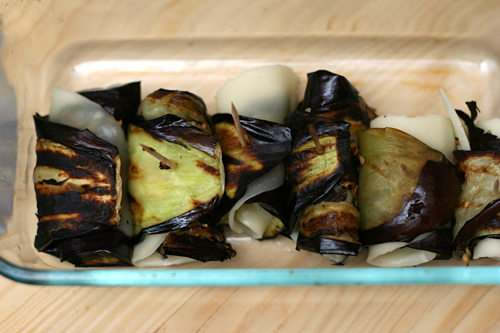
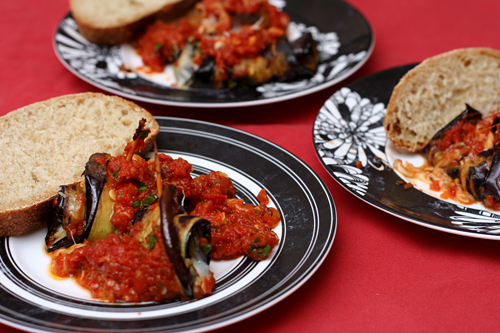
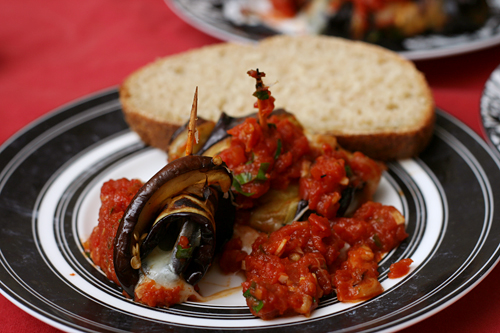
Now I am. Cheese and tomato sauce is never a bad way to ease into an ingredient. Each grilled slice of eggplant is rolled with a slice of cheese, then topped with a quick marinara sauce and heated until the flavors meld and the cheese softens. For me, they were too messy to serve as a hand-held hors d’œuvre, but instead made for a very nice plated first course. That’s right, a recipe with eggplant was very nice. I’m one step closer toward liking eggplant again.

One year ago: Pasta with Baked Ricotta and Sweet Tomato Sauce
Two years ago: Vegetarian Chili
Three years ago: Salmon Pesto Pasta

Printer Friendly Recipe
Eggplant Rollatini (adapted from Cara’s Cravings)

I just stick a pair of kitchen shears into the can of tomatoes and chop away a bit. It’s coarser than a puree, but still just fine for sauce. If you want it smoother, puree the tomatoes in the food processor.

We grilled the eggplant; I haven’t personally tried the roasting technique recommended in the original Gourmet recipe.

4 small Italian eggplants or 2 regular eggplants
Kosher salt
1 tablespoon olive oil
2 garlic cloves, finely chopped
¼ teaspoon dried hot red-pepper flakes
1 (15-ounce) can diced tomatoes, chopped, undrained
½ teaspoon salt
¼ cup coarsely chopped fresh basil
16 thin slices provolone cheese
½ ounce (¼ cup) finely grated parmesan cheese

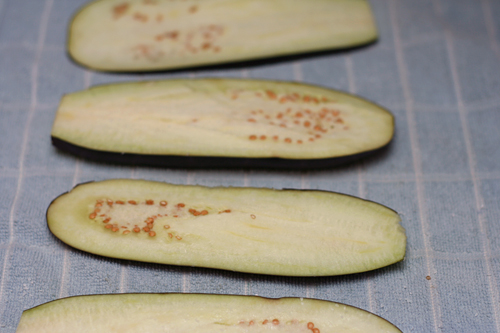
1. Peel 2 opposite long sides of each eggplant. Cut each eggplant lengthwise (to form long skinny ovals) into 1/4-inch slices. Sprinkle both sides of the slices with kosher salt; set aside for 30 minutes. Heat the oven to 425 degrees.

2. Heat the oil in a medium skillet over medium heat until it flows like water when the pan is tilted; add the garlic and red pepper flakes and cook, stirring constantly, until fragrant, about 30 seconds. Add the tomatoes and ½ teaspoon salt; cook, stirring occasionally, until thickened, 8-12 minutes. Remove from heat; stir in the basil.

3. Prepare a grill for direct-heat cooking over moderate heat (or line a large baking sheet with foil and heat the oven to 450 degrees). Brush any remaining salt crystals from the eggplant; pat the slices dry and spray both sides with nonstick spray. Grill the eggplant, turning once, until tender, about 4 minutes total (or bake for 20 minutes, turning once). Transfer to a work surface.

4. Top each slice of eggplant with a slice of cheese; starting at a short end, roll the eggplant and cheese into a spiral and seal with a toothpick. Repeat with the remaining eggplant and cheese. Arrange the eggplant spirals in a shallow baking pan and top with the sauce; bake until the cheese is melted, about 10 minutes.
butternut squash and pancetta phyllo cigars

I’m always a little disappointed that, living 300 miles away from my family and half a country away from Dave’s, we’ll always be traveling for Thanksgiving and I’ll never get to host. So when the grocery store offered me a free turkey just for doing my normal shopping, I got to thinking that maybe instead of donating it to a food bank or cooking it to shred for leftovers, I could make a full turkey dinner just for me and Dave. I had a grand ol’ time choosing recipes, and then I went through each and tweaked them until they hardly resembled the originals.

This one was originally a pizza, but I wanted cute little individual servings. Scallions didn’t seem like a good match for the squash, and when I thought on it more, neither did the crunch of red onions, but sweet caramelized onions sounded good.  Then I needed something tart to counter the sweetness, and goat cheese was the answer. I exchanged the bacon for pancetta because pancetta’s hint of fall spice would compliment the squash.

Obviously, the main reason I make turkey dinners just for the heck of it is because it’s fun. But it doesn’t hurt to get practice, because someday, one way or another, I know I will get a chance to host. And practice is important when you’re talking about cooking a huge finicky chunk of meat, and, speaking of finicky, how about phyllo. Phyllo takes practice, but, due to its association with lots of butter and with a delicious squash goat cheese pancetta filling, it is never bad; it is always very, very good.

One year ago: Sopaipillas, Cranberry Nut Dessert, Mashed Potatoes with Root Vegetables, Pumpkin Yeast Bread
Two years ago: Chocolate Chip Cookie comparison, Lime Meltaways, Chanterelle Salad with Speck and Poached Eggs (ugh, I’m trying not to dwell on the days when I was able to buy ingredients like chanterelles and speck – or when I had time to post every day for a month, for that matter), European-Style Hearth Bread

Printer Friendly Recipe
Butternut Squash and Pancetta Phyllo Cigars (adapted from Gourmet via epicurious)

Makes about 16 appetizers

6 ounces pancetta, diced into ¼-inch cubes
1 onion, chopped fine
1 small butternut squash, peeled, diced into ½-inch cubes
1 tablespoon fresh rosemary leaves, minced
4 ounces goat cheese
8 ounces phyllo, defrosted
6 tablespoons unsalted butter, melted
2 ounces (1 cup) parmesan, grated

1. Heat the oven to 425 degrees. Line a baking sheet with parchment paper or a silicone mat.

2. In a 12-inch nonstick skillet over medium heat, cook the pancetta until crisp, about 8 minutes. Using a slotted spoon, transfer the pancetta to a large bowl. Drain the fat in the pan into a small bowl. Transfer 1 tablespoon of fat back to the pan and add the onions. Cook, stirring occasionally, until the onions are lightly browned around their edges, about 8 minutes. Transfer the onions to the bowl with the pancetta. Add another 1 tablespoon reserved pancetta fat to the pan; add the squash. Cover the pan and cook, stirring occasionally, until the squash is browned and tender, about 15 minutes. Use a potato masher to lightly mash the squash, then transfer it to the bowl with the onions and pancetta. Add the rosemary and goat cheese to the bowl; stir to combine.

3. Unroll the phyllo and place it between two damp dishtowels. Lightly spray a second baking sheet with nonstick spray. Lay a sheet of phyllo on the oiled pan; brush lightly with butter and sprinkle with parmesan. Fold the phyllo in half parallel to the short end to form a 7-by 9-inch rectangle; spray with nonstick spray. Scoop 2 generous tablespoons of the squash filling onto the phyllo; spread the filling about 1 inch from the folded edge, leaving ½-inch free on either end. Roll the long end of the phyllo over the filling; fold the edges in; continue rolling to form a cigar shape. Transfer the cigar to the lined baking sheet. Repeat with the remaining phyllo and filling, including spraying the baking pan work surface with nonstick spray, spacing the cigars about 1-inch apart on the parchment-lined baking sheet.

4. Bake until golden brown and crisp, about 15 minutes. Let cool about 15 minutes before serving.

prosciutto-wrapped, neufchatel-stuffed jalapenos

I think it’s about time to pack up my garden for the year. The last month has felt like borrowed time. Homegrown tomatoes on Halloween? Well, yes; in fact, the last few months have been the most successful in my garden because the grasshoppers who I’d been sharing my tomatoes with all summer have flown the coop. But our night lows are starting to drop to near freezing, so I’ll be lucky to get some nice red tomatoes for my burgers tonight.

It’s no problem to use up tomatoes. If I found myself with more than I’d expected, I just made some sauce and froze it. But what easy solution is there for at least ten jalapenos per week? Jalapenos are rarely a primary flavor, and even a good batch of pico de gallo only uses a couple.

Bacon-wrapped cream cheese-stuffed jalapenos certainly use up the jalapeno bounty, but I can’t be eating a plate of cream cheese and bacon every week, even if there are vegetables hidden under all that fattening flavor. But is the fat necessary?

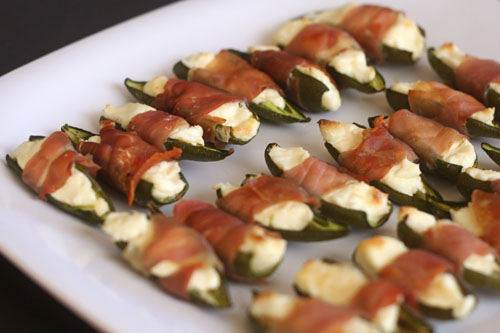
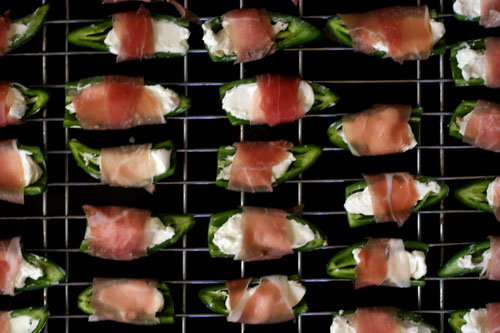
It turns out it isn’t. Well, some of it is, but by replacing the bacon with prosciutto and the cream cheese with (American, not French) Neufchâtel, these snacks lose a lot of fat but very little of the flavor. In fact, I preferred the prosciutto to the bacon; it’s easier to work with and bakes up crisper. I’m already looking forward to next year’s gardening season – and not just for the tomatoes this time!

One year ago: Pork Chops Loco Moco, Pumpkin Mushroom Soup, Cranberry Orange Scones, Buttermilk Scones, Pumpkin Scones
Two years ago: Chickpea and Butternut Squash Salad, Brown Sugar Apple Cheesecake, Gratin Dauphinois

Prosciutto-Wrapped, Neufchâtel-Stuffed Jalapenos

Makes 24 appetizers

If you keep gloves in the kitchen, use them when handling jalapenos.

12 jalapenos
4 ounces Neufchâtel
6 ounces prosciutto, sliced lengthwise into 24 strips

1. Adjust a rack to the middle position and heat the oven to 400 degrees. Place an oven-safe baking rack on a baking sheet.

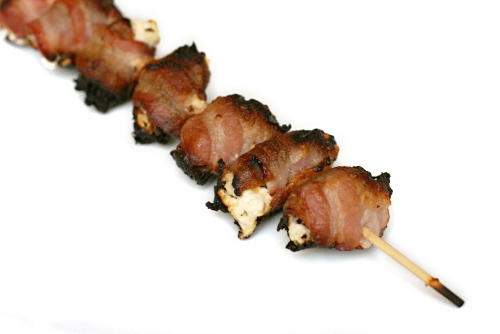
2. Cut the stems off the jalapenos; slice them in half lengthwise and use a spoon to scoop out the seeds. Divide the cheese evenly between the jalapenos, then wrap strips of prosciutto around the jalapenos. Arrange the stuffed jalapenos on the prepared baking pan on the rack.

3. Bake for 20 minutes, until the cheese is browned in places and the prosciutto is crisp. Cool slightly before serving.

cheddar shortbread

You guys know I’m a major dough-eater, right? Okay, well, if not, there you go – cookie dough, cake batter, brownie batter, any of that – major weakness. As embarrassing as this story is, I will tell you that I have actually reached into the oven to take one more spoonful of pound cake batter from the pan. (Pound cake batter is even better than chocolate chip cookie dough, I’m not even kidding.)

So I was a little worried about these after I mixed up the dough. It…well, frankly, it wasn’t very good. It didn’t have enough flavor. But I don’t have a lot of experience baking savory cookies, so I wasn’t sure how it was supposed to taste.

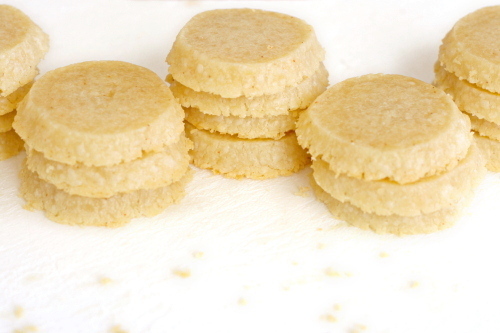
After baking, they were pretty good actually. My students must be getting braver, because I got more feedback on this one – would be good with garlic, herbs, and, um, served with wine. (“I mean, I don’t know if you drink wine”, he said. I did not respond with, “Do I ever! But only on weekends.”)

In the end, I think they mostly taste like Cheez-Its. Which is an okay thing, I think. But hey, garlic, thyme, and a bit of salt couldn’t hurt. And what isn’t better served with wine? Just wait until they’re baked before you start eating them. (Oh, you do that with all cookies? Well, aren’t you the picture of self-restraint.)

One year ago: Fresh Strawberry Scones
Two years ago: Caesar Salad

Printer Friendly Recipe
Cheddar Shortbread (adapted from Whisk: a food blog)

Makes about 30 cookies

Despite the advice of my students, I’m not sure I’d add garlic, which sounds like it could easily become overpowering. I could go either way on herbs, and I definitely think some salt (maybe ¼ teaspoon to start) would be a nice addition.

I’m not sure I baked these this long; I think it’s more likely that I baked them about 10 minutes, just until they no longer looked wet on top and they were slightly browned around the edges.

6 tablespoons unsalted butter, softened
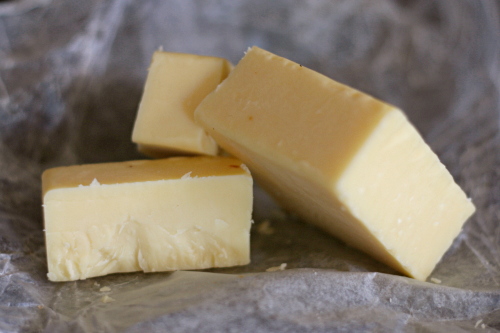
6 ounces (about 1 1/2 cups) cheddar cheese, shredded
1 cup (4.8 ounces) all-purpose flour
½ teaspoon cayenne pepper

1. In a food processor, mix all of the ingredients with the metal blade until the dough forms a ball.

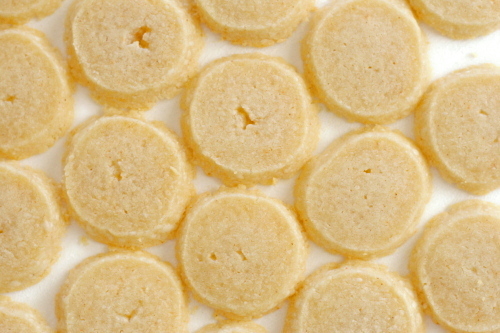
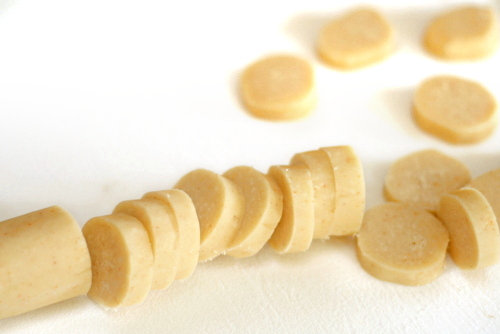
2. Roll the dough into a log. (You can freeze the logs by wrapping them in plastic wrap and put them in a freezer bag. Thaw overnight in the refrigerator before baking.) Slice into ¼-inch rounds and place on baking sheet. Chill for 1 hour in the refrigerator or 30 minutes in the freezer.

3. Meanwhile, preheat the oven to 350˚F. Bake for 17-20 minutes, or until light brown. Cool completely on a wire rack.

bacon-wrapped goat-cheese-and-almond-stuffed dates

Stuffed dates are part of one my favorite days recently – one of those that, for whatever reason, just ended up being particularly awesome. Some great friends visited us in Philadelphia shortly before we moved. After walking around the famous historical sites and before seeing one of my favorite musicians play; before walking up the famous steps to the art museum and much before eating cheesesteaks at 2am, we ate dinner at Alma de Cuba.

While we all loved our entrees, our drinks, and the ceviche, the star of the show was the bacon-wrapped almond-stuffed dates. Is transcendent too over-the-top a description? It seems appropriate for something that caused each of us to close our eyes and exclaim with every bite.

I had kind of assumed that my bacon-wrapped almond-stuffed date days were behind me when we moved from Philadelphia. I don’t know why it never occurred to me that I could make them myself. I certainly never thought it would be so easy.

And just as good! I mean, it’s missing the friends-visiting, concert-going, downtown-exploring mystique, but it retains other important things – salty bacon, sweet dates, tangy goat cheese, crunchy almonds. And now it isn’t a once in a lifetime treat, like those standout days are.

One year ago: Honey Yogurt Dip
Two years ago: Salmon Cakes with Hashed Brussels Sprouts and Flaky Biscuits

Printer Friendly Recipe
Bacon-Wrapped Goat-Cheese-and-Almond-Stuffed Dates (rewritten from Beantown Baker)

Makes 32 appetizers

32 dates, pitted
4 ounces goat cheese
32 almonds (about ⅓ cup)
16 slices (about 1 pound) bacon, halved lengthwise

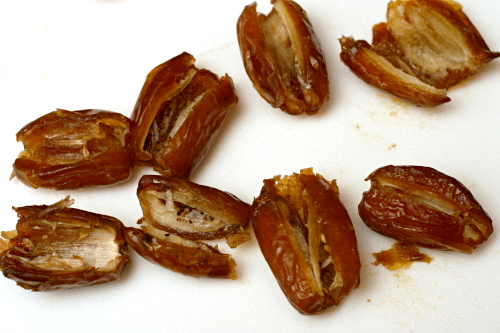
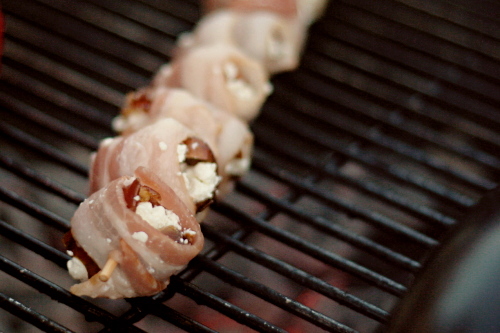
1. With a paring knife, cut through one long edge of each date; unfold the dates to open them up. Use your fingers to stuff both sides of the date with goat cheese. Push an almond into the goat cheese; close up the dates. Wrap each stuffed date with a piece of bacon and secure with a toothpick or skewer.

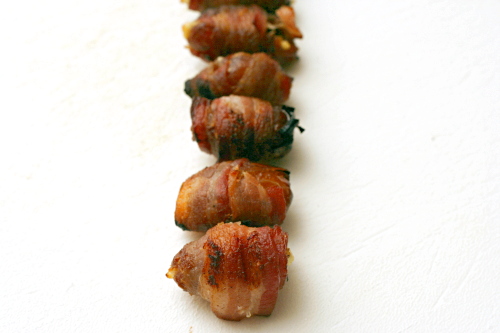
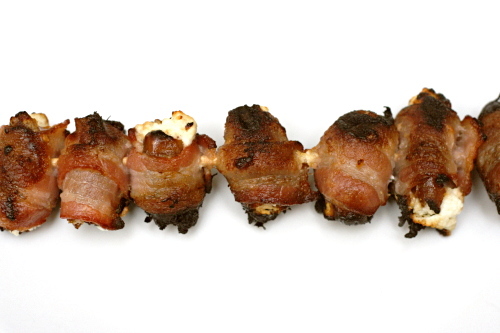
2. If you’re broiling the dates, put them on a rimmed baking sheet. Grill the dates over medium-hot coals or broil them 5 inches from the heating unit until the bacon is cooked through, about 5 minutes per side. Serve immediately or at room temperature.

roasted garlic balsamic white bean dip

No matter how hard I try, I can’t get excited about the Thanksgiving feast. Turkey, stuffing, cranberries – I don’t know, they’re all just fine, but Thanksgiving isn’t the eat-until-you-pop day for me that it is for a lot of people. I do love the idea of a free for all food day though. I also love football, so the Super Bowl tends to be my big overeating event.

But even a day of unapologetic binging requires some vegetables. Besides the ubiquitous salsa and guacamole, that is. Since I was already treating myself, I suppose I could have made a delicious mayonnaise and sour cream based dip, but I wanted to leave plenty of belly space for the brownies, meatball sliders, and that guacamole, so I stuck to a light bean dip for the vegetables.

The problem with bean dip is that it’s always a battle between how healthy it is and how much flavor it has. If you don’t want to add cream cheese or butter or nut butters, it can be difficult to find ingredients to bump up the flavor.

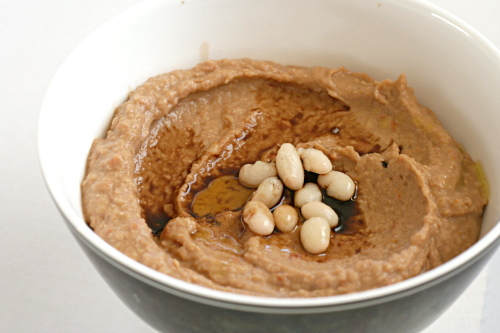
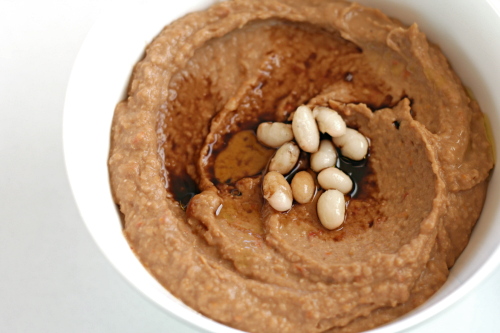
Three strong flavors help make this white bean dip interesting – roasted garlic, sun-dried tomatoes, and balsamic vinegar. The result? A bean dip worth filling up on.

One year ago: Vegetarian Chili
Two years ago: Salmon Pesto Pasta

Printer Friendly Recipe
Roasted Garlic White Bean Balsamic Dip (adapted substantially from Bon Appetit via epicurious)

1 head of garlic, outer papery skin removed
½ teaspoon extra virgin olive oil
4 sun-dried tomatoes packed in oil
¼ teaspoon kosher salt
1 (15-ounce) can white beans (cannellini, navy, great northern), drained and rinsed
pinch black pepper
1 tablespoon balsamic vinegar plus extra for drizzling
1 tablespoon oil from jar of sun-dried tomatoes

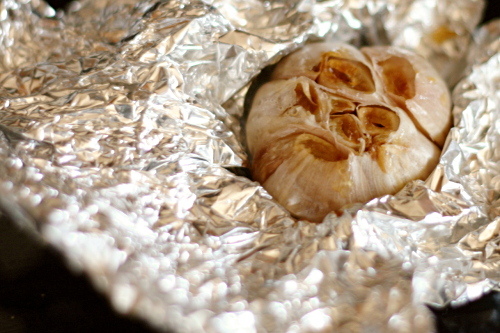
1. Adjust an oven rack to the middle position and heat the oven to 400ºF. Cut ¼-inch off of the top of the bulb of garlic. Place the bulb in an 8-inch square of foil and drizzle with ½ teaspoon of the oil. Wrap the garlic in the foil and roast until soft, about 40 minutes.

2. When the garlic is cool enough to handle, squeeze the cloves from their peels and put them in the bowl of a food processor. Add the tomatoes and salt; process until smooth. Add the beans and pepper and continue processing. With the machine running, pour in the balsamic vinegar and sun-dried tomato oil. Adjust the seasonings if necessary, and serve, drizzling with more balsamic vinegar.

sun-dried tomato jam

Copy of IMG_0278

Crusty bread, cheese, cured sausage, fruit. It’s a seriously underestimated meal. Yes, a meal. Not a particularly healthy one, I admit, but it does cover all of the nutritional bases, as long as you make an extra effort to eat a lot of the fruit. It doesn’t hurt to use 100% whole wheat bread either.

Copy of IMG_0255

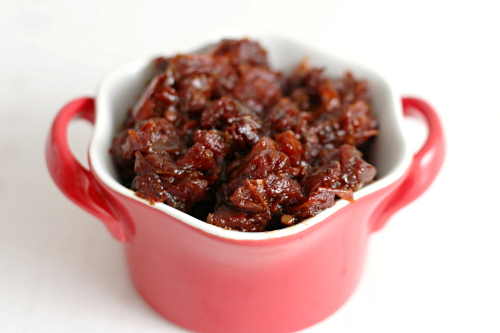
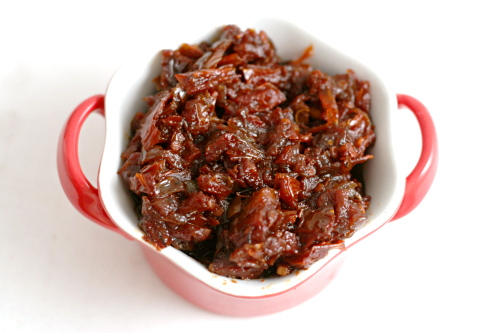
And if you add a bit of tomato jam, you’ve just given yourself one more healthy-ish vegetably option. (“Healthy-ish” and “vegetably” really is how I think about nutrition. It seems to sorta kinda work.) The jam is just sautéed and then stewed vegetables.

Copy of IMG_0266

The result is a perfect counterpart for creamy or sharp or tangy cheese (or one of each!), salty salami, and fresh berries or grapes. The jam is both sweet and savory, fantastic spread on a slice of baguette by itself or combined with cheese. Definitely a great addition to one of my favorite somewhat indulgent meals.  Or maybe you’re a normal person and would serve this as an appetizer?  I guess that would work too.

Copy of IMG_0288

Printer Friendly Recipe
Sun-dried Tomato Jam
(adapted from Everyday Italian via Confections of a Foodie Bride)

The original recipe is for crostini with goat cheese, but I thought the jam was a great addition to a cheese plate on its own.

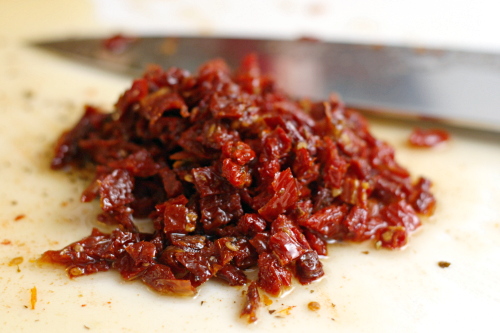
If you can find pre-sliced dried tomatoes, your life will be much easier.  Chopping greasy, slippery tomatoes is the hardest part of this recipe.

Makes about 1½ cups

8oz jar sun-dried tomatoes packed in oil, drained and chopped, oil reserved
1 tablespoon olive oil
½ onion, thinly sliced
1 clove garlic, minced
2 tablespoon sugar
¼ cup red wine vinegar
1 cup water
½ cup chicken broth
1 teaspoon chopped fresh thyme leaves
½ teaspoon salt
½ teaspoon freshly ground black pepper

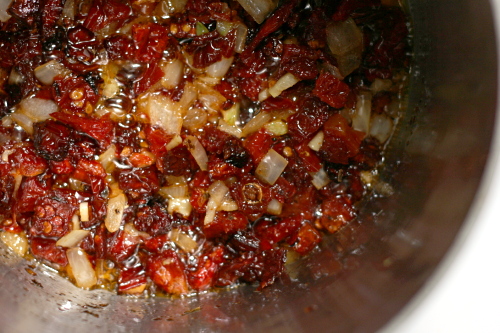
1. Place a medium saucepan over medium heat. Add the chopped sun-dried tomatoes, 1 tablespoon of the reserved sun-dried tomato oil, olive oil, onion, and garlic. Stir and cook until the onions are soft and beginning to brown at the edges, about 5 to 7 minutes.

2. Add the sugar, vinegar, water, chicken broth, thyme, salt, and pepper. Bring the liquid to a boil, reduce the heat, and simmer, covered, for 30 minutes. Remove the cover and continue simmering until most of the liquid is reduced and the mixture is the consistency of jam, about 5 to 10 more minutes. Remove from the heat, let cool slightly, and serve.

Copy of IMG_0280

stuffed mushrooms with sun-dried tomatoes

Copy of IMG_9931

I’ve started my annual football season tradition of planning to eat snacks on Sundays instead of a full dinner, which will invariably last two weeks before I forget all about it and go back to planning a meal and then whining that “I don’t feel like cooking, I just wanna relax!” My life is so hard.

Copy of IMG_9913

But it can be tricky to come up with snacks that are really good but not so filling that I can’t graze on them for a while. (Translation: I’d like to be eating cheese and bread and sausage and mayonnaise-based dips and chips and cookies and, you know, tasty delicious things like that. But I also want my pants to fit.)

Copy of IMG_9924

Stuffed mushrooms are a good example of something that seems like it should be fairly healthy, but on closer inspection, is often full of cheese, and not just any cheese, but that most-delicious and fattening of examples – cream cheese.

Copy of IMG_9919

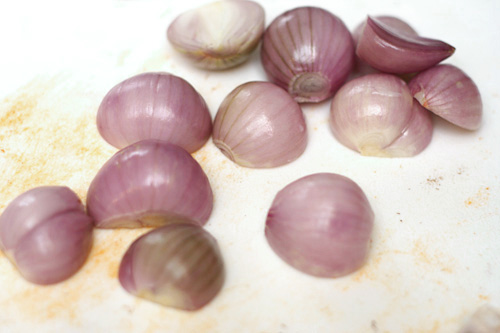
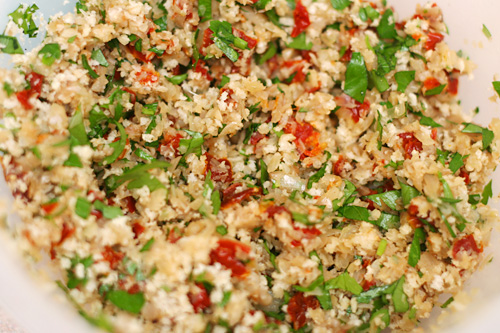
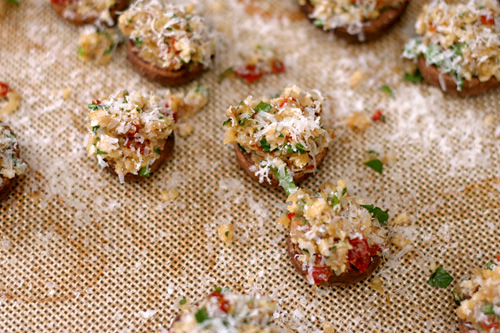
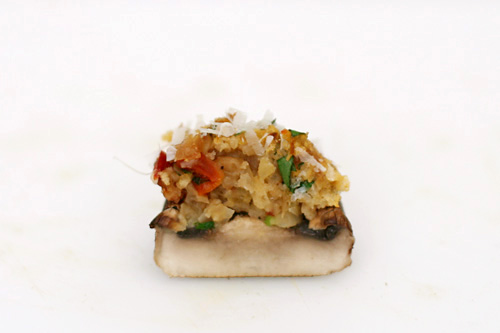
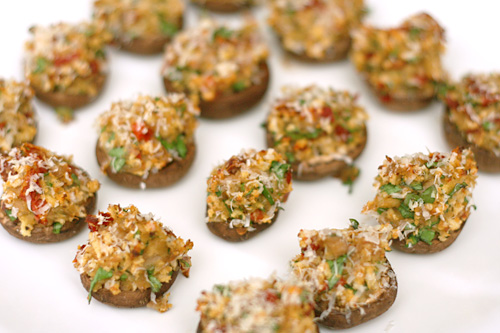
Fortunately, this recipe keeps it light by skipping the cheese, flavoring the filling with just shallots, parsley, and sun-dried tomatoes, with bread crumbs used for bulk and just a sprinkle of parmesan grated on top for an accent.

Copy of IMG_9922

Even though it was just Dave and I watching football together on a Sunday afternoon, and we had a few other snacks, I made the full recipe. But it turns out these stuffed mushrooms aren’t the type of snack that you graze on throughout an afternoon, because they were so darn good that we snarfed them up immediately. And since they’re not very filling, you can eat a bunch of them and still have plenty of room for some hummus!

Copy of IMG_9929

One year ago: Roasted Carrots

Printer Friendly Recipe
Mushrooms Stuffed with Sun-Dried Tomatoes
(adapted from Gourmet via Smitten Kitchen)

The only minor change I’ll make to this recipe, to bring it from really damn good to perfect, is to sprinkle the inside of the mushrooms with a bit of salt before roasting them the first time. Not so much to eliminate more liquid, but just to season them. (Even Dave agreed with this, and he isn’t as salt-crazy as I am.)

Makes 18

½ ounce sun-dried tomatoes (about 5)
2 tablespoons olive oil
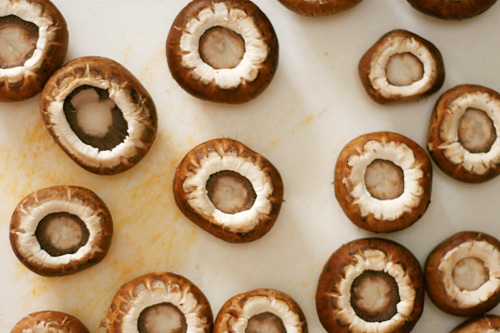
18 white mushrooms, caps reserved, stems pulled out and chopped fine
½ cup finely chopped shallots
2 garlic cloves, minced
⅓ cup fine dry bread crumbs
1 large egg yolk, beaten lightly
¼ cup fresh parsley leaves, washed well, spun dry, and minced
½ teaspoon dried basil, crumbled
2 tablespoons freshly grated Parmesan

1. Preheat oven to 400°F.

2. If your tomatoes are packed in oil, rinse them before chopping them finely. If they’re not packed in oil, soak them in a small bowl in hot water to cover for 5 minutes. Reserving 1 tablespoon soaking liquid, drain tomatoes well and chop fine.

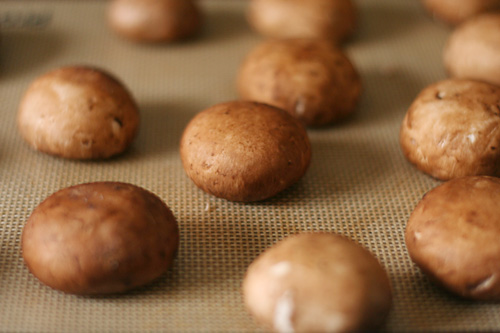
3. Lay mushroom caps, stems removed, face down on baking sheet either lightly sprayed with cooking spray or lined with parchment paper. Bake them approximately 10 minutes, or until their liquid puddles underneath. Remove from the oven. Carefully pour off liquid that has gathered in the bottom of the pan, and then again, carefully, turn mushroom caps over so they are ready to be filled.

4. In a small skillet heat oil over moderate heat until hot but not smoking and cook chopped mushrooms stems, shallots and garlic, stirring until shallots are softened. In a bowl stir together mushrooms mixture, bread crumbs, tomatoes, reserved soaking liquid, yolk, parsley, basil, and salt and pepper to taste. Mound stuffing in reserved mushroom caps and arrange caps in a lightly greased shallow baking dish, or the same parchment-lined pan you’ve roasted your mushrooms in. Sprinkle mushrooms with Parmesan and bake in middle of oven 15 minutes.

Copy of IMG_9937

goat cheese, pesto, and sun-dried tomato terrine

Copy of IMG_9428

Dave is, it should come as no surprise to me by now, quite a good match for me. I used to wish that he was as excited about food as I was. I’d ask him for meal ideas, I’d demand feedback after trying a new recipe, and I wished he’d cook with me. Invariably, his replies were, respectively, “salmon pesto pasta”, “good”, and “sure, someday.”

Which, actually – is fine by me. Do I really need someone picking apart each dish I make? Or adding even more ideas to an already overstuffed recipes-to-try folder? Or taking up valuable cooking opportunities?

Copy of IMG_9404

No, his uncritical, always-appreciative, open-minded attitude toward food is perfect. And when he does get excited by a dish, I know to take note, like when he came home from a work party raving about a goat cheese pesto spread someone had brought.

Copy of IMG_9406

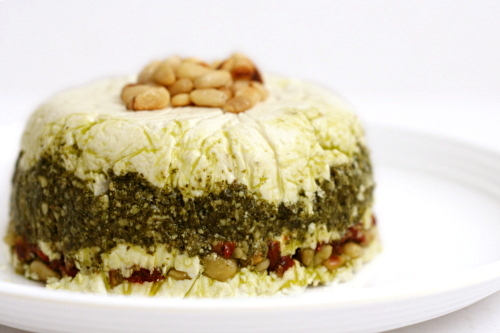
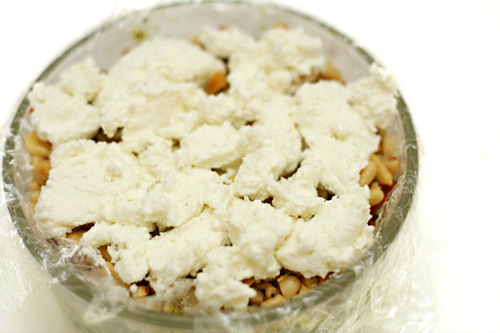
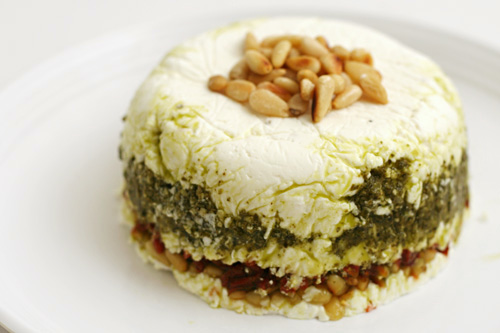
What you do is line a bowl with plastic wrap, then spread some softened goat cheese in the bottom. You’re supposed to make the goat cheese spreadable by adding cream, but I used milk and it worked just fine. Over the first layer of goat cheese, you add some pesto, then more goat cheese, then minced sun-dried tomatoes and chopped toasted pine nuts, then more goat cheese. After chilling for a few hours, it inverts nicely, and you pull the plastic wrap off to reveal nice layers.

Copy of IMG_9411

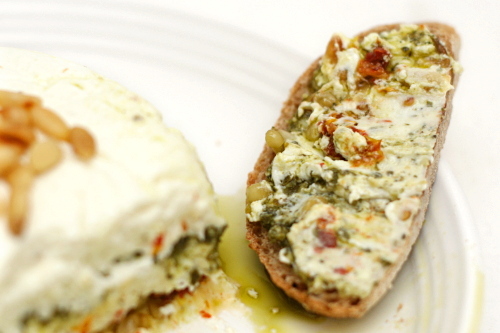
Wow, what a great combination of ingredients. The sweetness of the sun-dried tomatoes balances the tart goat cheese, and pesto is always delicious.  I served it with a whole wheat baguette, and we ate, um, a lot of it. It was completely irresistible.

Copy of IMG_9433

One year ago: Lavash Crackers and Pesto Goat Cheese Spread (Hi! I like pesto! And goat cheese!)

Printer Friendly Recipe
Goat Cheese, Pesto, and Sun-Dried Tomato Terrine
(from Fine Cooking)

Dave did tell me, too late, that his coworker had advised that one of the tricks to making the terrine look neat was to not overfill the intervening layers. That would have been nice to know before I spooned in a bunch of extra pesto.

My personal preference would have been for one more tomato. Dave didn’t agree.

10 ounces goat cheese
¼ to ½ cup heavy cream
Kosher salt and freshly ground black pepper
3 tablespoons basil pesto (homemade or store-bought)
5 oil-packed sun-dried tomatoes, drained and finely chopped
¼ cup pine nuts, toasted and coarsely chopped
Extra-virgin olive oil for drizzling

1. Line the inside of a 2-cup sharply sloping bowl (about 4 inches across the top) with plastic; let the ends extend over the sides a few inches. In a mixing bowl, mash the goat cheese and ¼ cup of the cream with a fork and season with ¼ teaspoon salt and a few grinds of pepper; add more cream if the cheese hasn’t softened.

2. Spoon about one-third of the cheese into the lined bowl and pack it into an even layer. Spread the pesto almost completely to the sides of the first layer of cheese. Top with another third of the cheese, the sun-dried tomatoes, and all but ½ tablespoon of the pine nuts. Top with the remaining cheese. Pack down, fold the plastic over, and refrigerate for at least 30 minutes.

3. Half an hour before serving, take the bowl out of the refrigerator. Pull on the edges of the plastic to loosen the terrine from the bowl. Invert the terrine onto a plate, drizzle with a little olive oil, and let sit for ½ hour to warm up. Sprinkle with the remaining pine nuts, season liberally with pepper, and serve.

Copy of IMG_9427

puff pastry dough

Copy of IMG_6106

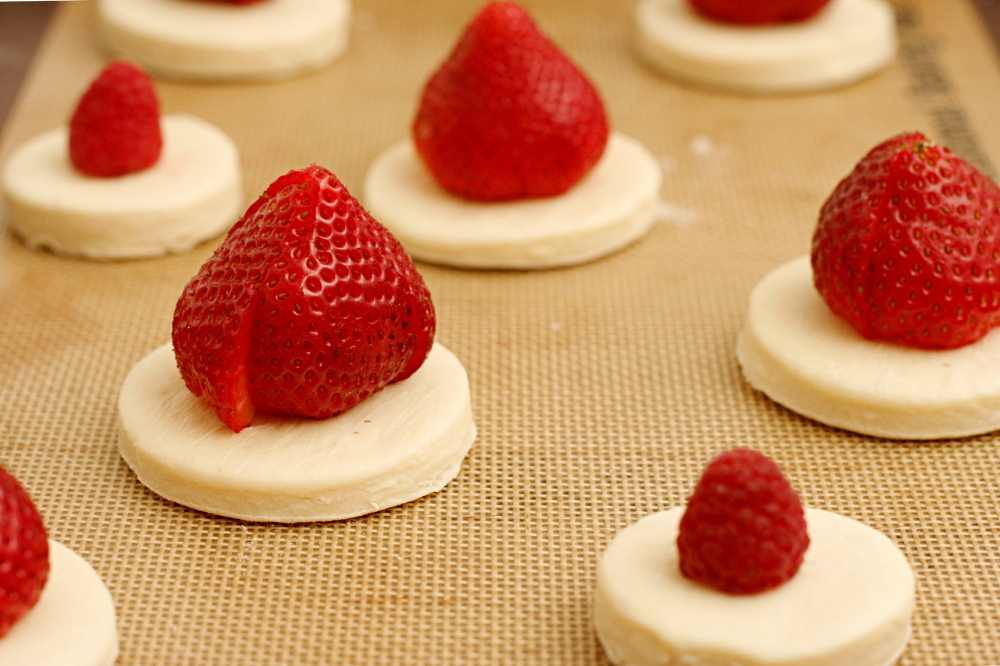
Remember when I made these? I was like, they’re so easy! Just cut out some puff pastry rounds, top with fruit and sugar, and bake until beautiful and buttery and perfect!

Copy of IMG_5968

Um. “Easy” isn’t really my thing when it comes to baking. I am determined to overcomplicate things.

Copy of IMG_5977

So I made my own puff pastry dough. I have tried the Pepperidge Farm stuff, years ago, and I don’t remember being particularly impressed. Plus, bleah, hydrogenated fat. I didn’t know where I could buy all-butter puff pastry dough and figured it would be easier to make my own than search for it.

Copy of IMG_5978

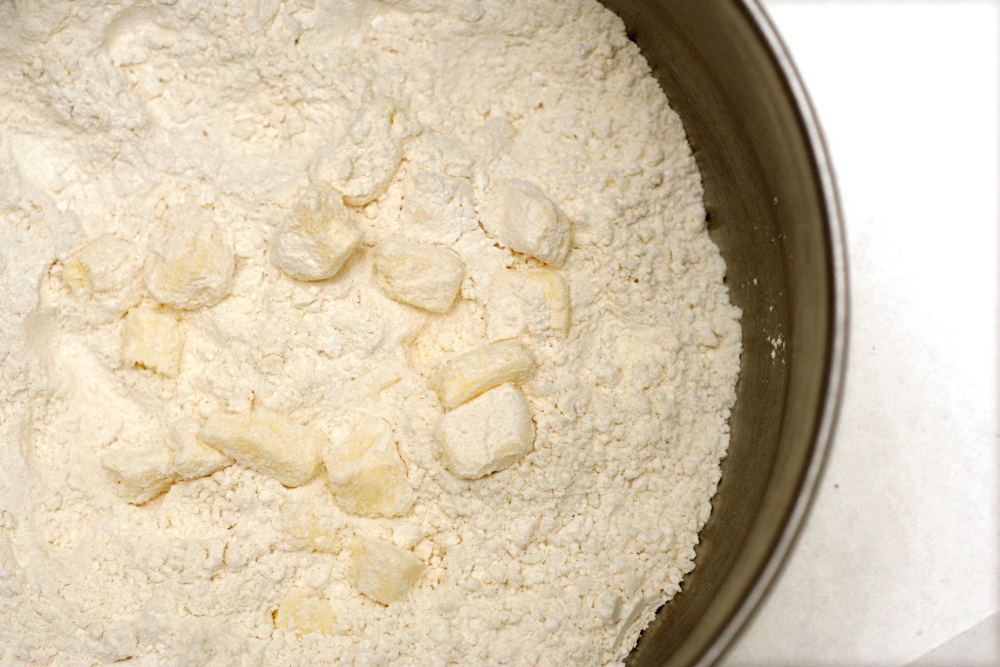
As it turns out, puff pastry isn’t all that hard to make. The first steps are similar to pie dough. You mix flour, salt, and sugar, then cut in butter. Then, because pie dough isn’t fattening enough on its own, you work a square of butter into the dough.

Copy of IMG_5981

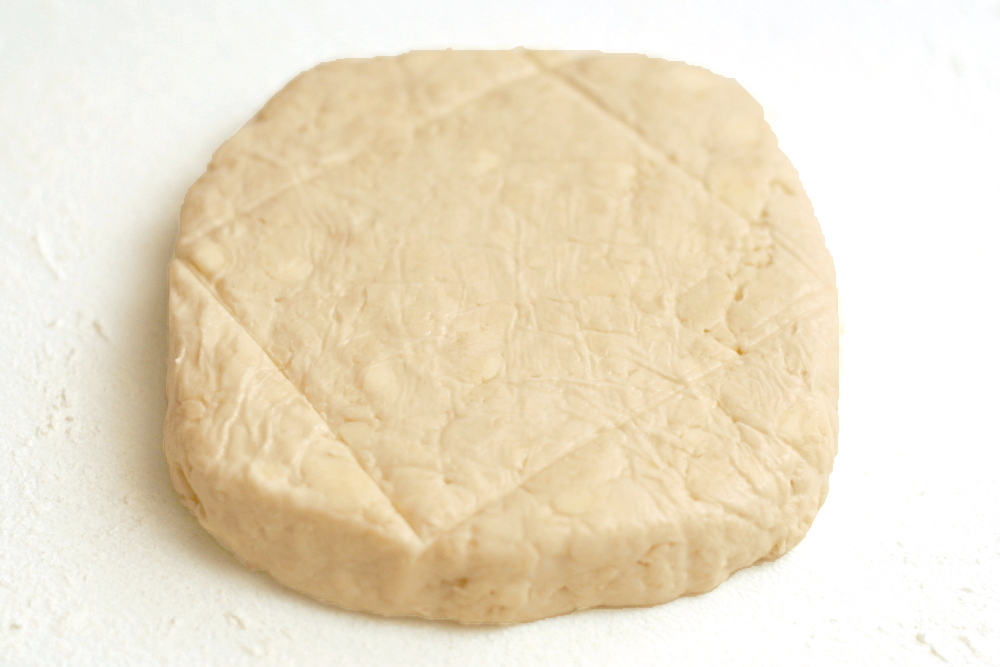
The directions for this are a bit tricky, and I think I would have had difficulty without a series of photos to follow. What you do is roll out the dough into a square that’s about twice the size of your square of butter. You place the butter square in the middle of the dough square, with the corners of the butter in the middle of the sides of the dough. (Uh…did you get that?)

Copy of IMG_5983

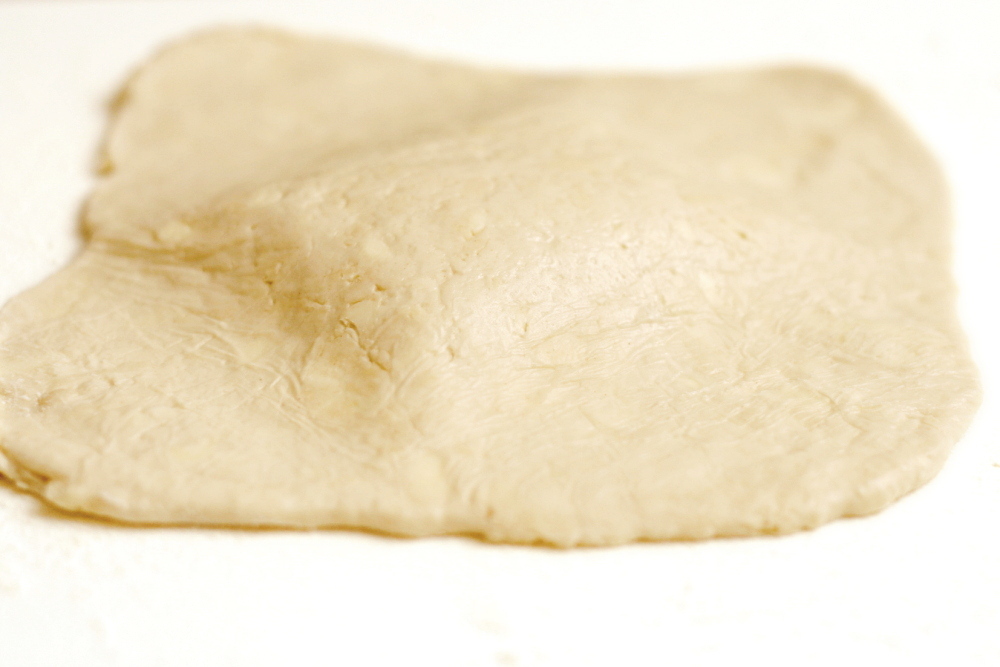
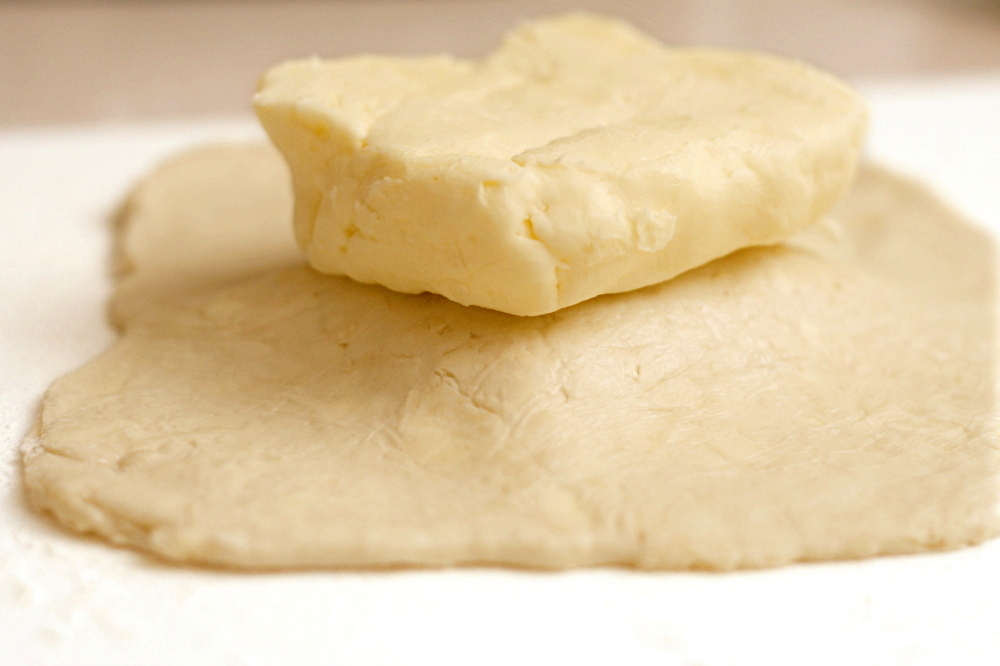
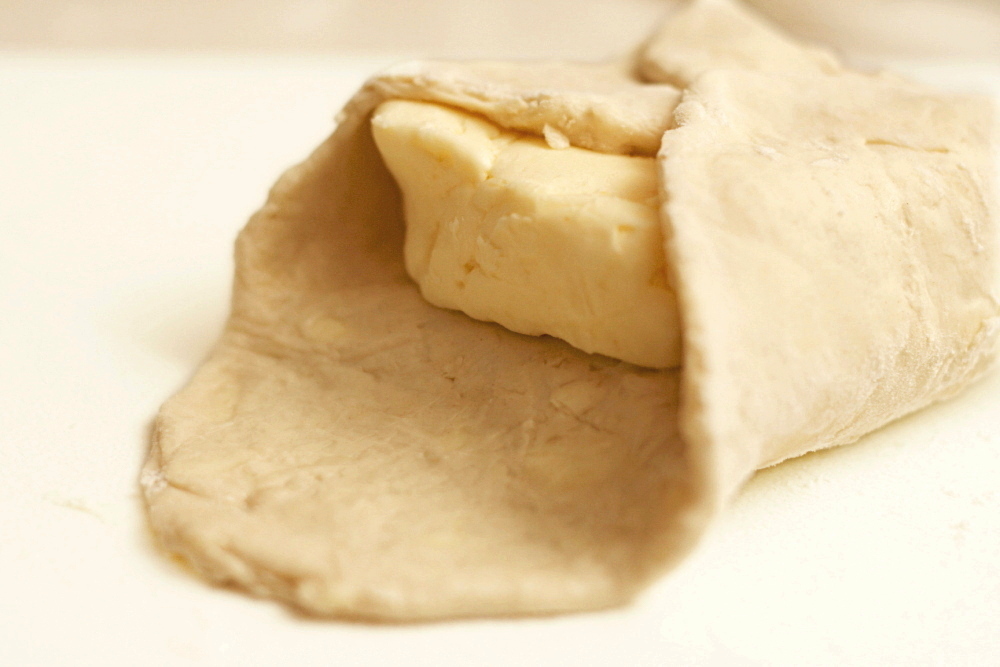
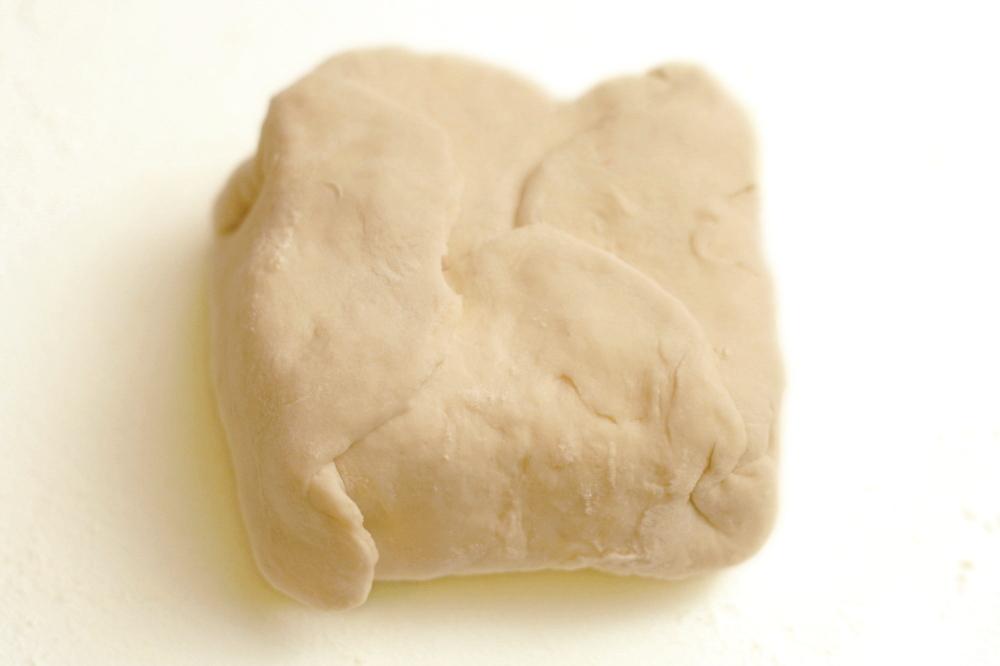
Then take the butter off and roll just the corners of the dough where the butter didn’t overlap. (Uh…did you get that?) You’re creating four flaps from the corners, but the middle, where the butter was, stays thicker. Once you’ve rolled out the flaps, put the butter back in the center of the dough and fold the flaps over. Now you have a nice little packet.

Copy of IMG_5984

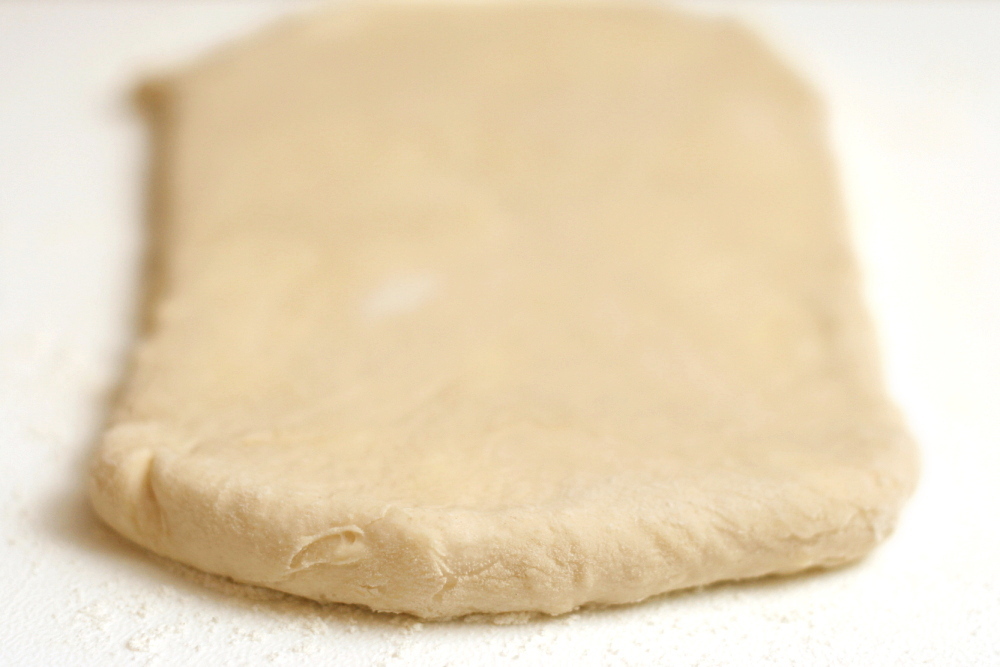
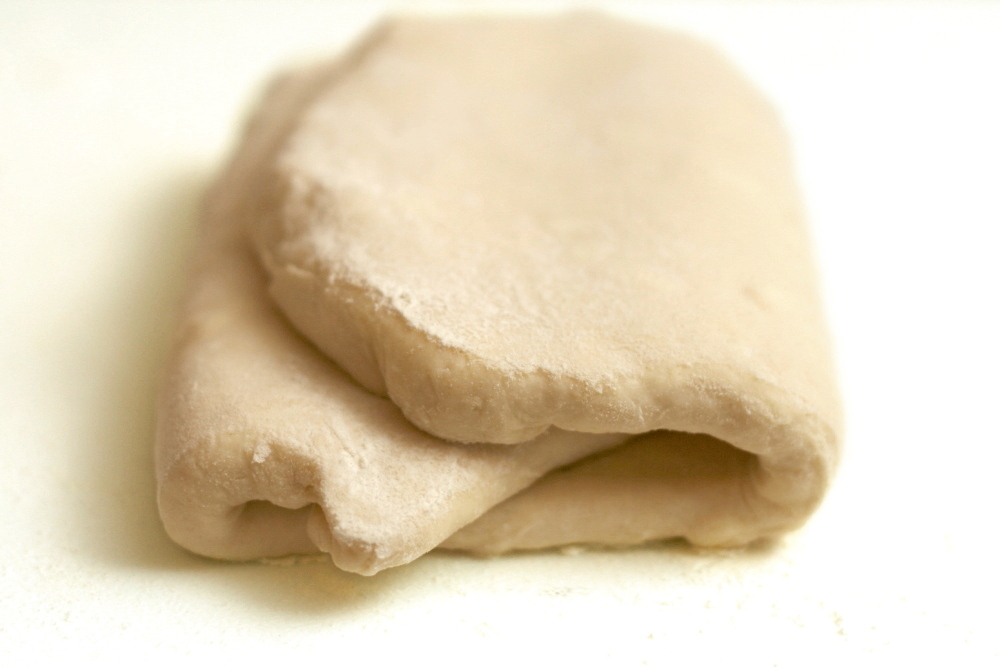
Roll the whole thing out, then fold it into thirds like a piece of paper going into an envelope. Then do that again. And again. And again and again and again. You’ll want to chill it in between there occasionally, and it sounds like a lot of rolling and folding, but the dough is really easy to work with, and each roll-and-fold takes maybe one minute. (I’ve been making a lot of croissants lately, which also involves rolling-and-folding, but croissant dough is much more difficult to work with due to its elasticity.)

Copy of IMG_5985

And then, you’re done. Then it’s just like having the store-bought stuff, except buttery-er. You can make whatever recipe you want, whether it be fruit tarts, pot pie, turnovers, cheese straws…etc… It’s versatile, it’s delicious, and it isn’t as hard as you think.

Copy of IMG_5987

One year ago: Chocolate Pudding

Puff Pastry (from Martha Stewart’s Baking Handbook)

Makes about 3 pounds

I accidentally added all of the flour into the dough and then didn’t add any flour to the butter package. Everything still went smoothly.

3 cups (14 ounces) all-purpose flour, plus more for dusting
1 cup (5 ounces) cake flour (not self-rising)
1 tablespoon salt
1 tablespoon sugar
1 pound (4 sticks) unsalted butter, cold, plus 1 stick (½ cup), cold, cut into small pieces
1 teaspoon white wine vinegar or freshly squeezed lemon juice

1. In a large bowl, combine 2¾ cups (12.85 ounces) all-purpose flour with the cake flour, salt, and sugar. With a pastry blender, cut in the butter pieces (1 stick) until the mixture resembles coarse meal, with a few larger clumps remaining. Make a well in the center, and pour in 1 cup cold water and the vinegar, gradually drawing the flour mixture over the water, gathering and combining until mixture comes together to form a dough. If the dough is too dry, add more cold water, 1 tablespoon at a time. Knead gently in the bowl, and form dough into a rough ball. Wrap in plastic, and refrigerate until well chilled, at least 40 minutes or up to 2 hours.

2. Sprinkle 2 tablespoons all-purpose flour on a sheet of parchment. Lay remaining 4 sticks of butter on top, side by side; sprinkle with remaining 2 tablespoons flour. Top with more parchment; pound butter with a rolling pin until it’s about ½ inch thick. Remove top paper, fold butter in half, replace paper; pound butter until it’s about ½ inch thick. Repeat two or three more times until it is pliable. Using a bench scraper, shape butter into a 6-inch square; wrap in plastic, and refrigerate until chilled, about 10 minutes.
3. Lightly dust work surface with flour. Roll out dough to a 9-inch round; place butter package in center. Using a paring knife or bench scraper, lightly score dough to outline butter square. Remove butter; set aside. Starting from each side of marked square, gently roll out dough to form flour flaps, each 4 to 5 inches long; do not touch square. Return butter to center square; fold flaps over butter. Press with your hands to seal.

4. With the rolling pin, gently pound the dough all over in regular intervals until it is about 1 inch thick; this will soften the dough, making it easer to roll. Working in only one directly (lengthwise), gently roll out the dough to a 20-by-9-inch rectangle, squaring corners with the side of the rolling pin or your hands as you go. Using a dry pastry brush, sweep off excess flour. With a short side facing you, fold the rectangle in thirds like a business letter. Turn the dough a quarter-turn clockwise, so the flap faces right, like a book. (This completes the first turn.) Roll out the dough again to a 20-by-9-inch rectangle, rolling in the same lengthwise direction; fold dough again into thirds. (This completes the second turn.) Wrap dough in plastic and refrigerate until well chilled, about 1 hour.
5. Repeat the rolling, turning, and chilling process for a total of six turns; always start each turn with the opening of the dough to the right. (If at any time, the dough becomes too soft to work with, return it to the refrigerator until firm.) Wrap dough in plastic; refrigerate 3 to 4 hours before using the dough.

Copy of IMG_6092