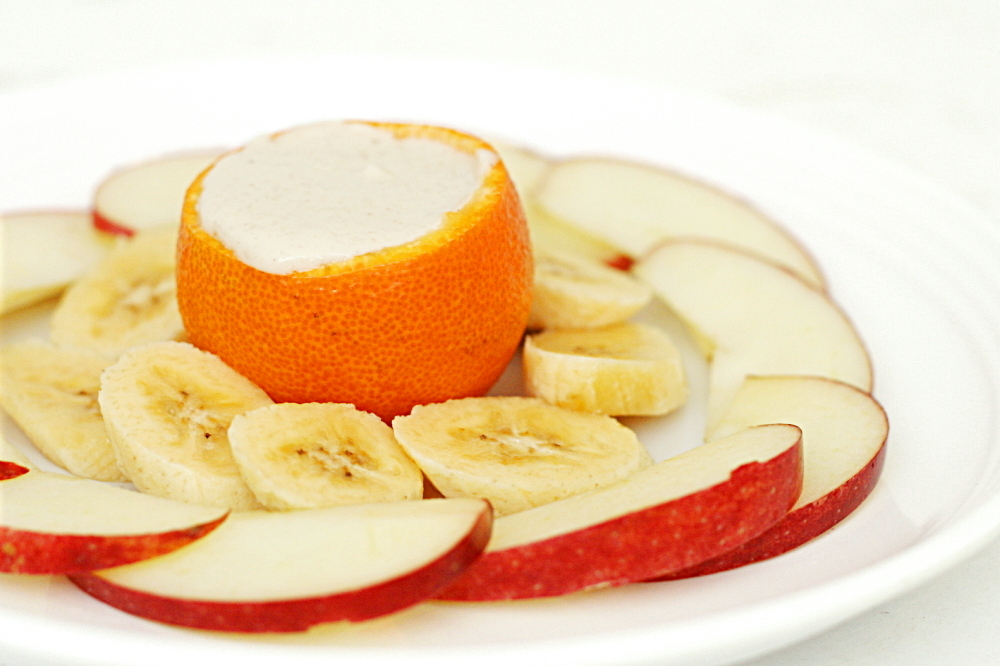
honey yogurt dip

copy-of-img_1756

Dave and I, for better or worse, don’t have the types of jobs that we can just forget about when we leave work at the end of the day. As a result, we often have to work on weekends. One particularly stressful weekend, I decided that we should make weekend working an event, where we set aside a few hours to sit down at the table together and get our work done. And what I really mean when I say ‘event’ is that I want snacks.
copy-of-img_1653

Since we were being industrious and working, it made sense to keep the snacks on the healthy side. Plus they were replacing dinner, so they needed to be nutritionally well-rounded. This fruit dip was exactly what I was looking for – easy, healthy(ish), and finger-food friendly.

copy-of-img_1644

Calling this a recipe may be overstating things a bit – it’s really just yogurt sweetened with honey and enhanced with a pinch of cinnamon. The original recipe recommended vanilla yogurt, but a number of the reviewers indicated that the result was too sweet. Another common complaint was that the dip was too thin. I thought using Greek yogurt would solve both problems at once.

copy-of-img_1651

It was a good change apparently, because the dip was perfect – fresh and light, plus just a little spicy from the cinnamon. It enhanced our fruit without overpowering it. Unfortunately, the dip was a lot more successful than working was for me that weekend – I found myself all too easily distracted. But at least I was eating fruit, right?

copy-of-img_1750

One year ago: Green Chile Chicken Enchiladas

Yogurt Honey Dip (adapted from Bon Apetit July 1998, but really epicurious.com)

Makes about 1 cup, or 4 servings

I have to admit that I didn’t measure anything when I made this. It’s pretty much a to-taste thing anyway, just keep in mind that the flavor of the cinnamon didn’t really come through until the dip had been chilled for a few hours.

1 (7-ounce) container plain Greek yogurt
3-4 tablespoons honey
1/8-¼ teaspoon ground cinnamon

Mix the ingredients together. Cover and chill for at least 2 hours or up to 2 days. Serve with fresh fruit.

copy-of-img_1751

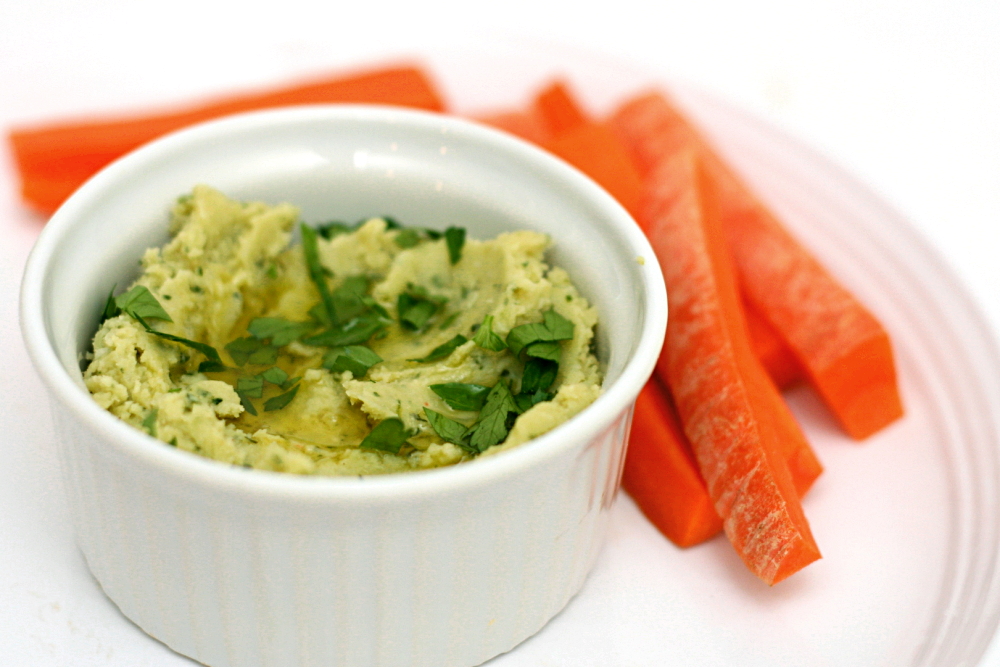
herbed lima bean hummus

copy-of-img_1461

I don’t blame Tuesdays with Dorie for my pants being too tight to button by the end of 2008.  I blame unemployment.   Instead of grabbing my standard healthy snacks and eating them at work because they were the only food available, I would pass over the bananas and carrots at home and fill up on cookie dough instead.

copy-of-img_1214

So one of my goals for 2009, since I’m still working at home a few days per week, is to make those healthy snacks more enticing. For bananas, it’s as simple as eating them with peanut butter or Nutella. The carrots, or whatever other raw vegetable I end up eating, cry out for some sort of dip. But anything based on mayonnaise and/or sour cream just defeats the purpose.

copy-of-img_1217

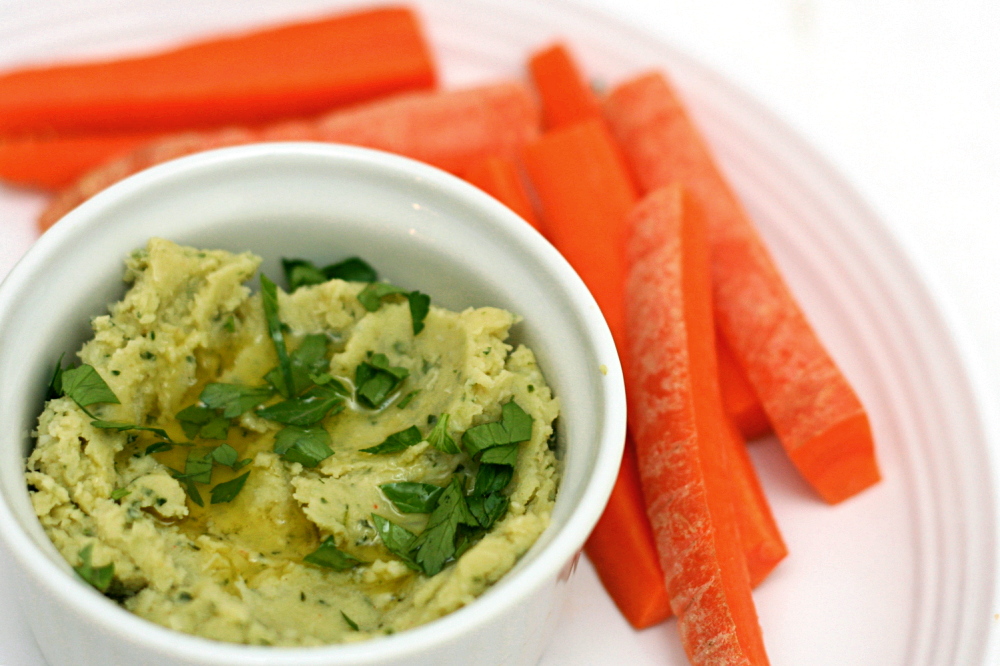
Fortunately, there’s plenty of bean dips out there to explore. This one, which isn’t like traditional hummus at all, is based on lima beans, a bean that I don’t have much experience with. The cooked lima beans are pureed along with aromatics, herbs and seasonings.

copy-of-img_1219

The original recipe called for the onion and garlic to be boiled along with the beans, but who wants boiled onion? Yuck. I took many of the recipe reviewers’ recommendations to sauté the onions and garlic instead. The recipe also calls for mint and dill, but I didn’t have any and didn’t miss it. Finally, I reduced the olive oil just a bit, since the whole point here is to make a healthy snack.

The resulting dip is a pretty green color with a very nice, sort of sweet, flavor. It made my daily carrot, which I guarantee wouldn’t have gotten eaten otherwise, much more enjoyable, but no less healthy.

copy-of-img_1463

One year ago:  Moo shu

Herbed Lima Bean Hummus (adapted substantially from Gourmet, via epicurious)

Makes about 2 cups

1-2 tablespoons extra-virgin olive oil, plus more for serving, if desired
½ large onion, chopped
3 garlic cloves, smashed with side of a large knife
½ teaspoon salt
1 (10-oz) packages frozen baby lima beans
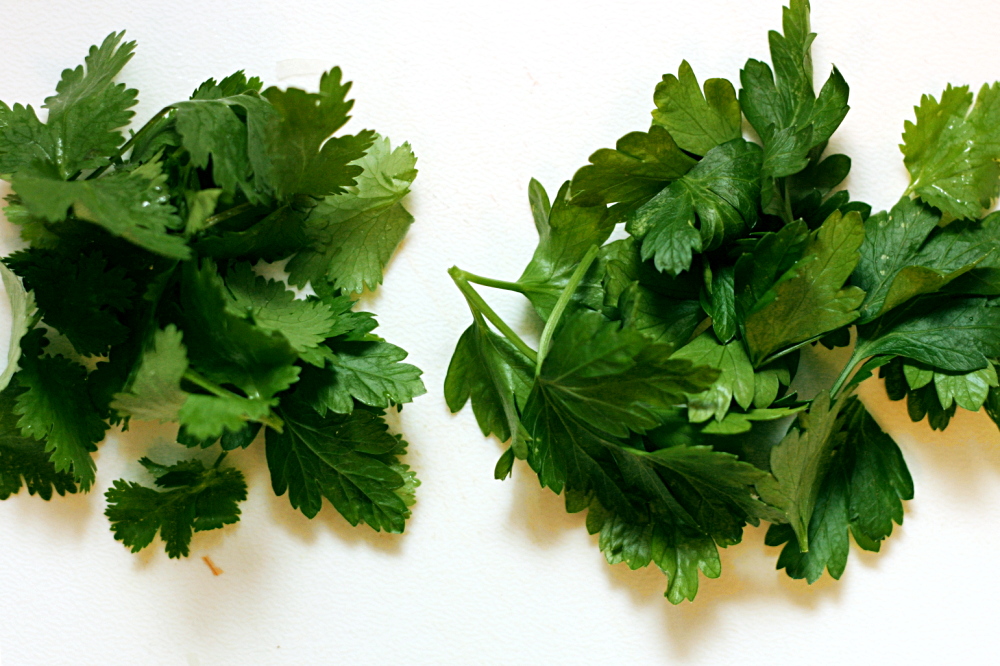
2 tablespoons chopped fresh cilantro
2 tablespoons chopped fresh flat-leaf parsley
½ teaspoon ground cumin
⅛ teaspoon cayenne, or to taste
2 tablespoons fresh lemon juice

1. Over medium heat, heat 1 tablespoon oil in medium skillet. Add onions and cook, stirring occasionally, until they’re just starting to brown around the edges. Add the garlic and salt, stir, then remove from the heat.

2. Meanwhile, in a medium saucepan, bring lima beans and 1 cup water to a boil over high heat. Cover, lower heat, and simmer for 6-8 minutes, until tender. Drain.

3. Add onion mixture, beans, and all remaining ingredients to a food processor and process until smooth. Add more oil if the dip seems too thick.

4. Transfer dip to a serving bowl and drizzle with remaining tablespoon oil, if desired. Serve with crudité or toasted pita wedges. (Dip can be covered and stored in refrigerator for up to 3 days.)

asian peanut dip

copy-of-copy-of-img_80881

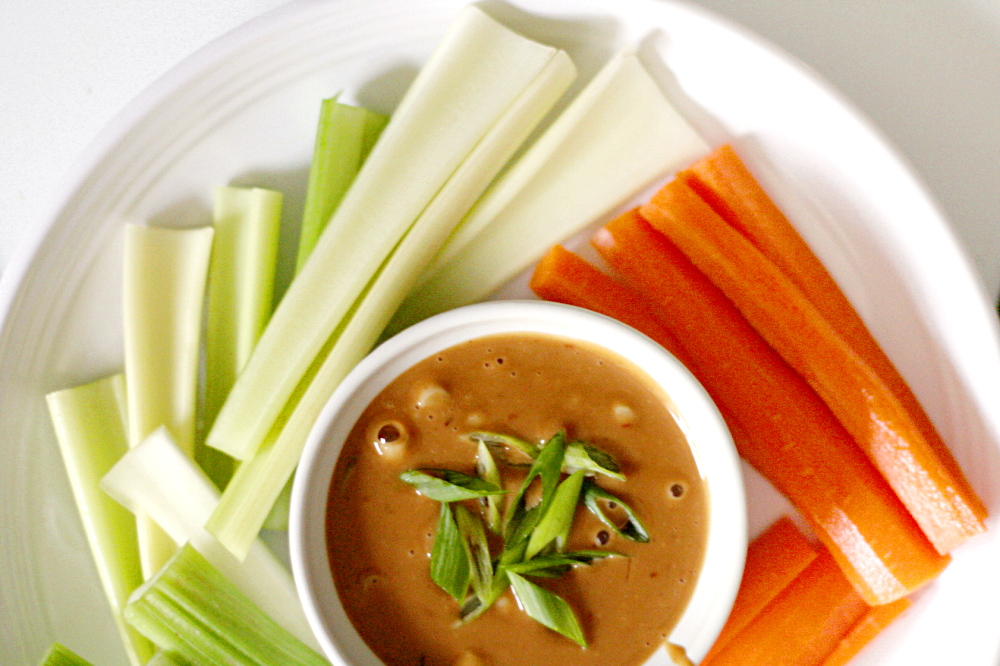
I keep my eye out for vegetables dips that aren’t ridiculously unhealthy. The thing is, when I serve some sort of meat that’s finger food, I don’t like to serve a vegetable that requires silverware. The perfect accompaniment is crudité (snobby way of saying vegetables eaten as a snack) with a dip, but most dips are nothing more than seasoned mayonnaise and sour cream. Not that I don’t love mayonnaise and sour cream, but I don’t always want to think of the dip as a treat.

copy-of-img_8078

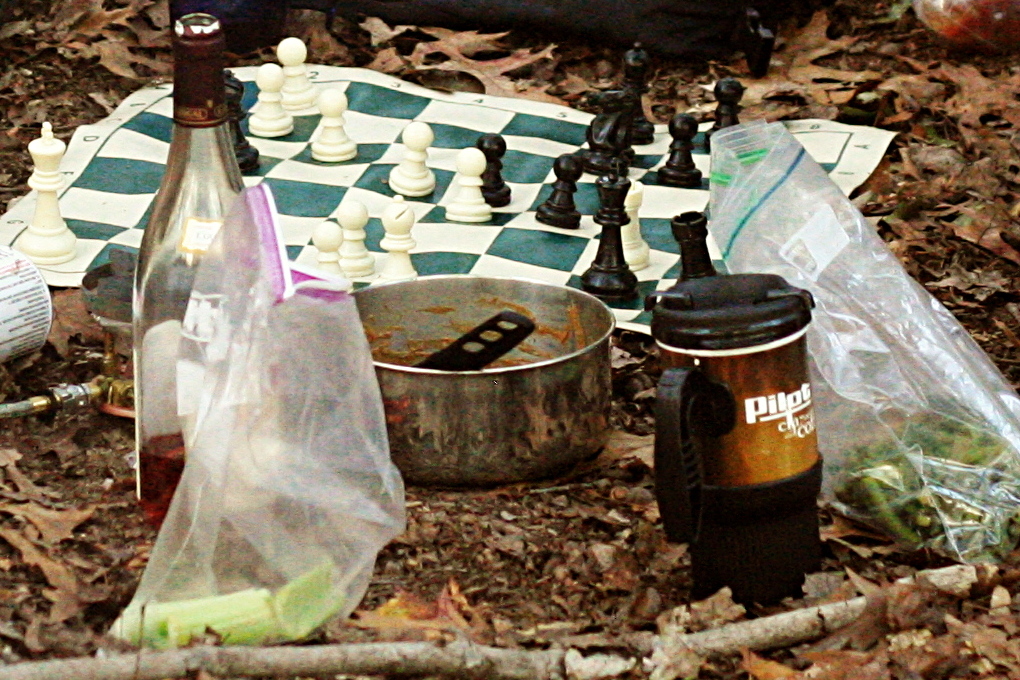
I’ve found one vegetable dip that’s a little healthier, and now I have another one. When struggling to figure out what to serve with the shrimp tempura recipe I was testing for Cooks Illustrated, I remembered that my friend had recently made this great spicy peanut dip on a camping trip. She got the recipe from Backpacker magazine, but when I searched on the internet, I saw that there were many similar recipes, most just as easy as the one we had the on the trip. There were slight variations between each, and I decided to stick with the Backpacker magazine one because it uses rice vinegar instead of lime juice for its acidity, which I’d really enjoyed.

copy-of-img_8020

(Clearly at the time I didn’t realize I’d blog about this at some point, or I would have taken a more flattering/interesting photo.)

The recipe, designed as it is to be made outdoors on a single-burner backpacking stove, is simple. I’ve tweaked the instructions just slightly, to bring the most flavor out of the red pepper and to tame the bite of the garlic. I also increased the seasoning and decreased the amount of red pepper flakes. It seemed far spicier when I made it at home than it did on the trip, maybe because I heated the flakes in oil first. And of course we didn’t add the scallions when we were camping – who brings scallions on a multi-day canoeing trip?

copy-of-img_8080

Usually, we adapt our favorite meals to be appropriate outdoors. I think this is the first time I’ve adapted a backpacking recipe for home, but this is a great recipe to have. I know peanut butter isn’t exactly a low-fat ingredient, but it’s a heck of a lot healthier than mayonnaise or sour cream, and this dip is just as good as more decadent vegetable dips.

copy-of-img_8086

Asian Peanut Dip (adapted from Backpacker Magazine)

Serves 4

1 teaspoon canola or vegetable oil
1 garlic clove, minced
½ teaspoon red pepper flakes
½ cup water
½ cup peanut butter, creamy or chunky
4 tablespoons soy sauce
2 tablespoons rice vinegar
1 scallion, sliced
salt to taste

In a small saucepan over medium heat, heat oil, garlic, and red pepper flakes. Cook, stirring frequently, until garlic is fragrant, 1-2 minutes. Add water, increase heat to high, and bring to boil. When water boils, remove pan from heat and add peanut butter, stirring until smooth. Stir in remaining ingredients (saving some scallion slices for garnish, if desired). Return to heat and continue stirring for 2-4 minutes until mixture is thickened. Serve warm or cold with crackers or crudité.

phyllo triangles: crawfish and mushroom fillings

I have had this recipe in my “To Blog” folder for months. It has sat there, ignored, while flashier ideas or more seasonal recipes or better photos or easier stories made other entries come first. In fact, I now have 33 recipes that are ready to be written about, just waiting for me to get up the motivation. I have decided that the only way to get my To Blog folder back under control will be a commitment to publish a blog entry every day for a month – which I could easily do even if I didn’t make one new recipe for the rest of the month.

These crawfish phyllo triangles caught my eye when Jen wrote about them because I remembered really liking crawfish the one time I’d had them before. But it was a few months before I discovered a great fish market nearby where I could actually buy crawfish. I served these with Deb’s mushroom phyllo triangles, thinking that it wouldn’t be much more work to make another filling as long as I was already dealing with phyllo.

I changed the season in the filling recipe, as Jen didn’t seem completely pleased with it. I love Old Bay, which is what she recommended using instead of the paprika in the original recipe. I also left out a few ingredients that didn’t seem really necessary. The recipe is originally from Emeril, and if there’s one thing I’ve learned from the number of Emeril recipes I’ve made, it’s that they can usually be simplified.


Here’s the most important lesson I learned from this experience: You cannot skimp on the butter used to brush the phyllo layers. I was making these for dinner on a weeknight (um, back when I was unemployed – I’m a little more practical about weeknight dinners now), and it wasn’t until I already had the filling made that I noticed the 2 sticks of butter used to brush the phyllo. I’m okay with splurging once in a while, but I just wasn’t mentally prepared for that.

So I did an internet search and saw that you can spray the sheets with nonstick spray instead of brushing them with butter. I did a hybrid – I gave the sheet a quick spray, and then a light brush with butter.  The problem is that, once baked, the phyllo triangles were clearly missing something. They were a little dry and not as flavorful or crisp as they should have been. Next time I work with phyllo, I’ll be sure to keep in mind that a lot of butter is absolutely necessary to make phyllo as good as it should be.


Despite this (and crawfish tails’ creepy similarity to insect abdomens), both of these fillings made for some tasty snacks. Dave and I liked the crawfish filling more than the mushroom filling, which seemed a little flat in comparison. But hey – at least they were a little healthier than normal. And most importantly, they’re finally out of my To Blog folder.


Crawfish Phyllo Triangles (adapted from Use Real Butter, who adapted it from Louisiana Real & Rustic by Emeril Lagasse)

Makes about 24 triangles

2 tablespoons butter
1 pound crawfish tails, peeled and cooked
1 medium onion, diced small
2 stalks celery, minced
1½ teaspoon salt
1 teaspoon Old Bay seasoning
3 tablespoon parsley, chopped
½ pound phyllo dough sheets, thawed
16 tablespoons (2 sticks), melted

1. Melt 2 tablespoons butter of medium-high heat in 12-inch skillet. Add the onions, celery, salt, and Old Bay and sauté until soft and brown, about 6 minutes, stirring occasionally. Add the crawfish and cook for about 5 minutes, stirring occasionally, until the crawfish tails begin to curl. Remove from heat. Stir in parsley. Let cool.

2. To make each triangle, set one sheet of phyllo on a clean work surface and brush melted butter on half of the sheet lengthwise. Fold the phyllo on its long axis in half. Brush melted butter on half of the phyllo lengthwise again, and fold on the long axis once more. You should have a long narrow strip of phyllo with 4 layers.

3. Place a heaping tablespoon of filling on one corner of the strip and begin folding the dough over the filling like a flag. Continue folding until the dough is completely wrapped around the filling. Brush a little butter on the end to seal it down. Repeat with remaining phyllo and filling.

4. Place triangles on a baking sheet so they are not touching one another. Bake at 375F for 18-20 minutes. Serve hot.

Mushroom Strudel (from Smitten Kitchen, who adapted it from The Complete Mushroom Book, by Antonio Carluccio)

Makes 18 triangles

18 sheets phyllo
8 tablespoons (1 stick) butter, melted
1 pound mixed, fresh, wild and cultivated mushrooms
1 medium onion, minced
3 tablespoons butter
Freshly grated nutmeg
1 tablespoon dry sherry
1 tablespoon all-purpose flour
Leaves from 1 sprig marjoram or thyme
6 tablespoons freshly grated Parmesan, plus extra for sprinkling, if you wish
Salt and pepper to taste

1. Preheat the oven to 400F (200C). Line a baking sheet with parchment paper. Clear a large work surface for this, big enough for two full sheets of phyllo, your egg wash, parmesan and filling.

2. Make the filling: Make sure the mushrooms are dust- and sand-free, wash if necessary, and trim if need be. Cook the onion in the butter and, when soft, add the mushrooms with the nutmeg. Sauté for 5 to 7 minutes, until liquid has been released and has partially evaporated. Add the sherry and evaporate the alcohol by cooking over low heat for 2 to 3 minutes. Stir in the flour, herbs, and some salt and pepper, and let cool. The mixture will be moist.

3. Take one sheet of phyllo at a time from their package; cover the remaining sheets with plastic and then a damp towel, ensuring they are completely covered. Brush one half of the sheet lengthwise with butter. Fold the unbuttered side over the buttered side, carefully, smoothing out any wrinkles and bubbles but not worrying if you can’t get them all. Again, brush one half of this lengthwise with butter, and fold the unbuttered side over it again. You’ll end up with one long column.

4. Dollop a spoonful of the mushroom filling near the end and sprinkle a teaspoon of parmesan over it. Begin folding one bottom corner of the phyllo strip over the filling until it meets the opposite edge, forming a triangle, as if you were folding a flag. Place the triangle seam side down on the baking sheet, brush lightly with egg wash and sprinkle with parmesan.

5. Bake in the preheated oven for 15 minutes. Serve warm.

lavash crackers (daring bakers)

This is the first Daring Baker recipe that has not only been from a cookbook I own, but was a recipe that I had planned to make soon anyway. Since football season started a few weeks ago, I’ve made Sunday into a snack day instead of serving an actual meal, which gives me a chance to play around with appetizer and dip recipes that I normally can’t (healthily) work into our routine.

The recipe itself was pretty simple. This is a rare recipe for Peter Reinhart in that it doesn’t require a pre-ferment, so the recipe can be completed in one day. The dough was easy to work with. I rolled it out right on my silicone baking mat, and then just moved the mat to a baking pan to bake it, so I never had to transfer just the sheet of dough.

I think Reinhart’s directions on rolling out the dough are off. I rolled the dough out to exactly the dimensions he recommends, but my “crackers” ended up far too thick. Reinhart refers to the rolled-out dough as “paper-thin” at one point, and mine certainly wasn’t. In the future, I’ll roll the dough out possibly twice as thin, so they’re more like crackers and less like little toasts.

I cheated on the dip. After I made it, I saw in the rules that we were supposed to make something that was gluten-free and vegan, but my pesto dip is based on goat cheese. But it’s so good! I have no regrets on breaking the rules if I get something so tasty out of it.

This challenge was a fun one – I always enjoy making yeast breads, and as I said, I’d been interested in this recipe for a while. The hosts this month, Natalie and Shel, also give directions for a gluten-free version, which I may try for my gluten-intolerant grandmother next time I see her. I’m always on the lookout for good gluten-free recipes.

Lavash Crackers (from Peter Reinhart’s The Bread Baker’s Apprentice)

Makes 1 sheet pan of crackers

1½ cups (6.75 ounces) unbleached bread flour
½ tsp salt
½ tsp instant yeast
1 tablespoons sugar
1 tablespoon vegetable oil
⅓ to ½ cup + 2 tablespoons (3 to 4 ounces) water, at room temperature
Poppy seeds, sesame seeds, paprika, cumin seeds, caraway seeds, or kosher salt for toppings

1. In a mixing bowl, stir together the flour, salt yeast, sugar, oil, and just enough water to bring everything together into a ball. You may not need the full ½ cup + 2 tablespoons of water, but be prepared to use it all if needed.

2. Sprinkle some flour on the counter and transfer the dough to the counter. Knead for about 10 minutes, or until the ingredients are evenly distributed. The dough should pass the windowpane test and register 77 degrees to 81 degrees Fahrenheit. The dough should be firmer than French bread dough, but not quite as firm as bagel dough (what I call medium-firm dough), satiny to the touch, not tacky, and supple enough to stretch when pulled. Lightly oil a bowl and transfer the dough to the bowl, rolling it around to coat it with oil. Cover the bowl with plastic wrap.

3. Ferment at room temperature for 90 minutes, or until the dough doubles in size. (You can also retard the dough overnight in the refrigerator immediately after kneading or mixing).

4. Mist the counter lightly with spray oil and transfer the dough to the counter. Press the dough into a square with your hand and dust the top of the dough lightly with flour. Roll it out with a rolling pin into a paper thin sheet about 15 inches by 12 inches. You may have to stop from time to time so that the gluten can relax. At these times, lift the dough from the counter and wave it a little, and then lay it back down. Cover it with a towel or plastic wrap while it relaxes. When it is the desired thinness, let the dough relax for 5 minutes. Line a sheet pan with baking parchment. Carefully lift the sheet of dough and lay it on the parchment. If it overlaps the edge of the pan, snip off the excess with scissors.

5. Preheat the oven to 350 degrees Fahrenheit with the oven rack on the middle shelf. Mist the top of the dough with water and sprinkle a covering of seeds or spices on the dough (such as alternating rows of poppy seeds, sesame seeds, paprika, cumin seeds, caraway seeds, kosher or pretzel salt, etc.) Be careful with spices and salt – a little goes a long way. If you want to precut the cracker, use a pizza cutter (rolling blade) and cut diamonds or rectangles in the dough. You do not need to separate the pieces, as they will snap apart after baking. If you want to make shards, bake the sheet of dough without cutting it first.

5. Bake for 15 to 20 minutes, or until the crackers begin to brown evenly across the top (the time will depend on how thinly and evenly you rolled the dough).

6. When the crackers are baked, remove the pan from the oven and let them cool in the pan for about 10 minutes. You can then snap them apart or snap off shards and serve.

Pesto Goat Cheese Spread (from Gourmet September 2002, but really epicurious.com)

4 ounces soft mild goat cheese at room temperature
2 ounces cream cheese at room temperature
¼ cup pesto

Stir together all ingredients with salt and pepper to taste until smooth.

summer rolls

I am not a collector of cookbooks. I do have one full shelf of about twenty or so, but I’m not one to idly buy any book I get excited about. Unless I’m interested in a very good proportion of the recipes in the book, I won’t buy it.

Unless it’s only three dollars, and every recipe has several pictures, and a surprising number of those recipes look good. I recently found a Thai Cooking Step-by-Step book in the bargain aisle and couldn’t pass it up.

The first recipe, and probably the one I was the most excited about, is for summer rolls, rice paper wrappers rolled around vegetables, rice vermicelli, and shrimp. I checked out a few recipes before making them, but most were similar, so I only slightly adapted the one in the book.

Every recipe included shrimp, rice vermicelli, cilantro and carrots. A few also included cucumber and Boston lettuce, both of which I wanted to include. One added mint, one Thai basil, and one preferred Thai basil but offered mint as an alternative. I haven’t been able to find Thai basil (although I haven’t looked very hard), so I used mint the first time I made these. Dave and I both hated the mint. I skipped the extra herbs entirely the second time, just using cilantro, and we much preferred it that way.

I struggled with what to do with the lettuce. I really wanted it inside the roll, similar to spider rolls. I tried it, but it was so bulky that I couldn’t get the summer rolls to make a tight wrap. Leaving the lettuce on the outside was preferable.

I thought the dipping sauce made from the recipe included in the step-by-step book was too pungent. The second time I made these, I used a recipe from another recently-acquired Asian cookbook (but I thought I didn’t buy many cookbooks?), and it was very good.

Admittedly, this isn’t the quickest recipe to put together. I kept thinking it would be pretty fast, since there’s very little cooking. Of course whenever you have to individually prepare fillings and wrappers, there will be a significant time investment. But for such a healthy and delicious meal, it’s worth it to me.

As per Joelen’s suggestion, I am submitting this entry to her Asian Appetizers event.

Update 9.21.08: I made this again and decided the recipe I originally had here needed a few tweaks.  I reduced the vermicelli from 2 ounces to 1.5 ounces and cut all of the dip ingredients in half.  Also, it only took me 45 minutes to make these, so it’s not quite the “significant time investment” that I originally thought.

Summer Rolls (adapted from Fresh Spring Rolls in Thai Cooking Step-by-Step, from the Confident Cooking Series)

Makes 8 rolls

16 medium shrimp, peeled and deveined
1.5 ounces rice vermicelli
8 rice paper wrappers
½ medium cucumber, cut into matchsticks
1 medium carrot, cut into matchsticks
16 Thai basil leaves (optional)
½ cup (0.5 ounces) loosely packed cilantro leaves
8 small leaves Boston lettuce (or 4 large leaves, torn in half)

1. Fill a medium skillet with water and bring to a boil. Add 1 teaspoon salt and the shrimp and cook just until the shrimp are opaque, about 3 minutes. Remove the pan from the heat and remove the shrimp from the pan using a slotted spoon. Cut the shrimp in half lengthwise. Add the vermicelli to the hot liquid and let set until tender, about 5 minutes. Remove the vermicelli from the pan.

2. Place a rice paper wrapper in the hot liquid and leave until softened, about one minute. Remove it from the water and place it on a work surface. Place 4 shrimp halves side-by-side in center of wrapper and top with 2 basil leaves, 1 tablespoon cilantro, a few carrot and cucumber strips, and a small amount of rice noodles.

3. Fold up bottom 2-inch border of wrapper over filling. Fold left, then right edge of wrapper over filling. Roll filling to top edge of wrapper to form tight cylinder.  Lay each roll in a leaf of lettuce and place on a serving platter.  Serve with dipping sauce.

Summer Roll Dipping Sauce (adapted from Nouc Cham in Corinne Trang’s Essentials of Asian Cuisine)

1 tablespoons granulated sugar
1.5 tablespoons fish sauce
1/4 cup lime or lemon juice
1 tablespoon water
1 small garlic clove, minced
1/8 teaspoon crushed red pepper flakes

Combine all ingredients. Let stand for 30 minutes to allow the flavors to come together.

baba ghanoush, falafel, hummus

Oh my gosh, this was such a great meal. I had something similar at a restaurant a while ago when Dave and I stopped for lunch in Syracuse’s university area. I got the vegetarian combination plate, which included hummus, falafel, baba ganoush, pita, and I think tabbouleh. I was trying to recreate that fantastic meal at home. I forgot to make tabbouleh this time, which was fine because this was plenty of cooking as it was.

I took the easy way out and made all Cooks Illustrated recipes. The hummus is their recently published Restaurant-Style Hummus recipe, which has gotten some great reviews. I thought it was really good, although I don’t know if it was that much better than any other hummus I’ve made. But – then I made it again a few weeks later with beans I cooked myself and Oh.My.God, that was so good. I had no idea it would make that much of a difference.

Other than that lunch in Syracuse, this is the only baba ghanoush I’ve ever had. You’re supposed to grill the eggplant until it’s completely soft and smoky, but grilling isn’t an option for me, so I had to use the oven. I still thought it was really good. It reminds me a lighter, more vegetal hummus.

The falafel was my favorite part of the meal. Shocking, I know, that Dave and I both liked the deep-fried food the best. Also, this was my first experience with dried chickpeas, and I loved them. The same funky shape as canned chickpeas but absolutely hard as rocks.

There’s some overlap between these three items – tahini or chickpeas showed up in everything – but they still have very distinct personalities. Tabbouleh would have been a nice light contrast, so I’ll have to remember that next time. And I can’t wait until next time!

(I’ll talk about the pita in my next post.)

Baba Ghanoush, Oven Method (from Cooks Illustrated July 2001)

CI note: When buying eggplant, select those with shiny, taut, and unbruised skins and an even shape (eggplant with a bulbous shape won’t cook evenly). We prefer to serve baba ghanoush only lightly chilled. If yours is cold, let it stand at room temperature for about 20 minutes before serving. Baba ghanoush does not keep well, so plan to make it the day you want to serve it. Pita bread, black olives, tomato wedges, and cucumber slices are nice accompaniments.

Bridget note: Cooks Illustrated has grilling methods for this recipe as well, but I don’t have a grill, so the oven it was.

Makes 2 cups

2 pounds eggplant (about 2 large globe, 5 medium Italian, or 12 medium Japanese), each poked uniformly over surface with fork to prevent bursting
1 tablespoon lemon juice
1 small clove garlic , minced
2 tablespoons tahini paste
Table salt and ground black pepper
1 tablespoon extra-virgin olive oil , plus extra for serving
2 teaspoons chopped fresh parsley leaves

1. Adjust oven rack to middle position and heat oven to 500 degrees. Line rimmed baking sheet with foil, set eggplants on baking sheet and roast, turning every 15 minutes, until eggplants are uniformly soft when pressed with tongs, about 60 minutes for large globe eggplants, 50 minutes for Italian eggplants, and 40 minutes for Japanese eggplants. Cool eggplants on baking sheet 5 minutes.

2. Set small colander over bowl or in sink. Trim top and bottom off each eggplant. Slit eggplants lengthwise and use spoon to scoop hot pulp from skins and place pulp in colander (you should have about 2 cups packed pulp); discard skins. Let pulp drain 3 minutes.

3. Transfer pulp to workbowl of food processor fitted with steel blade. Add lemon juice, garlic, tahini, ¼ teaspoon salt, and ¼ teaspoon pepper; process until mixture has coarse, choppy texture, about eight 1-second pulses. Adjust seasoning with salt and pepper; transfer to serving bowl, cover with plastic wrap flush with surface of dip, and refrigerate 45 to 60 minutes. To serve, use spoon to make trough in center of dip and spoon olive oil into it; sprinkle with parsley and serve.

Chickpea Fritters-Falafel (from Cooks Illustrated’s The Best International Recipe)

The chickpeas in this recipe must be soaked overnight; you can not substitute canned beans or quick-soaked chickpeas because their texture will result in soggy falafel. A wire spider comes in handy here when cooking the falafel. Serve the falafel in lavash or pita bread with lettuce, pickled vegetables, and chopped tomatoes or cucumbers, or as an hors d’oeuvres with tahini sauce as a dip.

Makes 20 falafel

6 ounces dried chickpeas (1 cup), rinsed, picked over, and soaked overnight in water to cover by an inch
5 scallions, chopped coarse
½ cup packed fresh parsley leaves
½ cup packed fresh cilantro leaves
3 medium garlic cloves (about 1 tablespoon), minced or pressed through a garlic press
1 teaspoon salt
½ teaspoon ground black pepper
¼ teaspoon ground cumin
⅛ teaspoon ground cinnamon
2 quarts vegetable oil, for frying
1.Adjust an oven rack to the middle position and heat the oven to 200 degrees. Drain the chickpeas, discarding the soaking liquid. Process all of the ingredients except for the oil in a food processor until smooth, about 1 minute, scraping down the bowl as needed. Form the mixture into 1 tablespoon-sized disks, about ½ inch thick and 1 inch wide, and arrange on a parchment paper-lined baking sheet. (The falafel can be refrigerated at this point for up to 2 hours.)

3. Heat the oil in a 5-quart large Dutch over medium-high heat to 375 degrees. (Use an instant-read thermometer that registers high temperatures or clip a candy/deep-fat thermometer onto the side of the pan.) Fry half of the falafel, stirring occasionally and adjusting the heat as needed to maintain 375 degrees, until deep brown, about 5 minutes. Transfer to a paper towel-lined baking sheet using a slotted spoon or wire spider and keep warm in the oven. Return the oil to 375 degrees and repeat with the remaining falafel. Serve immediately with the sauce.

I’m out of town right now, eating truffles and drinking wine. I’ll be back next week to catch up on comments and other blogs!

scotch eggs

1.jpg

I’m always hearing about people frying crazy things. There’s the twinkies, and the snickers bars, and now brownies. I had a fried oreo at a street fair in Manhattan, and it was delicious. Of course it was delicious – it’s a deep-fried oreo. It’s also kind of absurd.

Speaking of absurd, what about peeling a hard-boiled egg, covering it in sausage, breading it, and frying it? Oh, and then serving it for breakfast (alongside cake).

In the Scotch egg’s defense, my understanding is that these are pub fare in Scotland, and therefore probably not served for breakfast. Whatever, we ate them for breakfast, and we were happy.

My mom used to make these for brunch parties when I was a kid. When I asked her for the recipe, she gave me two and was wishy-washy on which she uses. I found two more and ended up with four similar but distinct recipes.

My biggest question concerned the sausage to egg ratio. My four recipes had four different ratios varying from 2 to 5 ounces of sausage per hard-boiled egg. I settled on three ounces, which ended up being pretty much perfect. Any more and the sausage would overwhelm the egg, but with much less, it would be difficult to evenly coat the egg.

5.jpg

Each recipe had a different frying temperature as well, ranging from 325 to 375 degrees. I generally try to maintain an oil temperature between 350 and 375 degrees while deep-frying, and that worked perfectly here. Two recipes used fresh bread crumbs, one used cracker meal, one used dried bread crumbs. I used panko (Japanese coarse-grained dried bread crumbs) because it’s all I had, but I’m thinking fresh would work great as well.

So, there you go. Scotch eggs. Not very healthy, but really freakin’ good. Serve with beer! Or for breakfast! But probably don’t drink beer for breakfast. Ew.

Scotch Eggs

1 egg, beaten
1 teaspoon Dijon mustard
½ cup (2½ ounces) unbleached flour
1 pound bulk sausage
2 cups breadcrumbs, either panko or fresh
5 eggs, hard-boiled and peeled
vegetable or peanut oil for frying

Mix egg and mustard in a medium bowl to blend. Place flour in another bowl. Place breadcrumbs in another bowl. Roll 1 hard-boiled egg in flour. Using wet hands, press 1/5 of sausage around egg to coat. Roll sausage-covered egg in beaten egg mixture, then roll in breadcrumbs, covering completely and pressing to adhere. Place Scotch egg on plate. Repeat with remaining eggs. (Can be made 1 day ahead. Cover and refrigerate.)

Add enough oil to heavy large saucepan to reach depth of 1½ inches. Attach deep-fry thermometer and heat oil to 360-370 °F. Add 3 prepared eggs to oil; fry until sausage is cooked through and coating is deep brown, about 6 minutes. Using slotted spoon, transfer eggs to paper towels to drain. Repeat with remaining 2 eggs. Serve warm.

6.jpg

four soups

1-copy.jpg

I have backlog of soups to be blogged, so I’m going to throw them all into one soupfest entry.

First up is lentil soup, which I was excited about because I found the fancy French lentils, but it seems like I’m cursed to never quite have all the right ingredients for this soup. The first time I made it, I was entrenched in step 3, after the vegetables are softened and the lentils are darkened, adding the wine, and running out of wine. Eh. I played around with some other acidic ingredients, and ended up with a delicious but teensy bit vinegary soup. This time it was chicken broth that I ran out of. Chicken broth! I never run out of chicken broth! I carefully monitor my Better Than Bouillon supply because I loooove Better Than Bouillon. Bummer. I substituted some vegetable (not better than) bouillon. Still a damn good soup. And healthy! The only non-healthy item in the whole thing is a few slices of bacon. That’s nothing.

4-copy.jpg

Next up is white chicken chili. This is the second time I’ve made this recipe, and I seem to remember liking it more the first time. It was far from bad this time – look at all that flavory goodness, how could it be bad?

2-copy.jpg

I just didn’t feel excited about it. Maybe it would have been as simple as adding salt. Another possibility is that adding 50% more beans than the recipe called for made the soup a little bland. I will make it again, but it’s on trial.

5-copy.jpg

Poor cream of mushroom soup. It’s been relegated to nothing more than an ingredient in bad casseroles, so when I saw a recipe for the real deal, I did a double take. People actually eat mushroom soup? Unheard of! Dave and I are both big mushroom fans, so I was excited about this soup. Unfortunately, it just didn’t deliver. It wasn’t bad, it was just so dominated by pureed mushrooms. It was a little intense, even for mushroom lovers like us. Maybe because I used all cremini mushrooms instead of the button mushrooms that the recipe calls for? Whatever, next time I’ll be trying this highly recommended recipe.

6-copy.jpg

And finally, we have my favorite of these four soups. I served this hot and sour soup with the potstickers, which we’re a little crazy about, so this soup had a tough job standing up to that. But it holds it’s own, oh yes. I loved the moo shu I made a few weeks ago, and this has most of the same ingredients, but in soup form. I also really like when tofu is used in recipes where it’s actually the original ingredient, instead of covering for some maligned but more flavorful meat. Mmm, and black vinegar. This is good stuff. And I’m all about the texture that the cornstarch gives the soup. It doesn’t thicken it to a paste, it just provides a little body. The soup has so many strong and contrasting flavors, I just love it. And, it’s healthy! In fact, it’s so light, that I don’t know if I can recommend serving it as a meal on its own. I made the full recipe, we ate it with potstickers for two meals, and then we snacked on it throughout the week. I wasn’t complaining about having hot and sour soup around all week!

So there you have it – a January’s worth of soups. Yum!

Hearty Lentil Soup (from Cooks Illustrated)

Lentils du Puy, sometimes called French green lentils, are our first choice for this recipe, but brown, black, or regular green lentils are fine, too. Note that cooking times will vary depending on the type of lentils used. Lentils lose flavor with age, and because most packaged lentils do not have expiration dates, try to buy them from a store that specializes in natural foods and grains. Before use, rinse and then carefully sort through the lentils to remove small stones and pebbles. The soup can be made in advance. After adding the vinegar in step 2, cool the soup to room temperature and refrigerate it in an airtight container for up to 2 days. To serve, heat it over medium-low until hot, then stir in the parsley.

Makes about 2 quarts, serving 4 to 6

3 slices bacon (about 3 ounces), cut into ¼-inch pieces
1 large onion, chopped fine (about 1½ cups)
2 medium carrots, peeled and chopped medium (about 1 cup)
3 medium cloves garlic, minced or pressed through garlic press (about 1 tablespoon)
1 can (14½ ounces) diced tomatoes, drained
1 bay leaf
1 teaspoon minced fresh thyme leaves
1 cup lentils (7 ounces), rinsed and picked over
1 teaspoon table salt
ground black pepper
½ cup dry white wine
4½ cups low-sodium chicken broth
1½ cups water
1½ teaspoons balsamic vinegar
3 tablespoons minced fresh parsley leaves

1. Fry bacon in large stockpot or Dutch oven over medium-high heat, stirring occasionally, until fat is rendered and bacon is crisp, 3 to 4 minutes. Add onion and carrots; cook, stirring occasionally, until vegetables begin to soften, about 2 minutes. Add garlic and cook until fragrant, about 30 seconds. Stir in tomatoes, bay leaf, and thyme; cook until fragrant, about 30 seconds. Stir in lentils, salt, and pepper to taste; cover, reduce heat to medium-low, and cook until vegetables are softened and lentils have darkened, 8 to 10 minutes. Uncover, increase heat to high, add wine, and bring to simmer. Add chicken broth and water; bring to boil, cover partially, and reduce heat to low. Simmer until lentils are tender but still hold their shape, 30 to 35 minutes; discard bay leaf.

2. Puree 3 cups soup in blender until smooth, then return to pot; stir in vinegar and heat soup over medium-low until hot, about 5 minutes. Stir in 2 tablespoons parsley and serve, garnishing each bowl with some of remaining parsley.

White Chicken Chili (from Cooks Illustrated)

Adjust the heat in this dish by adding the minced ribs and seeds from the jalapeño as directed in step 6. If Anaheim chiles cannot be found, add an additional poblano and jalapeño to the chili. This dish can also be successfully made by substituting chicken thighs for the chicken breasts. If using thighs, increase the cooking time in step 4 to about 40 minutes. Serve chili with sour cream, tortilla chips, and lime wedges.

Serves 6 to 8

3 pounds bone-in, skin-on chicken breast halves, trimmed of excess fat and skin
Table salt and ground black pepper
1 tablespoon vegetable oil
3 medium jalapeño chiles
3 poblano chiles (medium), stemmed, seeded, and cut into large pieces
3 Anaheim chile peppers (medium), stemmed, seeded, and cut into large pieces
2 medium onions, cut into large pieces (2 cups)
6 medium cloves garlic, minced or pressed through garlic press (about 2 tablespoons)
1 tablespoon ground cumin
1½ teaspoons ground coriander
2 (14.5-ounce) cans cannellini beans, drained and rinsed
3 cups low-sodium chicken broth
3 tablespoons fresh lime juice (from 2 to 3 limes)
¼ cup minced fresh cilantro leaves
4 scallions, white and light green parts sliced thin
1. Season chicken liberally with salt and pepper. Heat oil in large Dutch oven over medium-high heat until just smoking. Add chicken, skin side down, and cook without moving until skin is golden brown, about 4 minutes. Using tongs, turn chicken and lightly brown on other side, about 2 minutes. Transfer chicken to plate; remove and discard skin.

2. While chicken is browning, remove and discard ribs and seeds from 2 jalapeños; mince flesh. In food processor, process half of poblano chiles, Anaheim chiles, and onions until consistency of chunky salsa, ten to twelve 1-second pulses, scraping down sides of workbowl halfway through. Transfer mixture to medium bowl. Repeat with remaining poblano chiles, Anaheim chiles, and onions; combine with first batch (do not wash food processor blade or workbowl).

3. Pour off all but 1 tablespoon fat from Dutch oven (adding additional vegetable oil if necessary) and reduce heat to medium. Add minced jalapeños, chile-onion mixture, garlic, cumin, coriander, and ¼ teaspoon salt. Cover and cook, stirring occasionally, until vegetables soften, about 10 minutes. Remove pot from heat.

4. Transfer 1 cup cooked vegetable mixture to now-empty food processor workbowl. Add 1 cup beans and 1 cup broth and process until smooth, about 20 seconds. Add vegetable-bean mixture, remaining 2 cups broth, and chicken breasts to Dutch oven and bring to boil over medium-high heat. Reduce heat to medium-low and simmer, covered, stirring occasionally, until chicken registers 160 degrees (175 degrees if using thighs) on instant-read thermometer, 15 to 20 minutes (40 minutes if using thighs).

5. Using tongs, transfer chicken to large plate. Stir in remaining beans and continue to simmer, uncovered, until beans are heated through and chili has thickened slightly, about 10 minutes.

6. Mince remaining jalapeño, reserving and mincing ribs and seeds (see note above), and set aside. When cool enough to handle, shred chicken into bite-sized pieces, discarding bones. Stir shredded chicken, lime juice, cilantro, scallions, and remaining minced jalapeño (with seeds if desired) into chili and return to simmer. Adjust seasonings with salt and pepper and serve.

Per Serving:
Cal 370; Fat 6 g; Sat fat 1 g; Chol 115 mg; Carb 25 g; Protein 52 g; Fiber 7 g; Sodium 710 mg

Creamy Mushroom Soup (from Cooks Illustrated)

To make sure that the soup has a fine, velvety texture, puree it hot off the stove, but do not fill the blender jar more than halfway, as the hot liquid may cause the lid to pop off the jar.

Makes 8 cups, serving 6 to 8

6 tablespoons unsalted butter
6 large shallots, minced (about 3/4 cup)
2 small cloves garlic, minced (about 1 1/2 teaspoons)
½ teaspoon ground nutmeg, freshly grated
2 pounds white button mushrooms, wiped clean and sliced 1/4 inch thick
3½ cups chicken stock or canned low-sodium chicken broth
4 cups hot water
½ ounce dried porcini mushrooms, rinsed well
1/3 cup dry sherry or Madeira
1 cup heavy cream
2 teaspoons lemon juice from 1 lemon
Table salt and ground black pepper

Sauteed Wild Mushroom Garnish (optional)
2 tablespoons unsalted butter
8 ounces shiitake mushrooms or chanterelle, oyster, or cremini mushrooms, stems
trimmed and discarded, mushrooms wiped clean and sliced thin
Table salt and ground black pepper

1. Melt butter in large, heavy-bottomed Dutch oven over medium-low heat; when foaming subsides, add shallots and saute, stirring frequently, until softened, about 4 minutes. Stir in garlic and nutmeg; cook until fragrant, about 1 minute longer. Increase heat to medium; add sliced mushrooms and stir to coat with butter. Cook, stirring occasionally, until mushrooms release liquid, about 7 minutes. Reduce heat to medium-low, cover pot, and cook, stirring occasionally, until softened and mushrooms have released all liquid, about 20 minutes. Add chicken stock, water, and porcini mushrooms; cover and bring to simmer, then reduce heat to low and simmer until mushrooms are fully tender, about 20 minutes longer.

2. Pour soup into a large bowl. Rinse and dry Dutch oven. Puree soup in batches in blender until smooth, filling blender jar only halfway for each batch. Return soup to Dutch oven; stir in Madeira and cream and bring to simmer over low heat. Add lemon juice, season to taste with salt and pepper, and serve with sauteed mushroom garnish, if desired. (Can be cooled to room temperature and refrigerated up to 4 days.) If making ahead, add cream at serving time.

3. For the Sauteed Wild Mushroom Garnish (optional): Heat butter in medium skillet over low heat; when foam subsides, add mushrooms and sprinkle with salt and pepper. Cover and cook, stirring occasionally, until mushrooms release their liquid, about 10 minutes for shiitakes and chanterelles, about 5 minutes for oysters, and about 9 minutes for cremini. Uncover and continue to cook, stirring occasionally, until liquid released by mushrooms has evaporated and mushrooms are browned, about 2 minutes for shiitakes, about 3 minutes for chanterelles, and about 2 minutes for oysters and cremini. Sprinkle a portion of mushrooms over individual bowls of soup and serve.

Hot and Sour Soup (from Cooks Illustrated)

To make slicing the pork chop easier, freeze it for 15 minutes. We prefer the distinctive flavor of Chinese black vinegar; look for it in Asian supermarkets. If you can’t find it, a combination of red wine vinegar and balsamic vinegar approximates its flavor. This soup is very spicy. For a less spicy soup, omit the chili oil altogether or add only 1 teaspoon.

Serves 6 to 8 as an appetizer

7 ounces extra-firm tofu, drained
4 tablespoons soy sauce
1 teaspoon toasted sesame oil
3 tablespoons cornstarch, plus an additional 1 1/2 teaspoons
1 boneless, center-cut, pork loin chop (1/2 inch thick, about 6 ounces), trimmed of fat and cut into 1 inch by 1/8-inch matchsticks
3 tablespoons cold water, plus 1 additional teaspoon
1 large egg
6 cups low-sodium chicken broth
1 cup bamboo shoots (from one 5-ounce can), sliced lengthwise into 1/8-inch-thick strips
4 ounces fresh shiitake mushrooms, stems removed, caps sliced 1/4 inch thick (about 1 cup)
5 tablespoons black Chinese vinegar or 1 tablespoon red wine vinegar plus 1 tablespoon balsamic vinegar (see note above)
2 teaspoons chili oil (see note above)
1 teaspoon ground white pepper
3 medium scallions, sliced thin

1. Place tofu in pie plate and set heavy plate on top. Weight with 2 heavy cans; let stand at least 15 minutes (tofu should release about ½ cup liquid). Whisk 1 tablespoon soy sauce, sesame oil, and 1 teaspoon cornstarch in medium bowl; toss pork with marinade and set aside for at least 10 minutes (but no more than 30 minutes).

2. Combine 3 tablespoons cornstarch with 3 tablespoons water in small bowl and mix thoroughly; set aside, leaving spoon in bowl. Mix remaining ½ teaspoon cornstarch with remaining 1 teaspoon water in small bowl; add egg and beat with fork until combined. Set aside.

3. Bring broth to boil in large saucepan set over medium-high heat. Reduce heat to medium-low; add bamboo shoots and mushrooms and simmer until mushrooms are just tender, about 5 minutes. While broth simmers, dice tofu into ½-inch cubes. Add tofu and pork, including marinade, to soup, stirring to separate any pieces of pork that stick together. Continue to simmer until pork is no longer pink, about 2 minutes.

4. Stir cornstarch mixture to recombine. Add to soup and increase heat to medium-high; cook, stirring occasionally, until soup thickens and turns translucent, about 1 minute. Stir in vinegar, chili oil, pepper, and remaining 3 tablespoons soy sauce; turn off heat.

5. Without stirring soup, use soupspoon to slowly drizzle very thin streams of egg mixture into pot in circular motion. Let soup sit 1 minute, then return saucepan to medium-high heat. Bring soup to gentle boil, then immediately remove from heat. Gently stir soup once to evenly distribute egg; ladle into bowls and top with scallions.

Per Serving:
Cal 120; Fat 5 g; Sat fat 1 g; Chol 12 mg; Carb 12 g; Protein 8 g; Fiber 1 g; Sodium 1110 mg

two dips

11.jpg

This post comes too late. Two days ago, everyone was planning their snacks for the Superbowl. Today, we’re recovering from overeating, overdrinking, and how did the Giants beat the Patriots? But I think these dishes have their place on any day. Now that I’ve tried them myself and can attest to their success, I offer them to you.

First, a dip for crudite that is healthy and tasty. I am not one to sacrifice flavor to make low-fat dishes; I’d rather eat less of great food than more of subpar food. But if I can get great flavor and good nutrition in one dish, I won’t complain. Most dips use mayonnaise and sour cream as a base – two foods that are almost pure fat. This dip uses pureed cottage cheese as a base, plain yogurt for acidity, and a (relatively) small amount of mayonnaise for tartness. The star of the show is sundried tomatoes, with garlic singing backup. It was a really great dip – I was surprised that we ate that whole plate of vegetables.

21.jpg

The other dip I have to offer is a chemical-free queso. My favorite queso recipe used to be 8 ounces of Velveeta + 1 can of condensed cream of mushroom soup + 1 can of Ro-tel tomatoes. However, I am now adverse to processed foods. Why eat “cheese product” when I can eat cheese? So I set out to make queso reminiscent of my favorite recipe, but without the processed ingredients. It was easy cheesy. (Heehee.) Same taste, real food. Gotta love that.

If you want to add interest to your vegetables, or enjoy chips with spicy melted cheese goodness, but don’t want to compromise your health, you have two new options.

Sun-dried Tomato Dip (adapted from epicurious)

Makes about 2 cups

4 garlic cloves, unpeeled
¼ teaspoon salt
12 oil-packed sun-dried tomatoes, drained
1 cup cottage cheese
1/3 cup plain yogurt
¼ cup mayonnaise

Place garlic in dry skillet over medium heat. Cook, stirring occasionally, until spotty golden brown. Remove peels and discard. Mince garlic in food processor with salt. Add tomatoes and process until chopped. Add cottage cheese and process until smooth. Add remaining ingredients and process to blend. Season with salt. (Can be made 1 day ahead. Chill.)

Serve with vegetables.

Queso

Makes about 2 cups

The jalapeno could be added with the tomatoes, or with the butter. I wasn’t sure how spicy the dip would be without it, so I waited until the end to add it.

Cheddar adds flavor but can be grainy when melted. Monterey jack cheese melts smoothly.

1 tablespoon butter
1½ tablespoon flour
1 cup milk
1 (10-ounce) can Ro-tel diced tomatoes and green chiles, undrained
2 ounces cheddar cheese, shredded
2 ounces Monterey jack cheese, shredded
¼ teaspoon salt
1 jalapeno, minced

Melt butter over medium heat. Once it foams, whisk in flour. Whisk constantly for 1 minute, then gradually whisk in milk. Bring mixture to boil over medium heat, stirring occasionally. Once boiling, reduce heat to medium and simmer for 5 minutes, stirring occasionally. Stir in tomatoes and chiles and bring to a simmer. Add remaining ingredients. Stir until cheese melts. Serve with tortilla chips.