Dave cooks now, and it is awesome for a number of reasons. Supposedly, it gives me a break from cooking, except I tend to use the free time to make cookies, but, that is still awesome. He chooses different sorts of recipes than I do, so it’s fun to have more variety. Mostly, it’s just nice to be in the kitchen together, doing one of my favorite things. And it provides me with plenty of – much needed – practice in only offering advice when it’s requested.
So far, Dave is only cooking fish. This is also awesome, because fish is complicated in the desert – finding out how to get it so it’s fresh, which types are sustainable, that sort of stuff. I’m glad he took this on because my method was mostly to stock up on frozen tilapia in Albuquerque or wait for the wild salmon in the summer. Dave, on the other hand, has made friends with the fish lady at the grocery store.
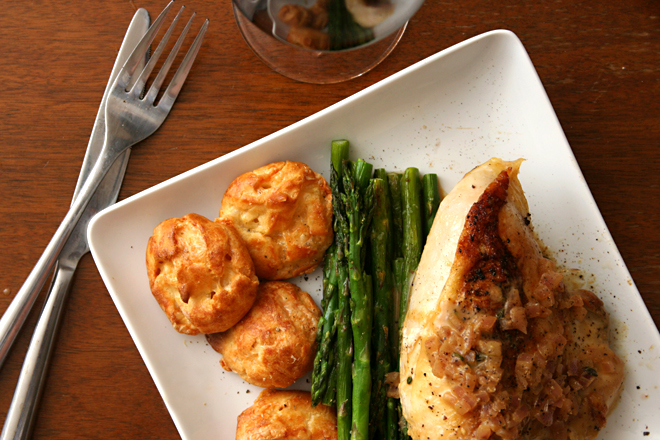
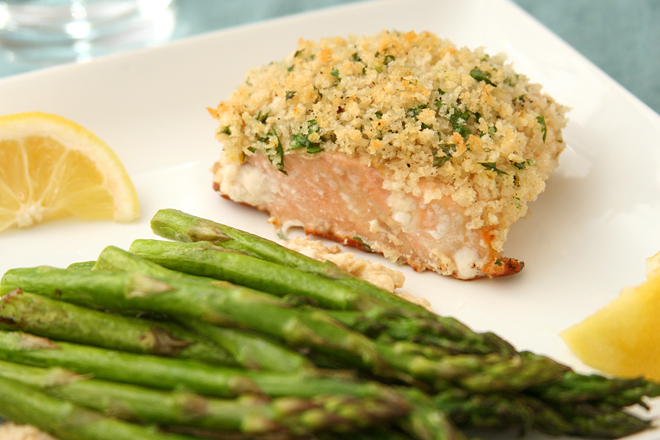
The vast majority of the recipes he makes are from Mark Bittman’s Fish cookbook, but I keep an eye out for quick and easy fish recipes to send his way, and this was one of those. While he mixed bread crumbs with lemon zest and herbs, I roasted asparagus, chased Dave around with a camera, and baked a cake. It was, as I might have mentioned, awesome*.
*Even more awesome? Dave wants to write the occasional guest post with some of his favorite fish recipes. Fun! I can’t wait.

Printer Friendly Recipe
Panko-Crusted Salmon (adapted from Ina Garten’s How Easy is That via Annie’s Eats)
4 servings
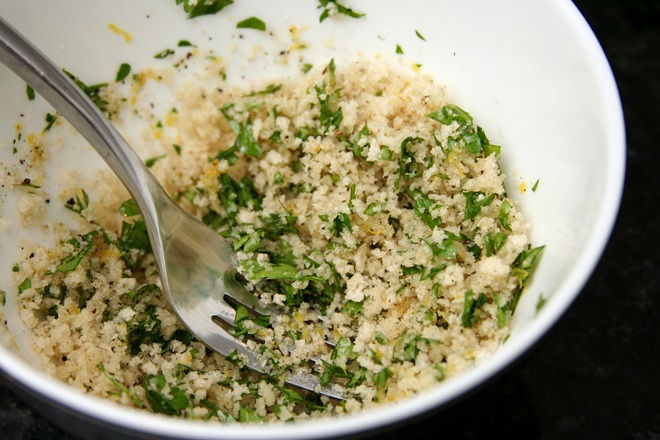
⅔ cup panko
2 tablespoons finely minced fresh parsley
1 teaspoon lemon zest
½ teaspoon kosher salt
½ teaspoon ground black pepper
3 tablespoons olive oil, divided
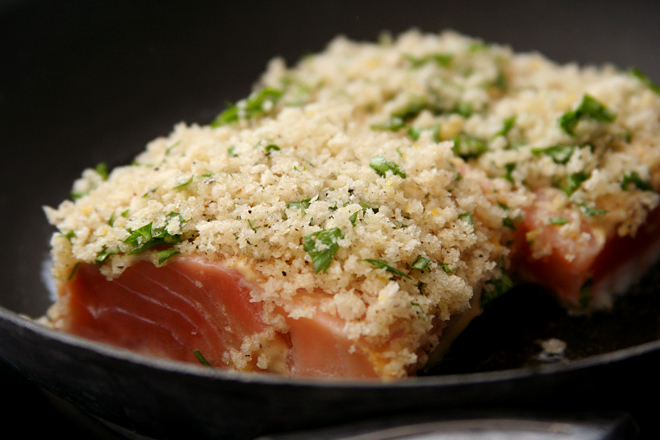
4 (6- to 8-ounce) salmon fillets, skin on
2 tablespoons Dijon mustard
lemon wedges, for serving
1. Preheat the oven to 425 degrees. In a small bowl, combine the panko, parsley, lemon zest, salt, and pepper. Add 2 tablespoons of the olive oil and toss with a fork until the crumbs are evenly coated; set aside.
2. Place the salmon fillets skin side down on a work surface. Generously brush the top of each fillet with the mustard, then season with salt and pepper. Press the panko mixture thickly on top of the mustard on each fillet.
3. In a 12-inch oven-safe nonstick skillet, heat the remaining 1 tablespoon of olive oil over medium-high heat. When the oil is hot, add the salmon fillets, skin side down, and sear for 3-4 minutes without turning to brown the skin. (If you don’t want to eat the skin, this step also helps the skin stick to the pan so the fillets can be easily removed without the skin later on.)
4. Transfer the pan to the oven for 5 to 7 minutes, until the salmon is almost cooked through and the panko is browned. Remove from the oven, cover with foil and let rest for 5 to 10 minutes. Serve with lemon wedges.
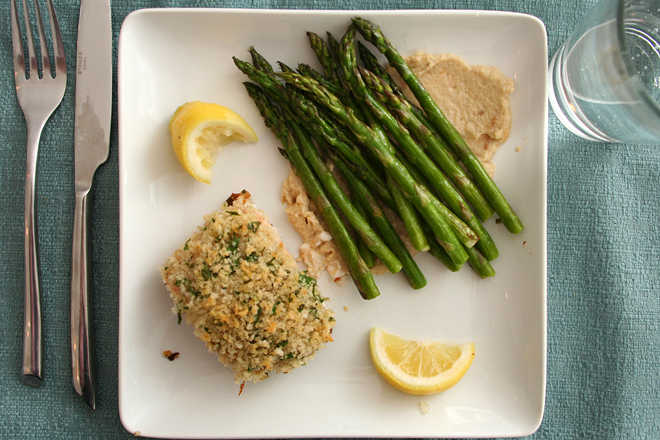
(The asparagus were served over pine nut crema. Very tasty.)