coffee break muffins

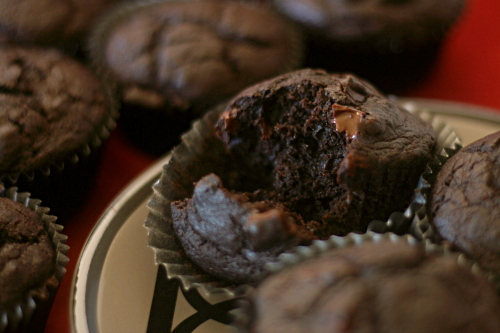
I wasn’t in the mood for these the day I made them. What I was in the mood for was the Chocolate Chunk Muffins a couple pages later. If you’ve flipped through Dorie’s book, you must have seen the ones I’m talking about – dark, rich muffins studded with big chunks of bittersweet chocolate. They’re not breakfast, but I bet they’re delicious.

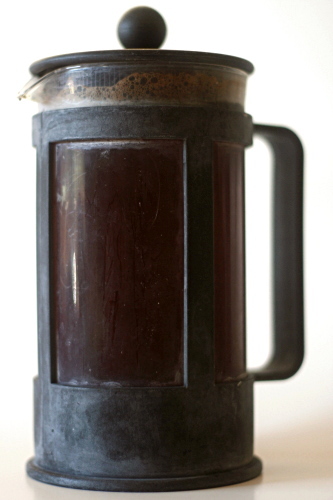
They are, however, not this week’s Tuesdays with Dorie recipe. This week’s recipe is espresso muffins. But I got to thinking about how coffee enhances the flavor of chocolate and wondered if the reverse were true. Could I add just a bit of chocolate to give these another flavor dimension?

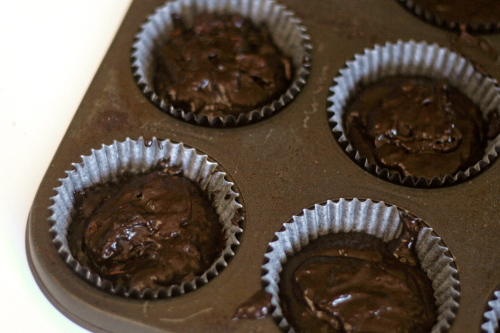
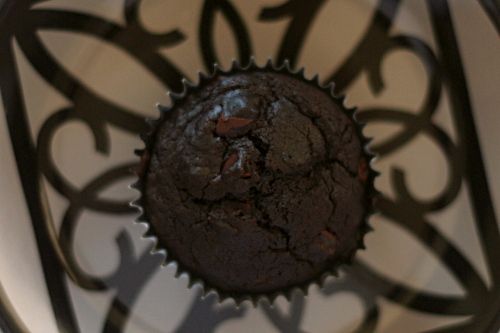
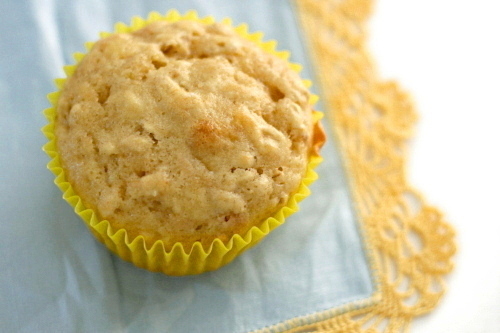
I replaced a quarter of the flour with cocoa powder, and, to just a few of the muffins, stirred in some chopped semisweet chocolate. And I was surprised that these ended up tasting just how I’d imagined the double chocolate muffins I’d been craving in the first place. The espresso flavor was timid, hiding behind the dominant chocolate. More chocolate flavor isn’t going to get any arguments from me, but now I’m curious about how the non-chocolate, pure espresso version would be. Next time I’ll have to try harder to resist my urge to eat chocolate for breakfast.

Rhiani chose these muffins, and she has the recipe posted. I replaced ½ cup of the flour with cocoa and added a few chocolate chips.

One year ago: Flaky Apple Turnovers
Two years ago: Dimply Plum Cake

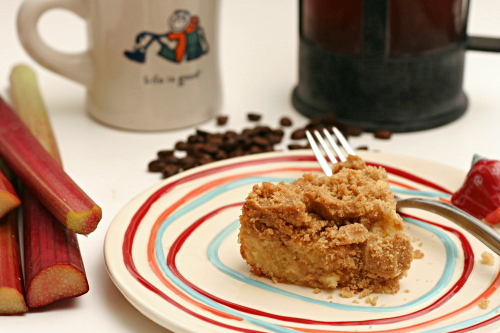
rhubarb crumb coffee cake

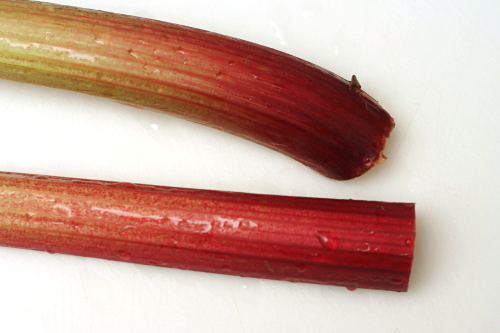
Did you know rhubarb has a second harvest in the late summer? It was news to me, but very happy news, as I’d missed the early spring crop in the busyness of starting a new job. Every time I saw rhubarb at the store, I thought, Next time. Next week. Next week I’ll have more time, more opportunities for baking, a rhubarb recipe I just can’t resist.

You know how this story ends. Finally, I said, Enough! I’ll make scones! I’ll shape the dough and freeze the scones to eat whenever the mood strikes! And then there was no rhubarb.

Taking pity on me, my friend in Tacoma sent me a jar of homemade strawberry rhubarb jam. And then another, bigger jar of strawberry rhubarb jam when the first didn’t last through a week. And then, finally, the perfect birthday present for someone like me: rhubarb from her garden.

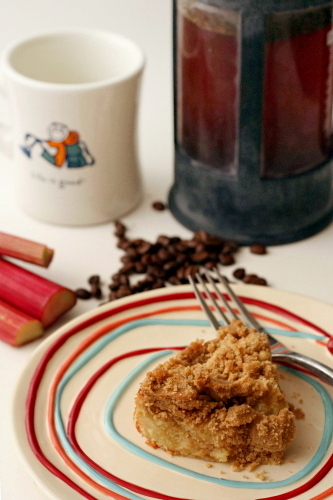
After the freezer was stocked with scones, I still wanted rhubarb for breakfast. And I always want cake. Especially this one, with its fluffy and soft cake studded with sweet-tart rhubarb and topped with a layer of sugary crisp crumbs. I’m so grateful for that second harvest of rhubarb – and to friends who send me produce as gifts!

One year ago: Amaretto Cheesecake
Two years ago: Fruit Bruschetta

Printer Friendly Recipe
Rhubarb Crumb Cake (from Smitten Kitchen via the New York Times)
Serves 6-8

For the rhubarb filling:
8 ounces rhubarb, trimmed
¼ cup (1.75 ounces) sugar
2 teaspoons cornstarch
½ teaspoon ground ginger

For the crumbs:
⅓ cup (2.33 ounces) dark brown sugar
⅓ cup (2.33 ounces) granulated sugar
1 teaspoon ground cinnamon
½ teaspoon ground ginger
⅛ teaspoon salt
8 tablespoons (1 stick) butter, melted
1¾ cups cake flour
For the cake:
⅓ cup sour cream
1 large egg
1 large egg yolk
2 teaspoons vanilla extract
1 cup cake flour
½ cup (3.5 ounces) sugar
½ teaspoon baking soda
½ teaspoon baking powder
¼ teaspoon salt
6 tablespoons softened butter, cut into 8 pieces

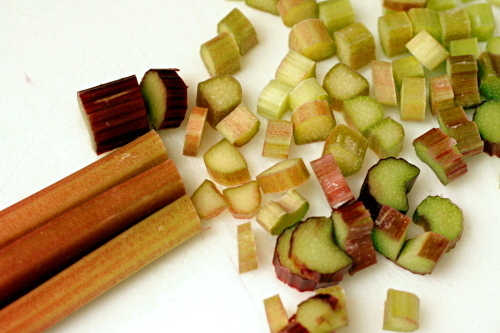
1. Preheat oven to 325 degrees. Grease an 8-inch-square baking pan. For filling, slice rhubarb ½-inch thick and toss with sugar, cornstarch and ginger. Set aside.
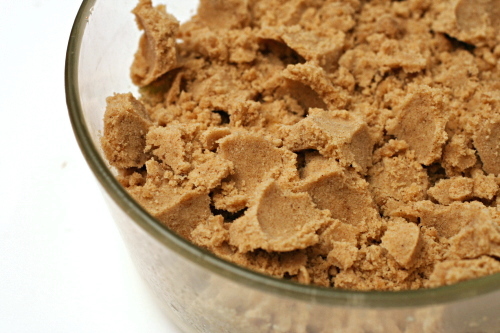
2. To make crumbs in a large bowl, whisk sugars, spices and salt into melted butter until smooth. Stir in flour with a spatula or wooden spoon. It will look and feel like a solid dough. Leave it pressed together in the bottom of the bowl and refrigerate.

3. To prepare the cake, in a small bowl, stir together the sour cream, egg, egg yolk and vanilla. Using a mixer fitted with paddle attachment, mix the flour, sugar, baking soda, baking powder and salt. Add the butter and a spoonful of the sour cream mixture and mix on medium speed until the flour is moistened. Increase the speed and beat for 30 seconds. Add the remaining sour cream mixture in two batches, beating for 20 seconds after each addition, and scraping down the sides of bowl with a spatula. Scoop out about ½ cup batter and set aside.

4. Scrape remaining batter into the prepared pan. Spread the rhubarb over batter. Dollop reserved batter over rhubarb; it does not have to be even.

5. Using your fingers, break the topping mixture into big crumbs, about ½-inch to ¾-inch in size. Sprinkle over cake. Bake cake until a toothpick inserted into the center comes out clean of batter (it might be moist from rhubarb), 45 to 55 minutes. Cool completely before serving.

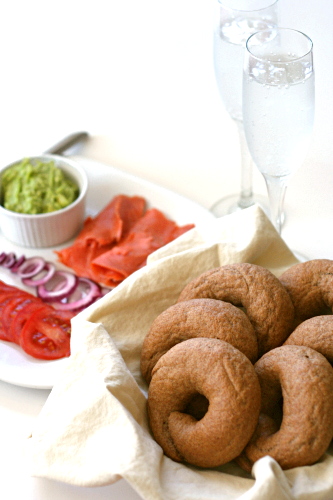
whole wheat bagels

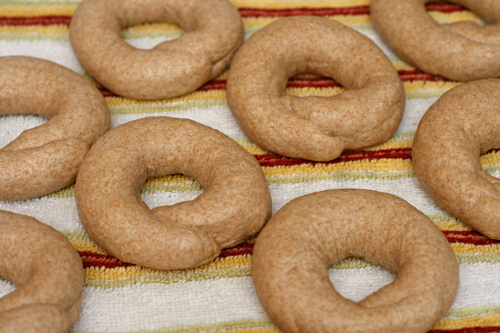
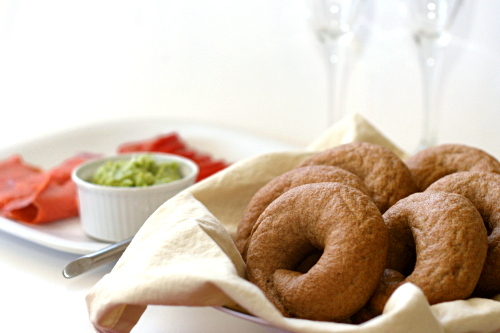
It’s possible that bagels are my favorite food. Yes, more so than tomato soup, than macaroni and cheese, even more so than chocolate chip cookie dough! And so I eat one almost everyday. It’s basically my lunch break and it’s a happy little time for me with my bagel, my black tea, and my Google Reader.

But here’s the thing – if I’m going to be eating a bagel every single day, I better make sure it’s healthy. For years, I made bagels with half white and half whole wheat flour, and I felt like that was a nice compromise between delicious and nutritious. Bagels with no white flour would be like hockey pucks, right? And they would taste like whole wheat. The horror!

I know I’m becoming a broken record, but the answer, of course, is in Peter Reinhart’s Whole Grain Breads. All it takes is a little overnight soak, and those whole grains act like refined white flour – they taste sweeter, form supple doughs, and bake into tender, light breads.

Not that it was smooth-sailing from the beginning with this bagel recipe. The problem I was having with this is that it’s too simple. Most bagel recipes need an overnight retardation in the refrigerator before they can be boiled and baked. This recipe doesn’t require that, and in fact, doesn’t need much time for a second rise at all. I’ve had the hardest time getting this through my stubborn head, and so over and over, I was making over-risen, sunken, ugly bagels.

A year after I started using this recipe, I think I’ve finally nailed it. You know what I did? I followed the recipe closer. My happy little bagel break just got a little happier.

One year ago: Pasta with No-Cook Tomato Sauce and Fresh Mozzarella
Two years ago: Country Egg Scramble

Printer Friendly Recipe
Whole Wheat Bagels (adapted from Peter Reinhart’s Whole Grain Breads)

Makes 8 large bagels or 12 small bagels

There are a few shortcuts in this compared to Reinhart’s original recipe. I make it every couple of weeks, so the faster I can get it done, the better!

I’ve played with the timing of this recipe quite a bit. The original results in fresh bagels 5-6 hours after you start (the second day). But I usually want them in the morning. You can refrigerate the dough in two places – either after the bagels are formed (in which case you should decrease the yeast slightly to prevent the bagels from over-rising) or right after kneading. The last time I refrigerated it after kneading, it rose overnight in the fridge, and in the morning, I immediately shaped the bagels and boiled them shortly afterward.

Pre-dough 1:
8 ounces whole wheat flour
¼ teaspoon instant yeast
6 ounces (¾ cup) water

Pre-dough 2:
2 tablespoons barley malt syrup
5 ounces water
8 ounces whole wheat flour
½ teaspoon salt

Final dough:
both pre-doughs
1 tablespoon water
2 teaspoons yeast
¾ teaspoon salt
7 tablespoons flour, plus more if necessary
1 tablespoon baking soda (for boiling)

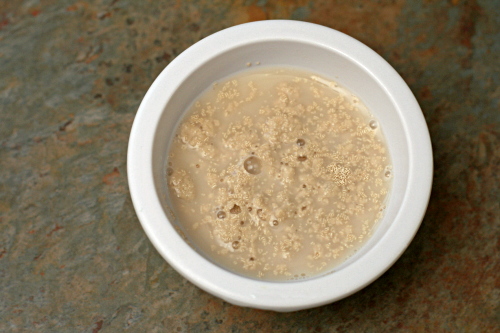
1. In the bowl of a stand mixer fitted with the dough hook, mix all of the ingredients in Pre-dough 1 on medium-low speed until combined. Set aside for 5 minutes. Meanwhile, in a 1-cup measuring cup, stir together the barley malt syrup and the 5 ounces of water in Pre-dough 2. Set aside, stirring occasionally, until the barley malt syrup dissolves into the water. Return to Pre-dough 1 and knead on low speed for 1 minute. Transfer to a small bowl and cover with plastic wrap or a damp kitchen towel. Refrigerate overnight. Add the flour and salt for Pre-dough 2 to the empty mixer bowl; with the mixer on low speed, pour in the water-syrup mixture. Mix on medium-low just until combined. Cover the mixer bowl with plastic wrap or a damp kitchen towel and set aside at room temperature for at least 8 hours or overnight.

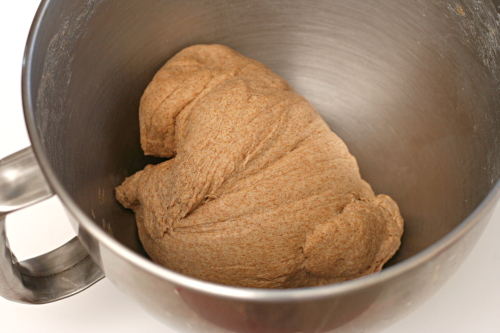
2. The following day, transfer the refrigerated Pre-dough 1 to room temperature for a couple hours to warm slightly. When you’re ready to make the final dough, stir together the 1 tablespoon water and the yeast. In the bowl of a stand mixer fitted with the dough hook, mix both pre-doughs, the water and yeast, and the salt on low speed until combined. While the mixer is running, add in the flour, 1 tablespoon at a time, until it’s fully absorbed by the dough. Knead on low speed for 5-6 minutes, adding more flour or water if necessary to form a smooth, firm dough. It shouldn’t be sticky.

3. Let the dough rise at room temperature until it increases to about 1½ times its original size, 1-2 hours.

4. Divide the dough into 8-12 pieces. Shape each piece into a smooth ball, then roll each piece into a rope about ¾-inch thick (slightly thicker for larger bagels). Bring the ends of the rope together and gently roll them on a flat surface to seal. Set aside for about 20 minutes.

5. Meanwhile, preheat the oven to 500 degrees, line a baking sheet with parchment paper or a silicone mat, and bring at least three inches of water to a boil in a large pot over high heat. Add 1 tablespoon baking soda, reduce the heat to medium-high and gently drop 2-4 bagels (as many as will fit without crowding) into the water. Boil for 1 minute, flipping the bagels halfway through.

6. Place the boiled bagels on the prepared baking sheet. Transfer the sheet to the oven, reduce the oven temperature to 450 degrees, and bake until the bagels are browned and feel hard, 13 minutes for small bagels and slightly longer for larger bagels. (The bagels will soften as they cool.) Cool completely before serving. (I can only fit one baking sheet, holding half a batch of bagels, in my oven at once, so I refrigerate the remaining unboiled bagels until the first pan is almost done baking, then boil and bake them.)

oatmeal breakfast bread

I finally admitted defeat this weekend. For the first time this year, I bought bread. I also bought pre-chopped vegetables, hummus, and pre-washed lettuce. Why do I force myself to do all these things from scratch? Preparing my snacks and lunches for the work week has been seriously cutting into my favorite Sunday activity (sitting outside with a margarita and a book, of course). The only things I’m still making from scratch are hard-boiled eggs and muffins for Dave.

I’m lucky that so far the quick bread chapter in the Tuesdays with Dorie cookbook has been seriously overlooked, so I can double task lunch prep and TWD. (The celebration cake chapter is DONE, which, for me, is cause for celebration.) It also helps that muffins are so easy and bake quickly.

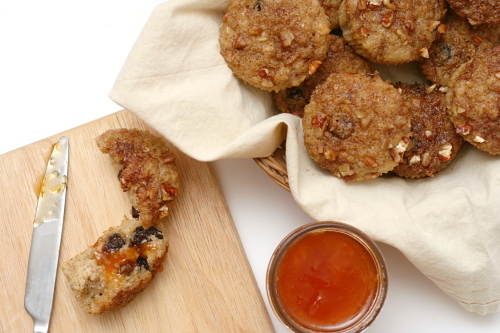
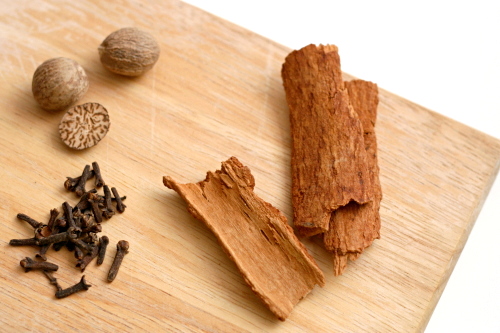
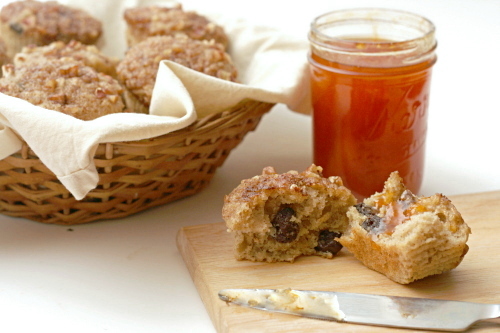
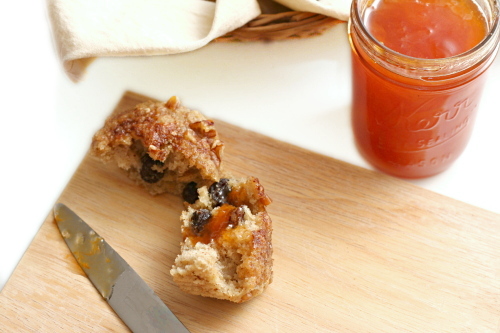
These are a perfect example of why I can’t bring myself to buy muffins. These aren’t perfectly healthy, but they’re certainly better for you than anything storebought – not to mention how sweet and tender and soft they are as well. I’m definitely willing to sacrifice a bit of Sunday margarita time to make muffins like this.

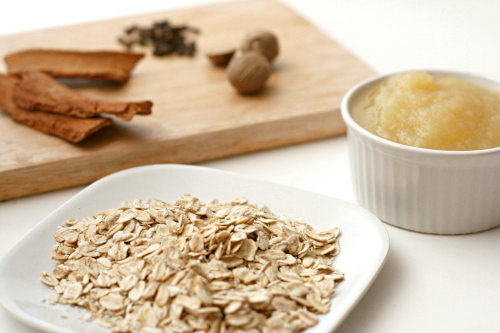
Natalie chose this recipe, and she has it posted on her site. I used raisins for the dried fruit, but these were so perfectly spiced for fall that I wish I’d used dried apples instead.

One year ago: Applesauce Spice Bars
Two years ago: Granola Grabbers

baked french toast

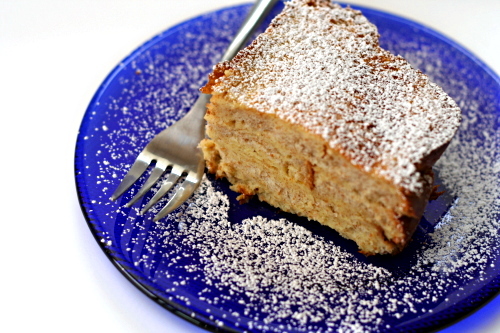
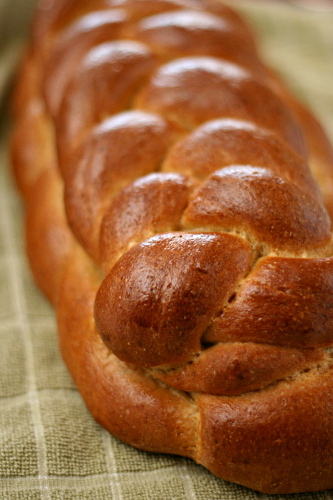
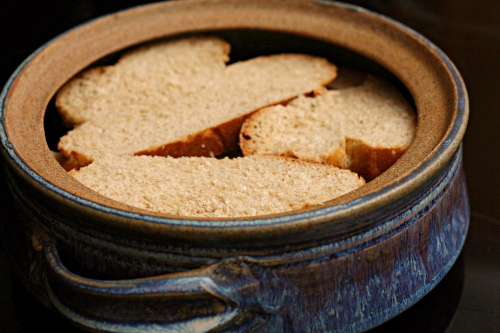
I need to stop doing things like making a complicated braided loaf of bread just to cut it up and put in a casserole. Especially considering that Deb specifically calls for supermarket bread, clarifying that there is no need for super fancy stuff. No! Everything must be fancy! This is why I have no time to clean my house.

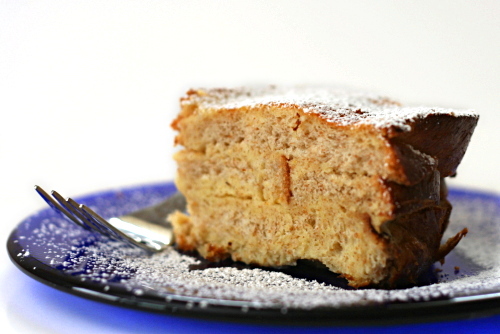
Deb suggests a range of flavoring options, but the first time I made this, I happened to have a grapefruit around, so I went a citrus direction, with grapefruit zest and triple sec. I also added vanilla to make, essentially, creamsicle French toast. Highly – highly – recommended.

Like most breakfast casseroles, the big advantage here (besides that it tastes like a creamsicle) is that you can make it in advance and then just bake it in the morning. Furthermore, it’s a simple, easy recipe, with just a few ingredients and simple mixing method. Which is very good thing, because you can spend the time you save making the casserole baking an impractically beautiful and fresh loaf of bread.

One year ago: Vegetable Curry
Two year ago: Grits Cheese and Onions Soufflés

Printer Friendly Recipe
Boozy Baked French Toast (rewritten from Smitten Kitchen)

Serves 6

This recipe is infinitely adaptable. Use whole milk for extra richness or lowfat milk to cut calories. Mix and match your liqueurs and your add-ins. Skip the liqueur entirely and use a couple teaspoons of an extract.

1 loaf challah, sliced 1-inch thick
3 cups whole milk
3 eggs
3 tablespoons sugar
½ teaspoon salt
¼ cup liqueur (see note)
other flavorings – ½ cup toasted nuts, 1 teaspoon zest, ½ cup dried fruit

1. Grease a 9×13-inch baking dish. Arrange half of the bread in a tightly-packed layer in the pan. Add the nuts or dried fruit, if using. Place the remaining bread on top of the first layer.

2. Whisk together the milk, eggs, sugar, salt, liqueur, and zest, or flavorings of your choice and pour over the bread. Wrap tightly with plastic wrap and refrigerate overnight.

3. Bake at 425 degrees until puffed and golden, about 30 minutes. Cut into generous squares and serve with maple syrup, fresh fruit, powdered sugar or all of the above.

banana peanut butter muffins

Conversely, I think I’d like bananas more if they weren’t so cheap, convenient, and healthy. It’s just that I eat so many bananas. For years, every weekday, a banana. I had to start mixing the bananas with other things to make them palatable. In the spring, strawberries make a wonderful accompaniment. And if I want something more filling, peanut butter works perfectly. Now I eat peanut butter with my banana everyday, and I’m hoping that it’s a tasty enough combination that I don’t get sick of it anytime soon.

If bananas are better with peanut butter, it stands to reason that banana bread is better with peanut butter too, right? Or banana muffins, as the case may be. And it turns out, yes, peanut butter is a wonderful addition, and so is oatmeal, to make banana muffins more fun and interesting. It’s just too bad that muffins don’t work as a healthy replacement to my normal daily banana.

One year ago: Farmer’s Market Salad with Spiced Goat Cheese Rounds
Two years ago: Tuscan-Style Couscous Salad

Printer Friendly Recipe
Peanut Butter Banana Oatmeal Muffins (from Baking Bites via Annie’s Eats)

I used oil instead of applesauce, because I always have oil around and never have applesauce around.

1½ cups (7.2 ounces) all-purpose flour
1 cup old-fashioned oats
1 teaspoons baking powder
½ teaspoons baking soda
½ teaspoons salt
2 tablespoons applesauce
¾ cup (5.25 ounces) light brown sugar
2 large eggs
1 cup mashed banana (about 3 bananas)
6 tablespoons creamy peanut butter
1 cup low-fat buttermilk

1. Preheat the oven to 350˚ F. Line 18 muffin cups with paper liners.

2. In a medium mixing bowl, combine the flour, oats, baking powder, baking soda and salt. In a large mixing bowl, whisk together the applesauce, brown sugar, eggs, banana, peanut butter and buttermilk until smooth. Pour the dry ingredients into the bowl with the wet ingredients and mix just until incorporated and fully blended.

3. Divide the batter between the prepared muffin cups. Bake 18-20 minutes, or until a toothpick inserted in the center comes out clean. Allow to cool in the pan for 5-10 minutes, then transfer to a wire rack to cool completely.

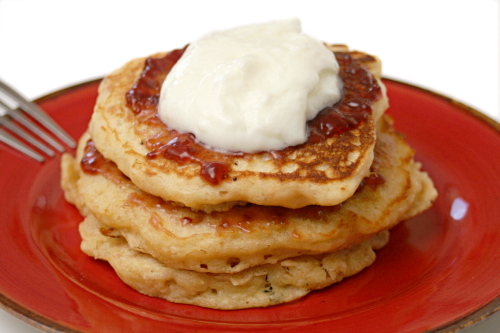
basic pancakes

Every time I want to make pancakes, I have to look up my pumpkin pancake recipe and mentally subtract out the pumpkin and fall spices. It’s about time I made my basic pancake recipe more accessible.

The thing about pancakes is that there are a lot of less-than-perfect recipes. Trust me, I’ve tried a lot of them. I suppose what’s less-than-perfect for me might be perfect for someone else. Maybe. Because if a pancake is not too thin and not too thick, not too sweet and not too bland, plus not too hard to make and not too bad for you, what else could you want?

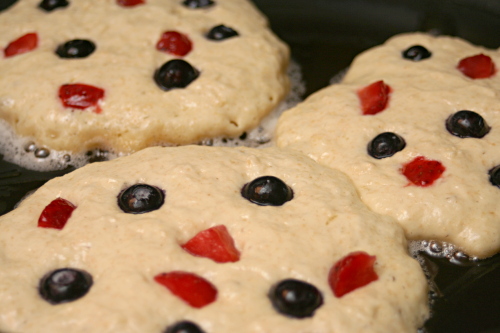
Did you want adaptability? You can have that too. Add fruit or nuts. Replace the sugar with honey. Replace half (maybe more!) of the flour with whole wheat pastry flour.

Did you want to use something other than buttermilk? I’m becoming a fan of actual buttermilk (or what passes for it in the grocery store today, which is not actually the “milk” leftover after churning cream into butter, but something more similar to yogurt – whatever, I like it). I love having it around. It lasts a while in the fridge and gives me an excuse to make pancakes, waffles, biscuits, coleslaw, cake. If you instead want to do the milk+lemon juice trick, only use ¾ cup of milk along with a tablespoon of lemon juice. If you’re using powdered buttermilk, only use 7 (liquid) ounces of water instead of the cup it recommends. If you have both plain yogurt and milk around, mixing the two together is my favorite buttermilk substitute.

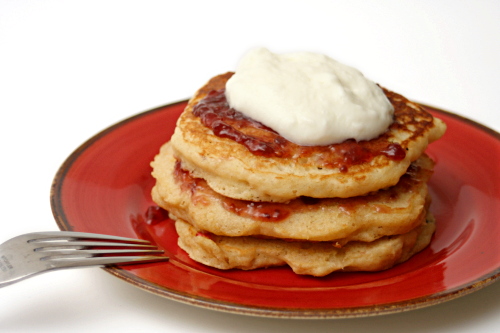
You can top your pancakes with whatever you want too, which probably means syrup. But, consider something different – maybe jam and plain yogurt? It’s healthier, but more important, it tastes great, with a nice balance of sweet and tart, hot (if you heat the jam first) and cool. Or just use syrup. However you prefer your perfect pancakes is fine by me.

One year ago: Brioche
Two years ago: Salad with Herbed Baked Goat Cheese

Printer Friendly Recipe
Basic Pancakes

Serves 2

There are all kinds of ways to play with this recipe – chunks of fruit or chocolate or nuts, spices, whole wheat pastry flour. The recipe is your oyster. You can even get away with using only 1 tablespoon of butter.

See the blog entry for notes on buttermilk substitutions.

1 cup (5 ounces) flour
1 tablespoon sugar
1 teaspoon baking powder
½ teaspoon baking soda
½ teaspoon salt
1 egg
2 tablespoons butter, melted and cooled
1 cup buttermilk
vegetable oil for the pan

1. In a large mixing bowl, stir together the flour, sugar, baking powder, baking soda, and salt. In a separate mixing bowl, whisk the egg until thoroughly combined, then add the butter and buttermilk. Pour the liquid ingredients into the dry ingredients and whisk gently until batter is mostly mixed but still contains small lumps. Let the batter rest while the pan heats, at least 5 minutes.

2. Heat a non-stick skillet or a griddle over medium heat. Add a few drops of oil and spread it over the bottom of the pan. Using a ¼ cup measure, pour the pancake batter onto the hot griddle. When the pancakes are golden brown, after about 2-3 minutes, flip to cook the other side another 2-3 minutes. Keep warm in oven heated to 200 degrees.

raisin swirl bread

Dave has recently encountered an enviable problem. After starting to exercise a few months ago for the first time in years, he started losing weight too fast.

Losing weight. Too fast.

So now we’re trying to come up with ways to get him more healthy calories that don’t create much more work. Hard-boiled eggs, peanut butter, protein shakes, and bread. Making a loaf of bread every couple of weeks for him to eat at work does require more effort, but it isn’t work, because I like making bread.

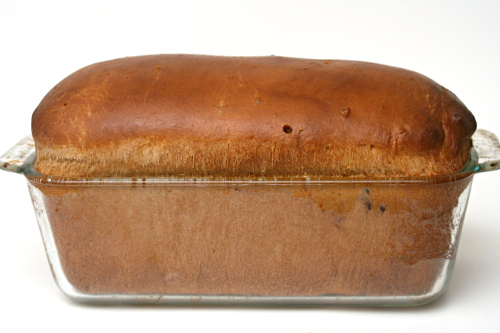
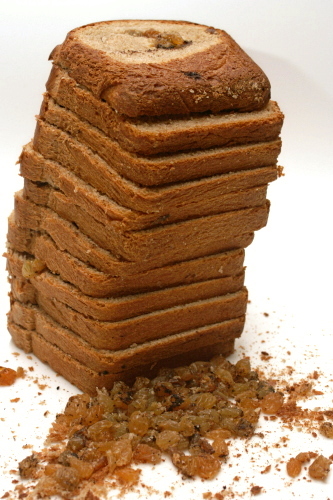
I haven’t bought bread since moving to New Mexico last winter, and I haven’t made pure white bread since discovering I could adapt any recipe to be at least partially whole wheat with no detriment to flavor or texture. It worked just as well with this bread as it has in the past, giving me a light, tender loaf of bread made a little more special with a spiral of raisins and sugar and cocoa. Not that I got to eat more than a slice, since most of this loaf went to He Who is Super Annoying Because He Gets to Eat Twice as Much Food as Me.

Susan chose this bread for Tuesdays with Dorie, and she has the recipe posted. I mixed 2 cups (9.6 ounces) of whole wheat flour with ¾ cup of the milk and ½ teaspoon of the salt and let it sit overnight before combining it with the rest of the ingredients. And for whatever reason, 1 cup of raisins was way too much for me and they all fell out when I cut into the bread. But no one else had this problem, so apparently I’m just a weirdo. Still, next time, ½ cup of raisins.

One year ago: Honey Peach Ice Cream
Two years ago: Cappuccino Cream Puff Rings

croissants 3 (martha stewart)

I worked in a lab for years, but I never absolutely loved it. You’d think I would have, considering that I basically mixed up ingredients and baked them, but I guess without that crucial eating-the-batter – sorry, of course I mean that eating-the-result step, it just wasn’t as fun.

Plus I could never get the hang of keeping good records in the lab. My notebook seemed to be both unorganized and lacking crucial information. I took detailed notes on the amount and type of ingredients used and the baking temperature and time, but whenever I needed to look up details of the result, I was left with a few marginally descriptive words.

In the kitchen, it’s the opposite. The result, now that’s memorable, especially in this case – slightly sweet, intensely flaky, dark golden brown, impossible to resist, always leaving me wanting another.

The path to that result isn’t as memorable, particularly in the amount of instant dry yeast I used. Probably I should have written that down somewhere. I’m going to hypothesize – remember, hypothesizing is not the same thing as guessing! It’s an educated guess, which is to say, don’t skip out on this recipe just because the fresh yeast called for in the original recipe is dumb and I’m bad at note-taking, because the chances are very good that my estimate of the amount of yeast I used isn’t too terribly terrible, and anyway, it’s yeast and yeast always does its job eventually.

Anyway. I’m going to hypothesize that I used about one packet of yeast. Please accept my apologies for not taking thirty seconds to write it down. This must be why I now have an office job instead of a lab job.

One year ago: Anadama Bread
Two years ago: Baba Ghanoush and Falafel

Printer Friendly Recipe
Croissants (adapted from Martha Stewart’s Baking Handbook)

Makes 12

1 cup cold milk
1 tablespoon honey
14 ounces (about 3 cups) all-purpose flour
¼ cup (1.75 ounces) sugar
2¼ teaspoons salt
2¼ teaspoons (1 packet) instant yeast
20 tablespoons (2½ sticks) unsalted butter, cold
1 large egg, lightly beaten with a pinch of salt and a dribble of water or milk

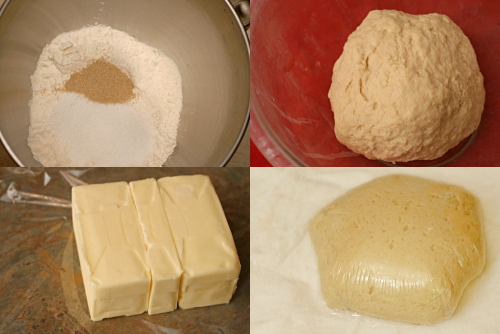
1. Make the dough package: Pour the milk and honey into a 2-cup liquid measuring cup, and stir to combine; set aside. In the bowl of an electric mixer fitted with the dough hook, stir together 12 ounces (about 2¾ cups) of the flour, the sugar, yeast, and salt; stir to combine. Add the milk mixture and mix on low speed until the dough just comes together, 2 to 3 minutes.

2. Turn out the dough onto a lightly floured work surface; gently knead to form a smooth ball, about 45 seconds. Wrap in plastic and refrigerate at least 1 hour or overnight.

3. Make the butter package: Lay the butter sticks side by side on a piece of plastic wrap, and sprinkle with the remaining 1 ounce (about 2 tablespoons) flour. Pound with a rolling pin until the flour is incorporated; roll into a 4- by 3-inch rectangle. Wrap tightly and refrigerate for at least 1 hour or overnight.

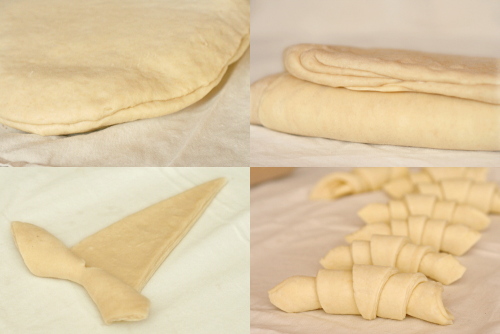
4. Remove the dough package from the refrigerator; place on a lightly floured work surface. Roll out to an 8-by-10-inch rectangle, about ½ inch thick, with a short side facing you. Remove the butter package from the refrigerator; place on the bottom half of the dough; fold the top half of the dough over the butter, and pinch the edges to seal.

5. Roll out the dough to a 10-by-10-inch square about ½ inch thick; keep the corners as square as possible. Remove any excess flour with a dry pastry brush. Starting at the far end, fold the square in thirds, as you would a business letter. This completes the first of three turns. Wrap in plastic and refrigerate for 1 hour.

6. Repeat rolling and folding as above two more times, starting with the flap opening on the right, as if it were a book, and refrigerate at least 1 hour between turns. To help you remember how many turns have been completed, mark the dough after each: Make one mark for the first turn, two for the second, and three for the third. After the third, wrap the dough in plastic, and refrigerate 6 to 8 hours, or overnight.

7. Turn out the chilled dough onto a lightly floured work surface. Roll out the dough to a 30-by-8-inch rectangle. (If the dough becomes too elastic, cover with plastic wrap, and let rest in the refrigerator for 10 minutes.) Using a pizza wheel, cut the dough into triangles, each with a 4-inch base (you will have scraps of dough at both ends). Cut a 1-inch slit in the center of the base of each triangle. Place triangles in a single layer on a clean work surface.

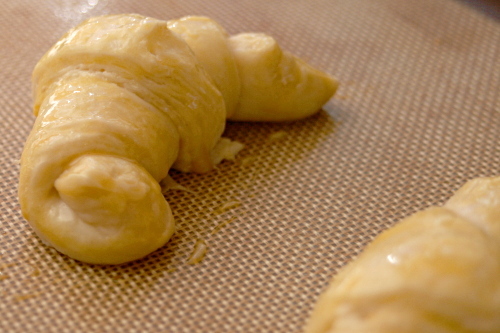
8. To shape the croissants, stretch the two lower points of each triangle to enlarge the slit slightly. Fold the inner corners formed by the slit toward the outer sides of the triangles, and press down to seal. Using your fingertips, roll the base of each triangle up and away from you, stretching the dough slightly outward as you roll; the tip should be tucked under the croissant. Pull the two ends toward you to form a crescent. Transfer the crescents to a parchment-lined baking sheets, 2 inches apart. Cover loosely with plastic wrap, and let rise in a warm place until very spongy and doubled in bulk, 45 to 60 minutes.

9. Preheat the oven to 400ºF, with a rack in the middle position. Lightly brush the crescents with the beaten egg. Bake until the croissants are puffed and golden brown, about 15 to 20 minutes. Transfer the sheet to a wire rack to cool. Serve warm or at room temperature.

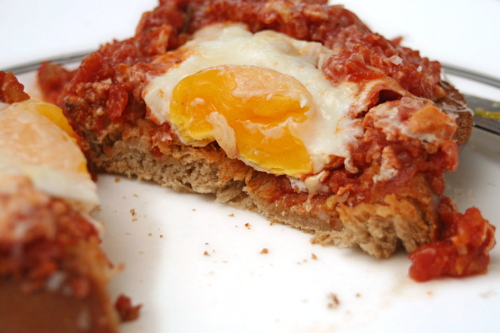
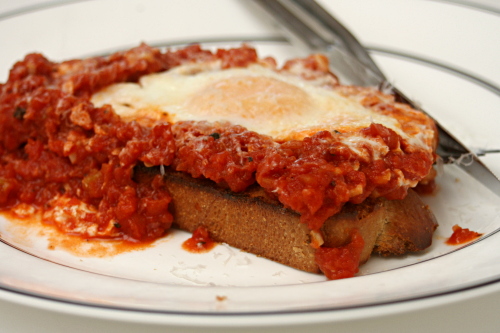
eggs in tomato sauce

Back in Dave’s bachelor days, “pasta and red” was one of his standard dinners. He’d cook and drain pasta, put the pasta back in the pot, dump jarred tomato sauce over it, and stir it all up until it was warmish. Pasta and red.

These days, I’m always insisting that ‘pasta and red’ is not a phrase that should be associated with actual home-cooked tomato sauce. Whether I’m quickly sautéing some garlic to make a simple sauce with canned diced tomatoes, mixing up vodka sauce, or simmering a slow-cooked bolognese, Dave wants to call them all pasta and red. No! A 5-hour bolognese should not be compared to oversweetened overcooked jarred sauce.

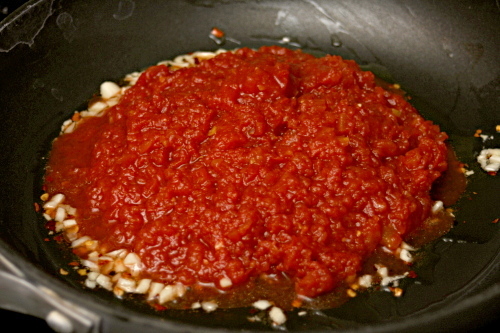
I like all types of tomato sauces, even jarred ‘red’, but when I smelled this simmering pan of tomatoes and garlic and realized that I was basically making spaghetti sauce to serve with eggs for breakfast, I started to worry – yes, I like tomato sauce with pasta, but would it translate to eggs and breakfast?

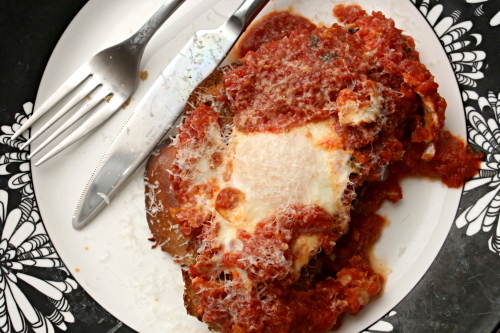
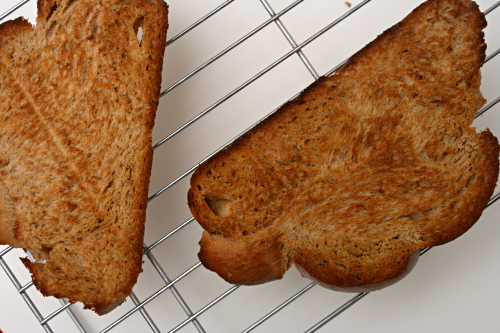
Yup. The rich egg balances the acidic tomato sauce, and the thick slice of whole wheat challah on the bottom soaked up every bit of flavor. Eggs and red – it works.

One year ago: Tofu Mu Shu
Two years ago: Crockpot Pulled Pork

Printer Friendly Recipe
Poached Eggs in Tomato Sauce
(adapted from Smitten Kitchen)

If you just want to coarsely chop your tomatoes, stick a pair of scissors into the opened can of tomatoes and snip away.

Serves 4

1 tablespoon olive oil
2 cloves garlic, minced
pinch of crushed red pepper flakes
2 tablespoons red or white wine (optional)
1 (28-ounce) can whole tomatoes, drained and chopped or pureed
pinch sugar
½ teaspoon salt
ground black pepper
4 large eggs
4 slices toasted country bread
freshly grated Parmesan cheese

1. In a medium skillet, heat the oil, garlic, and pepper flakes over medium heat until the garlic and pepper is sizzling. Add the wine and let it simmer until it becomes syrupy, about 2 minutes. Stir in the tomatoes, sugar, salt and pepper. Reduce the heat to medium-low and simmer until thickened, 12 to 15 minutes.

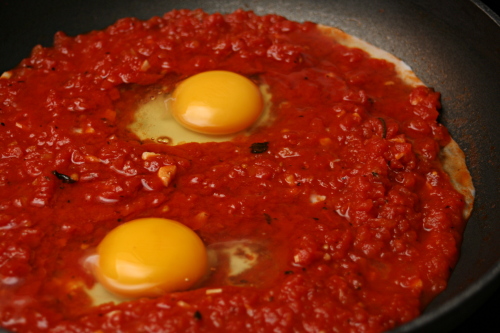
2. Break the eggs into individual small cups. Make wells or indentations in the sauce, and gently transfer the eggs from the cups to the wells; season the eggs with salt and pepper. Cover the pan and cook over medium-low heat for 5 to 7 minutes, or until the whites are set.

3. Spoon a portion of sauce with an egg over toasted bread. Top with a generous sprinkling of parmesan cheese and serve immediately.