lemon cake with lemon curd filling and cream cheese frosting

fondant 22

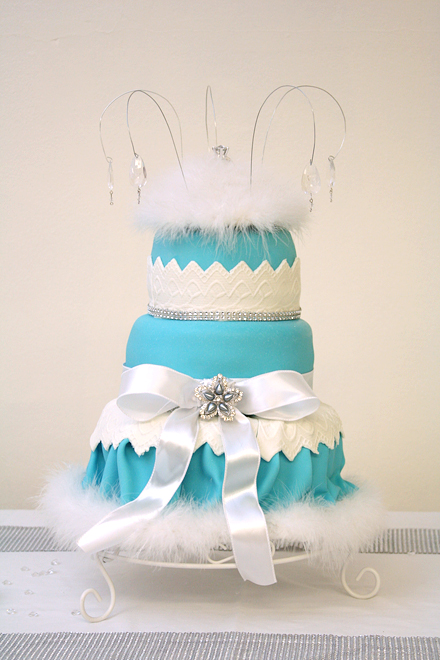
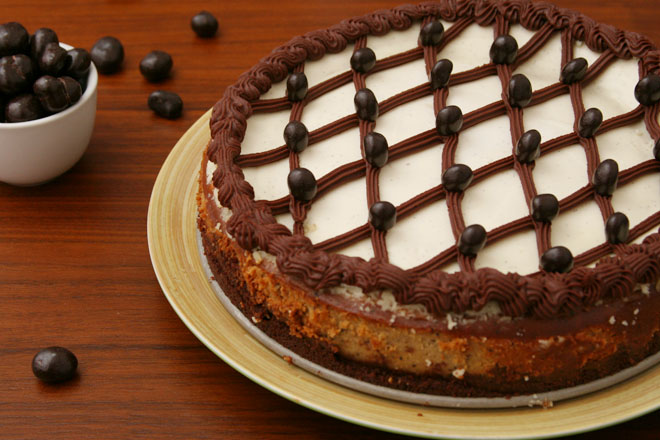
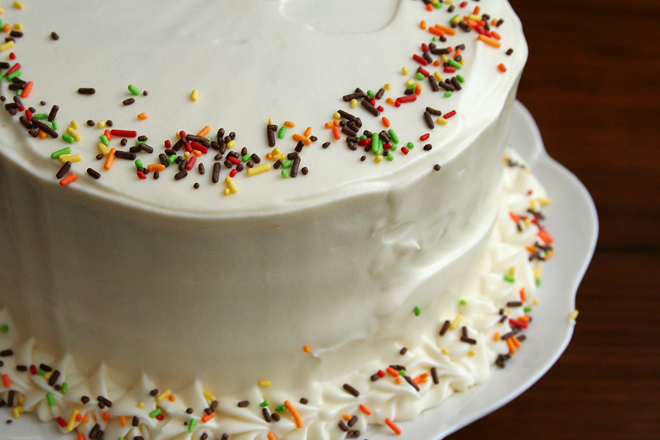
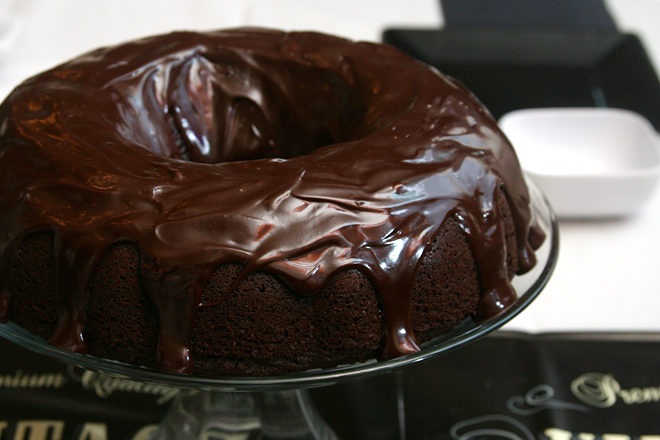
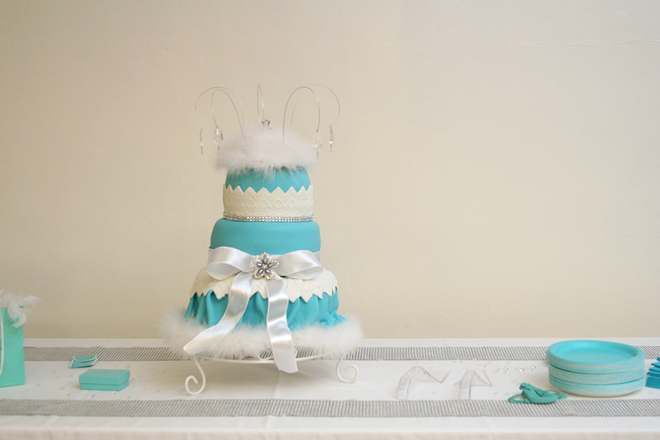
Two years ago, I made this cake for a Tiffany-themed baby shower (and I’m just now telling you about it), and it became infamous for the cake that made me cry. I wouldn’t have told anyone that myself, but Dave blurted it out when we delivered the cake. “Never again!”, he told our friends.

tiffany fondant collage

I’m actually proud of the cake, but it’s true that it wasn’t a smooth process. When my friend showed me a picture of the cake and asked me to reproduce it for the baby shower she was hosting for her daughter, I ambitiously agreed. I had never worked with fondant before, but how hard could it be?

fondant 16

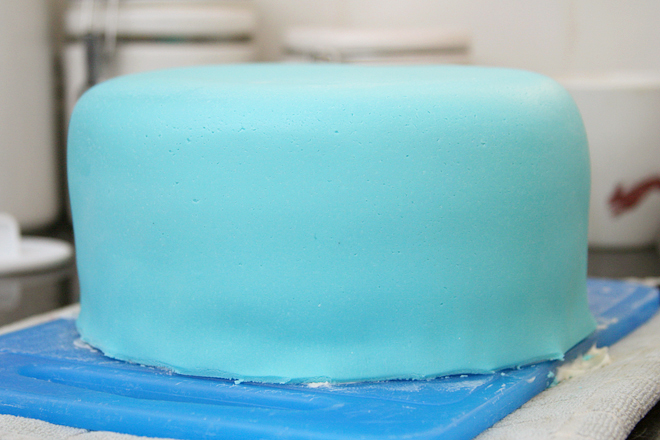
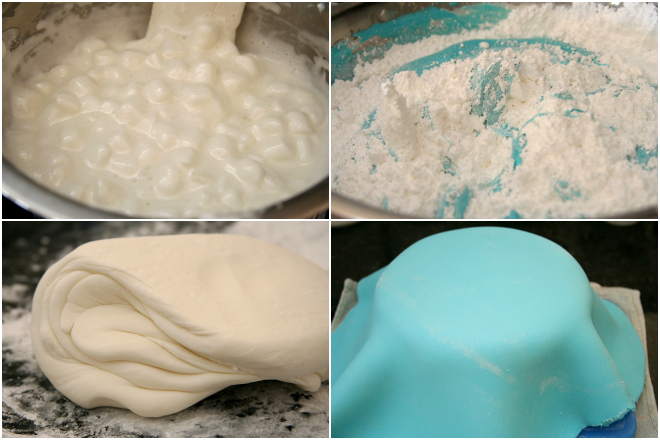
Well, pretty hard, actually, at least when you’re both inexperienced and a perfectionist. I found a few opportunities to practice before the shower and learned some valuable lessons, but on the morning of the shower, the ruffles and lace were still uncharted territory. Looking back, I can’t remember what caused the tears, but it could have been any number of things – the lace sticking to the mold, running out of fondant, running behind schedule.

fondant 18

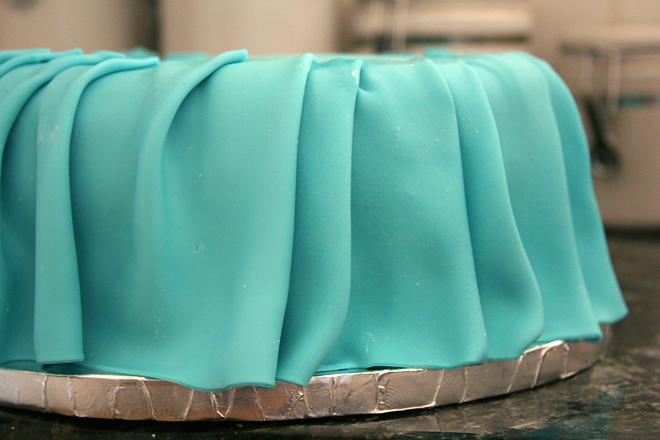
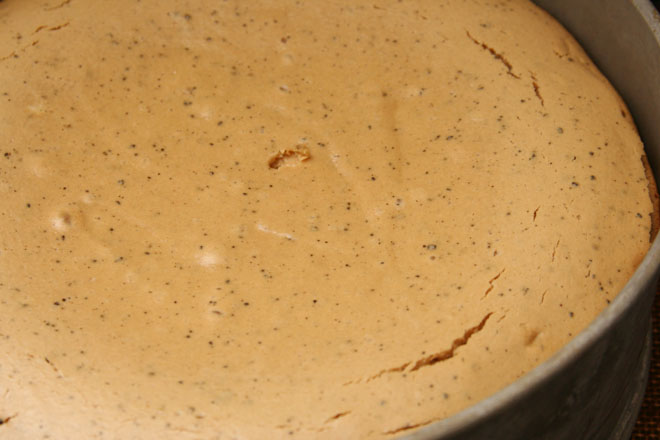
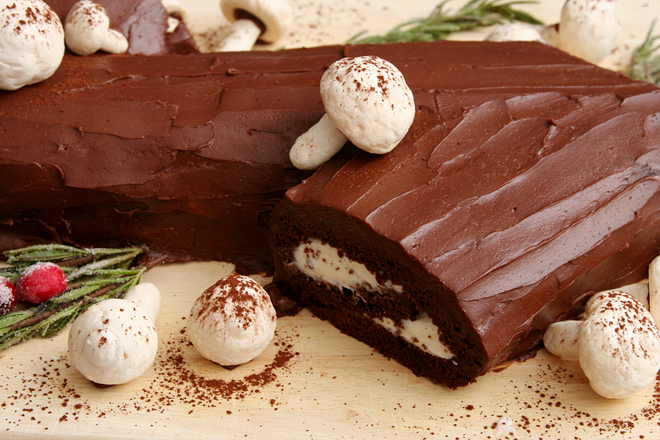
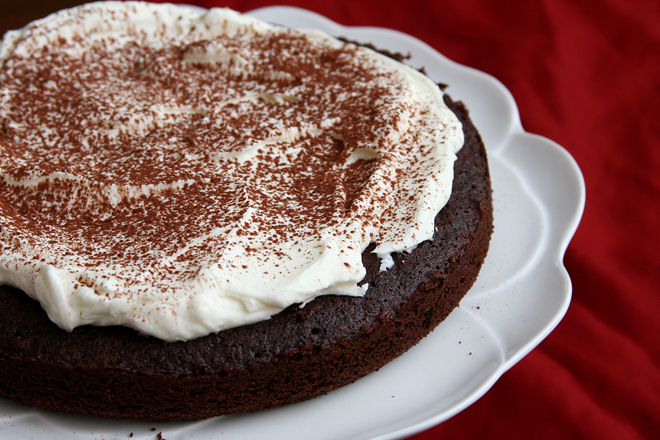
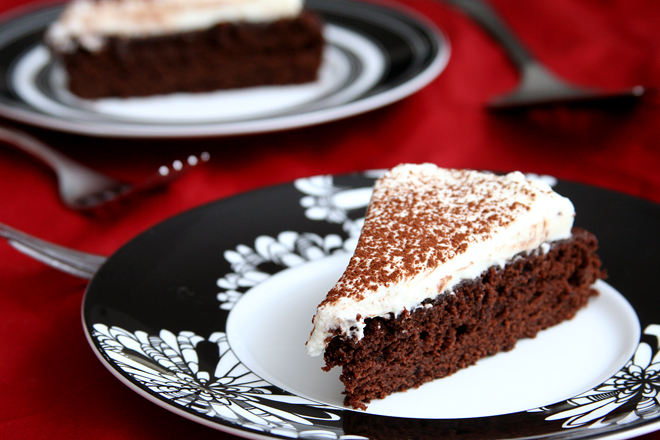
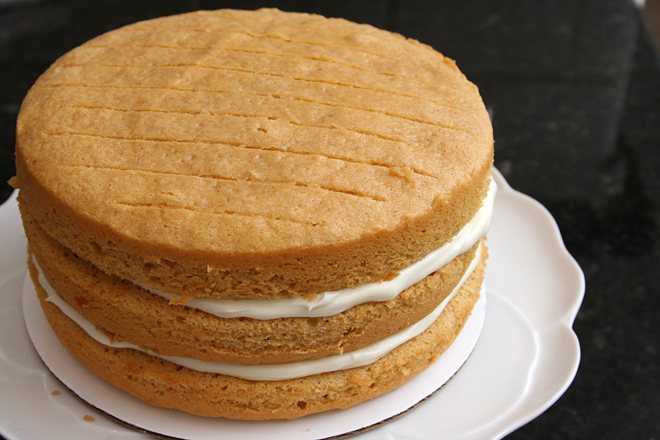
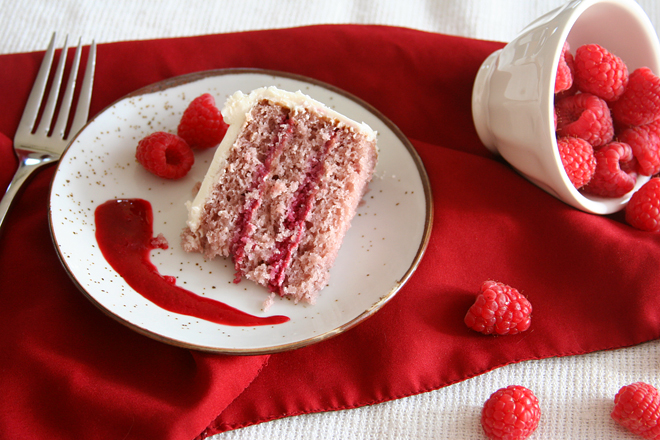
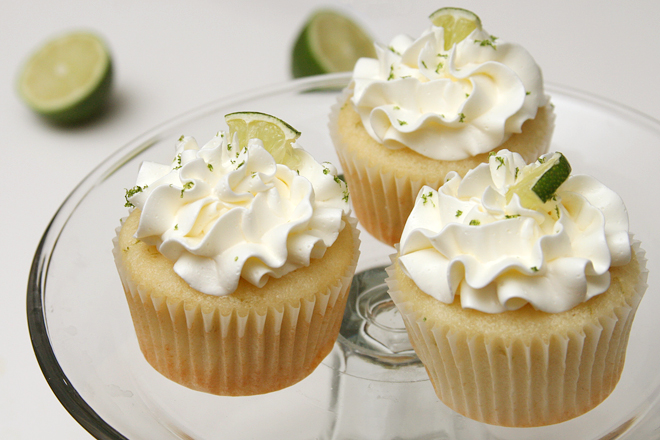
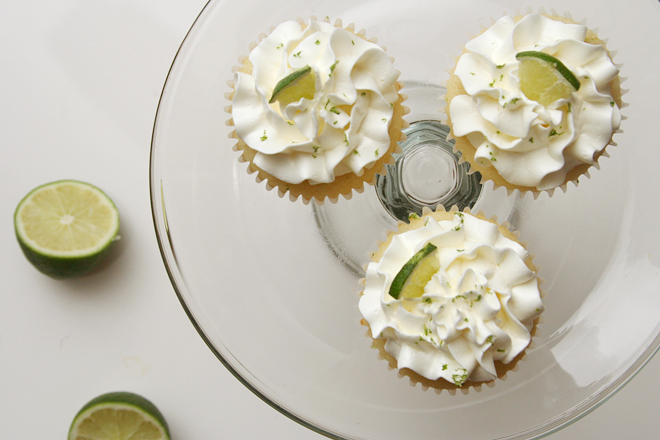
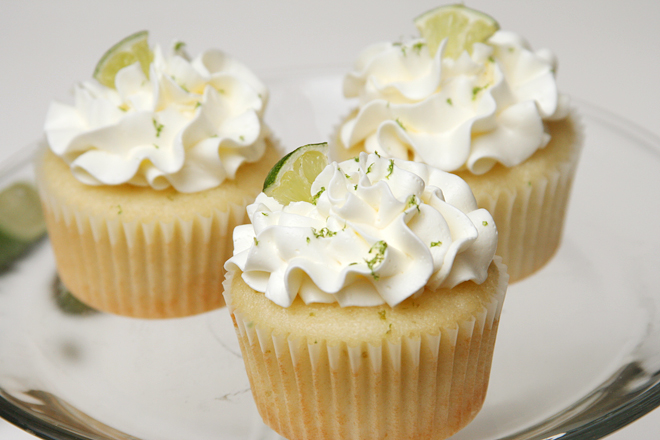
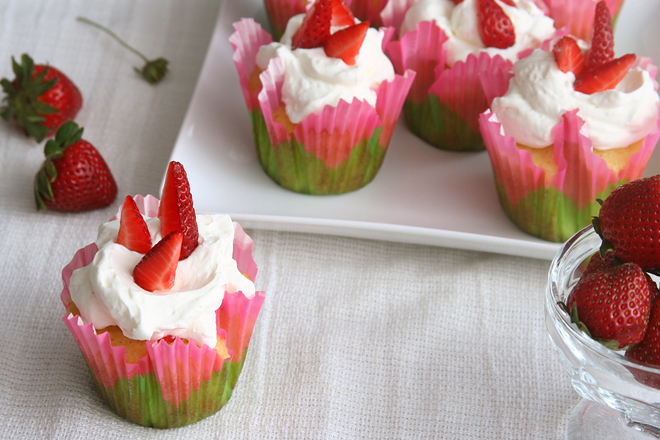
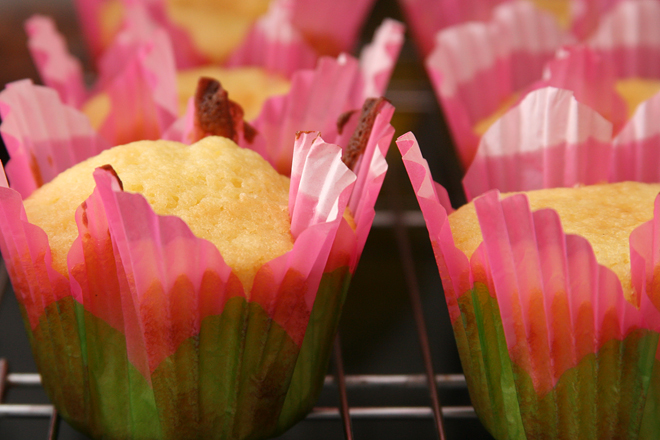
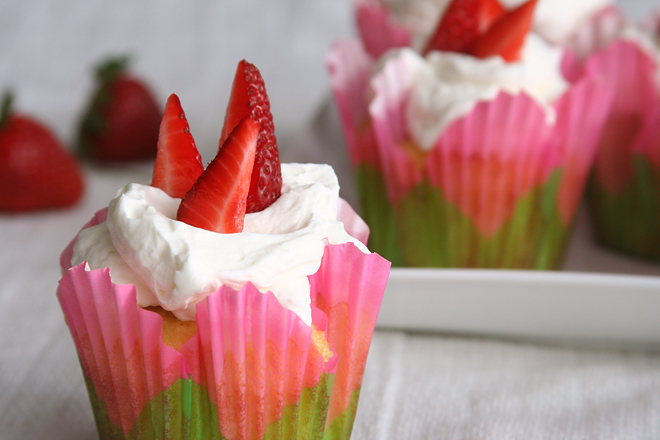
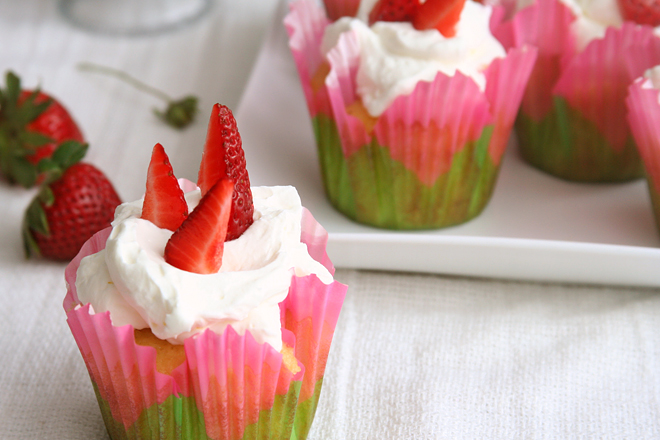
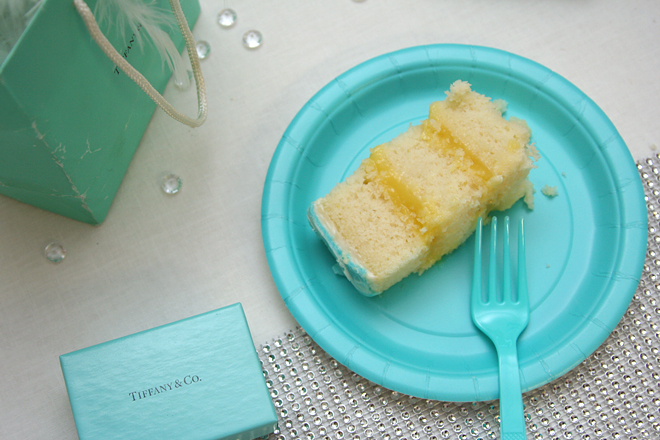
Fortunately, whether the lace had obvious seams or the fondant cracked at the corners, I knew the cake itself would taste good. I’m much more confident in my baking skills than my decorating skills. I took one of my favorite white cakes and added lemon zest, so that, at least, was one part of this project that wasn’t complicated.

fondant 19

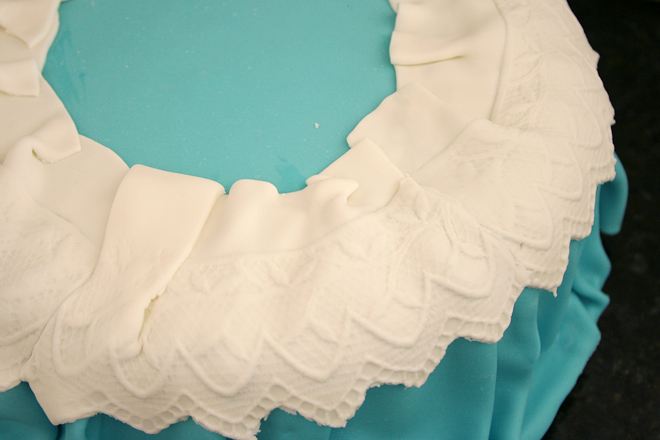
Despite my struggles, I think the cake turned out great, and the host seemed pleased. It tasted at least as good as it looked. Still, it was two years before anyone asked me to make a tiered cake with fondant for them again. That is what I’ll be doing this weekend. Any bets on how many times I cry this time?

fondant 24

Printer Friendly Recipe
Lemon Cake with Lemon Curd Filling and Cream Cheese Frosting
(adapted from Cook’s Illustrated’s Classic White Cake)

Makes a double-layer 8-inch or 9-inch cake

1 cup whole milk, at room temperature
6 large egg whites (¾ cup), at room temperature
2 teaspoons almond extract
1 teaspoon vanilla extract
zest of 1 small lemon
1¾ cups granulated sugar (12¼ ounces)
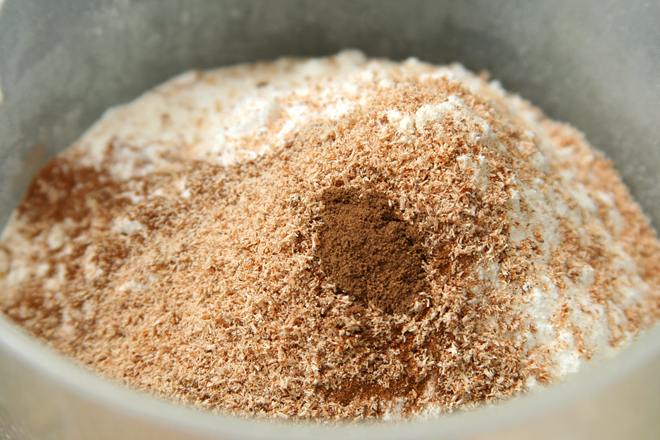
2¼ cups cake flour (9 ounces)
4 teaspoons baking powder
1 teaspoon table salt
12 tablespoons unsalted butter (1½ sticks), softened but still cool

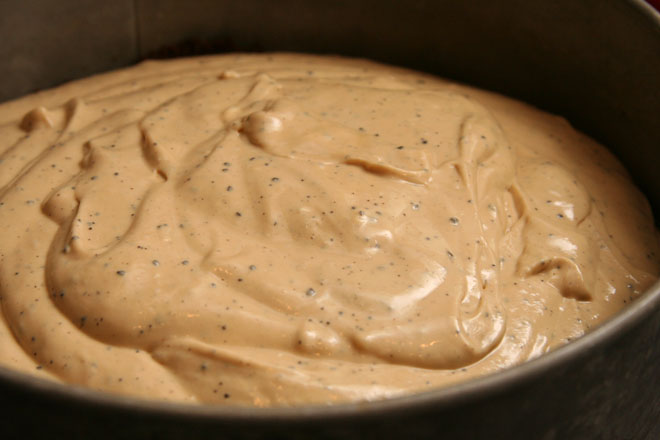
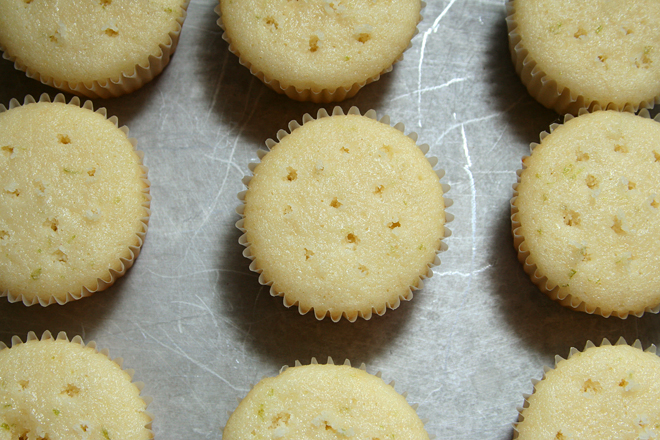
1. Adjust an oven rack to middle position and heat oven to 350 degrees. Grease and flour two 8- or 9-inch-wide by 2-inch-high round cake pans and line with parchment paper. In a 4-cup liquid measure or medium bowl, whisk together milk, egg whites, and vanilla.

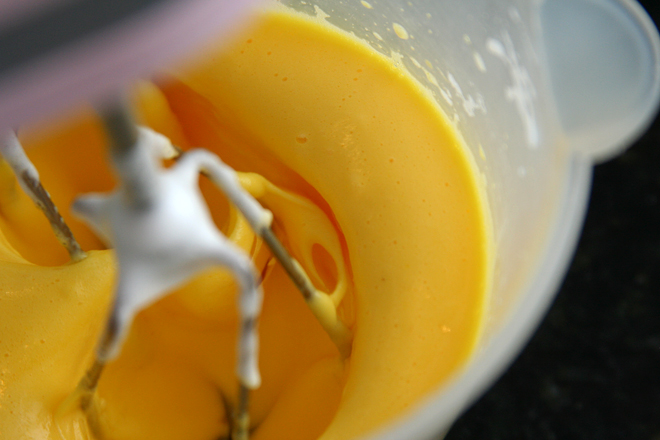
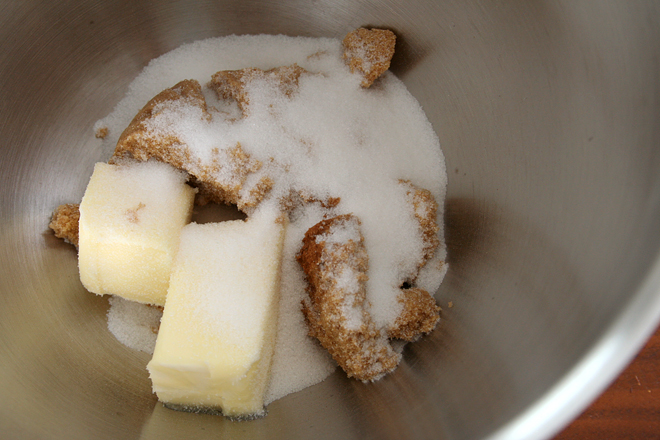
2. In bowl of standing mixer fitted with paddle attachment, mix the flour, sugar, baking powder, and salt at low speed. With the mixer running at low speed, add the butter one piece at a time; continue beating until the mixture resembles moist crumbs with no visible butter chunks. Add all but ½ cup milk mixture to crumbs and beat at medium speed until mixture is pale and fluffy, about 1½ minutes. With mixer running at low speed, add remaining ½ cup milk mixture; increase speed to medium and beat 30 seconds more. Stop mixer and scrape sides of bowl. Return mixer to medium speed and beat 20 seconds longer. Divide batter evenly between cake pans; using rubber spatula, spread batter to pan walls and smooth tops.

3. Bake until toothpick inserted in center of cakes comes out clean, about 20 minutes for 6-inch pans, 22 minutes for 8-inch pans, and 26 minutes for 10-inch pans. Loosen cakes from the sides of the pans with a small knife, cool in pan 10 minutes, then invert onto greased wire racks; peel off parchment. Invert the cakes again; cool completely on rack, about 1½ hours.

fondant 9

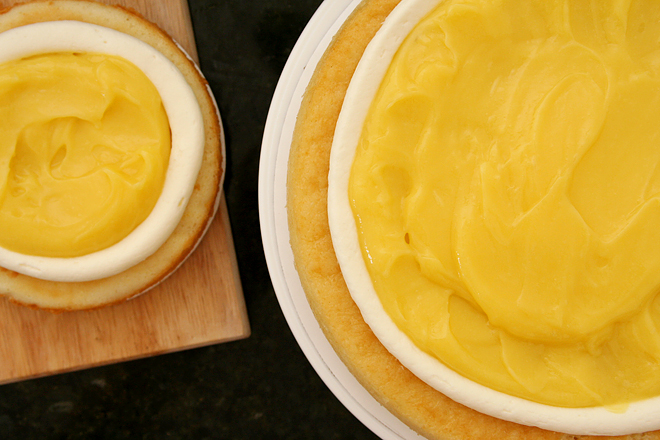
Lemon Curd Filling (from Cook’s Illustrated)

⅓ cup lemon juice, from 2 lemons
2 large eggs
1 egg yolk
½ cup sugar (3½ ounces)
2 tablespoons unsalted butter, cut into ½-inch cubes and chilled
1 tablespoon heavy cream
¼ teaspoon vanilla extract
pinch table salt

1. Heat lemon juice in small nonreactive saucepan over medium heat until hot but not boiling. Whisk eggs and yolk in medium nonreactive bowl; gradually whisk in sugar. Whisking constantly, slowly pour hot lemon juice into eggs, then return mixture to saucepan and cook over medium heat, stirring constantly with wooden spoon, until mixture registers 170 degrees on instant-read thermometer and is thick enough to cling to spoon, about 3 minutes.

2. Immediately remove pan from heat and stir in cold butter until incorporated; stir in cream, vanilla, and salt, then pour curd through fine-mesh strainer into small nonreactive bowl. Cover surface of curd directly with plastic wrap; refrigerate until needed.

fondant 2

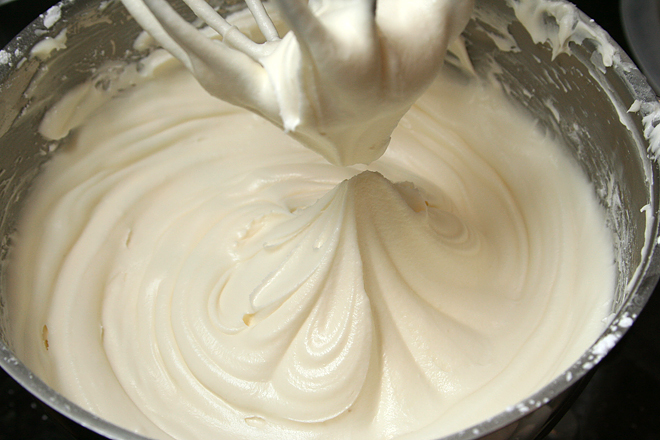
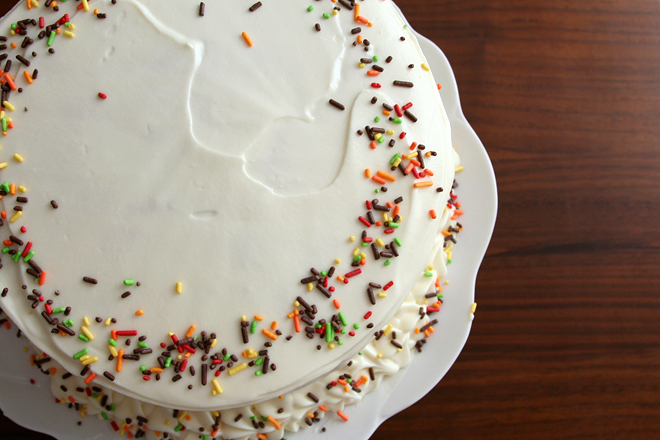
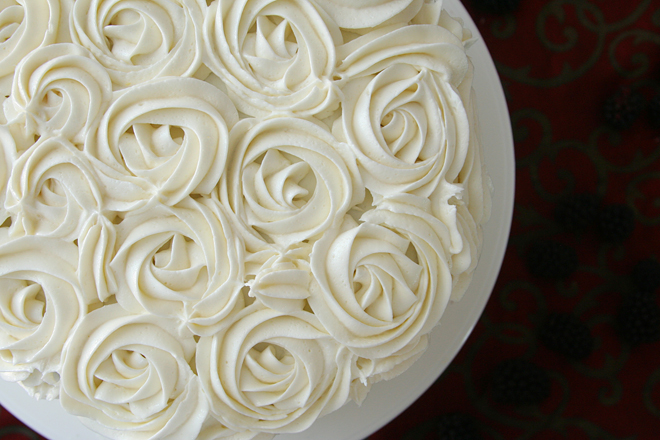
Cream Cheese Frosting (adapted from Smitten Kitchen)

Makes 6 cups

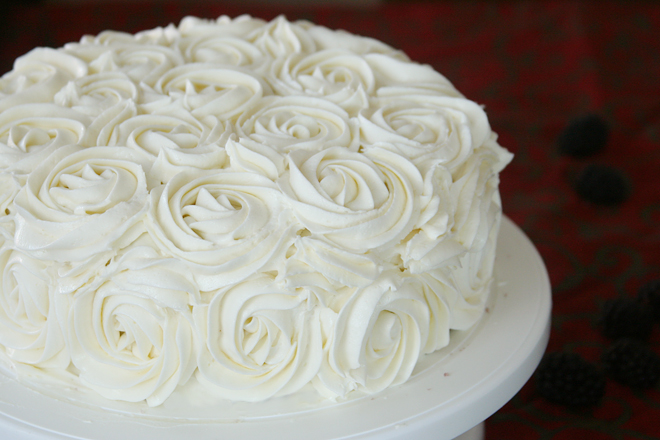
You can use 12 ounces powdered sugar instead of 16 if you’re going to make pretty swirls with the icing instead of decorating. It’ll taste less sweet and more cream cheesy.

8 ounces cream cheese, room temperature
8 tablespoons (1 stick) butter room temperature
4 cups (16 ounces) powdered sugar
1 teaspoon pure vanilla extract

Place cream cheese and butter in a medium bowl. With a handheld electric mixer, beat until light and fluffy, about 2 minutes. Add sugar and vanilla. Beat on low speed to combine.

fondant 21

cappuccino fudge cheesecake

cappuccino fudge cheesecake 7

Cheesecake, the more I think about it, is an almost perfect choice for bringing to dinner parties. It’s universally loved. It’s rarely complicated to make. It can be made several days in advance (or farther in advance and frozen). It transports well. The only tiny potential issue is that a full slice of cheesecake after a big meal can be tough to tackle.

cappuccino fudge cheesecake 1

I get together with a group of friends every month; usually it’s some version of a potluck – perhaps the host will provide salad greens and dressings while everyone else contributes toppings (and wine). Or perhaps the host will provide corn tortillas and barbacoa and everyone else contributes toppings and sides. Last month, the host provided crostini, zuppa toscana, and salad. I was thrilled she didn’t have a dessert planned, providing me with an opening. Cappuccino fudge cheesecake seemed to fit the theme.

cappuccino fudge cheesecake 2

Still, I was worried that 2 pounds of cream cheese, 1¼ pounds of chocolate, 1½ cups of heavy cream, and 1½ cups of sour cream would be overkill after bread and soup and lasagna, so I pared down the recipe to something more reasonable. Considering how much my friends raved, I’m not sure I needed to make a smaller version. Yes, there were leftovers, but there was no shortage of people to take them home. I might start bringing cheesecake to all the parties; I can’t imagine anyone will complain.

cappuccino fudge cheesecake 4

Printer Friendly Recipe
Cappuccino Fudge Cheesecake (adapted from Bon Appetit via epicurious)

16 servings

Crust:
5 ounces chocolate cookies
1 tablespoon sugar
5 tablespoons butter, melted

Ganache:
1 cup heavy cream
12 ounces semisweet chocolate, chopped
3 tablespoons Kahlúa or other coffee-flavored liqueur

Filling:
3 (8-ounce) packages cream cheese, room temperature
1 cup (7 ounces) sugar
1½ tablespoons all-purpose flour
1½ tablespoons dark rum
1½ tablespoons instant espresso powder
1½ tablespoons ground whole espresso coffee beans (medium-coarse grind)
1 tablespoon vanilla extract
1½ teaspoons light molasses
3 large eggs

Topping:
1 cup sour cream
¼ cup (1.75 ounces) sugar
2 teaspoons vanilla extract
chocolate-covered espresso beans

1. For the crust: Spray the bottom of a springform pan with nonstick spray. Either grind the cookies with a food processor or place them in a ziptop bag and crush with a rolling pin. Add the sugar and butter to the crumbs and stir until evenly mixed. Press the crumbs into an even layer covering the bottom of the prepared pan and up the sides an inch or so. Put the pan in the freezer for 30 minutes.

2. Bring the heavy cream to a simmer in a small saucepan; pour over the chocolate and stir in the kahlua. Gently whisk until the chocolate is melted and the ganache is smooth. Pour 1½ cups of the ganache over the bottom of the crust. Freeze until the ganache layer is firm, about 30 minutes. Reserve the remaining ganache; cover and let stand at room temperature to use later for decorations.

3. For the filling: Position a rack in the middle of the oven and heat the oven to 350°F. Beat the cream cheese on low speed until smooth; add the sugar and beat until blended. Mix in the flour. Combine the rum, espresso powder, ground coffee, vanilla, and molasses in a small bowl until the instant coffee dissolves; beat into the cream cheese mixture. Beat in eggs one at a time, occasionally scraping down the sides of the bowl.

4. Pour the filling over the cold ganache in the crust. Place the cheesecake on a rimmed baking sheet. Bake until the top is brown, puffed and cracked at the edges, the center two inches moves only slightly when pan is gently shaken, and the cheesecake reads 150 degrees on an instant-read thermometer, about 1 hour 5 minutes. Transfer the cheesecake to a rack. Cool 15 minutes while preparing the topping (the top of the cheesecake will fall slightly). Maintain the oven temperature.

5. For the topping: Whisk the sour cream, sugar, and vanilla in a medium bowl to blend. Spread the topping over the hot cheesecake, spreading to cover the cheesecake filling completely. Bake until the topping is set, about 10 minutes. Transfer the cheesecake to a rack. Refrigerate the hot cheesecake on a rack until cool, about 3 hours.

6. Run a small sharp knife between the crust and pan sides to loosen the cake; release the pan sides. Transfer the cheesecake to a platter. Spoon the reserved ganache into a pastry bag fitted with small star tip. Pipe lines one inch apart atop the cheesecake. Repeat in the opposite direction, making a lattice. Pipe ganache around the top edge of the cake. Garnish with chocolate-covered espresso beans, if desired. Chill until the lattice is firm, at least 6 hours. (Cheesecake can be made 4 days ahead. Wrap loosely in foil, forming a dome over the lattice; keep chilled.)

cappuccino fudge cheesecake 6

buche de noel

buche de noel 12

I was tense for the entire 2½ hours I spent making this cake. I’d signed up to bring it to the office holiday party potluck, and I wasn’t sure which title was more commonly known, yule log or buche de noel, so I wrote down both. This was a mistake; several hours later, Big Boss came barreling down the hall blustering about using fancy French words and/or bringing a piece of wood to the party.

buche de noel 1

He was mollified when I told him it was a cake. “Chocolate”, he asked? “Um, yes, chocolate”, even though I hadn’t really planned on chocolate.

buche de noel 6

So I felt like the stakes were high. And considering that I hadn’t made a rolled cake in seven years, the risk was high as well. This is why I spent all afternoon nervous, waiting to make a mistake that would result in a cake disaster.

buche de noel 8

There were no cake disasters. It wasn’t a perfectly smooth process – the grocery store ran out of mascarpone, the cake cracked when I rolled it, my baking pan is too small so the spiral was loose, the ganache didn’t set up, the cake cracked again when I tried to move it, and the last minute sugared rosemary and cranberries I made for decorations weren’t dry so the sugar dissolved instead of sparkled – but there was nothing that a little ganache couldn’t cover up. Once the ganache was frantically put in the freezer so it would set, that is.

buche de noel 11

Substituting cream cheese for mascarpone worked in my favor in the end, because when Big Boss asked me what the filling was made of, I told him cream cheese and didn’t mention the mascarpone. I’ve learned my lesson about fancy European words. Fortunately, the cream cheese/mascarpone filling really was delicious, just like the chocolate cake, and the ganache. Even the mushrooms were all gone by the time we left the party. It was an unqualified success; still, next year I’m bringing all-American cheesecake.

buche de noel 13

Printer Friendly Recipe
Bittersweet Chocolate Yule Log (slightly adapted from Cook’s Illustrated)

Serves 8 to 10

The ganache didn’t firm up for me in an hour at room temperature, so I put it in the refrigerator for a 10 minutes or so before icing the cake.

I was afraid to move the cake after it was formed and frosted, so I put it together directly on the serving plate. I slipped thin strips of wax paper under the edges of the cake to catch extra ganache, then discarded the strips before serving.

My grocery store ran out of mascarpone, so I used half mascarpone and half cream cheese in the filling, which worked very well.

The original recipe calls for an espresso-flavored filling instead of vanilla, but I didn’t think espresso would be as popular with the crowd I served this to. If you’d rather have the espresso, replace the vanilla flavorings in the mascarpone cream with 2 teaspoons espresso powder.

Dark Chocolate Ganache:
¾ cup heavy cream
2 tablespoons unsalted butter
6 ounces semisweet chocolate (high-quality), chopped
1 tablespoon Cognac or brandy

Vanilla Bean-Mascarpone Cream:
½ cup heavy cream
seeds from 1 vanilla bean
1 teaspoon vanilla extract
6 tablespoons confectioners’ sugar (1½ ounces)
16 ounces mascarpone cheese (about 2 cups)

Roulade:
¼ cup unbleached all-purpose flour (about 1¼ ounces), plus more for dusting baking sheet
6 ounces bittersweet chocolate or semisweet chocolate, chopped fine
2 tablespoons cold unsalted butter, cut into two pieces
2 tablespoons cold water
¼ cup cocoa (¾ ounce), Dutch-processed, sifted, plus more for unmolding and garnish
⅛ teaspoon table salt
6 large eggs, separated, room temperature
⅓ cup granulated sugar (2⅓ ounces)
1 teaspoon vanilla extract
⅛ teaspoon cream of tartar

1. For the Dark Chocolate Ganache: Bring the cream and butter to a simmer in a small saucepan over medium-high heat. Place the chocolate in the bowl of a food processor fitted with the steel blade. With the machine running, gradually add the hot cream and brandy through the feed tube and process until smooth and thickened, about 3 minutes. Transfer the ganache to a medium bowl and let stand at room temperature 1 hour, until spreadable (ganache should have consistency of soft icing).

2. For the Vanilla Bean-Mascarpone Cream: Bring the cream to a simmer in a small saucepan over high heat. Remove from the heat and stir in the vanilla seeds, extract, and confectioners’ sugar; cool slightly. With a rubber spatula, beat the mascarpone in a medium bowl until softened. Gently whisk in the cooled cream mixture until combined. Cover with plastic wrap and refrigerate until ready to use.

3. For the Roulade: Adjust an oven rack to the upper-middle position and heat the oven to 400 degrees. Spray an 18 by 12-inch rimmed baking sheet with nonstick cooking spray, cover the pan bottom with parchment paper, and spray the parchment with nonstick cooking spray; dust baking sheet with flour, tapping out excess.

4. Bring 2 inches of water to a simmer in a small saucepan over medium heat. Combine the chocolate, butter, and water in a small heatproof bowl and cover tightly with plastic wrap. Set the bowl over the saucepan, reduce the heat to medium-low, and heat until the butter is almost completely melted and the chocolate pieces are glossy, have lost definition, and are fully melted around edges, about 15 minutes. (Do not stir or let water in saucepan come to boil.) Remove the bowl from heat, unwrap, and stir until smooth and glossy. While the chocolate is melting, sift the cocoa, flour, and salt together into a small bowl and set aside.

5. In the bowl of a standing mixer, beat the egg yolks at medium-high speed until just combined, about 15 seconds. With the mixer running, add half of the sugar. Continue to beat, scraping down the sides of the bowl as necessary until the yolks are pale yellow and the mixture falls in a thick ribbon when the beaters are lifted, about 8 minutes. Add the vanilla and beat to combine, scraping down the bowl once, about 30 seconds. Turn the mixture into a medium bowl; wash the mixer bowl and beaters and dry with a kitchen towel. (If you have 2 mixer bowls, leave the yolk mixture in the mixer bowl; wash and dry the beaters and use second bowl in step 6.)

6. In a clean bowl with clean beaters, beat the egg whites and cream of tartar at medium speed until foamy, about 30 seconds. With the mixer running, add about 1 teaspoon of the remaining sugar; continue beating until soft peaks form, about 40 seconds. Gradually add the remaining sugar and beat until the egg whites are glossy and supple and hold stiff peaks when the whisk is lifted, about 1 minute longer. Do not overbeat (if the whites look dry and granular, they are overbeaten). While the whites are beating, stir the chocolate mixture into the yolks. With a rubber spatula, stir a quarter of the whites into the chocolate mixture to lighten it. Fold in the remaining whites until almost no streaks remain. Sprinkle the dry ingredients over the egg and chocolate mixture and fold in quickly but gently.

7. Pour the batter into the prepared pan; using an offset icing spatula and working quickly, smooth the surface and spread the batter into the pan corners. Bake until the center of the cake springs back when touched with a finger, 8 to 10 minutes, rotating the pan halfway through the baking time. Cool the cake in the pan on a wire rack for 5 minutes.

8. While the cake is cooling, lay a clean kitchen towel over a work surface and sift 1 tablespoon cocoa over the towel; with your hands, rub the cocoa into the towel. Run a paring knife around the perimeter of the baking sheet to loosen the cake. Invert the cake onto the towel and peel off the parchment.

9. For the finished cake: Starting at a long side, roll the cake and towel together into a jelly roll shape. Cool for 15 minutes, then unroll the cake and towel. Using an offset spatula, immediately spread the mascarpone cream filling evenly over the surface of the cake, almost to the edges. Reroll the cake gently but snugly around the filling. Set a large sheet of parchment paper on an overturned rimmed baking sheet and set the cake seam-side down on top. Trim both ends of the cake on a diagonal. Reserve ¼ cup of ganache for attaching meringue mushrooms. Spread the remaining ganache over the roulade with a small icing spatula. Use a fork to make wood-grain striations on the surface of the ganache before it has set. Refrigerate the cake, uncovered, on a baking sheet to slightly set the icing, about 20 minutes.

10. When ready to serve, carefully slide two wide metal spatulas under the cake and transfer the cake to a serving platter. Arrange the meringue mushrooms around the cake, attaching them with dabs of reserved ganache. Sift a light dusting of cocoa over the mushrooms. Sift the yule log with confectioners’ sugar. Serve within 2 hours.

buche de noel 3

Meringue Mushrooms (from Cook’s Illustrated)

Makes about 30

I didn’t need 30 mushrooms, so I cut the recipe in half, using a hand mixer and a small mixing bowl. Although maybe 30 mushrooms wouldn’t have been so bad, considering how smooth and airy and delicious these were.

CI note: If the caps and stems become soggy during storage, crisp them in a 200-degree oven for 30 minutes before assembling the mushrooms.

¼ cup water
½ cup (3.5 ounces) granulated sugar
2 large egg whites, room temperature
Pinch table salt
⅛ teaspoon cream of tartar
½ teaspoon vanilla extract

1. Adjust oven racks to the middle and lowest positions and heat the oven to 200 degrees. Line 2 rimmed baking sheets with parchment paper.

2. Combine the water and sugar in heavy saucepan. Cover and bring to a boil over medium-high heat. Boil, swirling the pan once or twice, until the sugar has dissolved, 1 to 2 minutes. If necessary, wipe down any sugar crystals on the side of the pan with a damp pastry brush. Cook, uncovered, until the temperature registers 238 degrees on a candy thermometer, about 10 minutes.

3. While the sugar is cooking, place the egg white in the bowl of a standing mixer fitted with the whisk. Beat at medium-low speed until frothy, about 1 minute. Add the salt and cream of tartar and beat, gradually increasing speed to high, until the whites hold soft peaks, about 1 minute.

4. With the mixer at medium speed, slowly pour the hot syrup into the egg whites, avoiding the whisk. Increase the speed to medium-high and continue to beat until the meringue cooks to room temperature and becomes very thick and shiny, 5 to 10 minutes. Using a rubber spatula, fold in the vanilla.

5. Fit a pastry bag with a ¼-inch pastry tip and fill with the meringue. Pipe about 30 caps and an equal number of stems onto the prepared pans.

6. Bake the meringues for 2 hours, then turn off the oven, leaving the meringues in the oven until very dry and crisp, about 30 minutes longer. Cool the mushroom caps and stems on the baking sheets. (Caps and stems may be stored in an airtight container for up to 1 week.) To assemble the mushrooms, use ganache to glue the caps and stems together.

buche de noel 14

chocolate port wine cake

port wine cake 5

I try not to be a hoarder. If I splurge on something, the last thing I want is for it to go to waste. That’s what almost happened with this bottle of port. We bought it last fall on a trip to Texas’s hill country, known for its wines. I have a friend who loves port, so we brought it over a few weeks later when we were invited to their house for dinner. And then, since port has a long shelf life, even after it’s opened, we put it back in the pantry.

port wine cake 2

And that’s where it stayed, for a year. I think the problem is that I always think of port as pairing nicely with desserts, particularly chocolate, but Dave and I rarely eat dessert at home. I couldn’t bear to pour it down the drain, so instead, I put it in cake.

port wine cake 1

Considering how good this cake was, the port can’t be said to have gone to waste. The port wasn’t an obvious flavor in the cake, but it must have contributed something to how rich and soft this cake was. Still, next time I buy an expensive bottle of wine, I’ll drink it with cake and save the cheap stuff for putting in the cake.

port wine cake 3

Printer Friendly Recipe
Port Wine Chocolate Cake (rewritten but barely adapted from Smitten Kitchen)

8-12 servings

Cake:
1 cup + 1 tablespoon (5.1 ounces) all-purpose flour
½ cup (1.5 ounces) Dutch cocoa powder
½ teaspoon baking powder
⅛ teaspoon baking soda
¼ teaspoon ground cinnamon
6 tablespoons unsalted butter, room temperature
¾ cup (5.25 ounces) firmly packed dark brown sugar
¼ cup (1.75 ounces) granulated sugar
¼ teaspoon table salt
1 large egg + 1 large egg yolk, room temperature
1 teaspoon vanilla extract
¾ cup port wine (tawny or ruby)

Topping:
½ cup mascarpone cheese
½ cup chilled heavy or whipping cream
2 tablespoons granulated sugar
¼ teaspoon vanilla extract

1. For the cake: Adjust a rack to the middle position and heat the oven to 325 degrees. Line the bottom of a 9-inch round cake pan with parchment paper; butter and flour the bottoms and sides of the lined pan, or spray with baking spray. In a small bowl, combine the flour, cocoa, baking powder, baking soda, and cinnamon.

2. In the bowl of electric mixer fitted with the paddle attachment, combine the butter, sugars, and salt; beat on medium speed until light and fluffy, 3-4 minutes. Add the egg yolk, beat until fully incorporated, then add the whole egg. Add the vanilla. Reduce the mixer speed to low and add one-third of the dry ingredients, followed by half the wine, another one-third of the dry ingredients, the remaining wine, and the remaining dry ingredients.

3. Transfer the batter to the prepared pan, smoothing the top. Bake until a toothpick inserted into the center of the cake comes out clean, 25 to 30 minutes. Let the cake cool in the pan for about 10 minutes, then turn it out onto a wire rack. Cool completely before topping, at least 1 hour. (The cake can be baked, cooled, tightly wrapped, and stored for at least one day before serving.)

4. For the topping: In the bowl of electric mixer fitted with the whisk attachment, beat the mascarpone, cream, sugar, and vanilla together until soft peaks form. Spread the topping over the cooled cake.

port wine cake 4

sweet potato cake

sweet potato cake 7

As far as I can remember, my mom only prepared sweet potatoes one way when I was growing up, and I don’t know exactly what that is, because I wouldn’t eat them. They were the only dish I was ever allowed to skip without even a no-thank-you helping. She served them twice a year, at Thanksgiving and then a month later when we repeated the Thanksgiving meal on Christmas. I don’t think anyone ate them except my mom and my brother-in-law.

sweet potato cake 1

I was in my twenties the first time I saw someone serve sweet potatoes any other way. They were simply roasted and served with salt and pepper. It was a revelation to me that sweet potatoes could be served without sugar and syrup and marshmallows. These days, I like sweet potatoes okay, but with dinner, I prefer to pair them with savory ingredients. Adding sugar to potatoes that are already sweet seems like serving dessert on the same plate as dinner.

sweet potato cake 2

No, if I decide to add sugar to sweet potatoes, it will be to make them into something that is unmistakeably dessert. With only 1 cup of mashed sweet potatoes in a 3-layer cake, this cake doesn’t taste overwhelmingly of sweet potatoes, but it is a pretty orange color, not to mention light and fluffy and moist, everything you want in a cake. If you’re going to add a bunch of sugar to your sweet potatoes, this is the way to do it.

sweet potato cake 4

Printer Friendly Recipe
Sweet Potato Cake with Maple Cream Cheese Frosting (slightly adapted from Alisa Huntsman and Peter Wynne’s Sky High: Irresistible Triple Layer Cakes )

Cake:
2 medium or 1 large sweet potato (12 ounces)
3 cups (12 ounces) cake flour
1 tablespoon baking powder
1½ teaspoons ground cinnamon
¾ teaspoon ground nutmeg
¼ teaspoon ground cloves
5 eggs, separated
2¼ cups (15.75 ounces) sugar
½ teaspoon table salt
10 tablespoons unsalted butter, at room temperature
1½ teaspoons vanilla extract
1¼ cups milk, room temperature

Frosting:
10 ounces cream cheese, room temperature
8 tablespoons (1 stick) butter, room temperature
3 cups (12 ounces) powdered sugar, sifted
3 tablespoons maple syrup

1. Heat the oven to 400 degrees. Prick each sweet potato with a fork in 5-6 places; place on a baking sheet and bake for 1 hour or until the potatoes are very soft. Remove from the oven and cool slightly. When the potatoes are cool, peel off the skin and remove any dark spots. Cut the potatoes into chunks and puree in a food processor until smooth. Measure out one cup of potato puree; discard the rest or save for another use.

2. Reduce the oven temperature to 350 degrees. Butter and flour the bottoms and sides of three 8- or 9-inch pans, or spray with baking spray. Line the bottom of the pans with parchment paper; grease the paper. In a small bowl, combine the flour, baking powder, cinnamon, nutmeg, and cloves; set aside.

3. In the bowl of electric mixer fitted with the whisk attachment, beat the egg whites on medium speed until frothy. Increase the speed to high and gradually add ¼ cup sugar. Continue to beat until the egg whites are moderately stiff. Transfer the egg whites to a separate bowl.

4. In the same bowl (no need to wash it), with the mixer fitted with the paddle attachment, combine the sweet potato, butter, vanilla, remaining sugar, and salt; beat on medium speed until light and fluffy, 3-4 minutes. Add the egg yolks one at a time, scraping the sides of the bowl after each egg yolk is added. Reduce the mixer speed to low and add one-third of the dry ingredients, followed by half the milk, another one-third of the dry ingredients, the remaining milk, and the remaining dry ingredients.

5. With a large spatula, fold in one-fourth of the egg whites into the batter to lighten it. Fold in the remaining egg whites until no streaks remain, making sure to not over mix. Divide the batter evenly between the prepared pans.

6. Bake for 25-35 minutes or until a toothpick inserted into the center of a cake layer comes out clean. Let the cake layers cool in the pan for 10 minutes, then turn out onto wire racks. Cool completely before frosting, at least 1 hour.

7. For the frosting: In a stand mixer fitted with the paddle attachment (or in a large bowl with a hand mixer), beat the cream cheese and butter on medium speed until smooth, about 1 minute. Stop the mixer, add the sugar, and mix on low speed until the sugar is incorporated; increase the mixer speed to medium and beat until light and smooth, 2-3 minutes. Mix in the maple syrup.

8. To assemble: Transfer one cake layer to a serving platter. Evenly spread ⅛-inch frosting over the top. Top with a second cake layer and another layer of frosting, then the third cake layer. If you have time, spread a very thin layer of frosting over the top and sides of the cake; chill, uncovered, for 30 minutes; this step will reduce crumbs in your final layer of frosting. Spread the remaining frosting evenly over the top and sides of the cake.

sweet potato cake 6

bittersweet chocolate and pear cake

pear chocolate cake 6

Earlier this summer, one of my coworkers brought in peaches from his tree, so I took some and made peach cupcakes to share at work. Then a couple weeks ago, another coworker was giving away apples, so I took some and made apple pie-cake for everyone. After that, the apple grower was excited to find someone to offload her apples to, so she brought me another bag, and I made apple cake and then apple muffins. Also, my mom gave me pears, so I made pear chocolate cake.

pear chocolate cake 2

It sounds weird, right, pears and chocolate together? That’s what most of my coworkers said, but then they said that it definitely worked. It’s a fun recipe, with the eggs beaten until foamy and the batter spread in the pan with the fruit and chocolate on top. As the cake bakes, it rises up due to all the air beaten into the eggs, incorporating the fruit and chocolate.

pear chocolate cake 4

Just like in a chocolate chip cookie, the chocolate here provides a bitter richness to compliment the sweet butteriness of a fruit-based cake. Sugar and butter being, of course, the perfect compliments to almost any fruit. Basically, if you have too much fruit, give it to me and I will make cake out of it.

pear chocolate cake 7

Printer Friendly Recipe
Bittersweet Chocolate and Pear Cake (rewritten but not significantly adapted from Al Di La Trattoria via Smitten Kitchen)

My homegrown pears were small, so I used five of them.

8 tablespoons (1 stick) unsalted butter, melted
1 cup (4.8 ounces) all-purpose flour
1 tablespoon baking powder
½ teaspoon salt
3 eggs, at room-temperature
¾ cup (5.25 ounces) sugar
3 pears, peeled, cored, and diced into ¼-inch cubes
¾ cup (4.5 ounces) bittersweet chocolate chunks

1. Heat oven to 350 degrees. Spray a 9-inch springform pan with nonstick baking spray (or oil and flour the pan). In a small bowl, combine the flour, baking powder, and salt. In a small skillet over medium heat, melt the butter. When the foaming subsides, start swirling the butter around the pan. When the milk solids sink and turn brown and the butter smells nutty, remove the pan from the heat and pour the butter into a small bowl or measuring cup so it stops cooking.

2. In the bowl of a stand mixer fitted with the whisk attachment (or a large bowl if using a hand-held mixer), beat the eggs until light yellow and thick, about 5 minutes on a stand mixer and 9 minutes with a handheld mixer. When the whisk is removed from the bowl, the egg should flow off of it in a thick ribbon. Gradually add the sugar to the eggs, beating for 1 minute after it’s all added. Reduce the mixer speed to its lowest setting and add one-third of the flour mixture, then half of the butter, another third of the flour, the rest of the butter, and the rest of the flour, beating just until combined.

3. Spread the batter evenly in the prepared pan. Evenly distribute the pears and chocolate over the top of the batter. Transfer to the oven and bake until a toothpick inserted into the center of the cake comes out clean, 45-60 minutes. Transfer to a wire rack to cool completely. If desired, dust with powdered sugar just before serving.

pear chocolate cake 5

blackberry cake with raspberry filling

blackberry cake 9

I require a weekend for my birthday. Not a week, certainly not a month, just two days and one evening to do as many as my favorite things as possible and as few of my least favorite things. So wine and a new novel are in; laundry is most definitely out.

blackberry cake 4

Baking and eating my birthday cake is in, but I was really on top of things this year and did all the steps I don’t like so much beforehand. That includes digging around in the messy, nearly unreachable cabinet for pans, lining the pans, and pureeing and straining the fruit. All that was left to do on my actual birthday was add things to the mixer and nibble on frosting while assembling the cake.

blackberry cake 2

I’d originally made this cake for a friend’s bridal shower, but there were two issues: 1) I only got one piece, and 2) I didn’t save any for Dave. He’s pretty adamant about not being a dessert guy and even less so a cake guy, but our friends had such good things to say about the cake after the party that he was sorry he missed it.

blackberry cake 6

So choosing this year’s birthday cake wasn’t a hard decision. Making the cake wasn’t hard either, since I’d left only my favorite parts of baking for my birthday itself. I made a small cake, but I had just enough to last for my entire birthday weekend. Cake everyday is definitely on the list for an awesome birthday.

blackberry cake 10

Printer Friendly Recipe
Blackberry Cake with Raspberry Filling and Cream Cheese Frosting (cake adapted from Cook’s Illustrated White Cake recipe; filling is just barely adapted from Cook’s Illustrated Raspberry Coulis)

The bride’s wedding colors are Tiffany blue and red, so I originally made a blackberry cake hoping that it would turn out blue, like Elly’s, with raspberry filling as the red. I ended up with a purple cake with pink filling, but no one complained. However, you could mix this up with other berries – blackberries, raspberries, blueberries, or strawberries can be used in both the cake and the filling. Fresh or frozen and thawed berries can be used.

I made a three-layer cake for my birthday, and a four-layer cake for the shower, which I preferred. I love the raspberry filling, so an extra layer of it is very welcome.

For heavy decorations like the roses, increase the frosting recipe by 50% (using 12 tablespoons butter, 12 ounces cream cheese, and 6 cups powdered sugar).

Cake:
¾ cup pureed and strained blackberries (from 8 ounces of blackberries)
⅓ cup milk, at room temperature
1 teaspoon vanilla extract
2¼ (9 ounces) cups cake flour
3 teaspoons baking powder
12 tablespoons unsalted butter, at room temperature
1½ cups (10.5 ounces) sugar
¾ teaspoon salt
4 egg whites, at room temperature

Raspberry Filling:
6 ounces fresh raspberries (or thawed if frozen)
2½ to 3½ tablespoons granulated sugar
pinch table salt
1 teaspoon lemon juice

Cream Cheese Frosting:
8 tablespoons (1 stick) butter, at room temperature
8 ounces cream cheese, at room temperature
pinch salt
2 teaspoons vanilla extract
4 cups powdered sugar

1. For the cake: Heat the oven to 350F. Spray two 8-inch round cake pans with baking spray (or grease and flour the pans). Line with parchment or waxed paper and grease the paper.

2. Using a blender, puree the blackberries. Transfer them to a fine-mesh strainer set over a small bowl; use a spoon or rubber spatula to press the liquid through the strainer, discarding the seeds. Measure ¾ cup of puree. Stir the milk and vanilla extract into the blackberry puree. In a separate small bowl, combine the flour and baking powder.

3. Place the butter, sugar, and salt in the bowl of an electric mixer fitted with the paddle attachment (or a large bowl if using a hand mixer). Beat on medium speed for 2 minutes, until light and fluffy. Add the egg whites one at a time, beating well after each addition. Reduce the mixer speed to low and add one-third of the flour mixture, followed immediately by half of the blackberry mixture, mixing just until incorporated. Repeat with another third of the flour and the rest of the blackberry puree, then the last of the flour. Scrape down the sides of the bowl and mix on medium-low speed for 15 seconds longer.

4. Divide the cake between the prepared pans. Bake for 22 to 28 minutes, or until a cake tester or wooden toothpick inserted into the center comes out clean. Allow the layers to cool in the pans for 5 to 10 minutes. Invert and turn out onto wire racks and peel off the paper liners. Let stand until completely cooled before assembling the cake, at least one hour.

5. For the filling: In a medium saucepan, bring the raspberries, 1 teaspoon water, 2½ tablespoons sugar, and salt to bare simmer over medium heat, stirring occasionally; cook until the sugar is dissolved and the berries are heated through, about 1 minute longer. Transfer the mixture to the blender; puree until smooth, about 20 seconds. Strain through a fine-mesh strainer into a small bowl, pressing and stirring the puree with a rubber spatula to extract as much seedless puree as possible. (there’s no need to wash either the blender or the strainer between the blackberries and the raspberries.) Stir in the lemon juice and additional sugar, if desired. Cover with plastic wrap and refrigerate until cold, at least 1 hour. Stir to recombine before serving. Can be refrigerated in airtight container for up to 4 days.

6. For the frosting: Place the butter, cream cheese, and salt in the (clean) bowl of an electric mixer fitted with the paddle attachment; beat on medium speed until smooth. Switch to the whisk attachment; on low speed, gradually add the powdered sugar, beating until it’s just incorporated. Increase the speed to high and beat for 5 minutes, scraping down the sides of the bowl as necessary.

7. To assemble: To make the cakes easier to handle, wrap each tightly in plastic wrap and chill for at least an hour or up to overnight. Working with one cake at a time, unwrap it and use a serrated bread knife to cut the cakes horizontally in half. If you’re using a cake board, put a small spoonful of frosting in the center of it to glue the cake to the board; if you’re not using a cake board, line the perimeter of your serving dish with strips of wax paper, then put a small spoonful of frosting in the center of the serving dish. Center a layer of cake over the frosting, cut side down. Spread a thin layer of cream cheese frosting over the cake layer. Spoon 3 tablespoons of raspberry filling over the frosting, spreading it to within about an inch of the edge. Center another cake layer over the filling, cut side-down. Repeat the layering of frosting, filling, and cake twice more. Spread a thin layer of frosting evenly over the top and sides of the cake to seal in crumbs. If the layers slide around while you’re spreading the frosting, push wooden skewers from the top to the bottom of the cake in three places to secure the layers. Chill the cake, uncovered, for 30 minutes to 2 hours to set the frosting. Remove the skewers if necessary, then spread the remaining cream cheese frosting evenly over the top and sides of the cake, decorating as desired. Either transfer the cake on the cake board to a serving platter, or carefully remove the strips of wax paper to leave a clean serving platter around the sides of the cake.

blackberry cake 8

margarita cupcakes

margarita cupcakes 5

I haven’t really been drinking margaritas lately, since we’ve moved from daiquiris into experiments with all sorts of tiki drinks, but eating them is another thing. I hosted a taco bar party recently, where I supplied corn tortillas and beef barbacoa and everyone else brought sides or toppings. I thought about serving margaritas, but I wasn’t excited about squeezing a hundred limes; sangria for a crowd is a whole lot easier.

margarita cupcakes 2

But a taco party without margaritas in any form just isn’t right, so we’d have them for dessert instead. This is a white cupcake flavored with lime zest, then brushed very liberally with a mixture of tequila and orange liqueur. The buttercream, light and airy swiss meringue, is flavored with more lime juice and more tequila.

margarita cupcakes 3

I’ve found it’s nearly impossible to get the flavor of liquor in the batter to come across after a dessert is baked (bourbon pound cake seems to be an exception), so I don’t even attempt that here, just brushing – and then brushing some more, and then more – the baked cakes with liquor. The cupcakes aren’t so strong that you’ll gag on the fumes, but they do have a hint of bite to them, just like the best margaritas. And I had way more fun making cupcakes and frosting than I would have had squeezing lime after lime after lime.

margarita cupcakes 4

Printer Friendly Recipe
Margarita Cupcakes (adapted from Dorie Greenspan’s Perfect Party Cake from Baking: From my Home to Yours)

Makes 24 cupcakes

It seems like a lot of liquor to brush into the cupcakes, but trust me that you will use it all, and the cupcakes won’t be soggy.

Cupcakes:
3¼ cups plus 2 tablespoons (13.5 ounces) cake flour
1½ teaspoons baking powder
¼ teaspoon baking soda
1 teaspoon salt
1 cup plain yogurt
6 large egg whites
2¼ cups (15.75 ounces) granulated sugar
1 tablespoon grated lime zest
12 tablespoons (1½ stick) unsalted butter, at room temperature
2 tablespoons lime juice
6 tablespoons tequila
3 tablespoons orange liqueur

Buttercream:
1 cup (7 ounces) granulated sugar
4 large egg whites
pinch salt
24 tablespoons (3 sticks) unsalted butter, at room temperature
4 tablespoons fresh lime juice (from 2 limes)
2 tablespoons tequila

1. For the cupcakes: Center a rack in the oven and preheat the oven to 350 degrees F. Line 24 cupcake cups with liners. Sift together the flour, baking powder and salt. Whisk together the buttermilk and egg whites in a medium bowl.

2. Put the sugar and lime zest in a mixer bowl mix with paddle attachment until the sugar is moist and fragrant. Add the butter and beat at medium speed for a full 3 minutes, until the butter and sugar are very light. Beat in the lime juice, then add one third of the flour mixture, still beating on medium speed. Beat in half of the milk-egg mixture, then beat in half of the remaining dry ingredients until incorporated. Add the rest of the milk and eggs, beating until the batter is homogeneous, then add the last of the dry ingredients. Finally, give the batter a good 2-minute beating to ensure that it is thoroughly mixed and well aerated.

3. Divide batter among cupcake liners, filling them ⅔ to ¾ of the way. Bake until a toothpick inserted into the center of a cupcake comes out clean, 18-24 minutes, rotating the pans once front to back if your oven bakes unevenly. Transfer the pans to wire racks; cool about 5 minutes, them remove the cupcakes. Cool cupcakes completely on a rack before frosting.

4. Combine the tequila and orange liqueur in a small dish. Using a toothpick or skewer, poke about 10 holes in the top of each cupcake, almost to the base. Brush with the alcohol mixture. Keep brushing the cupcakes until all the alcohol has been used.

5. For the buttercream: Combine the egg whites, sugar, and salt in a metal mixing bowl set over a pot of simmering water. Heat, whisking frequently, until the mixture reaches 160 degrees and the sugar has dissolved. Using the whisk attachment, beat on medium-high speed until stiff peaks form and the mixture has cooled to room temperature, about 6 minutes. Reduce the speed to medium and add the butter, 2 tablespoons at a time, adding more once each addition has been incorporated. If the frosting looks soupy or curdled, continue to beat on medium-high speed until thick and smooth again, about 3-5 minutes more. Stir in the lime juice and tequila; mix just until incorporated. Use a wide star tip to pipe frosting onto the cupcakes, garnishing with tiny lime wedges and lime zest.

margarita cupcakes 6

strawberry shortcake cupcakes

strawberry shortcake cupcakes 10

I’ve had these cupcake wrappers for at least a year, maybe close to two years. But because they’re tulips, I was determined that I could only use them in the spring, and sometimes, a whole month or two can go by where I don’t think about cupcake wrappers. If that month is April and May, then it’s too late for tulips. Having actually remembered this year, I wanted to make the most springy cupcake I could.

strawberry shortcake cupcakes 1

Strawberries are the obvious choice. And what dessert is more springy than strawberry shortcake?

strawberry shortcake cupcakes 2

This isn’t too different than a cupcake adaptation of this strawberry cream cake, but the cake portion of that recipe is meant to be dense enough to stand up to layers of strawberries and whipped cream. I wanted something fluffier, so I started with my favorite basic vanilla cake. The filling in that strawberry cream cake would be perfect for adding to the middle of cupcakes, because the strawberries are minced and juicy, just right for maximizing the flavor they can contribute in just a small hole in the middle of each cupcake.

strawberry shortcake cupcakes 4

The topping is perfect as well, since the cream cheese stabilizes the whipped cream enough to mound on top of each cupcake. With a slice of strawberry over the hole filled with strawberries to even out the top of the cupcake, plus more fresh strawberries on top, there were plenty of berries to balance the cake and rich cream topping. It was a perfect combination.  Tulips and strawberries, what’s better than that for spring?

strawberry shortcake cupcakes 12

Strawberry Shortcake Cupcakes (cake adapted from Confections of a Foodie Bride; filling and topping adapted from Cook’s Illustrated’s Strawberry Cream Cake)

24 cupcakes

Vanilla cupcakes:
3 cups (12 ounces) cake flour
1 tablespoon baking powder
1 teaspoon salt
16 tablespoons (2 sticks) unsalted butter, at room temperature
2 cups (14 ounces) sugar
4 large eggs, at room temperature
1¼ cups buttermilk, at room temperature
1 tablespoon vanilla extract

Strawberry filling:
8 ounces fresh strawberries (about ½ quart), washed, dried, and stemmed
1 tablespoon sugar
½ tablespoon Kirsch or port
Pinch table salt

Whipped cream topping:
8 ounces cream cheese, room temperature
½ cup (3.5 ounces) sugar
1 teaspoon vanilla extract
pinch table salt
2 cups heavy cream

6-8 strawberries, sliced crosswise into rounds
additional strawberries for garnish

1. For the cupcakes: Preheat the oven to 350°F. Line two cupcake pans with paper liners. In a medium bowl, combine the cake flour and baking powder.

2. Place the butter and salt in the bowl of an electric mixer fitted with the paddle attachment (or a large bowl if using a hand mixer). Beat on medium-high speed for 3 minutes, until light and creamy in color, scraping the sides of the bowl as necessary.

3. Gradually add the sugar to the butter mixture, beating until fluffy. Add the eggs one at a time, beating until incorporated. Combine the buttermilk and the vanilla extract in a liquid measuring cup. With the mixer on low speed, add one-third of the flour mixture, followed immediately by half of the buttermilk, mixing just until incorporated. Repeat with another third of the flour and the rest of the buttermilk, then the last of the flour. Mix for 15 seconds longer.

4. Divide the batter between the prepared paper liners, filling each about two-thirds of the way full. Bake 18-22 minutes, or until a toothpick inserted in the center comes out clean. Allow to cool in the pans for 5 minutes, then transfer to a cooling rack to cool completely.

5. For the filling: Quarter the berries; toss with sugar in a medium bowl and let sit 1 hour, stirring occasionally. Strain the juices from the berries and reserve (you should have about ¼ cup). In the workbowl of a food processor fitted with the metal blade, give the macerated berries five 1-second pulses (you should have about ¾ cup). In a small saucepan over medium-high heat, simmer the reserved juices and Kirsch until the mixture is syrupy and reduced to about 1½ tablespoons, 3 to 5 minutes. Pour the reduced syrup over the macerated berries, add a pinch of salt, and toss to combine.

6. For the topping: When the cake has cooled, place the cream cheese, sugar, vanilla, and salt in the bowl of a standing mixer fitted with the whisk attachment. Whisk at medium-high speed until light and fluffy, 1 to 2 minutes, scraping down the bowl with a rubber spatula as needed. Reduce the speed to low and add the heavy cream in a slow, steady stream; when it’s almost fully combined, increase the speed to medium-high and beat until the mixture holds stiff peaks, 2 to 2½ minutes more, scraping the bowl as needed (you should have about 4½ cups).

7. To assemble: With a paring knife, carve a cone out of the center of each cupcake. Use a slotted spoon to transfer some strawberry filling to the cavity; top each hole with a round slice of strawberry. Frost the cupcakes; garnish with additional strawberries. If not serving within about an hour, refrigerate for up to 8 hours. Let stand at room temperature for at least 30 minutes or up to an hour before serving (otherwise, the cake will seem hard and stale).

strawberry shortcake cupcakes 9

chocolate stout cake

chocolate stout cake 6

We celebrated my friend’s 40th birthday by eating meat and drinking beer. He’s a hunter with friends who are hunters, so we had two types of venison, Barbary sheep, rabbit, quail, partridge, and dove. We also compared ten different stouts. It was a nice manly birthday party.

chocolate stout cake 2

Obviously chocolate stout cake is the perfect birthday cake for Game and Stout Night. (And just wait until I tell you about the perfect ice cream for Game and Stout Night.) For one thing, a glazed bundt cake is simple to put together compared to a layered, filled, iced, and decorated cake, which was good because I also contributed baguettes, ravioli filled with homemade venison sausage, and ice cream.

chocolate stout cake 5

Small slices of bundt cake are also easier to handle than a triple-layer wedge of cake when you’ve been eating meat and drinking heavy beer all night. But there’s a lot of flavor packed into a small serving, with lots of rich chocolate and a hint of bitterness from the stout and the espresso powder in the glaze. I left the leftovers with the hosts, and I was so annoyed the next morning when I didn’t have any cake to eat with my coffee, but at least it was the perfect cake for Game and Stout Night.

chocolate stout cake 8

Printer Friendly Recipe
Chocolate Stout Cake (via Bon Appetit via Smitten Kitchen)

Cake:
2 cups (9.6 ounces) all-purpose flour
2 cups (14 ounces) granulated sugar
1½ teaspoons baking soda
¾ teaspoon salt
1 cup stout (such as Guinness)
16 tablespoons (2 sticks) unsalted butter
¾ cup unsweetened cocoa powder (preferably Dutch-process)
2 large eggs, room temperature
⅔ cup sour cream

Glaze:
6 ounces good semisweet chocolate, chopped
6 tablespoons heavy cream
¾ teaspoon espresso powder

1. For the cake: Heat the oven to 350 degrees. Spray a bundt pan with baking spray, or spray with cooking spray and then dust with flour. In a small bowl, whisk together the flour, sugar, baking soda, and salt.

2. In a medium saucepan over medium heat, heat the stout and butter together until the mixture comes to a simmer; add the cocoa powder and whisk until smooth; set aside to cool slightly.

3. In a large bowl, whisk the eggs and sour cream until smooth. Slowly whisk in the stout mixture. Add the flour mixture; using a rubber spatula, fold the flour into the batter until just combined. Pour the batter into the prepared pan and smooth the top.

4. Bake until a toothpick inserted into the center of the cake comes out clean, 50 to 60 minutes. Cool the cake on a rack for 10 minutes, then invert onto the rack to cool completely.

5. For the glaze: In a heatproof bowl set over a saucepan containing 1 inch of simmering water, melt the chocolate, cream, and espresso powder until smooth and glossy. Drizzle over cooled cake.

chocolate stout cake 7