feta and shrimp macaroni and cheese

I can’t deny that quality matters when it comes to food. I know I’m lucky in this small town that I can buy the ingredients I can – Greek yogurt, dried currants, and free range eggs are all items that my grocery store has started carrying since we moved here last year. (Soy yogurt and King Arthur whole wheat flour are ingredients they’ve stopped carrying, unfortunately.) But there just isn’t a market here for all the ingredients I wish I could buy. And that’s why I stock up on cheese and chocolate when we visit my parents in Albuquerque.

I made this recipe once with swiss cheese I bought in the grocery store here. It might even have called itself gruyere. And the pasta was fine. Not thrilling, but nice. But I couldn’t wrap my head around how something with this combination of ingredients – pasta, fresh herbs, feta, shrimp, and gruyere – could not be thrilling.

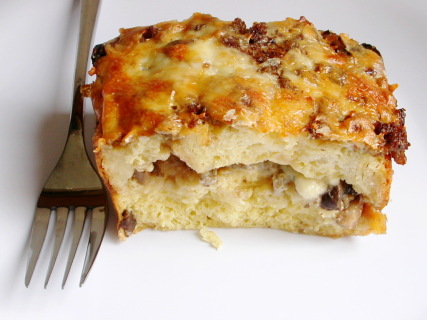
When I tried again with gruyere I got at Whole Foods in Albuquerque, it was a whole different dish. This time it was everything I had expected originally, with bright fresh lemon and dill, sweet shrimp, and pungent gruyere melted around swirls of pasta. Just like the good coffee is less acidic and good chocolate tastes deeper, good cheese makes better macaroni and cheese.

One year ago: Apple Muffins
Two years ago: Caramel-Topped Flan
Three years ago: Marcella Hazan’s Lasagne Bolognese

Printer Friendly Recipe
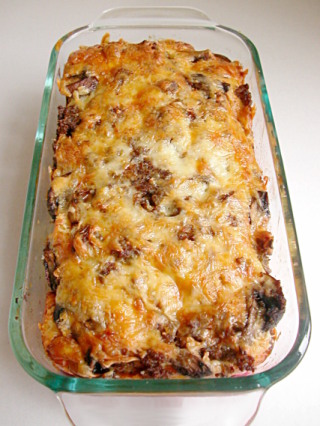
Shrimp and Feta Macaroni and Cheese (adapted from The Perfect Pantry via Annie’s Eats)

½ cup panko breadcrumbs
10 ounces feta cheese, crumbled and divided
zest of 1 lemon, divided
2 tablespoons fresh parsley, chopped, divided
5 tablespoons butter, divided
salt
1 pound pasta
1 pound raw shrimp (31-40 ct.), peeled and deveined, cut in half (if desired)
4 tablespoons all-purpose flour
3 cups milk
2 tablespoons fresh dill, chopped
8 ounces Gruyere cheese, shredded (about 2 cups)
½ teaspoon kosher salt
½ teaspoon ground black pepper

1. Preheat the oven to 400˚ F. In a small bowl, combine the panko, a quarter of the feta, a pinch of lemon zest, 2 teaspoons of the parsley and 1 tablespoon of the butter, melted. Toss with a fork to combine; set aside.

2. Bring a large pot of salted water to a boil. Cook the pasta until al dente according to the package directions. Drain, then transfer the pasta back to the cooking pot. Add the raw shrimp to the warm pasta; combine.

3. In a medium saucepan, melt the remaining 4 tablespoons of butter over medium-high heat; whisk in the flour. Cook 1-2 minutes, whisking constantly, until light golden brown. Whisk in the milk. Cook, stirring frequently, over medium heat until the sauce bubbles and thickens, about 5 minutes. Remove the pot from the heat and stir in the remaining feta, Gruyere, remaining parsley, remaining lemon zest, dill, salt and pepper. Pour the sauce over the pasta and shrimp; stir well to coat.

4. Transfer the mixture to a lightly greased 2½ or 3-quart baking dish. Sprinkle the breadcrumb mixture evenly over the top. Bake for 20-25 minutes, until lightly browned and bubbling. Remove from the oven and let cool 5-10 minutes before serving.

baked french toast

I need to stop doing things like making a complicated braided loaf of bread just to cut it up and put in a casserole. Especially considering that Deb specifically calls for supermarket bread, clarifying that there is no need for super fancy stuff. No! Everything must be fancy! This is why I have no time to clean my house.

Deb suggests a range of flavoring options, but the first time I made this, I happened to have a grapefruit around, so I went a citrus direction, with grapefruit zest and triple sec. I also added vanilla to make, essentially, creamsicle French toast. Highly – highly – recommended.

Like most breakfast casseroles, the big advantage here (besides that it tastes like a creamsicle) is that you can make it in advance and then just bake it in the morning. Furthermore, it’s a simple, easy recipe, with just a few ingredients and simple mixing method. Which is very good thing, because you can spend the time you save making the casserole baking an impractically beautiful and fresh loaf of bread.

One year ago: Vegetable Curry
Two year ago: Grits Cheese and Onions Soufflés

Printer Friendly Recipe
Boozy Baked French Toast (rewritten from Smitten Kitchen)

Serves 6

This recipe is infinitely adaptable. Use whole milk for extra richness or lowfat milk to cut calories. Mix and match your liqueurs and your add-ins. Skip the liqueur entirely and use a couple teaspoons of an extract.

1 loaf challah, sliced 1-inch thick
3 cups whole milk
3 eggs
3 tablespoons sugar
½ teaspoon salt
¼ cup liqueur (see note)
other flavorings – ½ cup toasted nuts, 1 teaspoon zest, ½ cup dried fruit

1. Grease a 9×13-inch baking dish. Arrange half of the bread in a tightly-packed layer in the pan. Add the nuts or dried fruit, if using. Place the remaining bread on top of the first layer.

2. Whisk together the milk, eggs, sugar, salt, liqueur, and zest, or flavorings of your choice and pour over the bread. Wrap tightly with plastic wrap and refrigerate overnight.

3. Bake at 425 degrees until puffed and golden, about 30 minutes. Cut into generous squares and serve with maple syrup, fresh fruit, powdered sugar or all of the above.

chicken mushroom spinach lasagna

I’m hardcore – I made an Emeril recipe more complicated. I did skip a few of his steps, so maybe I’m not completely ridiculous.

It’s just that if I’m going to go through all the trouble of making lasagna, with cooking chicken, stirring béchamel, layering and baking, I might as well go all the way – homemade pasta and damn good chicken.

So there was no cooking of boneless skinless chicken breasts in a dry pan – weird, isn’t it, that I’m not a fan of dry tasteless meat. Heck no, I roasted those suckers – bone-in, skin-on, thankyouverymuch. And before that, I brined them – hey, it’s a step that takes about 2 minutes of effort and you ensure fully seasoned, moist meat. Why not do it?

But if I’m going to add homemade pasta and brined, roasted, shredded chicken to an already ambitious recipe, I probably needed to cut some corners somewhere. Since I can’t seem to convince myself to enjoy cooked spinach, I decided to skip the cooking and blanching of the spinach and just add shredded baby spinach directly to the béchamel. I wasn’t able to use quite as much, but that’s okay – it was still a colorful, healthy, easy addition.

Okay, so I guess I only skipped one little step in Emeril’s recipe. Oh wait, I also mixed all the chicken and parmesan into the sauce, so I was really only layering two things – sauce and noodles. That probably saved 30 seconds or so of effort. That’s okay, I had fun making the lasagna, and I was completely confident that the extra bit of work I put into it would give me a perfect result, and, yes, it did.

One year ago: Deli-Style Rye Bread
Two years ago: (Almost) No-Knead Bread

Printer Friendly Recipe
Chicken, Mushroom and Spinach Alfredo Lasagna (adapted from Emeril Lagasse)

This is how I made the lasagna, but there are some things you could do differently. The original recipe keeps the chicken and some of the parmesan separate from the béchamel, laying pasta-béchamel-cheese-chicken instead of just alternating pasta and chickeny parmesany béchamel, like I did.

Also, the type of pasta you use is entirely up to you. You could use the no-cook dry noodles or buy fresh noodles or make your own. And I don’t know for sure that fresh homemade noodles need to be blanched for lasagna, but the one time I skipped that step was a disaster.

One more thing – the original recipes calls for double these ingredients to be layered into a 9- by 13-inch pan, but I was concerned that I’d have overflow. While my lasagna is a little on the short side, I think twice this height would have been too much for my standard 9- by 13-inch pan. But maybe the quantity of ingredients that I used would make an ideal 8- by 8-inch lasagna?

6 to 8 servings

1 teaspoon vegetable oil
1 pound chicken breasts, bone-in, skin-on, trimmed of excess fat and skin
salt and pepper
4 tablespoons (1 stick) unsalted butter
8 ounces button mushrooms, thinly sliced
2 large shallots, finely chopped
4 cloves minced garlic
¼ cup all-purpose flour
3½ cups milk
¼ teaspoon freshly ground black pepper
¼ teaspoon freshly grated nutmeg
4 ounces spinach, stemmed, washed, sliced into ¼-inch ribbons
3 ounces (1½ cups) grated Parmesan, divided
fresh lasagna noodles (if homemade, use 1 egg + ⅔ cup (3.2 ounces) flour, kneaded and rolled to the
next-to-thinnest setting on a pasta roller, blanched as described here)

1. (Optional) Stir 2 tablespoons salt into 2 cups cold water until it dissolves. Add the chicken; refrigerate for 30 minutes, then remove the chicken from the brine and pat it dry.

2. Adjust an oven rack to the middle-low position and heat the oven to 450ºF. Heat a small oven-safe skillet over medium-high heat. Add the oil and swirl to coat the bottom of the pan; place the chicken breast in the pan skin-side down. Cook without moving until well-browned, about 5 minutes. Turn the chicken over and move the pan to the oven. Roast until an instant-read thermometer inserted into the thickest part of the chicken measures 160ºF or the juices run clear when small cut is made in the chicken. Remove the pan from the oven and set aside. When the chicken has cooled enough to handle, remove and discard the skin (or eat it, because it’s crisp and delicious!) and shred the meat with your fingers or two forks. Decrease the oven temperature to 375ºF.

3. Béchamel: Melt the butter in a large saucepan over medium heat. Add the mushrooms and cook, stirring often, until their liquid has evaporated and the mushrooms are slightly browned, about 5 to 7 minutes. Add the shallots to the pan and sauté until soft and translucent, 3 to 4 minutes. Stir in the garlic and sauté for about 30 seconds, until fragrant. Add the flour and cook, stirring with a wooden spoon, to make a light roux, about 1 minute. Whisking constantly, slowly add the milk and continue to cook, stirring occasionally, until thickened, 5 minutes. Add ¾ teaspoon of the salt, the pepper, nutmeg, spinach and 2½ ounces (1¼ cups) of the Parmesan and cook, stirring, until thickened, about 2 minutes, then add the shredded chicken. Taste the sauce to decide if it needs more salt. Remove the béchamel from the heat and place a piece of plastic wrap directly on the surface until ready to assemble the lasagna.

4. Spray a 9 by 13-inch pan with nonstick spray, and spread about ¼ cup of the béchamel sauce on the bottom of the dish, avoiding any large chunks of chicken. Arrange a single layer of noodles evenly over the sauce. Then alternate layering béchamel and noodles until you run out of noodles – I was able to make 4 layers, I believe. End with the remaining béchamel and sprinkle the top with the remaining parmesan.

5. Cover the pan with aluminum foil and bake for 20 minutes. Remove the foil and continue baking for about 20 minutes, until bubbly. Let the lasagna rest for about 10 minutes before slicing and serving.

baked ziti

I am officially out of recipes to share. I am now raiding my “Probably Not” folder – the rejects that either didn’t taste good or didn’t photograph well. I’ll spare you that ones that didn’t taste good.

It seems like I could just make something new and blog about it, right? The thing is though, nothing is working quite right for me lately. My delicious banana cream pies keep coming out with a layer of candy armor over the crust; the southwestern pasta salad recipe I patched together was too similar to and probably not quite as good as this one; I never got the ratios right in my cocktail last weekend (despite many attempts), and I forgot to take final photos of my pesto.

I’m just lucky that the photos of the baked ziti aren’t as ugly as I’d remembered. For this is not in the “didn’t taste good” category. With a mixture of pasta, tomatoes, cheese, and herbs, how could it not be delicious?

And although it’s hard to believe, you can make it halfway healthy without sacrificing much in the way of flavor or creaminess. In my experience, good whole wheat pasta (I like Bionaturae) is hardly different from refined versions. I’m perfectly happy with 1% cottage cheese and skim mozzarella. That just leaves the heavy cream to worry about, and with a slight increase in the cornstarch, you can get away with using milk instead.

And you can make it ahead, and it freezes well, and it reheats well, and heck, it isn’t half bad cold if you’re too impatient to bother heating it up. This is certainly worth pulling out of the reject file.

One year ago: Herbed Lima Bean Hummus
Two years ago: Country Crust Bread

Printer Friendly Recipe
Baked Ziti (from Cooks Illustrated)

Serves 8-10

Healthy tricks: Use 1% cottage cheese, whole wheat pasta, part-skim mozzarella, and 2 teaspoons cornstarch plus 1 cup milk instead of ¾ teaspoon cornstarch with 1 cup heavy cream.

1 pound whole milk or 1% cottage cheese
2 large eggs, lightly beaten
3 ounces parmesan cheese (about 1½ cups), grated
table salt
1 pound ziti pasta
2 tablespoons extra-virgin olive oil
5 medium garlic cloves, minced (about 5 teaspoons)
1 (28 ounce) can tomato sauce
1 (14.5 ounce) can diced tomatoes
1 teaspoon dried oregano
½ cup plus 2 tablespoons chopped fresh basil leaves
1 teaspoon sugar
black pepper
¾ teaspoon cornstarch
1 cup heavy cream
8 ounces low-moisture mozzarella cheese, cut into ¼ inch pieces (about 1½ cups)

1. Adjust oven rack to middle position and heat oven to 350°F. Whisk cottage cheese, eggs and 1 cup Parmesan together in medium bowl; set aside. Bring 4 quarts of water to boil in large Dutch oven over high heat. Stir in 1 tablespoon salt and pasta; cook, stirring occasionally, until pasta begins to soften but is not yet cooked through, 5 to 7 minutes. Drain pasta and leave in colander.

2. Meanwhile, heat oil and garlic in 12-inch skillet over medium heat until garlic is fragrant but not brown. Stir in tomato sauce, diced tomatoes, and oregano; simmer until thickened, about 10 minutes. Off heat, stir in ½ cup basil and sugar, then season with salt and pepper.

3. Stir cornstarch into heavy cream in small bowl, transfer mixture to Dutch oven set over medium heat. Bring to simmer and cook until thickened, 3 to 4 minutes. Remove pot from heat and add cottage cheese mixture, 1 cup tomato sauce and ¾ cup mozzarella, then stir to combine. Add pasta and stir to coat thoroughly with sauce.

4. Transfer pasta mixture to 13- by 9-inch baking dish and spread remaining tomato sauce evenly over pasta. Sprinkle with remaining ¾ cup mozzarella and remaining ½ cup Parmesan over top. Cover baking dish tightly with foil and bake for 30 minutes.

5. Remove foil and continue to cook until cheese is bubbling and beginning to brown, about 30 minutes longer. Cool for 20 minutes. Sprinkle with remaining 3 tablespoons basil and serve.

vegetarian lasagna

Copy of IMG_0495

This is, for me, perfect lasagna. You can’t go wrong with most combinations of pasta + sauce + cheese, but this one has just the right balance of light and rich, cheese and tomatoes, pasta and sauce, vegetables and…well, not meat, because there is none.

Copy of IMG_0470

But don’t worry, it isn’t vegetable lasagna. It’s vegetarian lasagna. It’s a fine line.

It isn’t that I don’t like meat in my lasagna; I just don’t know that it’s really necessary for me. On the other hand, I definitely do not like large chunks of vegetables in my lasagna – no layers of eggplant or zucchini or peppers.

Copy of IMG_0478

What I’ve done here is use minced mushrooms to mimic the texture and somewhat even the flavor of ground meat in the tomato sauce. The sauce has so much flavor that you’ll never miss the meat. Other than that, it’s a pretty traditional lasagna. I’ve replaced the ricotta with béchamel sauce, just because I like it that way.

Copy of IMG_0484

It’s also, as far as lasagna goes, not terribly indulgent. I use 2% milk in the béchamel and skim mozzarella, although you can certainly use something richer if you prefer. I like to make my own spinach pasta, because if you can add a bag of spinach to the lasagna without it affecting the final flavor or texture, why not? And with mushrooms replacing meat, plus plenty of homemade tomato sauce, there is certainly no shortage of vegetables.

Copy of IMG_0492

It’s just…perfect. Perfectly flavored, a perfect balance of richness. It’s full of vegetables, but they’re not overbearing. It’s a lot of work, yes, but I usually have fun making lasagna. And for a big pan of what is, for me, perfect lasagna? It’s absolutely worth it.

One year ago: Stuffed Sandwich Rolls

Copy of IMG_0496

Printer Friendly Recipe
Vegetarian Lasagna

Serves 8

The recipe looks more complicated than it needs to because of the homemade pasta. You can save yourself a lot of time (skip steps 1 through 4) by buying fresh pasta sheets instead of making and rolling out the spinach pasta. Or you can use a box of no-boil lasagna noodles, soaking them in hot water for 5 minutes before layering the lasagna.

Utilize your food processor! For the parmesan, mozzarella, fresh mushrooms, onion, and tomatoes (in that order).

You can make the whole lasagna ahead of time and refrigerate it overnight. Or you can freeze the whole lasagna. Let it defrost in the refrigerator overnight. To bake the lasagna straight from the refrigerator, just place it in the cold oven, then turn the oven onto 375ºF to bake the lasagna. The lasagna will warm up as the oven heats.

You can also make the pasta dough and both sauces a day in advance and then assemble the layers right before baking.

If you keep fresh basil around, definitely mince up a few leaves and add them to the cooked tomato sauce. You may also want to sprinkle some on top of the lasagna when it comes out of the oven.

Spinach pasta:
5 ounces baby spinach, washed
1 egg
¾ cup all-purpose flour, plus (a lot) more for dusting

Tomato sauce:
½ ounce dried porcini mushrooms, rinsed
2 tablespoons olive oil
1 large onion, chopped fine (reserve ½ cup of the onions for the béchamel)
4 cloves garlic, minced
16 ounces mushrooms, minced
¼ cup wine (optional; red or white is fine)
1 (28-ounce) can diced tomatoes, drained and pureed
1 (14-ounce) can diced tomatoes, drained and pureed
¾ teaspoon salt
¼ teaspoon pepper

Béchamel:
3 tablespoons unsalted butter
½ cup finely diced onions
3 garlic cloves, minced
3 tablespoons all-purpose flour
2½ cups milk
1 bay leaf
pinch nutmeg
¼ teaspoon salt
⅛ teaspoon pepper
½ cup grated parmesan cheese (1 ounce)

Assembly:
nonstick spray
8 ounces (2 cups) shredded mozzarella cheese

1. For the pasta: Place the spinach in a 12-inch skillet and add a few tablespoons of water (or if the spinach is wet from being washed, just add the wet spinach to the skillet). Turn the heat to high until the water boils, then reduce the heat and stir the spinach until it just wilts, about 1 minute. Remove the spinach from the pan (don’t wash the skillet) and place it on a clean dishtowel. Pat and squeeze the spinach until it’s very dry, then finely mince it.

2. Add the flour to a wide bowl or pie plate, then make a well in the center of the flour. Lightly beat the egg, then add it to the well with the chopped spinach. Stir the flour, egg, and spinach together until thoroughly mixed, then started kneading. Knead, adding flour as necessary to keep the dough from being sticky, until the dough is smooth and elastic, about 5 minutes. Don’t be concerned if you need to add quite a bit of extra flour; the dough should be malleable but not at all sticky.

3. Divide the dough into 3 balls. Work with one ball of dough at a time and leave the others covered with a damp dishtowel (you can use the same one you used for drying the spinach). Flatten the dough slightly, then roll it through the widest setting on a pasta roller. Fold it in thirds like a piece of paper going into an envelope, then roll it through the pasta roller again, feeding it with one of the open sides first. If at any point the dough is sticky, brush it with flour. Repeat the folding into thirds and rolling a few times. Without folding, run the pasta through the widest setting once more. Adjust the pasta roller to the next-thinner setting and roll the dough through the machine. Continue to gradually thin the dough until the third-to-last setting. Brush it with flour if the dough starts to stick at all. If the strip of dough becomes too long to handle, cut it into two shorter strips and work with each strip separately. Repeat the rolling, folding, and thinning with the remaining balls of dough, laying the sheets of pasta on dishtowels.

4. Bring a large pot of water to a boil, then add 1 tablespoon salt and reduce the heat until the water is at a lively simmer instead of a vigorous boil. Cut the strips of dough into 8-inch lengths. One by one, dip each rectangle of dough in the water, leave it for about 10 seconds, then remove it and rinse it under running water. Lay the strips of dough on dishtowels.

5. For the tomato sauce: Place the dried porcini in a small saucepan and add just enough water to cover. Bring the water to a boil over high heat, then turn the burner off.

6. Heat the olive oil over medium heat in the same large skillet the spinach was cooked in. Add the onions and a pinch of salt and sauté, stirring occasionally, until the onions just brown around the edges, about 8 minutes. Add the garlic and mushrooms and continue cooking and occasionally stirring until the mushrooms start to brown. First they’ll release a bunch of liquid, but then that will evaporate and they’ll brown. Once they do, pour in the wine and cook, scraping the bottom of the pan, until the wine almost completely evaporates, then add the tomatoes, salt and pepper. Bring to a simmer. Carefully lift the porcini from their soaking liquid with a fork; mince them and add them to the sauce. Simmer the sauce over medium heat until thick, about 15 minutes.

7. For the béchamel: Heat the butter in a medium saucepan over medium heat. When the foaming subsides, add the onions and garlic and sauté, stirring occasionally, until the onion is softened. Add the flour and stir continuously for 1 minute. Stirring constantly, gradually pour in the milk and reserved porcini liquid (pouring carefully so as to leave any grit behind in the small saucepan). Increase the heat to medium-high and bring the mixture to a light boil, stirring very frequently. Once the sauce starts to bubble, lower the heat to medium-low and let it simmer for 10 minutes, stirring in occasionally. Stir in the nutmeg, salt, pepper, and parmesan.

8. Assembly: Adjust an oven rack to the middle position and heat the oven to 375ºF. Spray a 9-by-13-inch pan with nonstick spray. Spread a thin layer of tomato sauce on the bottom of the pan, then add a layer of noodles. Spread ¼ of the béchamel on the noodles, followed by ¼ of the cheese, and ¼ of the tomato sauce. Repeat the layering (noodles, béchamel, cheese, tomato sauce) twice more, then finish by adding a layer of noodles, then the last of the béchamel, the last of the tomato sauce, and the last of the mozzarella.

9. Spray a large sheet of aluminum foil with nonstick spray, then use it to cover the lasagna. Bake, covered, for 30 minutes, then remove the foil and continue to bake for another 15 minutes, until the lasagna is bubbling around the edges. Remove the pan from the oven and let the lasagna set for 10 minutes before cutting and serving.

Copy of IMG_0901

spinach, artichoke, and red pepper strata

This recipe has a lot of ingredients in it, and I wasn’t sure how well they would all go together. Cheddar and parmesan and spinach and red peppers and marinated artichokes don’t seem like natural compliments. But I wanted to make a strata, and I had some spinach and scallions and cheddar to use up.

Typing up the recipe now, it really doesn’t seem like a lot of work, but it certainly seemed so at the time. Stratas are supposed to be convenient because you can make them the night before and just pop them in the oven in the morning. However, I’m rarely in the mood to make breakfast the night before. On the weekends, I’ve usually just made an ambitious dinner and probably dessert, and the last thing I want to do after enjoying that is go back into the kitchen and make breakfast.

I made a third of the recipe in a loaf pan, since it was just for me and Dave. I used fresh spinach, sautéed for a few seconds in the same pan the red peppers had just been removed from. I had the spinach leftover from something else, and I’m not generally a huge fan of frozen spinach anyway – too stemmy. I used Country Crust bread, which is my favorite recipe anytime white sandwich-type bread is called for.

The strata exceeded my expectations. All of the flavors meshed quite well. I had also been concerned that it wouldn’t be rich enough, since my other favorite strata recipe uses half and half instead of milk, but the texture of this one was great. It’s a fairly healthy, and very tasty, take on a breakfast strata.

Spinach, Artichoke, and Red Pepper Strata (from Vegetarian Classics, by Jeanne Lemlin)

JL notes: Choose a firm homemade-style bread such as sourdough, a Tuscan-style chewy bread, or a day-old loaf of Italian or French bread. Avoid very soft packaged bread. Make sure the strata is cooked enough when you remove it from the oven. Test it like a cake. A knife inserted in the center should come out clean.

1 tablespoon olive oil
1 large red bell pepper, cut into thin strips 2 inches long
1 (10-ounce) package frozen chopped spinach, thawed
9 large eggs
3½ cups milk
½ cup (1 ounce) grated Parmesan cheese
¼ teaspoon nutmeg
1 teaspoon salt
generous seasoning freshly ground black pepper
2½ tablespoon butter, softened
9 slices firm white bread
2 (6-ounce) jars marinated artichoke hearts, well drained
2 scallions, very thinly sliced
3 cups (12 ounces) grated extra-sharp cheddar cheese

1. Heat the oil in a medium-size skillet over medium heat and sauté the red pepper until tender, about 7 minutes. Set aside.

2. Place the thawed spinach in a strainer and press out all of its liquid with the back of a large spoon. Set aside.

3. Thoroughly beat the eggs in a large bowl. Beat in the spinach, milk, Parmesan cheese, nutmeg, salt and pepper.

4. Using ½ tablespoon butter, grease a 13x9x2-inch baking dish. With the remaining 2 tablespoons butter, coat 1 side of each slice of bread. Cut the bread into 1-inch cubes. You should have about 9 cups of cubed bread.

5. Place half the bread cubes in the baking dish. Sprinkle on half of the red peppers strips, 1 jar of artichokes, and half of the scallions. Ladle on half of the spinach mixture, then sprinkle on half of the cheddar cheese. Repeat this layering and end with the cheddar cheese.  Cover the dish with place wrap or foil and refrigerate overnight.

6. Remove the dish from the refrigerator at least 30 minutes before baking. Preheat the oven to 350 degrees. Bake the strata, uncovered, for 1 hour, or until golden brown on top and firm in the center. Let the strata sit 15 minutes before cutting it into squares.

breakfast strata with sausage, mushrooms, and monterey jack

I hear a lot of requests for breakfast casserole recipes. They’re popular for good reason. Waking up to a tasty and filling breakfast that needs nothing more than to be thrown into a hot oven is a great way to start the weekend. I’ve made and loved Deb’s Boozy Baked French Toast, but it’s missing some sort of fruit to round out the nutrition. This sausage and mushroom strata has it all – protein, starch, and vegetables.

I’ve eaten a lot of different breakfast casseroles, and I’ve found that there are some tricks to making a good one. One is to use hearty bread and to dry it out so you don’t have a soggy casserole. You want to replace the moisture that’s naturally in the bread with your own flavored liquids. Also, don’t use so many eggs that they can’t be evenly mixed in and absorbed. I have a recipe for a breakfast casserole that I love the flavors of, but the original recipe calls for so many eggs that I once got a bite of nothing but unmixed egg white while eating it. Finally, of course you need to use a combination of flavors that you love, and adding lots of cheese never hurts.

Casseroles like this are perfect when you have a long day ahead of you and don’t have time to prepare a good breakfast in the morning. I’ve eaten them before skiing, hiking, and moving. They also make a great addition to a brunch menu.

Breakfast Strata with Sausage, Mushrooms, and Monterey Jack (from Cooks Illustrated November 2001)

Makes one 8 by 8-inch strata, serving 6

CI note: To weigh down the assembled strata, we found that two 1-pound boxes of brown or powdered sugar, laid side by side over the plastic-covered surface, make ideal weights. A gallon-sized zipper-lock bag filled with about 2 pounds of sugar or rice also works. This recipe doubles easily; use a 9 by 13-inch baking dish greased with only 1½ tablespoons butter and increase the baking time as directed in step 4. Feel free to substitute any good melting cheese, such as Havarti, sharp cheddar, or colby.

Bridget note: This time when I made this recipe, it ended up a bit too salty. I’m guessing the necessary salt will vary based on the sausage, so start low and add more if necessary. Pictures show a half recipe made in a loaf pan.

8-10 slices supermarket French bread (½-inch thick) or Italian bread (6 – 7 ounces)
3 tablespoons unsalted butter, softened
8 ounces bulk breakfast sausage, crumbled
3 medium shallots, minced (about 1/3 cup)
8 ounces white button mushrooms, cleaned and quartered
Table salt and ground black pepper
½ cup medium-dry white wine, such as Sauvignon Blanc
6 ounces Monterey Jack cheese, grated (about 1½ cups)
6 large eggs
1¾ cups half-and-half
2 tablespoons minced fresh parsley leaves
1. Adjust oven rack to middle position and heat oven to 225 degrees. Arrange bread in single layer on large baking sheet and bake until dry and crisp, about 40 minutes, turning slices over halfway through drying time. (Alternatively, leave slices out overnight to dry.) When cooled, butter slices on one side with 2 tablespoons butter; set aside.

2. Fry sausage in medium nonstick skillet over medium heat, breaking sausage apart with wooden spoon, until sausage has lost raw color and begins to brown, about 4 minutes; add shallots and cook, stirring frequently, until softened and translucent, about 1 minute longer. Add mushrooms to skillet, and cook until mushrooms no longer release liquid, about 6 minutes; transfer mixture to medium bowl and season to taste with salt and pepper. Add wine to skillet, increase heat to medium-high, and simmer until reduced to ¼ cup, 2 to 3 minutes; set aside.

3. Butter 8-inch square baking dish with remaining 1 tablespoon butter; arrange half the buttered bread slices, buttered-side up, in single layer in dish. Sprinkle half of sausage mixture, then ½ cup grated cheese evenly over bread slices. Arrange remaining bread slices in single layer over cheese; sprinkle remaining sausage mixture and another ½ cup cheese evenly over bread. Whisk eggs and parsley in medium bowl until combined; whisk in reduced wine, half-and-half, 1 teaspoon salt, and pepper to taste. Pour egg mixture evenly over bread layers; cover surface flush with plastic wrap, weigh down (see note, above), and refrigerate at least 1 hour or up to overnight.

4. Remove dish from refrigerator and let stand at room temperature 20 minutes. Meanwhile, adjust oven rack to middle position and heat oven to 325 degrees. Uncover strata and sprinkle remaining ½ cup cheese evenly over surface; bake until both edges and center are puffed and edges have pulled away slightly from sides of dish, 50 to 55 minutes (or about 80 minutes for doubled recipe). Cool on wire rack 5 minutes; serve.

smitten kitchen recipes

t1.jpg

Smitten Kitchen is my new favorite cookbook. In the past month since discovering Deb’s blog, I’ve made seven of her recipes. When I’m trying to come up with cooking ideas, I just scan through her recipe page. Rather than rehash each dish in detail, I’m combining them into one entry.

bft.jpg

Boozy Baked French Toast

Of all of Deb’s recipes that I’ve made recently, this is my and Dave’s favorite. For one thing, it takes all of 10 minutes to put together, and that can be done the night before. In the morning, just cook it in the oven for half an hour, and voila – a great breakfast. The recipe is supposedly adaptable to whatever flavors you’re in the mood for or you have available, but I’ve only made it one way. I was planning to follow Deb’s recent favorite, with triple sec and orange zest, but I use “planning” loosely, as I didn’t actually bother to get either triple sec or orange zest. Instead, I used Grand Marnier as the alcohol, the zest of one grapefruit, and a splash of vanilla extract. It was fantastic. It was like Creamsicle French Toast. I made it again a week later, exactly the same way. This is why I have a loaf of challah in my freezer right now, and a grapefruit languishing in my crisper drawer, waiting for me to get back from New Mexico and make this great and easy dish for my friends who will be visiting.

copy-of-dscn3652.jpg

Artichoke Ravioli

I love the idea of homemade ravioli. I enjoy working with fresh pasta, and I like the option of customizing my ravioli filling to whatever strikes my interest – mushrooms, squash, seafood, and in this case, artichokes. The problem is, I sort of suck at making it. Both times I’ve tried, the pasta has been too watery after being boiled. This particular recipe is baked after being boiled, which helped dry it out somewhat, but clearly I need to work on my technique. Ravioli is too much tedious work to get anything less than amazing results. I’m not ready to give up yet. This filling was, fortunately, very good. The simple sauce was good too, although I used canned tomatoes instead of fresh, it being February and all.

copy-of-dscn3833.jpg

Creamy Baked Macaroni and Cheese

I already have a macaroni and cheese recipe that I love, but Deb’s photos of a crispy cheesy crust and creamy cheesy sauce had me intrigued to try a new recipe. Did I mention that it’s cheesy? This recipe uses twice as much cheese per pasta as my other favorite recipe. So I made it, and it was delicious, but Dave and I couldn’t decide if it was as good as my other favorite. So I made them side-by-side, which was, well, confusing. Neither recipe is particularly difficult, but I was making half recipes of each sauce, then storing half of that in the fridge so we could have an easy but fresh meal a few days later, which means that each sauce was topping only a quarter recipe of pasta. There was a screw-up here and there, but nothing vital. We weren’t able to pick a favorite. I know they’re both macaroni and cheese, but it felt like comparing apples and oranges. The Cooks Illustrated recipe is creamy and smooth, both in texture and flavor, while the new recipe was far sharper (did I mention that it has twice as much cheese as the other?) and a bit grainy, but oh, that crisp crust was fun. I think I’ll be combining the two in the future. I know Cooks Illustrated uses half cheddar because of its great flavor, and half Monterey jack because of its smooth melting qualities, but I’m going to try using 75% cheddar and 25% Monterey jack next time to get some more of that sharp flavor. I’m also going to skip the bread crumb topping and use more cheese instead, then put that under the broiler to brown the cheese. I think this will combine my favorite aspects of each recipe. (I was also just reminded of a recipe I used to love that uses smoked gouda, so I need to revisit that one. Hey, I love cheesy pasta.)

ribs.jpg

Hoisin and Honey Pork Ribs

When I was a kid, pork ribs were my favorite meal, and I requested them for every birthday. I grew out of that when I decided that ribs were too much effort and mess to eat when there was so little meat. But these ribs were certainly worth the effort. I wanted to make them because I recently tried hoisin sauce for the first time and loved it. This was my first time cooking pork ribs, plus I’m not usually very good with the broiler, but everything worked out great. Because the ribs are boiled first, the broiler is just to crisp them and caramelize the sauce, so it was easy.

ddl2b.jpg

Dulce de Leche Cheesecake Squares

This recipe called to me as soon as Deb posted it. Cheesecake filling, graham cracker crust, chocolate glaze, all mixed up with dulce de leche. I’m not really familiar with dulce de leche, but caramelized milk certainly sounds great. But wow, these were rich. I can usually handle rich foods without a problem, but these were too much even for me. It helped when I thought of them like candy instead of like a bar cookie and started cutting them into the 1-inch squares that the recipe recommends. I did enjoy them, but I don’t think I’ll be making them again.

t3.jpg

Truffles

It sounds like Valentine’s Day is becoming mostly an excuse for couples to enjoy a good meal together, which I think is great. Dave and I weren’t even going to do that (we were having the second day of mac and chz comparison on V-Day), and I was okay with that. I found out on February 13th that Dave wanted to do something extra, so I surprised him by making truffles the next day. I loosely followed the recipe for Robert Linxe’s truffles, except, less fancy. I didn’t use Volrhona chocolate, I didn’t wear gloves, and I didn’t simmer the cream multiple times. It wasn’t worried about details this time. It was my first time making truffles, and I think they came out well. I want to try them again, but comparing a number of different quality chocolates to see how much it really matters.

Pizza Dough

Deb discussed a recipe for pizza dough that replaced some of the water with white wine and added a little honey. I tried it, and while the dough wasn’t sweet and the wine flavor wasn’t obvious, it made a really good pizza crust. Even Dave, who didn’t know that I had changed the recipe, pointed out that it was particularly good. I forgot that this recipe was related to this entry in my blog, so I didn’t think to take a picture, which is unfortunate because the crust was really crisp and light.

Next on the list is Lighter-Than-Air Chocolate Cake. Flourless chocolate cakes are usually dense confections, so I’m interested in this very light version. And then, who knows? World Peace Cookies? Pretzel rolls? Risotto alla Barolo? There’s so many great recipes to choose from, all beautifully photographed and enticingly described.

ddl1.jpg

green chile chicken enchiladas

16.jpg

I’m from New Mexico, but I’m not one of those New Mexicans who like green chile in everything. I don’t want it in my eggs, and not really on my pizza, and I’m just coming around to the idea of it in burgers. I do love green chile in traditional New Mexican food though, and chicken enchiladas are my favorite dish.

Not that my recipe is similar to what you’d get in a New Mexican restaurant in Albuquerque. There, chicken enchiladas have nothing but shredded chicken in them, with green chile sauce on top and melted cheddar garnishing. I prefer all of those flavors mixed together right inside the tortilla.

This recipe began with a recipe for Sour Cream Chicken Enchiladas in Pillsbury’s Complete Cookbook. I took that base and combined it with some techniques from my favorite chicken pot pie recipe (coming soon), which is all about maximizing the flavor of the each ingredient, especially the chicken.

After seasoning the bone-in, skin-on chicken breast, I sear it on the stove and then roast it in the oven. When it’s done roasting, I deglaze the pan with some chicken broth to get any remnant tasty chicken-ness. Then I shred the chicken.

26.jpg

The filling is an embellished béchamel. I sauté onions and garlic in the butter before adding the flour, then add milk (and the broth used to deglaze the pan with the chicken), green chile and sour cream. Some of this mixture is set aside to become the sauce, and the chicken and some cheese is added to the remaining filling. The sauce is loosened with some additional milk and sour cream.

35.jpg

The first time I cooked with corn tortillas was a disaster, because I didn’t know that they need to be heated before they’ll roll without cracking. Now I wet the tortillas a bit, then heat them in the oven for a few minutes before attempting to fill and roll them. Once they’re all in the pan, I pour the sauce over them, sprinkle some more cheese on top, and bake until everything is heated through.

44.jpg

These are the best enchiladas I’ve ever had, putting traditional New Mexican recipes to shame.

Green Chile Chicken Enchiladas

Note: To wet the tortillas before heating and rolling them, I usually hold them under running water for a second. Alternatively, you could brush water on them using a pastry brush.

1 bone-in, skin-on chicken breast (12-16 ounces)
salt and pepper
1 tsp vegetable oil
2 tablespoons water
3 tablespoons butter
½ large onion, chopped fine
3 cloves garlic, minced
3 tablespoons flour
1 cup milk plus ¼ cup
4 ounces chopped green chiles, undrained
½ cup sour cream plus 2 tablespoons
1 cup (4 ounces) cheddar, shredded, plus ¾ cup (3 ounces)

1. For chicken: Adjust oven racks to the lower-middle and upper-middle positions; heat oven to 450 degrees. Heat oil in heavy-bottomed 9-inch ovenproof skillet over medium-high heat until oil just begins to smoke; swirl skillet to coat evenly with oil. Brown chicken breast skin side down until deep golden, 3 to 4 minutes; turn chicken breast and brown until golden on second side, 3 to 4 minutes longer. Place in oven on lower-middle rack. Roast until thickest part of breast registers about 160 degrees on instant-read thermometer, 18 to 25 minutes. Using potholder or oven mitt, remove skillet from oven. Transfer chicken to platter and set aside until cool enough to handle. Pour water into hot skillet and scrape with a heat-proof spatula or wooden spoon to loosen browned bits. Pour liquid into small bowl. Reduce oven temperature to 375 degrees.

2. For filling: Melt butter until foaming in medium saucepan over medium heat; add onions and garlic and cook, stirring frequently, until translucent, about 4 minutes. Add flour and cook, stirring constantly, for about 1½ minutes. Do not brown. Gradually whisk in milk and reserved water from deglazing. Bring mixture to boil over medium-high heat. Stir in green chiles, 1/8 teaspoon salt, and a pinch of pepper. Remove from heat, and stir in ½ cup sour cream.

3. For sauce: Set aside ¼ cup of filling mixture. Add an additional ¼ cup milk and 2 tablespoons sour cream and stir until blended.

4. Remove and discard chicken skin. Using fingers or fork, pull chicken off bones into 2-inch shreds and 1-inch chunks. Stir shredded chicken and 1 cup shredded cheddar into filling mixture. Spread ¼ of sauce in bottom of 9×13-inch pan.

5. Lightly wet both sides of four tortillas; place on baking sheet in oven for 3-4 minutes, until soft. Spread approximately ¼ cup of filling down center of each tortilla. Fold in sides and place enchilada, seam side down, in prepared pan. Repeat with remaining tortillas until all the filling has been used, wetting and warming tortillas as necessary.

6. Pour remaining sauce over enchiladas and top with remaining ¾ cup cheese. Bake on upper-middle rack until the sauce is bubbling and the cheese is melted, 20-25 minutes. Let rest 5-10 minutes and serve.

the real deal (marcella hazan’s lasagne bolognese)

dscn2543.jpg

I’ve been kept away from cooking for too long. Between holiday traveling and moving, it’s been at least a month since I did any serious cooking or baking. Every time I have a cooking dry spell like this, I end up thinking of food constantly. I start to make lists of what I want to make. And it seems like the dish that occupies the most of my thoughts is always lasagna.

I love lasagna in all of its forms – meat, mushroom, spinach, artichoke, tomato, béchamel. This time I wanted to make a classic meat lasagna. I keep trying new recipes because I haven’t yet found one that I love. I decided it was high time to try Marcella Hazan’s recipe. I coveted Hazan’s Essentials of Classic Italian Cooking for several years before receiving it as a wedding gift from my sister-in-law. Yay! This is the first recipe I’ve made from it.

I’ve often heard about those lasagna recipes that take all day. Most modern recipes are trying to simplify and shorten the process, but I’ve always been curious about the original. If someone spends all day on a recipe, it must be worth it, right?

I was about to find out. Reading Hazan’s recipe for Baked Green Lasagne with Meat Sauce, Bolognese Style, was like the Choose Your Own Adventure books I read as a kid. Turn to page 129 for pasta made with the machine method, or page 143 for the hand-rolled method. On page 129, I was directed to page 89 for instructions on cooking the spinach. Yeesh. I took the recipe(s) one step at a time, and everything really did go without a hitch.

The recipe involves a lot of patience. Hazan is not much into modern tools that make life easier; she’s all about doing things the hard way. I’ve made béchamel sauce many times, always by melting butter, stirring in flour, whisking in cold milk, stirring until it boils. Hazan instructs this all to be done over low heat, and the milk is pre-heated, then added to the butter-flour mixture 2 tablespoons at a time. Then this mixture is stirred, of course constantly, over low heat until it thickens. Over low heat, it takes a long time to thicken. But once it does, it makes the smoothest béchamel sauce I’ve ever made, albeit one that tastes somewhat of raw flour.

The bolognese sauce is similar in that there’s a lot of “gentle simmering.” Hazan is very specific that the sauce must simmer for at least 3 hours after the tomatoes are added. What she fails to mention is that the recipe takes about an hour even before that point. One cup of milk takes quite some time to completely bubble away at a gentle simmer.

dscn2482.jpg

Of course the pasta dough could not be made in the food processor, it must be done by hand. I was determined to follow the recipe exactly, so I trudged on. And this is what I got…

dscn2499.jpg

Obviously the egg is supposed to stay in the well in the center of the flour, not glop out a breach in the side. Next time I’ll mix the egg and spinach together in a bowl, even add some flour to it before I move to a flat work surface to complete the additions of flour.

dscn2501.jpg

This is the first time I’ve rolled out pasta without wanting to scream! Really, rolling out the pasta just went splendidly, and I’m so glad that I finally learned a good technique for this.

dscn2529.jpg

The two sauces are mixed together and alternately layered with pasta. Hazan specifies that there should be at least 6 layers. I lost count, but I know I had more than that, and I only used probably 2/3 of the pasta sheets before I ran out of sauce.

dscn2542.jpg

All in all, the lasagna took about 7 hours, keeping in mind that I was taking my time. Was the recipe worth all this? Well…the short answer is no. It was good, but not that good. Dave and I agreed that it tasted somewhat meatloaf-ish. The long answer is that I was fairly certain going in that there would be things I’d want to change in the recipe for later editions. For one thing, the only cheese in the entire recipe is 2/3 cup of parmesan. I gather (from wikipedia) that this is the traditional Bolognese method for lasagna. But I’m an all-American girl, and I want mozzarella! I’d also like less carrot and celery to counteract the “meatloafness”, and more onion. I want to try adding some flavorings to the béchamel as well.

So I will be attempting this recipe again, but probably in a less authentic Italian form. I trust that it will go much faster now that I understand the methods involved. If nothing else, I’m grateful to have learned how to roll out homemade pasta to the thinnest setting without any swearing.

I’m typing out the whole recipe for you below, so you can see for yourself the pickiness that is a Marcella Hazan recipe. I followed the recipe just about exactly.

Baked Green Lasagne with Meat Sauce, Bolognese Style

Serves 6

Bolognese Sauce
Béchamel Sauce
Green pasta dough
1 tablespoon salt
2 tablespoons butter, plus more for greasing a 9- by 12-inch bake-and-serve lasagna pan, no less than 2½ inches high
2/3 cup fresh grated parmigiano-reggiano cheese

1. Prepare the meat sauce and set aside.

2. Prepare the béchamel, keeping it rather runny, somewhat like sour cream. When done, keep it warm in the upper half of a double boiler, with the heat turned to very low. If a film should form on top, just stir it when you are ready to use it.

3. Make green pasta dough. Roll it out as thin as it will come. Leave the strips as wide as they come from the rollers, and cut them into 10-inch lengths.

4. Set a bowl of cold water near the range, and lay some clean, dry cloth towels flat on a work counter. Bring 4 quarts of water to a rapid boil, add 1 tablespoon salt, and as the water returns to a boil, slip in 4 or 5 of the cut pasta strips. Cook very briefly, just seconds after the water returns to a boil after you dropped in the pasta. Retrieve the strips with a colander scoop of slotted spatula, and plunge them into the bowl of cold water. Pick up the strips, one at a time, rinse them under cold running water, and rub them delicately, as though you were doing fine hand laundry. Squeeze each strip very gently in your hands, then spread if flat on the towel to dry. When all the pasta is cooked in the manner, 4 or 5 strips at a time, and spread out to dry, pat it dry on top with another towel.

*Explanatory note: The washing, wringing, and drying of pasta for lasagna is something of a nuisance, but it is necessary. You first dip the partly cooked pasta into cold water to stop the cooking instantly. This is important because if lasagna pasta is not kept very firm at this stage it will become horribly mushy later when it is baked. And you must afterward rinse off the moist starch on its surface, or the dough will become glued to the towel on which it is laid out to dry, and tear when you are ready to use it.

5. Preheat the oven to 400 degrees.

6. Thickly smear the bottom of a lasagna pan with butter and about 1 tablespoon of béchamel. Line the bottom of the pan with a single layer of pasta strips, cutting them to fit the pan, edge to edge, allowing no more than ¼ inch for overlapping.

7. Combine the meat sauce and the béchamel and spread a thin coating of it on the pasta. Sprinkle on some grated parmesan, then add another layer of pasta, cutting it to fit as you did before. Repeat the procedure of spreading the sauce and béchamel mixture, then sprinkling with Parmesan. Use the trimmings of pasta dough to fill in gaps, if necessary. Build up to at least 6 layers of pasta. Leave yourself enough sauce to spread very thinly over the topmost layer. Sprinkle with parmesan and dot with butter.

*Ahead-of-time note: The lasagna may be completed up to 2 days in advance up to this point. Refrigerate under tightly sealing plastic wrap.

8. Bake on the uppermost rack of the preheated oven until a light, golden crust formed on top. It should take between 10 and 15 minutes. If after the first few minutes you don’t see any sign of a crust beginning to form, turn up the oven another 50 to 75 degrees. Do not bake longer then 15 minutes altogether.

9. Remove from the oven and allow to settle for about 10 minutes, then serve at table directly from the pan.

Bolognese Sauce:
1 tablespoon oil
3 tablespoon butter
½ cup chopped onion
2/3 cup chopped celery
2/3 cup chopped carrot
3/4 pound ground beef chuck
salt
black pepper, ground fresh from the mill
1 cup whole milk
whole nutmeg
1 cup dry white wine
1½ cup canned imported Italian plum tomatoes, cut up, with their juice

1. Put the oil, butter and onion in the pot, and turn the heat on to medium. Cook and stir the onion until is has become translucent, then add the chopped celery and carrot. Cook for about 2 minutes, stirring the vegetables to coat them well.

2. Add the ground beef, a large pinch of salt, & a few grindings of pepper. Crumble the meat with a fork and cook until beef has lost its raw, red color.

3. Add the milk and let simmer gently, stirring frequently, until it has bubbled away completely. Add a tiny grating – about 1/8 teaspoon – of nutmeg and stir.

4. Add the wine, let simmer until it has evaporated, then add the tomatoes and stir thoroughly to coat all ingredients well. When the tomatoes begin to bubble, turn the heat down so that the sauce cooks at the laziest of simmers, with just an intermittent bubble breaking through the surface. Cook, uncovered, for 3 hours or more, stirring from time to time. While the sauce is stirring, you are likely to find that it begins to dry out and the fat separates from the meat. To keep it from sticking, continue the cooking, adding ½ cup of water whenever necessary. At the end, however, no water at all must be left and the fat must separate from the sauce. Taste and correct for salt.

Béchamel Sauce:
3 cups milk
6 tablespoons butter
4½ tablespoons flour
¼ teaspoon salt

1. Put the milk in a saucepan, turn the heat to medium-low, and bring the milk just to the verge of boiling, to the point when it begins to form a ring of small, pearly bubbles.

2. While heating the milk, put the butter in a heavy-bottomed, 4- to 6-cup saucepan, and turn the heat to low. When the butter has melted completely, add the flour and stirring it with a wooden spoon. Cook, while stirring constantly, for about 2 minutes. Do not allow flour to become colored. Remove from heat.

3. Add the hot milk to the flour-and-butter mixture, no more than 2 tablespoons of it at a time. Stir steadily and thoroughly. As soon as the first 2 tablespoons have been incorporated into the mixture, add 2 more, and continue to stir. Repeat this procedure until you have added ½ cup milk; you can now put in the rest of the milk ½ cup at a time, stirring steadfastly, until all the milk has been smoothly amalgamated with the flour and butter.

4. Place the pot over low heat, add the salt, and cook, stirring without interruption, until the sauce is as dense as thick cream. If you find any lumps forming, dissolve them by beating the sauce rapidly with a whisk.

Pasta:
6 ounces fresh spinach, cooked, or 1/3 package frozen leaf spinach
2 large eggs
1½ cups unbleached flour

Pour the flour onto a work surface, shape it into a mound, and scoop out a deep hollow in its center. Break the eggs and add the chopped spinach into the hollow.

Beat the eggs and spinach lightly with a fork for about 2 minutes as though you were making an omelet. Draw some of the flour over the eggs, mixing it in with the fork a little at a time, until the eggs are no longer runny. Draw the sides of the mound together with your hands, but push some of the flour to one side, keeping it out of the way until you find you absolutely need it. Work the eggs and flour together, using your fingers and the palms of your hands, until you have a smoothly integrated mixture. If it is still moist, work in more flour.

When the mass feels good to you and you think it does not require any more flour, wash your hands, dry them, and run a simple test: Press you thumb deep into center of the mass; if it comes out clean, without any sticky matter on it, no more flour is needed. Put the egg and flour mass to one side, scrape the work surface absolutely clear of any loose or caked bits of flour and of any crumbs, and get ready to knead.

Return to the mass of flour and eggs. Push forward against it using the heel of your palm, keeping your fingers bent. Fold the mass in half, give it a half turn, press hard against it with the heel of your palm again, and repeat the operation. Make sure that you keep turning the ball of dough always in the same direction, either clockwise or counterclockwise, as you prefer. When you have kneaded it thus for 8 full minutes and the dough is as smooth as baby skin, it is ready for the machine.

Cut the ball of dough into 6 equal parts.

Spread clean, dry, cloth dish towels over a work counter near where you’ll be using the machine.

Set the pair of smooth cylinders, the thinning rollers, at the widest opening. Flatten one of the pieces of dough by pummeling it with your palm, and run it through the machine. Fold the dough twice into a third of its length, and feed it by its narrow end through the machine once again. Repeat the operation 2 or 3 times, then lay the flattened strip of pasta over a towel on the counter. Since you are going to have a lot of strips, start at one end of the counter, leaving for for the others.

Take another piece of dough, flatten it with your hand, and urn it through the machine exactly as described above. Lay the strip next to the previously thinned one on the towel, but do not allow them to touch or overlap, because they are still moist enough to stick to each other. Proceed to flatten all the remaining pieces in the same manner.

Close down the opening between the machine’s rollers by one notch. Take the first pasta strip you had flattened and run it once through the rollers, feeding it by its narrow end. Do not fold it, but spread it flat on the cloth towel, and move on to the next pasta strip in the sequence.

When all the pasta strips have gone through the narrower opening once, bring the rollers closer together by another notch, and run the strips of pasta through them once again, following the procedure described above. You will find the strips becoming longer, as they get thinner, and if there is not enough room to spread them out on the counter, you can let them hand over the edge. Continue thinning the strips in sequence, progressively closing down the opening between the rollers one notch at a time. This step-by-step thinning procedure, which commercial makers of fresh pasta greatly abbreviate or skip altogether, is responsible, along with proper kneading, for giving good pasta its body and structure.

dscn2562.jpg