Elly’s chicken gyros are so very popular for good reason – it’s a simple recipe with exceptional results. I, of course, can’t keep anything simple. After I made Elly’s recipe a few times, I noticed how similar it is to chicken fajitas – marinated chicken wrapped in flat bread with vegetables. My favorite chicken fajita recipe has a few tricks up its sleeve that I love, so I started incorporating those into Elly’s chicken gyro recipe.
My favorite trick is saving a portion of the marinade (before mixing it with raw meat, of course) to stir into the cooked and shredded chicken, reviving any flavors that might be lost during cooking. Another portion of the marinade is stirred into the vegetables, brightening their flavor while the vinegar tames the onion’s bite. I also insist on taking advantage of everyone’s favorite cooking method – fire. I love grilling the chicken and then toasting the pita over the remaining coals.
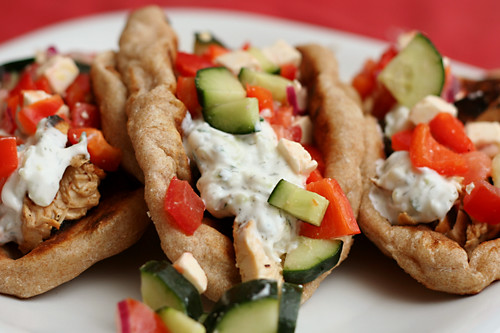
I’m fairly certain that traditionally, gyros aren’t topped with red peppers and feta, and the first few times I made this recipe, I served those on the side as part of Mediterranean Pepper Salad. But each time, more and more of the salad made its way onto the gyro, and eventually I stopped keeping them separate at all. With the vegetables right on top of the marinated grilled chicken and toasted flatbread, topped with tart white sauce, these were even more similar to chicken fajitas, except – dare I say – even better.
One year ago: Croissants (Martha Stewart’s recipe)
Two years ago: Rhubarb Scones
Three years ago: Pita (cook these right on the grill instead of baking!)
Printer Friendly Recipe
Chicken Gyros (adapted from Elly Says Opa and from Cooks Illustrated’s Chicken Fajita recipe)
Greek yogurt is often sold in 7-ounce containers. If you don’t have extra plain yogurt around to use in the marinade, using 2 tablespoons of the Greek yogurt meant for the tzatziki recipe in your marinade won’t hurt your tzatziki at all.
Chicken:
¼ cup juice from 1 to 2 lemons
2 tablespoons olive oil
3 medium garlic cloves, crushed
1 tablespoon red wine vinegar
1 teaspoon sugar
table salt and ground black pepper
2 tablespoons plain yogurt
3 boneless, skinless chicken breasts (about 1½ pounds), trimmed of fat, tenderloins removed, pounded to ½-inch thickness
Tzatziki:
½ cucumber, unpeeled, shredded
½ teaspoon kosher salt
7 ounces Greek yogurt
1 tablespoon freshly squeezed lemon juice
½ tablespoon white wine vinegar
½ tablespoon minced fresh dill (optional)
1 clove garlic, minced
¼ teaspoon freshly ground black pepper
For serving:
½ red onion, quartered lengthwise and sliced thinly
1 large red bell pepper, quartered lengthwise and sliced thinly
½ cucumber, quartered lengthwise and sliced thinly
1 tomato, chopped medium, or 1 cup grape tomatoes, halved
½ cup feta, crumbled
4-6 (6-inch) pocketless pitas
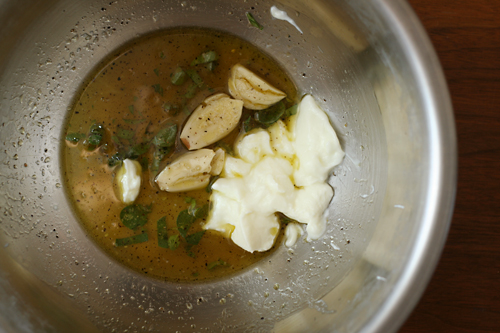
1. In a medium bowl, whisk together the lemon juice, oil, garlic, vinegar, sugar, 1 teaspoon salt, and ¾ teaspoon pepper. Reserve 3 tablespoons of the marinade in a small bowl; set aside. Add the yogurt and another teaspoon salt to the remaining marinade. Place the chicken in the marinade; cover with plastic wrap and refrigerate 15 minutes.
2. Meanwhile, using a large chimney starter, ignite 6 quarts of charcoal briquettes and burn until the coals are fully ignited, about 20 minutes. Empty the coals into the grill, spreading them in a single layer; place an additional 20 unlit coals over the lit coals on one side of grill to create a two-level fire. Position the grill grate over the coals and heat the grate for 5 minutes; scrape clean with a grill brush. (For a gas grill, light all burners and turn to high, cover, and heat the grill until hot, about 15 minutes; scrape the grill grate clean with a grill brush. Leave one burner on high heat while turning the remaining burner(s) down to medium.)
3. For the tzatziki: Place the cucumber in a strainer set over a medium bowl and add the salt. Set aside for at least 15 minutes to drain. Transfer the cucumber to a clean kitchen towel and squeeze dry. Combine the drained cucumber with the yogurt, lemon juice, vinegar, dill, garlic, and pepper.
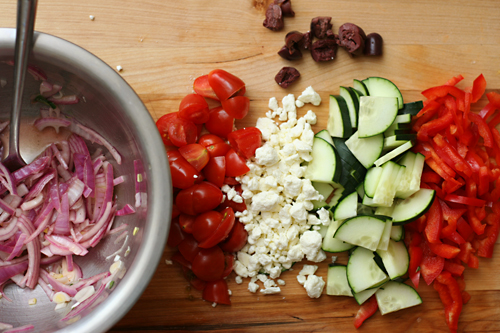
4. Add 2 tablespoons of the reserved marinade to a bowl; add the sliced onion to the marinade. Set aside to lightly pickle while you prepare the remaining toppings. Mix all of the vegetables and feta into the bowl with the onion.
5. Remove the chicken from the marinade and place it smooth side down on the hotter side of the grill; discard the remaining marinade. Cook the chicken until it’s well browned, 4 to 5 minutes; using tongs, flip the chicken and continue grilling until it’s no longer pink when cut into with a paring knife or an instant-read thermometer inserted into the thickest part registers about 160 degrees, 4 to 5 minutes longer. Transfer to a plate; cover to keep warm.
6. Working in 2 or 3 batches, place the pitas in a single layer on the cooler side of the now-empty grill and cook until warm and lightly browned, about 20 seconds per side (do not grill too long or the pitas will become brittle). As the pitas are done, wrap them in a kitchen towel or a large sheet of foil.
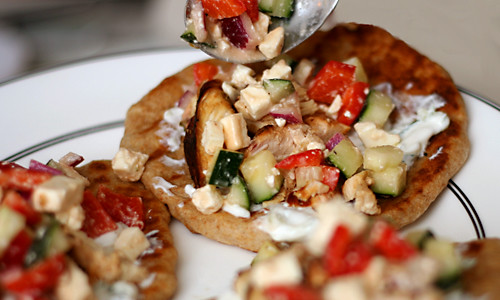
7. Slice the chicken into ¼-inch strips and toss with the remaining tablespoon of reserved marinade in another bowl; arrange the chicken and vegetables on a large platter and serve with the warmed pitas.


