watermelon agua fresca

watermelon agua fresca 7

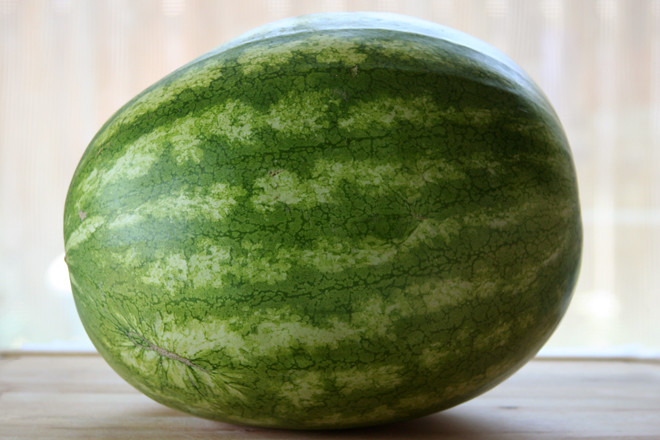
This is the first watermelon I’ve ever bought. The thing is, I don’t actually like watermelon. Because it tastes like water. And if I want water, I’ll just drink some; no need to eat faintly sugary overly soft fruit.

watermelon agua fresca 1

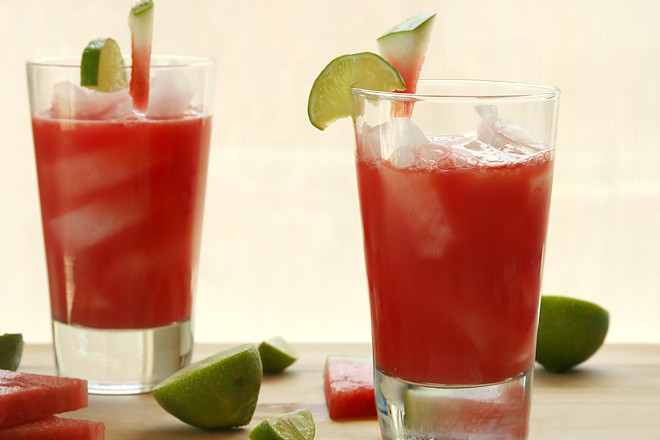
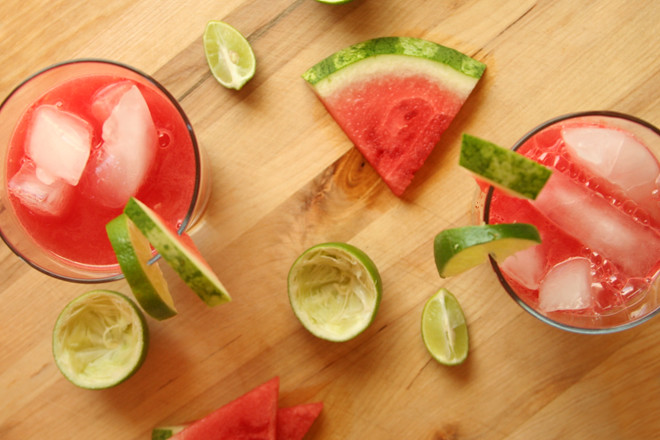
But, I see now – sugary water, isn’t that the perfect base for a drink? It isn’t quite enough on its own; after all, watermelon is bland. But with some tart lime juice to brighten it up and maybe some mint, now we’re talking. Basically, think of the most supremely refreshing ingredients you can, then blend them up and serve them over ice.

watermelon agua fresca 3

This is so good that Dave had to verify with me that there was no alcohol in it. Yes, a refreshing summer citrusy drink without tequila or rum! I will be buying many, many more watermelons.

watermelon agua fresca 8

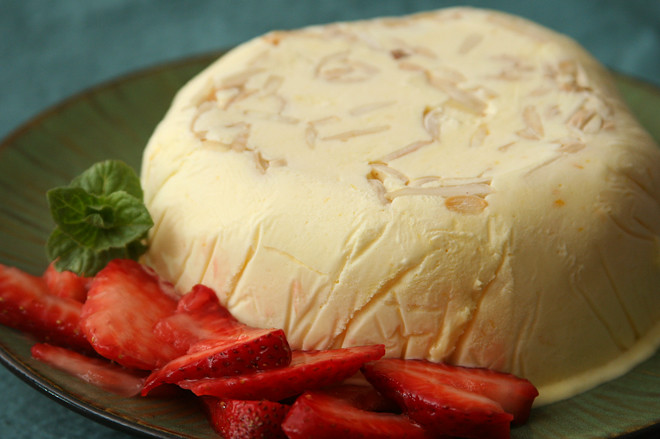
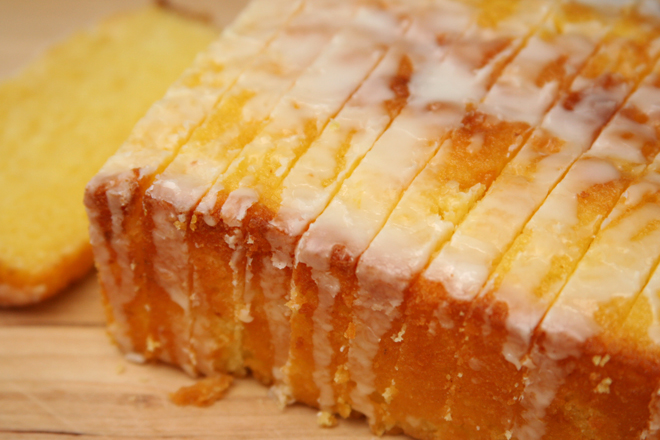
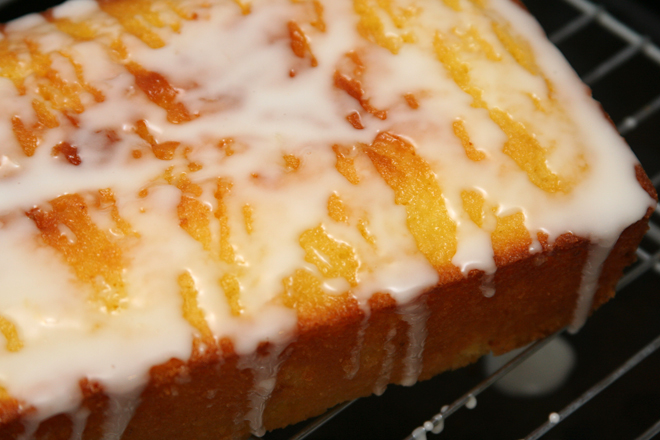
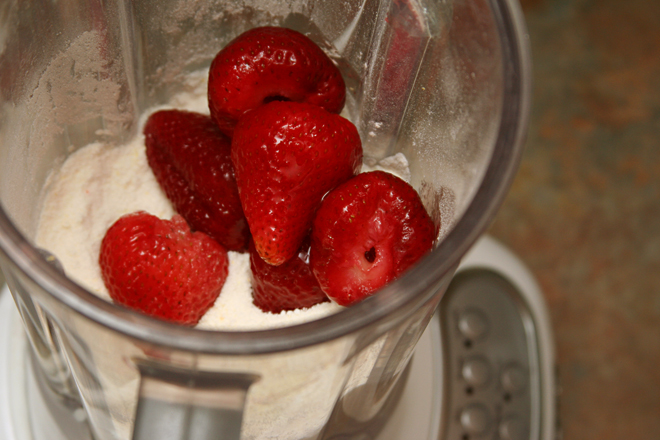
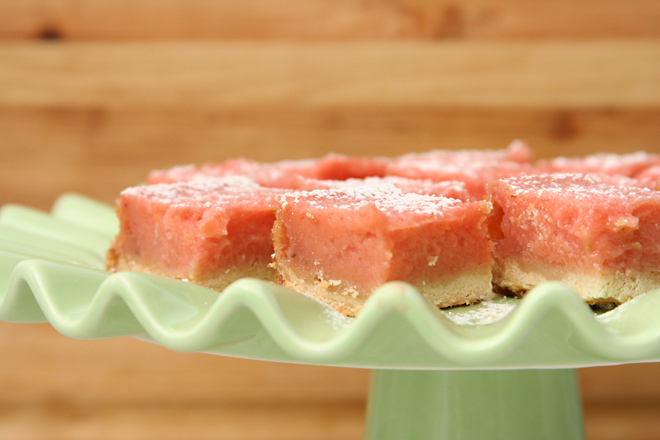
One year ago: Strawberry Cream Cake
Two years ago: Turkey Burgers
Three years ago: Potato Galette
Four years ago: Pecan Honey Sticky Buns

Printer Friendly Recipe
Watermelon Agua Fresca (adapted slightly from sunny vegan)

6 servings

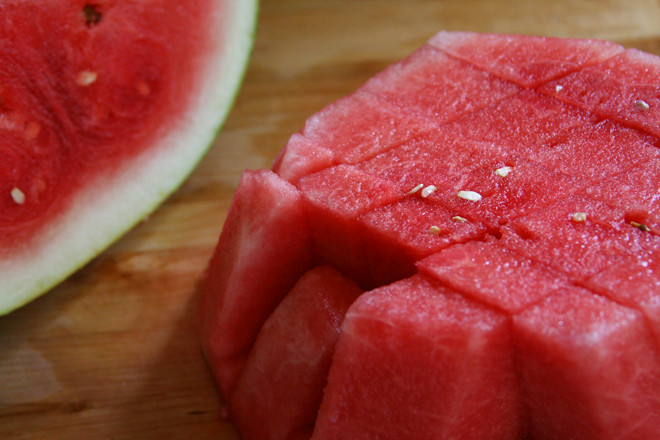
8 cups cubed, seeded, peeled watermelon (about a third of a medium watermelon)
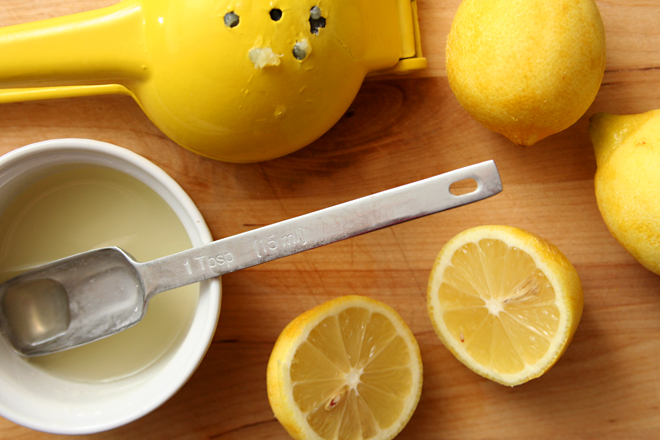
6 tablespoons lime juice
4 sprigs mint (optional)
ice
sparkling water

In a blender or food processor, puree the watermelon, lime juice, and mint. Pour the mixture into a fine-mesh strainer (or a colander lined with a single layer of cheesecloth); set aside for 30 minutes for the liquid to drain, stirring occasionally. Discard the solids in the strainer. Serve the remaining liquid over ice, topped off with sparkling water.

watermelon agua fresca 6

lemon ricotta cookies

lemon ricotta cookies 6

Due to the knee injury that’s kept me from working out at my normal intensity for four months (and counting), I mostly gave up baking for a while. Most of the baking I’ve done recently has been to use up the surplus of organic lemons I keep ending up with as a result of buying them in bags in the Big City. I hoard them until the week before I plan to head back to the Big City, and then I figure that I’d better get rid of them so I can justify buying more.

lemon ricotta cookies 1

I’m not sure my coworkers have noticed the prevalence of lemon treats I’ve brought in to share. It started with the pound cake, and then, weeks later (a departure from the once a week or so I used to bring stuff in), there were these cookies. Next week, it’ll be lemon cream tartelettes.

lemon ricotta cookies 2

I don’t think anyone has minded, considering that several people came by to tell me that these might be the best thing I’ve shared yet. (Questionable.) More tiny glazed cake than cookie, I definitely understand the popularity. But now that I’m almost back to my normal workouts, my coworkers better brace themselves for something besides lemon – by which I mean chocolate, of course.

lemon ricotta cookies 3

One year ago: Basic Coleslaw
Two years ago: Quinoa Tabbouleh
Three years ago: Croissants
Four years ago: Ricotta Spinach and Tofu Ravioli

Printer Friendly Format
Lemon Ricotta Cookies with Lemon Glaze (slightly adapted from Giada DeLaurentiis via Apple a Day)

Cookies:
2½ cups (12 ounces) all-purpose flour
1 teaspoon baking powder
8 tablespoons (1 stick) unsalted butter, softened
2 cups (14 ounces) granulated sugar
zest of 1 lemon
1 teaspoon table salt
2 large eggs
1 (15-ounce) container ricotta cheese
3 tablespoons lemon juice

Glaze:
1 cup (4 ounces) powdered sugar
3 tablespoons lemon juice
zest of 1 lemon

1. Preheat the oven to 375 degrees. Line 2 baking sheets with parchment paper or silicone mats. In a medium bowl, combine the flour and baking powder. Set aside.

2. Place the sugar, salt, and lemon zest in the bowl of a stand mixer fitted with the paddle attachment (or a large mixing bowl if you’re using a hand-held mixer). Beat on medium-low speed until the sugar looks slightly moist. Add the butter and continue beating on medium-low until the mixture is light and fluffy, about 2 minutes, scraping the sides of the bowl as needed. With the mixer running, add the eggs, one at a time. Add the ricotta and lemon juice, then continue mixing on medium speed for about 1 minute. Reduce the mixer speed to low and gradually add the flour mixture, mixing just until evenly combined.

3. Spoon the dough (about 1 tablespoon for each cookie) onto the baking sheets. Bake for 8-11 minutes, until slightly golden at the edges. Remove from the oven and let the cookies rest on the baking sheet for 15 minutes.

4. For the glaze: Combine the powdered sugar, lemon juice, and lemon zest in a small bowl and stir until smooth. Spoon about ½ teaspoon onto each cookie and use the back of the spoon to gently spread. Let the glaze harden for about 2 hours before serving.

lemon ricotta cookies 5

fish tacos

fish tacos 7

For a while there, I made fish tacos more than any other meal. That might only be once a month or so, but for this household, once a month is considered heavy rotation. Unsurprisingly, with that much iteration, the original recipe has gone through some modifications.

fish tacos 1

In fact, I now have two versions that I alternate between, an easy weeknight version cooked on the stove, plus a smokier grilled option using a firmer fish. The indoor recipe is similar to the original, except now I like to combine all of the toppings – cabbage, red onion, yogurt-based cilantro-lime sauce – into one slaw before building the tacos, which distributes the flavors better along with taming the onion’s bite and weighing down the cabbage – so you can fit more of it into each taco. The other important tweak is a squeeze of lime juice after the fish cooks, which refreshes the flavor of the marinade.

fish tacos 2

When I have more time, I’ll (have Dave) heat the grill, and we’ll cook the fish outside. I like thin tilapia filets for cooking on the stovetop, but something firmer, like halibut, is required for the grill. And if the grill is already hot, I’m definitely going toast the tortillas on there, and I might consider grilling the onions as well.

fish tacos 3

Sadly, I don’t make fish tacos as often anymore, because I realized that the tilapia available in my town isn’t sustainably produced. Halibut, my favorite variety for grilling, isn’t sold at all here, so I only get to make that when I buy it in the Big City.  But, catfish is readily available here, and it seems like it would make excellent tacos.  I’ll have to test that out with one – or both – of my new and improved fish taco recipes.

fish tacos 4
And if you run out of fish, this recipe works great with shrimp too!

One year ago: Lemon Bars (comparison of 3 recipes)
Two years ago: Cream Cheese Spritz
Three years ago: Strawberry Lemon Sorbet
Four years ago: Snickery Squares

Printer Friendly Recipe
(Grilled or Pan-Seared) Fish Tacos with Cilantro Lime Slaw

Serves 4

Marinade:
¼ cup lime juice (from 3-4 limes)
1 tablespoon olive oil
1 teaspoon salt
¼ teaspoon ground cumin
2 cloves garlic, peeled and smashed
¼ cup minced cilantro, stems and leaves
6 (4 to 5-ounce) tilapia filets if pan-searing; 4 (6-ounce) halibut filets if grilling

Slaw:
2 tablespoons lime juice (from 1-2 limes)
½ small red onion, quartered lengthwise and thinly sliced
¼ teaspoon table salt
⅛ teaspoon ground black pepper
¾ cup Greek yogurt (or a mixture of yogurt and mayonnaise)
¼ cup minced cilantro
½ cabbage, cut into quarters, cored, and sliced thin

For the tacos:
1 tablespoon olive oil (if pan-searing)
1 tablespoon lime juice
8 (5-inch) flour tortillas
other possible toppings: green chile, avocados, cheese, salsa

1. In a medium bowl, combine all of the marinade ingredients, including the fish. Refrigerate 15 minutes.

2. Meanwhile, make the slaw by combining the 2 tablespoons lime juice, red onion, ¼ teaspoon salt, pepper, and yogurt in a large bowl. Add the ¼ cup cilantro and cabbage, folding to evenly coat.

3. To pan-sear the fish: Heat 1 tablespoon of oil in a large nonstick skillet over medium-high heat. Add the fish and cook, without moving, until browned, about 3 minutes. Flip the fish and continue to cook until evenly flaky, an additional 2-3 minutes. To grill the fish: Heat a grill to medium-high. Oil the grill grate; grill the fish for about 8 minutes, turning once halfway through cooking.

4. Using two spoons, shred the fish into bite-size pieces. Pour the remaining lime juice over the fish; toss to combine.  Build the tacos by layering fish, slaw, and desired toppings on tortillas.

fish tacos 6

meyer lemon semifreddo

semifreddo 4

I traveled to Santa Fe last month for work, and while I didn’t love the day-long meetings all week, it was worth it to eat at Santa Fe restaurants and shop at Santa Fe grocery stores. I stopped at Whole Foods before I even checked in to my hotel, picking up some healthy snacks for the week and some sushi for dinner. I got pizza the next night (pizza – good pizza! – that I didn’t make myself!), but it was back to sushi the third night. The last day, after only six hours of meetings instead of the usual eight, I drove home, but not before making stops at both Whole Foods (where I got, you guessed it, more sushi to snack on during the drive home) and Trader Joe’s.

semifreddo 3

Whole Foods had what must have been the last Meyer lemons of the season, and I couldn’t resist buying a few, even though I already had a bag of organic regular lemons in my cart. I could not, however, decide what to make with them. Like the last time I bought Meyer lemons, well over four years ago, I wanted something that would showcase their flavor so I could figure out just how much different they are from regular lemons.

semifreddo 2

I diluted the flavor only slightly by mixing it with heavy cream, sugar, and egg yolks to make semifreddo. And if you’re paying attention while eating this dessert, the flavor has a little extra something, even beyond the sweeter orange hint of Meyer lemons. However, if you’re distracted by the light and airy texture that comes from freezing whipped heavy cream, I won’t blame you. And this indulgent dessert with a popular but elusive ingredient is all thanks to a week of meetings; traveling for work has its advantages.

semifreddo 5

One year ago: Barbecued Pulled Pork
Two years ago: Grilled Artichokes
Three years ago: Basic Lentil Soup
Four years ago: Asparagus and Arugula Salad with Cannellini Beans and Balsamic Vinegar

Printer Friendly Recipe
Meyer Lemon Semifreddo (from Bon Appétit via epicurious)

Serves 8 to 10

While the recipe indicates that you can use Meyer or regular lemons interchangeably, Meyer lemons are significantly less sour than regular lemons. I used Meyer, but if you use regular, you should probably increase the sugar.

I used a round pan instead of a loaf pan, but other than that, followed the recipe exactly.

½ cup sliced almonds, toasted
1¾ cups chilled heavy whipping cream
1¼ cups (8.75 ounces) plus 2 tablespoons sugar
7 large egg yolks
½ cup fresh Meyer lemon juice or regular lemon juice
1 tablespoon plus 2 teaspoons finely grated Meyer lemon peel or regular lemon peel
¼ teaspoon salt
4 cups mixed fresh berries (such as raspberries, blackberries, blueberries, and quartered hulled strawberries)

1. Line a 9-by-5-inch metal loaf pan with plastic wrap, leaving a generous overhang. Sprinkle almonds evenly over the bottom of the pan. Using an electric mixer, beat the whipping cream in a large bowl until soft peaks form. Refrigerate the whipped cream while making the custard.

2. Whisk 1¼ cups sugar, the egg yolks, lemon juice, lemon peel, and salt in a large metal bowl to blend. Set the bowl over a large saucepan of simmering water and whisk constantly until the yolk mixture is thick and fluffy and instant-read thermometer inserted into the mixture registers 170°F, about 4 minutes. Remove the bowl from over the simmering water. Using an electric mixer, beat the mixture until cool, thick, and doubled in volume, about 6 minutes. Fold in the chilled whipped cream. Transfer the mixture to the prepared loaf pan; smooth the top. Tap the loaf pan lightly on the work surface to remove air pockets. Fold the plastic wrap overhang over top to cover. Freeze the semifreddo until firm, at least 8 hours or overnight. (Semifreddo can be made 3 days ahead. Keep frozen.)

3. Gently mix the berries and remaining 2 tablespoons sugar in a large bowl. Set aside for 30 minutes.

4. Unfold the plastic wrap from the top of the semifreddo; invert onto a platter and remove the plastic wrap. Dip a heavy large knife into hot water; cut the semifreddo crosswise into 1-inch-thick slices. Transfer to plates; spoon the berries alongside and serve.

dolmades

dolmades 10

Someone please tell me to stop making recipes that involve individually filling and shaping portions after a full workday! Last week it was these dolmades, this week it was tortellini. (Tortellini, it turns out, are a lot more time-consuming to make than ravioli. A lot.) Evenings after work are not a good time to take on ambitious cooking projects.

dolmades 2

It didn’t help that this venture started out with a jar full of grape leaves stuffed so tightly they wouldn’t come out. All I could think of to do was rip out the middle leaves in a messy clump to loosen up the remainder, which wasn’t very satisfying. Then I discovered that grape leaves are not a shape that lends itself to easy rolling. And finally, at the end of it all, I realized that the early step of boiling the grape leaves before filling them was more important than I had counted on when I cut it short in my rush to get dinner on the table.

dolmades 3

And then I learned that it doesn’t matter how smoothly the dolmades come together, because the combination of grape leaves, rice, and a lemony sauce will always be a hit. Even if the grape leaves mostly unroll. And they’re just a little tough. Even if dinner is nearly an hour late. Or maybe they tasted so good because dinner was an hour late?

dolmades 4

One year ago: Cornmeal Shortbread Cookies
Two years ago: Chockablock Cookies
Three years ago: Brownies (comparison of 4 recipes)
Four years ago: Cheesecake Pops (Daring Bakers)

Printer Friendly Recipe
Dolmades (adapted from Elly Says Opa and Emeril Live)

Makes about 36

1 (8-ounce) jar grape leaves, or 36 medium-sized fresh leaves
1 tablespoon olive oil
1 onion, diced
3 cloves garlic, minced
½ cup pine nuts
1 cup long-grain rice
1 teaspoon salt
½ cup currants (or raisins)
⅔ cup broth + additional for cooking dolmades
1 lemon
2 tablespoons chopped parsley
Avgolemono sauce (recipe follows)

1. Bring a medium pot of water to a simmer. Remove the grape leaves from the jar and drop them in batches of 4 or 5 into the hot water. Leave them in the simmering water for 4-5 minutes, then spread them flat on a towel-lined work surface. Cut the stem from each grape leaf, as needed.

2. In a large skillet over medium- high heat, heat the olive oil. Add the onions and sauté until translucent, about 6 minutes. Add the garlic and pine nuts and sauté for 2 minutes. Add the rice, salt, currants, broth, and the juice of half the lemon. Simmer, stirring occasionally, until the liquid is absorbed. Stir in the parsley.

3. To assemble the dolmades, place 1 grape leaf on the work surface, dull side (or underside) of the leaf up. Place 1 to 2 teaspoons of rice filling near the stem end of the leaf. Fold the stem (bottom) end up over the filling, fold the sides toward the filling in the center, then roll up the leaf into a small cylindrical package, being careful not to fold too tightly, as the rice will expand during cooking.

4. Place the dolmades in a large Dutch oven or wide sauté pan, seam side down. Add the juice from the remaining lemon half, plus enough broth to just cover the dolmades. Rest a heavy plate or baking dish directly on top of the dolmades. Bring to a boil over high heat, lower the heat, and simmer for 30 minutes, or until the rice is tender. Serve with avgolemeno sauce.

Avgolemono Sauce (adapted from Elly Says Opa)

2 eggs
⅓ cup fresh lemon juice (about 2-3 lemons)
liquid from cooking dolmades

In a medium bowl, whisk the eggs with the lemon juice until combined. Slowly drizzle the hot dolmades cooking liquid into the egg/lemon mixture, whisking continuously to avoid scrambling the eggs.

dolmades 9

lemon pound cake

lemon pound cake 4

Lemons have been added to the list of ingredients I like to buy in the Big City (which isn’t that big compared to a lot of other cities but is definitely big compared to the town I live in), along with coffee, chocolate, parmesan cheese, and cheap wine from Trader Joe’s. This is because organic lemons aren’t available in my town, and while I have nothing against lemon juice, my favorite part of the lemon by far is the zest. The problem is that lemons have a more limited shelf life than my other Big City buys and the fruit tends to get hard (or worse, soft) after a few weeks in the crisper drawer.

lemon pound cake 2

Around this time is when I start going into lemon mania mode, and a lemon cake soaked with lemon syrup and drizzled with lemon glaze is a fine way to use up some of the lemon excess. In fact, I was so focused on my primary goals of using up lemons and having fun in the kitchen that I pushed another priority aside, that of making the best possible recipe. When combining loads of butter with loads of sugar, I knew it couldn’t end up too bad.

lemon pound cake 3

And so, for no other reason than I think the stand mixer is more fun to use and easier to clean up, I used that instead of the food processor the original recipe calls for, but when the top of my cake came out a little flat, I started thinking that maybe I should have just followed directions. I took the cake to work without tasting it, saving myself a piece for the end of the workday. It was good I set some aside for myself, because this cake disappeared in less than half the time as some of the other treats I’ve brought in. Savoring my much-anticipated slice at the end of the day, I decided that mixer or food processor, it didn’t matter; this cake would be a success either way.

lemon pound cake 7

One year ago: Chocolate Chunk Oatmeal Cookies with Dried Cherries and Pecans
Two years ago: Vodka Gimlet
Three years ago: Cook’s Illustrated’s Perfect Chocolate Chip Cookies
Four years ago: Cinnamon Rolls

Printer Friendly Recipe
Lemon Pound Cake (adapted from Baked: New Frontiers in Baking via the now defunct Dinner and Dessert)

Makes one loaf

I made this with a stand mixer instead of a food process like the original recipe instructs for no reason other than I think the mixer is more fun to use and easier to clean up.

For the cake:
¾ cup (3 ounces) cake flour
¾ cup (3.6 ounces) all-purpose flour
1 teaspoon baking powder
⅛ teaspoon baking soda
¼ cup sour cream, at room temperature
2 tablespoons fresh lemon juice
1 teaspoon pure vanilla extract
16 tablespoons (2 sticks) unsalted butter, room temperature
½ teaspoon salt
1 cup + 2 tablespoons (7.9 ounces) sugar
2 tablespoons grated lemon zest (from about 2 lemons)
4 large eggs, at room temperature

For the syrup:
2½ tablespoons fresh lemon juice
2½ tablespoons sugar

For the glaze:
1 cup (4 ounces) confectioners’ sugar, sifted
2 tablespoons fresh lemon juice

1. Heat the oven to 350 degrees. Spray the sides and bottom of a 9-by-5-by-3-inch loaf pan with nonstick cooking spray. Line the bottom with parchment paper and spray the paper. Sift both flours, baking powder, and baking soda together in a medium bowl. In a small measuring cup, whisk together the sour cream, lemon juice, and vanilla.

2. In the bowl of a stand mixer fitted with the paddle attachment (or a large mixing bowl with a hand-held mixer), beat the sugar and zest together until fragrant. Add the butter and salt; beat on medium speed until the mixture is light and fluffy, 2-3 minutes. With the mixer running, add the eggs one a time. Once the eggs are in, stop and scrape the sides of the bowl, then continue beating for another 2-3 minutes. Reduce the mixture speed to low, add one-third of the flour mixture, then half of the sour cream mixture. Continue alternating additions of dry and wet ingredients, ending with the dry ingredients. Scrape the bowl and mix for another 20-30 seconds, until the flour is thoroughly incorporated.

3. Transfer the batter to the prepared pan, smoothing the top. Bake in the center of the oven for 20 minutes, rotate the pans, reduce the oven temperature to 325 degrees, and bake for another 30 to 35 minutes, or until a toothpick inserted in the center of the loaf comes out clean. Let cool in the pans for 15 minutes.

4. In a small saucepan over medium heat, heat the lemon juice and sugar until the sugar is completely dissolved. Once dissolved, continue to cook for 3 more minutes. Remove from the heat and set aside.

5. Inver the cake onto a cooling rack set over a rimmed pan. Use a toothpick to poke holes in the top and sides of the loaf. Brush the top and sides of the loaves with the lemon syrup. Let the syrup soak into the cake and brush again. Let the cake cool completely, at least 30 minutes. (The soaked but unglazed loaf will keep, wrapped in two layers of plastic wrap and frozen, for up to 6 weeks.)

6. In a small bowl, whisk together the confectioners’ sugar and the lemon juice. Pour the lemon glaze over the top of the loaf and let it drip down the sides. Let the lemon glaze harden, about 15 minutes, before serving. (The glazed loaves will keep for up to 3 days, wrapped tightly in plastic wrap, at room temperature.)

lemon pound cake 5

strawberry lemonade bars

strawberry lemonade bars 8

I’m always trying to find desserts that Dave will eat because they’re so good he can’t resist, and not just to be polite. It isn’t that those desserts don’t exist – crème brulee, eclairs, and tapioca pudding come to mind – it’s just that the desserts he loves don’t require me to use the mixer, and where’s the fun in that? So the real challenge is finding a dessert that Dave loves to eat as much as I love to bake it.

strawberry lemonade bars 1

Strawberry lemonade bars weren’t a sure thing, but it was a good bet, I thought. He does like lemon bars – not as much as, say, snickerdoodles, but more than brownies at least. And his favorite ice cream flavor is strawberry, so strawberry lemonade bars seemed like they’d have potential.

strawberry lemonade bars 2

The browned flaky crust, taken from my lemon bar comparison last year, didn’t hurt, and neither did the creamy filling. The filling was not just a lemon bar filling with some strawberry juice added; it incorporated a generous portion of flour, necessary to hold all the extra liquid together. The result was a bar that was soft and gooey (maybe I should have cooked it longer) and tasted perfectly of lemons and strawberries. I loved the bars, and as for Dave – he liked them enough to eat a couple to be polite.

strawberry lemonade bars 5

One year ago: Caesar Salad
Two years ago: Whole Wheat Brioche
Three years ago: Blueberry Crumb Cake
Four years ago: Spinach Feta Pine Nut Tart

Printer Friendly Recipe
Strawberry Lemonade Bars (adapted from Annie’s Eats via Sophistimom)

For the crust:
8 tablespoons unsalted butter, at room temperature
⅓ cup (1.33 ounces) powdered sugar
1 cup (5 ounces) all-purpose flour
¼ teaspoon salt

For the filling:
1½ cups (10.5 ounces) sugar
⅔ cup (3.3 ounces) all-purpose flour
1½ tablespoons lemon zest (from 3 lemons)
⅛ teaspoon salt
1½ cups (8 ounces) frozen strawberries, thawed
3 large egg whites
1 large egg
⅔ cup freshly squeezed lemon juice (from 3 lemons)
Confectioners’ sugar, for dusting

1. Preheat the oven to 350 degrees. Spray an 8-by-8 inch baking pan with nonstick spray.

2. In the bowl of an electric mixer, beat the butter and sugar on medium-high speed until smooth, 1-2 minutes. Reduce the mixer speed to low and add the flour and salt, mixing just until incorporated.

3. Transfer the dough to the prepared baking pan, pressing into an even layer over the bottom of the pan. Bake the crust for about 25 minutes, or until light golden brown. Remove from the oven, maintaining the temperature.

4. While the crust is baking, prepare the filling. Combine the sugar, flour, lemon zest and salt in a blender. Add the strawberries; blend until smooth. Add the egg whites and eggs; blend until incorporated. Add the lemon juice, processing just until evenly mixed.

5. Pour the filling over the crust and bake until the center is just set and no longer jiggles when gently shaken, about 30-40 minutes. Transfer to a wire rack to cool to room temperature, then cover and refrigerate for at least 2 hours. Dust the top with confectioners’ sugar before cutting and serving.

strawberry lemonade bars 7

poached salmon pasta salad

poached salmon pasta salad 7

It’s a recipe that doesn’t require butter and flour! These have been few and far between around this joint lately (and an unscheduled break didn’t help matters), or at least it would seem that way if your only window into my kitchen was through this blog. We’ve actually been eating dinners that are just as healthy as always (in other words, very healthy on the weekdays, decidedly less so on weekends), but while I was going through my excessive baking phase for a few weeks, I stuck to meals that were familiar and easy, so cooking dinner would minimize the time I had to spend apart from butter and sugar.

poached salmon pasta salad 3

Now that I’ve settled down and slowly stepped away from the mixer, I’m more willing to try new recipes after work. This one was a nice way to get out of the salmon rut I’ve been in. I know I can’t go wrong with pasta and a yogurt-based sauce. This one also has several other ingredients I love, like capers, mustard, and red onion. Since there was no cooking fat in the recipe, I indulged a bit and stirred in some mayonnaise to the sauce in addition to the Greek yogurt.

poached salmon pasta salad 4

I keep trying to serve things in romaine leaves, and it keeps turning out to be a mess. But there are worse things than tangy bites of salmon and pasta falling out of their lettuce cups. There’s no butter or sugar and I didn’t get to use the mixer, but it’ll do.

poached salmon pasta salad 5

One year ago: Lentil Goat Cheese Burgers
Two years ago: Soft Chocolate and Berry Tart
Three years ago: Chicken Artichoke Pesto Calzones
Four years ago: Sushi Rolls

Printer Friendly Recipe
Poached Salmon Pasta Salad (adapted from An Edible Mosaic via Prevention RD and from Cooks Illustrated’s Poached Salmon recipe)

Serves 6

2 lemons, 1 sliced ¼-inch thick, 1 juiced
3 tablespoons chopped fresh parsley leaves, stems reserved
1 small shallot, minced (about 2 tablespoons)
½ cup dry white wine
½ cup water
4 (8-ounce) salmon fillets, about 1½ inches at the thickest part
Salt
12 ounces dry pasta
½ red onion, minced
1 tablespoon capers
2 teaspoons mustard
1 cup plain Greek yogurt
2 tablespoons mayonnaise

1. Arrange the lemon slices in a single layer across the bottom of a 12-inch skillet. Scatter the parsley stems and minced shallots evenly over the lemon slices; add the water and wine. Place the salmon fillets in the skillet, skin side down on top of the lemon slices; set the pan over high heat and bring the liquid to a simmer. Reduce the heat to medium-low, cover, and cook until the sides of the salmon are opaque but the center of the thickest part is still translucent, 11 to 16 minutes. Remove the pan from the heat and carefully transfer the salmon to a cutting board. When cooled, remove the skin and cut the salmon into bite-sized chunks.

2. Meanwhile, bring a large pot of water to rolling boil over high heat. Add 1 tablespoon of salt and the pasta; cook according to the package instructions. Drain.

3. Combine 2 tablespoons lemon juice, ½ teaspoon salt, the mustard, parsley leaves, capers, yogurt, and mayonnaise in a large bowl. Fold in the pasta and salmon. Serve immediately or chill for several hours.

poached salmon pasta salad 6

pear almond danishes and lemon ricotta danishes

danish 14

I went through a baking drought early this year that lasted a few weeks, maybe a month. I couldn’t explain it, but I just wasn’t interested in baking for the first time in years. I was kind of worried – how long would this last? When would my drive to bake come back?

danish 1

Oh it’s back. It crept back in, but it’s in full force now. The last few weeks, in particular, I’ve taken on some ambitious projects. It started with these danishes, made for a brunch potluck that was in the evening after work. The very next day, I stayed up until midnight flooding sugar cookies with royal icing. A week after that, I made two batches of fancy cupcakes for a bridal shower. I breathed a sigh of relief when that was over, but mixed up another batch of sugar cookie dough just one day later. I’ll decorate those sugar cookies this week, plus make a double batch of tiramisu for my friend’s rehearsal dinner on Friday.

danish 5

Baking projects that are for an event in the evening after work are particularly complicated, especially if the event is toward the end of the week instead of shortly after the weekend. It requires careful balancing of chilling time, lunch hours, and evening schedules. Of course it’s worth it when you’re sitting around with your friends, drinking bellinis and eating eggs Benedict and buttery, flaky danishes on Thursday evening after work. Not just worth it, but so enjoyable that I did it again a week later with cupcakes, and a week after that I’m sure it will be something else. My baking obsession is back.

danish 12

One year ago: Chocolate Pots de Creme
Two years ago: Toasted Coconut Custard Tart
Three years ago: Lemon Cream Cheese Bars
Four years ago: Raspberry Bars

Printer Friendly Recipe
Danishes (adapted from Martha Stewart’s Baking Handbook)

I made 18 danishes from this batch of dough, and they were about 3-inches on a side after baking. Bigger danishes are probably easier to work with; many of mine unfolded when the dough expanded during baking, particularly the square shape with the corners folding in.

½ cup warm milk
2 teaspoons instant yeast
10 ounces (about 2 cups) all-purpose flour
3 tablespoons sugar
1 teaspoon table salt
2 sticks butter, room temperature
1 large egg
1 batch of filling (recipes follow)
egg wash (1 egg mixed with ⅛ teaspoon salt and 1 teaspoon water)

1. In a small measuring cup, stir the yeast into the milk. In the bowl of a stand mixer fitted with the paddle attachment, combine the flour, sugar, and salt. Add 2 tablespoons of butter; mix until evenly combined. Pour in the yeast and milk; mix until the dough starts to look shaggy. Switch to the dough hook; add the egg and knead until the dough just starts to look smooth, 2-3 minutes. Wrap the dough in plastic wrap and refrigerate for at least 2 hours or overnight.

2. On a lightly floured surface, roll the dough out to a 12-inch by 8-inch rectangle, about ¼ inch thick. Distribute the softened butter over two-thirds of the dough, leaving a short end free of butter. Fold the non-buttered third over the middle, then fold the last third over the middle, like folding a letter. Pinch the edges to seal. Roll the dough out to a 12-by-8-inch rectangle again, then fold it in thirds again. Rewrap the dough in plastic wrap; chill 1 hour.

danish 3
(see here for an explanation of the creases on the dough)

3. After the dough has chilled, roll it out and fold it in thirds twice more, then chill another hour, and roll and fold twice more. Wrap tightly and refrigerate for at least four hours or overnight. (This is a good point to freeze the dough too; thaw in the refrigerator overnight.)

4. Roll the dough out to a 12-by-18-inch rectangle about ⅛-inch thick. If the dough becomes too elastic and springs back, cover it and place it in the refrigerator for at least ten minutes, then try rolling again. Be patient; the rolling and chilling could take up to an hour. Cut 12 to 18 squares (see note).

5. For pinwheels: Cut from each corner halfway to the center of each square. Dab about ¼ teaspoon of filling into the center of each square, then fold every other corner toward the center, pressing to seal. Top with one (for smaller danishes) to two (for the larger size) tablespoons of filling.

danish 8

For squares with folded corners: Spoon one (for smaller danishes) to two (for the larger size) tablespoons of filling into the center of each square. Fold each corner to the middle of the dough; press to seal.

danish 9

6. Transfer the danishes to a baking sheet lined with parchment paper or a silicone mat. Cover and either chill overnight or set aside to rise. Heat the oven to 400 degrees. When the danish dough is about doubled in height and is starting to look puffy, brush the danishes with the egg wash. Bake one baking sheet at a time until the danishes are golden brown, 20-25 minutes. Transfer the pan to a wire rack; let the danishes cool on the pan for a few minutes before transferring them to cooling racks to cool to room temperature. Serve within a day.

danish 10

Cheese Danish Filling

Makes enough for 1 batch of danishes

1 cup ricotta cheese
6 tablespoons (2.6 ounces) sugar
⅛ teaspoon salt
1 tablespoon lemon zest
1 large egg
2 teaspoons vanilla
2 tablespoons unsalted butter, melted and cooled

Combine all ingredients. Chill.

danish 11

Pear Almond Danish Filling (rewritten from Martha Stewart’s Baking Handbook)

Makes enough for 1 batch of danishes

⅔ cup slivered almonds, toasted and cooled completely
2 tablespoons flour
½ cup (3.5 ounces) sugar, plus 1 tablespoon
¼ teaspoon salt
2 tablespoons butter
1 large egg
2 pears, peeled, cored, diced finely
¼ cup lemon juice

1. In a food processor, grind the almonds, flour, ½ cup sugar, and salt; add the butter and egg; chill.

2. Heat the pears, lemon juice, and 1 tablespoon sugar in a medium nonstick skillet over medium heat, stirring occasionally, until the pears caramelize, 8-10 minutes. Chill.

danish 15

black bean quinoa salad with tomatillo salsa

black bean quinoa 7

A few weeks ago, I was skiing, and I was having fun, but I felt stale. I felt like I was doing the same things I always do when I ski, back and forth across the slope, not too fast, just nice and comfortable. After a morning of this, I was getting impatient with myself – why are you so timid, I asked myself? Go faster, mix it up, challenge yourself, get out of that comfort zone. So I did, and I fell, and I twisted my knees, had to sit in the lodge and read a book the next day while my friends skied, and I couldn’t run or progress in my weightlifting routine for three weeks (and counting*).

black bean quinoa 1

My weeknight dinner routine has felt stale lately too. So many grain salads, so many beans. It seems like I always use quinoa the same way, in some sort of salad. And how many different ways can I possibly combine black beans, chiles, and avocadoes?

black bean quinoa 3

On the other hand, maybe I’m in this rut because it works – it’s healthy, it’s fast, and it’s good. Sometimes it’s better to stick with what works. Quinoa salads work. Black beans and cilantro works. And avocado works on everything. This was one of the best meals I’ve made lately. Mixing it up is overrated.

black bean quinoa 4

*Eventually, I decided that if resting wasn’t helping my knees heal, I might as well run. (Impeccable logic, right?) A couple runs in, my knees feel better than they have in weeks. Crossing my fingers to start weightlifting again this weekend!

black bean quinoa 6

One year ago: Chocolate Frosting (comparison of 3 recipes)
Two years ago: Dorie Greenspan’s Best Chocolate Chip Cookies
Three years ago: Devil’s Food White Out Cake
Four years ago: Cream Cheese Brownies

Printer Friendly Recipe
Black Bean Quinoa Salad with Tomatillo Salsa (adapted slightly from Cate’s World Kitchen)

Serves 3-4

I substituted about 4 ounces of roasted peeled Hatch green chiles for one of the jalapenos.

1 cup quinoa, rinsed
salt
4 tomatillos, papery skins removed
3 cloves garlic, unpeeled
2 jalapenos, stemmed and seeded
¾ cup cilantro, divided
juice of 1 lime
1 (15-ounce) can black beans, rinsed and drained
1 cup grape tomatoes, halved
1 avocado, diced

1. In a medium saucepan over high heat, bring 1 cup water, ¼ teaspoon salt, and the quinoa to a boil. Cover the pot, reduce the heat to low, and simmer for 15 minutes. After 15 minutes, remove the pot from the heat and let sit, still covered, for 10 minutes.

2. Meanwhile, adjust an oven rack to the upper-middle position and heat the broiler. Broil the tomatillos and garlic until the tomatillos are browned, 5-8 minutes. Peel the garlic; transfer it to a blender with the tomatillos, ½ teaspoon salt, jalapenos, and ½ cup cilantro. Puree.

3. Transfer the quinoa to a large bowl. Stir in the lime juice. Once the quinoa cools to slightly warmer than room temperature, add the beans, tomatoes, avocado, remaining ¼ cup cilantro, and salsa. Serve.

black bean quinoa 5