cinnamon macarons with apple buttercream

apple cinnamon macarons 4

Macarons have been all the rage recently, and yet, I’ve had no real desire to make them myself. This, even though they’re known to be finicky, and I do love making my life unnecessarily complicated. But while I do love a challenge, I don’t particularly love meringue cookies.

apple cinnamon macarons 1

This is probably because I’ve never gotten them quite right, as they always seem to be chewy in the center instead of crisp the whole way through. Maybe the precise directions included with many macaron recipes could help me avoid this pitfall. If not, at least they’d be filled with swiss meringue buttercream.

apple cinnamon macarons 2

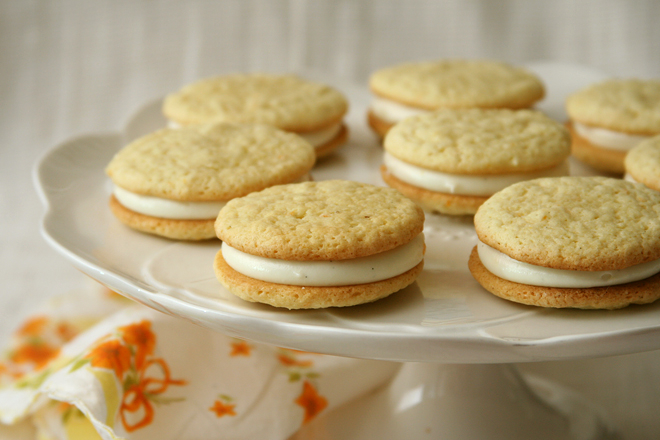
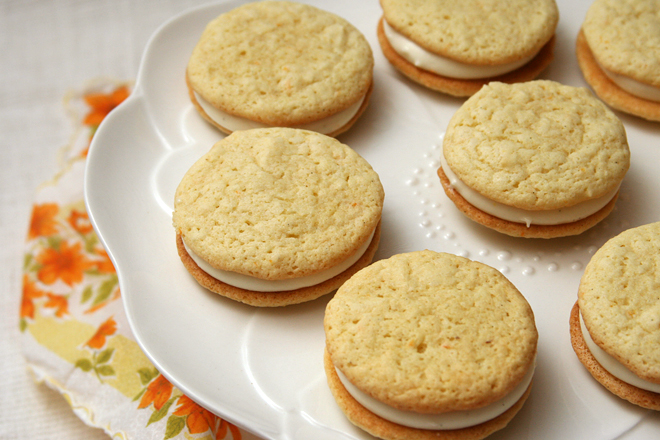
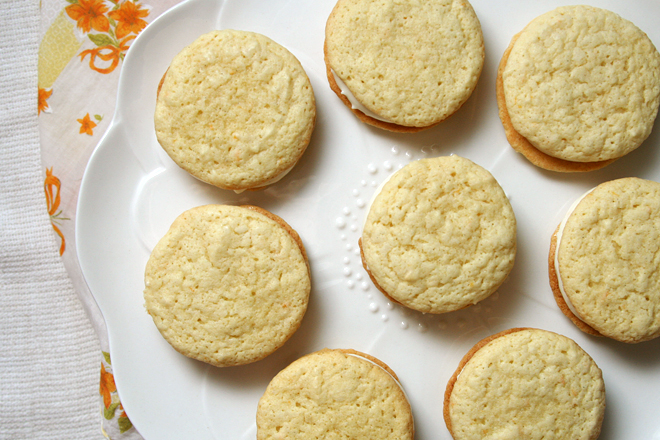
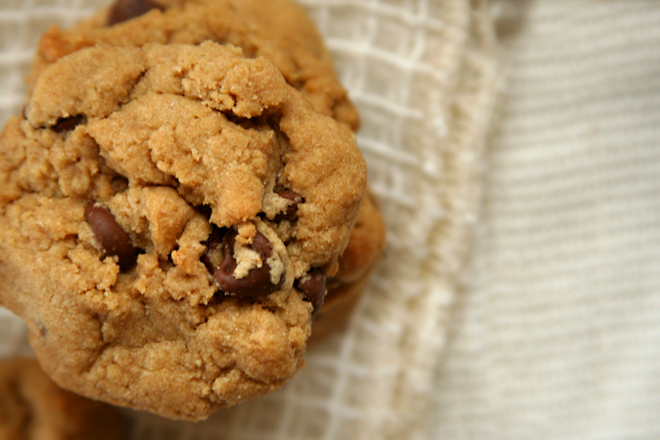
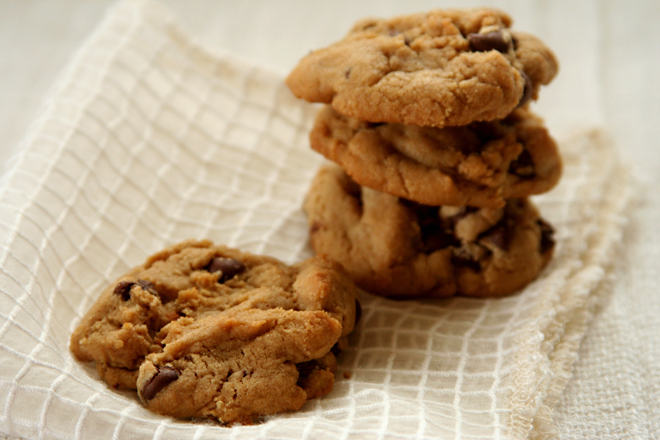
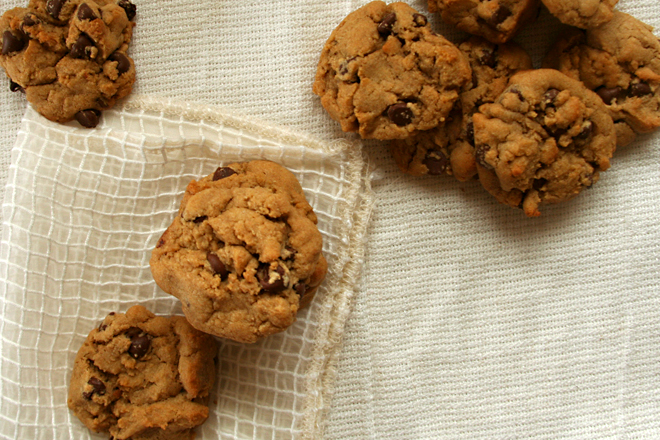
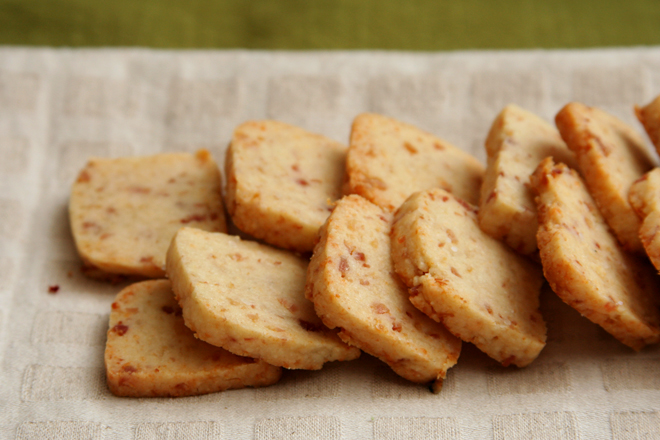
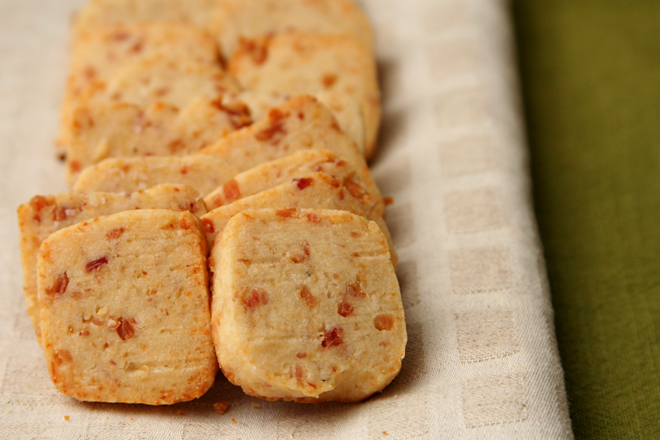
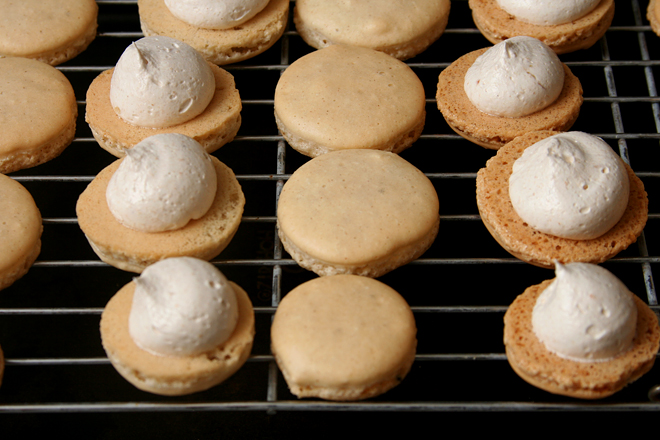
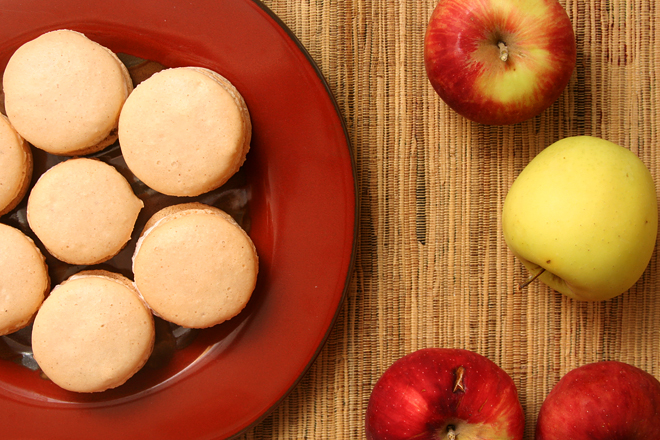
One of the hallmarks of good macarons is the foamy feet around the bottom edge, which show that your macarons rose up in the oven instead of spreading out. When I started to see those feet form, I made Dave come over to look through the oven window with me and give me a high-five. I was also happy with the smooth tops of the cookies, and it goes without saying that I was happy with the apple buttercream, which was noticeably and pleasantly appley.

apple cinnamon macarons 3

The only problem? A chewy center. I guess practice makes perfect. Fortunately, I think it’s safe to say that meringues are good enough to make again.

apple cinnamon macarons 6

One year ago: Butternut Squash Risotto
Two years ago: Pomegranate Glazed Salmon
Three years ago: Sun-Dried Tomato Jam
Four years ago: Sushi Bowls

Printer Friendly Recipe
Cinnamon Macarons with Apple Buttercream (adapted from Tartelette)

Makes about 20 sandwich cookies

For a lot of meringue-making tips, read Tartelette’s article.

Meringues:
110 grams blanched almonds or almond meal
200 grams powdered sugar
½ teaspoon cinnamon
100 grams egg whites (from about 3 large eggs), aged overnight
25 grams sugar
Pinch salt

Apple buttercream:
4 egg whites
1¼ cups (8.75 ounces) granulated sugar
Pinch salt
24 tablespoons (3 sticks) unsalted butter, softened
⅓ cup apple butter
1 teaspoon vanilla extract

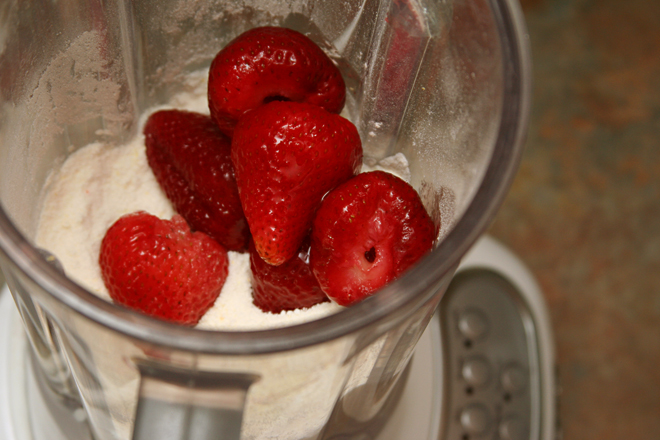
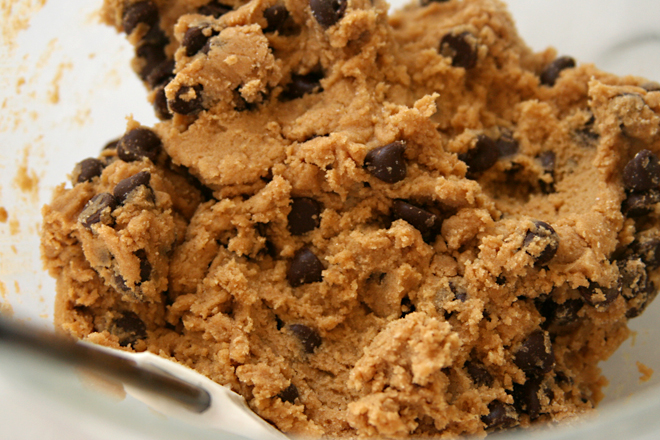
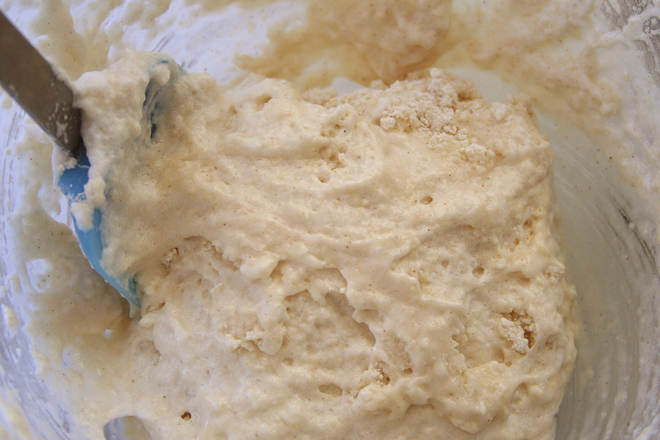
1. In a food processor, process the almonds and powdered sugar until the nuts are finely ground. In a stand mixer fitted with the whisk attachment (or a large bowl with a handheld mixer), beat the egg whites, sugar, and salt on medium-high speed (high speed if using a stand mixer) until soft peaks form. Use a large rubber spatula to fold the nut mixture into the egg mixture. After about 50 folds, the batter should be evenly mixed, with no streaks of egg white.

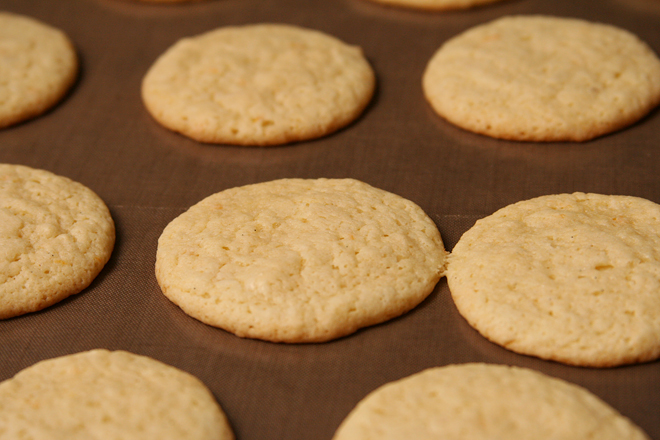
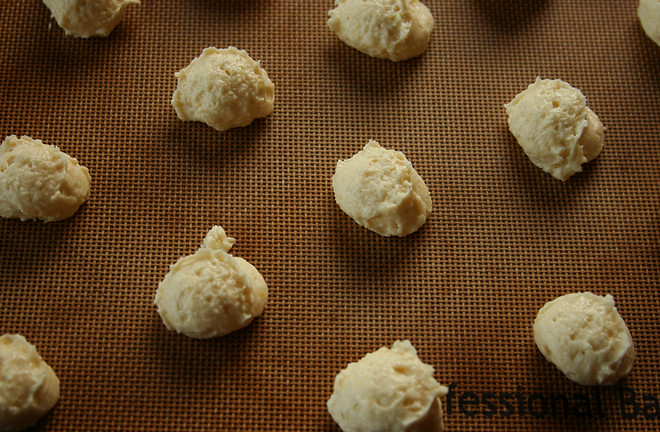
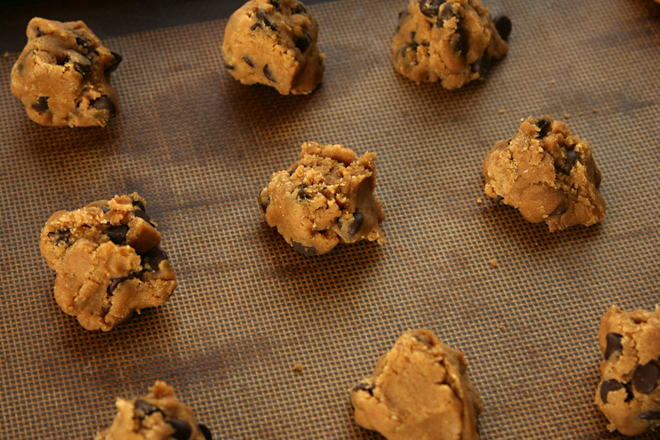
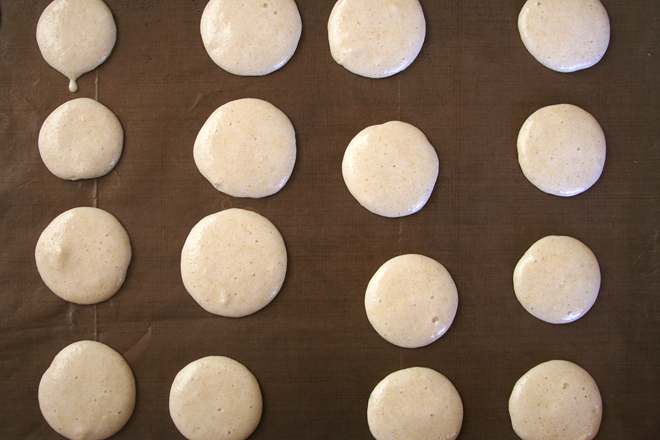
2. Line 2 baking sheets with parchment paper or silicone mats. Spray the lined sheets lightly with cooking spray. Transfer the batter to a piping bag fitted with a wide (about ½-inch) round tip. Pipe quarter-sized rounds onto the prepared pans, leaving about an inch between rounds. Gently rap the baking sheet against the counter to pop any large bubbles. Set the piped dough aside for 1 hour.

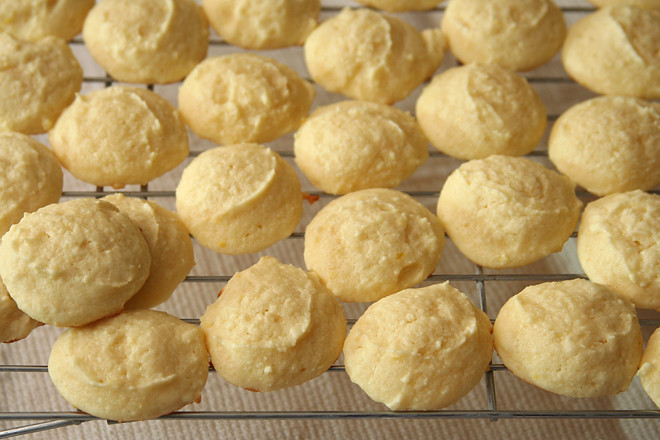
3. Adjust a rack to the middle position and heat the oven to 300 degrees. Bake one sheet at a time until the cookies are lightly browned around the bottom edges, about 15 minutes. Transfer the baking sheet to a wire rack; cool for about 5 minutes, then use a thin spatula to transfer the cookies from the pan to the wire rack. Cool completely before filling.

4. In the bowl of a stand mixer (or a large bowl if using a hand-held mixer), combine the egg whites, sugar, and salt. Set the bowl over a pot of simmering water, making sure the bottom of the bowl does not touch the water. Whisk constantly until the mixture reaches 160 degrees.

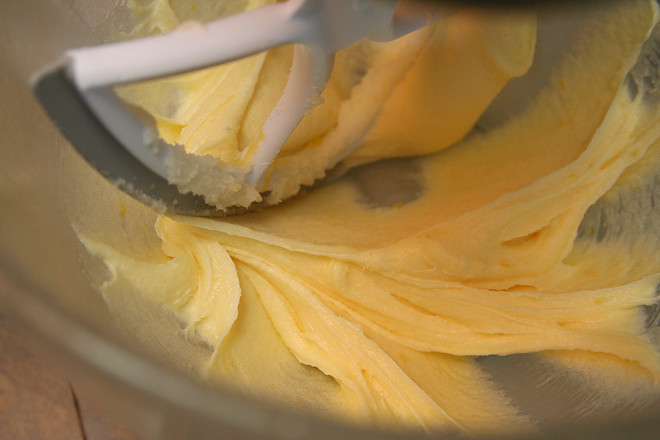
5. Fit the mixer with the whisk attachment; beat the egg white mixture on medium-high speed until stiff peaks form and it has cooled to room temperature, about 8 minutes. Reduce the mixer speed to medium and add the butter 2 tablespoons at a time, adding more once each addition has been incorporated. Increase the mixer speed to medium-high and beat until the buttercream is thick and smooth, 3-5 minutes. Add apple butter and vanilla; mix until incorporated.

6. Pipe the buttercream onto the flat sides of half of the cookies.  Top with the remaining cookies.  Serve immediately or cover and store overnight in the refrigerator (bring to cool room temperature before serving).

apple cinnamon macarons 5

chocolate chip cookie comparison 2

chocolate chip comparison 2
The Chewy

I’ve done all these comparisons and experiments with chocolate chip cookies, and yet, I don’t make any of those recipes. Usually, I make chocolate chip cookies to please myself, because I think it’s fun, so I’m more concerned with which recipe I most enjoy baking instead of which recipe has the best result. But maybe this isn’t so bad – maybe my hacked combination of recipes could stand up to the originals.

chocolate chip comparison 1
The Chewy dough

It was time to find out. For a comparison of the best of the best, I chose Alton Brown’s The Chewy recipe, winner of my last comparison; Cook’s Illustrated’s Perfect Chocolate Chip Cookie, a true standout; Kelsey’s Best Ever Chewy Chocolate Chip Cookies (adapted from Anna Olson’s original recipe), which are the most popular post on her blog; and the one I always make when I’m too lazy to follow an actual recipe.

chocolate chip comparison 3
The Chewy

What sets Alton’s recipe apart is the use of bread flour instead of regular and the replacement of an egg white with milk. Cook’s Illustrated Perfect recipe is designed to mimic the effects of the overnight rest of the dough recommended by the New York Times, which it does using melted browned butter. Compared to the traditional Tollhouse recipe, Kelsey’s recipe uses a higher ratio of flour (plus a bit of cornstarch). My recipe has some similar traits to those above, like bread flour instead all-purpose and an overnight chill to enhance the butterscotch flavor.

chocolate chip comparison 4
my recipe dough

Between the four tasters I had, there was no unanimous favorite. Dave’s favorite was CI’s Perfect cookies. My sister and her husband both chose Alton Brown’s The Chewy as their favorite; it was chewier, but, to Dave, it was too greasy. Kelsey’s recipe was drier than the others; compared to the ultra-rich versions it was being compared to, it had less flavor. My hacked together recipe was the most traditional, crispy around the edges and gooey in the middle.

chocolate chip comparison 6
Cook’s Illustrated’s Perfect

As for me, I’ll certainly keep making the version I have been, now that I know that it can hold its own with the big dogs. I love it because I don’t have to look at a recipe and the dough is perfect for snacking. The Chewy tends to come out a little too flat, and I don’t like the dough for CI’s Perfect (which makes it the recipe of choice when self-control is necessary!), plus it simply isn’t as fun to make cookies with a whisk as it is with a mixer. Slight differences aside, these were all standout recipes, but I appreciate the validation to keep being lazy with my hacked together version.

chocolate chip comparison 5
left to right: The Chewy, my recipe, Kelsey’s Best-Ever, Cook’s Illustrated’s Perfect

One year ago: Kofta
Two years ago: Grilled Corn Salad
Three years ago: Espresso Cheesecake Brownies
Four years ago: Chunky Peanut Butter and Oatmeal Chocolate Chipsters

Printer Friendly Recipe
Accidental Variation of The Chewy (adapted from Alton Brown)

As I was writing up this recipe, I realized I did not actually make The Chewy, which I now see is supposed to use melted butter. I used room temperature solid butter. The recipe below is what I did. This means that the only difference between my recipe and The Chewy is a lower ratio of brown sugar to white and the use of an egg white instead of milk.

16 tablespoons (2 sticks) unsalted butter, room temperature
2¼ cups (11.25 ounces) bread flour
1 teaspoon table salt
1 teaspoon baking soda
¼ cup granulated sugar
1¼ cups brown sugar
1 egg
1 egg yolk
2 tablespoons milk
1½ teaspoons vanilla extract
2 cups (12 ounces) semisweet chocolate chips

1. Heat oven to 375 degrees. Sift together the flour, salt, and baking soda and set aside.

2. Add the butter to the mixer’s work bowl with the sugars. Cream the butter and sugars on medium speed. Add the egg, yolk, 2 tablespoons milk, and vanilla extract, and mix until well combined. Slowly incorporate the flour mixture until thoroughly combined. Stir in the chocolate chips.

3. Scoop the dough in heaping tablespoons onto the prepared baking sheets. Bake the cookies, one sheet at a time, until they are browned around the edges and do not look wet on top, 8-12 minutes. Let the cookies cool on the cookie sheets for 5 minutes, then transfer to wire racks to cool completely.

Printer Friendly Recipe
Perfect Chocolate Chip Cookies (from Cook’s Illustrated May/June 2009)

I baked smaller cookies – tablespoon-sized dollops of dough – for about 9 minutes at 375 degrees.

1¾ cups (8¾ ounces) unbleached all-purpose flour
½ teaspoon baking soda
14 tablespoons (1¾ sticks) unsalted butter
½ cup (3½ ounces) granulated sugar
¾ cup (5¼ ounces) packed dark brown sugar
1 teaspoon table salt
2 teaspoons vanilla extract
1 large egg
1 large egg yolk
1¼ cups semisweet chocolate chips or chunks
¾ cup chopped pecans or walnuts, toasted (optional)

1. Adjust oven rack to middle position and heat oven to 375 degrees. Line 2 large baking sheets with parchment paper. Whisk flour and baking soda together in medium bowl; set aside.

2. Heat 10 tablespoons butter in 10-inch skillet over medium-high heat until melted, about 2 minutes. Continue cooking, swirling pan constantly until butter is dark golden brown and has nutty aroma, 1 to 3 minutes. Remove skillet from heat and, using heatproof spatula, transfer browned butter to large heatproof bowl. Stir remaining 4 tablespoons butter into hot butter until completely melted.

3. Add both sugars, salt and vanilla to bowl with butter and whisk until fully incorporated. Add egg and yolk and whisk until mixture is smooth with no sugar lumps remaining, about 30 seconds. Let mixture stand for 3 minutes, then whish for 30 seconds. Repeat process of resting and whisking 2 more times until mixture is thick, smooth and shiny. Using rubber spatula or wooden spoon, stir in flour mixture until just combined, about 1 minute. Stir in chocolate chips and nuts (if using), giving dough final stir to ensure no flour pockets remain.

4. Divide dough into 16 portions, each about 3 tablespoons (or use a #24 cookie scoop). Arrange 2 inches apart on prepared baking sheets, 8 dough balls per sheet.

5. Bake cookies 1 tray at a time until cookies are golden brown and still puffy, and edges have begun to set but centers are still soft, 10-14 minutes, rotating baking sheet halfway through baking. Transfer baking sheet to wire rack; cool cookies completely before serving.

Printer Friendly Recipe
Best-Ever Chocolate Chip Cookies (rewritten but not changed from Kelsey’s Apple a Day, who adapted it from Anna Olson)

2 cups (9.6 ounces) all-purpose flour
2 teaspoons cornstarch
1 teaspoon baking soda
½ teaspoon table salt
12 tablespoons (1½ sticks) unsalted butter, softened
¾ cup (5.25 ounces) brown sugar
¼ cup (1.75 ounces) granulated sugar
1 egg
2 teaspoons vanilla extract
1 cup (6 ounces) bittersweet chocolate chips

1. Heat the oven to 350 degrees. Line two baking sheets with parchment paper or silicone mats. In a medium bowl, mix the flour and baking soda.

2. In the bowl of a stand mixer fitted with the paddle attachment (or a large bowl if using a stand mixer), beat the butter, salt, and sugars on medium speed until light and fluffy, 1-2 minutes. Add the egg, beating until incorporated, then mix in the vanilla. Reduce the mixer speed to low and gradually add the flour, mixing just until incorporated. Stir in the chocolate chips.

3. Scoop the dough in heaping tablespoons onto the prepared baking sheets. Bake the cookies, one sheet at a time, until they are slightly browned around the edges, 8-10 minutes. Let the cookies cool on the cookie sheets for 5 minutes, then transfer to wire racks to cool completely.

Printer Friendly Recipe
Chocolate Chip Cookies (adapted from nearly every single chocolate chip cookie recipe I’ve ever read)

I haven’t found a dependable measurement for the weight of 1 cup of bread flour.  I used to assume 5 ounces for 1 cup of bread flour, but I think this is on the high side, so I’m changing the volume measurement in this recipe from 2¼ cups to 2⅓ cups.  Unfortunately,  it could be as high as 2½ cups, depending on how you measure your flour.  If you can, definitely measure by weight and not volume (food scales are cheap!)!

16 tablespoons (2 sticks) unsalted butter, room temperature
1 teaspoon table salt
1 cup (7 ounces) brown sugar
½ cup (3.5 ounces) white sugar
2 eggs
1 teaspoon vanilla
2¼ cups (11.25 ounces) bread flour
1 teaspoon baking soda
2 cups (12 ounces) semisweet chocolate chips

1. Heat the oven to 375 degrees. Line two baking sheets with parchment paper or silicone mats. In a medium bowl, mix the flour and baking soda.

2. In the bowl of a stand mixer fitted with the paddle attachment (or a large bowl if using a stand mixer), beat the butter, salt, and sugars on medium speed until light and fluffy, 1-2 minutes. Add the eggs, one at a time, beating until incorporated, then mix in the vanilla. Reduce the mixer speed to low and gradually add the flour, mixing just until incorporated. Stir in the chocolate chips.

3. Scoop the dough in heaping tablespoons onto the prepared baking sheets. Bake the cookies, one sheet at a time, until they are browned around the edges and do not look wet on top, 8-12 minutes. Let the cookies cool on the cookie sheets for 5 minutes, then transfer to wire racks to cool completely.

orange vanilla creamsicle whoopie pies

creamsicle whoopie pies 5

I brought pumpkin whoopie pies to a company picnic a couple years ago, and my coworkers got quite a kick over the name. So you’ll forgive me if the post-it next to these in the office kitchen said “orange vanilla creamsicle sandwich cookies”, with no mention of whoopie. I didn’t need the giggles today.

creamsicle whoopie pies 2

I’m not sure if these are more whoopie pie or more sandwich cookie anyway. The cookie part ended up on the chewy side, not as tender and fluffy as the traditional cakey whoopie pie. At least it seemed that way to me fresh out of the oven.

creamsicle whoopie pies 4

Sandwiched with cream cheese frosting and left overnight in the fridge, they seem to have become more cakey, because the several coworkers I quizzed about whether these seemed more cookie-like or more cake-like guessed cake. (They didn’t seem excited about the pop quiz, but they passed with flying colors.) More importantly, they raved, so whoopie pies or sandwich cookies, it doesn’t matter; all that matters is how good they are.

creamsicle whoopie pies 6

One year ago: Blueberry Barbecue Salmon
Two years ago: Rhubarb Crumb Coffee Cake
Three years ago: Quick Baking Powder Pizza Crust
Four years ago: Mashed Potatoes with Kale

Printer Friendly Recipe
Orange Vanilla Creamsicle Whoopie Pies (adapted from Culinary Concoctions by Peabody)

Makes about 3 dozen sandwiches

If you have vanilla sugar, use that!

I am a food blogger failure and used cream cheese frosting that I’ve had in my freezer for months, doctored up with vanilla seeds.

Cookies:
3½ cups (16.8 ounces) all-purpose flour
1¼ teaspoon baking soda
1¼ teaspoon baking powder 2 cups (14 ounces) sugar
zest from 2 oranges
12 tablespoons unsalted butter, room temperature
½ teaspoon salt
1 vanilla bean, seeds scraped
½ cup sour cream
2 eggs, room temperature

Filling:
3 ounces cream cheese
3 tablespoons unsalted butter
1 vanilla bean, seeds scraped
pinch salt
1½ cups (6 ounces) powdered sugar
1 teaspoon vanilla extract

1. For the cookies: Adjust an oven rack to the middle position; preheat the oven to 350 degrees. Line two baking sheets with parchment paper or silicone mats. In a medium bowl, whisk together the flour, baking soda, and baking powder.

2. In a stand mixer fitted with the paddle attachment (or a large mixing bowl with a hand mixer), beat the sugar and orange zest on medium speed until fragrant, about a minute. Add the butter, salt, and vanilla seeds; continue beating until fluffy, about 2 minutes. Beat in the sour cream. Add the eggs, one at a time, beating to incorporate each addition. Reduce the mixer speed to low, and gradually add the flour mixture, beating just until combined.

3. Spoon (or pipe) the batter in 1 tablespoon rounds on the prepared baking sheets, leaving 2 inches between rounds.

4. Bake until the tops of the cookies don’t look wet and the bottoms just begin to brown, 8-12 minutes. Cool for 2 minutes on the cookie sheet before transferring the cookies to a wire rack to cool completely.

5. For the filling: Add the cream cheese, butter, vanilla seeds, and salt to a clean mixer bowl and beat until smooth. Gradually add the powdered sugar, beating until smooth. Beat in the vanilla extract.

6. To fill, dollop (or pipe) the filling onto the flat sides of half of the cookies. Top with the remaining cookies, flat sides down. Serve immediately, or cover tightly and store in the refrigerator for up to 2 days, bringing to cool room temperature before serving.

creamsicle whoopie pies 8

strawberry white chocolate brownies

strawberry white chocolate brownies 9

I know white chocolate isn’t as sexy as its darker sibling, but I think it has its own charm. It’s not much beyond sweet and soft, which could be boring, but you can use those traits to the advantage of the treat you’re making with it. Mixed into a batter, it adds a little more interest than plain white sugar would, although I think you’d be hard-pressed to pick out the white chocolate flavor if you didn’t know it was there.

strawberry white chocolate brownies 5

That being said, while I expected these to turn out quite nice, they exceeded my expectations. I reduced the sugar from the original recipe, suspecting that the white chocolate would contribute plenty of sweetness, and that, combined with an extra dose of salt, resulted in the perfect balance. Bright, juicy strawberries added a welcome flavor and texture contrast. Forced to choose between these and my favorite dark chocolate brownies would be a tough call, but these tamer white chocolate brownies would stand a good chance.

strawberry white chocolate brownies 6

One year ago: Pizza Bianca with Goat Cheese and Greens
Two years ago: Garlic Mustard Glazed Skewers
Three years ago: Tribute to Katharine Hepburn Brownies
Four years ago: Vanilla Ice Cream

Printer Friendly Recipe
Strawberry White Chocolate Brownies (adapted from Love and Olive Oil)

Makes 16 squares

1 cup (4.8 ounces) all-purpose flour
¼ teaspoon baking powder
⅓ teaspoon salt
5 ounces white chocolate, chopped fine
5 tablespoons butter, cut into ½-inch cubes
½ cup (3.5 ounces) sugar
1 teaspoon vanilla
2 eggs
4 ounces strawberries, hulled and quartered

1. Adjust a rack to the middle position and heat the oven to 350 degrees. Line the bottom and sides of an 8×8 baking pan with parchment paper, leaving a slight overhang. In a medium bowl, whisk the flour, baking powder, and salt together.

2. Set a heatproof bowl over a saucepan containing one inch of simmering water. Add the chocolate and butter; stir frequently until the mixture is melted and smooth, then remove from the heat. Whisk in the sugar (the mixture will appear curdled), then add vanilla and the eggs one at a time, whisking constantly.

3. Switch to a rubber spatula and add the flour mixture, stirring until just combined. Gently fold in the strawberries. Pour the batter into the prepared pan, spreading it into an even layer.

4. Bake the brownies for 25 to 30 minutes, or until the top is lightly golden and a toothpick inserted near the center comes out clean. Transfer the pan to a wire rack; cool completely. Use the parchment paper to lift the bars out of the pan and cut into 2-inch squares. (The brownies can be stored in an airtight container in the refrigerator for up to 3 days.)

strawberry white chocolate brownies 8

radiation sugar cookies

radiation cookies 8

If I don’t often talk about what I do for a living, it’s because it’s hard to explain. I don’t have one of those jobs that you can name in one word and people will get at least some idea of how you spend your days, like being a teacher or nurse or accountant or engineer. My official title is either Scientist 2 or Difficult Waste Expert.

radiation symbol

If I say I work with nuclear waste, you might start to picture Homer Simpson’s job, but mostly I work in an office with spreadsheets. Our official task is to come up with ways to get radioactive waste (stuff mostly left over from the Cold War; not spent nuclear fuel) safely disposed of. There is a radioactive waste repository near my town, half a mile underground in a salt deposit, but I never have any reason to go out there.

radiation containment suit

Even so, my coworkers and I are trained on what the radiation symbol looks like, including the colors – yellow and magenta, at least until you run out of magenta icing, and then black is acceptable. Not even one of the thirty or so people in my office have been required to wear hazmat suits for our current positions, but the idea was too cute to pass up.

radiation cookies 10

I was worried my nuclear containment guys would end up looking like yellow astronaut teddy bears, but I think I got the point across. Other than one manager who thought they might be eskimos, my coworkers loved these. And after another long day looking at computers, trying to make tiny steps toward solving the country’s nuclear waste problem, a distraction in the form of cute cookies is something we could all use.

One year ago: Baked Eggs in Mushrooms with Zucchini Ragout
Two years ago: Vanilla Bean Cupcakes
Three years ago: Sourdough Bagels
Four years ago: Apple Cheddar Scones

lemon ricotta cookies

lemon ricotta cookies 6

Due to the knee injury that’s kept me from working out at my normal intensity for four months (and counting), I mostly gave up baking for a while. Most of the baking I’ve done recently has been to use up the surplus of organic lemons I keep ending up with as a result of buying them in bags in the Big City. I hoard them until the week before I plan to head back to the Big City, and then I figure that I’d better get rid of them so I can justify buying more.

lemon ricotta cookies 1

I’m not sure my coworkers have noticed the prevalence of lemon treats I’ve brought in to share. It started with the pound cake, and then, weeks later (a departure from the once a week or so I used to bring stuff in), there were these cookies. Next week, it’ll be lemon cream tartelettes.

lemon ricotta cookies 2

I don’t think anyone has minded, considering that several people came by to tell me that these might be the best thing I’ve shared yet. (Questionable.) More tiny glazed cake than cookie, I definitely understand the popularity. But now that I’m almost back to my normal workouts, my coworkers better brace themselves for something besides lemon – by which I mean chocolate, of course.

lemon ricotta cookies 3

One year ago: Basic Coleslaw
Two years ago: Quinoa Tabbouleh
Three years ago: Croissants
Four years ago: Ricotta Spinach and Tofu Ravioli

Printer Friendly Format
Lemon Ricotta Cookies with Lemon Glaze (slightly adapted from Giada DeLaurentiis via Apple a Day)

Cookies:
2½ cups (12 ounces) all-purpose flour
1 teaspoon baking powder
8 tablespoons (1 stick) unsalted butter, softened
2 cups (14 ounces) granulated sugar
zest of 1 lemon
1 teaspoon table salt
2 large eggs
1 (15-ounce) container ricotta cheese
3 tablespoons lemon juice

Glaze:
1 cup (4 ounces) powdered sugar
3 tablespoons lemon juice
zest of 1 lemon

1. Preheat the oven to 375 degrees. Line 2 baking sheets with parchment paper or silicone mats. In a medium bowl, combine the flour and baking powder. Set aside.

2. Place the sugar, salt, and lemon zest in the bowl of a stand mixer fitted with the paddle attachment (or a large mixing bowl if you’re using a hand-held mixer). Beat on medium-low speed until the sugar looks slightly moist. Add the butter and continue beating on medium-low until the mixture is light and fluffy, about 2 minutes, scraping the sides of the bowl as needed. With the mixer running, add the eggs, one at a time. Add the ricotta and lemon juice, then continue mixing on medium speed for about 1 minute. Reduce the mixer speed to low and gradually add the flour mixture, mixing just until evenly combined.

3. Spoon the dough (about 1 tablespoon for each cookie) onto the baking sheets. Bake for 8-11 minutes, until slightly golden at the edges. Remove from the oven and let the cookies rest on the baking sheet for 15 minutes.

4. For the glaze: Combine the powdered sugar, lemon juice, and lemon zest in a small bowl and stir until smooth. Spoon about ½ teaspoon onto each cookie and use the back of the spoon to gently spread. Let the glaze harden for about 2 hours before serving.

lemon ricotta cookies 5

wedding cake sugar cookies

wedding cake cookies 9

It’s possible that cookies soaked in espresso and rum might not be the best idea for children, so I planned to make something in addition to tiramisu for my coworker’s rehearsal dinner. When I was discussing ideas with the bride, I almost offered to decorate sugar cookies, and then I realized that that might be insane. I planned to make raspberry squares instead, but in the end, sane has never been my strong suit. I mixed up a batch of sugar cookie dough the day after the bridal shower.

wedding cake cookies 1

I had spent some time with the bride discussing her decorations, because I’m a girl and I’m into that stuff, so I knew her cake was going to be white fondant covered in black damask with a red ribbon around the bottom. The lack of a wedding cake cookie cutter did not stop me from charging off to make a cookie imitation of this. The lack of cookie decorating skills did not stop me from attempting to make tiny swirls and, even trickier, letters.

wedding cake cookies 4

Still, I thought they came out well, and it wasn’t difficult to work in the time to decorate them. I made the dough a week before the dinner, rolled and cut it the next day, then froze the unbaked cookies for a few days. I baked, outlined, and flooded them three days before the party, detailed them two days beforehand, had time to go out with a friend the night before, and made tiramisu the morning of the rehearsal dinner. And then I took a well-deserved nap.

wedding cake cookies 6

One year ago: Semolina Bread
Two years ago: Shrimp Burgers
Three years ago: Pasta with Cauliflower, Walnuts, and Ricotta Salata
Four years ago: Creamy Buttermilk Coleslaw

wedding cake cookies 8

I used my favorite recipe from this roll-out sugar cookie comparison.

strawberry lemonade bars

strawberry lemonade bars 8

I’m always trying to find desserts that Dave will eat because they’re so good he can’t resist, and not just to be polite. It isn’t that those desserts don’t exist – crème brulee, eclairs, and tapioca pudding come to mind – it’s just that the desserts he loves don’t require me to use the mixer, and where’s the fun in that? So the real challenge is finding a dessert that Dave loves to eat as much as I love to bake it.

strawberry lemonade bars 1

Strawberry lemonade bars weren’t a sure thing, but it was a good bet, I thought. He does like lemon bars – not as much as, say, snickerdoodles, but more than brownies at least. And his favorite ice cream flavor is strawberry, so strawberry lemonade bars seemed like they’d have potential.

strawberry lemonade bars 2

The browned flaky crust, taken from my lemon bar comparison last year, didn’t hurt, and neither did the creamy filling. The filling was not just a lemon bar filling with some strawberry juice added; it incorporated a generous portion of flour, necessary to hold all the extra liquid together. The result was a bar that was soft and gooey (maybe I should have cooked it longer) and tasted perfectly of lemons and strawberries. I loved the bars, and as for Dave – he liked them enough to eat a couple to be polite.

strawberry lemonade bars 5

One year ago: Caesar Salad
Two years ago: Whole Wheat Brioche
Three years ago: Blueberry Crumb Cake
Four years ago: Spinach Feta Pine Nut Tart

Printer Friendly Recipe
Strawberry Lemonade Bars (adapted from Annie’s Eats via Sophistimom)

For the crust:
8 tablespoons unsalted butter, at room temperature
⅓ cup (1.33 ounces) powdered sugar
1 cup (5 ounces) all-purpose flour
¼ teaspoon salt

For the filling:
1½ cups (10.5 ounces) sugar
⅔ cup (3.3 ounces) all-purpose flour
1½ tablespoons lemon zest (from 3 lemons)
⅛ teaspoon salt
1½ cups (8 ounces) frozen strawberries, thawed
3 large egg whites
1 large egg
⅔ cup freshly squeezed lemon juice (from 3 lemons)
Confectioners’ sugar, for dusting

1. Preheat the oven to 350 degrees. Spray an 8-by-8 inch baking pan with nonstick spray.

2. In the bowl of an electric mixer, beat the butter and sugar on medium-high speed until smooth, 1-2 minutes. Reduce the mixer speed to low and add the flour and salt, mixing just until incorporated.

3. Transfer the dough to the prepared baking pan, pressing into an even layer over the bottom of the pan. Bake the crust for about 25 minutes, or until light golden brown. Remove from the oven, maintaining the temperature.

4. While the crust is baking, prepare the filling. Combine the sugar, flour, lemon zest and salt in a blender. Add the strawberries; blend until smooth. Add the egg whites and eggs; blend until incorporated. Add the lemon juice, processing just until evenly mixed.

5. Pour the filling over the crust and bake until the center is just set and no longer jiggles when gently shaken, about 30-40 minutes. Transfer to a wire rack to cool to room temperature, then cover and refrigerate for at least 2 hours. Dust the top with confectioners’ sugar before cutting and serving.

strawberry lemonade bars 7

whole wheat chocolate chip cookies

whole wheat chocolate chip cookies 4

I was never a big fan of roast turkey, so when I was a kid, my favorite part of Thanksgiving was that it was the only time of year my mom bought white sandwich bread, because she liked it better for the stuffing. White bread! What a treat!  It’s been a slow adjustment, spanning close to ten years, but these days, largely due to Peter Reinhart’s trick and Tartine’s country bread, I actually prefer bread with a hearty portion of whole wheat flour. The flavor is deeper, more complex. I’m disappointed when a restaurant serves only pasty white bread.

whole wheat chocolate chip cookies 1

Cookies, in my experience, are a different matter. But my experience is only for substituting whole wheat flour in a recipe designed for white flour. Starting with a recipe designed for whole wheat flour is bound to give me better results. The only ingredient called for in this recipe that isn’t in the Tollhouse chocolate chip cookie recipe, besides whole wheat flour of course, is baking powder, substituted for the baking soda in most chocolate chip cookie recipes. Other differences are more flour and sugar for the same amount of butter and eggs in the Tollhouse recipe and less chocolate.

whole wheat chocolate chip cookies 2

I was a little worried that the dough, my favorite part about baking chocolate chip cookies, wouldn’t be as tasty as dough made with white flour, but it definitely passed inspection. The cookies themselves were also irresistible. Obviously the whole wheat flour doesn’t make the cookies healthy – that isn’t the point. These cookies are just as loaded with butter and sugar as any other cookie, and the whole grains are just for flavor. For me, though, the flavor was perhaps a little stronger than I might prefer. Plus, the texture was more bread-like than tender. I still loved the cookies, but now I want to find a way to tone down the whole wheatiness and get the texture I want. Should I replace half of the flour in this recipe with white bread flour? Should I start with my favorite regular chocolate chip cookie recipe and substitute whole wheat flour for some of the white? I can’t wait to start experimenting.

whole wheat chocolate chip cookies 3

One year ago: Comparison of 3 Chocolate Mousse recipes
Two years ago: Brown Soda Bread
Three years ago: Deli-Style Rye Bread
Four years ago: Chocolate Cream Pie

Printer Friendly Recipe
Whole Wheat Chocolate Chip Cookies (adapted from Kim Boyle’s Good to the Grain)

The original recipe is designed to start with cold butter, perhaps so the dough doesn’t get too warm and spread too much in the oven. However, because I have found that an overnight rest is good for both cookie dough and whole wheat doughs, I knew I would be chilling the dough before baking it and started with the softened butter that I’m used to. I also increased the chocolate and used chips instead of chopping my own.

3 cups whole wheat flour
1½ teaspoons baking powder
1 teaspoon baking soda
16 tablespoons (2 sticks) unsalted butter, softened
1½ teaspoons salt
1 cup (7 ounces) dark brown sugar
1 cup (7 ounces) sugar
2 eggs
2 teaspoons pure vanilla extract
8 ounces bittersweet chocolate, roughly chopped into ¼- and ½-inch pieces

1. In a small bowl, combine the flour and baking powder. In the bowl of a stand mixer fitted with the paddle attachment (or a hand mixer, or a spoon or whatever), beat the butter and salt until creamy. Add the sugars and beat on medium speed until fluffy. Add the eggs, one a time, mixing for one minute after each addition. Add the vanilla. Reduce the mixer speed to low and add the flour miture, mixing just until almost combined. Add the chocolate and pulse the mixer on low speed until the chips are dispersed and the flour is incorporated. Press a sheet of plastic wrap right against the dough; refrigerate overnight or up to 3 days.

2. Adjust an oven rack to the middle position. Heat the oven to 350 degrees. Line a baking sheet with parchment paper or a silicone baking mat.

3. Drop rounded tablespoons of dough onto the lined baking pan, spaced an inch or two apart. Bake the cookies for 7-10 minutes, until slightly browned around the edges and just set in the middle. Cool the cookies for at least 2 minutes on the sheet before transferring to a rack to finish cooling. (If they still seem fragile after 2 minutes of cooling, you can just leave them on the sheet to cool completely.)

whole wheat chocolate chip cookies 5

parmesan bacon shortbread

bacon parmesan crackers 9

There’s a fine art to choosing a dish to bring to a potluck. If people are milling around, there’s a definite advantage to a handheld, plate-optional snack. On the other hand, if it’s mostly sit-down, dips and spreads don’t work well because people have to guess at the right ratio of dip to dipper to scoop onto their plate, not to mention the issue of whether to put the dip next to the dippers, taking up valuable plate space, or on top, risking getting dip on your fingers while you try to eat the dippers.

bacon parmesan crackers 2

Last year, I brought goat cheese, sundried tomato, pesto terrine with a thinly sliced baguette to the company potluck. It did not go over well. For one thing, it’s a dip and the potluck turned out to be a sit-down kind of deal. For another, a few of my coworkers were unfamiliar with and unwilling to try goat cheese. (Their loss!)

bacon parmesan crackers 10

This year I went to the other end of the spectrum and chose easily grabbable finger food. I included bacon to guarantee there would be no complaints about scary new ingredients. It seems to have worked; these got a lot more love than last year’s goat cheese spread. And no wonder, with so many salty rich ingredients encased in a tender cookie. I can’t think of many situations in which these little treats wouldn’t work perfectly.

bacon parmesan crackers 4

One year ago: Roasted Tomato Soup
Two years ago: Orange Berry Muffins
Three years ago: Thumbprints for Us Big Guys
Four years ago: Cooks Illustrated’s Classic Pound Cake

Printer Friendly Recipe
Bacon Parmesan Shortbread (adapted from The New York Times via Use Real Butter)

Makes about 18 cookies (more if you cut them thinner)

I used pancetta instead of bacon, which complimented the parmesan nicely.

The original recipe titles these crackers and shows a picture of thin and flaky squares. These must have been rolled paper thin before baking. However, the recipe instructs the dough to be rolled out (or cut, the way I did it) ½-inch thick. I compromised and went with ¼-inch thick, which gave a texture more like shortbread than crackers. I’m sure they’re good both ways, but if you do roll them thinner, you’ll need to adjust the cooking time.

1 cup (4.8 ounces) all-purpose flour
½ teaspoon salt
½ cup (1 ounce) finely grated fresh Parmesan cheese
4 tablespoons (½ stick) unsalted butter
¼ cup cream or half-and-half, more as needed
4 ounces (about 4 slices) bacon, cooked and crumbled

1. Put the flour, salt, cheese and butter in the bowl of a food processor. Pulse until the flour and butter are combined. Add about ¼ cup cream or half-and-half and let machine run for a bit; continue to add liquid a teaspoon at a time, until the mixture holds together but is not sticky. Add the bacon and pulse a few times to incorporate.

2. Transfer the dough to a large square of parchment or wax paper. Shape the dough into a long rectangle with a 1-inch square cross-section. Wrap tightly in the paper and freeze for at least 3 hours.

3. Heat the oven to 400 degrees. Line a baking sheet with parchment paper or a silicone mat.

4. Slice the dough ¼-inch thick, arranging the cookies ½-inch apart on the baking sheet. Bake until lightly browned, about 10 minutes. Cool on a rack; serve warm or at room temperature or store in a tin for a few days.

bacon parmesan crackers 3