tapioca pudding comparison

tapioca pudding 11

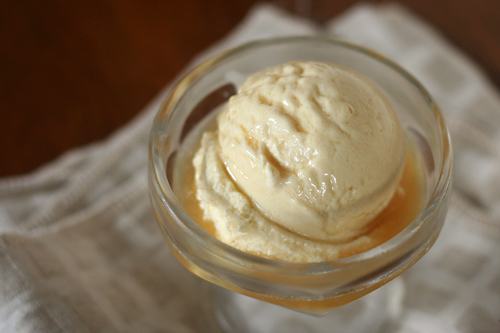
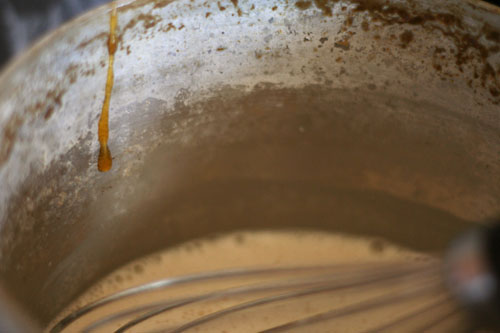
Everyone knows there’s science in cooking – reactions occur when heat is applied to ingredients or even just mixed together, like the bubbles that form when baking powder is stirred into batter. But rarely when I cook do I feel like a scientist. I understand some of what’s happening on a molecular level, but following the steps in a recipe, or even hashing out my own path on the stovetop, does not feel like doing science.

tapioca pudding 2

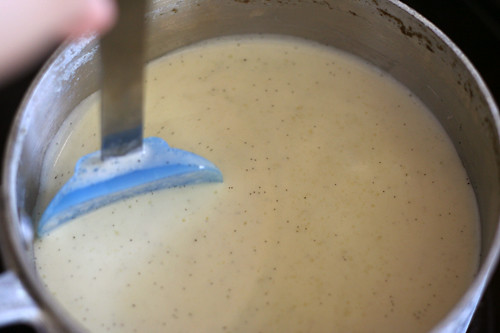
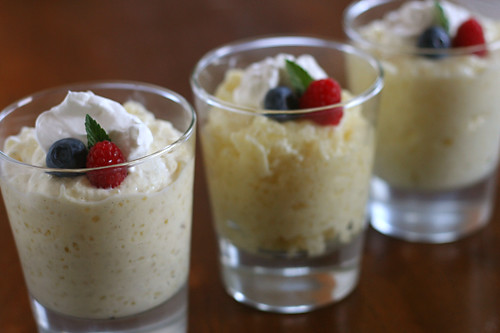
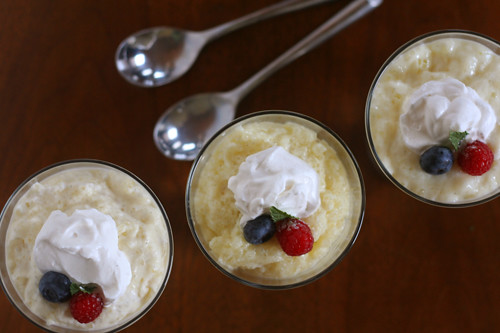
Recipe comparisons are when I get to be an experimentalist and a cook/baker all at once, and that’s why I love them, despite all the work they entail. I thought a tapioca pudding comparison would be easier, and so I wouldn’t mind sharing it with Jen as part of her Friday Favorites series. And besides, Jen’s an engineer – that’s just a scientist with a purpose. It wasn’t until later that I found out that Jen doesn’t like pudding.

tapioca pudding 9

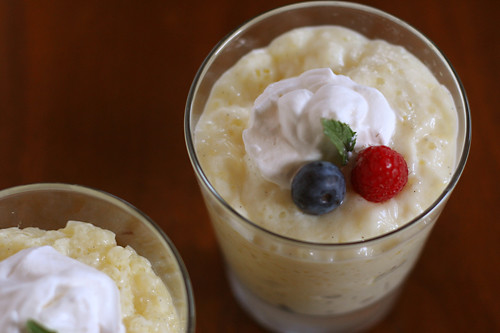
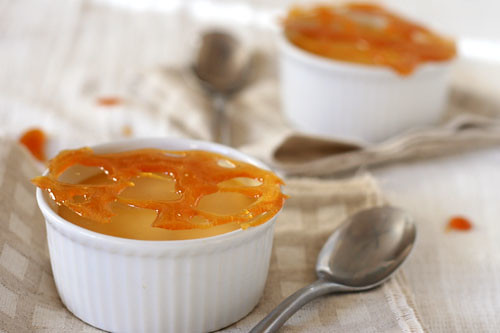
I would have loved for my first shared comparison to be one of those rarities in which there’s a clear favorite, but there wasn’t even one recipe that we loved. Cooks Illustrated’s had a weird gritty texture, Kraft’s was lacking flavor, and I completely messed up Mark Bittman’s recipe – although that one ended up being Dave’s favorite. Clearly more experimentation is in order, and that is absolutely fine with me. Check out Jen’s blog to get the full analysis, more photos, and the recipes – the very first pudding recipes in her blog, and perhaps the only ones she’ll ever post!

One year ago: Tacos al Pastor
Two years ago: Crockpot Chicken Broth
Three years ago: Chicken with Forty Cloves of Garlic

tapioca pudding 10

bourbon ice cream

bourbon ice cream 4

Dave and I have developed a little whiskey collection. The first bottle I bought for cooking, and one Dave wanted because it’s what Dirk Pitt drinks. Then I bought a bottle of Scotch for my dad for Father’s Day last year, but right before I was going to give it to him, he said he didn’t like Scotch so I ran out and bought some bourbon for him and kept the Scotch for myself. And then I bought another bottle of bourbon for my dad for Father’s Day this year (I’m very creative with my Father’s Day gifts, obviously), but then decided to get him something else.

bourbon ice cream 1

So Dave and I decided we should do a whiskey tasting with our collection. But somehow time got away from us over the weekend, and we didn’t get to it until Sunday night. And let me give you a piece of advice: Sunday night is not a good time for a whiskey tasting, assuming you have to go to work Monday morning. Which we did. Grudgingly.

bourbon ice cream 2

Dave and I apparently agree with my dad in his whiskey preferences, in that we both liked the bourbons better than the Scotch. I enjoy both, but the bourbon is so sweet and caramelly that it’s no wonder it’s my favorite. And doesn’t the sweet and caramelly description make it seem like bourbon is a perfect flavor for ice cream?

bourbon ice cream 3

Like all desserts, it’s difficult to get the flavor of the alcohol to shine through the creamy custard base. I even increased the amount of bourbon, at the risk of ice cream that would never freeze, and still the bourbon was a subtle overtone. Dave thought it was just right; he thinks bourbon ice cream should be ice cream first with just a taste of bourbon, which was exactly what this was. Me? I thought I liked my bourbon on ice, but now I think it’s even better on ice cream.

bourbon ice cream 5

One year ago: Rice and Peas
Two years ago: Strawberry Cake
Three years ago: Deep Dark Chocolate Cookies

Printer Friendly Recipe
Bourbon Ice Cream (from Bon Appétit via Erin’s Food Files)

I had never seen powdered milk used in ice cream before, but if it’s what caused this batch to be so perfectly smooth and creamy, I’m sold.

Erin and a number of epicurious reviewers warn that this ice cream stays rather soft, but even with using an extra tablespoon or two of bourbon, my ice cream set up just fine.

2 cups heavy whipping cream
2 cups half-and-half
½ cup nonfat dry milk powder
6 large egg yolks
½ cup (3.5 ounces) sugar
¼ cup (1.75 ounces) packed dark brown sugar
¼ teaspoon kosher salt
5 tablespoons bourbon
1 tablespoon vanilla extract

1. Bring the cream, half-and-half, and milk powder to a simmer in a heavy large saucepan over medium-high heat, stirring until the milk powder dissolves completely. Remove from heat.

2. Combine the egg yolks, sugar, brown sugar, and coarse salt in large bowl; whisk until thick and blended. Gradually whisk the hot cream mixture into yolk mixture. Return the mixture to the same saucepan; stir over medium-low heat until the custard just simmers and the temperature registers 175°F to 178°F, about 3 minutes. Pour the custard through a fine-mesh strainer into a bowl. Mix in the bourbon and vanilla extract. Refrigerate the custard, uncovered, until cold, stirring occasionally, at least 3 hours. (Custard can be made 1 day ahead. Cover and keep refrigerated.)

3. Once the custard is completely chilled, churn according to the directions of your ice cream maker. When the custard has the consistency of soft-serve ice cream (usually after about 20 minutes of churning), transfer it to a chilled container, press plastic wrap directly on the surface, and freeze until firm, at least 4 hours.

bourbon ice cream 6

caramel pots de creme

caramel pots de creme 4

Despite a few bumps in the road, caramel and I have always been on good terms. I’ve had a good, safe method that I’m comfortable with: add sugar and water to a pot, be careful not to get any crystals on the sides of the pot, stir in some corn syrup for safety, bring to a simmer, be careful to brush down any crystals on the sides of the pot, watch carefully while it darkens, be careful to swirl the pan instead of stir with anything that might have sugar crystals on it. It worked…as long as I was careful.

caramel pots de creme 1

I knew there was this no-water method, in which sugar is melted directly, instead of dissolved in water first. But it seemed so much safer to add water and dissolve the sugar first, despite all the being careful that that method entailed. I assumed I’d try the other method eventually, but, for years, I was nervous.

I finally took the plunge this weekend, and, friends? Dive right in, because the water is just fine.

caramel pots de creme 2

Directly melting the sugar is so much easier! Why does anyone bother with that troublesome water method? It takes twice as long, and there’s all this being careful to be careful about. Just put the sugar in a pot, turn the heat on, stir when it starts to melt and keep stirring as it darkens, which takes just a few minutes. And then if you want a real treat, mix in some heavy cream and eggs for a smooth, creamy, thick custard that has a hint of burnt sugar – a hint you hardly had to work for.

Peggy chose this recipe for Tuesdays with Dorie, and she has the recipe posted. I added a hefty pinch of salt to balance all that sugar.

One year ago: White Chocolate Brownies
Two years ago: Cappuccino Muffins
Three years ago: French Chocolate Brownies

caramel pots de creme 3

strawberry daiquiri ice cream

When it comes to alcohol, I pretty much like it all. Red wine, white wine, dark beers, light beers, vodka cocktails, straight whiskey. It’s all good. I don’t drink foo-foo drinks often, only because they’re too much work to mix up at home and too low on alcohol to pay for in a bar. But that doesn’t mean I have anything against the combination of fruit and liquor.

Still, doesn’t it seem like fruit puree, citrus, alcohol, and the cream that’s inevitably served, whipped, on top, would be an even better combination churned into ice cream?  The same combination of strawberries and lime, but smoother, richer, and, okay, less alcoholic.

I wish it had occurred to me earlier – like before we ate all the ice cream – to pour rum over the ice cream. Rum float!  Or to mix so much rum into the base that the ice cream doesn’t freeze completely.  Rum slushy!  Or I suppose we could keep this recipe as a dessert and not a cocktail.  If I must.

One year ago: Artichoke Ravioli
Three years ago: Blueberry Poppy Seed Brunch Cake

Printer Friendly Recipe
Strawberry Daiquiri Ice Cream (adapted from David Lebovitz’s Raspberry Ice Cream recipe in The Perfect Scoop)

Makes about 1 quart

Mine wasn’t as limey as I would have liked, so I’ve doubled both the zest and the juice from what I used. I don’t believe the extra juice will be detrimental to the smoothness of the ice cream. You could also let the half-and-half mixture steep with the zest for up to an hour before reheating it and mixing it with the yolks.

When strawberries are pureed, I often prefer to use frozen berries that have been defrosted. Because they are picked at their peak and immediately frozen, they are often of higher quality than fresh strawberries. Furthermore, they make a smoother puree.

To make this more kid-friendly, feel free to use only half the rum.  Don’t leave it all out, as it helps keep the ice cream softer.

1 cup (7 ounces) sugar, separated
Zest from 2 limes
Pinch salt
1½ cups half-and-half
1½ cups heavy cream
4 yolks
1½ cups (6 ounces) strawberry puree
¼ cup lime juice (2 limes)
2 tablespoons rum

1. In a medium saucepan, rub the lime zest into ½ cup (3.5 ounces) of the sugar until fragrant. Add the half-and-half and heat the mixture over medium-high heat until it simmers. Meanwhile, pour the cream into a large bowl; set a fine-mesh strainer over the bowl.

2. In a separate medium bowl, beat the egg yolks with the remaining ½ cup (3.5 ounces) sugar. When the half-and-half simmers, very slowly pour it into the beaten egg yolks, whisking constantly. Pour the mixture back into the pot and bring just to a simmer over medium heat, still whisking constantly. Pour through the strainer into the bowl with the cream; stir to combine. Mix in the strawberry puree, lime juice, and rum. Chill until cold, at least 4 hours or up to overnight.

3. Freeze the ice cream custard in your ice cream maker according to the manufacturer’s instructions. Once frozen to the consistency of soft serve ice cream, transfer the ice cream to a chilled bowl and freeze until firm.


ice cream tart

It was 96 degrees here on Saturday, which is hot for this time of year even by southern New Mexico standards. Ice cream tartlets on the hottest day of the year would have been perfect. Too bad I was so busy sitting outside enjoying the heat to get the tarts made.

I’m surprised by how well we weathered the heat this weekend. I guess between the breeze, the cool nights, the cheapy kiddie pool full of frigid water to put our feet in, and plenty of shade when the sun got to be too much, we can handle those hot days just fine. The ice cream tarts that got made the next – also hot – day didn’t hurt either.

Jessica chose the Coffee Ice Cream Tart for Tuesdays with Dorie this week, and she has that recipe posted. I went a different direction with a plain tart crust and strawberry daiquiri ice cream. Because there were a few comments about the tart crust being too hard to cut once it was frozen, I increased the butter in Dorie’s Sweet Tart Dough to 10 tablespoons and added an extra egg yolk. Even frozen, this tart crust was perfectly tender.

One year ago: Mocha Walnut Marbled Bundt Cake
Two years ago: Banana Cream Pie
Three years ago: Lemon Cream Tart

chocolate mousse comparison

I realized something potentially important with this comparison. When Dave and I and whoever else participate in comparisons, we just dive in and start throwing out adjectives. That’s never been a problem before, but this time, Dave and I had some confusion over what we each wanted in a mousse. Perhaps my tasters and I should clarify beforehand what we’re looking for. I know I wanted an exceptionally chocolately flavor and an exceptionally light texture. I don’t think Dave knew what he wanted…or even what chocolate mousse is supposed to be.

I compared David Lebovitz’s recipe from A Sweet Life in Paris (DL), Cooks Illustrated’s Premium Chocolate Mousse recipe from 2006 (CI Premium), and Cooks Illustrated’s older Chocolate Mousse recipe (found in The New Best Recipe) (CI). It drives me crazy when Cooks Illustrated publishes multiple recipes for the same thing without referencing the previous recipe. I’m always left wondering which is the better version. What better way to find out than to make them both?

DL – This recipe is simple: chocolate melted with water, egg yolks added, beaten egg whites folded in. I haven’t read A Sweet Life and couldn’t find this recipe on David’s blog, but according to Annie, he explains in his book that this is the most traditional version of chocolate mousse.

CI Premium – This recipe is designed specifically for fancy schmancy chocolate. (I was using Valrhona.) The recipe contains the chocolate, water, and eggs called for in Lebovitz’s recipe, but spices things up with cocoa (balanced by the addition of sugar), brandy, and espresso powder. Folding in whipped cream lightens the mixture.

CI – Unlike the other two recipes, this one contains butter and no water. In addition to the requisite chocolate and eggs, it includes coffee (or alcohol), vanilla, sugar and whipped cream.

DL – Lightened by only beaten egg whites and not whipped cream, this was the heaviest mousse of the three. It was thicker, grainy, and more solid, with a cocoa-like flavor (despite containing no cocoa) and a bitter aftertaste. For Dave, it was too much – too rich and too dense.  For me, it just wasn’t as light as I want my mousse.

CI Premium – This was softer and sweeter than the other mousses. Dave thought it was the most balanced.

CI – This was light and airy and chocolately, and for me, perfect in every way. I love its bittersweetness, I love the meringue bubbles that pop in my mouth, I love how it’s firm but light.

The confusion came when Dave said that none of them were as good as my standard recipe – but I hadn’t made chocolate mousse in nearly four years, and CI’s recipe from The New Best Recipe was what I used then. Furthermore, Dave’s favorite of the three was CI’s Premium recipe, because it was “puddinglike”. But a mousse shouldn’t be puddinglike (and I confess it probably hadn’t chilled long enough).

It looks like for this comparison, there is only one opinion that matters, and that is mine, of course. Good thing Cooks Illustrated’s Chocolate Mousse was so clearly the winner. Well, I was the winner too, because I got to eat three delicious chocolate mousses – and one perfect mousse – in one sitting.


left to right: CI Premium, CI, DL

One year ago: Chicken Mushroom Spinach Lasagna
Two years ago: Pecan Sour Cream Biscuits
Three years ago: Spaghetti and Meatballs

Printer Friendly Recipe
Chocolate Mousse
(from Cooks Illustrated’s The New Best Recipe)

6 ounces bittersweet or semisweet chocolate, chopped coarse
4 tablespoons (½ stick) unsalted butter
Pinch salt
1 teaspoon vanilla extract
2 tablespoons strong coffee or 4 teaspoons brandy, orange-flavored liqueur, or light rum
4 large eggs, separated
2 tablespoons sugar
½ cup chilled heavy cream, plus more for serving

1. Melt the chocolate in a medium bowl set over a large saucepan of barely simmering water or in an uncovered Pyrex measuring cup microwaved at 50 percent power for 3 minutes, stirring once at the 2-minute mark. Whisk the butter into the melted chocolate, 1 tablespoon at a time. Stir in the salt, vanilla, and coffee until completely incorporated. Whisk in the yolks, one at a time, making sure that each is fully incorporated before adding the next; set the mixture aside.

2. Stir the egg whites in a clean mixing bowl set over a saucepan of hot water until slightly warm, 1 to 2 minutes; remove the bowl from the saucepan. Beat with an electric mixer set at medium speed until soft peaks form. Raise the mixer speed to high and slowly add the sugar; beat to soft peaks. Whisk a quarter of the beaten whites into the chocolate mixture to lighten it, then gently fold in the remaining whites.

3. Whip the cream to soft peaks. Gently fold the whipped cream into the mousse. Spoon portions of the mousse into 6 or 8 individual serving dishes or goblets. Cover and refrigerate to allow the flavors to blend, at least 2 hours. (The mousse may be covered and refrigerated for up to 24 hours.) Serve with additional whipped cream.

Printer Friendly Recipe
Dark Chocolate Mousse
(from Cooks Illustrated)

8 ounces bittersweet chocolate, 62 to 70 percent cacao, chopped fine
3 tablespoons granulated sugar
2 tablespoons cocoa powder, preferably Dutch-processed
1 teaspoon instant espresso powder
7 tablespoons water
1 tablespoon brandy
3 large eggs, separated
⅛ teaspoon table salt
1 cup heavy cream, plus 2 more tablespoons (chilled)

1. Melt the chocolate, 2 tablespoons sugar, cocoa powder, espresso powder, water, and brandy in a medium heatproof bowl set over a saucepan filled with 1 inch of barely simmering water, stirring frequently until smooth. Remove from the heat.

2. Whisk the egg yolks, 1½ teaspoons sugar, and salt in a medium bowl until the mixture lightens in color and thickens slightly, about 30 seconds. Pour the melted chocolate into the egg mixture and whisk until thoroughly combined. Let cool until slightly warmer than room temperature, 3 to 5 minutes.

3. In the clean bowl of a standing mixer fitted with the whisk attachment, beat the egg whites at medium-low speed until frothy, 1 to 2 minutes. Add the remaining 1½ teaspoons sugar, increase the mixer speed to medium-high, and beat until soft peaks form when the whisk is lifted, about 1 minute. Detach the whisk and bowl from the mixer and whisk the last few strokes by hand, making sure to scrape any unbeaten whites from the bottom of the bowl. Using the whisk, stir about one-quarter of the beaten egg whites into the chocolate mixture to lighten it; gently fold in the remaining egg whites with a rubber spatula until a few white streaks remain.

4. Whip the heavy cream at medium speed until it begins to thicken, about 30 seconds. Increase the speed to high and whip until soft peaks form when the whisk is lifted, about 15 seconds longer. Using a rubber spatula, gently fold the whipped cream into the mousse until no white streaks remain. Spoon the mousse into 6 to 8 individual serving dishes or goblets. Cover with plastic wrap and refrigerate until set and firm, at least 2 hours. (The mousse may be covered and refrigerated for up to 24 hours.)

Printer Friendly Recipe
Chocolate Mousse
(from David Lebovitz via Annie’s Eats)

I just got David Lebovitz’s The Sweet Life in Paris, which contains this original recipe, in the mail. I’ve copied the recipe in his words. I also noticed that he calls for 2 tablespoons brandy or coffee, which I didn’t use.

7 ounces bittersweet or semisweet chocolate, finely chopped
3 tablespoons water
4 large eggs, at room temperature, separated
Pinch of coarse salt

1. In a medium-sized bowl set over a pan of barely simmering water, begin melting the chocolate with the water, making sure not to let it get too hot. Take the bowl off the heat when the chocolate is almost completely melted, then stir gently until smooth. Set aside.

2. In a clean, dry bowl, whip the egg whites with the salt until they form stiff peaks when you lift the whip. They should still be smooth and creamy, not grainy.

3. Stir the egg yolks into the chocolate, then fold one-third of the whites into the chocolate to lighten it up.

4. Fold the remaining egg whites into the chocolate just until there are no visible streaks of whites. Cover the bowl with plastic wrap and chill for at least 3 hours. (You can also divide the mousse into individual custard cups, ramekins, or goblets before serving.)


chocolate pots de creme

I optimistically bought a container of fancy full-fat yogurt to replace dessert this week, thinking that a few days without cookies and cake would do me good. I didn’t plan for the extra couple of chocolate pots de crème that would need to get eaten, and I forgot that I wanted to bake cookies to bring to work one day this week. I have good intentions of skipping dessert, but my love of baking is always my undoing.

Inasmuch as a tiny espresso mug of chocolate pot de crème can be anyone’s undoing. This simple mixture of chocolate, milk, cream, and egg yolks is rich and certainly best served in tiny servings if you want to retain any bit of those good intentions. But where’s the fun in that?

Christine chose this for Tuesdays with Dorie, and she has the recipe posted. I love how rich and creamy it is but wish the chocolate flavor was more intense.

One year ago: Toasted-Coconut Custard Tart
Two years ago: Chocolate Whiskey Cake.


bourbon bread pudding

After making alfredo sauce and bourbon bread pudding in the same evening, I realized that they’re both on my cooking bucket list. What else is on it? Pulled pork cooked completely on the grill. Sourdough starter made without commercial yeast. Ricotta. I recently, impractically, added rillettes to the list.

Well, I have made ricotta, once, sort of. I don’t remember the particulars, but I remember that it was a half-baked effort, so it doesn’t count. And neither does this half-baked (not literally) attempt at bourbon bread pudding.

True, there was bourbon, there was bread, and there was pudding, but the bread was leftover from a failed attempt to squeeze the whole bread-baking procedure in after work (before I started just bringing the dough with me to work to shape it and let it rise) and was brick-like in density. Because it hadn’t risen enough, it didn’t have many air holes, and without those holes, the custard has no where to absorb into.

The pudding was still good, but I suspect that it wasn’t quite right. I’m crossing alfredo off, but I think I’ll keep bourbon bread pudding on the list for now. What’s on your cooking bucket list?

Sharon chose this for Tuesdays with Dorie, and she has the recipe posted. I used poorly risen bread, didn’t add any extra egg yolks, and overbaked it. Oh, and I added a pinch of salt of course.

One year ago: Rick Katz’s Brownies for Julia Child
Two years ago: Floating Islands

coconut cream tart

Don’t you hate when the only coconut in something that’s supposedly coconut cream pie is a garnish of coconut shreds over the top? Or strawberry cake that’s actually vanilla cake topped with gluey strawberry gel? Or, worse – brownies that have just enough cocoa to look chocolate-flavored, but after one bite, you realize are just sugar-flavored. If a dessert is going to claim to have a primary flavor, that flavor had better really dominate.

I wanted to stuff as much coconut into this tart (that turned into pie when I couldn’t find my tart pan) as possible, so I was excited when I stumbled upon coconut flour in the store. What a perfect way to turn the crust into a tender coconut cookie that’s still sturdy enough to hold up an inch or so of pastry cream.

I love Tartine’s pastry cream because it uses whole eggs instead of yolks, which results in a lighter, looser, silky cream. Its only downside is that it’s quick to form lumps when it’s cooked, although a quick whisk and a pass through a fine-mess strainer smooths it out. However, my friend and I were working on this pie/tart together, and she slowly dribbled the tempered custard mix into the hot milk, carefully stirring all the while, and what do you know – no lumps. I should try being careful more often myself.

With coconut extract and unsweetened coconut flakes stirred into the pastry cream, coconut flour in the crust, plus a spinkling of sweetened toasted coconut over the top of the pie, this was coconut all the way. You could add swirls of whipped cream, but wouldn’t that dilute the coconut that you tried so hard to make shine? This pie is perfect just the way it is.

One year ago: Sun-Dried Tomato Jam
Two years ago: Sushi Bowls

Coconut Cream Tart (crust adapted from Dorie Greenspan; filling adapted from Tartine)

If you can’t find (or just don’t want to buy) coconut flour, replace the coconut flour in the crust with an additional ¼ cup all-purpose flour (to make a total of 1½ cups all-purpose flour).

Consider using half coconut milk in the filling instead of some of the whole milk! I forgot, but I think would add another delicious layer of coconut.

For the filling:
2 cups whole milk
¼ teaspoon salt
4 tablespoons cornstarch
4 ounces (½ cup + 1 tablespoon) granulated sugar
2 large eggs
1 teaspoon vanilla extract
¼ teaspoon coconut extract
4 tablespoons unsalted butter, cut into 8 cubes
1¼ cups (3.5 ounces) unsweetened small-flake coconut

For the crust:
1¼ cups (6 ounces) all-purpose flour
¼ cup coconut flour
½ cup (2 ounces) confectioners’ sugar
¼ teaspoon salt
1 stick plus 1 tablespoon (9 tablespoons total) very cold (or frozen) unsalted butter, cut into small pieces
1 large egg yolk

¼ cup shredded sweetened coconut, toasted, for garnish
whipped cream (optionial)

1. For the filling: Add the milk and salt to a 2-quart saucepan and bring to a boil over medium-high heat. Meanwhile, whisk together the sugar and cornstarch in a medium bowl, then whisk in the eggs. When the milk boils, pour just a bit of it into the egg mixture, whisking constantly. Keep whisking and very gradually add the rest of the milk to the egg mixture. Pour the mixture back into the pot and whisk constantly over medium heat until the mixture thickens and just starts to boil; it will only take a few minutes. Quickly pour the pastry cream into a fine-mesh strainer set over a medium bowl (I use the same bowl I originally mixed everything in). Use a rubber spatula to push the pastry cream through the strainer. Let the pastry cream cool for a few minutes, occasionally stirring it, and then mix in the butter, 2 cubes at a time. Press plastic wrap directly on the surface of the pastry cream and refrigerate it until completely chilled, 3-4 hours or overnight.

2. Prepare the crust: Add the flours, sugar, and salt to the bowl of a food processor fitted with the metal blade. Pulse briefly to combine. Add the butter, and pulse until the butter is cut into the dough but some pieces are still pea-sized, 2-3 seconds. Add the yolk and process continuously until the dough begins to form clumps, 30-45 seconds, stirring once or twice.

3. Spray a 9-inch tart pan (or a pie pan, but then your crust will be thicker, like mine) with nonstick spray. Lightly pat the dough onto the bottom of the pan and up the sides. Freeze the lined pan for at least an hour before baking.

4. Adjust an oven rack to the middle position and heat the oven to 375 degrees. Spray one side of a 12-inch square of foil with nonstick spray; press onto the crust, oiled side down. Bake 25 minutes; remove the foil and continue to bake until the crust is golden brown, about 8 minutes more. Cool completely.

5. Assembly: Remove the chilled pastry cream from the freezer and stir in the unsweetened coconut. Spread the pastry cream into the cooled crust; smooth the top. Place a piece of plastic wrap directly over the filling and refrigerate for at least 3 hours. During this time, the coconut will soak up moisture from the filling, become softer and thickening the filling further.

6. When ready to serve, remove the plastic wrap and top with toasted coconut and whipped cream, if desired.

caramel pumpkin pie

Bringing desserts to work is awesome. It gives me a chance to bake without wondering what in the world we’re going to do with all this stuff, people come by and say thanks, and I become known as “the girl who brings treats” instead of “the girl whose desk faces the men’s bathroom.”

The disadvantage is that sometimes I only eat just enough of what I bake for quality control. And by quality control, I mean, is this edible? And not, can I taste the caramel in this?

I didn’t detect the caramel in the few bites I had, and neither did the coworkers I accosted in the hallway when they were trying to enjoy their tartlets (pie-lets?) in peace. But we all agreed that it was good, and that’s all that matters.

Janell, who chose this for Tuesdays with Dorie, has the recipe posted.

One year ago: Split-Level Pudding
Two years ago: Pumpkin Muffins