sweet potato cake

sweet potato cake 7

As far as I can remember, my mom only prepared sweet potatoes one way when I was growing up, and I don’t know exactly what that is, because I wouldn’t eat them. They were the only dish I was ever allowed to skip without even a no-thank-you helping. She served them twice a year, at Thanksgiving and then a month later when we repeated the Thanksgiving meal on Christmas. I don’t think anyone ate them except my mom and my brother-in-law.

sweet potato cake 1

I was in my twenties the first time I saw someone serve sweet potatoes any other way. They were simply roasted and served with salt and pepper. It was a revelation to me that sweet potatoes could be served without sugar and syrup and marshmallows. These days, I like sweet potatoes okay, but with dinner, I prefer to pair them with savory ingredients. Adding sugar to potatoes that are already sweet seems like serving dessert on the same plate as dinner.

sweet potato cake 2

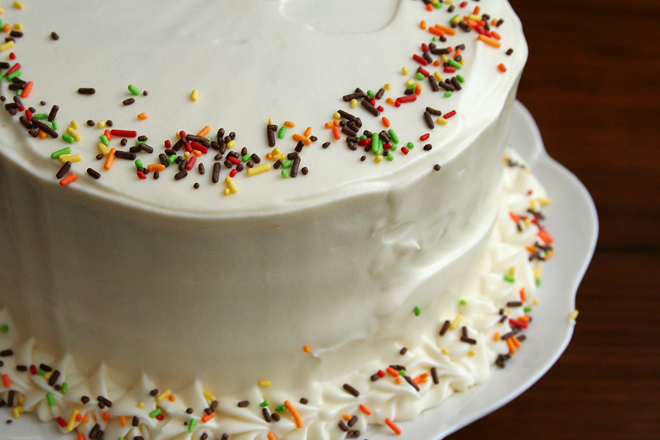
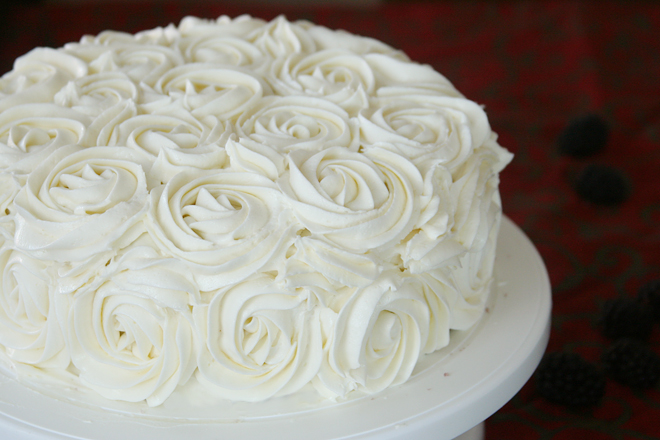
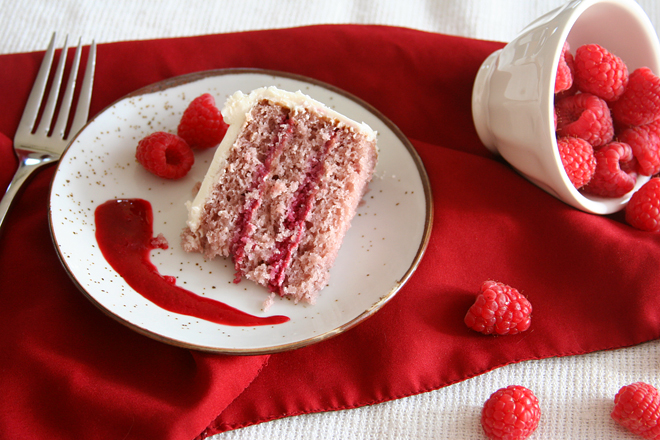
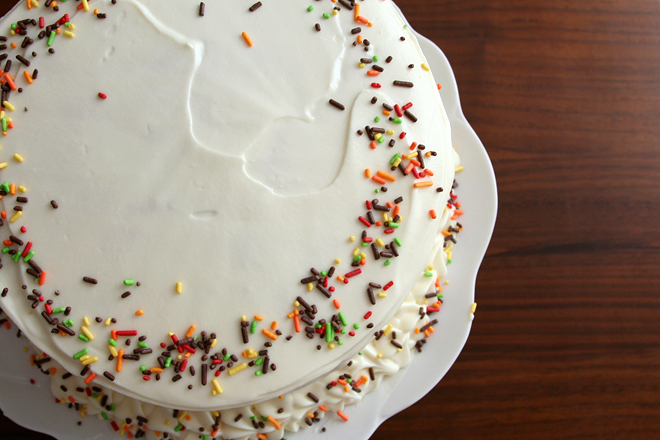
No, if I decide to add sugar to sweet potatoes, it will be to make them into something that is unmistakeably dessert. With only 1 cup of mashed sweet potatoes in a 3-layer cake, this cake doesn’t taste overwhelmingly of sweet potatoes, but it is a pretty orange color, not to mention light and fluffy and moist, everything you want in a cake. If you’re going to add a bunch of sugar to your sweet potatoes, this is the way to do it.

sweet potato cake 4

Printer Friendly Recipe
Sweet Potato Cake with Maple Cream Cheese Frosting (slightly adapted from Alisa Huntsman and Peter Wynne’s Sky High: Irresistible Triple Layer Cakes )

Cake:
2 medium or 1 large sweet potato (12 ounces)
3 cups (12 ounces) cake flour
1 tablespoon baking powder
1½ teaspoons ground cinnamon
¾ teaspoon ground nutmeg
¼ teaspoon ground cloves
5 eggs, separated
2¼ cups (15.75 ounces) sugar
½ teaspoon table salt
10 tablespoons unsalted butter, at room temperature
1½ teaspoons vanilla extract
1¼ cups milk, room temperature

Frosting:
10 ounces cream cheese, room temperature
8 tablespoons (1 stick) butter, room temperature
3 cups (12 ounces) powdered sugar, sifted
3 tablespoons maple syrup

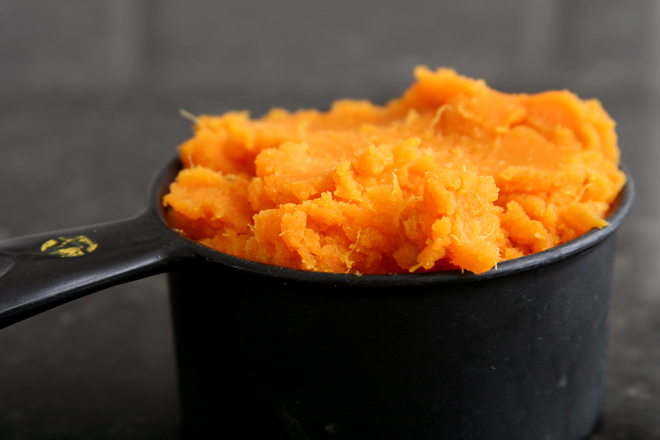
1. Heat the oven to 400 degrees. Prick each sweet potato with a fork in 5-6 places; place on a baking sheet and bake for 1 hour or until the potatoes are very soft. Remove from the oven and cool slightly. When the potatoes are cool, peel off the skin and remove any dark spots. Cut the potatoes into chunks and puree in a food processor until smooth. Measure out one cup of potato puree; discard the rest or save for another use.

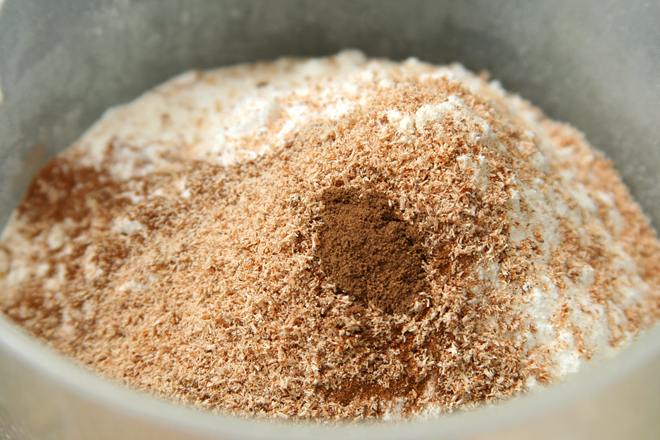
2. Reduce the oven temperature to 350 degrees. Butter and flour the bottoms and sides of three 8- or 9-inch pans, or spray with baking spray. Line the bottom of the pans with parchment paper; grease the paper. In a small bowl, combine the flour, baking powder, cinnamon, nutmeg, and cloves; set aside.

3. In the bowl of electric mixer fitted with the whisk attachment, beat the egg whites on medium speed until frothy. Increase the speed to high and gradually add ¼ cup sugar. Continue to beat until the egg whites are moderately stiff. Transfer the egg whites to a separate bowl.

4. In the same bowl (no need to wash it), with the mixer fitted with the paddle attachment, combine the sweet potato, butter, vanilla, remaining sugar, and salt; beat on medium speed until light and fluffy, 3-4 minutes. Add the egg yolks one at a time, scraping the sides of the bowl after each egg yolk is added. Reduce the mixer speed to low and add one-third of the dry ingredients, followed by half the milk, another one-third of the dry ingredients, the remaining milk, and the remaining dry ingredients.

5. With a large spatula, fold in one-fourth of the egg whites into the batter to lighten it. Fold in the remaining egg whites until no streaks remain, making sure to not over mix. Divide the batter evenly between the prepared pans.

6. Bake for 25-35 minutes or until a toothpick inserted into the center of a cake layer comes out clean. Let the cake layers cool in the pan for 10 minutes, then turn out onto wire racks. Cool completely before frosting, at least 1 hour.

7. For the frosting: In a stand mixer fitted with the paddle attachment (or in a large bowl with a hand mixer), beat the cream cheese and butter on medium speed until smooth, about 1 minute. Stop the mixer, add the sugar, and mix on low speed until the sugar is incorporated; increase the mixer speed to medium and beat until light and smooth, 2-3 minutes. Mix in the maple syrup.

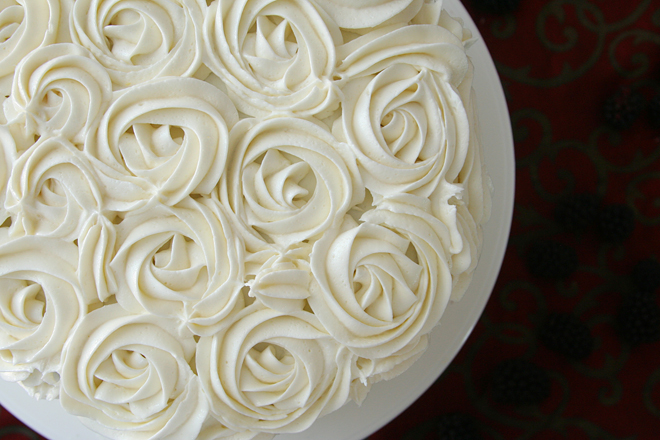
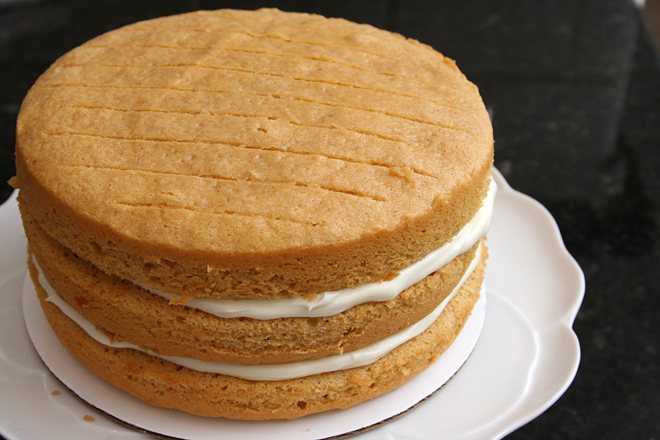
8. To assemble: Transfer one cake layer to a serving platter. Evenly spread ⅛-inch frosting over the top. Top with a second cake layer and another layer of frosting, then the third cake layer. If you have time, spread a very thin layer of frosting over the top and sides of the cake; chill, uncovered, for 30 minutes; this step will reduce crumbs in your final layer of frosting. Spread the remaining frosting evenly over the top and sides of the cake.

sweet potato cake 6

cranberry almond crostata

cranberry crostata 6

I’ve got nothing against pie – buttery, flaky crust, fruit filling, what’s not to like? – but I’m mostly a cake girl. Soft, spongy, tender, doughy cake. Brownies are good too. Or cookies. Pie is great, but it isn’t as good as doughy baked things, either to eat or to make.

cranberry crostata 1

This crostata, however, is the perfect compromise, because the crust is made from cookie dough, not pie dough. The filling, on the other hand, is classic pie – thickened, fruity, juicy. It looked just like cherry pie as it baked.

cranberry crostata 3

When I made this for my big Italian-themed turkey feast last year, I mixed and cut the dough the day before the meal, storing it in the freezer. I also cooked and chilled the filling overnight. The next day, I spent 15 minutes assembling the tart in the morning before anything else needed to go in the oven. After transferring the beautifully browned and sugar sparkly tart to a cake stand, I didn’t have to think about it again until it was time for dessert. This sweet and tart and buttery dessert was the perfect end to the meal – and it was just as good the next morning for breakfast, just like pie.

cranberry crostata 4

Printer Friendly Recipe
Cranberry Almond Crostata (from Gourmet via epicurious)

For pastry dough:
⅛ cup whole raw almonds (¼ pound), toasted and cooled
2 cups all-purpose flour, divided
1¼ sticks unsalted butter, softened
½ cup packed light brown sugar
1 large egg, lightly beaten, divided
½ teaspoon pure vanilla extract
⅛ teaspoon pure almond extract
2 teaspoons grated lemon zest
½ teaspoon salt

For filling and assembly:
2½ cups fresh or frozen cranberries (10 ounces)
¼ cup fresh orange juice
½ cup sweet orange marmalade
½ cup packed light brown sugar
¼ teaspoon salt
1 tablespoon granulated sugar

1. Make the dough: Pulse the almonds with ¼ cup flour until finely ground (be careful not to grind to a paste). Beat together the butter and brown sugar with an electric mixer at medium speed until pale and fluffy, about 3 minutes. Reserve 1 tablespoon of the beaten egg, chilled, for egg wash and beat the remaining egg into the butter mixture, then add the vanilla and almond extracts, beating well. At low speed, mix in the almond mixture, zest, salt, and remaining 1¾ cups flour until mixture just forms a dough. Halve the dough and form each half into a 5- to 6-inch disk. Wrap the disks separately in plastic wrap and chill until firm, at least 30 minutes.

2. Make the filling: Bring the cranberries, orange juice, marmalade, brown sugar, and salt to a boil in a heavy medium pot, stirring, then simmer, uncovered, until some of the cranberries burst and the mixture is slightly thickened, about 5 minutes. Cool the filling quickly by spreading it in a shallow baking pan and chilling until lukewarm, about 15 minutes.

3. Preheat the oven to 375 degrees with a foil-lined large baking sheet on the middle rack. Generously grease a springform pan.

4. Roll out 1 piece of dough between sheets of wax or parchment paper into a 12-inch round (dough will be very tender). Remove the top sheet of paper and invert the dough into the springform pan. (Dough will tear easily but can be patched together with your fingers.) Press the dough over the bottom and up the side of the pan, trimming the dough to reach ½ inch up the side of the pan. Chill.

5. Roll out the remaining dough into a 12-inch round in same manner. Remove the top sheet of paper, then cut the dough into 10 (⅓-inch-wide) strips with a pastry wheel and slide (still on the wax paper) onto a tray. Freeze strips until firm, about 10 minutes.

6. Spread the filling in the chilled shell and arrange 5 strips 1 inch apart on filling. Arrange the remaining 5 strips 1 inch apart diagonally across first strips to form a lattice with diamond-shaped spaces. Trim the edges of all the strips flush with the edge of the shell. Brush the lattice top with the reserved beaten egg and sprinkle the crostata with the 1 tablespoon granulated sugar.

7. Bake the crostata in the pan on the hot baking sheet until the pastry is golden and the filling is bubbling, 50 to 60 minutes. (If the pastry is too brown after 30 minutes, loosely cover the crostata with foil.) Cool the crostata completely in the pan on a rack, 1½ to 2 hours.

cranberry crostata 5

bittersweet chocolate and pear cake

pear chocolate cake 6

Earlier this summer, one of my coworkers brought in peaches from his tree, so I took some and made peach cupcakes to share at work. Then a couple weeks ago, another coworker was giving away apples, so I took some and made apple pie-cake for everyone. After that, the apple grower was excited to find someone to offload her apples to, so she brought me another bag, and I made apple cake and then apple muffins. Also, my mom gave me pears, so I made pear chocolate cake.

pear chocolate cake 2

It sounds weird, right, pears and chocolate together? That’s what most of my coworkers said, but then they said that it definitely worked. It’s a fun recipe, with the eggs beaten until foamy and the batter spread in the pan with the fruit and chocolate on top. As the cake bakes, it rises up due to all the air beaten into the eggs, incorporating the fruit and chocolate.

pear chocolate cake 4

Just like in a chocolate chip cookie, the chocolate here provides a bitter richness to compliment the sweet butteriness of a fruit-based cake. Sugar and butter being, of course, the perfect compliments to almost any fruit. Basically, if you have too much fruit, give it to me and I will make cake out of it.

pear chocolate cake 7

Printer Friendly Recipe
Bittersweet Chocolate and Pear Cake (rewritten but not significantly adapted from Al Di La Trattoria via Smitten Kitchen)

My homegrown pears were small, so I used five of them.

8 tablespoons (1 stick) unsalted butter, melted
1 cup (4.8 ounces) all-purpose flour
1 tablespoon baking powder
½ teaspoon salt
3 eggs, at room-temperature
¾ cup (5.25 ounces) sugar
3 pears, peeled, cored, and diced into ¼-inch cubes
¾ cup (4.5 ounces) bittersweet chocolate chunks

1. Heat oven to 350 degrees. Spray a 9-inch springform pan with nonstick baking spray (or oil and flour the pan). In a small bowl, combine the flour, baking powder, and salt. In a small skillet over medium heat, melt the butter. When the foaming subsides, start swirling the butter around the pan. When the milk solids sink and turn brown and the butter smells nutty, remove the pan from the heat and pour the butter into a small bowl or measuring cup so it stops cooking.

2. In the bowl of a stand mixer fitted with the whisk attachment (or a large bowl if using a hand-held mixer), beat the eggs until light yellow and thick, about 5 minutes on a stand mixer and 9 minutes with a handheld mixer. When the whisk is removed from the bowl, the egg should flow off of it in a thick ribbon. Gradually add the sugar to the eggs, beating for 1 minute after it’s all added. Reduce the mixer speed to its lowest setting and add one-third of the flour mixture, then half of the butter, another third of the flour, the rest of the butter, and the rest of the flour, beating just until combined.

3. Spread the batter evenly in the prepared pan. Evenly distribute the pears and chocolate over the top of the batter. Transfer to the oven and bake until a toothpick inserted into the center of the cake comes out clean, 45-60 minutes. Transfer to a wire rack to cool completely. If desired, dust with powdered sugar just before serving.

pear chocolate cake 5

noir bars

noir bars 7

When I made this, I had eight types of chocolate in my pantry, plus cocoa nibs, plus two types of cocoa. I’m a chocolate hoarder.

noir bars 3

A chocolate cookie topped with chocolate cheesecake filling and finished with chocolate ganache will make a dent in that. The cookie base only has a couple ounces of melted chocolate in it, and I considered replacing some of the flour with cocoa, because, if you’re making a chocolate dessert, it should be as chocolatey as possible, right? No. The other pound of chocolate in the pan is quite enough.

noir bars 4

The middle layer may call itself a cheesecake filling, but it’s made from cream cheese, melted chocolate, powdered sugar, and vanilla extract – so it’s really chocolate cream cheese frosting. Okay, so these were rich. But they were also delicious. And after making chocolate frosting the next day, I’m down to six types of chocolate. Time to start stocking up again.

noir bars 6

Printer Friendly Recipe
Noir Bars (slightly adapted from Sugarcrafter)

The only significant change I’ve made to the original recipe is to increase the cream in the ganache topping. I used the original, lower amount, but when the dessert was chilled, it was too solid – each bite squished out the filling instead of cutting through the topping.

I used a mix of 60% cacao chocolate and 80% cacao chocolate in the topping. Unless you like your chocolate really bitter, I recommend sticking to something closer to 60%.

My favorite way to melt chocolate is in a fake double boiler: Put about 1 inch of water in a saucepan and bring it to a simmer over medium-high heat. Reduce the heat to medium and place a small heatproof bowl (preferably stainless steel, but glass will work; it just takes longer in glass) over the saucepan, making sure the bottom of the bowl doesn’t touch the water. Add the chocolate and stir occasionally with a rubber spatula until the chocolate is completely melted, about 5 minutes.

Chocolate cookie base:
1¾ cup (8.4 ounces) all-purpose flour
½ teaspoon baking soda
8 tablespoons (1 stick) unsalted butter, softened
1 cup (7 ounces) granulated sugar
½ teaspoon salt
1 egg
1 teaspoon vanilla
2 ounces semisweet chocolate, chopped (⅓ cup), melted

Chocolate cheesecake filling:
2 (8-ounce) packages cream cheese, softened
8 tablespoons (1 stick) butter, softened
pinch salt
6 ounces (1½ cups) powdered sugar
4 ounces semisweet chocolate, chopped (⅔ cup), melted
1 teaspoon vanilla

Ganache:
12 ounces semisweet chocolate, chopped (2 cups), melted
1 cup heavy whipping cream

1. Adjust a rack to the middle position and heat the oven to 375 degrees. Spray a 9-by-13-inch pan with nonstick spray. In a medium-sized bowl, combine the flour and baking soda.

2. For the cookie base: Place the butter in the bowl of a stand mixer fitted with the paddle attachment (or a large mixing bowl if you’re using a hand-held mixer). Beat the butter on medium-low speed until it’s smooth, then add the sugar and salt. Continue beating on medium speed until the mixture is light and fluffy, about 2 minutes, scraping the sides of the bowl as needed. With the mixer running, add the egg, then the vanilla and melted chocolate. Reduce the mixer speed to low and gradually add the flour mixture, mixing just until evenly combined.

3. Spread the mixture evenly in the prepared pan. Bake until set, 10-12 minutes. Transfer to a cooling rack and allow to cool to room temperature.

4. For the cheesecake filling: Place the cream cheese, butter, and salt in the bowl of a stand mixer fitted with the paddle attachment. Beat on medium-low speed until smooth. Reduce the speed to low and add the powdered sugar. When the sugar is incorporated, increase the speed to medium-high (high on a hand-held mixer) and beat until smooth and lighter, 2-3 minutes. Add the melted chocolate and vanilla. Spread the mixture over the crust. Chill until set, about 2 hours.

5. For the ganache: Stir together the chocolate and cream. Spread over the filling. Chill until set, about 1 hour.

noir bars 9

peach raspberry galette

peach raspberry galette 10

I know this is crazy, but I’ve already started on my New Year’s resolutions for 2015. Resolution-haters are always saying that they don’t need to make resolutions at the new year, because if they see changes they want to make, they just make them, regardless of the date. And I get their point, but I also think that right after the busy, indulgent holiday season when things slow down to a more manageable pace is a great time to think about personal changes. While I am expecting the next four months to be rushed, I was worried I would lose momentum by the new year, so I’m dipping my toe in now.

peach raspberry galette 2

My goals are mostly cooking-related, as usual:

1) Use more cookbooks. It’s not the first time I’ve made this resolution, but I didn’t do a great job before. This time, I’m going to make myself a schedule to stick to, and hopefully that will lead to a routine. Because I love cookbooks so much, but if I don’t use them, I feel guilty for having them.

peach raspberry galette 3

2) Cook a wider variety of cuisines. There is delicious food out there that isn’t Italian, and maybe I should try some of that once in while. I’m particularly interested in Asian food. I’m intimidated by the ingredient availability issue, but if I’m cooking more of it, I should be able to use up ingredients before they get lost in the back of the refrigerator or pantry.

peach raspberry galette 4

3) Read Harold McGee’s On Food and Cooking. Also not the first time I’ve made this resolution. I started it but got bogged down.

4) Bake more pastries. I’ve gotten into a bit of a bar cookie rut, partly because almost everything I bake is brought to work to share, and it’s easier for coworkers to grab a fruit crisp bar than a slice of pie. But after four years of almost weekly treats, my coworkers seem happy with anything I bring in.

peach raspberry galette 5

So far, I’m doing good with my not-New Year resolutions. I’ve been going to bed a little earlier almost every night to read On Food and Cooking. I recently made kung pao tofu, and last night, we had summer rolls for dinner. And I made these galettes from Tartine, perhaps my favorite baking book. Since they’re sort of pastries, so I killed two birds with one stone.

peach raspberry galette 6

My coworkers, as expected, did not mind cutting themselves a slice of galette, transferring it to a plate, and spooning a dollop of whipped cream on top. And I had fun tackling a more ambitious baking project than usual, even on a weeknight. Maybe I need to join the New Year’s resolution haters and create my own not-New Year’s resolution tradition.

peach raspberry galette 7

Printer Friendly Recipe
Raspberry Peach Galette (adapted from Elisabeth Prueitt and Chad Robertson’s Tartine)

Makes two 10-inch galettes, serving about 16

Galettes are often lauded as the lazy man’s pie, with only one crust and no crimping. This recipe belies that description. In order to maximize the flakiness of the crust, the butter is rolled into the flour several times, then the dough is rolled several more times after the water is added. I was pleasantly surprised that this process only took half an hour.

I didn’t use quite enough fruit, mostly because I was too lazy to peel and slice a fifth peach and too cheap to buy a second container of raspberries. However, I am recommending that you use the extra fruit, as my crust to fruit ratio was slightly high, even as delicious as this crust is. Tartine recommends substantially more crust, but the reduced amounts listed here (which are what I used) were perfect for two galettes (or it would be, with a little more fruit than I used).

24 tablespoons (3 sticks) unsalted butter
18 ounces (3¾ cups) unbleached flour
2 teaspoons sugar
1¼ teaspoons salt
¾ cup ice water
4 cups peaches (4-5 large peaches), peeled and pitted, sliced ⅛-inch thick
2 (6-ounce) containers raspberries
¼ to ½ cup (1.75 to 3.5 ounces) sugar, plus more for sprinkling
1 small egg, whisked with a pinch of salt

1. Cut the butter into ½-inch cubes; freeze for 10 minutes. In a medium bowl, mix the flour, sugar, and salt.

2. Transfer the dry ingredients to a pastry cloth or clean work surface; spread out to ⅓-inch thickness. Scatter the butter pieces over the flour, tossing them to coat with flour. Use a rolling pin to flatten the butter pieces into the flour. When the flour/butter mix has been rolled to the edge of your work surface, shape it back together to a ⅓-inch thickness. Repeat the rolling and reshaping three more times, until the mixture resembles large flakes.

3. Form the mixture into a pile and clear a well in the middle of the pile. Pour in the water, then use a bench scraper to mix the dough into the water with a cutting motion. Use a well-floured rolling pin to roll the dough into a rectangle about 10 by 14 inches. Fold it into thirds, then in half the opposite direction. Repeat the rolling and folding three more times. Roll the dough into a 14-inch by 7-inch rectangle. Cut the dough in half to form two 7-by 7-inch squares. Wrap the dough tightly and refrigerate for at least an hour or overnight.

4. Adjust an oven rack to the middle position and heat the oven to 375 degrees. Line two baking sheets with parchment paper or silicone mats. Roll each square of dough into a 14-inch round. Transfer the rounds to the prepared baking sheets; chill 10 minutes.

5. Divide the peaches evenly between the two dough rounds, leaving a 2-inch border. Top with the raspberries, then sprinkle 2-4 tablespoons of sugar (depending on how ripe and sweet your fruit is) over each pile of fruit. Fold the sides of dough over the fruit, pleating as necessary. Brush the dough with the egg wash, then sprinkle with sugar.

6. Bake until the fruit is bubbling and the crust is browned, 45-55 minutes. Remove from the oven and let cool on the pan. Serve warm or at room temperature.

peach raspberry galette 8

blackberry cake with raspberry filling

blackberry cake 9

I require a weekend for my birthday. Not a week, certainly not a month, just two days and one evening to do as many as my favorite things as possible and as few of my least favorite things. So wine and a new novel are in; laundry is most definitely out.

blackberry cake 4

Baking and eating my birthday cake is in, but I was really on top of things this year and did all the steps I don’t like so much beforehand. That includes digging around in the messy, nearly unreachable cabinet for pans, lining the pans, and pureeing and straining the fruit. All that was left to do on my actual birthday was add things to the mixer and nibble on frosting while assembling the cake.

blackberry cake 2

I’d originally made this cake for a friend’s bridal shower, but there were two issues: 1) I only got one piece, and 2) I didn’t save any for Dave. He’s pretty adamant about not being a dessert guy and even less so a cake guy, but our friends had such good things to say about the cake after the party that he was sorry he missed it.

blackberry cake 6

So choosing this year’s birthday cake wasn’t a hard decision. Making the cake wasn’t hard either, since I’d left only my favorite parts of baking for my birthday itself. I made a small cake, but I had just enough to last for my entire birthday weekend. Cake everyday is definitely on the list for an awesome birthday.

blackberry cake 10

Printer Friendly Recipe
Blackberry Cake with Raspberry Filling and Cream Cheese Frosting (cake adapted from Cook’s Illustrated White Cake recipe; filling is just barely adapted from Cook’s Illustrated Raspberry Coulis)

The bride’s wedding colors are Tiffany blue and red, so I originally made a blackberry cake hoping that it would turn out blue, like Elly’s, with raspberry filling as the red. I ended up with a purple cake with pink filling, but no one complained. However, you could mix this up with other berries – blackberries, raspberries, blueberries, or strawberries can be used in both the cake and the filling. Fresh or frozen and thawed berries can be used.

I made a three-layer cake for my birthday, and a four-layer cake for the shower, which I preferred. I love the raspberry filling, so an extra layer of it is very welcome.

For heavy decorations like the roses, increase the frosting recipe by 50% (using 12 tablespoons butter, 12 ounces cream cheese, and 6 cups powdered sugar).

Cake:
¾ cup pureed and strained blackberries (from 8 ounces of blackberries)
⅓ cup milk, at room temperature
1 teaspoon vanilla extract
2¼ (9 ounces) cups cake flour
3 teaspoons baking powder
12 tablespoons unsalted butter, at room temperature
1½ cups (10.5 ounces) sugar
¾ teaspoon salt
4 egg whites, at room temperature

Raspberry Filling:
6 ounces fresh raspberries (or thawed if frozen)
2½ to 3½ tablespoons granulated sugar
pinch table salt
1 teaspoon lemon juice

Cream Cheese Frosting:
8 tablespoons (1 stick) butter, at room temperature
8 ounces cream cheese, at room temperature
pinch salt
2 teaspoons vanilla extract
4 cups powdered sugar

1. For the cake: Heat the oven to 350F. Spray two 8-inch round cake pans with baking spray (or grease and flour the pans). Line with parchment or waxed paper and grease the paper.

2. Using a blender, puree the blackberries. Transfer them to a fine-mesh strainer set over a small bowl; use a spoon or rubber spatula to press the liquid through the strainer, discarding the seeds. Measure ¾ cup of puree. Stir the milk and vanilla extract into the blackberry puree. In a separate small bowl, combine the flour and baking powder.

3. Place the butter, sugar, and salt in the bowl of an electric mixer fitted with the paddle attachment (or a large bowl if using a hand mixer). Beat on medium speed for 2 minutes, until light and fluffy. Add the egg whites one at a time, beating well after each addition. Reduce the mixer speed to low and add one-third of the flour mixture, followed immediately by half of the blackberry mixture, mixing just until incorporated. Repeat with another third of the flour and the rest of the blackberry puree, then the last of the flour. Scrape down the sides of the bowl and mix on medium-low speed for 15 seconds longer.

4. Divide the cake between the prepared pans. Bake for 22 to 28 minutes, or until a cake tester or wooden toothpick inserted into the center comes out clean. Allow the layers to cool in the pans for 5 to 10 minutes. Invert and turn out onto wire racks and peel off the paper liners. Let stand until completely cooled before assembling the cake, at least one hour.

5. For the filling: In a medium saucepan, bring the raspberries, 1 teaspoon water, 2½ tablespoons sugar, and salt to bare simmer over medium heat, stirring occasionally; cook until the sugar is dissolved and the berries are heated through, about 1 minute longer. Transfer the mixture to the blender; puree until smooth, about 20 seconds. Strain through a fine-mesh strainer into a small bowl, pressing and stirring the puree with a rubber spatula to extract as much seedless puree as possible. (there’s no need to wash either the blender or the strainer between the blackberries and the raspberries.) Stir in the lemon juice and additional sugar, if desired. Cover with plastic wrap and refrigerate until cold, at least 1 hour. Stir to recombine before serving. Can be refrigerated in airtight container for up to 4 days.

6. For the frosting: Place the butter, cream cheese, and salt in the (clean) bowl of an electric mixer fitted with the paddle attachment; beat on medium speed until smooth. Switch to the whisk attachment; on low speed, gradually add the powdered sugar, beating until it’s just incorporated. Increase the speed to high and beat for 5 minutes, scraping down the sides of the bowl as necessary.

7. To assemble: To make the cakes easier to handle, wrap each tightly in plastic wrap and chill for at least an hour or up to overnight. Working with one cake at a time, unwrap it and use a serrated bread knife to cut the cakes horizontally in half. If you’re using a cake board, put a small spoonful of frosting in the center of it to glue the cake to the board; if you’re not using a cake board, line the perimeter of your serving dish with strips of wax paper, then put a small spoonful of frosting in the center of the serving dish. Center a layer of cake over the frosting, cut side down. Spread a thin layer of cream cheese frosting over the cake layer. Spoon 3 tablespoons of raspberry filling over the frosting, spreading it to within about an inch of the edge. Center another cake layer over the filling, cut side-down. Repeat the layering of frosting, filling, and cake twice more. Spread a thin layer of frosting evenly over the top and sides of the cake to seal in crumbs. If the layers slide around while you’re spreading the frosting, push wooden skewers from the top to the bottom of the cake in three places to secure the layers. Chill the cake, uncovered, for 30 minutes to 2 hours to set the frosting. Remove the skewers if necessary, then spread the remaining cream cheese frosting evenly over the top and sides of the cake, decorating as desired. Either transfer the cake on the cake board to a serving platter, or carefully remove the strips of wax paper to leave a clean serving platter around the sides of the cake.

blackberry cake 8

cocoa nib peanut butter bites

hippie cookies 4

You can call these Peanut Butter Bites if you want, but for me, they will forever be known as Hippie Cookies. Sweetened with dates? Fat from all-natural peanut butter? Cocoa nibs, of all things?! I kept hearing people talk about cocoa nibs, so I bought some, and it turns out that they’re not even good. They’re like chocolate, but mean. There’s no sugar in them at all, just bitterness, like that time when you were a kid and accidentally ate your mom’s unsweetened baking chocolate.

hippie cookies 2

Still, the cocoa nibs are perfect in these cookies, because it turns out that you don’t need processed sugar to make a very sweet snack; dates are plenty sweet on their own. The bitter cocoa nibs are actually the perfect balance.

hippie cookies 3

I just loved these cookies so much, and not just because I filed them under “snack” instead of “dessert” and therefore enjoyed them without guilt. They’re shockingly good, or maybe it’s just shocking to someone used to adding refined sugar and butter to everything sweet. Who knew hippie cookies would be so delicious?

hippie cookies 6

Printer Friendly Recipe
Cocoa Nib Peanut Butter Bites (adapted from Sprouted Kitchen)

Because these aren’t baked, feel free to taste and add – more salt, more cinnamon, more cocoa nibs – to your taste, as well as more peanut butter to bring the mixture together, if necessary.  The amount of salt you add will also depend on whether you use salted or unsalted peanut butter.  You could also add dark chocolate instead of cocoa nibs, although the cocoa nibs balanced the sweet dates really well.

1 cup almonds
¼-½ teaspoon table salt
1 cup pitted dates
1 teaspoon vanilla extract
¼ teaspoon cinnamon
½ cup natural peanut butter
½ cup cocoa nibs

In the bowl of a food processor, process the nuts and salt until evenly ground; do not, however, process long enough to make almond butter. Add the dates, vanilla, and cinnamon, and process until the dates are minced and evenly dispersed. Add the peanut butter and pulse to combine, then repeat with the cocoa nibs. Form the mixture into 1-inch balls, then flatten gently to about ⅓-inch thick. Cookies can be covered and stored in the refrigerator for up to a week.

hippie cookies 5

blueberry pie

blueberry pie 5

The two weeks a year when blueberries are reasonably priced are almost a tease. Blink and you miss it! Down here in the desert, some years it doesn’t happen at all (or maybe I blinked). They went on sale recently, and I loaded up my cart. I didn’t know what I was going to make for dessert that weekend, but I knew it would have lots of blueberries in it.

blueberry pie 1

Pie. Pie is so classic, and like I recently said, I don’t get many opportunities to make it. While pies aren’t the easiest desserts to make, at least blueberries don’t require any tedious prep like most other fruits – that is, unless you choose a high-maintenance Cook’s Illustrated recipe for blueberry pie.

blueberry pie 3

I did, because I hate soupy pies enough to pre-cook the filling and peel and grate an apple into the mix. And clean out the coffee grinder to powder the tapioca when the grinder I keep in the kitchen for non-coffee things broke. All the cleaning, dough-rolling, pre-cooking, and apple-shredding was worth it when I was rewarded with a flaky crust over a juicy but not soupy filling of my favorite summer fruit.

blueberry pie 4

Printer Friendly Recipe
Blueberry Pie (pretty much straight from Cook’s Illustrated, except for I don’t use their crust)

CI notes: This recipe was developed using fresh blueberries, but unthawed frozen blueberries (our favorite brands are Wyman’s and Cascadian Farm) will work as well. In step 4, cook half the frozen berries over medium-high heat, without mashing, until reduced to 1¼ cups, 12 to 15 minutes. Grind the tapioca to a powder in a spice grinder or mini food processor. If using pearl tapioca, reduce the amount to 5 teaspoons.

dough for double-crust pie (I always make this one)
6 cups fresh blueberries (about 30 ounces) (see note)
1 Granny Smith apple, peeled and grated on large holes of box grater
2 teaspoons grated zest and 2 teaspoons juice from 1 lemon
¾ cup sugar (5¼ ounces)
2 tablespoons quick-cooking tapioca, ground (see note)
pinch table salt
2 tablespoons unsalted butter, cut into ¼-inch pieces
1 large egg, lightly beaten with 1 teaspoon water

1. Adjust oven rack to lowest position, place rimmed baking sheet on oven rack, and heat oven to 400 degrees. Place 3 cups berries in medium saucepan and set over medium heat. Using potato masher, mash berries several times to release juices. Continue to cook, stirring frequently and mashing occasionally, until about half of berries have broken down and mixture is thickened and reduced to 1 ½ cups, about 8 minutes. Let cool slightly.

2. Place grated apple in clean kitchen towel and wring dry. Transfer apple to large bowl. Add cooked berries, remaining 3 cups uncooked berries, lemon zest, juice, sugar, tapioca, and salt; toss to combine. Transfer mixture to dough-lined pie plate and scatter butter pieces over filling.

3. Roll out second disk of dough on generously floured (up to ¼ cup) work surface to 11-inch circle, about ⅛ inch thick. Using 1¼-inch round biscuit cutter, cut round from center of dough. Cut another 6 rounds from dough, 1½ inches from edge of center hole and equally spaced around center hole. Roll dough loosely around rolling pin and unroll over pie, leaving at least ½-inch overhang on each side.

4. Using kitchen shears, trim bottom layer of overhanging dough, leaving ½-inch overhang. Fold dough under itself so that edge of fold is flush with outer rim of pie plate. Flute edges using thumb and forefinger or press with tines of fork to seal. Brush top and edges of pie with egg mixture. If dough is very soft, chill in freezer for 10 minutes.

5. Place pie on heated baking sheet and bake 30 minutes. Reduce oven temperature to 350 degrees and continue to bake until juices bubble and crust is deep golden brown, 30 to 40 minutes longer. Transfer pie to wire rack; cool to room temperature, at least 4 hours. Cut into wedges and serve.

blueberry pie 6

margarita cupcakes

margarita cupcakes 5

I haven’t really been drinking margaritas lately, since we’ve moved from daiquiris into experiments with all sorts of tiki drinks, but eating them is another thing. I hosted a taco bar party recently, where I supplied corn tortillas and beef barbacoa and everyone else brought sides or toppings. I thought about serving margaritas, but I wasn’t excited about squeezing a hundred limes; sangria for a crowd is a whole lot easier.

margarita cupcakes 2

But a taco party without margaritas in any form just isn’t right, so we’d have them for dessert instead. This is a white cupcake flavored with lime zest, then brushed very liberally with a mixture of tequila and orange liqueur. The buttercream, light and airy swiss meringue, is flavored with more lime juice and more tequila.

margarita cupcakes 3

I’ve found it’s nearly impossible to get the flavor of liquor in the batter to come across after a dessert is baked (bourbon pound cake seems to be an exception), so I don’t even attempt that here, just brushing – and then brushing some more, and then more – the baked cakes with liquor. The cupcakes aren’t so strong that you’ll gag on the fumes, but they do have a hint of bite to them, just like the best margaritas. And I had way more fun making cupcakes and frosting than I would have had squeezing lime after lime after lime.

margarita cupcakes 4

Printer Friendly Recipe
Margarita Cupcakes (adapted from Dorie Greenspan’s Perfect Party Cake from Baking: From my Home to Yours)

Makes 24 cupcakes

It seems like a lot of liquor to brush into the cupcakes, but trust me that you will use it all, and the cupcakes won’t be soggy.

Cupcakes:
3¼ cups plus 2 tablespoons (13.5 ounces) cake flour
1½ teaspoons baking powder
¼ teaspoon baking soda
1 teaspoon salt
1 cup plain yogurt
6 large egg whites
2¼ cups (15.75 ounces) granulated sugar
1 tablespoon grated lime zest
12 tablespoons (1½ stick) unsalted butter, at room temperature
2 tablespoons lime juice
6 tablespoons tequila
3 tablespoons orange liqueur

Buttercream:
1 cup (7 ounces) granulated sugar
4 large egg whites
pinch salt
24 tablespoons (3 sticks) unsalted butter, at room temperature
4 tablespoons fresh lime juice (from 2 limes)
2 tablespoons tequila

1. For the cupcakes: Center a rack in the oven and preheat the oven to 350 degrees F. Line 24 cupcake cups with liners. Sift together the flour, baking powder and salt. Whisk together the buttermilk and egg whites in a medium bowl.

2. Put the sugar and lime zest in a mixer bowl mix with paddle attachment until the sugar is moist and fragrant. Add the butter and beat at medium speed for a full 3 minutes, until the butter and sugar are very light. Beat in the lime juice, then add one third of the flour mixture, still beating on medium speed. Beat in half of the milk-egg mixture, then beat in half of the remaining dry ingredients until incorporated. Add the rest of the milk and eggs, beating until the batter is homogeneous, then add the last of the dry ingredients. Finally, give the batter a good 2-minute beating to ensure that it is thoroughly mixed and well aerated.

3. Divide batter among cupcake liners, filling them ⅔ to ¾ of the way. Bake until a toothpick inserted into the center of a cupcake comes out clean, 18-24 minutes, rotating the pans once front to back if your oven bakes unevenly. Transfer the pans to wire racks; cool about 5 minutes, them remove the cupcakes. Cool cupcakes completely on a rack before frosting.

4. Combine the tequila and orange liqueur in a small dish. Using a toothpick or skewer, poke about 10 holes in the top of each cupcake, almost to the base. Brush with the alcohol mixture. Keep brushing the cupcakes until all the alcohol has been used.

5. For the buttercream: Combine the egg whites, sugar, and salt in a metal mixing bowl set over a pot of simmering water. Heat, whisking frequently, until the mixture reaches 160 degrees and the sugar has dissolved. Using the whisk attachment, beat on medium-high speed until stiff peaks form and the mixture has cooled to room temperature, about 6 minutes. Reduce the speed to medium and add the butter, 2 tablespoons at a time, adding more once each addition has been incorporated. If the frosting looks soupy or curdled, continue to beat on medium-high speed until thick and smooth again, about 3-5 minutes more. Stir in the lime juice and tequila; mix just until incorporated. Use a wide star tip to pipe frosting onto the cupcakes, garnishing with tiny lime wedges and lime zest.

margarita cupcakes 6

strawberry shortcake cupcakes

strawberry shortcake cupcakes 10

I’ve had these cupcake wrappers for at least a year, maybe close to two years. But because they’re tulips, I was determined that I could only use them in the spring, and sometimes, a whole month or two can go by where I don’t think about cupcake wrappers. If that month is April and May, then it’s too late for tulips. Having actually remembered this year, I wanted to make the most springy cupcake I could.

strawberry shortcake cupcakes 1

Strawberries are the obvious choice. And what dessert is more springy than strawberry shortcake?

strawberry shortcake cupcakes 2

This isn’t too different than a cupcake adaptation of this strawberry cream cake, but the cake portion of that recipe is meant to be dense enough to stand up to layers of strawberries and whipped cream. I wanted something fluffier, so I started with my favorite basic vanilla cake. The filling in that strawberry cream cake would be perfect for adding to the middle of cupcakes, because the strawberries are minced and juicy, just right for maximizing the flavor they can contribute in just a small hole in the middle of each cupcake.

strawberry shortcake cupcakes 4

The topping is perfect as well, since the cream cheese stabilizes the whipped cream enough to mound on top of each cupcake. With a slice of strawberry over the hole filled with strawberries to even out the top of the cupcake, plus more fresh strawberries on top, there were plenty of berries to balance the cake and rich cream topping. It was a perfect combination.  Tulips and strawberries, what’s better than that for spring?

strawberry shortcake cupcakes 12

Strawberry Shortcake Cupcakes (cake adapted from Confections of a Foodie Bride; filling and topping adapted from Cook’s Illustrated’s Strawberry Cream Cake)

24 cupcakes

Vanilla cupcakes:
3 cups (12 ounces) cake flour
1 tablespoon baking powder
1 teaspoon salt
16 tablespoons (2 sticks) unsalted butter, at room temperature
2 cups (14 ounces) sugar
4 large eggs, at room temperature
1¼ cups buttermilk, at room temperature
1 tablespoon vanilla extract

Strawberry filling:
8 ounces fresh strawberries (about ½ quart), washed, dried, and stemmed
1 tablespoon sugar
½ tablespoon Kirsch or port
Pinch table salt

Whipped cream topping:
8 ounces cream cheese, room temperature
½ cup (3.5 ounces) sugar
1 teaspoon vanilla extract
pinch table salt
2 cups heavy cream

6-8 strawberries, sliced crosswise into rounds
additional strawberries for garnish

1. For the cupcakes: Preheat the oven to 350°F. Line two cupcake pans with paper liners. In a medium bowl, combine the cake flour and baking powder.

2. Place the butter and salt in the bowl of an electric mixer fitted with the paddle attachment (or a large bowl if using a hand mixer). Beat on medium-high speed for 3 minutes, until light and creamy in color, scraping the sides of the bowl as necessary.

3. Gradually add the sugar to the butter mixture, beating until fluffy. Add the eggs one at a time, beating until incorporated. Combine the buttermilk and the vanilla extract in a liquid measuring cup. With the mixer on low speed, add one-third of the flour mixture, followed immediately by half of the buttermilk, mixing just until incorporated. Repeat with another third of the flour and the rest of the buttermilk, then the last of the flour. Mix for 15 seconds longer.

4. Divide the batter between the prepared paper liners, filling each about two-thirds of the way full. Bake 18-22 minutes, or until a toothpick inserted in the center comes out clean. Allow to cool in the pans for 5 minutes, then transfer to a cooling rack to cool completely.

5. For the filling: Quarter the berries; toss with sugar in a medium bowl and let sit 1 hour, stirring occasionally. Strain the juices from the berries and reserve (you should have about ¼ cup). In the workbowl of a food processor fitted with the metal blade, give the macerated berries five 1-second pulses (you should have about ¾ cup). In a small saucepan over medium-high heat, simmer the reserved juices and Kirsch until the mixture is syrupy and reduced to about 1½ tablespoons, 3 to 5 minutes. Pour the reduced syrup over the macerated berries, add a pinch of salt, and toss to combine.

6. For the topping: When the cake has cooled, place the cream cheese, sugar, vanilla, and salt in the bowl of a standing mixer fitted with the whisk attachment. Whisk at medium-high speed until light and fluffy, 1 to 2 minutes, scraping down the bowl with a rubber spatula as needed. Reduce the speed to low and add the heavy cream in a slow, steady stream; when it’s almost fully combined, increase the speed to medium-high and beat until the mixture holds stiff peaks, 2 to 2½ minutes more, scraping the bowl as needed (you should have about 4½ cups).

7. To assemble: With a paring knife, carve a cone out of the center of each cupcake. Use a slotted spoon to transfer some strawberry filling to the cavity; top each hole with a round slice of strawberry. Frost the cupcakes; garnish with additional strawberries. If not serving within about an hour, refrigerate for up to 8 hours. Let stand at room temperature for at least 30 minutes or up to an hour before serving (otherwise, the cake will seem hard and stale).

strawberry shortcake cupcakes 9