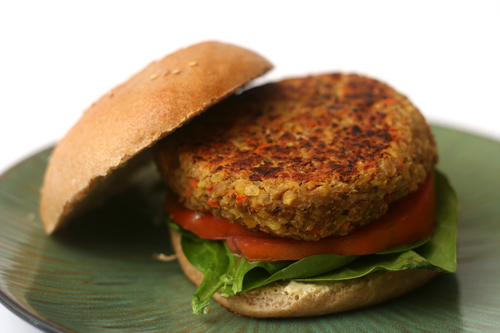
lentil goat cheese burgers

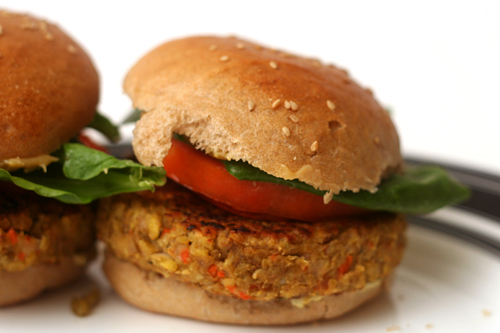
Burgers are just sandwiches with patties in the middle. I don’t care if that patty is beef, bird, or beans. What I do require is that it not be bread.

A carb-filled patty between two ends of a bun doesn’t make nutritional sense, but it does seem like most vegetarian burgers are bound by large amounts of bread crumbs, oatmeal, or other grains. Whether whole or refined, these are still grains where I want there to be protein.

Cara is a great source for high-protein, low-carb ideas like these lentil burgers, which are bound with just a tablespoon of bread crumbs per serving. The protein – and, more importantly, the flavor – is increased even more with the addition of creamy, tangy goat cheese, one of my favorite ingredients.

While certainly healthy enough for a good weeknight dinner, prepping these burgers is not a short process from start to finish. However, the active time is not unreasonable, making these a great option to make ahead of time, leaving just the final searing for dinner time. It’s nice to have a meal as hearty but nutritious as this one stashed in the freezer.

One year ago: Brown Soda Bread
Two years ago: Deli-Style Rye Bread
Three years ago: Rice Pudding

Printer Friendly Recipe
Lentil Goat Cheese Burgers (adapted from Cara’s Cravings)

Make 4 burgers

Don’t be shy with the salt. I always need more than I expect in these.

¾ cup dried lentils
1 bay leaf
salt
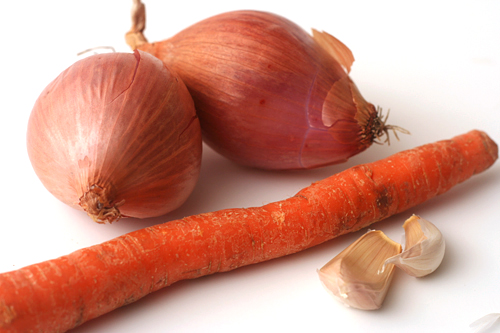
1 large carrot, coarsely chopped
2 large shallots, coarsely chopped
2 cloves garlic
1 tablespoon olive oil, divided
1 tablespoon balsamic vinegar
4 ounces goat cheese
¼ cup breadcrumbs (fresh or dried)
¼ teaspoon black pepper
1 egg
for serving: buns, mustard, lettuce, tomato

1. Combine lentils, bay leaf, ½ teaspoon salt and 3 cups water in medium saucepan; bring to a boil over medium-high heat. Reduce the heat and simmer until the lentils are tender, 18-20 minutes. Drain the lentils, discarding the bay leaf.

2. Meanwhile, process the carrot, shallots, and garlic in the food processor until finely chopped but not pureed, about 5 seconds. (Do not clean processor bowl or blade.) Heat 1½ teaspoons olive oil in a medium nonstick skillet over medium heat; sauté the vegetables with a pinch of salt until softened and the shallots just browns around the edges, about 5 minutes. Add the vinegar; cook, stirring occasionally, until it has reduced to a syrupy consistency, 1-2 minutes.

3. Combine the lentils, sautéed vegetables, cheese, bread crumbs, and pepper in the food processor; process until evenly mixed and finely ground. Taste and adjust the seasoning if necessary. Add the egg; pulse until just combined.

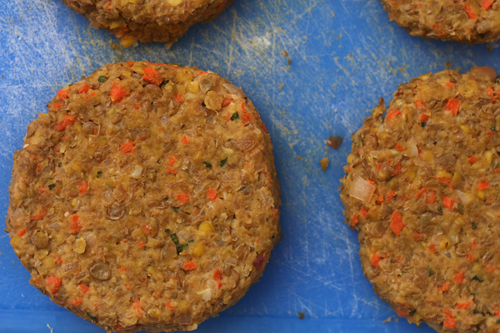
4. Divide the dough into four portions; shape each one into a disk about ½-inch tall and 4 inches across (or approximately the diameter of your burger buns). Chill, uncovered, for at least 30 minutes or up to 2 days (cover if longer than 30 minutes).

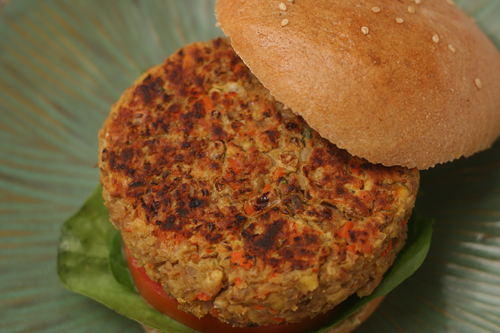
5. Heat the remaining 1½ teaspoons of oil in a 12-inch nonstick pan over medium to medium-high heat. Using a spatula, carefully lower each patty into the pan; cook without moving for 4 minutes, until the bottom side is browned. Flip the patties and continue cooking for another 6 minutes until the second side is browned. Serve immediately with buns and toppings.
roasted tomato soup

When I was a kid, my friend Katie and I played a game in which we had a restaurant. We wrote up a menu and would let our parents order food from it, and then we’d bring them what they ordered. In other words, our parents paid for their food twice – once at the grocery store, and then a second time to Katie and I after we heated it up in the microwave for them.

Among other delicacies, our menu included nachos (Cheez Whiz and chips) and tomato soup. Tomato soup was probably our specialty. At Katie’s house, the Campbell’s concentrate was mixed with milk, but at my house, we added water. Katie and I were nothing if not accommodating to our customers’ preferences.

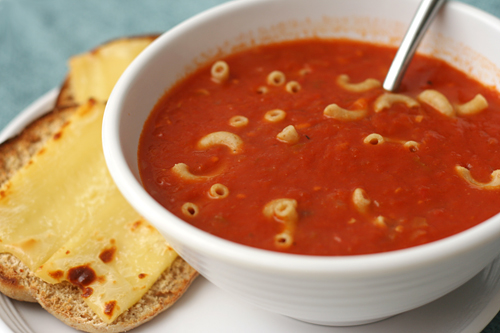
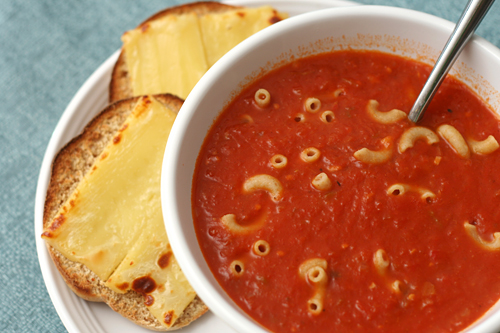
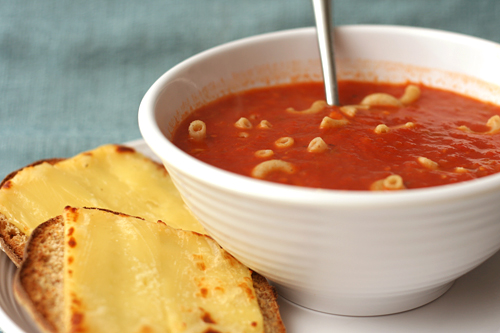
This tomato soup is not that tomato soup. It’s brighter, fresher, but still deeply flavored from the roasted tomatoes. The shallots make it just a little sweet, and a pinch of allspice adds warmth. This soup, topped with whole wheat macaroni noodles and served alongside cheese toast, is my favorite meal. It’s even worth ordering in a real restaurant.

One year ago: Masa Pancakes with Chipotle Salsa and Poached Eggs (I’m about halfway through that same bag of masa harina.)
Two years ago: Spinach Bread
Three years ago: Raspberry Bars

Printer Friendly Recipe
Roasted Tomato Soup (adapted from Cooks Illustrated)

6 servings

This recipe is messier without an immersion blender, but I made it that way for years. Use a large slotted spoon to transfer the solids to the blender with a cup or two of liquid and blend to puree. Pour the pureed mixture back into the liquid; stir in the brandy. You can blend everything instead of just the solids, but the soup will turn orange instead of red.

Feel free to add in a few tablespoons of cream (or pureed cottage cheese for a healthier alternative) at the end if you’re like Katie’s family and prefer your tomato soup creamy.

2 (28-ounce) cans whole tomatoes in juice
1½ tablespoons brown sugar
2 tablespoons butter
4 shallots, chopped
1 tablespoon tomato paste
⅛ teaspoon allspice
1¾ cup low-sodium chicken broth
¼ cup brandy

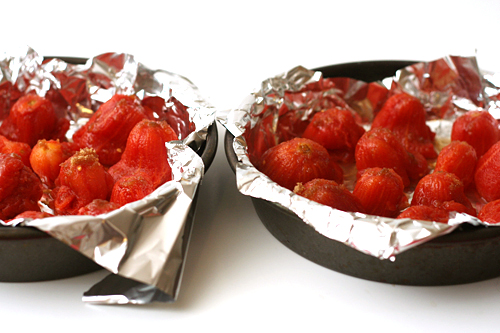
1. Adjust an oven rack to the upper middle position and heat the oven to 450 degrees. Line the bottom and sides of two 8- or 9-inch round pans with aluminum foil. Use a slotted spoon to remove the tomatoes, one by one, from their juice. Open the tomato on the side opposite the stem. Holding the tomato loosely in a fist, gently squeeze the tomato to remove most of its juice. Place the tomato stem-side up on one of the prepared pans. Repeat with the remaining tomatoes. Sprinkle the tomatoes with the brown sugar.  Roast the tomatoes until they are dry and lightly browned, about 45 minutes. Reserve the tomato juice.

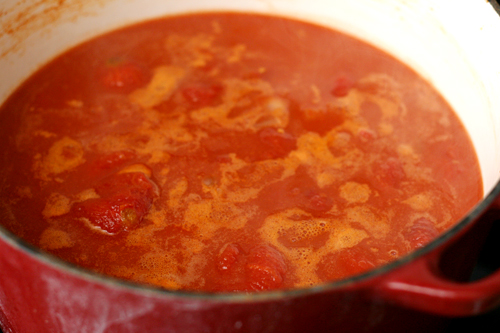
2. Melt the butter in a large saucepan over medium-low heat. Add the shallots, tomato paste, and allspice to the pot; stir, then cover the pot and cook, stirring occasionally, until the shallots are soft, about 10 minutes. Add the chicken broth, reserved tomato juice, and roasted tomatoes. Bring to a simmer over medium-high heat, then reduce the heat to low, cover, and simmer 15 minutes. Use an immersion blender to puree the soup. Stir in the brandy and serve.

This recipe is in one of my earliest blog entries, but I have simplified and healthified (but not de-tastified) the soup since then, so I thought it was worth posting an updated version.

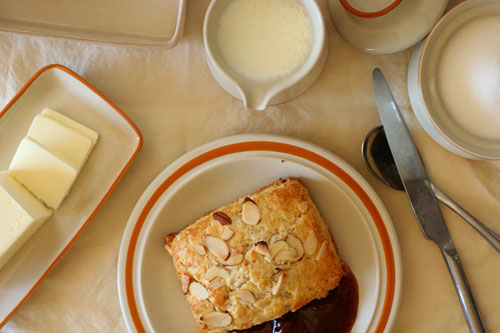
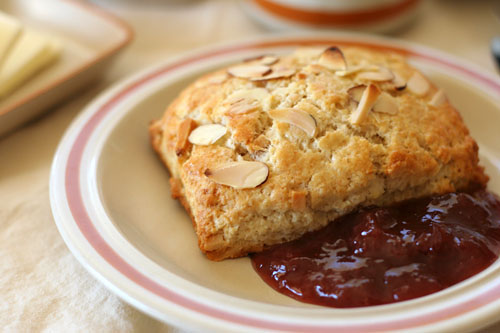
toasted almond scones

My parents are visiting this weekend (Hi Mom!), so of course I want to figure out the perfect menu that will taste amazing, fit everyone’s food preferences, reflect how I like to cook, and magically prepare itself while we’re out doing touristy things. Wish me luck!

My dinner plans are coming together, but I’ve been stumped at breakfast. Until I remembered that I have almond scones the freezer. Perfect! My mom loves scones and has been eating a lot of almonds lately. I’m sure my dad would rather have bacon (or sausage or ham or really any form of meat) and eggs, but when is it ever about the dad when your parents visit?

I believe my mom started really enjoying scones while she was visiting New Zealand several years ago. Unlike my retired world-traveling parents, I have never been to New Zealand, but I’m guessing the scones there are less sweet than we usually make them here in the US. If that’s the case, my mom will especially love these lightly sweetened biscuits. For eating plain, I might add a bit more sugar next time, but with a generous smear of jam, these were perfect.

Mike chose this recipe for Tuesdays with Dorie, and he has the recipe posted (as a link to the pdf; don’t miss it!). I doubled the salt.

One year ago: Honey Wheat Cookies
Two years ago: Caramel Crunch Bars

beef short ribs braised in tomato sauce

When my sister visits with her young kids, I like to make a dish on the first night that’s particularly kid-friendly. While they aren’t picky eaters, they love pizza and spaghetti and hot dogs as much as any other kid. But if I’m cooking, the food has to be Bridget-friendly too. In other words, it has to be fun to cook.

I’ve wanted to perfect a recipe like this for a long time. I had in mind something that wasn’t just tomato sauce with meat added. I wanted the meat to shine, and I wanted the sauce itself to taste distinctly meaty.

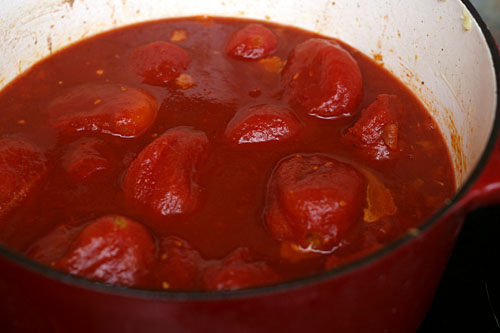
To get the intensity I was hoping for, I pulled out every umami trick I know. Beef, obviously, and all the tomatoes don’t hurt. Dried porcini mushrooms, tomato paste (added with the aromatics and browned slightly), and pancetta added layers of meaty flavor.

This is my favorite type of recipe to make. Ingredients are added incrementally, food gets browned and delicious, and all the while, I get to stir and inhale the aroma, stir and inhale. It gets better after the sauce has simmered for hours, and then it becomes stir and taste, stir and taste. Even better is enjoying the meal with pasta, freshly baked bread, salad, a bottle of red wine, and two rambunctious kids and their parents.

One year ago: Lighter Chicken and Dumplings
Two years ago: Chopped Salad
Three years ago: Banana Cream Pie

Printer Friendly Recipe
Beef Short Ribs Braised in Tomato Sauce

½ ounce dried porcini mushrooms
1 teaspoon olive oil
4 (3-4 pounds total) beef short ribs
salt
3 ounces pancetta, diced
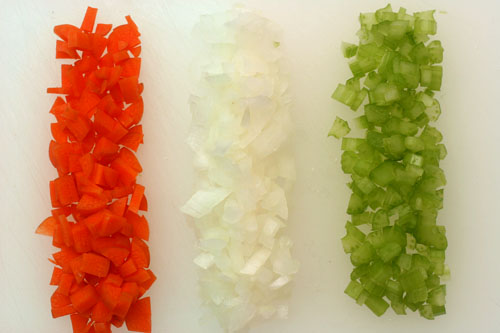
1 onion, diced small
1 carrot, diced small
3 garlic cloves, minced
2 tablespoons tomato paste
½ teaspoon oregano
½ cup wine (red or white, just something that isn’t too sweet or oaky)
2 (28-ounce) cans whole tomatoes with their juice

1. Rinse the mushrooms to remove any dirt clinging to them. Cover them with ½ cup water in a small microwave-safe bowl. Cover the bowl with plastic wrap, poke a few holes in the plastic wrap, and microwave on high power for 30 seconds. Let stand until the mushrooms are softened, about 5 minutes. Use a fork to lift the mushrooms from the liquid; mince the mushrooms, reserving the liquid.

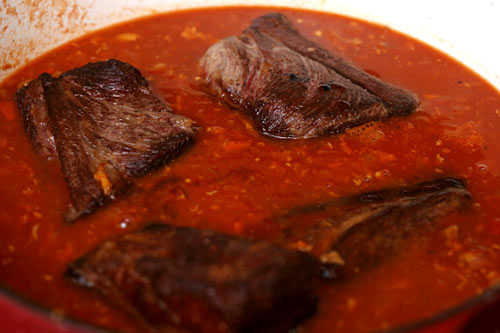
2. Season the beef ribs with salt. Meanwhile, in a 5-quart Dutch oven, heat the olive oil over medium-high heat until it flows like water when the pot is tilted. Add the beef ribs and cook, for 2-3 minutes per side, until richly browned on all sides. Remove the ribs from the pot. Lower the heat to medium and add the pancetta to the pot. Cook, stirring occasionally, until the fat is rendered and the pancetta is crisp. Use a slotted spoon to transfer the pancetta to the plate with the short ribs. Drain all but 1 tablespoon fat from the pot. Add the onions and carrots; cook, stirring occasionally, until softened and lightly browned on the edges, 6-8 minutes. Stir in the garlic, tomato paste, mushrooms, and oregano; cook, stirring constantly, until fragrant, about 30 seconds. Pour in the wine; scrape up the browned bits on the bottom of the pot. Stir in the tomatoes, beef ribs, pancetta, mushroom soaking liquid (being careful to leave any dirt behind) and 1 teaspoon salt; bring to a simmer over medium-high heat, then reduce the heat to low, cover the pot, and cook, stirring occasionally, for 2 hours. After 2 hours, remove the cover, increase the heat to medium-low, and simmer for another hour, until the beef is tender.

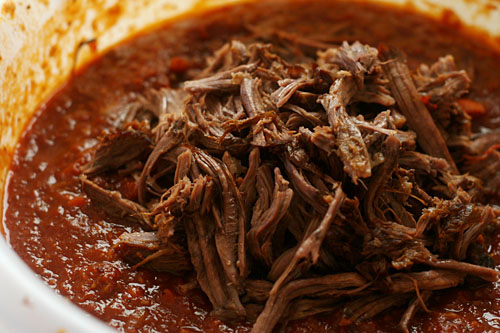
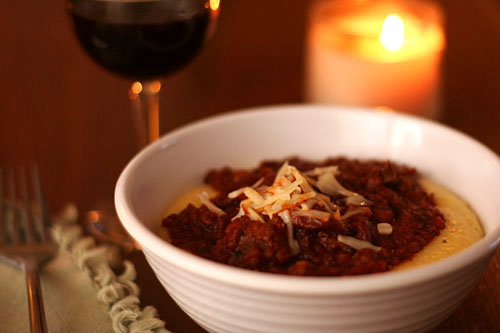
3. Transfer the ribs to a plate; shred the meat. Meanwhile, if the sauce is too thin, increase the heat to medium-high and simmer until it reaches the desired thickness. Stir the meat back into the sauce. Taste for seasoning, adding salt if necessary, and serve over pasta or polenta.

pumpkin cinnamon rolls

The problem with the internet is that you don’t get to believe, even for a minute, that you were the first to come up with an idea. First there was sushi bowls, most recently it was eggnog martinis, and last month there were pumpkin cinnamon rolls. I thought I was a genius. Pumpkin and cinnamon! A classic combination! I could just take pumpkin bread dough, roll it out, spike the cinnamon filling mixture with cloves and nutmeg, and top it with a cream cheese glaze. It’s the perfect combination of pumpkin and accents! I deserve accolades! Awards! At the very least, lots of blog hits!

Oops, never mind. Many many people have done this before. Still. I’m convinced that my pumpkin cinnamon rolls are better than theirs. It’s all about balance – cinnamon rolls should be decadent treat worth the splurge, but you might as well save the calorie-dense ingredients for where they’re going to make the most impact.

I’m convinced that a super rich dough for cinnamon rolls isn’t worth the calories. Once the dough is filled with a sugary spiced filling and topped with a creamy glaze, extra fat in the dough just gets lost. If you don’t notice it, why bother with it? On that same note, I used oil in the dough instead of butter. You can use butter if you prefer, but again – the taste of butter will be overpowered by the filling and glaze, but the added tenderness of oil compared to butter will not go unnoticed.

Pumpkin, cinnamon, cream cheese, and sugar – for breakfast! The dough part is light, soft, and orange; the filling is sweet and spice and everything nice; and the glaze, well, it has cream cheese. I told you I was a genius.

One year ago: Twice-Baked Potatoes
Two years ago: White Chocolate Lemon Truffles, Pumpkin Seed Brittle, Vanilla Bean Caramels

Pumpkin Cinnamon Rolls

You can chill the rolls after they’re shaped, rolled, and cut, but before rising. They’ll still need several hours in the morning to finish rising, bake, and cool, although you can speed the rising along by giving them a very warm place to get started.

A riskier method to get cinnamon rolls at a reasonable breakfast hour is to adjust the amount of yeast. I used ½ teaspoon yeast instead of 2 teaspoons. Your first rise will take several hours. Then you can roll, cut, and chill the dough (or freeze it and defrost in the refrigerator). Take the prepared, chilled rolls out of the fridge before you go to bed and they should be perfectly risen and ready to bake when you wake up.

Dough:
4-4 ½ cups (20 to 21¼ ounces) unbleached all-purpose flour
2 teaspoons instant yeast
⅓ cup (2.33 ounces) sugar
1½ teaspoons salt
2 eggs
1 (15-ounce) can pumpkin
4 tablespoons vegetable oil

Filling:
¾ cup packed (5¼ ounces) light brown sugar
1 tablespoon pumpkin pie spice (or a mixture of mostly cinnamon with some cloves, nutmeg, and ginger)
⅛ teaspoon salt
1 tablespoon melted butter

Glaze:
1 cup (4 ounces) confectioners sugar, sifted to remove lumps
1 ounce cream cheese, softened
½ teaspoon vanilla extract
1-2 tablespoons milk

1. Stand mixer: Mix the flour, yeast, sugar, and salt in the bowl of a stand mixer fitted with the dough hook. In a large measuring cup, lightly beat the eggs; whisk in the pumpkin and oil. With the mixer on low speed, gradually add the liquid ingredients. Continue mixing on medium-low until the dough is elastic and supple, about 8 minutes. You may need to add a little more flour or water to get the correct consistency – soft but not sticky.

By hand: Mix the flour, yeast, sugar, and salt in a large bowl. In a large measuring cup, lightly beat the eggs; whisk in the pumpkin and oil. Make a well in the middle of the dry ingredients and pour in the liquid ingredients. Stir the mixture until the dough comes together. Transfer it to a floured board or countertop and knead, incorporating as little flour as possible, for about 10 minutes, until the dough is elastic and supple. You may need to add a little more flour or water to get the correct consistency – soft but not sticky.

2. Mix together the filling ingredients in a small bowl. Grease a 13 by 9-inch baking dish.

3. After the dough has doubled in bulk, press it down and turn it out onto a lightly floured work surface. Using a rolling pin, shape the dough into a 16 by 12-inch rectangle, with a long side facing you. Sprinkle the filling evenly over the dough, leaving a ½-inch border at the far edges. Roll the dough, beginning with the long edge closest to you and using both hands to pinch the dough with your fingertips as you roll. Using unflavored dental floss or a serrated knife, cut the roll into 12 equal pieces and place the rolls cut-side up in the prepared baking dish. Cover with plastic wrap and place in a warm, draft-free spot until doubled in bulk, 1½ to 2 hours.

4. When the rolls are almost fully risen, adjust an oven rack to the middle position and heat the oven to 350 degrees. Bake the rolls until golden brown and an instant-read thermometer inserted into the center of one reads 185 to 188 degrees, 25 to 30 minutes. Cool for 10 minutes. Meanwhile, stir the glaze ingredients together until smooth. Glaze the rolls and serve.

bolognese sauce comparison

(Anne Burrell’s recipe)

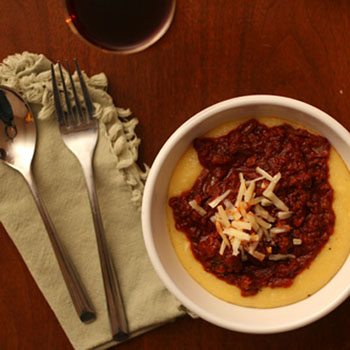
Have you ever had a traditional Bolognese sauce? Not just tomato sauce with ground meat mixed in, but one that involves milk and wine and hours of simmering. Just a few ingredients, but when they’re combined just right, the result is a complex, rich blend with incredible depth. Served over a bowl of creamy polenta with a sprinkling of parmesan cheese and a glass of good red wine on the side, there can be no more comforting, warming food.

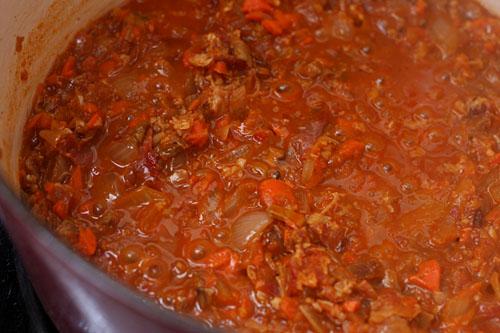
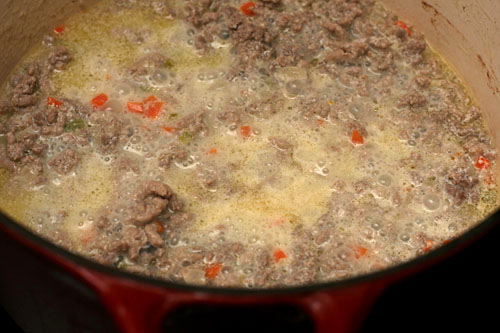
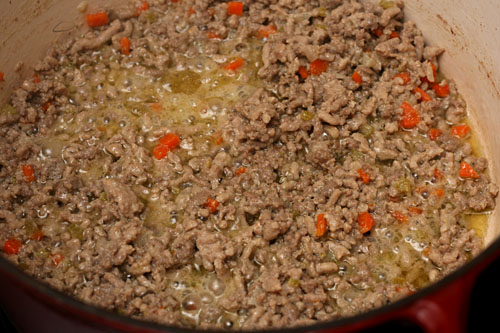
The first Bolognese I made was Marcella Hazen’s recipe. She is to Italian food what Julia Child is to French food; certainly a trusted source. In her method, a class mirepoix (or, technically, “soffritto” in Italian) of carrots, celery and onions is lightly cooked in butter, then ground meat is added and cooked just until it loses its pink. Stir in milk and let it bubble until only its delicious fat is left in the pot, then pour over some wine and let it simmer away, and only then, finally, after an hour of slow simmering, are the tomatoes (whole, canned) added – and simmered for 3 more hours.

After all that, however, I found Hazan’s recipe to be a little too vegetably. But Cooks Illustrated’s recipe for classic Bolognese is identical except for a smaller amount of vegetables. With only a couple tablespoons each of onions, carrots, and celery, it almost seems like they’re not worth adding, but there isn’t a thing I would change about the recipe.

Bolognese sauce takes a lot of time, yes, but it isn’t a lot of work. It’s my favorite type of recipe, in that it’s undemanding, but if you do happen to be in the kitchen (and I always am) you can stir to your heart’s content. But I suppose the long simmering time intimidates people, because there are a crop of supposedly weeknight friendly Bolognese sauce recipes popping up. In general, I’m not a fan of these types of recipes, because what they save in cooking time they make up for in ingredient prep.

(Cooks Illustrated’s Classic Bolognese)

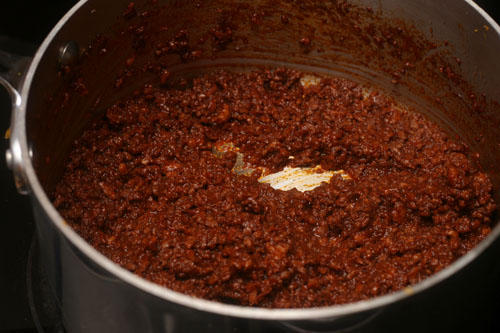
Then I kept seeing another type of Bolognese with great reviews. This one uses only tomato paste as its source of tomato flavor. And if anything can be identified as authentic in a recipe like Bolognese, it’s the tomato paste version, with a heavier meat influence and just a hint of tomatoes.

(Cooks Illustrated’s Classic Bolognese)

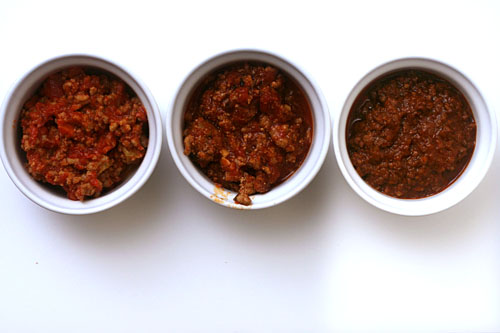
Authenticity aside, I wanted to know which was best. So I baked up three batches – my favorite version from Cooks Illustrated, their weeknight version, and Anne Burrell’s annoying (please don’t yell at me in the recipe, thank you) but well-reviewed tomato paste-based recipe.


(Anne Burrell’s recipe)

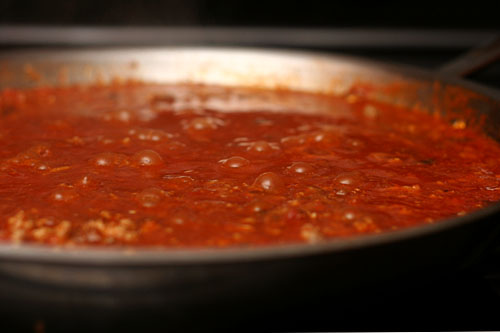
The quicker “weeknight-friendly” recipe was, as I expected, the most work, with more ingredients and dishes necessary to mimic the slow-cooked flavor of the other two recipes. However, after all that and a shorter cooking time, its flavor did nicely mimic that of the other, more tomato-rich Cooks Illustrated recipe. I don’t believe Dave could tell the difference. My only complaint was that the meat was slightly tough.

Dave had a few interesting comments about Burrell’s Bolognese. The sauce is simply a classic mirepoix, beef, wine, tomato paste, and herbs, yet Dave detected flavors of mushrooms and possibly Worchestershire sauce in it – two ingredients high in umami, the fifth basic flavor that is best described by “meaty”. In fact, mushrooms are added to CI’s quick Bolognese to increase the meaty flavor that doesn’t have time to develop through a long simmer. One thing that was obvious to both me and Dave was the unusual texture of Burrell’s sauce; to me, it seemed slightly mealy, but Dave was kinder with “fine-grained”.

(Cooks Illustrated’s Weeknight Bolognese)

Dave couldn’t choose a favorite, with his usual “different but good” response, but I’m still stuck on my classic, tomato-heavy slow-simmered method. It’s intensely rich and meaty, but it has a bright balance from the tomatoes. Burrell’s meatier sauce was delicious too, and maybe all those tomatoes aren’t quite as traditional, but, frankly, I like tomatoes. And since Bolognese – any version – is one of those dishes that improves by being made in advance and will suffer no ill effects from being frozen, I see no reason to spend extra time cooking a supposedly quicker “weeknight-friendly” version. Besides, I like watching ingredients bubble away, increasing in intensity as they decrease in volume until they settle into something delicious.

left to right: CI Classic, CI Weeknight, Anne Burrell

One year ago: Thai-Style Chicken Soup
Two years ago: Pumpkin Ginger Muffins

Printer Friendly Recipe
Classic Bolognese (from Cooks Illustrated)

Enough to top 1 pound of dried pasta

If you double this recipe – and considering how well it freezes and reheats, you should – the simmering times will need to be extended.

3 tablespoons unsalted butter
2 tablespoons minced onion
2 tablespoons minced carrot
2 tablespoons minced celery
¾ pound ground beef chuck
table salt
1 cup whole milk
1 cup dry white wine
1 (28 ounce) can whole tomatoes, packed in juice, chopped fine, with juice reserved

1. Heat butter in large, heavy-bottomed Dutch oven over medium heat; add onion, carrot, and celery and sautè until softened but not browned, about 6 minutes. Add ground meat and ½ teaspoon salt; crumble meat with edge of wooden spoon to break apart into tiny pieces. Cook, continuing to crumble meat, just until it loses its raw color but has not yet browned, about 3 minutes.

2. Add milk and bring to simmer; continue to simmer until milk evaporates and only clear fat remains, 10 to 15 minutes. Add wine and bring to simmer; continue to simmer until wine evaporates, 10 to 15 minutes longer. Add tomatoes and their juice and bring to simmer; reduce heat to low so that sauce continues to simmer just barely, with an occasional bubble or two at the surface, until liquid has evaporated, about 3 hours. Adjust seasonings with extra salt to taste and serve. (Can be refrigerated in an airtight container for several days or frozen for several months. Warm over low heat before serving.)

Printer Friendly Recipe
Bolognese Sauce (slightly rewritten to remove all of Anne Burrell’s vulgarity)

Enough to top 1 pound of dried pasta

1 large onion or 2 small, cut into 1-inch dice
2 large carrots, cut into ½-inch dice
3 ribs celery, cut into 1-inch dice
4 cloves garlic
Extra-virgin olive oil, for the pan
Kosher salt
3 pounds ground chuck, brisket or round or combination
2 cups tomato paste
3 cups hearty red wine
Water
3 bay leaves
1 bunch thyme, tied in a bundle

1. In a food processor, puree onion, carrots, celery, and garlic into a coarse paste. Heat a large pan over medium heat; add a slick of oil. Add the pureed vegetables and season generously with salt. Bring the pan to medium-high heat and cook until all the water has evaporated and they brown, stirring frequently, about 15 to 20 minutes.

2. Add the ground beef and season again generously with salt. Cook, stirring occasionally, 15-20 minutes, until browned.

3. Add the tomato paste and cook until brown, 4 to 5 minutes. Add the red wine. Cook until the wine has reduced by half, another 4 to 5 minutes.

4. Add water to the pan until water is about 1 inch above the meat. Toss in the bay leaves and the bundle of thyme and stir to combine. Bring to a boil over medium-high heat, then reduce to a simmer, stirring occasionally. As the water evaporates you will gradually need to add more, about 2 to 3 cups at a time. Simmer, stirring occasionally, for 3½ to 4 hours. Adjust the seasoning with salt and serve immediately.

Printer Friendly Recipe
Weeknight Bolognese (from Cooks Illustrated)

Enough to top 1 pound of dried pasta

½ ounce dried porcini mushrooms
1¼ cup white wine (Riesling, gewürztraminer, white zinfandel, xx)
½ small carrot, peeled and chopped into rough 1/2-inch pieces
½ small onion, chopped into rough 1/2-inch pieces
3 ounces pancetta, cut into 1-inch pieces
28 ounces whole tomatoes with juice
1½ tablespoon unsalted butter
1 small garlic clove, pressed through garlic press or minced
1 teaspoon sugar
1¼ pound meatloaf mix or equal amounts 80 percent lean ground beef, ground veal, and ground pork
1½ cup whole milk
2 tablespoons tomato paste
Salt
⅛ teaspoon ground black pepper

1. Cover porcini mushrooms with ½ cup water in small microwave-safe bowl; cover bowl with plastic wrap, cut a few steam vents with paring knife, and microwave on high power for 30 seconds. Let stand until mushrooms have softened, about 5 minutes. Using fork, lift porcini from liquid and transfer to second small bowl; pour soaking liquid through mesh strainer lined with paper towel. Set porcini and strained liquid aside.

2. Bring wine to simmer in 10-inch nonstick skillet over medium heat; reduce heat to low and simmer until wine is reduced to 2 tablespoons, about 20 minutes. Set reduced wine aside.

3. Meanwhile, pulse carrot in food processor until broken down into rough ¼-inch pieces, about ten 1-second pulses. Add onion; pulse until vegetables are broken down to ⅛-inch pieces, about ten 1-second pulses. Transfer vegetables to small bowl. Process softened porcini until well ground, about 15 seconds, scraping down bowl if necessary. Transfer porcini to bowl with onions and carrots. Process pancetta until pieces are no larger than ¼ inch, 30 to 35 seconds, scraping down bowl if necessary; transfer to small bowl. Pulse tomatoes with juice until chopped fine, 6 to 8 one-second pulses.

4. Heat butter in 12-inch skillet over medium-high heat; when foaming subsides, add pancetta and cook, stirring frequently, until well browned, about 2 minutes. Add carrot, onion, and porcini; cook, stirring frequently, until vegetables are softened but not browned, about 4 minutes. Add garlic and sugar; cook until fragrant, about 30 seconds. Add ground meats, breaking meat into 1- inch pieces with wooden spoon, about 1 minute. Add milk and stir to break meat into ½-inch bits; bring to simmer, reduce heat to medium, and continue to simmer, stirring to break up meat into small pieces, until most liquid has evaporated and meat begins to sizzle, 18 to 20 minutes. Stir in tomato paste and cook until combined, about 1 minute. Add tomatoes, reserved porcini soaking liquid, ¼ teaspoon salt, and pepper; bring to simmer over medium-high heat, then reduce heat to medium and simmer until liquid is reduced and sauce is thickened but still moist, 12 to 15 minutes. Stir in reduced wine and simmer to blend flavors, about 5 minutes.

(Cooks Illustrated’s Weeknight Bolognese)

devilish shortcakes

While I’m grateful to the recent Tuesdays with Dorie recipe choosers for picking seasonal recipes, I miss chocolate. It’s been months – almost four! – since chocolate has played a starring roll in a recipe – and December isn’t looking any better. A few chips here and there in cookies just isn’t going to cut it for the long term.

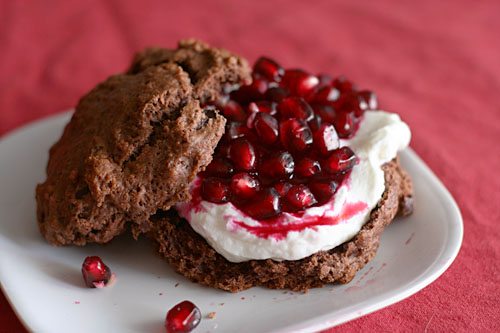
After Caitlin’s warning that these are “very subtly chocolate”, I decided that the solution was to add chunks of bittersweet chocolate into the biscuit dough. I considered filling the biscuits with ganache instead of whipped cream, but decided that after a holiday weekend dedicated largely to eating, I couldn’t afford either.

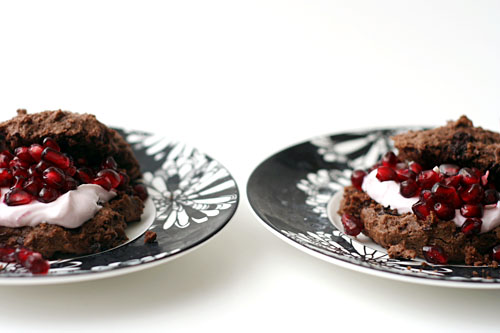
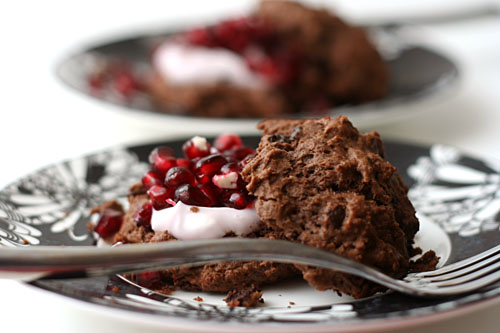
Greek yogurt with pomegranate seeds made the perfect compromise. But my favorite bites are still the ones that include bits of pure chocolate.  It’s just been too long.

Tania chose these chocolate shortcakes for the group, and she has the recipe posted. I made half the recipe using 1 whole egg yolk instead of ½ an egg. I split my halved recipe into 8 portions. I mixed 2 ounces of chopped bittersweet chocolate into the dry ingredients (but even more chocolate would have been welcome).

One year ago: All-in-One Holiday Bundt Cake
Two years ago: Linzer Sablés

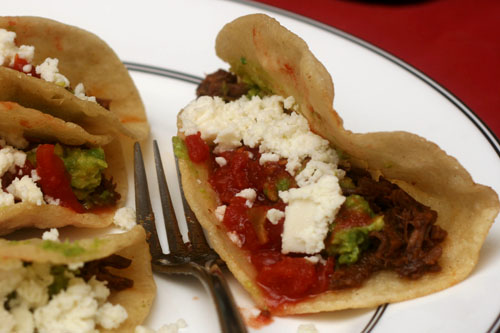
shredded beef tacos

The first few months when I moved out of my parents’ house and across the country were exciting and lonely and intense. I was lucky that I made some great friends right away. I remember the first time someone invited me over for dinner. I’d asked what he and his wife were serving, and I thought he said pea stew. I went, but I was so relieved when it was actually beef stew.

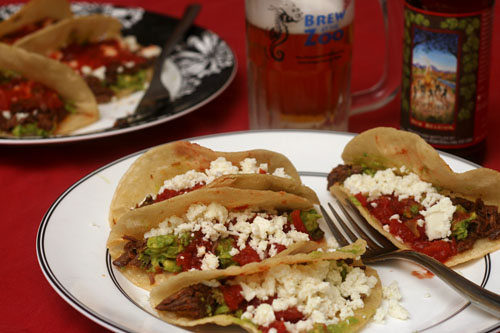
That meal turned into a weekly dinner tradition that lasted for as long as we all lived near each other. We took turns cooking and rarely made the same thing twice, but there was one favorite meal that was requested more than any other – tacos. My friend’s taco filling and accompaniments were good, but the real treat was the shells – freshly fried, still hot, and, frankly, a little greasy. I had never had home-fried taco shells before, and it was a revelation.

These days, tacos are still one of my favorite meals, but I can’t enjoy them as much without those fried shells. Even better is when they’re stuffed with this shredded beef. It’s marinated in vinegar, lime juice, and spices, then baked for hours until it falls into shreds. I’m thankful for those friends not just for helping me feel comfortable on my own, but for teaching me about the perfection of fried corn tortillas. Nothing else would be good enough accompany this intensely flavorful filling.

One year ago: Sandwich Rolls
Two years ago: Pumpkin Pancakes

Shredded Beef Tacos (slightly adapted from Use Real Butter who slightly adapted it from The Border Cookbook)

Jen discusses the cut of beef that is preferred for this recipe. Her recommended eye of chuck was not available, so I chose chuck steak. I have no complaints. Plus I didn’t need to slice it before marinating, which was a nice bonus.

You could always go with the classic cheddar-sour cream-lettuce combination for toppings, but I really love the queso fresco-avocado-salsa direction that Jen recommends.

6 servings

2 tablespoons vegetable oil
2 tablespoons white vinegar
2 tablespoons lime juice
1½ teaspoons ground cumin
1½ tsps chili powder
1 teaspoon salt
3 garlic cloves, peeled and smashed
1½ pounds chuck steak
1 cup vegetable oil
24 corn tortillas
toppings: lettuce, queso fresco, salsa, guacamole, etc.

1. In a gallon-size zip-top bag, combine the oil, vinegar, lime juice, salt, spices and garlic. Add the meat and squish the bag around to make sure the meat is fully coated. Refrigerate for at least 4 hours or overnight.

2. Adjust an oven rack to the middle position and heat the oven to 350 degrees. Dump the contents of the bag into a baking dish just large enough to fit the meat in a single layer. Cover the pan with foil; bake until the meat is tender enough to shred easily, about 2 hours. Use two forks to pull the meat into shreds. Lower the oven temperature to 250 degrees.

3. Heat the oil in an 8-inch skillet over medium heat. Slide a tortilla into the oil; use tongs to fold the tortilla in half and hold it partially open. Flip after about 1 minute. Fry for an additional minute, until the tortilla is slightly crisp. Continue with the remaining tortillas, storing the fried tortillas in the warm oven. Serve with shredded meat and desired toppings.
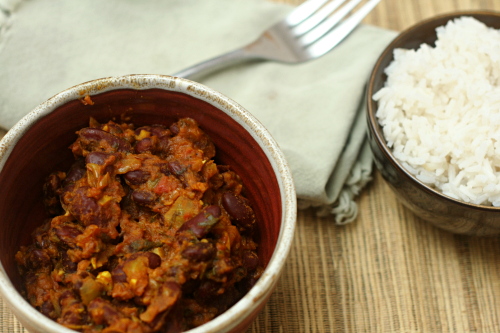
red kidney bean curry

When my schedule picks up, I tend to fall into a weeknight dinner rut. I think we ate pasta with chopped tomatoes and fresh mozzarella ten times during the month or so of peak tomato season. Fish tacos are in no short supply around here year-round. Red beans and rice, salmon pesto pasta, braised white beans, jalapeno-baked fish

Surely there must be new recipes for me to try that fit my tough weeknight standards – quick, light, fully balanced, vegetarian or seafood-based. And yes! This is perfect. Plus I love my one other Indian curry standard and knew there must be similar-but-different dishes out there to try.

It’s such a basic recipe – sauté aromatics and spices, add beans and other flavorings, simmer, serve over starch. It makes me wonder how many other cuisines I could do this with. I suspect I’ll be trying a few, because you can never have enough quick healthy balanced vegetarian meal ideas.
One year ago: Stuffed Mushrooms with Sun-Dried Tomatoes
Two years ago: Mulled Cider

Printer Friendly Recipe
Red Kidney Bean Curry
(adapted from Smitten Kitchen)

This recipe has another trait I love – it takes well to freezing. Make a large batch, freeze in portions, and your next meal is that much easier!
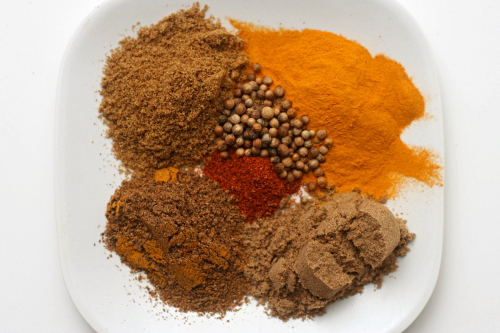
The first time I made this, it seemed a little bland so I’ve increased the spices and added garam masala. I love garam masala. I’ve also changed the tomatoes around to something that makes more sense to me.

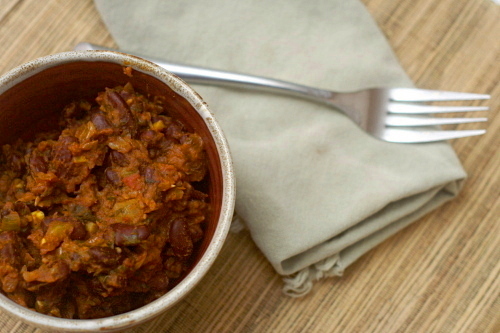
I know Deb’s looks like soup and mine looks like a paste. My only explanation is that this batch was frozen and defrosted, and I was too busy catching up on The Office episodes to see that it needed more liquid.

Serves 6

2 tablespoons olive oil
1 medium onion, finely chopped
1 jalapeno, minced
2 tablespoons chopped fresh ginger
3 cloves garlic, chopped
1 tablespoon tomato paste
2 teaspoons ground turmeric
2 teaspoons garam masala
1½ teaspoon ground cumin
1½ teaspoon ground coriander
1 teaspoon cumin seeds
¼ teaspoon cayenne
1 (15-ounce) can diced tomatoes, with juice
2 (15-ounce) cans red kidney beans, rinsed and drained (or 3 cups cooked beans)
1 teaspoon salt
½ cup chopped fresh cilantro

In a 3-quart saucepan over medium heat, heat the oil. Add the onion and jalapeno and cook, stirring occasionally, until the onion just starts to brown at the edges, 5-8 minutes. Add the garlic, ginger, tomato paste and spices; cook, stirring constantly, until fragrant, about 1 minutes. Add the tomatoes and their juice, the beans, and the salt. Bring to a boil over medium-high heat, then decrease the heat to low and simmer uncovered for 10 minutes. Stir in the cilantro, taste for seasoning, and serve over rice or with naan.

penne alla vodka

People keep asking me how my recent vacation was, and I can’t think of any response other “so, so good.” How else do you sum up a week of playing in the waves, drinking margaritas, snorkeling, baking cookies, swimming with sea lions, watching shooting stars, eating shrimp tacos, and just basically everything that is good. I didn’t even get sunburned. I want to go back.

At least I had an easy meal planned for my first night at home. This is my ‘just got back from vacation’ dish. After traveling all day, I don’t want to spend much time cooking. There’s no time to defrost anything. We haven’t been home, so there isn’t a lot of fresh food around. I’ve been eating out all week on vacation, so I don’t want to get takeout.

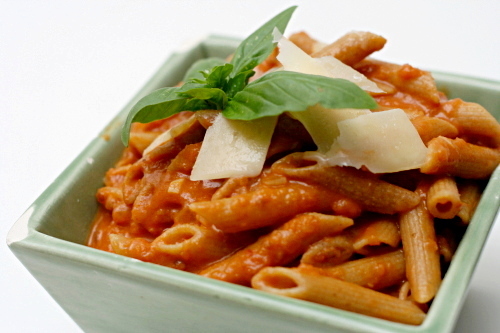
This dish solves all those problems. It takes as long to make as it takes pasta to cook. There are only a couple ingredients to chop. It’s fairly healthy. And it uses ingredients that I can buy before I leave and trust that they’ll keep until I get back – pasta, canned tomatoes, onion. And of course, it tastes great.

I bet it would taste even better on vacation. Everything is better on vacation.

One year ago: Potato Tomato Tart
Two years ago: Banana Coconut Muffins

Printer Friendly Recipe
Penne alla Vodka (from Cooks Illustrated)

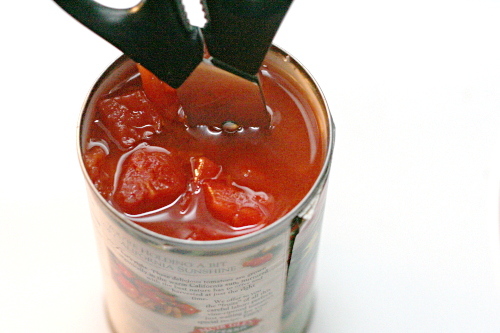
You can never go wrong following a Cooks Illustrated recipe precisely. I, however, don’t, in this case. Because I almost always make this after a day of traveling, I simplify it wherever possible. Instead of pureeing half of the tomatoes and dicing the rest, I simply stick a pair of kitchen shears in the tomato can and snip away. I don’t separate the liquid and the tomatoes in order to measure a certain amount; I just pour all of the liquid in to the sauce. I like to use 2 shallots instead of half an onion. If I don’t have cream, I use milk. If I don’t have milk, I skip the dairy. If I don’t have basil, I use parsley. If I don’t have parsley, I skip the herbs or use dried. It’s tomatoes, pasta, and alcohol; it isn’t going to be bad.

1 (28-ounce) can whole tomatoes, drained, liquid reserved
2 tablespoons olive oil
½ small onion, minced (about ¼ cup)
1 tablespoon tomato paste
2 medium garlic cloves, minced or pressed through a garlic press (about 2 teaspoons)
¼-½ teaspoon hot red pepper flakes
table salt
⅓ cup vodka
½ cup heavy cream
2 tablespoons finely chopped fresh basil leaves
fresh parmesan cheese, for serving

1. Puree half of the tomatoes in a food processor until smooth. Dice the remaining tomatoes into ½-inch pieces, discarding cores. Combine the pureed and diced tomatoes in a liquid measuring cup (you should have about 1⅔ cups). Add reserved tomato liquid to equal 2 cups.

2. Heat the oil in a large saucepan over medium heat until shimmering. Add the onion and tomato paste and cook, stirring occasionally, until the onions are light golden around the edges, about 3 minutes. Add the garlic and pepper flakes; cook, stirring constantly, until fragrant, about 30 seconds.

3. Stir in the tomatoes and ½ teaspoon salt. Remove the pan from the heat and add the vodka. Return the pan to medium-high heat and simmer briskly until the alcohol flavor is cooked off, 8 to 10 minutes; stir frequently and lower the heat to medium if the simmering becomes too vigorous. Stir in the cream and cook until hot, about 1 minutes.

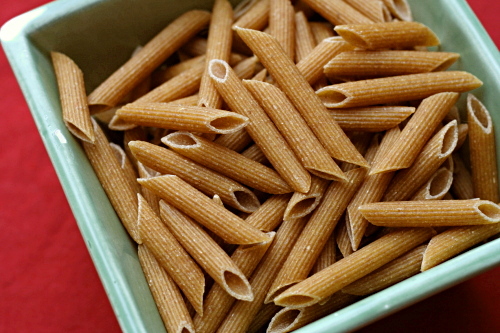
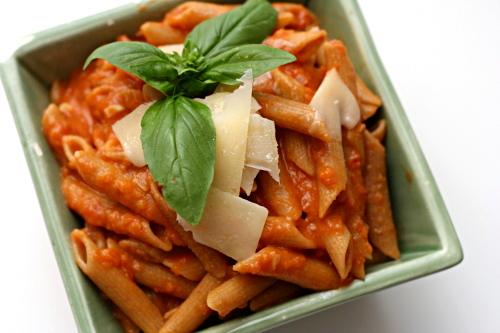
4. Meanwhile, bring 4 quarts water to a boil in a large Dutch oven over high heat. Add 1 tablespoon salt and the pasta. Cook until just shy of al dente, then drain the pasta, reserving ¼ cup cooking water, and transfer the pasta back to the Dutch oven. Add the sauce to the pasta and toss over medium heat until the pasta absorbs some of the sauce, 1 to 2 minutes, adding reserved cooking water if sauce is too thick. Stir in the basil and adjust the seasoning with salt. Divide among pasta bowls and serve immediately, passing Parmesan separately.