croissants 3 (martha stewart)

I worked in a lab for years, but I never absolutely loved it. You’d think I would have, considering that I basically mixed up ingredients and baked them, but I guess without that crucial eating-the-batter – sorry, of course I mean that eating-the-result step, it just wasn’t as fun.

Plus I could never get the hang of keeping good records in the lab. My notebook seemed to be both unorganized and lacking crucial information. I took detailed notes on the amount and type of ingredients used and the baking temperature and time, but whenever I needed to look up details of the result, I was left with a few marginally descriptive words.

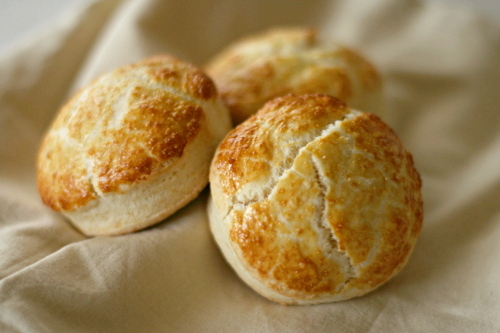
In the kitchen, it’s the opposite. The result, now that’s memorable, especially in this case – slightly sweet, intensely flaky, dark golden brown, impossible to resist, always leaving me wanting another.

The path to that result isn’t as memorable, particularly in the amount of instant dry yeast I used. Probably I should have written that down somewhere. I’m going to hypothesize – remember, hypothesizing is not the same thing as guessing! It’s an educated guess, which is to say, don’t skip out on this recipe just because the fresh yeast called for in the original recipe is dumb and I’m bad at note-taking, because the chances are very good that my estimate of the amount of yeast I used isn’t too terribly terrible, and anyway, it’s yeast and yeast always does its job eventually.

Anyway. I’m going to hypothesize that I used about one packet of yeast. Please accept my apologies for not taking thirty seconds to write it down. This must be why I now have an office job instead of a lab job.

One year ago: Anadama Bread
Two years ago: Baba Ghanoush and Falafel

Printer Friendly Recipe
Croissants (adapted from Martha Stewart’s Baking Handbook)

Makes 12

1 cup cold milk
1 tablespoon honey
14 ounces (about 3 cups) all-purpose flour
¼ cup (1.75 ounces) sugar
2¼ teaspoons salt
2¼ teaspoons (1 packet) instant yeast
20 tablespoons (2½ sticks) unsalted butter, cold
1 large egg, lightly beaten with a pinch of salt and a dribble of water or milk

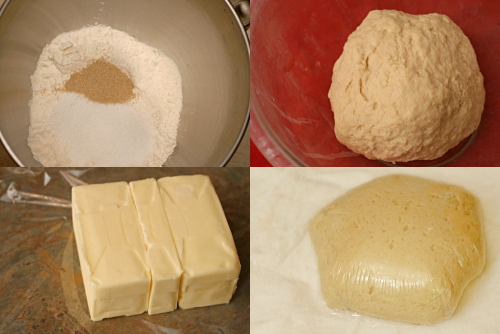
1. Make the dough package: Pour the milk and honey into a 2-cup liquid measuring cup, and stir to combine; set aside. In the bowl of an electric mixer fitted with the dough hook, stir together 12 ounces (about 2¾ cups) of the flour, the sugar, yeast, and salt; stir to combine. Add the milk mixture and mix on low speed until the dough just comes together, 2 to 3 minutes.

2. Turn out the dough onto a lightly floured work surface; gently knead to form a smooth ball, about 45 seconds. Wrap in plastic and refrigerate at least 1 hour or overnight.

3. Make the butter package: Lay the butter sticks side by side on a piece of plastic wrap, and sprinkle with the remaining 1 ounce (about 2 tablespoons) flour. Pound with a rolling pin until the flour is incorporated; roll into a 4- by 3-inch rectangle. Wrap tightly and refrigerate for at least 1 hour or overnight.

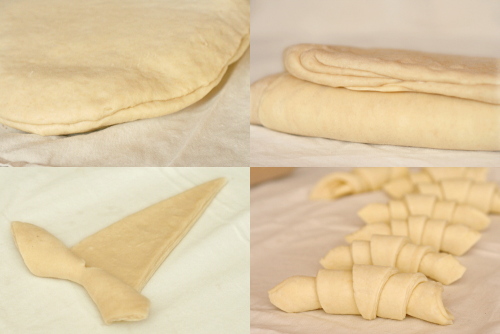
4. Remove the dough package from the refrigerator; place on a lightly floured work surface. Roll out to an 8-by-10-inch rectangle, about ½ inch thick, with a short side facing you. Remove the butter package from the refrigerator; place on the bottom half of the dough; fold the top half of the dough over the butter, and pinch the edges to seal.

5. Roll out the dough to a 10-by-10-inch square about ½ inch thick; keep the corners as square as possible. Remove any excess flour with a dry pastry brush. Starting at the far end, fold the square in thirds, as you would a business letter. This completes the first of three turns. Wrap in plastic and refrigerate for 1 hour.

6. Repeat rolling and folding as above two more times, starting with the flap opening on the right, as if it were a book, and refrigerate at least 1 hour between turns. To help you remember how many turns have been completed, mark the dough after each: Make one mark for the first turn, two for the second, and three for the third. After the third, wrap the dough in plastic, and refrigerate 6 to 8 hours, or overnight.

7. Turn out the chilled dough onto a lightly floured work surface. Roll out the dough to a 30-by-8-inch rectangle. (If the dough becomes too elastic, cover with plastic wrap, and let rest in the refrigerator for 10 minutes.) Using a pizza wheel, cut the dough into triangles, each with a 4-inch base (you will have scraps of dough at both ends). Cut a 1-inch slit in the center of the base of each triangle. Place triangles in a single layer on a clean work surface.

8. To shape the croissants, stretch the two lower points of each triangle to enlarge the slit slightly. Fold the inner corners formed by the slit toward the outer sides of the triangles, and press down to seal. Using your fingertips, roll the base of each triangle up and away from you, stretching the dough slightly outward as you roll; the tip should be tucked under the croissant. Pull the two ends toward you to form a crescent. Transfer the crescents to a parchment-lined baking sheets, 2 inches apart. Cover loosely with plastic wrap, and let rise in a warm place until very spongy and doubled in bulk, 45 to 60 minutes.

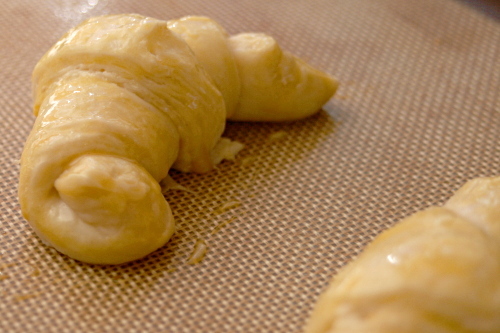
9. Preheat the oven to 400ºF, with a rack in the middle position. Lightly brush the crescents with the beaten egg. Bake until the croissants are puffed and golden brown, about 15 to 20 minutes. Transfer the sheet to a wire rack to cool. Serve warm or at room temperature.

turkey burgers

Working full-time sure is…time-consuming, isn’t it? I haven’t figured out yet what has to give. (First choice – chores!) Cooking, blogging, photography, gardening, exercising…sleeping. It’s hard to balance everything. It’s possible that I should cut down on meals that require grinding your own meat, huh?

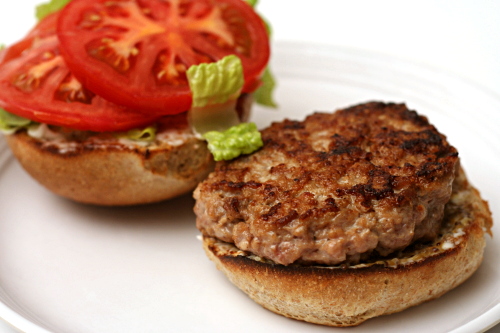
Well, I would consider that, except that these burgers were so perfect. I made beef burgers a week later (also with home-ground meat – stop the insanity!), and I enjoyed the turkey burgers so much more. And I love beef, so it wasn’t a prejudice.

But once you add good buns and your various toppings, the turkey burgers don’t taste significantly different from beef burgers. These have about half the fat of good beef burgers, so that’s another advantage, although what I mostly care about is that I thought their texture was smoother and more cohesive, and their taste was at least as good.

Grinding your own meat isn’t as hard as it might sound, and you almost definitely have the equipment. All you have to do is cut your meat into chunks, freeze it until it’s firm, and process it in the food processor. Then you mix in a few tasty additions, sear them up in a pan and enjoy a perfect burger. Make some extra to freeze, just in case Future You has a rough day at work and needs an easy meal.

One year ago: Croissants (Tartine)
Two years ago: Franks and Beans

Printer Friendly Recipe
Turkey Burgers (not really adapted from Cooks Illustrated)

Cooks Illustrated recommends 6 ounce burgers; I prefer mine significantly smaller. If you do too, don’t forget to reduce the cooking time.

2 pounds skin-on, bone-in turkey thighs or 1½ pounds skinless, boneless thighs
½ teaspoon salt
½ teaspoon black pepper
2 teaspoons Worcestershire sauce
2 teaspoons Dijon mustard
1 tablespoon vegetable or canola oil

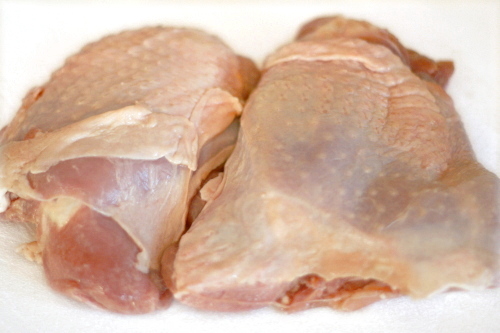
1. If using skin-on, bone-in turkey thighs, remove the meat from from the skin and bones. Cut the thighs into 1-inch chunks and arrange in a single layer on a baking sheet. Freeze until somewhat firm, about 30 minutes.

2. Working in 3 batches, place the semifrozen turkey chunks in a food processor fitted with the steel blade; pulse until the largest pieces are no bigger than 1/8-inch, twelve to fourteen 1-second pulses.

3. Transfer the ground meat to a medium bowl. Stir in the salt, pepper, Worcestershire sauce, and mustard until blended and divide the meat into 4 portions. Lightly toss one portion from hand to hand to form a ball, then lightly flatten the ball with your fingertips into a 1-inch-thick patty. Repeat with the remaining portions.

4. Heat a large, heavy skillet (preferably cast iron or stainless steel with an aluminum core) over medium heat until very hot, 4 to 5 minutes. Swirl the oil in the pan to coat the bottom. Add the burgers and cook over medium heat without moving them until the bottom of each is dark brown and crusted, about 5 minutes. Turn the burgers over; continue to cook until the bottom is light brown but not yet crusted, 4 to 5 minutes longer. Reduce the heat to low, position the cover slightly ajar on the pan to allow steam to escape, and continue to cook 5 to 6 minutes longer, or until the center is completely opaque yet still juicy or an instant-read thermometer inserted from the side of the burger into the center registers 160 degrees. Remove from the pan and serve immediately. (Alternatively, grill the burgers over a medium-low fire (you can hold your hand about 5 inches above the grill surface for 5 seconds) until dark spotty brown on the bottom, 7 to 9 minutes. Turn the burgers over; continue grilling 7 to 9 minutes longer.)

strawberry chocolate ice cream pie

The rest of the country (hemisphere, I suppose) is gearing up for summer. Here in the desert though, we’ve been there for a while. This weekend Dave and I hiked over seven miles in 90 degree weather. It’s a dry heat though! (Actually, the hike wasn’t bad at all – it was either shady or windy the whole time, so although we were hot, we weren’t dying. And the dry heat does make a difference.)


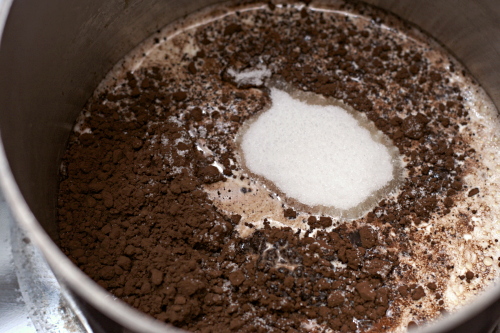
the beginning of homemade chocolate ice cream

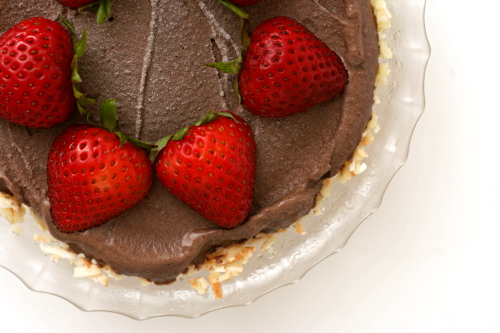
Ice cream pie is perfect for the weather we’ve been having. The specific ingredients called for here aren’t perfect for me though. I eat so many bananas as snacks that the idea of adding them to chocolate ice cream for dessert didn’t sound appealing. Strawberries, however, can be added to most any dessert.

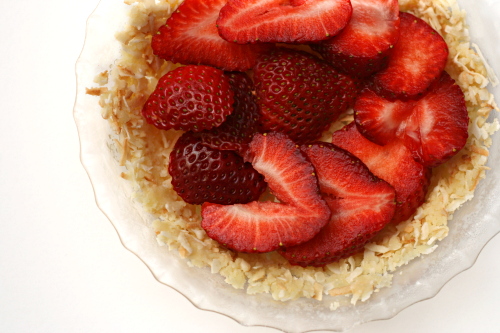
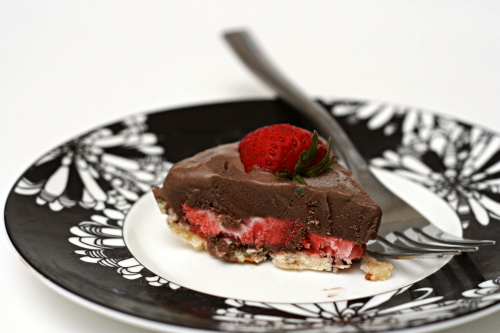
Oh, except maybe not one that’s going to be stored in the freezer like this. Sliced strawberries between the crust and the ice cream turned into ice cubes in the freezer; I should have given them a dip in vodka before freezing them to keep them from freezing so solidly. Other than that, what’s not to love about this dessert? I don’t need to tell you that chocolate ice cream and strawberries are a tempting combination – especially when it’s a hundred degrees out.

Spike chose this recipe for Tuesdays with Dorie, and she has the recipe posted.

One year ago: Chipster-Topped Brownies
Two years ago: Pecan-Honey Sticky Buns

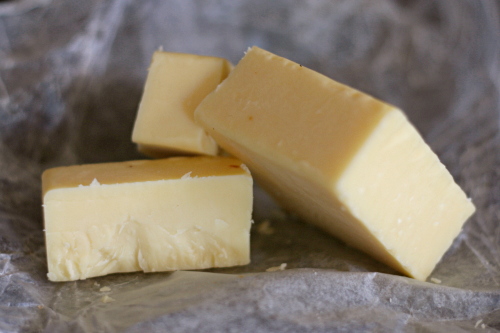
cheddar shortbread

You guys know I’m a major dough-eater, right? Okay, well, if not, there you go – cookie dough, cake batter, brownie batter, any of that – major weakness. As embarrassing as this story is, I will tell you that I have actually reached into the oven to take one more spoonful of pound cake batter from the pan. (Pound cake batter is even better than chocolate chip cookie dough, I’m not even kidding.)

So I was a little worried about these after I mixed up the dough. It…well, frankly, it wasn’t very good. It didn’t have enough flavor. But I don’t have a lot of experience baking savory cookies, so I wasn’t sure how it was supposed to taste.

After baking, they were pretty good actually. My students must be getting braver, because I got more feedback on this one – would be good with garlic, herbs, and, um, served with wine. (“I mean, I don’t know if you drink wine”, he said. I did not respond with, “Do I ever! But only on weekends.”)

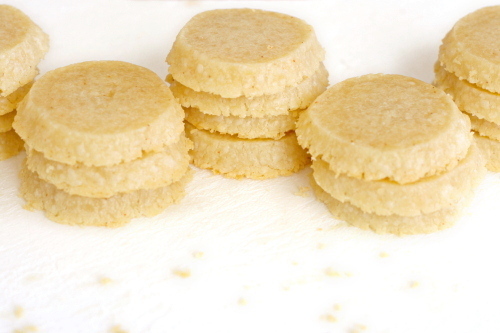
In the end, I think they mostly taste like Cheez-Its. Which is an okay thing, I think. But hey, garlic, thyme, and a bit of salt couldn’t hurt. And what isn’t better served with wine? Just wait until they’re baked before you start eating them. (Oh, you do that with all cookies? Well, aren’t you the picture of self-restraint.)

One year ago: Fresh Strawberry Scones
Two years ago: Caesar Salad

Printer Friendly Recipe
Cheddar Shortbread (adapted from Whisk: a food blog)

Makes about 30 cookies

Despite the advice of my students, I’m not sure I’d add garlic, which sounds like it could easily become overpowering. I could go either way on herbs, and I definitely think some salt (maybe ¼ teaspoon to start) would be a nice addition.

I’m not sure I baked these this long; I think it’s more likely that I baked them about 10 minutes, just until they no longer looked wet on top and they were slightly browned around the edges.

6 tablespoons unsalted butter, softened
6 ounces (about 1 1/2 cups) cheddar cheese, shredded
1 cup (4.8 ounces) all-purpose flour
½ teaspoon cayenne pepper

1. In a food processor, mix all of the ingredients with the metal blade until the dough forms a ball.

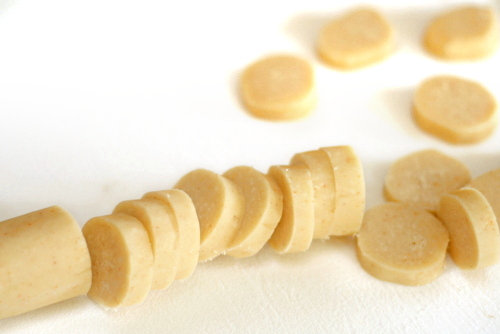
2. Roll the dough into a log. (You can freeze the logs by wrapping them in plastic wrap and put them in a freezer bag. Thaw overnight in the refrigerator before baking.) Slice into ¼-inch rounds and place on baking sheet. Chill for 1 hour in the refrigerator or 30 minutes in the freezer.

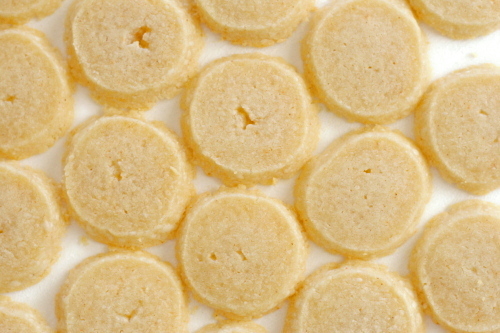
3. Meanwhile, preheat the oven to 350˚F. Bake for 17-20 minutes, or until light brown. Cool completely on a wire rack.

sweet cream biscuits

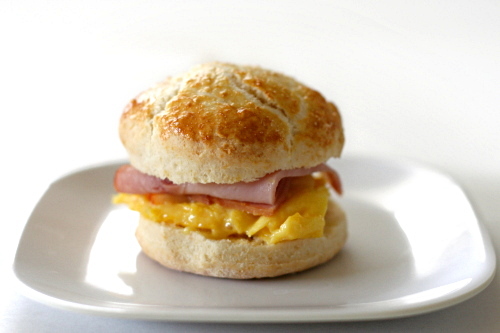
I was all set to make the tiniest portion of this recipe and serve little bitty biscuits with salad for dinner. And then Dorie mentioned ham sandwiches in the headnote and I started thinking about adding eggs and cheese to that and suddenly I was making extra dough to freeze. Breakfast sandwiches are on my Favorite Foods Ever List. (Let us not discuss how long that list is.)

There are all sorts of biscuits – flaky from cutting in butter, layered from multiple pastry turns, tender from stirring in cream – and I love them all. And they all make one mean breakfast sandwich.

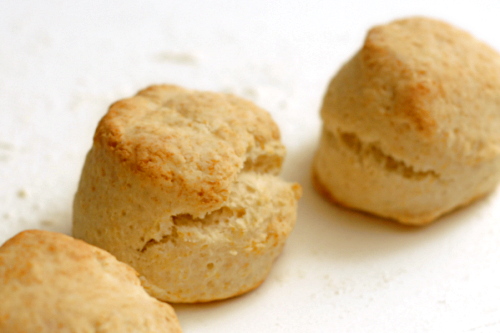
Melissa, who chose these biscuits for Tuesdays with Dorie, has the recipe posted on her site. You might be able to tell from the photos that my tiny biscuits rose higher than my bigger biscuits. I mixed, cut, and rolled the dough at the same time; the only difference is that the larger ones were baked straight from the freezer instead of right after the dough was made like the smaller ones. Also, I brushed the larger biscuits with an egg wash because I happened to have eggs available. It makes for a pretty biscuit, but they’re great either way.

One year ago: Chocolate Bread Pudding
Two years ago: Carrot Cake

artichoke ravioli

Spring break was last week. I miss it already.

On the other hand, I’m apparently bad at spring break. I had plans to do all these big things, and then when I didn’t get every single one of them done, to perfection, every day, I got all annoyed. Plus, you know what I did instead of work? Chores. I hate chores, and I like my job, so…forget what I said about missing spring break.

I’m sure it’s a surprise to no one that the one thing I did find time for was cooking. I kept to the mostly-healthy, mostly-vegetarian routine we normally stick to on weekdays instead of going for the all-out, life-is-a-celebration, let’s-eat-meat-and-drink-wine routine we tend toward on the weekends. And I realized that another reason I often stick to vegetarian meals on weekdays is that they’re easier.

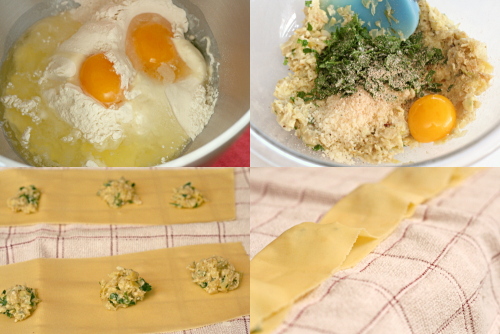
Not so with ravioli, of course. Once you mix and knead the pasta dough, roll it out, make your filling, fill the ravioli, cook the ravioli, make your sauce – well, that adds up to a nice project for a day off from work.

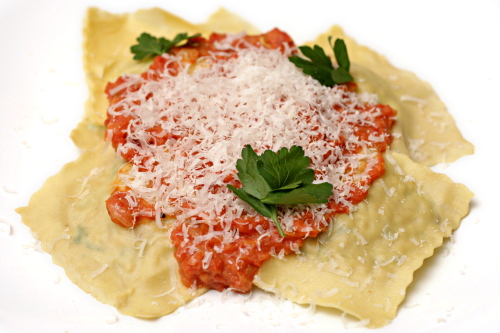
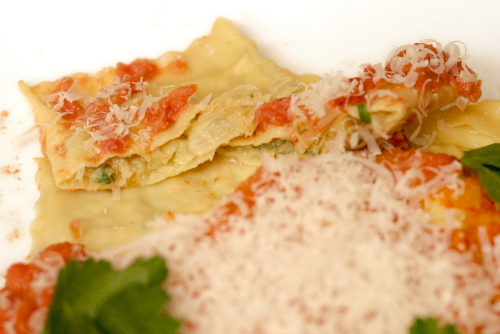
Fortunately, the end result of this one is definitely worth avoiding chores over. The artichokes are subtle, but not invisible. The sauce is rich, but not heavy. And the fresh pasta – well, it’s fresh pasta. You can’t go wrong.

It’s meals like this that make me miss spring break.

One year ago: Cooks Illustrated’s Perfect Chocolate Chip Cookies
Two years ago: Spinach Feta Pine Nut Tart

Printer Friendly Recipe
Artichoke Ravioli With Tomatoes
(adapted from Gourmet via Smitten Kitchen)

4 to 6 servings

This is a good time to utilize your food processor if you have one. I think the best order to process the ingredients in (to avoid cleaning the bowl in between uses) is parmesan, onions, artichoke mixture, tomatoes. You could also make the pasta dough in the food processor, although I’ve had better luck using the stand mixer or kneading by hand.

Ravioli take well to freezing.  Just freeze them in a single layer on a flour-dusted baking sheet.  Once they harden on the pan, transfer them to freezer bags.

Pasta:
6 ounces (1¼ cups) all-purpose flour, plus more for dusting the work surface
2 large eggs

Filling:
2 tablespoons unsalted butter, cut into pieces
1 onion, chopped (½ cup)
2 (14-ounce) cans quartered artichoke hearts, drained
2 ounces (1 cup) finely grated Parmigiano-Reggiano
½ cup chopped fresh flat-leaf parsley
1 large egg
½ teaspoon salt
½ teaspoon black pepper
½ teaspoon freshly grated nutmeg

Sauce:
2 tablespoons unsalted butter
1 onion, minced
1 (28-ounce) can diced tomatoes
½ teaspoon salt
¼ teaspoon black pepper
2 ounces (1 cup) finely grated Parmigiano-Reggiano
2 tablespoons heavy cream

1. For the pasta: Add the flour and egg to the bowl of a stand mixer fitted with the paddle attachment. Mix on low speed until thoroughly incorporated. Change to the dough hook and knead for 5-6 minutes, until smooth. Add flour as necessary – the dough shouldn’t be sticky.  Shape the dough into a ball and wrap it in plastic wrap. Let the dough rest for at least 30 minutes. (You can also mix and knead the dough by hand. It’s easiest – less messy – in a large, wide bowl.)

2. For the filling: In a 12-inch skillet over medium heat, melt the butter. When the foam subsides, add the onion and sauté, stirring occasionally, until golden, about 6 minutes. Add the artichoke hearts and continue cooking while stirring occasionally, until they’re tender, 8 to 10 minutes. Transfer the artichoke mixture to the food processor (scraping but not washing the pan), and process in pulses until the artichokes are coarsely chopped. Stir in the parmesan, parsley, yolk, salt, pepper, and nutmeg.

3. Divide the dough into 6 balls. Work with one ball of dough at a time and leave the others covered with a damp dishtowel. Flatten the dough slightly, then roll it through the widest setting on a pasta roller. Fold it in thirds like a piece of paper going into an envelope, then roll it through the pasta roller again, feeding it with one of the open sides first. If at any point the dough is sticky, brush it with flour. Repeat the folding into thirds and rolling a few times. Without folding, run the pasta through the widest setting once more. Adjust the pasta roller to the next-thinner setting and roll the dough through the machine. Continue to gradually thin the dough until the second-to-last setting. Brush it with flour if the dough starts to stick at all. If the strip of dough becomes too long to handle, cut it into two shorter strips and work with each strip separately. Repeat the rolling, folding, and thinning with the remaining balls of dough, laying the sheets of pasta on dishtowels.

4. For the sauce: Melt the butter in the now-empty skillet over medium heat. When the foaming subsides, add the onion and sauté until just golden around the edges, about 5 minutes. Add the tomatoes with their juice and the salt and simmer over low heat until the sauce is thickened, 15-20 minutes. Stir in the pepper, most of the parmesan and the heavy cream. Set aside.

5. The pasta sheets should be approximately 4 inches across. Place small balls of filling (about one rounded teaspoon each) in a line one inch from the bottom of the pasta sheet. Leave one and one-quarter inches between each ball of filling. Fold over the top of the pasta and line it up with the bottom edge. Seal the bottom and the two open sides with your finger. Use a fluted pastry wheel to cut along the two sides and bottom of the sealed pasta sheet. Run pastry wheel between balls of filling to cut out the ravioli.

6. Bring 4 quarts of water to boil in a large stockpot. Add about a tablespoon of salt and half of the pasta. Cook until doubled edges are al dente, 3-4 minutes. With a slotted spoon, remove the ravioli from the pot and transfer them to warmed bowls or plates. Keep warm in a warm oven while the remaining ravioli are boiled. Top the ravioli with sauce and the remaining parmesan; serve immediately.

whole wheat brioche

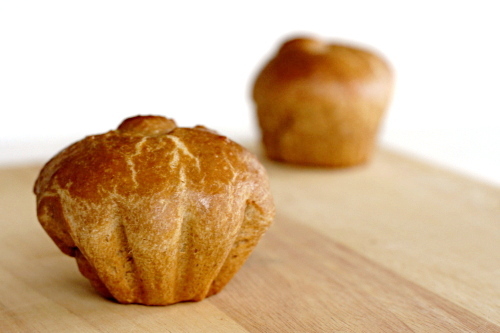
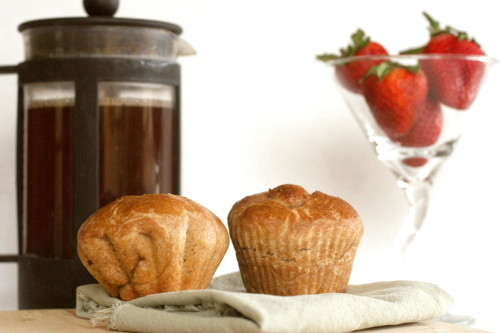
This recipe cracks me up. Each little brioche roll has 1¼ tablespoons of butter in it, so it doesn’t matter how much whole grain you use – these are not good for you.

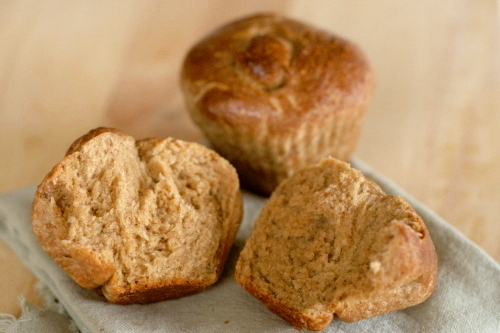
They are, however, good. Of course they don’t have much in common with their white flour cousins, which, if we were talking about people, would be one of those unceasingly friendly people who always have something nice to say. The whole wheat version is more akin to a sarcastic friend who always manages to make you laugh, but sometimes at your own expense. Both are good! Just different.

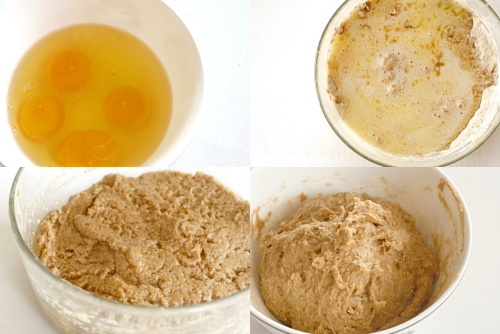
The whole wheat brioche is made along the same lines as the rest of Peter Reinhart’s Whole Grain Breads. What’s fun about this recipe is that the liquid used in one of the pre-doughs is melted butter, and in the other, it’s eggs. The one with the butter had a texture very different from the normal water-hydrated doughs – and not a particularly appetizing one, truth be told, as the best word to describe it would be ‘greasy’. Fortunately, after sitting in the fridge for several hours, the butter hardens and the mixture is more palatable – plus, of course, the liquid has had an opportunity to break down those bran fibers, which is the heart of Reinhart’s whole wheat bread method.

I tried a trick with this bread that was marginally successful. After the final dough is mixed and kneaded, it’s shaped immediately and then needs to rise again – for 3 to 4 hours. We tend to eat breakfast kind of late on weekends, but not that late!

So I reduced the yeast quite a bit, with the goal of extending the rising time to about 8 hours, or overnight. I wanted to wake up, heat the oven and throw the perfectly risen brioche rolls in to bake.

It turns out, though, that I decreased the yeast too much, and the poor little guys didn’t have enough strength to lift up that heavy dough. I still think the method is sound; I just need to use more yeast than I did. (The under-risen after 8 hours brioche were salvageable; I just had to give them an hour or so in a really warm environment before I could bake them.)

Usually my theory is that if food is supposed to be indulgent, then make it indulgent! Why worry about whole grains if you’re mainlining butter? But sometimes it’s just fun to make something weird, and whole wheat brioche is, indeed, weird.

One year ago: Pecan Sour Cream Biscuits
Two years ago: Chocolate Cream Pie

Printer Friendly Recipe
Whole Wheat Brioche (rewritten from Peter Reinhart’s Whole Grain Breads)

I reduced the yeast in the final dough to ½ teaspoon, hoping I could stretch the rising time to 8-10 hours, or overnight. This was too little, but I still think the method is worth trying, but with 1 teaspoon yeast.

I froze the brioche rolls after shaping, before rising. I let them defrost in the fridge for a few hours before moving them to room temperature to rise.

The melted butter kept leaking out of its pre-dough. Once the dough had chilled somewhat, I stirred it back in, so that the pre-dough would be homogeneous.

For the final cup of flour, after both pre-doughs are combined, I used white flour. I know that’s cheating, but I’ve had better results with Reinhart’s whole wheat bagels when white flour is used at the end, and I thought it was probably similar here. The rolls are still 80% whole wheat.

Pre-dough 1:
1¾ cups (8 ounces) whole wheat flour
½ teaspoon salt
½ cup whole milk, scalded and cooled
16 tablespoons (2 sticks) unsalted butter, melted

Mix all of the ingredients until thoroughly combined. Cover and refrigerate at least 8 hours and up to 3 days.

Pre-dough 2:
1¾ cups (8 ounces) whole wheat flour
¼ teaspoon instant yeast
4 large eggs, slightly beaten

Mix all of the ingredients until thoroughly combined. Using a rubber spatula or wet hands, knead the dough in the bowl for a couple minutes; it will be very tacky. Let the dough rest for 5 minutes, then knead again for 1 minute. Cover and refrigerate for at least 8 hours and up to 3 days.

Final dough:
Both pre-doughs
1 cup (4.5 ounces) whole wheat flour (see note)
¾ teaspoon salt
2¼ teaspoons instant yeast (see note)
3 tablespoons sugar

Egg wash:
1 egg beaten with 1 tablespoon water and a pinch of salt

1. Chop the chilled pre-doughs into to 12 pieces each. Combine the pre-doughs, flour, salt, yeast and sugar in the bowl of a standing mixer fitted with the dough hook (or a large bowl if mixing by hand). Mix on slow speed for 3 to 4 minutes, scraping the bowl as needed, (or knead with wet hands) until the pre-doughs are assimilated into each other. Add flour or water, as needed, to form a soft and slightly sticky dough. Knead (either with a mixer or by hand) for 3 to 4 minutes, until the dough is cold, firm, and slightly tacky. Let the dough rest for 5 minutes.

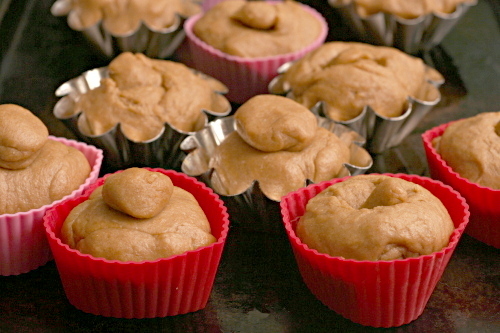
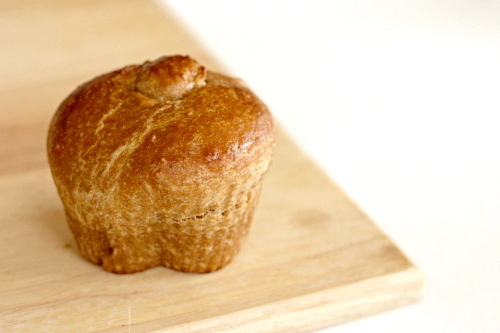
2. Divide the dough into 12 equal pieces and round each into a smooth ball. Spray 12 brioche molds or a 12-cup muffin pan with spray oil. To shape the brioche, roll each piece of dough into a cone; poke a hole through the larger end and slip the small end through the hole. (I also sometimes just formed a much smaller round from a small portion of the dough and stuck that on top of the larger round. I didn’t notice a difference in the baked versions of the two shaping methods.) Place the shaped rolls into the prepared pan and cover loosely with plastic wrap or a damp towel. Let rise at room temperature for 3 to 4 hours, until the dough has grown to about 1½ times its original size.

3. Adjust a rack to the middle position and heat the oven to 425 degrees. Brush the risen rolls with egg wash and place them in the oven, lowering the temperature to 400 degrees. Bake for 17 to 25 minutes, rotating the pan halfway through, until the brioche are dark golden brown, measure 195 degrees in the center, and sound hollow when tapped on the bottom (after one is removed from its pan).

4. Remove the rolls from their molds; cool on a cooling rack for at least 20 minutes before serving.

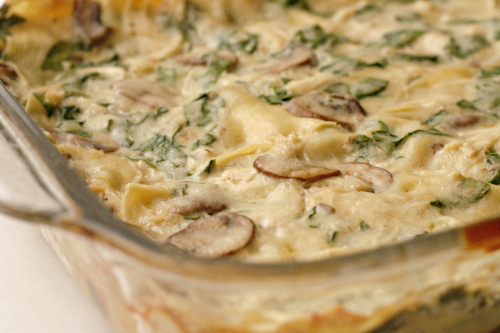
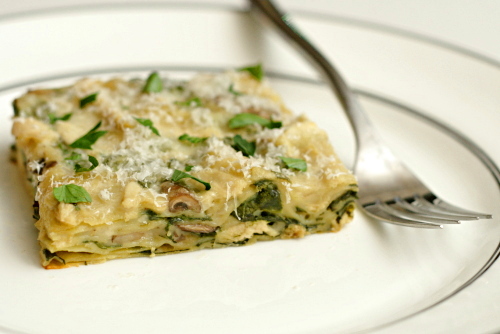
chicken mushroom spinach lasagna

I’m hardcore – I made an Emeril recipe more complicated. I did skip a few of his steps, so maybe I’m not completely ridiculous.

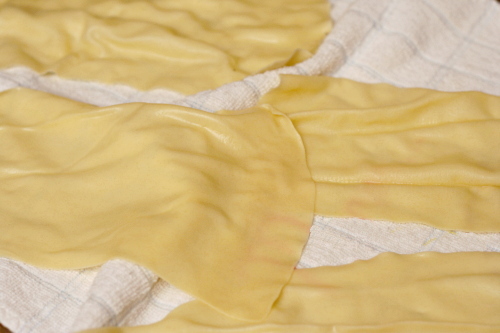
It’s just that if I’m going to go through all the trouble of making lasagna, with cooking chicken, stirring béchamel, layering and baking, I might as well go all the way – homemade pasta and damn good chicken.

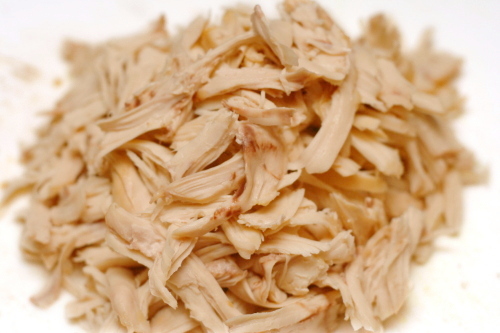
So there was no cooking of boneless skinless chicken breasts in a dry pan – weird, isn’t it, that I’m not a fan of dry tasteless meat. Heck no, I roasted those suckers – bone-in, skin-on, thankyouverymuch. And before that, I brined them – hey, it’s a step that takes about 2 minutes of effort and you ensure fully seasoned, moist meat. Why not do it?

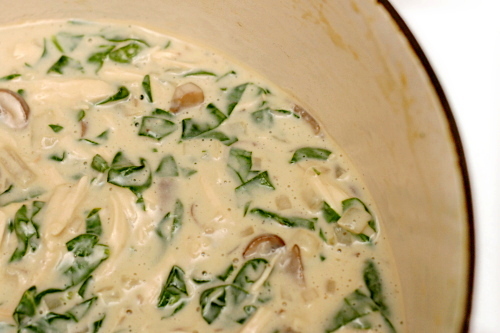
But if I’m going to add homemade pasta and brined, roasted, shredded chicken to an already ambitious recipe, I probably needed to cut some corners somewhere. Since I can’t seem to convince myself to enjoy cooked spinach, I decided to skip the cooking and blanching of the spinach and just add shredded baby spinach directly to the béchamel. I wasn’t able to use quite as much, but that’s okay – it was still a colorful, healthy, easy addition.

Okay, so I guess I only skipped one little step in Emeril’s recipe. Oh wait, I also mixed all the chicken and parmesan into the sauce, so I was really only layering two things – sauce and noodles. That probably saved 30 seconds or so of effort. That’s okay, I had fun making the lasagna, and I was completely confident that the extra bit of work I put into it would give me a perfect result, and, yes, it did.

One year ago: Deli-Style Rye Bread
Two years ago: (Almost) No-Knead Bread

Printer Friendly Recipe
Chicken, Mushroom and Spinach Alfredo Lasagna (adapted from Emeril Lagasse)

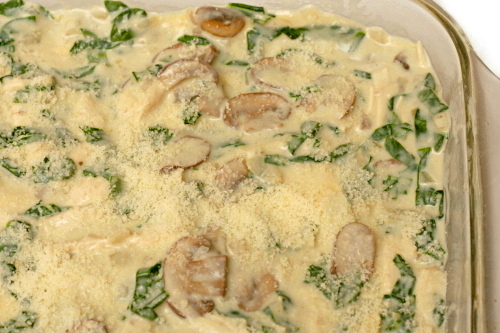
This is how I made the lasagna, but there are some things you could do differently. The original recipe keeps the chicken and some of the parmesan separate from the béchamel, laying pasta-béchamel-cheese-chicken instead of just alternating pasta and chickeny parmesany béchamel, like I did.

Also, the type of pasta you use is entirely up to you. You could use the no-cook dry noodles or buy fresh noodles or make your own. And I don’t know for sure that fresh homemade noodles need to be blanched for lasagna, but the one time I skipped that step was a disaster.

One more thing – the original recipes calls for double these ingredients to be layered into a 9- by 13-inch pan, but I was concerned that I’d have overflow. While my lasagna is a little on the short side, I think twice this height would have been too much for my standard 9- by 13-inch pan. But maybe the quantity of ingredients that I used would make an ideal 8- by 8-inch lasagna?

6 to 8 servings

1 teaspoon vegetable oil
1 pound chicken breasts, bone-in, skin-on, trimmed of excess fat and skin
salt and pepper
4 tablespoons (1 stick) unsalted butter
8 ounces button mushrooms, thinly sliced
2 large shallots, finely chopped
4 cloves minced garlic
¼ cup all-purpose flour
3½ cups milk
¼ teaspoon freshly ground black pepper
¼ teaspoon freshly grated nutmeg
4 ounces spinach, stemmed, washed, sliced into ¼-inch ribbons
3 ounces (1½ cups) grated Parmesan, divided
fresh lasagna noodles (if homemade, use 1 egg + ⅔ cup (3.2 ounces) flour, kneaded and rolled to the
next-to-thinnest setting on a pasta roller, blanched as described here)

1. (Optional) Stir 2 tablespoons salt into 2 cups cold water until it dissolves. Add the chicken; refrigerate for 30 minutes, then remove the chicken from the brine and pat it dry.

2. Adjust an oven rack to the middle-low position and heat the oven to 450ºF. Heat a small oven-safe skillet over medium-high heat. Add the oil and swirl to coat the bottom of the pan; place the chicken breast in the pan skin-side down. Cook without moving until well-browned, about 5 minutes. Turn the chicken over and move the pan to the oven. Roast until an instant-read thermometer inserted into the thickest part of the chicken measures 160ºF or the juices run clear when small cut is made in the chicken. Remove the pan from the oven and set aside. When the chicken has cooled enough to handle, remove and discard the skin (or eat it, because it’s crisp and delicious!) and shred the meat with your fingers or two forks. Decrease the oven temperature to 375ºF.

3. Béchamel: Melt the butter in a large saucepan over medium heat. Add the mushrooms and cook, stirring often, until their liquid has evaporated and the mushrooms are slightly browned, about 5 to 7 minutes. Add the shallots to the pan and sauté until soft and translucent, 3 to 4 minutes. Stir in the garlic and sauté for about 30 seconds, until fragrant. Add the flour and cook, stirring with a wooden spoon, to make a light roux, about 1 minute. Whisking constantly, slowly add the milk and continue to cook, stirring occasionally, until thickened, 5 minutes. Add ¾ teaspoon of the salt, the pepper, nutmeg, spinach and 2½ ounces (1¼ cups) of the Parmesan and cook, stirring, until thickened, about 2 minutes, then add the shredded chicken. Taste the sauce to decide if it needs more salt. Remove the béchamel from the heat and place a piece of plastic wrap directly on the surface until ready to assemble the lasagna.

4. Spray a 9 by 13-inch pan with nonstick spray, and spread about ¼ cup of the béchamel sauce on the bottom of the dish, avoiding any large chunks of chicken. Arrange a single layer of noodles evenly over the sauce. Then alternate layering béchamel and noodles until you run out of noodles – I was able to make 4 layers, I believe. End with the remaining béchamel and sprinkle the top with the remaining parmesan.

5. Cover the pan with aluminum foil and bake for 20 minutes. Remove the foil and continue baking for about 20 minutes, until bubbly. Let the lasagna rest for about 10 minutes before slicing and serving.

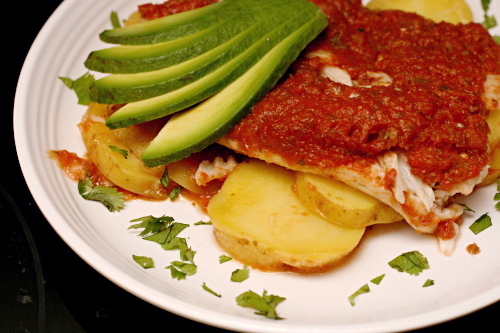
jalapeno-baked fish with roasted tomatoes and potatoes

I need every weekday meal to be exactly like this one.

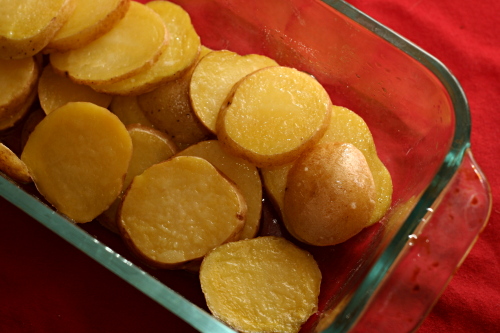
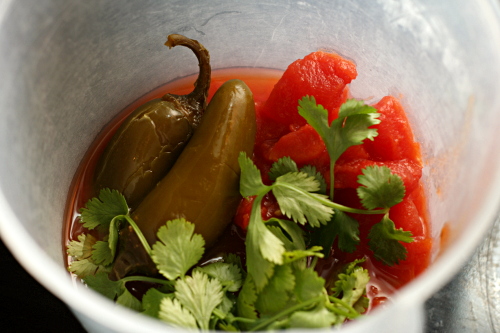
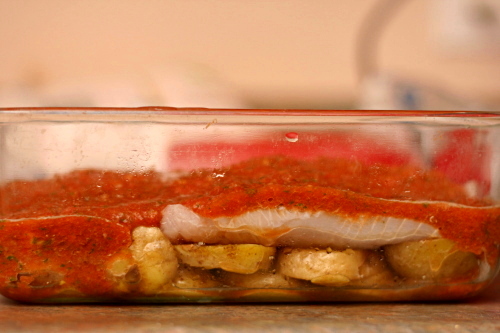
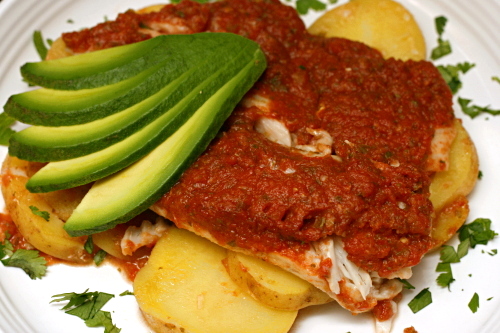
First, it took only 20 minutes of actual effort. Sliced potatoes are softened in the microwave right in the baking dish. Meanwhile, I pureed a few other ingredients, mostly straight from cans, with my immersion blender. Then I laid some fish filets over the potatoes and poured the pureed sauce on top.

Second, it only bakes for 20 minutes. This was the perfect amount of time for me to empty the dishwasher, clean up the kitchen and unpack groceries.

Third, it’s nice and light, with lean white fish, vegetables, and just a small amount of oil to help the potatoes cook.

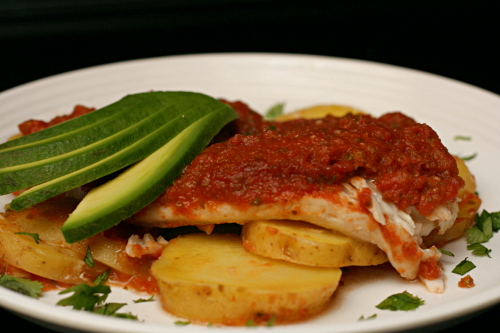
Fourth, and of course the only point that really matters, it was just so good. The fish, potatoes, and sauce were balanced nicely and the spice level was just right.

My favorite meals have all the ingredients jumbled together like this, protein and starch and vegetables. It’s especially nice on a weeknight so I don’t have to make side dishes as well. I haven’t found many fish recipes like that, so this is perfect – in every way, really.

One year ago: Red Velvet Cake comparison
Two years ago: Olive Oil Bread

Printer Friendly Recipe
Jalapeno-Baked Fish with Roasted Tomatoes and Potatoes
(from Rick Bayless’s Mexican Everyday via Dinner and Dessert)

Serves 4

4 medium (1 pound total) red-skin boiling or Yukon Gold potatoes, sliced 1/8-inch thick
1 tablespoon vegetable or olive oil
Salt
1 (15-ounce) can diced tomatoes in juice
1 large garlic clove, peeled and cut in half
⅓ cup (loosely packed) coarsely chopped cilantro, plus extra for garnish
About ¼ cup sliced canned pickled jalapenos
1 tablespoon jalapeno pickling juice
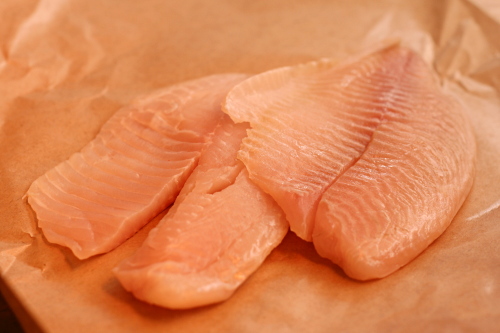
Four 4- to 5-ounce (1 to 1¼ pounds total) skinless fish fillets, preferably ¾ to 1 inch thick

1. Turn on the oven to 400 degrees. Scoop the sliced potatoes into a microwaveable 8×8-inch baking dish. Drizzle on the oil and sprinkle with ½ teaspoon salt. Toss to coat, then spread the potatoes in an even layer. Cover with plastic wrap and poke a couple of holes in the top. Microwave on high until the potatoes are nearly tender, about 4 to 5 minutes.

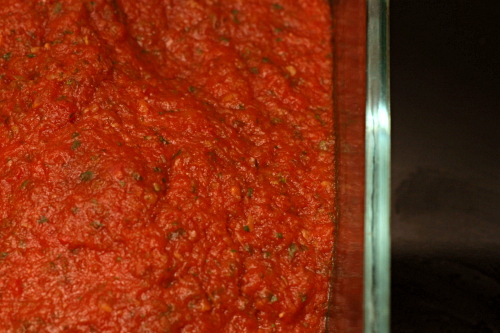
2. Meanwhile, in a food processor or blender, combine the tomatoes with their juice, garlic, cilantro, jalapenos, and pickling juice. Process to a puree, leaving just a little texture.

3. Lay the fish fillets in a single layer over the potatoes. Pour the tomato mixture evenly over the fish and potatoes.

4. Slide the baking dish into the oven. Bake for 20 minutes, until the fish flakes when pressed firmly.

5. Scoop a portion of the fish-potato-sauce onto each dinner plate, sprinkle with cilantro, and serve right away.

baked ziti

I am officially out of recipes to share. I am now raiding my “Probably Not” folder – the rejects that either didn’t taste good or didn’t photograph well. I’ll spare you that ones that didn’t taste good.
It seems like I could just make something new and blog about it, right? The thing is though, nothing is working quite right for me lately. My delicious banana cream pies keep coming out with a layer of candy armor over the crust; the southwestern pasta salad recipe I patched together was too similar to and probably not quite as good as this one; I never got the ratios right in my cocktail last weekend (despite many attempts), and I forgot to take final photos of my pesto.

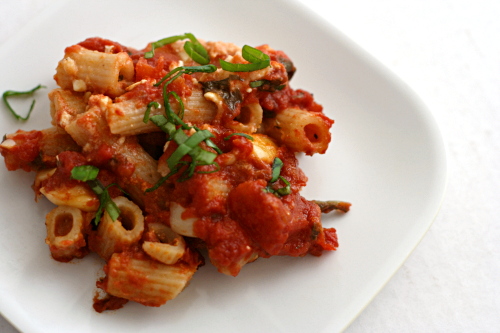
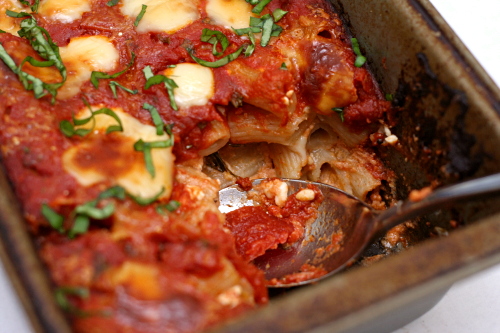
I’m just lucky that the photos of the baked ziti aren’t as ugly as I’d remembered. For this is not in the “didn’t taste good” category. With a mixture of pasta, tomatoes, cheese, and herbs, how could it not be delicious?

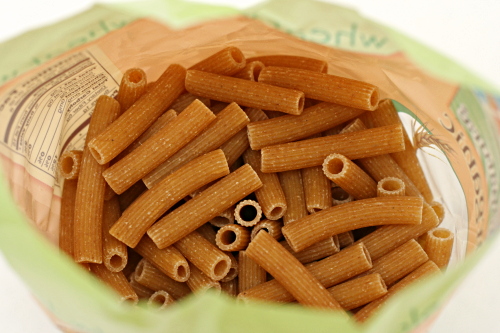
And although it’s hard to believe, you can make it halfway healthy without sacrificing much in the way of flavor or creaminess. In my experience, good whole wheat pasta (I like Bionaturae) is hardly different from refined versions. I’m perfectly happy with 1% cottage cheese and skim mozzarella. That just leaves the heavy cream to worry about, and with a slight increase in the cornstarch, you can get away with using milk instead.

And you can make it ahead, and it freezes well, and it reheats well, and heck, it isn’t half bad cold if you’re too impatient to bother heating it up. This is certainly worth pulling out of the reject file.
One year ago: Herbed Lima Bean Hummus
Two years ago: Country Crust Bread

Printer Friendly Recipe
Baked Ziti (from Cooks Illustrated)

Serves 8-10

Healthy tricks: Use 1% cottage cheese, whole wheat pasta, part-skim mozzarella, and 2 teaspoons cornstarch plus 1 cup milk instead of ¾ teaspoon cornstarch with 1 cup heavy cream.
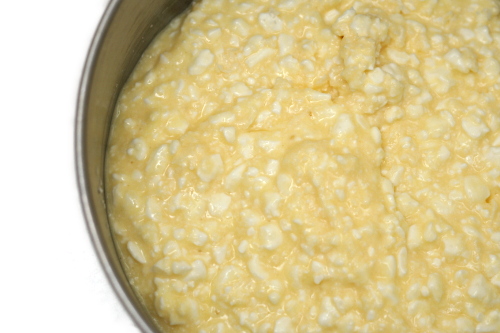
1 pound whole milk or 1% cottage cheese
2 large eggs, lightly beaten
3 ounces parmesan cheese (about 1½ cups), grated
table salt
1 pound ziti pasta
2 tablespoons extra-virgin olive oil
5 medium garlic cloves, minced (about 5 teaspoons)
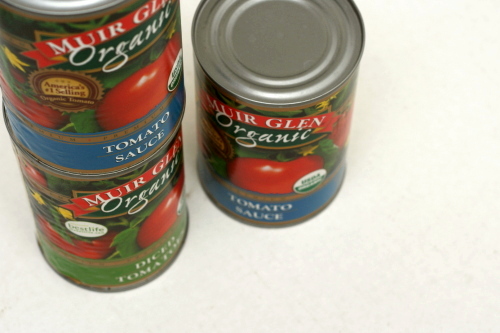
1 (28 ounce) can tomato sauce
1 (14.5 ounce) can diced tomatoes
1 teaspoon dried oregano
½ cup plus 2 tablespoons chopped fresh basil leaves
1 teaspoon sugar
black pepper
¾ teaspoon cornstarch
1 cup heavy cream
8 ounces low-moisture mozzarella cheese, cut into ¼ inch pieces (about 1½ cups)

1. Adjust oven rack to middle position and heat oven to 350°F. Whisk cottage cheese, eggs and 1 cup Parmesan together in medium bowl; set aside. Bring 4 quarts of water to boil in large Dutch oven over high heat. Stir in 1 tablespoon salt and pasta; cook, stirring occasionally, until pasta begins to soften but is not yet cooked through, 5 to 7 minutes. Drain pasta and leave in colander.

2. Meanwhile, heat oil and garlic in 12-inch skillet over medium heat until garlic is fragrant but not brown. Stir in tomato sauce, diced tomatoes, and oregano; simmer until thickened, about 10 minutes. Off heat, stir in ½ cup basil and sugar, then season with salt and pepper.

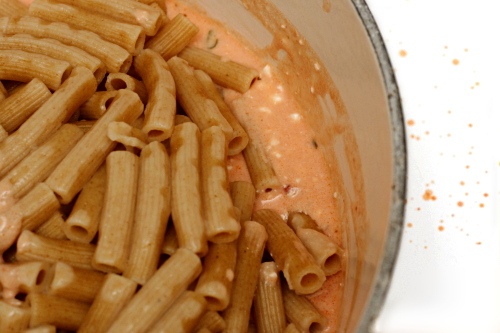
3. Stir cornstarch into heavy cream in small bowl, transfer mixture to Dutch oven set over medium heat. Bring to simmer and cook until thickened, 3 to 4 minutes. Remove pot from heat and add cottage cheese mixture, 1 cup tomato sauce and ¾ cup mozzarella, then stir to combine. Add pasta and stir to coat thoroughly with sauce.

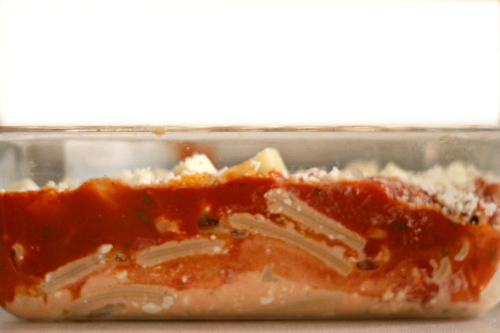
4. Transfer pasta mixture to 13- by 9-inch baking dish and spread remaining tomato sauce evenly over pasta. Sprinkle with remaining ¾ cup mozzarella and remaining ½ cup Parmesan over top. Cover baking dish tightly with foil and bake for 30 minutes.

5. Remove foil and continue to cook until cheese is bubbling and beginning to brown, about 30 minutes longer. Cool for 20 minutes. Sprinkle with remaining 3 tablespoons basil and serve.