cranberry grappa jelly

grappa cranberries 3

Perhaps the lesson learned here is that cranberry sauce is better with alcohol. These are the only cranberry sauce recipes I can say that I honestly like. The plain stuff is nothing but sweet and tart, but adding a lot of wine or a little bit of grappa mellows those flavors while adding some complexity.

grappa cranberries 1

Still, I have to admit, I’m not really sure what to do with cranberry sauce. I gather it’s supposed to be put on top of the turkey, but that’s where I keep my gravy. Mostly I make it because it makes an excellent sandwich when combined with leftover turkey, green chile, and mayo.

grappa cranberries 2

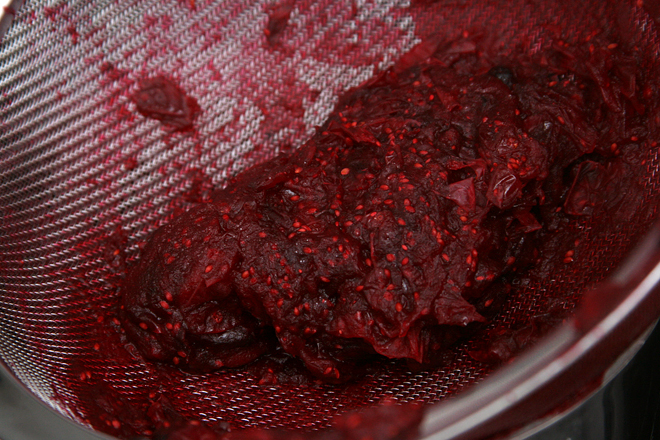
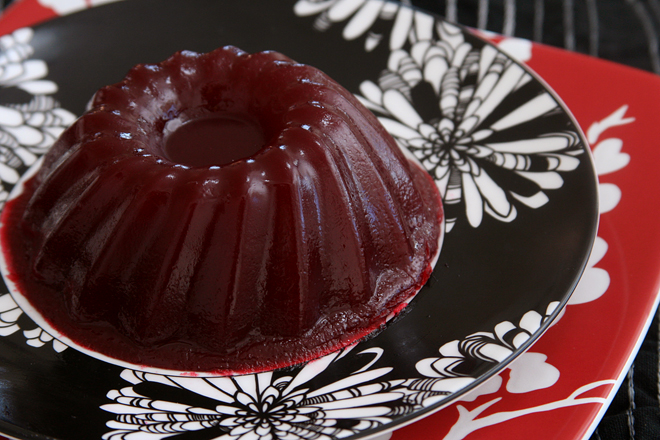
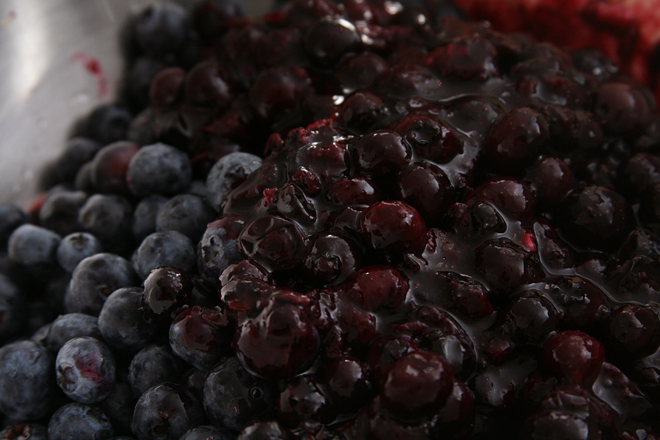
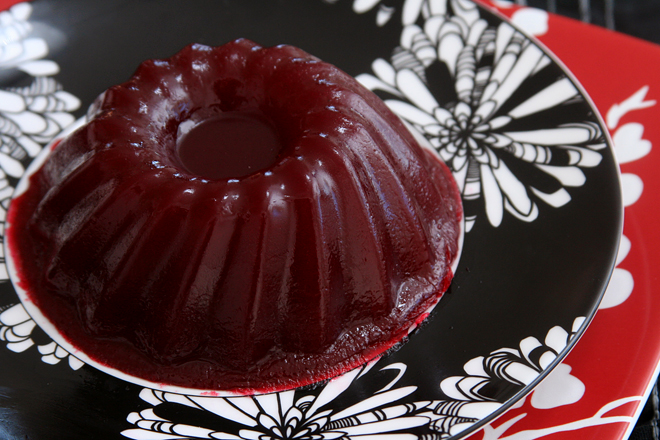
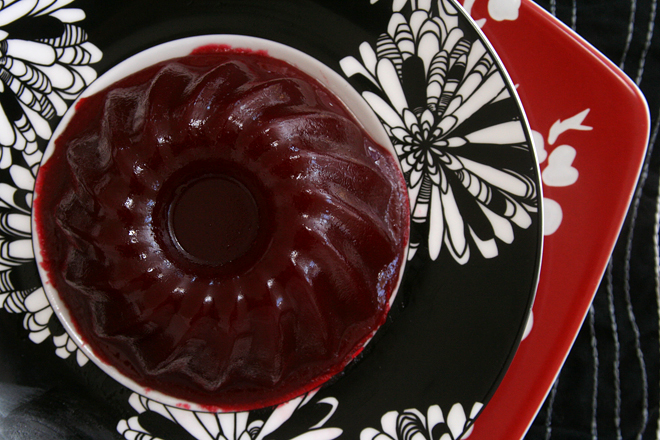
I already had my mind made up that I prefer my cranberries without the skins, and this recipe is designed for that. Plus, it slurps just like the stuff from the can, but you can make it any pretty shape you want (and have a pan for). Of course it tastes way more interesting than the stuff from a can, and it does make one heck of a sandwich.

grappa cranberries 5
Printer Friendly Recipe
Cranberry Grappa Jelly (from Gourmet via epicurious)

8 servings

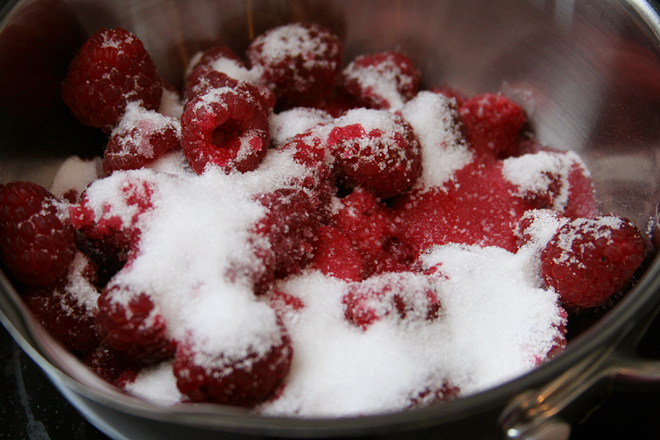
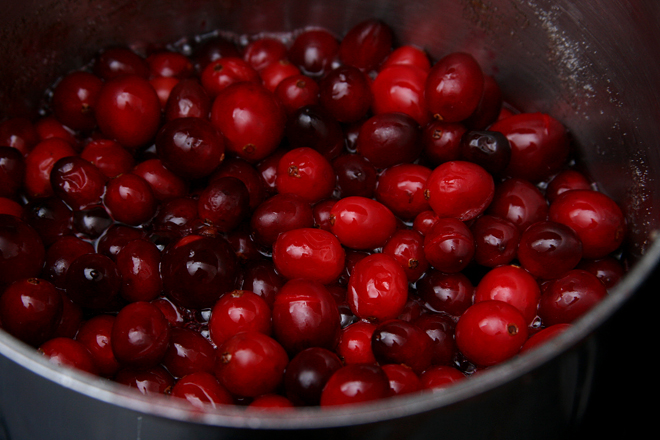
1¼ pounds fresh or frozen cranberries (4½ cups)
1¾ cups sugar
1¾ cups cold water, divided
1 cup grappa, divided
2 (¼-ounce) envelopes unflavored gelatin (4½ teaspoons)

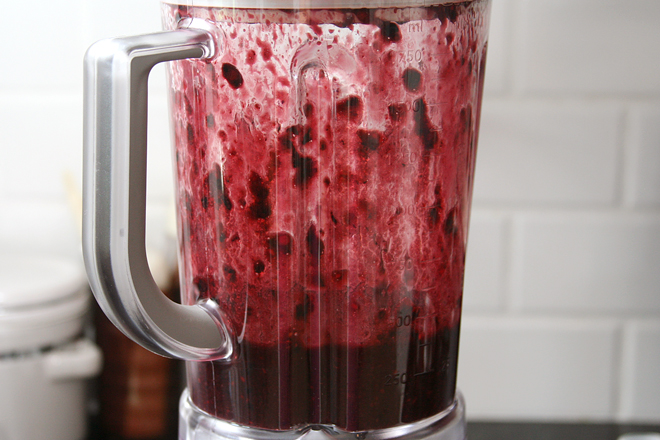
1. Bring cranberries, sugar, 1½ cups water, and ¾ cup grappa to a boil in a 4- to 5-quart heavy pot, stirring until sugar has dissolved, then briskly simmer, partially covered, stirring occasionally, until most of berries have burst and the mixture is thickened, 15 to 20 minutes. Strain through a large fine-mesh sieve into a 2-quart measuring cup or a bowl, pressing hard on and then discarding solids. (You will need 2½ cups liquid.)

2. Stir together the gelatin and remaining ¼ cup water and let stand 1 minute to soften. Bring 1 cup drained cranberry liquid to a simmer in a small saucepan, then add the gelatin mixture and stir until just dissolved. Add the gelatin mixture and remaining ¼ cup grappa to the remaining 1½ cups cranberry liquid and stir well. Pour the cranberry sauce into a lightly oiled mold and chill, covered with plastic wrap, until firmly set, at least 12 hours.

3. To unmold, dip the mold in a large bowl of warm water (water should reach halfway up mold) for 5 seconds, then run tip of a thin knife around edge of mold. Tilt mold sideways and tap side against a counter, turning it, to evenly break seal and loosen jelly. Keeping the mold tilted, put a plate over mold, then invert the jelly onto the plate.

grappa cranberries 4

bittersweet chocolate and pear cake

pear chocolate cake 6

Earlier this summer, one of my coworkers brought in peaches from his tree, so I took some and made peach cupcakes to share at work. Then a couple weeks ago, another coworker was giving away apples, so I took some and made apple pie-cake for everyone. After that, the apple grower was excited to find someone to offload her apples to, so she brought me another bag, and I made apple cake and then apple muffins. Also, my mom gave me pears, so I made pear chocolate cake.

pear chocolate cake 2

It sounds weird, right, pears and chocolate together? That’s what most of my coworkers said, but then they said that it definitely worked. It’s a fun recipe, with the eggs beaten until foamy and the batter spread in the pan with the fruit and chocolate on top. As the cake bakes, it rises up due to all the air beaten into the eggs, incorporating the fruit and chocolate.

pear chocolate cake 4

Just like in a chocolate chip cookie, the chocolate here provides a bitter richness to compliment the sweet butteriness of a fruit-based cake. Sugar and butter being, of course, the perfect compliments to almost any fruit. Basically, if you have too much fruit, give it to me and I will make cake out of it.

pear chocolate cake 7

Printer Friendly Recipe
Bittersweet Chocolate and Pear Cake (rewritten but not significantly adapted from Al Di La Trattoria via Smitten Kitchen)

My homegrown pears were small, so I used five of them.

8 tablespoons (1 stick) unsalted butter, melted
1 cup (4.8 ounces) all-purpose flour
1 tablespoon baking powder
½ teaspoon salt
3 eggs, at room-temperature
¾ cup (5.25 ounces) sugar
3 pears, peeled, cored, and diced into ¼-inch cubes
¾ cup (4.5 ounces) bittersweet chocolate chunks

1. Heat oven to 350 degrees. Spray a 9-inch springform pan with nonstick baking spray (or oil and flour the pan). In a small bowl, combine the flour, baking powder, and salt. In a small skillet over medium heat, melt the butter. When the foaming subsides, start swirling the butter around the pan. When the milk solids sink and turn brown and the butter smells nutty, remove the pan from the heat and pour the butter into a small bowl or measuring cup so it stops cooking.

2. In the bowl of a stand mixer fitted with the whisk attachment (or a large bowl if using a hand-held mixer), beat the eggs until light yellow and thick, about 5 minutes on a stand mixer and 9 minutes with a handheld mixer. When the whisk is removed from the bowl, the egg should flow off of it in a thick ribbon. Gradually add the sugar to the eggs, beating for 1 minute after it’s all added. Reduce the mixer speed to its lowest setting and add one-third of the flour mixture, then half of the butter, another third of the flour, the rest of the butter, and the rest of the flour, beating just until combined.

3. Spread the batter evenly in the prepared pan. Evenly distribute the pears and chocolate over the top of the batter. Transfer to the oven and bake until a toothpick inserted into the center of the cake comes out clean, 45-60 minutes. Transfer to a wire rack to cool completely. If desired, dust with powdered sugar just before serving.

pear chocolate cake 5

peach raspberry galette

peach raspberry galette 10

I know this is crazy, but I’ve already started on my New Year’s resolutions for 2015. Resolution-haters are always saying that they don’t need to make resolutions at the new year, because if they see changes they want to make, they just make them, regardless of the date. And I get their point, but I also think that right after the busy, indulgent holiday season when things slow down to a more manageable pace is a great time to think about personal changes. While I am expecting the next four months to be rushed, I was worried I would lose momentum by the new year, so I’m dipping my toe in now.

peach raspberry galette 2

My goals are mostly cooking-related, as usual:

1) Use more cookbooks. It’s not the first time I’ve made this resolution, but I didn’t do a great job before. This time, I’m going to make myself a schedule to stick to, and hopefully that will lead to a routine. Because I love cookbooks so much, but if I don’t use them, I feel guilty for having them.

peach raspberry galette 3

2) Cook a wider variety of cuisines. There is delicious food out there that isn’t Italian, and maybe I should try some of that once in while. I’m particularly interested in Asian food. I’m intimidated by the ingredient availability issue, but if I’m cooking more of it, I should be able to use up ingredients before they get lost in the back of the refrigerator or pantry.

peach raspberry galette 4

3) Read Harold McGee’s On Food and Cooking. Also not the first time I’ve made this resolution. I started it but got bogged down.

4) Bake more pastries. I’ve gotten into a bit of a bar cookie rut, partly because almost everything I bake is brought to work to share, and it’s easier for coworkers to grab a fruit crisp bar than a slice of pie. But after four years of almost weekly treats, my coworkers seem happy with anything I bring in.

peach raspberry galette 5

So far, I’m doing good with my not-New Year resolutions. I’ve been going to bed a little earlier almost every night to read On Food and Cooking. I recently made kung pao tofu, and last night, we had summer rolls for dinner. And I made these galettes from Tartine, perhaps my favorite baking book. Since they’re sort of pastries, so I killed two birds with one stone.

peach raspberry galette 6

My coworkers, as expected, did not mind cutting themselves a slice of galette, transferring it to a plate, and spooning a dollop of whipped cream on top. And I had fun tackling a more ambitious baking project than usual, even on a weeknight. Maybe I need to join the New Year’s resolution haters and create my own not-New Year’s resolution tradition.

peach raspberry galette 7

Printer Friendly Recipe
Raspberry Peach Galette (adapted from Elisabeth Prueitt and Chad Robertson’s Tartine)

Makes two 10-inch galettes, serving about 16

Galettes are often lauded as the lazy man’s pie, with only one crust and no crimping. This recipe belies that description. In order to maximize the flakiness of the crust, the butter is rolled into the flour several times, then the dough is rolled several more times after the water is added. I was pleasantly surprised that this process only took half an hour.

I didn’t use quite enough fruit, mostly because I was too lazy to peel and slice a fifth peach and too cheap to buy a second container of raspberries. However, I am recommending that you use the extra fruit, as my crust to fruit ratio was slightly high, even as delicious as this crust is. Tartine recommends substantially more crust, but the reduced amounts listed here (which are what I used) were perfect for two galettes (or it would be, with a little more fruit than I used).

24 tablespoons (3 sticks) unsalted butter
18 ounces (3¾ cups) unbleached flour
2 teaspoons sugar
1¼ teaspoons salt
¾ cup ice water
4 cups peaches (4-5 large peaches), peeled and pitted, sliced ⅛-inch thick
2 (6-ounce) containers raspberries
¼ to ½ cup (1.75 to 3.5 ounces) sugar, plus more for sprinkling
1 small egg, whisked with a pinch of salt

1. Cut the butter into ½-inch cubes; freeze for 10 minutes. In a medium bowl, mix the flour, sugar, and salt.

2. Transfer the dry ingredients to a pastry cloth or clean work surface; spread out to ⅓-inch thickness. Scatter the butter pieces over the flour, tossing them to coat with flour. Use a rolling pin to flatten the butter pieces into the flour. When the flour/butter mix has been rolled to the edge of your work surface, shape it back together to a ⅓-inch thickness. Repeat the rolling and reshaping three more times, until the mixture resembles large flakes.

3. Form the mixture into a pile and clear a well in the middle of the pile. Pour in the water, then use a bench scraper to mix the dough into the water with a cutting motion. Use a well-floured rolling pin to roll the dough into a rectangle about 10 by 14 inches. Fold it into thirds, then in half the opposite direction. Repeat the rolling and folding three more times. Roll the dough into a 14-inch by 7-inch rectangle. Cut the dough in half to form two 7-by 7-inch squares. Wrap the dough tightly and refrigerate for at least an hour or overnight.

4. Adjust an oven rack to the middle position and heat the oven to 375 degrees. Line two baking sheets with parchment paper or silicone mats. Roll each square of dough into a 14-inch round. Transfer the rounds to the prepared baking sheets; chill 10 minutes.

5. Divide the peaches evenly between the two dough rounds, leaving a 2-inch border. Top with the raspberries, then sprinkle 2-4 tablespoons of sugar (depending on how ripe and sweet your fruit is) over each pile of fruit. Fold the sides of dough over the fruit, pleating as necessary. Brush the dough with the egg wash, then sprinkle with sugar.

6. Bake until the fruit is bubbling and the crust is browned, 45-55 minutes. Remove from the oven and let cool on the pan. Serve warm or at room temperature.

peach raspberry galette 8

blackberry cake with raspberry filling

blackberry cake 9

I require a weekend for my birthday. Not a week, certainly not a month, just two days and one evening to do as many as my favorite things as possible and as few of my least favorite things. So wine and a new novel are in; laundry is most definitely out.

blackberry cake 4

Baking and eating my birthday cake is in, but I was really on top of things this year and did all the steps I don’t like so much beforehand. That includes digging around in the messy, nearly unreachable cabinet for pans, lining the pans, and pureeing and straining the fruit. All that was left to do on my actual birthday was add things to the mixer and nibble on frosting while assembling the cake.

blackberry cake 2

I’d originally made this cake for a friend’s bridal shower, but there were two issues: 1) I only got one piece, and 2) I didn’t save any for Dave. He’s pretty adamant about not being a dessert guy and even less so a cake guy, but our friends had such good things to say about the cake after the party that he was sorry he missed it.

blackberry cake 6

So choosing this year’s birthday cake wasn’t a hard decision. Making the cake wasn’t hard either, since I’d left only my favorite parts of baking for my birthday itself. I made a small cake, but I had just enough to last for my entire birthday weekend. Cake everyday is definitely on the list for an awesome birthday.

blackberry cake 10

Printer Friendly Recipe
Blackberry Cake with Raspberry Filling and Cream Cheese Frosting (cake adapted from Cook’s Illustrated White Cake recipe; filling is just barely adapted from Cook’s Illustrated Raspberry Coulis)

The bride’s wedding colors are Tiffany blue and red, so I originally made a blackberry cake hoping that it would turn out blue, like Elly’s, with raspberry filling as the red. I ended up with a purple cake with pink filling, but no one complained. However, you could mix this up with other berries – blackberries, raspberries, blueberries, or strawberries can be used in both the cake and the filling. Fresh or frozen and thawed berries can be used.

I made a three-layer cake for my birthday, and a four-layer cake for the shower, which I preferred. I love the raspberry filling, so an extra layer of it is very welcome.

For heavy decorations like the roses, increase the frosting recipe by 50% (using 12 tablespoons butter, 12 ounces cream cheese, and 6 cups powdered sugar).

Cake:
¾ cup pureed and strained blackberries (from 8 ounces of blackberries)
⅓ cup milk, at room temperature
1 teaspoon vanilla extract
2¼ (9 ounces) cups cake flour
3 teaspoons baking powder
12 tablespoons unsalted butter, at room temperature
1½ cups (10.5 ounces) sugar
¾ teaspoon salt
4 egg whites, at room temperature

Raspberry Filling:
6 ounces fresh raspberries (or thawed if frozen)
2½ to 3½ tablespoons granulated sugar
pinch table salt
1 teaspoon lemon juice

Cream Cheese Frosting:
8 tablespoons (1 stick) butter, at room temperature
8 ounces cream cheese, at room temperature
pinch salt
2 teaspoons vanilla extract
4 cups powdered sugar

1. For the cake: Heat the oven to 350F. Spray two 8-inch round cake pans with baking spray (or grease and flour the pans). Line with parchment or waxed paper and grease the paper.

2. Using a blender, puree the blackberries. Transfer them to a fine-mesh strainer set over a small bowl; use a spoon or rubber spatula to press the liquid through the strainer, discarding the seeds. Measure ¾ cup of puree. Stir the milk and vanilla extract into the blackberry puree. In a separate small bowl, combine the flour and baking powder.

3. Place the butter, sugar, and salt in the bowl of an electric mixer fitted with the paddle attachment (or a large bowl if using a hand mixer). Beat on medium speed for 2 minutes, until light and fluffy. Add the egg whites one at a time, beating well after each addition. Reduce the mixer speed to low and add one-third of the flour mixture, followed immediately by half of the blackberry mixture, mixing just until incorporated. Repeat with another third of the flour and the rest of the blackberry puree, then the last of the flour. Scrape down the sides of the bowl and mix on medium-low speed for 15 seconds longer.

4. Divide the cake between the prepared pans. Bake for 22 to 28 minutes, or until a cake tester or wooden toothpick inserted into the center comes out clean. Allow the layers to cool in the pans for 5 to 10 minutes. Invert and turn out onto wire racks and peel off the paper liners. Let stand until completely cooled before assembling the cake, at least one hour.

5. For the filling: In a medium saucepan, bring the raspberries, 1 teaspoon water, 2½ tablespoons sugar, and salt to bare simmer over medium heat, stirring occasionally; cook until the sugar is dissolved and the berries are heated through, about 1 minute longer. Transfer the mixture to the blender; puree until smooth, about 20 seconds. Strain through a fine-mesh strainer into a small bowl, pressing and stirring the puree with a rubber spatula to extract as much seedless puree as possible. (there’s no need to wash either the blender or the strainer between the blackberries and the raspberries.) Stir in the lemon juice and additional sugar, if desired. Cover with plastic wrap and refrigerate until cold, at least 1 hour. Stir to recombine before serving. Can be refrigerated in airtight container for up to 4 days.

6. For the frosting: Place the butter, cream cheese, and salt in the (clean) bowl of an electric mixer fitted with the paddle attachment; beat on medium speed until smooth. Switch to the whisk attachment; on low speed, gradually add the powdered sugar, beating until it’s just incorporated. Increase the speed to high and beat for 5 minutes, scraping down the sides of the bowl as necessary.

7. To assemble: To make the cakes easier to handle, wrap each tightly in plastic wrap and chill for at least an hour or up to overnight. Working with one cake at a time, unwrap it and use a serrated bread knife to cut the cakes horizontally in half. If you’re using a cake board, put a small spoonful of frosting in the center of it to glue the cake to the board; if you’re not using a cake board, line the perimeter of your serving dish with strips of wax paper, then put a small spoonful of frosting in the center of the serving dish. Center a layer of cake over the frosting, cut side down. Spread a thin layer of cream cheese frosting over the cake layer. Spoon 3 tablespoons of raspberry filling over the frosting, spreading it to within about an inch of the edge. Center another cake layer over the filling, cut side-down. Repeat the layering of frosting, filling, and cake twice more. Spread a thin layer of frosting evenly over the top and sides of the cake to seal in crumbs. If the layers slide around while you’re spreading the frosting, push wooden skewers from the top to the bottom of the cake in three places to secure the layers. Chill the cake, uncovered, for 30 minutes to 2 hours to set the frosting. Remove the skewers if necessary, then spread the remaining cream cheese frosting evenly over the top and sides of the cake, decorating as desired. Either transfer the cake on the cake board to a serving platter, or carefully remove the strips of wax paper to leave a clean serving platter around the sides of the cake.

blackberry cake 8

blueberry pie

blueberry pie 5

The two weeks a year when blueberries are reasonably priced are almost a tease. Blink and you miss it! Down here in the desert, some years it doesn’t happen at all (or maybe I blinked). They went on sale recently, and I loaded up my cart. I didn’t know what I was going to make for dessert that weekend, but I knew it would have lots of blueberries in it.

blueberry pie 1

Pie. Pie is so classic, and like I recently said, I don’t get many opportunities to make it. While pies aren’t the easiest desserts to make, at least blueberries don’t require any tedious prep like most other fruits – that is, unless you choose a high-maintenance Cook’s Illustrated recipe for blueberry pie.

blueberry pie 3

I did, because I hate soupy pies enough to pre-cook the filling and peel and grate an apple into the mix. And clean out the coffee grinder to powder the tapioca when the grinder I keep in the kitchen for non-coffee things broke. All the cleaning, dough-rolling, pre-cooking, and apple-shredding was worth it when I was rewarded with a flaky crust over a juicy but not soupy filling of my favorite summer fruit.

blueberry pie 4

Printer Friendly Recipe
Blueberry Pie (pretty much straight from Cook’s Illustrated, except for I don’t use their crust)

CI notes: This recipe was developed using fresh blueberries, but unthawed frozen blueberries (our favorite brands are Wyman’s and Cascadian Farm) will work as well. In step 4, cook half the frozen berries over medium-high heat, without mashing, until reduced to 1¼ cups, 12 to 15 minutes. Grind the tapioca to a powder in a spice grinder or mini food processor. If using pearl tapioca, reduce the amount to 5 teaspoons.

dough for double-crust pie (I always make this one)
6 cups fresh blueberries (about 30 ounces) (see note)
1 Granny Smith apple, peeled and grated on large holes of box grater
2 teaspoons grated zest and 2 teaspoons juice from 1 lemon
¾ cup sugar (5¼ ounces)
2 tablespoons quick-cooking tapioca, ground (see note)
pinch table salt
2 tablespoons unsalted butter, cut into ¼-inch pieces
1 large egg, lightly beaten with 1 teaspoon water

1. Adjust oven rack to lowest position, place rimmed baking sheet on oven rack, and heat oven to 400 degrees. Place 3 cups berries in medium saucepan and set over medium heat. Using potato masher, mash berries several times to release juices. Continue to cook, stirring frequently and mashing occasionally, until about half of berries have broken down and mixture is thickened and reduced to 1 ½ cups, about 8 minutes. Let cool slightly.

2. Place grated apple in clean kitchen towel and wring dry. Transfer apple to large bowl. Add cooked berries, remaining 3 cups uncooked berries, lemon zest, juice, sugar, tapioca, and salt; toss to combine. Transfer mixture to dough-lined pie plate and scatter butter pieces over filling.

3. Roll out second disk of dough on generously floured (up to ¼ cup) work surface to 11-inch circle, about ⅛ inch thick. Using 1¼-inch round biscuit cutter, cut round from center of dough. Cut another 6 rounds from dough, 1½ inches from edge of center hole and equally spaced around center hole. Roll dough loosely around rolling pin and unroll over pie, leaving at least ½-inch overhang on each side.

4. Using kitchen shears, trim bottom layer of overhanging dough, leaving ½-inch overhang. Fold dough under itself so that edge of fold is flush with outer rim of pie plate. Flute edges using thumb and forefinger or press with tines of fork to seal. Brush top and edges of pie with egg mixture. If dough is very soft, chill in freezer for 10 minutes.

5. Place pie on heated baking sheet and bake 30 minutes. Reduce oven temperature to 350 degrees and continue to bake until juices bubble and crust is deep golden brown, 30 to 40 minutes longer. Transfer pie to wire rack; cool to room temperature, at least 4 hours. Cut into wedges and serve.

blueberry pie 6

strawberry rhubarb crisp bars

strawberry rhubarb crisp bars 4

I never make pies anymore. Most of what I bake is meant to be easily shared by a large crowd, either at work or at a party. That’s fine, but pies are fine too.

strawberry rhubarb crisp bars 1

This was part of my annual frenzy to use rhubarb as much as possible during its short season. When the grocery store has it, I buy it, whether I have a plan for it or not. That’s easy when you have a bunch of coworkers who will eat anything – preferably anything handheld, easy to grab along with a cup of coffee.

strawberry rhubarb crisp bars 2

Until I find a small gathering – with plates and even forks – to make a pie for, these bars are a good stand in. The balance of tart, juicy fruit to buttery flour is spot on, and although the crispness isn’t like a flaky pie crust, the oaty crunch is a good stand-in. Best of all, I actually had an opportunity to share them, unlike a silverware-demanding pie.

strawberry rhubarb crisp bars 3

Printer Friendly Recipe
Strawberry Rhubarb Crisp Bars (adapted from Yvonne Rupert’s One Bowl Baking via Smitten Kitchen)

Makes 9 to 16 bars

I un-one bowled this. I’m spoiled by my dishwasher and would rather mix things conveniently than use less dishes.

1 cup (80 grams) rolled oats
¾ cup (95 grams) all-purpose flour
½ cup (95 grams) light brown sugar
¼ teaspoon table salt
6 tablespoons unsalted butter, melted
1 cup (125 grams) small-diced rhubarb (from about 1½ medium stalks)
1 cup (155 grams) small-diced strawberries
1 tablespoon granulated sugar, divided
1 tablespoon lemon juice
1 teaspoon cornstarch
Powdered sugar, for decoration, if desired

1. Heat oven to 375 degrees. Spray an 8-by-8 inch square pan with cooking spray.

2. In a medium bowl, mix the oats, flour, brown sugar, and salt. Add the butter and stir until clumps form. Set aside ½ cup of the crumble mixture and press the rest of the crumb mixture evenly in the bottom of the prepared pan.

3. In a medium bowl (you could even use the same bowl; see, one less dish to wash!), combine the rhubarb, strawberries, granulated sugar, lemon juice, and cornstarch. Evenly distribute the fruit over the crust, then scatter the reserved crumbs over the fruit.

4. Bake the bars until the fruit is bubbling and the crisp portion is golden, 30 to 40 minutes. Cool completely before serving.

strawberry rhubarb crisp bars 5

strawberry shortcake cupcakes

strawberry shortcake cupcakes 10

I’ve had these cupcake wrappers for at least a year, maybe close to two years. But because they’re tulips, I was determined that I could only use them in the spring, and sometimes, a whole month or two can go by where I don’t think about cupcake wrappers. If that month is April and May, then it’s too late for tulips. Having actually remembered this year, I wanted to make the most springy cupcake I could.

strawberry shortcake cupcakes 1

Strawberries are the obvious choice. And what dessert is more springy than strawberry shortcake?

strawberry shortcake cupcakes 2

This isn’t too different than a cupcake adaptation of this strawberry cream cake, but the cake portion of that recipe is meant to be dense enough to stand up to layers of strawberries and whipped cream. I wanted something fluffier, so I started with my favorite basic vanilla cake. The filling in that strawberry cream cake would be perfect for adding to the middle of cupcakes, because the strawberries are minced and juicy, just right for maximizing the flavor they can contribute in just a small hole in the middle of each cupcake.

strawberry shortcake cupcakes 4

The topping is perfect as well, since the cream cheese stabilizes the whipped cream enough to mound on top of each cupcake. With a slice of strawberry over the hole filled with strawberries to even out the top of the cupcake, plus more fresh strawberries on top, there were plenty of berries to balance the cake and rich cream topping. It was a perfect combination.  Tulips and strawberries, what’s better than that for spring?

strawberry shortcake cupcakes 12

Strawberry Shortcake Cupcakes (cake adapted from Confections of a Foodie Bride; filling and topping adapted from Cook’s Illustrated’s Strawberry Cream Cake)

24 cupcakes

Vanilla cupcakes:
3 cups (12 ounces) cake flour
1 tablespoon baking powder
1 teaspoon salt
16 tablespoons (2 sticks) unsalted butter, at room temperature
2 cups (14 ounces) sugar
4 large eggs, at room temperature
1¼ cups buttermilk, at room temperature
1 tablespoon vanilla extract

Strawberry filling:
8 ounces fresh strawberries (about ½ quart), washed, dried, and stemmed
1 tablespoon sugar
½ tablespoon Kirsch or port
Pinch table salt

Whipped cream topping:
8 ounces cream cheese, room temperature
½ cup (3.5 ounces) sugar
1 teaspoon vanilla extract
pinch table salt
2 cups heavy cream

6-8 strawberries, sliced crosswise into rounds
additional strawberries for garnish

1. For the cupcakes: Preheat the oven to 350°F. Line two cupcake pans with paper liners. In a medium bowl, combine the cake flour and baking powder.

2. Place the butter and salt in the bowl of an electric mixer fitted with the paddle attachment (or a large bowl if using a hand mixer). Beat on medium-high speed for 3 minutes, until light and creamy in color, scraping the sides of the bowl as necessary.

3. Gradually add the sugar to the butter mixture, beating until fluffy. Add the eggs one at a time, beating until incorporated. Combine the buttermilk and the vanilla extract in a liquid measuring cup. With the mixer on low speed, add one-third of the flour mixture, followed immediately by half of the buttermilk, mixing just until incorporated. Repeat with another third of the flour and the rest of the buttermilk, then the last of the flour. Mix for 15 seconds longer.

4. Divide the batter between the prepared paper liners, filling each about two-thirds of the way full. Bake 18-22 minutes, or until a toothpick inserted in the center comes out clean. Allow to cool in the pans for 5 minutes, then transfer to a cooling rack to cool completely.

5. For the filling: Quarter the berries; toss with sugar in a medium bowl and let sit 1 hour, stirring occasionally. Strain the juices from the berries and reserve (you should have about ¼ cup). In the workbowl of a food processor fitted with the metal blade, give the macerated berries five 1-second pulses (you should have about ¾ cup). In a small saucepan over medium-high heat, simmer the reserved juices and Kirsch until the mixture is syrupy and reduced to about 1½ tablespoons, 3 to 5 minutes. Pour the reduced syrup over the macerated berries, add a pinch of salt, and toss to combine.

6. For the topping: When the cake has cooled, place the cream cheese, sugar, vanilla, and salt in the bowl of a standing mixer fitted with the whisk attachment. Whisk at medium-high speed until light and fluffy, 1 to 2 minutes, scraping down the bowl with a rubber spatula as needed. Reduce the speed to low and add the heavy cream in a slow, steady stream; when it’s almost fully combined, increase the speed to medium-high and beat until the mixture holds stiff peaks, 2 to 2½ minutes more, scraping the bowl as needed (you should have about 4½ cups).

7. To assemble: With a paring knife, carve a cone out of the center of each cupcake. Use a slotted spoon to transfer some strawberry filling to the cavity; top each hole with a round slice of strawberry. Frost the cupcakes; garnish with additional strawberries. If not serving within about an hour, refrigerate for up to 8 hours. Let stand at room temperature for at least 30 minutes or up to an hour before serving (otherwise, the cake will seem hard and stale).

strawberry shortcake cupcakes 9

strawberry daiquiris

strawberry daiquiris 4

These ain’t your mama’s strawberry daiquiris. Or at least, they’re not my mama’s strawberry daiquiris, which are slushy and sugary and delicious and rightfully earn their classification as a frou frou drink.

strawberry daiquiris 7

These strawberry daiquiris are no frou frou drink. They’re serious. Made from nothing but strawberry-infused rum, sugar syrup, and lime juice, they are also the most delicious cocktail I have ever had.

strawberry daiquiris 6

It’s all thanks to Dave, who found an interest in rum after we went on a Caribbean cruise with his parents last year. Our liquor cabinet is now half rum, which is fair since that’s all we drink now that Dave is willing to mix up a variety of rum drinks and I’m willing to let him bring them to me.

strawberry daiquiris 1

My part in this recipe is to think ahead enough to pour a bottle of rum over strawberries. Let them sit for a week (or really, just a few days if you’re in a hurry), strain, and you’re on your way to a seriously great cocktail. Just be careful, because these ain’t no frou frou drink.

strawberry daiquiris 3

Printer Friendly Recipe
Strawberry Daiquiris

4 drinks

Make the sugar syrup by heating 1 cup water and 1 cup sugar over medium heat until the sugar dissolves. Cool before using. Cover and refrigerate leftovers for several weeks.

Make the strawberry rum by pouring 1 (750-ml) bottle of rum over 1 pound of stemmed and quartered strawberries. Strain after 5-7 days. Cover and refrigerate leftovers for several weeks.

Our favorite rum for mixing is Shellback Silver.

Update 6/5/2014 – Unfortunately, I had this recipe wrong initially.  The sugar syrup has now been reduced from ½ cup to ¼ cup.  We use ¼ cup, although we like our drinks on the tart side.

1½ cups strawberry rum
¾ cup lime juice
¼ cup sugar syrup

In a large measuring cup, mix the three ingredients. Fill a cocktail shaker with crushed ice; add half the rum mixture. Cover and shake until the sides of the cocktail shaker are frosty. Strain into two glasses. Add more ice and repeat with the remaining mix. Add some of the ice from the shaker into each glass. Serve immediately.

strawberry daiquiris 2

blood orange cosmopolitans

blood orange cosmos 4

My new favorite thing is to sit in my favorite chair in the living room, the one that gets the most direct sun, and read a book with my cat on my lap, while drinking something delicious. On a weekend morning, this delicious thing is coffee. On a Sunday evening, it’s a cocktail.

blood orange cosmos 1

I’m a latecomer to blood oranges, both in life and this season, so I’ll probably have to move on to a new cocktail soon, but while they’re in season, I’ll be enjoying these cosmos. I have nothing against oranges, I’m just not usually all that interested in them. Maybe blood oranges are sweeter and juicier than regular oranges, but I wouldn’t know, because as soon as I buy them, I mix their purple juice with cranberry juice, orange liqueur, and vodka.

blood orange cosmos 2

Then I add ice and give it a shake-shake-shake, strain into a glass for me and one for Dave, and plop myself down in my spot. My cat will run over to wait for me as soon as she sees me heading that direction. Then I finish up my weekend with all of my favorite things – a cozy place, a good book, a cuddly cat, and an excellent drink.

blood orange cosmos 8

Printer Friendly Recipe
Blood Orange Cosmopolitans (adapted from Pink Parsley)

Makes 2 cocktails

I had to reduce the orange liqueur a bit, because while I used to like the one I’m using (Pitron Citronge), lately it seems a little harsh. If you’re using Grand Marnier or another higher quality liqueur, you might prefer the higher amount. Similarly, you might want to adjust the vodka depending on the quality of the one you’re using. This Crystal Head vodka was nice and smooth.

3 ounces blood orange juice, from 2 blood oranges, strained of pulp
3 ounces unsweetened cranberry juice
2 ounces orange liqueur
5 ounces vodka

Combine all ingredients in a cocktail shaker, attach the lid and shake until the sides of the shaker are frosted. Strain liquid into 2 glasses. Serve immediately.

blood orange cosmos 5

banana cream pie

banana cream pie 4

It’s Dave’s birthday (well, yesterday was), and therefore time for my annual banana cream pie post! Except last year I made banana cream cupcakes, and the year before I took a break from posting about banana cream pie – I must have assumed I’d made all the variations that were out there. But then I found a recipe that steeps bananas in the half-and-half that is then used to make the pastry cream, and I had to try it.

banana cream pie 1

I have to say that this might be my favorite banana cream pie recipe. There are things I really like about each of them, but this one is simply just what a banana cream pie should be – the crust stayed crisp even after two days in the fridge, the pastry cream didn’t slop all over the plate, and everything was in balance.

banana cream pie 2

Steeping the bananas in the dairy used for the pastry cream didn’t make an obvious difference, but I wonder if that was part of what made this pie so good, because all the components seemed to go together so well. Unless I find yet another trick to try in the realm of banana cream pies, I’ll be making this one for Dave’s birthday next year too.

banana cream pie 5

Printer Friendly Recipe
Banana Cream Pie
(very slightly tweaked from Cook’s Country)

I didn’t want to buy a second container of half-and-half only use a small portion of it, so I used 2 cups half-and-half, ¼ cup whole milk, and ¼ cup cream. Then I only used ¾ cup of cream for the topping, reducing the confectioners’ sugar to 1½ tablespoons. I also scraped the seeds of a vanilla bean into the steeping dairy and let the bean steep as well. And I forgot the orange juice.

5 ripe bananas
4 tablespoons butter
2½ cups half-and-half
½ cup plus 2 tablespoons granulated sugar
6 large egg yolks
¼ teaspoon salt
2 tablespoons cornstarch
1½ teaspoons vanilla extract
pie crust for single-crust pie (recipe below)
2 tablespoons orange juice
1 cup heavy cream
2 tablespoons confectioners’ sugar

1. Peel 2 of the bananas and slice them into ½-inch-thick pieces. Melt 1 tablespoon of butter in a medium saucepan over medium-high heat. Add the sliced bananas and cook until they begin to soften, about 2 minutes. Add the half-and-half, bring to a boil, and boil for 30 seconds. Remove from the heat, cover, and allow to sit for 40 minutes.

2. Whisk the granulated sugar, egg yolks, and salt together in a large bowl until smooth. Whisk in the cornstarch. Strain the cooled half-and-half mixture through a fine mesh strainer into the yolk mixture – do not press on the bananas – and whisk until incorporated; discard the cooked bananas.

3. Transfer the mixture to a clean medium saucepan. Cook over medium heat, whisking constantly, until it is thickened to the consistency of warm pudding (180 degrees), about 4 to 6 minutes. Remove the pan from the heat; whisk in the remaining 3 tablespoons of butter and 1 teaspoon of vanilla. Transfer the pastry cream to a bowl, press greased parchment paper directly against the surface, and allow it to cool for about one hour.

4. Meanwhile, roll the pie dough into a 12-inch round on a lightly floured counter. Transfer the dough to a 9-inch pie plate, fold the edge of the dough under itself so the edge of the fold is flush with the outer rim of the plate, and flute the edges. Refrigerate for 40 minutes, then freeze for 20 minutes. Adjust an oven rack to the lower-middle position and heat the oven to 375°.

5. Line the chilled pie shell with a 12-inch square of aluminum foil, folding the foil over the edges of the dough. Fill with pie weights, place the pie plate on a baking sheet, and bake for 20 minutes. Carefully remove the foil and the weights, rotate the plate, and continue baking until the crust is golden brown, about 7 to 11 minutes. Transfer it to a cooling rack to cool to room temperature.

6. Peel and slice the remaining 3 bananas to about ¼-inch-thick and toss them with the orange juice. Whisk the pastry cream briefly, then spread half over the bottom of the pie shell. Arrange the sliced bananas on the pastry cream. Top with the remaining pastry cream.

7. Using a stand mixer fitted with a whisk, whip the cream, confectioner’s sugar, and the remaining ½ teaspoon of vanilla on medium-low speed until foamy, about 1 minute. Increase the speed to high and whip until stiff peaks form, about 1 to 3 minutes. Spread the whipped cream evenly over the top of the pie. Refrigerate the pie until it is set, at least 5 hours and up to 24 hours.

Pie Crust for Single-Crust Pie (adapted from Smitten Kitchen)

Deb has instructions for mixing by hand if that’s your preference.

1¼ cups (6 ounces) flour
1½ teaspoon sugar
½ teaspoon table salt
8 tablespoons (1 stick) unsalted butter, very cold
⅓-½ cup ice water

Pulse the flour, sugar, and salt in a food processor until mixed. Add half of the butter; pulse once, add the remaining butter, and process with 1-second pulses until the largest pieces of butter are about ¼-inch across. Add ¼ cup of water; pulse once, then add 2 more tablespoons of water. Pulse a couple times to incorporate the water, then pinch a portion of the dough together; if it crumbles, pulse in another tablespoon of water. If it barely holds together, transfer the mixture to a large piece of plastic wrap. Form the dough into a ball, kneading it once or twice so it holds together. Wrap tightly and refrigerate for at least one hour before rolling.

banana cream pie 3