goat cheese-stuffed mini peppers

goat cheese stuffed peppers 3

I’ve been lucky to have a lot of opportunities for tapas lately. It started, I believe, last year when Dave and I met my brother for a weekend in Los Angeles, and we shared an exceptional tapas meal. Since then, my brother is tapas-crazy.

goat cheese stuffed peppers 1

On our family’s recent trip to the beach, we collaborated to serve nine different tapas to eleven people (in a house with no dishwasher). Two weeks later, Dave and I had the opportunity to go tailgating in the parking lot of an opera house before seeing Carmen; tapas was the obvious choice again. Less than a week after that, a friend hosted a potluck dinner, and the theme she chose was tapas.

goat cheese stuffed peppers 2

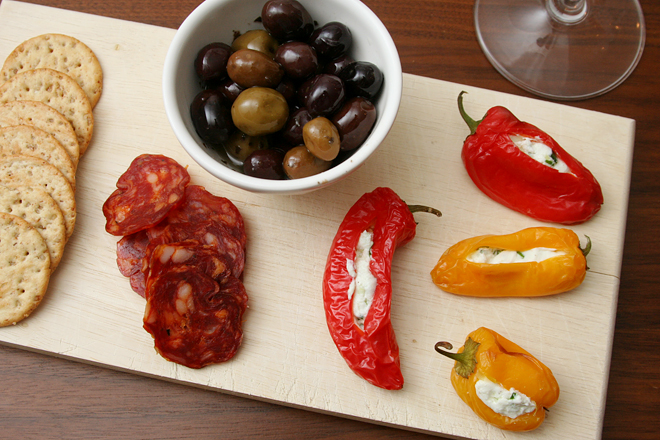
These are among some of my favorite of the options at each dinner, with nods also going to gazpacho and anything with bread (obviously). There are so many bread-based snack options that I love offering something different, especially something with vegetables. But the vegetables are filled with cheese, so they can hold their own on a table filled with garlicky shrimp and things-on-bread. With this recipe in my pocket, I’m ready for many more tapas dinners.

goat cheese stuffed peppers 4

Printer Friendly Recipe
Goat Cheese-Stuffed Mini Peppers

Makes 24 appetizers

I don’t take the seeds or veins out of these when I make them. It hasn’t been a problem.

24 miniature sweet peppers
8 ounces soft goat cheese
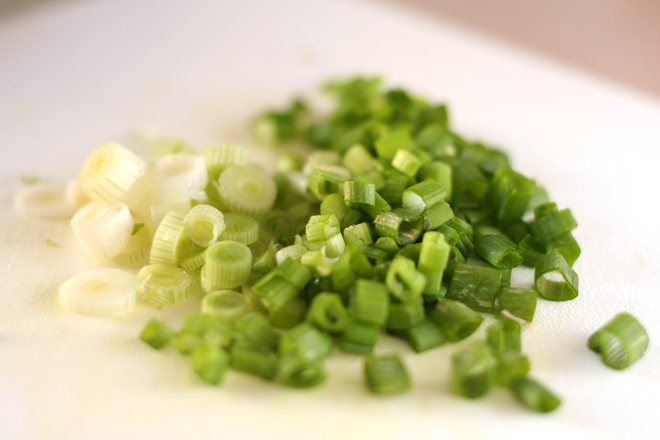
2 scallions, finely chopped
2 tablespoons lemon juice
Pinch salt
Pinch black pepper

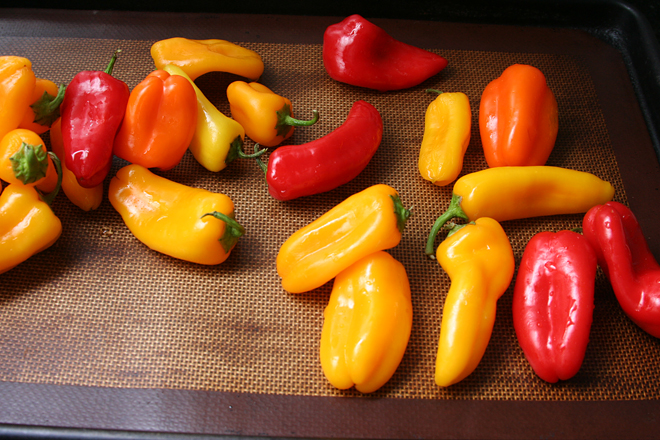
1. Adjust a rack to the middle position and heat the oven to 400 degrees. Cut a 1 to 2-inch slit down the side of each pepper. Arrange the peppers in a single layer on a rimmed baking sheet, cut-side up. Roasted until softened and slightly browned, about 20 minutes. Set aside to cool slightly.

2. Meanwhile, mix the goat cheese, scallions, lemon juice, salt, and pepper. Transfer the mixture to a piping bag with a wide tip or a zip-top bag with a corner cut off. (I tried spooning the filling into the peppers once, and it didn’t work at all. Piping is definitely the way to go.)

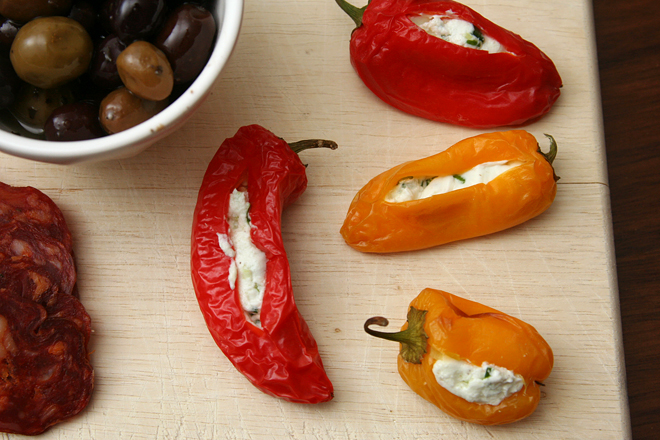
3. Squeeze the goat cheese mixture into each pepper, widening the cut in the pepper if necessary. Serve at room temperature (can be made 2 days in advance).

quinoa puttanesca

quinoa puttanesca 1

Based on whether it leaves a bunch of half-used ingredients leftover, this may not be the best single-person dinner, but it’s one of my favorite meals for when Dave is out of town anyway. For years, Dave didn’t like anchovies or olives, so those were the things I ate when he traveled. He’s come around to both, but the tradition has stuck, and this has become a treat for myself while he’s gone.

quinoa puttanesca 3

It’s very similar to the pasta version, but I like to think quinoa is a little healthier than pasta. Certainly, quinoa has a stronger, earthier flavor, which required adjustments in the other ingredients. More briny olives, more salty capers, and more bitter parsley were all necessary to stand out next to the quinoa.

quinoa puttanesca 4

Even if it doesn’t fulfill my no-leftover-bits-of-ingredients rule for single-person dinners, it meets the rest of my criteria – easy, healthy, minimal dishes. Fortunately, I like it so much that I’m willing to make it twice in one week while Dave travels, which is the perfect way to use up the half cans of tomatoes and tuna leftover from one serving. That puts this back on the list of great meals for cooking for one.

quinoa puttanesca 2

Printer Friendly Recipe
Quinoa Puttanesca (adapted from Cook’s Illustrated’s Spaghetti Puttanesca)

4 servings

I use the higher amount of anchovies, because I love them, but I understand that not everyone shares that opinion. The tuna is not at all traditional in puttanesca, but it increases the protein of this one-pot dish.

1 tablespoon olive oil
1 teaspoon red pepper flakes
6 cloves garlic, peeled and minced
6-8 anchovies, minced
8 ounces (1⅓ cups) quinoa, rinsed and drained
1 (28-ounce) can whole tomatoes, coarsely diced in the can with scissors
2 (5-ounce) cans solid white tuna in water, drained and flaked into bite-sized pieces (optional)
¼ cup capers, drained
1 cup kalamata olives, finely chopped
¼ cup minced parsley

In the medium saucepan over medium heat, heat the olive oil, red pepper flakes, garlic, and anchovies until sizzling and fragrant, 2-3 minutes. Add the quinoa, tomatoes with their juice, and tuna (if using). Increase the heat to medium-high and bring to a simmer. Once the mixture simmers, cover, reduce the heat to low, and simmer for 15 minutes. Stir once, then replace the cover, remove the pot from the heat, and let set for another 15 minutes. Stir in the capers, olives, and parsley; serve immediately.

cocoa nib peanut butter bites

hippie cookies 4

You can call these Peanut Butter Bites if you want, but for me, they will forever be known as Hippie Cookies. Sweetened with dates? Fat from all-natural peanut butter? Cocoa nibs, of all things?! I kept hearing people talk about cocoa nibs, so I bought some, and it turns out that they’re not even good. They’re like chocolate, but mean. There’s no sugar in them at all, just bitterness, like that time when you were a kid and accidentally ate your mom’s unsweetened baking chocolate.

hippie cookies 2

Still, the cocoa nibs are perfect in these cookies, because it turns out that you don’t need processed sugar to make a very sweet snack; dates are plenty sweet on their own. The bitter cocoa nibs are actually the perfect balance.

hippie cookies 3

I just loved these cookies so much, and not just because I filed them under “snack” instead of “dessert” and therefore enjoyed them without guilt. They’re shockingly good, or maybe it’s just shocking to someone used to adding refined sugar and butter to everything sweet. Who knew hippie cookies would be so delicious?

hippie cookies 6

Printer Friendly Recipe
Cocoa Nib Peanut Butter Bites (adapted from Sprouted Kitchen)

Because these aren’t baked, feel free to taste and add – more salt, more cinnamon, more cocoa nibs – to your taste, as well as more peanut butter to bring the mixture together, if necessary.  The amount of salt you add will also depend on whether you use salted or unsalted peanut butter.  You could also add dark chocolate instead of cocoa nibs, although the cocoa nibs balanced the sweet dates really well.

1 cup almonds
¼-½ teaspoon table salt
1 cup pitted dates
1 teaspoon vanilla extract
¼ teaspoon cinnamon
½ cup natural peanut butter
½ cup cocoa nibs

In the bowl of a food processor, process the nuts and salt until evenly ground; do not, however, process long enough to make almond butter. Add the dates, vanilla, and cinnamon, and process until the dates are minced and evenly dispersed. Add the peanut butter and pulse to combine, then repeat with the cocoa nibs. Form the mixture into 1-inch balls, then flatten gently to about ⅓-inch thick. Cookies can be covered and stored in the refrigerator for up to a week.

hippie cookies 5

pan-seared halibut in white wine sauce with green beans and tomato-scallion relish

halibut green beans 5

I have found the perfect single-person dinner. Not because it’s easy, although that’s nice. Not because it only uses one pan to cook, although I’m not complaining about less dishes to wash. Not because it tastes good, because of course it tastes good or why would I be talking about it?

halibut green beans 0

No, the key for bachelor(ette) meals is that they don’t leave you with half a can of tomatoes or beans, or half a cucumber or pepper, or the vast majority of a roast leftover. If you’re cooking for one, this recipe uses one fish filet, one tomato, one scallion, and a handful of green beans.

halibut green beans 1

Because I have been cooking for one a lot lately, while Dave travels for work, I’ve been making this dish often. The original recipe instructs that the green beans be steamed in a separate pot, but that seemed like a lot of hassle and dishes just for me, so I saute them quickly in a skillet, then add just a bit of water to cook them through. Any remnant green bean bits are scraped up with a glug of wine. I like to transfer the green beans to a pasta bowl and cover them with a big plate while the fish cooks in the same skillet. The fish gets laid over the green beans, the pan is deglazed with wine again, then a simple relish is heated briefly in the pan before it’s time to eat.

halibut green beans 3

I don’t know if fish served over green beans (although you could put yours on the side if that’s more your thing) sounds weird. The relish really brings everything together, since it’s so bright and flavorful, mixing perfectly with both the beans and the fish. It’s an easy, healthy, one-pan, delicious meal that won’t leave you with a bunch of half-used ingredients, and one of my newest favorites.

halibut green beans 6

Printer Friendly Recipe
Pan-Seared Halibut in White Wine Sauce with Haricots Verts and Tomato-Scallion Relish (adapted from Alfred Portale’s The Twelve Seasons Cookbook via epicurious)

4 servings

Regular green beans work just as well as haricots verts in this recipe. I’ve also successfully made it with both halibut and mahi-mahi. The pictures show mahi-mahi.

It’s easy to adapt for one person; just divide all of the ingredients by four and use a small skillet.

2 tablespoons olive oil, divided
16 ounces haricots verts or green beans
Coarse salt and freshly ground pepper to taste
¼ cup water
6 tablespoons white wine, divided
4 halibut or mahi-mahi fillets, each approximately 1 inch thick
2 tablespoons fresh lemon juice
2 tablespoons unsalted butter
4 scallions, finely sliced
2 tablespoons capers, drained
4 small roma tomatoes, diced fine

1. In a large nonstick skillet, heat 2 teaspoons oil over medium to medium-high heat. Add the beans, 1 teaspoon salt, and a pinch of pepper; cook, stirring occasionally, until the beans are spotty brown, 4 minutes. Add the water, cover, and cook until the beans are bright green and still crisp, about 2 minutes. Remove the cover, increase the heat to high, and cook until the water evaporates, 30 to 60 seconds. Divide the beans between four plates or shallow bowls. Add 2 tablespoons of wine to the pan, swirling it around and scraping the pan with a rubber spatula to dissolve any stickiness on the bottom of the skillet. Transfer to liquid to the dishes with the green beans; cover set aside.

2. Season the halibut on both sides with salt and pepper. In the same skillet, heat the remaining 4 teaspoons of oil over medium-high heat. Cook the fish for about 3 minutes, until lightly browned. Flip the fish, reduce the heat to medium, and cook about 4 minutes longer, until the fish is opaque in the center and browned on both sides. Put the fish over the green beans in the bowl; cover again.

3. Remove the pan from the heat and add the remaining 4 tablespoons wine and the lemon juice to the pan. Deglaze the pan by scraping up any browned bits with a rubber spatula. Stir in the butter. Add the scallions, capers, and tomatoes. Season with salt and pepper if necessary, and pour over the fish in the bowls. Serve immediately.

halibut green beans 4

crab towers with gazpacho and avocado salsas

crab towers 6

I once made twenty of these in one night. I also made twenty tiny caramelized onion gruyere tarts, six baguettes, three types of sorbet, and smoked popcorn with bacon. (Not totally true: The baguettes and sorbet were made in advance, just served that night. Thank god.) My friend made Thai chicken slaw, twenty tiny shepherd’s pies, braised venison over mashed potatoes, and chocolate pudding cake. Each dish had its own wine paired with it. It was an epic party. (And the next day was an epic hangover.)

crab towers 8

It was, as you can probably imagine, a lot of work. Building twenty tiny stacks of three different mixtures actually went pretty fast; no, the truly tedious part is creating teeny tiny squares of vegetables. But making your food into confetti is so pretty, sometimes it’s worth it.

crab towers 9

And it isn’t all about looks. It’s about combining my favorite foods into one elegant salad – avocadoes and crab and gazpacho, neatly layered and colorful. And if you aren’t making twenty of them, as well as twenty each of several other small dishes, the mincing isn’t too bad.  You might not have an epic party in that case, but you’ll still have a dish worthy of one.

crab towers 11

Printer Friendly Recipe
Crab Towers with Avocado and Gazpacho Salsas (adapted from Cook’s Illustrated’s Restaurant Favorites at Home)

Even when I’m making these for just a few people at home, I use Dixie cups with the bottoms cut off for the molds. You can make the gazpacho salsa a day in advance.

Makes 8

Gazpacho salsa:
1 cup grape tomatoes, minced
½ yellow pepper, minced
1 Persian or ½ regular cucumber, minced
1 small shallot, minced
¼ teaspoon salt
pinch black pepper
2 teaspoons sherry vinegar
2 teaspoons olive oil

Crab salad:
1 pound crabmeat, shredded
1 tablespoon white wine vinegar
1 tablespoon mayonnaise

Avocado salsa:
2 large avocados, peeled, pitted, minced
¼ teaspoon salt
1 tablespoon lemon juice

1. In a medium bowl, combine the tomatoes, pepper, cucumbers, shallot, salt, pepper, sherry vinegar, and olive oil. In a separate medium bowl, combine the crab, vinegar, and mayonnaise. In a small bowl, combine the avocado, salt, and lemon juice, mashing very lightly so the mixture holds together.

2. Divide the avocado mixture between eight 2-inch molds. Divide the crab salad between the molds on top of the avocados, pressing lightly again. Top with the gazpacho salsa. Serve immediately.

crab towers 7

braised artichokes with creamy dipping sauce

braised artichokes 8

My sister’s kids aren’t particularly picky, but sometimes I push their limits without meaning to. Like the time I thought they’d get a kick out of eggs cooked in bacon toast cups, but instead they were like, Hey, now where does the jelly go? And at least that wasn’t a vegetable.

braised artichokes 2

I don’t even remember why I thought artichokes would be a good idea in the first place, but then when I started thinking about it, I got worried. They tend to turn a military shade of green once they’re cooked. I tried to get the kids excited about saying “okey dokey artichokey”, but I was pulling at strings and knew it.

braised artichokes 4

And then, oddly, they loved the artichokes. I think it was the number one rule of feeding children that worked in my favor – opportunities to dip. Plus, maybe, just maybe, I was right, and the fun of pulling off leaves and scraping the “meat” off with your teeth was more important than the brownish green shade of the vegetables. It certainly is for me, as this is one of my absolute favorite foods.

braised artichokes 7

Printer Friendly Recipe
Braised Artichokes with Creamy Dipping Sauce

Serves 3 to 6 as a first course, depending on how big your artichokes are and how big your appetite is

Trimming artichokes isn’t hard, but you might want to watch a youtube video or two if you’re not familiar with the process.

99% of artichoke recipes call for transferring the trimmed ‘chokes to a bowl of water with a lemon squeezed into it to keep them from browning. Not only does it not work, but they look and taste the same after cooking, so I’ve skipped this step. (But a recent issue of Cook’s Illustrated tested it and found it the lemon water worthwhile.)

If your artichokes are really big, you might need to use a 12-inch sauté pan instead of a Dutch oven to fit them in a single layer.

If you’re mayonnaise-adverse, crème fraiche would be a great substitute. Greek yogurt or sour cream would work if you stir it in off the heat so the dairy doesn’t curdle.

3 medium artichokes
1 tablespoon olive oil
3 cloves garlic, minced
¾ cup water
½ cup white wine
¼ teaspoon black pepper
½ teaspoon salt
2 tablespoons mayonnaise
1 tablespoon parsley leaves, minced

1. Working with one artichoke at a time, cut off the top 2 inches of the artichoke. Working around the artichoke, use scissors to cut off the sharp tips of the leaves. Trim the base of the stem, then trim off the outside millimeter or so of the stem. Cut the artichoke in half from top to bottom and use a paring knife to cut out the sharp purple leaves and fuzzy choke from the center. Rinse the artichoke under running water to remove any remaining fuzz.

2. Heat the olive oil in a 5- or 6-quart Dutch oven over medium heat. Add the garlic and cook, stirring constantly, until fragrant, about 30 seconds. Arrange the artichokes cut-side down in the pot, overlapping the stems in the middle. Add the water, wine, pepper, and salt. Cover the pot, reduce the heat to medium-low, and braise artichokes until tender when pierced with a knife, about 30 minutes for small artichokes and 40 minutes for very large artichokes. (If you’re not ready to serve the artichokes right away, remove the pot from the heat and leave the cover on; the ‘chokes will stay hot for up to 30 minutes.)

3. Transfer artichoke halves to a serving platter or plates. There should about ⅓ cup liquid remaining in the pot; if there’s less, add water until there’s a total of ⅓ cup liquid; if there’s more, simmer the liquid to reduce it slightly. Add the mayonnaise and parsley to the liquid; whisk to combine and pour into individual dipping containers.

braised artichokes 10

spicy mexican beans and rice

mexican rice and beans 6

It’s been a long road since I shared something vaguely similar to this recipe, well over six years ago. At the time, I said that I had a goal to make more crockpot recipes. Since then, I have made exactly three crockpot recipes worth sharing, and one of those I’ve never made again. In general, I’m more into low-and-slow oven cooking than crockpotting. Heck, I recently even made “crockpot” pulled “pork” (it was venison; still delicious) in the oven.

mexican rice and beans 1

The long road of not-crockpotting has led me to adapt my old favorite crockpot recipe for the stove. The way the original recipe is written, with bone-in chicken thighs, the crockpot is a good choice. However, I always make this as an easy, healthy, vegetarian weeknight meal, leaving the chicken out. Why spend 10 hours, the whole day when I’m away for work, slow-cooking canned beans with some seasonings?

mexican rice and beans 3

So instead of adapting stovetop or oven recipes for the crockpot like most people do, I’ve adapted a crockpot recipe for the stove. I replaced the chicken soup mix with aromatics and spices, the chicken with a greater variety of beans, and the fresh tomatoes with canned tomatoes (in season year round!). It really isn’t any harder than the crockpot recipe was, and it tastes just as good.  With this new crockpot-less recipe, it might be time to retire my crockpot entirely.  Surely I can think of another fun new kitchen tool that I don’t really need to take up that cabinet space, right?

mexican rice and beans 5

Printer Friendly Recipe
Spicy Mexican Beans and Rice

8 servings

2 tablespoons vegetable or olive oil
1 large or 2 small to medium onions, diced
salt
4 cloves garlic, minced
2 teaspoons chili powder
1 teaspoon cumin
½ teaspoon oregano
½ cup green chile, roasted, peeled, and diced
2 chipotle chiles, minced
2 (15-ounce) cans black beans, drained and rinsed
1 (15-ounce) can kidney beans, drained and rinsed
1 (15-ounce) can pinto beans, drained and rinsed
1 (14-ounce) diced tomatoes
1 cup chicken broth
juice from 1 lime
6 cups cooked rice from 2 cups uncooked rice
cilantro, minced
optional toppings: queso fresco or cheddar cheese, diced avocado, Greek yogurt or sour cream

Heat the oil in a large saucepan over medium heat. Add the onion and a pinch of salt and cook, stirring occasionally, until just beginning to brown at the edges, about 8 minutes. Add the garlic, chili powder, cumin, and oregano; cook, stirring constantly, until fragrant, about 30 seconds. Add the green chile, chipotle chiles, beans, tomatoes, and broth; cover, bring to a simmer, then reduce the heat to low and lightly simmer until the flavors are blended, at least 20 minutes or up to an hour if you aren’t in a hurry. If the mixture is too liquidy, remove the cover, increase the heat to medium, and simmer until the desired thickness is reached. Taste and add salt if necessary. Stir in the lime juice. Serve over rice, topped with cilantro and other toppings as desired.

mexican rice and beans 8

green chile chicken tacos

chicken tacos 3

Okay, so all my taco recipes are almost the same – I want avocado, and salty cheese, and fresh lime juice, cilantro, maybe some pickled onions, all mixed up in a fresh corn tortilla. Even with just those fixings and no meat, I’d probably be perfectly happy. But, I’ve been spoiled by barbacoa. Tacos are held to a higher standard now.

chicken tacos 1

My first couple attempts at chicken tacos weren’t up to par. I thought grilling sounded promising, but afterward, the chicken just tasted like chicken, with nothing more interesting to contribute. Plus it’s so easy for chicken to dry out on the grill.

chicken tacos 2

This recipe solves any problem of dry, bland chicken by braising chicken thighs directly in a sauce made from blistered tomatillos, onions, and green chiles. The chicken turns out tender and juicy, already tasting like it’s meant for tacos, and then the game is upped even more when the braising liquid is reduced to a sauce. I feel like I should say something about how this filling is so good that I don’t need all those tasty fixings, but no filling is good enough to pass up a slice of avocado in a corn tortilla.  Still, this is the next best thing to barbacoa.

chicken tacos 4

Printer Friendly Recipe
Green Chile Chicken Tacos (almost directly from Kenji Alt-Lopez at Serious Eats)

Serves 4 to 6

2 green chiles, preferably Hatch or Anaheim
2 medium tomatillos, husks removed, split in half
1 small yellow onion, peeled and split in half
3 cloves garlic, unpeeled
2 tablespoons vegetable oil, divided
1 cup fresh cilantro leaves, roughly chopped, divided
Kosher salt and freshly ground black pepper
4 limes
2 pounds chicken thighs (bone-in and skin-on)
1 small white onion, minced
16 to 24 warm corn tortillas
1 batch pickled red onions
½ cup grated queso cotija or jack cheese
1 avocado, sliced

1. Preheat the broiler to high and adjust the broiler rack to 5 to 6 inches below the heating element. Toss the peppers, tomatillos, yellow onion, and garlic in a medium bowl with 1 tablespoon of the olive oil. Place on a foil-lined rimmed baking sheet and broil until the vegetables are completely tender and charred on all sides, turning occasionally, about 20 minutes total. When cool enough to handle, peel the peppers and remove the stems and seeds. Transfer the vegetables to a food processor or blender with half of the cilantro and ½ teaspoon of salt; process on high speed until smooth. Add 2 tablespoons of lime juice from about 2 of the limes, season to taste with salt, and set aside.

2. While the vegetables broil, heat the remaining oil in a Dutch oven over high heat until shimmering. Add the chicken pieces skin side-down and cook, without moving, until well browned, about 6 minutes. Flip and brown the second side, about 3 minutes longer. Transfer to a plate. Pour off the excess fat and deglaze the Dutch oven with 1 cup of water, scraping up the browned bits from the bottom of the pot.

3. Transfer the vegetable puree to the Dutch oven and stir with the deglazing water to combine. Nestle the chicken pieces into the sauce. Bring to a boil, reduce to a bare simmer, cover, and cook until the chicken is completely tender, about 30 minutes. Remove the chicken from sauce and place on a plate to cool.

4. When the chicken is cool enough to handle, discard the skin and bones and shred meat into bite-sized pieces. Return the meat to the sauce and bring to a simmer. Cook until thick and saucy, then season to taste with salt and pepper if desired.

5. Combine the white onion and remaining cilantro in a bowl. Serve chicken with warm tortillas, onion and cilantro mixture, pickled onions, cheese, and avocado.

chicken tacos 5

bacon ranch salad with salmon

salmon ranch salad 3

We had this salad the first time with just greens, salmon, avocado, cucumber, and ranch, and I loved it. But I asked Dave, ‘you know what would make this salad even better?’ ‘Bacon’, he said.

salmon ranch salad 2

Yup. Bacon is a classic in salads, with ranch dressing, with avocados, with tomatoes – with just about every ingredient in this salad. I was so eager to try this salad again, this time with that one extra ingredient, that I decided to make it for lunch on a Sunday afternoon, right before I had to leave for a trip for work.

salmon ranch salad 1

After packing and practicing my presentation for the conference, I had some regrets about planning a real meal before I needed to leave. It was absolutely worth it though. The salad was just as good with the bacon as I was hoping, by which I mean it was even better than the original – not an easy feat.

salmon ranch salad 6

Printer Friendly Recipe
Bacon Ranch Salad with Pan-Seared Salmon (inspired by Handle the Heat via The Barbee Housewife)

Serves 4

Okay, so the salad in the pictures doesn’t have bacon; it’s the original version. I was lucky to make a decent meal before heading out of town, much less take pictures of it!

Dressing:
⅔ cup plain yogurt
2 tablespoons mayonnaise
½ teaspoon salt
1 tablespoon lemon juice
½ teaspoon mustard
¼ cup chives, minced

2 romaine hearts, cored and diced
2-4 slices thick-cut bacon, cooked and chopped
1 pint grape tomatoes, halved
1 cucumber, quartered lengthwise and sliced
1-2 avocados, diced
1 tablespoon vegetable oil
4 (5-ounce) fillets salmon, seasoned

1. For the dressing: Mix everything.

2. Heat a not-nonstick skillet over medium-high heat. Add the oil, spreading it evenly with a spatula, then the salmon, skin-side down. Cook, without moving, for 4 minutes. Flip the fillets and continue to cook for 3 more minutes. Transfer the salmon to a clean plate and let rest for 1 minute.

3. Meanwhile, in a large bowl, mix the romaine, bacon, tomatoes, cucumber, avocados, and dressing. Top with the salmon and serve immediately.

salmon ranch salad 7

corn tortillas

corn tortillas 18

I don’t want to get melodramatic here, but these are almost life-changing. Certainly dinner-changing, and especially taco-changing.

corn tortillas 4

I have told you before about my quest for the best way to soften store-bought corn tortillas. My favorite method had to be effective and easy without adding a ton of fat. Fried tortillas are so good, but a significant amount of work, and obviously not healthy.

corn tortillas 8

I tried heating them under a damp kitchen towel, which worked okay, but the tortillas could get soggy and limp. The best I’d found was to spray both sides of the tortillas with oil and bake them until pliable but not crisp. Besides the addition of some, although not a lot, of fat, my biggest problem with this was that the tortillas would occasionally get too crisp to fold, and sometimes would just get chewy.

corn tortillas 11

Okay, so making fresh tortillas isn’t all that easy. But they’re so good – even as good as real deep-fried tortillas – and so healthy (no fat, whole grains), that I’ll spend the extra 15 minutes making them, even on a weeknight. If I only make enough for one meal, for the two of us, it isn’t so bad – just mix up two ingredients, maybe three if you want to add a pinch of salt, let it rest for a few minutes while you chop some taco fillings, roll it into balls, smash it with a tortilla press, sear it on a hot comal (or skillet) for a minute.

corn tortillas 12

As soon as you mix the masa harina with water, the dough will smell like the best corn tortillas, before you even cook them. Once you add some smoky char from the hot pan, then wrap them around fillings while they bend without breaking, you’ll see what I mean about a dinner-changing experience. But considering how often we make tacos now and how much better they are, life-changing isn’t too far of a stretch for me.

corn tortillas 14

Printer Friendly Recipe
Corn Tortillas (adapted from Serious Eats)

Makes 8 tortillas

I confess I have some specialized tools for tortillas. The cleaning lady at my office gave me the comal; she had two and hates to cook. I’m sure a cast-iron skillet will work just fine. I haven’t tried making tortillas without a press, but supposedly you can smash them under a skillet. They won’t get as thin, but a thicker fresh tortilla is still better than anything you can buy. The last item isn’t so special – just a scale – but I’ve had much more consistent results with getting the dough to the right hydration with a scale than I did with measuring cups.

4 ounces (about ¾ cup) masa harina
5 ounces water
pinch salt

1. In a medium bowl, mix the three ingredients until large crumbles form, then bring the dough together into a ball. Wrap in plastic wrap and set aside for ten minutes. Meanwhile, cut both sides of a gallon zip-top bag. Transfer the bag to a tortilla press with the crease of the bag at the hinge of the press.

2. Heat a not-nonstick skillet (preferably cast iron) over medium-high heat for at least 5 minutes.

3. Divide the dough into 8 equal portions. Roll each portion into a ball.

4. Place a ball onto the plastic-lined tortilla press, slightly off-center toward the hinge of the press. Press the tortilla just until it shows around the edges of the tortilla press. Open the press, peel the plastic wrap off the top of the tortilla, and invert the tortilla, still on the plastic, onto a towel. Slowly peel the plastic off of the tortilla. Replace the plastic in the tortilla press and repeat with the remaining balls of dough.

5. Transfer one tortilla to the hot pan; cook, without moving, until the tortilla bubbles and smokes, 30 seconds to 1 minute. Using a thin spatula, flip the tortilla; cook for another 15 to 30 seconds. Transfer the tortilla to a kitchen towel, wrapping it loosely. Repeat with the remaining tortillas, stacking them in the towel.

6. Let the tortillas sit in the towel to steam for a few minutes after the last tortilla is cooked, then serve. Kept wrapped, the tortillas will stay warm for about half an hour.

corn tortillas 1