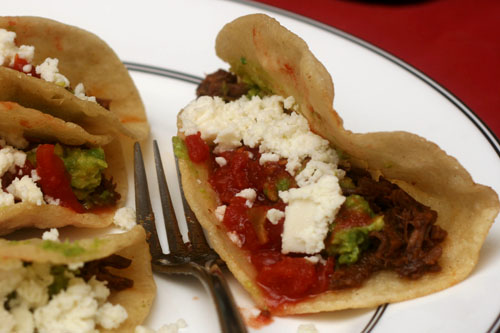
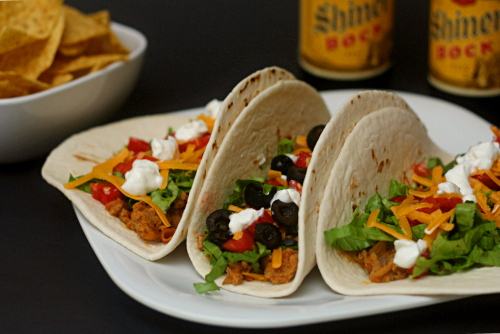
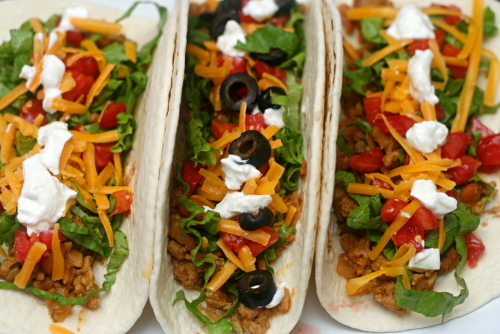
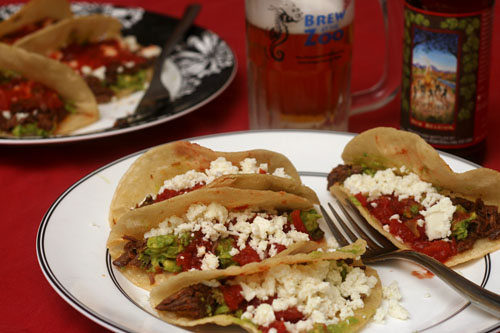
shredded beef tacos

The first few months when I moved out of my parents’ house and across the country were exciting and lonely and intense. I was lucky that I made some great friends right away. I remember the first time someone invited me over for dinner. I’d asked what he and his wife were serving, and I thought he said pea stew. I went, but I was so relieved when it was actually beef stew.

That meal turned into a weekly dinner tradition that lasted for as long as we all lived near each other. We took turns cooking and rarely made the same thing twice, but there was one favorite meal that was requested more than any other – tacos. My friend’s taco filling and accompaniments were good, but the real treat was the shells – freshly fried, still hot, and, frankly, a little greasy. I had never had home-fried taco shells before, and it was a revelation.

These days, tacos are still one of my favorite meals, but I can’t enjoy them as much without those fried shells. Even better is when they’re stuffed with this shredded beef. It’s marinated in vinegar, lime juice, and spices, then baked for hours until it falls into shreds. I’m thankful for those friends not just for helping me feel comfortable on my own, but for teaching me about the perfection of fried corn tortillas. Nothing else would be good enough accompany this intensely flavorful filling.

One year ago: Sandwich Rolls
Two years ago: Pumpkin Pancakes

Shredded Beef Tacos (slightly adapted from Use Real Butter who slightly adapted it from The Border Cookbook)

Jen discusses the cut of beef that is preferred for this recipe. Her recommended eye of chuck was not available, so I chose chuck steak. I have no complaints. Plus I didn’t need to slice it before marinating, which was a nice bonus.

You could always go with the classic cheddar-sour cream-lettuce combination for toppings, but I really love the queso fresco-avocado-salsa direction that Jen recommends.

6 servings

2 tablespoons vegetable oil
2 tablespoons white vinegar
2 tablespoons lime juice
1½ teaspoons ground cumin
1½ tsps chili powder
1 teaspoon salt
3 garlic cloves, peeled and smashed
1½ pounds chuck steak
1 cup vegetable oil
24 corn tortillas
toppings: lettuce, queso fresco, salsa, guacamole, etc.

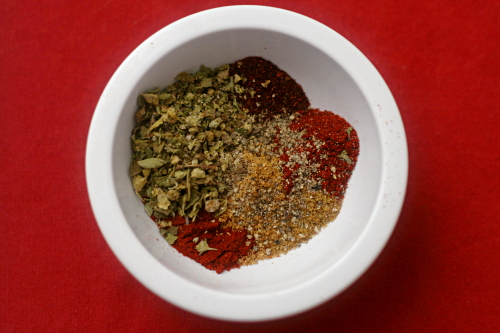
1. In a gallon-size zip-top bag, combine the oil, vinegar, lime juice, salt, spices and garlic. Add the meat and squish the bag around to make sure the meat is fully coated. Refrigerate for at least 4 hours or overnight.

2. Adjust an oven rack to the middle position and heat the oven to 350 degrees. Dump the contents of the bag into a baking dish just large enough to fit the meat in a single layer. Cover the pan with foil; bake until the meat is tender enough to shred easily, about 2 hours. Use two forks to pull the meat into shreds. Lower the oven temperature to 250 degrees.

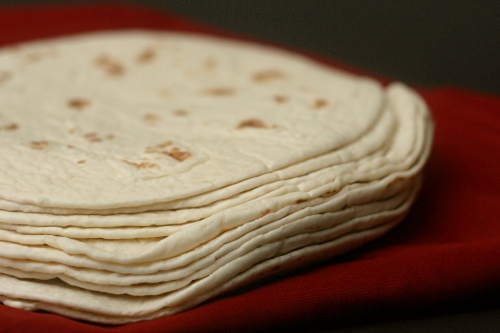
3. Heat the oil in an 8-inch skillet over medium heat. Slide a tortilla into the oil; use tongs to fold the tortilla in half and hold it partially open. Flip after about 1 minute. Fry for an additional minute, until the tortilla is slightly crisp. Continue with the remaining tortillas, storing the fried tortillas in the warm oven. Serve with shredded meat and desired toppings.
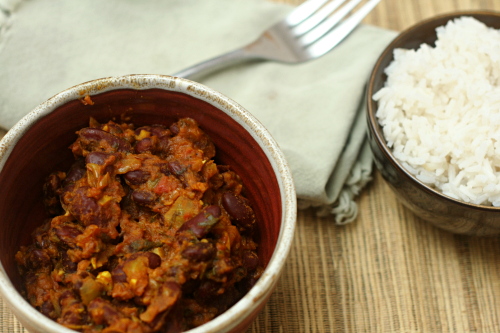
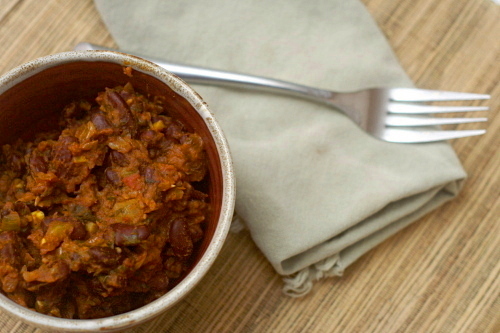
red kidney bean curry

When my schedule picks up, I tend to fall into a weeknight dinner rut. I think we ate pasta with chopped tomatoes and fresh mozzarella ten times during the month or so of peak tomato season. Fish tacos are in no short supply around here year-round. Red beans and rice, salmon pesto pasta, braised white beans, jalapeno-baked fish

Surely there must be new recipes for me to try that fit my tough weeknight standards – quick, light, fully balanced, vegetarian or seafood-based. And yes! This is perfect. Plus I love my one other Indian curry standard and knew there must be similar-but-different dishes out there to try.

It’s such a basic recipe – sauté aromatics and spices, add beans and other flavorings, simmer, serve over starch. It makes me wonder how many other cuisines I could do this with. I suspect I’ll be trying a few, because you can never have enough quick healthy balanced vegetarian meal ideas.
One year ago: Stuffed Mushrooms with Sun-Dried Tomatoes
Two years ago: Mulled Cider

Printer Friendly Recipe
Red Kidney Bean Curry
(adapted from Smitten Kitchen)

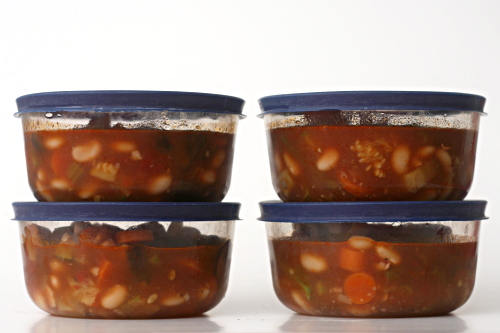
This recipe has another trait I love – it takes well to freezing. Make a large batch, freeze in portions, and your next meal is that much easier!
The first time I made this, it seemed a little bland so I’ve increased the spices and added garam masala. I love garam masala. I’ve also changed the tomatoes around to something that makes more sense to me.

I know Deb’s looks like soup and mine looks like a paste. My only explanation is that this batch was frozen and defrosted, and I was too busy catching up on The Office episodes to see that it needed more liquid.

Serves 6

2 tablespoons olive oil
1 medium onion, finely chopped
1 jalapeno, minced
2 tablespoons chopped fresh ginger
3 cloves garlic, chopped
1 tablespoon tomato paste
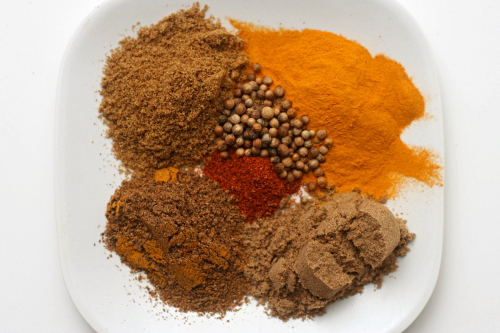
2 teaspoons ground turmeric
2 teaspoons garam masala
1½ teaspoon ground cumin
1½ teaspoon ground coriander
1 teaspoon cumin seeds
¼ teaspoon cayenne
1 (15-ounce) can diced tomatoes, with juice
2 (15-ounce) cans red kidney beans, rinsed and drained (or 3 cups cooked beans)
1 teaspoon salt
½ cup chopped fresh cilantro

In a 3-quart saucepan over medium heat, heat the oil. Add the onion and jalapeno and cook, stirring occasionally, until the onion just starts to brown at the edges, 5-8 minutes. Add the garlic, ginger, tomato paste and spices; cook, stirring constantly, until fragrant, about 1 minutes. Add the tomatoes and their juice, the beans, and the salt. Bring to a boil over medium-high heat, then decrease the heat to low and simmer uncovered for 10 minutes. Stir in the cilantro, taste for seasoning, and serve over rice or with naan.

classic burritos

This is not my most gourmet meal. It’s mostly fancy Taco Bell. It kind of looks like dog food. It’s delicious and easy and kinda healthy. I like it.

It’s at least fancier than we made it when I was a kid. Back then, we (usually my brother) browned some ground beef, dumped in a packet of burrito seasoning and some water, and stirred in a can of refried beans. Then we glopped it on tortillas with fixin’s and were happy.

Then my brother started getting creative. He would add green chile to the mix or use shredded chicken instead of ground beef. I don’t like change. I just want my fancy Taco Bell.

What I have changed is to get rid of the sodium and preservative-filled spice packet and the pasty canned refried beans for some good stuff – browned onions, fresh garlic, spices that I already have anyway, and pinto beans I mush up myself. Plus I use ground turkey instead of ground beef, because it tastes the same once it’s mixed in with everything else, and it’s a little healthier. Same goes for Greek yogurt instead of sour cream.

Sure, it’s just a regular old burrito, and it costs 79 cents at a fast food chain. But if you make it yourself, you can use high quality ingredients – lettuce that is actually crisp, cheese that has flavor, spices that are fresh – and it isn’t much harder than going through the drive-thru.

One year ago: Bran Muffins
Two years ago: Spinach Artichoke and Red Pepper Strata

Printer Friendly Recipe
Classic Burritos

4-6 servings

The filling also reheats really well, so I usually make enough for more than one meal and have an easy leftover night a few days later.

These are my favorite fillings for these very basic burritos. Obviously you can go wild here with whatever you like – salsa, hot sauce, green chile, guacamole…

Filling:
1 tablespoon vegetable oil
1 onion, diced
2 cloves garlic, minced
2 teaspoons ground cumin
2 teaspoons chile powder
1 teaspoon coriander
1 teaspoon dried oregano
¼ teaspoon black pepper
¼ teaspoon cayenne
1 pound ground turkey (or other ground meat of your choice)
1 teaspoon salt
1 (15-ounce) can pinto beans, rinsed and drained
1 cup water

Toppings:
flour tortillas
green leaf lettuce, sliced
tomatoes, diced
cheddar cheese, shredded
black olives, chopped
sour cream (or Greek yogurt)

Heat the oil in a large nonstick skillet over medium heat. Add the onion and sauté, stirring occasionally, until just browned around the edges, about 8 minutes. Add the spices and garlic and cook, stirring constantly, for about a minute, until fragrant. Add the meat and salt and cook, stirring occasionally to break up large chunks, until no longer pink. Clear a space in the middle of the pan and add the beans to it; use a potato masher to break up the beans slightly. Stir in the water and simmer over medium heat until the liquid mostly evaporates. Serve the filling with toppings of your choice.

roasted vegetable bean soup

I keep to a strict food routine at work. Yogurt and fruit for breakfast, then a whole wheat bagel, more fruit, a hard-boiled egg, a banana with peanut butter, vegetables with hummus, lettuce with feta. Nutritionally, it’s exactly what I want, and, for a while, it was exactly the flavors I wanted too. The first ten or twenty times I ate some sort of lettuce with feta, I was wowed again by how something so simple and healthy could taste so good. Bananas and peanut butter? A classic combination, and for good reason! Hard-boiled eggs – such a great balance between the rich creamy yolk and the lighter white.

As the months pass, the charm of my snack routine is wearing thin. I need more variety. I’ve tried changing lettuce types, cheese types, vegetable types, bean dip types. It isn’t enough. The only thing I truly look forward to these days is the bagel.

But I’ve been struggling with how to keep the perfect nutritional balance with completely different foods. I wasn’t thinking outside of the box. I forgot about hot food. Sure, the microwave at work is a little scary, but so is eating the same five snacks everyday for the rest of my life.

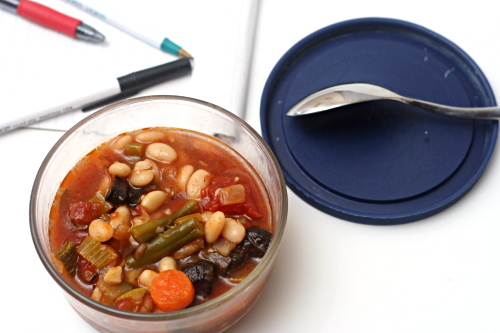
Soup with vegetables and beans is the perfect substitute for vegetables with bean dip. Ree got me started with this classic minestrone enhanced with some roasted vegetables. Not only is it healthy and delicious, but soup is so much fun to make. And it has the added bonus of warming me up after a day spent typing in my over-air-conditioned office. I see a lot more vegetable soups in my future.

One year ago: Herb-Roasted Onions
Two years ago: Roasted Carrots
(Apparently this is the time of year that I roast vegetables.)

Printer Friendly Recipe
Roasted Vegetable Bean Soup (adapted from the Pioneer Woman)

8-10 servings

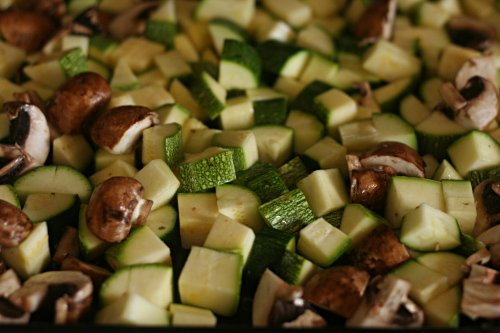
Ree specifies to roast the vegetables on two sheet pans so you don’t overcrowd them. I used only one pan. The vegetables were overcrowded. I recommend using two pans, so your squash gets browned but not mushy.

I skipped the pasta that Ree calls for (and therefore decided not to call this minestrone – even though I realize that pasta isn’t what makes a soup minestrone). For one thing, it doesn’t fit into my nutritional specifications (see above re: strict rules for food at work). For another, pasta in soup doesn’t make for good leftovers. And finally, pasta in soup like this is just a tease for me; one morsel of pasta in every other bite just isn’t enough.

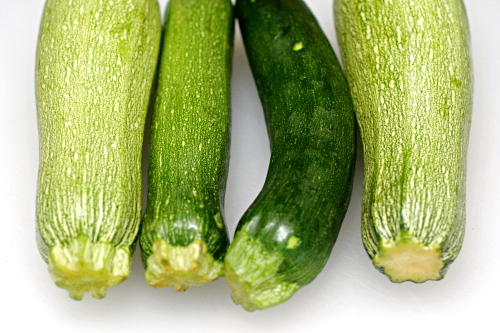
2 zucchini, diced into ½-inch cubes
2 summer squash, diced into ½-inch cubes
8 ounces white mushrooms, quartered
2 tablespoons olive oil
salt
2 carrots, sliced
1 onion, diced
3 stalks celery, sliced
2 cloves garlic, minced
1 tablespoon tomato paste
8 cups low-sodium chicken broth
1 (14.5-ounce) can diced tomatoes, undrained
2 (15-ounce) cans cannellini beans, rinsed
1 cup green beans, cut into 1-inch pieces
parmesan cheese, shaved

1. Adjust the oven racks to the lower-middle and upper-middle position; heat the oven to 500 degrees. Toss the zucchini, squash, and mushrooms in a bowl with 1 tablespoon of olive oil and a sprinkling of kosher salt. Divide the vegetables between two baking sheets and roast in the hot oven for 5 to 10 minutes, or until brown and black parts begin to show. Remove from the oven and set aside.

2. Meanwhile, in a 5-quart Dutch oven, heat another tablespoon of olive oil over medium heat. Add the carrots, onions, and celery; cook until just beginning to brown, about 8 minutes. Add the garlic and tomato paste and cook, stirring constantly, until fragrant, about 30 seconds.

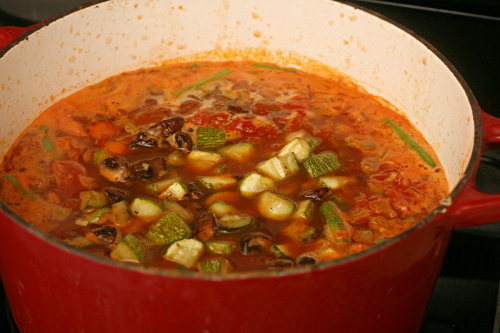
3. Pour in the broth, tomatoes with their juice, and 1 teaspoon salt; bring to a boil over medium-high heat. Add the cannellini beans and green beans; simmer for fifteen minutes, until the green beans are just tender. Stir in the roasted vegetables. Taste for seasoning, adding more salt if necessary. Serve with parmesan.

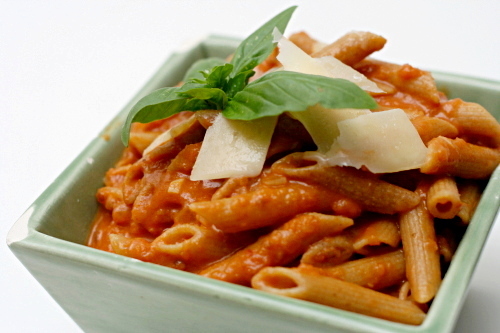
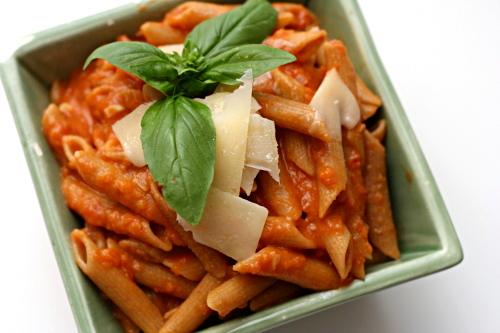
penne alla vodka

People keep asking me how my recent vacation was, and I can’t think of any response other “so, so good.” How else do you sum up a week of playing in the waves, drinking margaritas, snorkeling, baking cookies, swimming with sea lions, watching shooting stars, eating shrimp tacos, and just basically everything that is good. I didn’t even get sunburned. I want to go back.

At least I had an easy meal planned for my first night at home. This is my ‘just got back from vacation’ dish. After traveling all day, I don’t want to spend much time cooking. There’s no time to defrost anything. We haven’t been home, so there isn’t a lot of fresh food around. I’ve been eating out all week on vacation, so I don’t want to get takeout.

This dish solves all those problems. It takes as long to make as it takes pasta to cook. There are only a couple ingredients to chop. It’s fairly healthy. And it uses ingredients that I can buy before I leave and trust that they’ll keep until I get back – pasta, canned tomatoes, onion. And of course, it tastes great.

I bet it would taste even better on vacation. Everything is better on vacation.

One year ago: Potato Tomato Tart
Two years ago: Banana Coconut Muffins

Printer Friendly Recipe
Penne alla Vodka (from Cooks Illustrated)

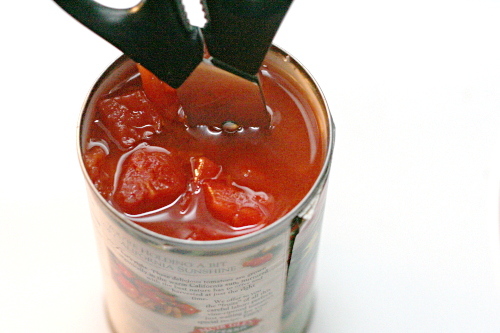
You can never go wrong following a Cooks Illustrated recipe precisely. I, however, don’t, in this case. Because I almost always make this after a day of traveling, I simplify it wherever possible. Instead of pureeing half of the tomatoes and dicing the rest, I simply stick a pair of kitchen shears in the tomato can and snip away. I don’t separate the liquid and the tomatoes in order to measure a certain amount; I just pour all of the liquid in to the sauce. I like to use 2 shallots instead of half an onion. If I don’t have cream, I use milk. If I don’t have milk, I skip the dairy. If I don’t have basil, I use parsley. If I don’t have parsley, I skip the herbs or use dried. It’s tomatoes, pasta, and alcohol; it isn’t going to be bad.

1 (28-ounce) can whole tomatoes, drained, liquid reserved
2 tablespoons olive oil
½ small onion, minced (about ¼ cup)
1 tablespoon tomato paste
2 medium garlic cloves, minced or pressed through a garlic press (about 2 teaspoons)
¼-½ teaspoon hot red pepper flakes
table salt
⅓ cup vodka
½ cup heavy cream
2 tablespoons finely chopped fresh basil leaves
fresh parmesan cheese, for serving

1. Puree half of the tomatoes in a food processor until smooth. Dice the remaining tomatoes into ½-inch pieces, discarding cores. Combine the pureed and diced tomatoes in a liquid measuring cup (you should have about 1⅔ cups). Add reserved tomato liquid to equal 2 cups.

2. Heat the oil in a large saucepan over medium heat until shimmering. Add the onion and tomato paste and cook, stirring occasionally, until the onions are light golden around the edges, about 3 minutes. Add the garlic and pepper flakes; cook, stirring constantly, until fragrant, about 30 seconds.

3. Stir in the tomatoes and ½ teaspoon salt. Remove the pan from the heat and add the vodka. Return the pan to medium-high heat and simmer briskly until the alcohol flavor is cooked off, 8 to 10 minutes; stir frequently and lower the heat to medium if the simmering becomes too vigorous. Stir in the cream and cook until hot, about 1 minutes.

4. Meanwhile, bring 4 quarts water to a boil in a large Dutch oven over high heat. Add 1 tablespoon salt and the pasta. Cook until just shy of al dente, then drain the pasta, reserving ¼ cup cooking water, and transfer the pasta back to the Dutch oven. Add the sauce to the pasta and toss over medium heat until the pasta absorbs some of the sauce, 1 to 2 minutes, adding reserved cooking water if sauce is too thick. Stir in the basil and adjust the seasoning with salt. Divide among pasta bowls and serve immediately, passing Parmesan separately.

rice and peas

Side dishes aren’t my strong suit. I often find myself googling dorky things like “what to serve with Jamaican jerk chicken?” Rice and peas kept coming up, and I kept bypassing it. Who wants green peas mixed with plain white rice?

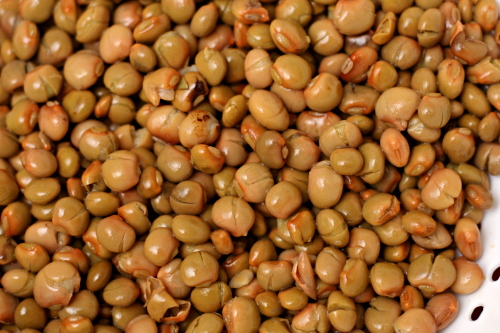
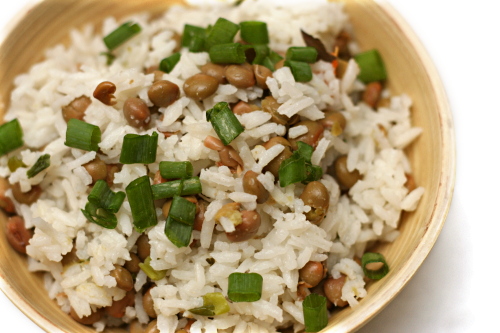
It turns out, of course, that rice and peas is nothing of the sort. Peas, in the Jamaican way, are beans. I was fortunate enough to find pigeon peas at my store (another reason to stop complaining about my grocery store), but red beans work too.

Rice and peas, then, is rice and beans cooked in coconut milk with thyme, green onions, and a spicy chile. The chile isn’t minced and eaten; it’s left whole and removed after cooking, so it adds just a hint of heat, which really does make this the perfect side dish for spicy jerk chicken. Thanks, Google!

Two years ago: Croque Madame

Printer Friendly Recipe
Rice and Peas

1 tablespoon vegetable oil
1 cup long-grained white rice
1 clove garlic, minced
½ cup coconut milk
1 cup water
½ teaspoon salt
½ teaspoon dried thyme
1 (15-ounce) can pigeon peas (or red beans), drained and rinsed
1 habanero chile, whole
2 green onions, chopped, plus extra for garnish

1. In a medium heavy-bottomed saucepan, heat the oil over medium heat until shimmering. Add the garlic and rice; cook, stirring constantly, until the rice is translucent at the edges and the garlic is fragrant, about 1 minute. Add the remaining ingredients. Stir once, increase the heat to medium-high, and bring to a simmer. Once the mixture simmers, reduce the heat to the lowest heat.

2. Cook for 15 minutes, then, without removing the lid or moving the pot, turn off the heat and let the rice sit for another 15 minutes. Remove the chile pepper, fluff the rice with a fork, and serve, topping with additional green onions.

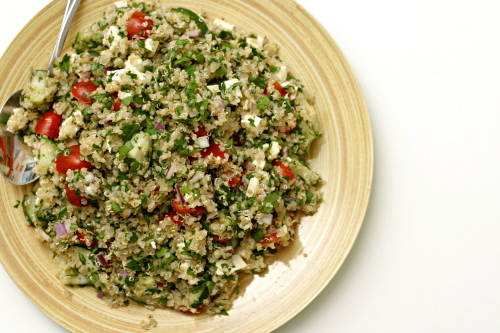
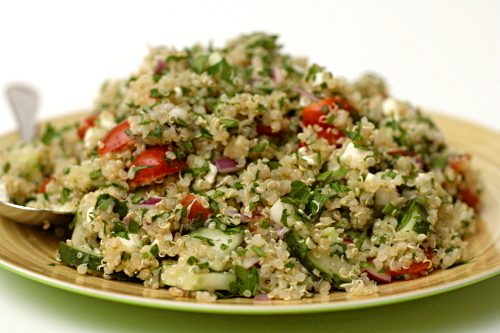
quinoa tabbouleh

I have annoying eating habits at work. Carrots – crunchy. Bananas – smelly. Hard-boiled eggs – crunchy (during the peeling) and smelly. My officemate is very tolerant. And on our first day in the office together, she asked me, “So is that how you stay thin? By eating healthy all the time?” Hmm…

  1. Call me thin some more, if you will. I will use it as an excuse to skip my workout this evening.
  2. Define “all the time.” Because…no. Not so much.

She asked me what I normally make for dinner, and I was at a loss for an answer. I’m a food blogger; I repeat dinners maybe once every couple of months. The quickest way I could think to answer that question was to give her the link to my blog. My third day at work, and I already outed myself as Food Obsessed.

She asked me what I was making for dinner that night, and when I answered, she asked what quinoa was. I was reminded: I’m the weird one when it comes to food. And so are you, probably, if you’re reading a food blog. I wonder what percentage of people in my small isolated desert town know what quinoa is?

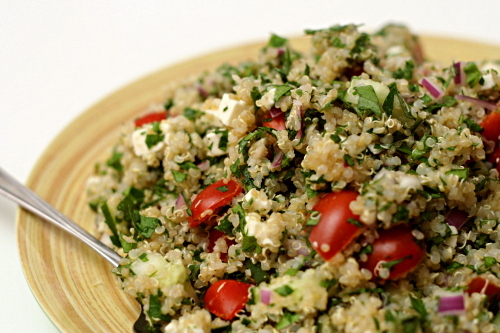
Which is sad, because, as you know if you are also one of the Food Obsessed, quinoa is what all of the other whole grains (I know, I know, not technically a grain) want to be – hearty and healthy, but fluffy and slightly sweet, the way most grains don’t taste until they’re refined. Mixing it with vegetables, herbs, and feta makes it even healthier, which is perfect because that way I get dessert.  No one can eat healthy all the time, right?

One year ago: Strawberry Lemon Sorbet
Two years ago: Ricotta Spinach Tofu Ravioli

Printer Friendly Recipe
Quinoa Tabbouleh (adapted from Bookcook via the kitchn)

Makes 3-4 main course servings

Some things: I didn’t quite follow this method to mellow the bite of the onions, and my method did not work. The leftovers were particularly intense. Soak the onion in water! You may want to add the garlic too, although I have no evidence that this method would work for garlic. It just seems like it could.

The original recipe includes mint, but I don’t usually like mint with savory food. It also called for olive oil, and I intended to add it but after tasting the salad, the oil didn’t seem necessary. And less oil in dinner means more cookies for dessert.

The standard directions for cooking quinoa seem to be 1 cup quinoa to 2 cups water, so I’ve left that as it was in the original recipe. But I’m suspicious: my pot had a lot of water left in it at the end of cooking that had to be drained off. Next time I’m trying 1½ cups water for 1 cup quinoa.

I know traditional tabbouleh is more parsley than grain, but it’s also more side dish than main, which wasn’t what I was going for.

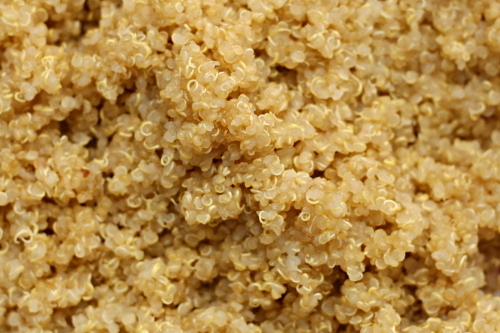
1 cup dry quinoa
2 cups water
½ teaspoon salt
½ red onion, diced fine
2 cloves garlic, minced
1 cup cherry tomatoes, halved
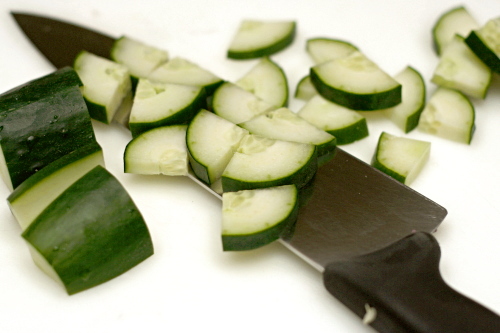
1 cucumber, quartered lengthwise and sliced ⅛-inch thick
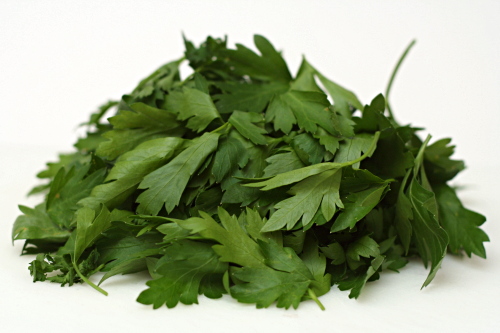
1 bunch parsley (about 2 cups), minced
8 ounces feta, crumbled
2 tablespoons fresh lemon juice

1. Rinse the quinoa well under cold water. Put it in a medium saucepan with 2 cups of water and ½ teaspoon salt. Bring the water to a boil over high heat, then reduce the heat to low and cook, covered, for 20 minutes. Transfer the cooked quinoa to a large bowl to cool slightly.

2. Meanwhile, in a small bowl, cover the diced onion and a pinch of salt with water. Let the onion soak while you prepare the other ingredients.

3. Drain the onions; add them to the bowl along with the garlic, tomatoes, cucumber, parsley, and feta; stir to combine. Add the lemon juice and toss to coat. Taste for seasoning (more salt? more lemon juice?) and serve.

home corned beef

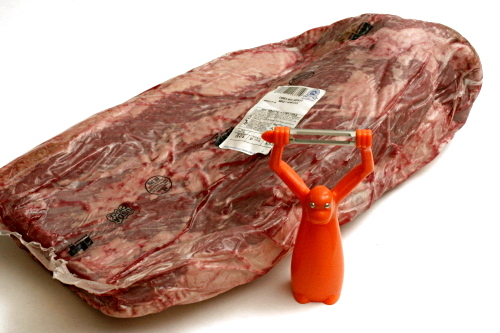
Can someone explain to me why the only way I can buy brisket in my tiny town is to get the whole brisket? (And why are there no dried currants? Or mini-cupcake liners?) I didn’t even know what a whole brisket looked like before last month. First off, it’s huge. Who needs to buy 15 pounds of meat at a time? Second, half of that 15 pounds is fat. I actually weighed the fat after I spent an entire hour aaaargh! trimming it off the brisket. An inch-thick layer of fat, yum.


monkey peeler for scale

And why is brisket so much more expensive to buy than prepared corned beef anyway? Corned beef is just seasoned brisket. I didn’t corn my own beef because I have a problem with the store-bought versions of corned beef; it’s just that…I can’t help myself. Homemade corned beef sounded fun.

I tried it a few years ago (back in the glorious days when I could buy pre-trimmed brisket in reasonable sized roasts), using Cooks Illustrated’s dry rub recipe. In that one, a mixture of salt and other seasonings is rubbed onto the brisket and left to set for several days. It was good, because it’s salty brisket, but I didn’t think it was significantly better than what I could buy.

I started out this time using Alton Brown’s recipe, which is a wet brine similar to what is often used for chicken. However, I balked when I was supposed to add 2 pounds of ice to 2 quarts of water to make the brine for four pounds of brisket. That seemed like an excessive amount of liquid per meat; I’m not sure I have the fridge space for all that. So I halved the liquid, but that means that my brine was far more concentrated, and the resulting corned beef was not-quite-inedibly salty.

I tried again (after all, I still had plenty of brisket in the freezer), dialing back the amount of salt by half. And what do you know? Perfection. Dave is already requesting more reubens, so it looks like I’ll use up 15 pounds of brisket after all.  Maybe next time I can get the butcher to trim it for me.

One year ago: Roasted Baby Artichokes
Two years ago: Red Beans and Rice

Printer Friendly Recipe
Corned Beef (adapted from Alton Brown)

6 to 8 servings

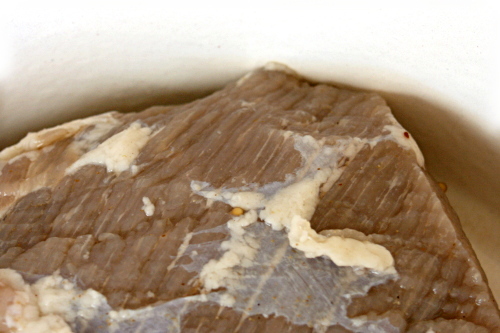
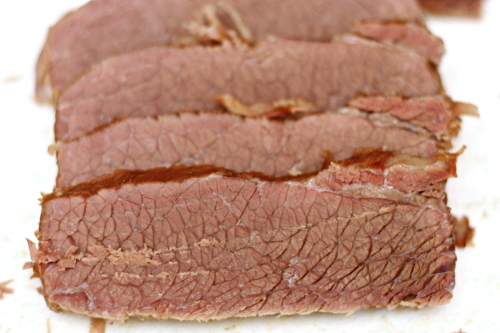
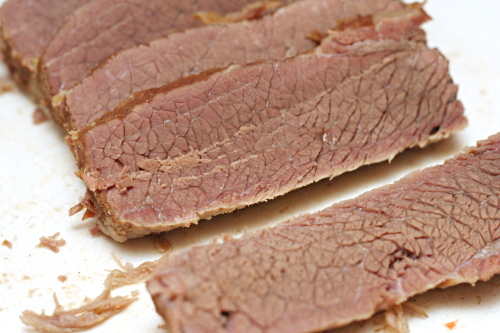
The use of saltpeter (potassium nitrate) is up to you. Its purpose is to make the meat pink; without it, it turns the purpley gray that you see in my pictures. Cooks Illustrated’s corned beef write-up reported chemical flavors whenever they used saltpeter, and I couldn’t find it anyway, so I left it out, and truthfully, I quite like the color of the meat at the end of cooking.

4 cups water
½ cup kosher salt
6 tablespoons brown sugar
1 tablespoon saltpeter (optional)
½ cinnamon stick, broken into several pieces
1 teaspoon mustard seeds
1 teaspoon black peppercorns
4 whole cloves
4 whole allspice berries
6 whole juniper berries
2 bay leaves, crumbled
¼ teaspoon ground ginger
4 quarts ice
1 (4 to 5 pound) beef brisket, trimmed

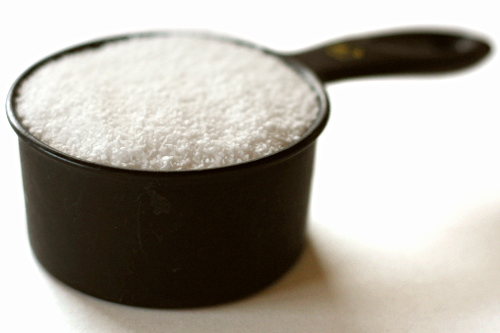
Place the water in a 5-quart pot along with the salt, sugar, saltpeter (if using), and spices. Cook over high heat until the salt and sugar have dissolved. Add the ice and let set the mixture until the ice is mostly melted. Once the liquid is cold, place the brisket in a 1-gallon zip-top bag and add the brine. Seal and lay flat inside a 9×13-inch pan. Refrigerate for 5 days, turning occasionally. After 5 days, remove the meat from the brine and rinse it under cool water. Cook using your favorite recipe. (I like to keep it very simple, just simmering the brisket in water for a few hours until it’s tender, adding potatoes, carrots and cabbage near the end.)

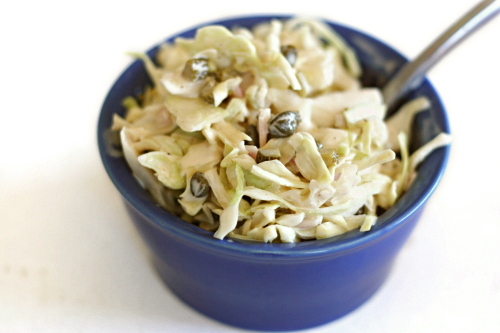
slaw tartare

“Here, taste this”, I requested, bringing Dave a cornichon.

He obliged, then made a face. “Euck, it’s a pickle.”

I sighed. Brined food is Dave’s single food hangup, but the cornichons had seemed relatively mild to me. I was hoping he wouldn’t mind them.

I went back into the kitchen to finish the salad, snacking on at least one cornichon for every one I chopped.

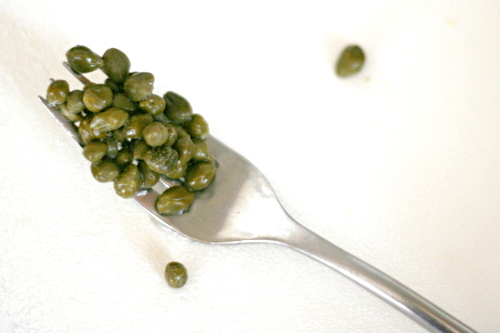
Before too long, I tried again, this time with capers. “Too briny”, he insisted.

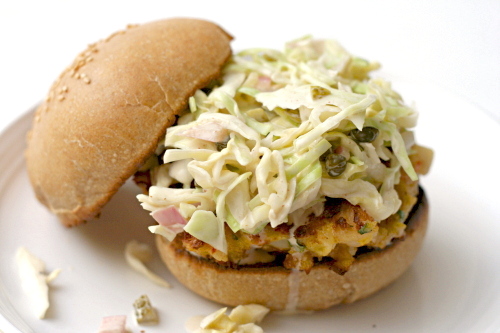
I was starting to get worried about whether Dave would tolerate this slaw at all. Instead of coleslaw, he might be topping his shrimp burger with arugula and, uh…ketchup? We were out of mayonnaise; it had all gone into the dressing.

I forged on, but halved the capers and reduced the vinegar by even more. After mixing the dressing into the salad, I started tasting for seasoning. Results were inconclusive, so I tasted again. Seems okay, but I should take one more taste. When I realized that all my tasting was simply to keep eating, I decided the seasoning was just fine.

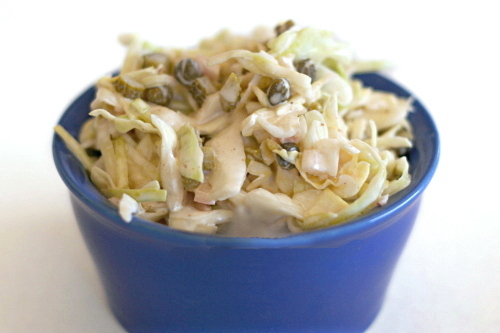
But it was time for the real test. I took a small bowl of the coleslaw to Dave. “Ooh, this is good slaw!” he exclaimed, finishing the bowl off in no time. I let out the breath I’d been holding. He was right. It is good slaw.

(The shrimp burgers were delicious.  They will be my next entry.)

One year ago: Pasta with Cauliflower, Walnuts, and Ricotta Salata
Two years ago: Creamy Buttermilk Coleslaw (okay, that’s kind of wierd)

Printer Friendly Recipe
Slaw Tartare (adapted from Smitten Kitchen who adapted it from Rebecca Charles’ and Deborah Di Clementi’s Lobster Rolls and Blueberry Pies)

Not a fan of watery coleslaw, these days I salt all of my cabbage destined for slaw.

Also, the recipe on Deb’s site, which reportedly already has less mayonnaise than the original, still seems to have a crazy amount of it. I’ve reduced it to about a third of what she recommends and thought the slaw was perfectly creamy. I’ve reduced some of the other dressing components accordingly.

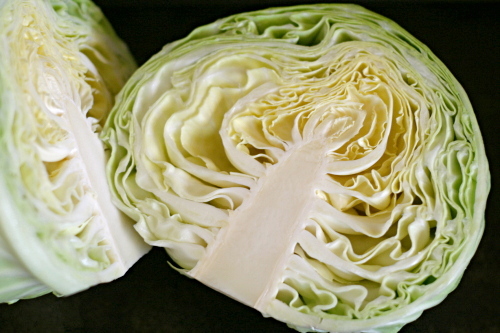
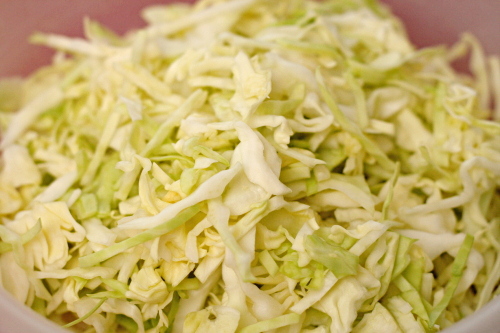
½ cabbage (about 1 pound), shredded fine (5-6 cups)
kosher salt
¼ cup chopped red onion
2 tablespoons sherry vinegar
½ teaspoon sugar
¼ cup capers
¼ cup chopped cornichons, plus 1 tablespoon of the juice
2 teaspoons Dijon mustard
6 tablespoons mayonnaise
½ teaspoon freshly ground black pepper

1. Toss the shredded cabbage and 1 teaspoon salt in a colander or large mesh strainer set over a medium bowl. Let it stand until cabbage wilts, at least 1 hour or up to 4 hours. Rinse the cabbage under cold running water. Spin the cabbage in a salad spinner until it’s dry or press, but do not squeeze, to drain it; pat dry with paper towels. Place the wilted cabbage in a large bowl.

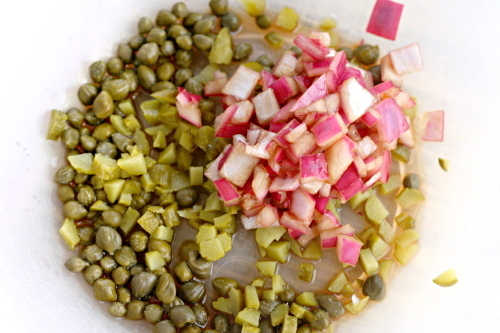
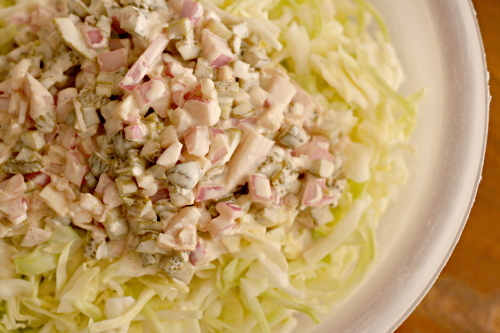
2. Mix the onions, sherry vinegar, and sugar together in a small bowl. Let it set for about 15 minutes, then mix in the capers, cornichons, cornichon juice, mustard, mayonnaise, and pepper. Fold the dressing into the cabbage and serve, or refrigerate for several hours for serving.

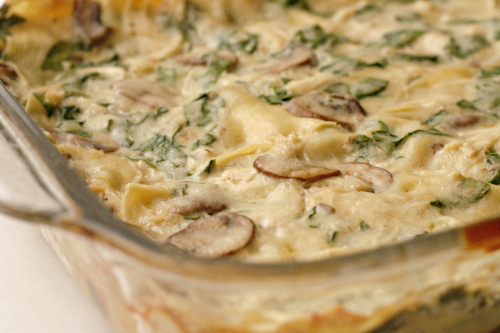
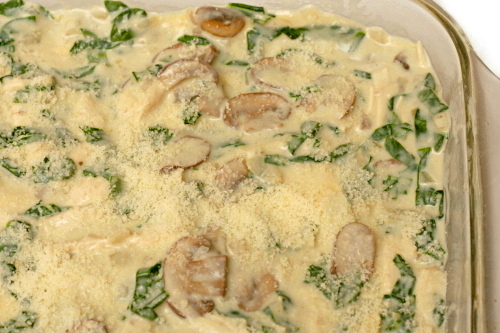
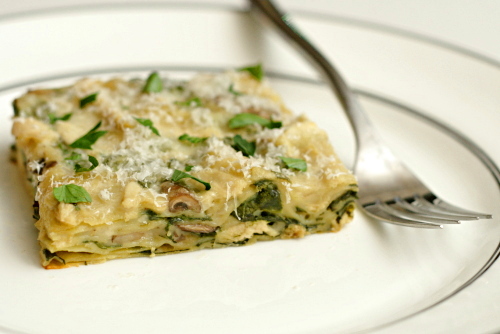
chicken mushroom spinach lasagna

I’m hardcore – I made an Emeril recipe more complicated. I did skip a few of his steps, so maybe I’m not completely ridiculous.

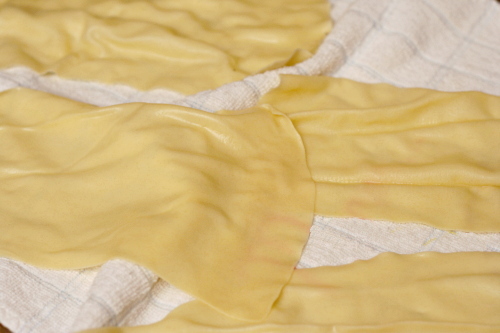
It’s just that if I’m going to go through all the trouble of making lasagna, with cooking chicken, stirring béchamel, layering and baking, I might as well go all the way – homemade pasta and damn good chicken.

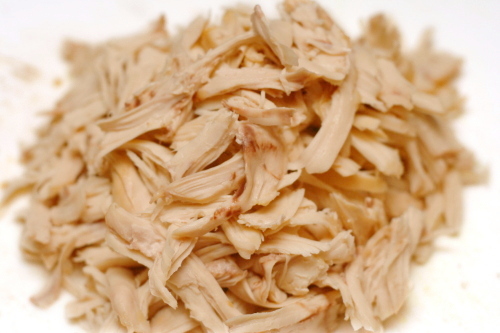
So there was no cooking of boneless skinless chicken breasts in a dry pan – weird, isn’t it, that I’m not a fan of dry tasteless meat. Heck no, I roasted those suckers – bone-in, skin-on, thankyouverymuch. And before that, I brined them – hey, it’s a step that takes about 2 minutes of effort and you ensure fully seasoned, moist meat. Why not do it?

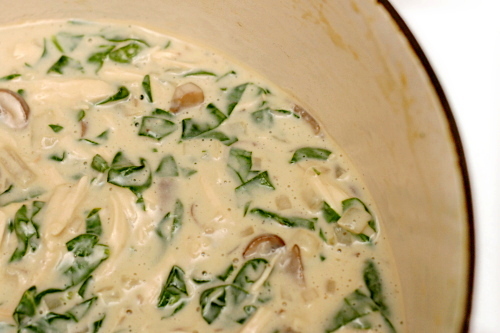
But if I’m going to add homemade pasta and brined, roasted, shredded chicken to an already ambitious recipe, I probably needed to cut some corners somewhere. Since I can’t seem to convince myself to enjoy cooked spinach, I decided to skip the cooking and blanching of the spinach and just add shredded baby spinach directly to the béchamel. I wasn’t able to use quite as much, but that’s okay – it was still a colorful, healthy, easy addition.

Okay, so I guess I only skipped one little step in Emeril’s recipe. Oh wait, I also mixed all the chicken and parmesan into the sauce, so I was really only layering two things – sauce and noodles. That probably saved 30 seconds or so of effort. That’s okay, I had fun making the lasagna, and I was completely confident that the extra bit of work I put into it would give me a perfect result, and, yes, it did.

One year ago: Deli-Style Rye Bread
Two years ago: (Almost) No-Knead Bread

Printer Friendly Recipe
Chicken, Mushroom and Spinach Alfredo Lasagna (adapted from Emeril Lagasse)

This is how I made the lasagna, but there are some things you could do differently. The original recipe keeps the chicken and some of the parmesan separate from the béchamel, laying pasta-béchamel-cheese-chicken instead of just alternating pasta and chickeny parmesany béchamel, like I did.

Also, the type of pasta you use is entirely up to you. You could use the no-cook dry noodles or buy fresh noodles or make your own. And I don’t know for sure that fresh homemade noodles need to be blanched for lasagna, but the one time I skipped that step was a disaster.

One more thing – the original recipes calls for double these ingredients to be layered into a 9- by 13-inch pan, but I was concerned that I’d have overflow. While my lasagna is a little on the short side, I think twice this height would have been too much for my standard 9- by 13-inch pan. But maybe the quantity of ingredients that I used would make an ideal 8- by 8-inch lasagna?

6 to 8 servings

1 teaspoon vegetable oil
1 pound chicken breasts, bone-in, skin-on, trimmed of excess fat and skin
salt and pepper
4 tablespoons (1 stick) unsalted butter
8 ounces button mushrooms, thinly sliced
2 large shallots, finely chopped
4 cloves minced garlic
¼ cup all-purpose flour
3½ cups milk
¼ teaspoon freshly ground black pepper
¼ teaspoon freshly grated nutmeg
4 ounces spinach, stemmed, washed, sliced into ¼-inch ribbons
3 ounces (1½ cups) grated Parmesan, divided
fresh lasagna noodles (if homemade, use 1 egg + ⅔ cup (3.2 ounces) flour, kneaded and rolled to the
next-to-thinnest setting on a pasta roller, blanched as described here)

1. (Optional) Stir 2 tablespoons salt into 2 cups cold water until it dissolves. Add the chicken; refrigerate for 30 minutes, then remove the chicken from the brine and pat it dry.

2. Adjust an oven rack to the middle-low position and heat the oven to 450ºF. Heat a small oven-safe skillet over medium-high heat. Add the oil and swirl to coat the bottom of the pan; place the chicken breast in the pan skin-side down. Cook without moving until well-browned, about 5 minutes. Turn the chicken over and move the pan to the oven. Roast until an instant-read thermometer inserted into the thickest part of the chicken measures 160ºF or the juices run clear when small cut is made in the chicken. Remove the pan from the oven and set aside. When the chicken has cooled enough to handle, remove and discard the skin (or eat it, because it’s crisp and delicious!) and shred the meat with your fingers or two forks. Decrease the oven temperature to 375ºF.

3. Béchamel: Melt the butter in a large saucepan over medium heat. Add the mushrooms and cook, stirring often, until their liquid has evaporated and the mushrooms are slightly browned, about 5 to 7 minutes. Add the shallots to the pan and sauté until soft and translucent, 3 to 4 minutes. Stir in the garlic and sauté for about 30 seconds, until fragrant. Add the flour and cook, stirring with a wooden spoon, to make a light roux, about 1 minute. Whisking constantly, slowly add the milk and continue to cook, stirring occasionally, until thickened, 5 minutes. Add ¾ teaspoon of the salt, the pepper, nutmeg, spinach and 2½ ounces (1¼ cups) of the Parmesan and cook, stirring, until thickened, about 2 minutes, then add the shredded chicken. Taste the sauce to decide if it needs more salt. Remove the béchamel from the heat and place a piece of plastic wrap directly on the surface until ready to assemble the lasagna.

4. Spray a 9 by 13-inch pan with nonstick spray, and spread about ¼ cup of the béchamel sauce on the bottom of the dish, avoiding any large chunks of chicken. Arrange a single layer of noodles evenly over the sauce. Then alternate layering béchamel and noodles until you run out of noodles – I was able to make 4 layers, I believe. End with the remaining béchamel and sprinkle the top with the remaining parmesan.

5. Cover the pan with aluminum foil and bake for 20 minutes. Remove the foil and continue baking for about 20 minutes, until bubbly. Let the lasagna rest for about 10 minutes before slicing and serving.