mediterranean pepper salad

When my friend Ramie visited me last spring, it was the first time I’d seen her in eight years. I wanted to cook a great meal for her on her first night, but we’d lost touch for a lot of those eight years, and I wasn’t sure what kind of eater she was. I knew she used to be a vegetarian and wasn’t anymore.

I thought a hodgepodge of Middle Eastern dishes would be perfect – most of it could be made in advance, it was fairly light in case she was a health nut (uh, apparently not), it was vegetarian in case she was picky about meat, it went with either red or white wine in case she didn’t care for one, it could sit out for nibbles while we sat and chatted, and, of course, it was delicious. I made hummus, fresh pita, falafel, and tabbouli, but got stuck when it came time to plan a salad.

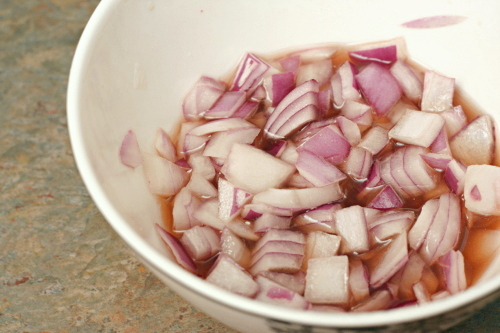
I ended up making a cucumber-tomato salad, which was fine but uninspired. I wish I had known about this pepper salad then. This salad is most definitely inspired. I particularly love the idea of a quick pickle for the red onions to tame their bite.

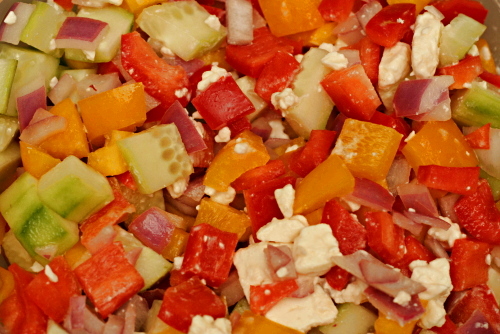
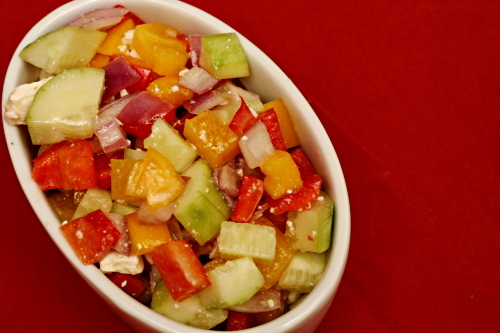
Peppers are one of the many foods I used to be picky about and now like quite a bit, but I was a little hesitant about a salad that starred them. However, everything in this salad came together perfectly. The sweet peppers were balanced by the tart dressing was balanced by the creamy feta was balanced by the fresh cucumber. I need someone else whose eating habits I’m not familiar with to come visit now that I can make their welcoming meal that much more perfect.

One year ago: Beer-Battered Fish
Two years ago: Green Chile Chicken Enchiladas

Printer Friendly Recipe
Mediterranean Pepper Salad (adapted slightly from Smitten Kitchen)

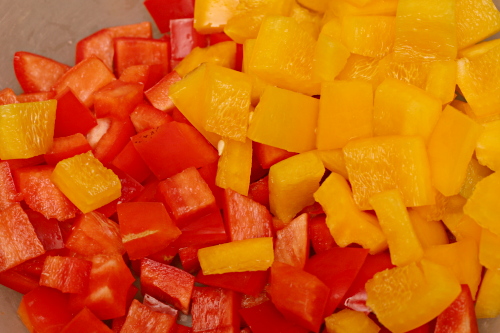
Cut the peppers, cucumbers, and tomatoes while the onion rests in the vinegar solution.

I left out the olives because Dave is not a fan and the tomatoes because…eh, I just wasn’t in a tomato mood.

As much as I loved this salad, it was a little salty for our tastes. For that reason, I’ve decreased the kosher salt in the onion pickling solution from 1 tablespoon (3 teaspoons) to 2 teaspoons. I’ve also increased the feta slightly, as Dave and I felt that the feta really brought everything together.

¼ cup red wine vinegar
¼ cup cold water
2 teaspoons kosher salt
2 teaspoons sugar
½ medium red onion, cut into a ½-inch cubes
3 bell peppers, your choice of colors, cut into ½-inch cubes
1 cucumber, cut into ½-inch cubes
1 cup grape tomatoes, halved
6 ounces firm feta cheese, crumbled
¼ to ½ cup pitted kalamata olives
¼ cup extra virgin olive oil
Salt and pepper to taste

1. Stir together the red wine vinegar, water, kosher salt and sugar in a small bowl until the salt and sugar are dissolved. Add the red onion and set aside for at least 15 minutes.

2. Combine the vegetables, cheese, olives, and drained onions in a large bowl. Pour a quarter cup of the vinegar mixture leftover from the onions over the salad, then drizzle with the olive oil. Adjust the seasonings to taste and either serve immediately or refrigerate for up to one day.

lamb stew

Whenever I eat lamb, my first whiff of it always seems a little…off. Is lamb like feety cheese – stinky, but in a good way? Or am I just attuned to beef, and I’m surprised when the lamb smells different? Whatever, I’ve decided that I officially like lamb. Stinky or not.

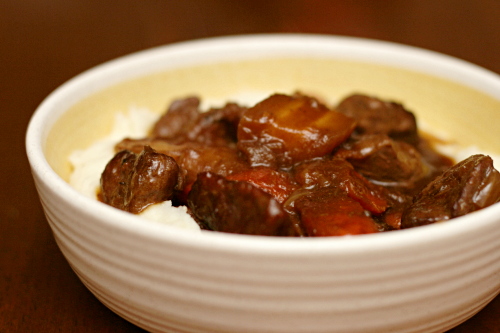
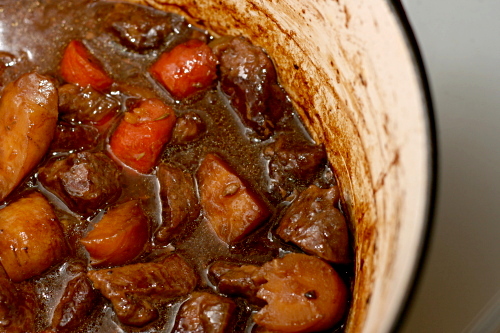
This stew is not any sort of authentic ethnic lamb stew – not Morrocon or Irish or whatever. It’s just lamb stew. It’s what I was in the mood for at the time – chunks of lamb, onions, root vegetables, thyme, and dark rich beer.

My only uncertainty was which type of lamb meat to use. I usually use beef chuck roast for stew, but what is that equivalent to for lamb? Certainly not sirloin, which was one of my few options. I also didn’t want to use expensive rib chops. Leg? Too big. Shanks? Dur…I don’t know. I went with a combination of sirloin meat and loin chops. I think blade chops would be a great option, but my store didn’t have them.

Whatever I did must have worked though, because the stew was just great. So rich and hearty and comforting. And distinctively…lamby. Which is a good thing.

One year ago: German Apple Pancake

Printer Friendly Recipe
Lamb Stew

The type of lamb to use is ill-defined, because a variety of lamb cuts might not be available and a number of different cuts will work. If you can find them, go for blade chops. I used a combination of loin chops and a sirloin steak, and it worked out very well. If the cut you use contains bones, use the higher amount of meat (around 3 pounds); otherwise, use around 2 pounds of meat.

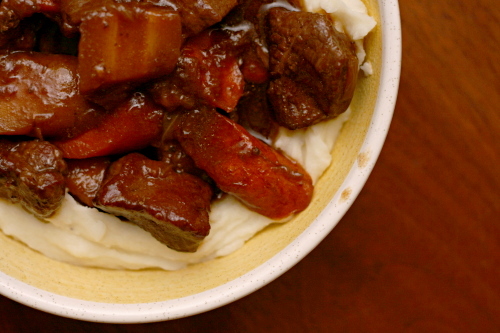
I served this over mashed potatoes, which I really enjoyed. You can also replace the parsnips with potatoes if you want something a little more like traditional stew.

Serves 6

3 tablespoon vegetable oil
2-3 pounds lamb meat, fat trimmed and cut into 1-inch chunks, bones reserved (see note)
salt
3 onions, chopped course
1 (12-ounce) bottle of stout
2 cups water
½ teaspoon black pepper
1 teaspoon dried thyme (or 2 sprigs fresh)
12 ounces carrots, halved lengthwise and sliced on a slight bias about ½ inch thick
12 ounces parsnips, halved lengthwise and sliced on a slight bias about ½ inch thick
¼ cup minced parsley

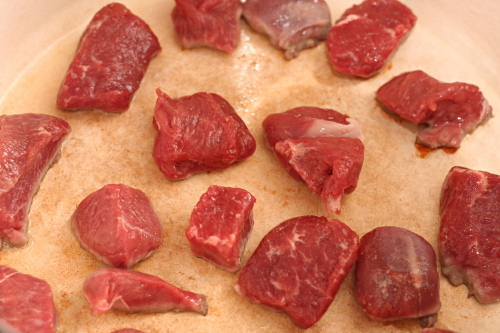
1. Adjust a rack to the lower-middle position and heat the oven to 325 degrees. Heat 1 tablespoon of the oil in a 5-quart Dutch oven over medium to medium-high heat. Add half of the meat, with pieces spaced about one inch apart. Cook without stirring for 2-3 minutes, until the first side is dark brown. Turn each piece to another flat side and cook for another 2-3 minutes, until the second side is dark brown. Continue cooking and turning the pieces until all sides are dark brown, about 10 minutes. Remove the lamb from the pot and place it on a plate. Repeat with another tablespoon oil and the remaining lamb. (If you use a 7-quart Dutch oven instead of a 5-quart, you might be able to fit them all in one batch.)

2. Reduce the heat to medium. Add the last tablespoon of oil to the empty, unrinsed pot, then add the onions and a pinch of salt. Sauté the onions, scraping the browned bits from the bottom of the pot and stirring occasionally, for 8-10 minutes, until the onions are softened and browned around the edges.

3. Add the browned meat, lamb bones, beer, water, 1½ teaspoons salt, pepper, and thyme to the pot with the onions. Bring to a simmer over medium-high heat, then cover the pot and place it in the oven. Cook for one hour, uncovered.

4. Add the carrots and parsnips to the stew and cook for another hour, or until the meat is tender and the vegetables are softened. Remove the lamb bones, stir in the parsley, adjust the salt and pepper if necessary, and serve.

carne adovada

Copy of IMG_5067

A carne adovada comparison post is a very bad idea because:

1. I don’t love cooking with meat, with the constant hand-washing and being careful not to contaminate cooked meat tools with raw meat tools.

Copy of IMG_7465

2. My limited counter space makes working with large roasts difficult.

3. The oven was on for four hours – in July.

Copy of IMG_7470

4. One of the recipes includes the warning “Don’t breathe the fumes!”

5. Another warning, this time from my sister: “My coworker said to be careful because red chile can give some people the runs if they aren’t used to eating it.”

Copy of IMG_4864

6. Carne adovada is red. Deep, dark red, and yes, of course it stains.

7. Who, outside of New Mexico, has even heard of carne adovada?

Copy of IMG_7487

Oh, and then, the outcome?

8. Dave thought all three recipes tasted the same anyway.
Copy of IMG_4879

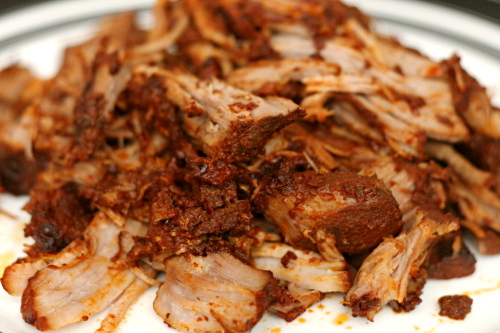
Carne adovada is pork marinated in red chile sauce, then slow roasted. It isn’t something that I’ve eaten a lot of; my dad made it once when I was young and it was crazy ridiculously painfully spicy, and I’ve pretty much been scared of it since. Of course now I realize that the level of spiciness will vary with the heat of the chiles.

Copy of IMG_4881

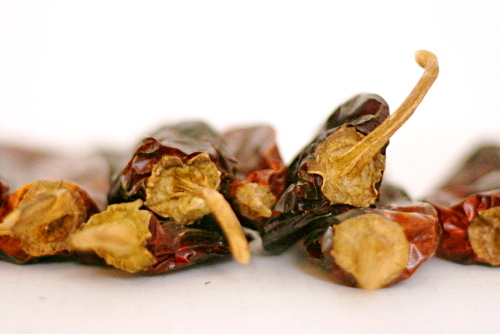
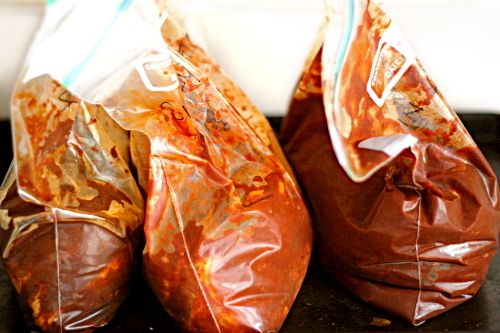
Unable, as usual, to decide on a recipe, I decided to compare a few. The meat in all recipes is marinated and cooked using the same method and cooking time; the difference is in the red chile sauce. At its most simple, the red chiles are soaked in hot water to rehydrate them, then blended with onions, garlic, and salt. Jen’s method is only slightly more complicated, with the added step of toasting the dried chiles before soaking them.

Copy of IMG_4871

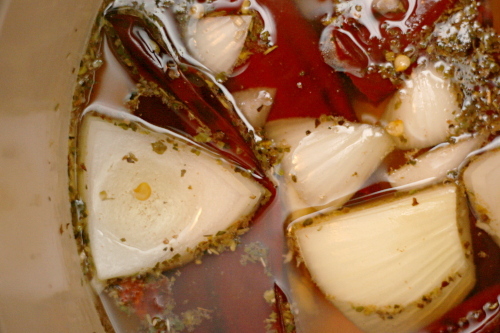
Kate’s recipe is a little more complicated – and uses far, far more red chiles. It’s similar but significantly more fussy, with a soak followed by a simmer instead of just a soak, and then the blended ingredients need to be pushed through a sieve, a step I find tedious in most recipes that call for it.

Copy of IMG_7463

I let the meat marinate for about 24 hours, but if you can swing longer, up to 2 full days, I really think that’s the way to go. The more red chile flavor, the better.

Copy of IMG_7505

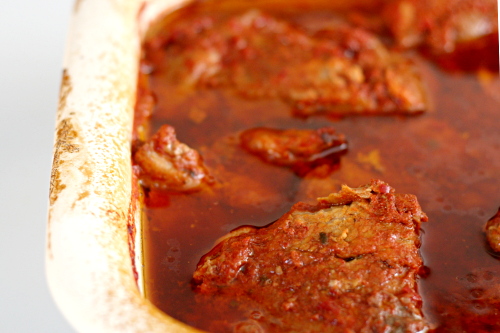
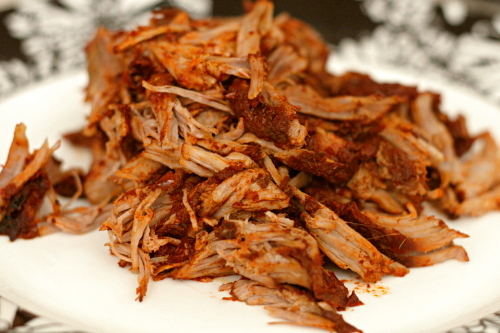
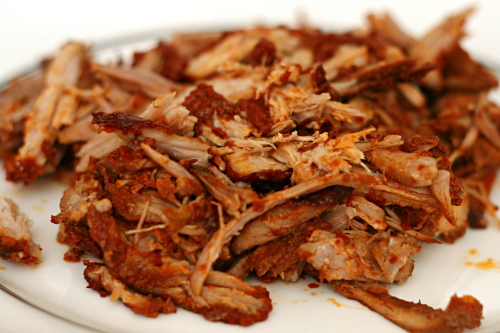
After finding enough properly-sized baking pans, jigsawing the pans into the oven, roasting the meat for hours, letting it cool slightly, and shredding all three pans of meat while trying to keep straight which was which so I could identify the photos, Dave and I decided that they were very, very similar.

Copy of IMG_7514

Dave would say identical. I would say that they’re oh-so-slightly different, but equally good. Kate’s recipe, which used so much more chiles, was spiciest. The recipe that did not require toasting the chiles tasted lighter and fresher, while the recipe with toasted chiles had a deeper flavor.

Copy of IMG_7523

My favorite was probably the simplest recipe; I liked that fresh flavor. Plus, if they all taste essentially the same, I might as well make the easiest, right? I guess a comparison was necessary, just so I know that, in this case, simple works just fine.

Copy of IMG_4929

Update: I thought I should add that neither of us had any, ah, digestive issues after eating the red chile, despite the concerns of my sister and her coworker.

One year ago: Baked Eggs with Spinach and Mushrooms

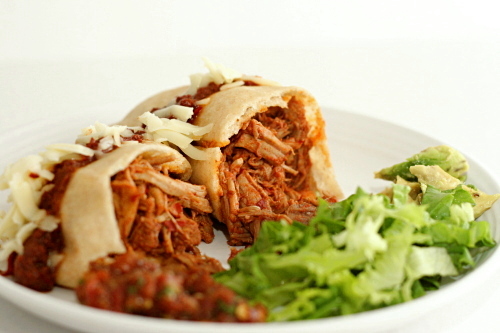
Serving suggestions: Burritos, stuffed sopaipillas (shown in the top photo), quesadillas, tacos, breakfast burritos.  You can also add potatoes to the mixture before cooking, and then serve the potatoes and meat as a main dish with beans and rice as sides.

Printer Friendly Recipe
Carne Adovada
(adapted from Simply Simpatico, by the Junior League of Albuquerque)

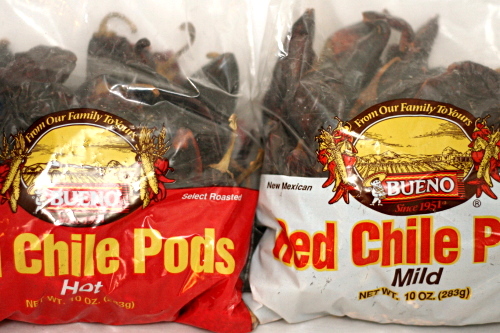
16-18 dried red chile pods
hot water
3 cloves garlic
2 teaspoons salt
1 tablespoon dried oregano
4 pounds pork shoulder, trimmed of thick layer of fat and sliced ½-inch thick

1. Remove stems and seeds from the chile pods. Place the pods in a large bowl or pot and pour in enough hot water to cover them. Soak for 1 hour. Strain, reserving the soaking liquid.

2. Place the chiles, garlic, and salt in a blender and add enough soaking liquid to just cover. Making sure there’s about two inches of headspace, blend until the skins disappear and the mixture is smooth, 2-3 minutes. Pour the sauce over meat, cover tightly, and marinate in the refrigerator for 24-28 hours.

3. Adjust a rack to the middle position and heat the oven to 350ºF. Place the meat and chile sauce marinade in a baking pan and cover tightly with foil. Bake the carne adovada until the meat is falling apart tender, about 4 hours. (You can also cook the carne adovada in a crockpot on low heat for 7-9 hours.) When the meat is done, shred it or cut it into 1-inch pieces. Serve.

Copy of IMG_7527

Printer Friendly Recipe
Carne Adovado
(adapted from Jen at Use Real Butter, who adapted it from Sante Fe Recipe)

16 dried red chile pods
1 tablespoon salt
4 cloves garlic
2 teaspoons oregano
5 pounds pork shoulder, trimmed of thick layer of fat and sliced ½-inch thick

1. Adjust an oven rack to the middle position and heat the oven to 325ºF. Remove the stems from the chile pods; place the pods in a pan and bake for 5-10 minutes, stirring occasionally, until the chiles are lightly roasted. Leave the oven door open, and don’t breathe the fumes! Shake the seeds out of the pods and discard them.

2. Place the chiles in a medium bowl and cover them with boiling water. Let them sit for 30 minutes. Drain the water, reserving about 2 cups. Place the chiles in a food processor or blender; add the salt, garlic, and oregano. Cover the mixture with the reserved chile water, and blend or process for 2 minutes or until the skins disappear.

3. Pour the sauce over meat, cover tightly, and marinate in the refrigerator for 24-28 hours.

4. Adjust a rack to the middle position and heat the oven to 350ºF. Place the meat and chile sauce marinade in a baking pan and cover tightly with foil. Bake the carne adovada until the meat is falling apart tender, about 4 hours. (You can also cook the carne adovada in a crockpot on low heat for 7-9 hours.) When the meat is done, shred it or cut it into 1-inch pieces. Serve.

Copy of IMG_7526

Printer Friendly Recipe
Carne Adovada
(adapted from Kate in the Kitchen , who adapted it from Sante Fe Hot and Spicy Recipes)

12 ounces dried red chile peppers
1 large onion, chopped
8 cloves fresh garlic, smashed with skins removed
2 teaspoons dried oregano
2 teaspoons ground cumin
2 teaspoon kosher salt
3-4 pounds pork shoulder, trimmed of thick layer of fat and sliced ½-inch thick
4 teaspoons red pepper flakes
2 sticks cinnamon

1. De-stem and de-seed chile peppers; place in a large stock pot and cover with hot water. Soak for 30 minutes. Add the remaining ingredients to the pot; bring to a boil. Reduce the heat to low and simmer for 30 minutes.

2. Strain, reserving liquid. Allow to cool slightly, then process solids in batches in a food processor using reserve liquid for proper consistency. Strain through a wire sieve, pressing on the solids to extract the liquids.
3. Pour the sauce over meat, add the cinnamon and red pepper flakes, cover tightly, and marinate in the refrigerator for 24-28 hours.

4. Adjust a rack to the middle position and heat the oven to 350ºF. Remove the cinnamon stick. Place the meat and chile sauce marinade in a baking pan and cover tightly with foil. Bake the carne adovada until the meat is falling apart tender, about 4 hours. (You can also cook the carne adovada in a crockpot on low heat for 7-9 hours.) When the meat is done, shred it or cut it into 1-inch pieces. Serve.

Copy of IMG_7524

african pineapple peanut stew

Copy of IMG_0562

I sort of hate when I find great recipes from blogs that come from a cookbook I already own. I guess it makes sense – now it isn’t just words on a page because someone (in this case, a number of people) is actually recommending it. But man, I sure wish that I could be the person to pick out the oddball recipe from the cookbook and spread the word about how great it is! You can tell I’m not one of those people who finds good stuff at thrift shops, can’t you?

Copy of IMG_0555

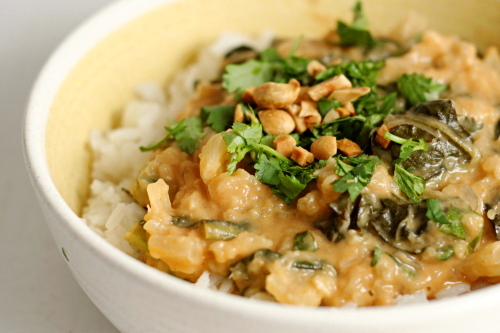
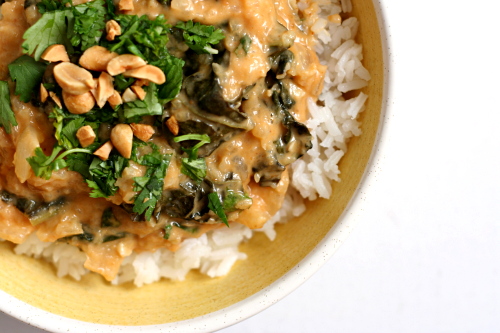
But can you really blame me; I mean, come on, pineapple, peanut butter, onions, and kale? Who would have expected that to come together into something delicious?

Copy of IMG_0546

It did though. No one of the flavors dominated; it wasn’t like I took a bite of stew and thought, “mm, pineappley.” Everything was in balance, coming together to create a meal that was earthy and comforting. I was surprised by how tasty it was, and I’m surprised that I’m already thinking that it would be the perfect way to use up the rest of the jar of peanut butter before we move. Who knew I’d ever crave pineapple stew?

Copy of IMG_0553

One year ago: Pumpkin Ravioli

Printer Friendly Recipe
African Pineapple Peanut Stew
(adapted from Moosewood Restaurant Cooks at Home)

4 servings

I used natural peanut butter, which worked great. Also, I only had Frank’s hot sauce, which isn’t as spicy as some, and I would have loved a little more heat. I think a pinch of cayenne added with the garlic would be great too.

1 tablespoon vegetable oil
1 small onion, diced
salt
2 garlic cloves, minced
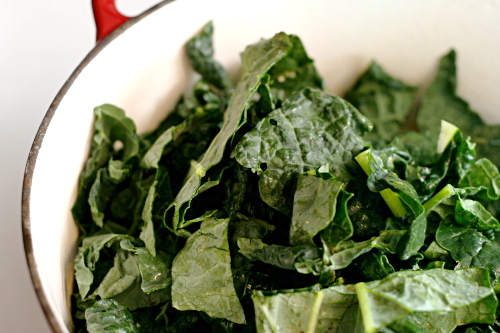
1 bunch kale or Swiss chard, large stems discarded, leaves chopped coarse
1 (20-ounce) can crushed pineapple, undrained
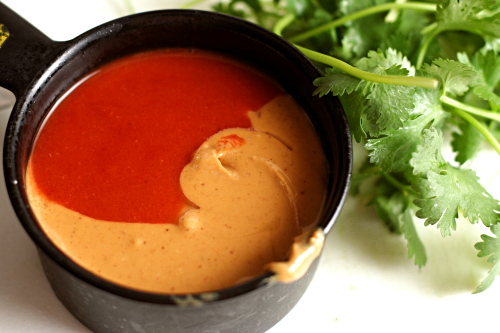
½ cup peanut butter
1 tablespoon Tabasco or other hot pepper sauce
½ cup chopped fresh cilantro
¼ cup peanuts, chopped
1 scallion, sliced

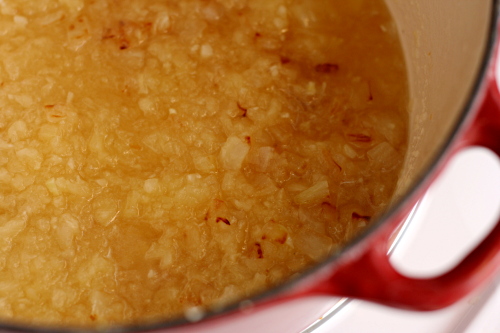
1. Heat the oil in a 5-quart Dutch oven over medium heat. Add the onion and a pinch of salt and sauté, stirring occasionally, until just browned at the edges, about 8 minutes. Add the garlic and cook, stirring constantly, until fragrant, about 30 seconds.

2. Add pineapple to the pot and bring to a simmer; add the greens, cover, and simmer for about 5 minutes, stirring occasionally, until just tender. Stir in the peanut butter and hot sauce and simmer for another 5 minutes, until the flavors are blended. Stir in the cilantro just before serving and add salt if necessary. Serve over rice or couscous, garnishing each serving with the peanuts and scallions.

Copy of IMG_0564

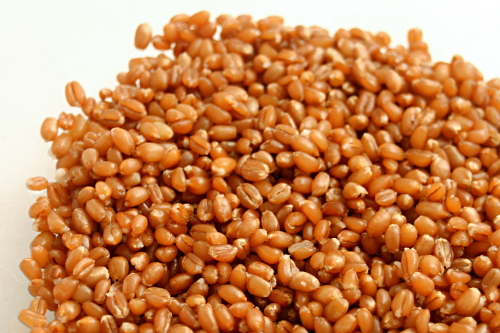
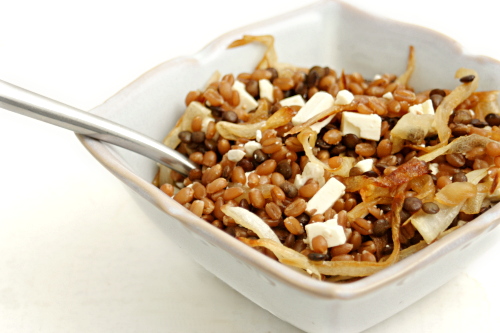
wheat berries with caramelized onions, feta, and lentils

Copy of IMG_0628

I’m really looking forward to moving to New Mexico. There’s absolutely nothing wrong with Philadelphia; any unhappiness I had here was my own deal and not a result of the location. But I am excited about having a fresh start somewhere.

Copy of IMG_0597

I am a little concerned about the grocery store situation. I have been majorly spoiled the last few years by always living near a Wegman’s. If you’re not familiar, suffice to say that it’s a great store, with a huge selection and high quality. When a recipe says that an ingredient can be found in “any well-stocked grocery store”, I’ve never had to worry about how I’d get a hold of it.

Copy of IMG_0613

The town we’re moving to, though, is small and isolated. It has just one grocery store. My initial explorations during our visit there over the summer indicated that it isn’t terrible but it isn’t great. I should be able to find, say, goat cheese, but only one type.

Copy of IMG_0606

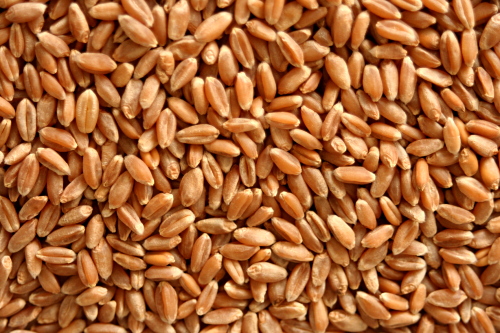
So I’ve been trying to take advantage of the wide selection of my current store while I can, by buying random unusual ingredients that I’m pretty sure I won’t be able to find after the move. My plan was actually to buy farro, but I guess even Wegman’s has its limits because they didn’t have it. I almost went with quinoa, since it’s familiar and safe, but I managed to talk myself into trying wheat berries instead.

Copy of IMG_0618

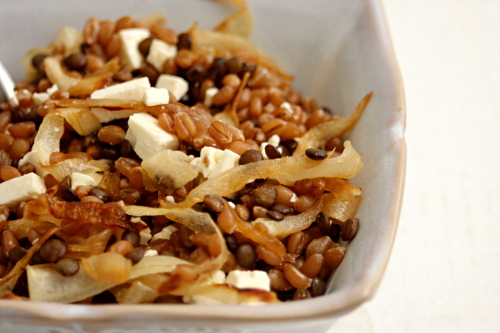
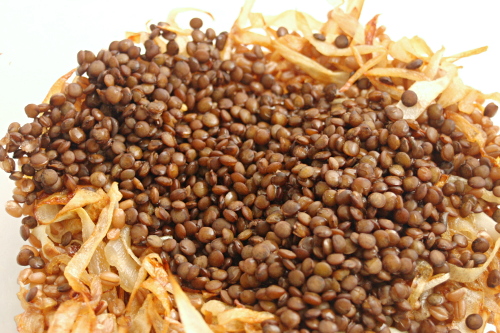
Well, I don’t know about farro, but wheat berries are certainly delicious. They’re nutty, and the texture was chewy, not unpleasantly crunchy or mushy. The sweet caramelized onions were a great compliment, and then the salty feta was perfect on top of all of that. The whole thing was just so good, and I couldn’t believe how healthy it was to boot. I sure hope I can find wheat berries and feta after we move because I want to be making this meal a lot!

Copy of IMG_0621

One year ago: Bacon-Wrapped Pork Tenderloin Medallions

Printer Friendly Recipe
Wheat Berries with Caramelized Onions, Lentils, and Feta (adapted a bit from Orangette; wheat berry cooking method from Deborah Madison’s Vegetarian Cooking for Everyone)

2-3 servings

You might not need a recipe here, because you’re just combining grains and lentils with caramelized onions and feta. If you already have favorite ways to cook grains, lentils, and onions, you should absolutely feel free to use those. In case you don’t, I’ll provide my preferred methods here.

You can probably skip the lentils if you don’t want to deal with an extra ingredient. Also, I haven’t tried it myself, but I don’t see why you couldn’t just add them to the wheat berries at the point when the wheat has 25 minutes of cooking left. Just make sure there’s enough water in the pot.  (Update 6/14/11: You can definitely cook the lentils in the same pot as the wheat berries. I’ve also used farro in this recipe now, which is convenient because it cooks in the same amount of time as lentils.)

I think you could use almost any grain here, as long as you adjust the cooking time. Quinoa would definitely be good (and would make this meal gluten-free).

¾ cup wheat berries
salt
2 onions, sliced
1 tablespoon olive oil
½ cup lentils, preferably lentils de puy, picked over and rinsed
4 ounces feta cheese, crumbled
hot sauce (optional)
lemon wedges (optional)

1. Soak the wheat berries in water for at least an hour and up to overnight. Put them in a pot with enough water to cover by a few inches. Bring to a boil, then lower the heat, cover the pot, and simmer until they’re tender, 1 to 2 hours. Add ½ teaspoon salt once they’ve started to soften.

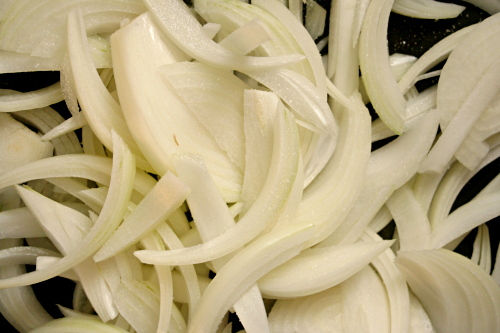
2. Heat the oil in a large nonstick skillet over medium-high heat. Add the onions and ¼ teaspoon salt, reduce the heat to medium, and cook, stirring somewhat frequently, until they just start to brown, about 8 minutes. Reduce to heat to medium-low and continue to cook and stir until the onions are evenly golden brown, about 20 minutes longer.

3. Put the lentils into a small saucepan. Add 3 cups of cold water and ¼ teaspoon salt. Bring to a boil over medium-high heat, then reduce the heat and simmer until tender but not falling apart, about 20 to 25 minutes. Drain.

4. Combine the wheat berries, caramelized onions, lentils, and feta. Adjust the seasonings if necessary and serve with either hot sauce or lemon wedges, if desired.

Copy of IMG_0625

not a chinese burrito (moo shu pancakes)

dscn2770-copy.jpg

I haven’t been reading food blogs long – only about a week longer than I’ve had my own, in fact – but I’m already playing favorites. One of the blogs that first caught my attention and held it is Jen’s use real butter. Jen’s blog has what I consider the three requisite aspects of a good food blog: beautiful pictures, entertaining writing, and recipes I actually want to make. Something else I love about Jen’s blog is that some of those recipes are authentic Chinese food. At least, I’m assuming they’re authentic. As an all-American mutt, I’m not exactly an expert on spotting traditional ethnic cuisine.

The latest such recipe is moo shu pork. I’d heard of moo shu before – the term seems to get tossed around a lot just because it sounds cute and is fun to say. Moo shu. Moooooo shu. But I actually had no idea what it was until Jen’s post about it. Turns out, it’s a bunch of stir-fried goodness all wrapped up in flatbread. Sounds delicious!

The recipe is fairly simple, but it did involve some ingredients that weren’t familiar to me. The first is hoisin sauce. Jen says that she prefers to buy hoisin sauce with more Chinese on the label that English. That sounds reasonable. My grocery store has a well-stocked ethnic section, so I was pretty confident that I’d be able to find something that fit the bill. I ended up with a bottle with about 50% English, 50% Chinese on the label. Close enough.

The moo shu shells were a bigger problem. Even Wegman’s ethnic section can only go so far. I had a bit of hope when I saw an “asian” sign in the freezer section, but there was no luck to be had there. I had two options at this point: find an asian grocery store or make my own moo shu shells. I just moved to Philadelphia a week ago and didn’t relish the idea of driving around looking for an asian grocery store, so homemade it was.

Okay, let’s be honest. I could have found an asian grocery store – I know how to use the internet, after all. The truth is, I’m just not very comfortable in them. The merchandise is unfamiliar to me, I don’t know how anything is arranged, and most of the labels are in Chinese. Last time I went to one, I wandered up and down the aisles looking for dried shrimp. When I gave up and asked the cashier for help, she yelled, “in the cooler!” The cooler encompassed an entire aisle of this store. I wandered over there and searched around, all the while with her yelling from the cash register which direction I needed to be looking. Why she didn’t just walk the 10 steps over to the cooler and grab the damn shrimp off the shelf for me is a mystery. Then, as I was checking out, she asked if I was making pad thai. Apparently little white girls have one use for dried shrimp and one use only. I said I was, and she told me I needed Thai basil. I know Thai basil is a traditional pad thai ingredient, but I’m assuming that it has the same shelf life of regular basil – so about 3 hours. My pad thai had always been damn good without it, so I declined, admitting that my pad thai must not be that authentic. So there you go – my desire to make traditional ethnic food lies somewhere between dried shrimp and Thai basil.

So, homemade moo shu shells it was. Turns out making moo shu shells is even easier than finding a recipe for them on the internet. (Hint: Don’t google “moo shu shells”, regardless of how you spell the “moo.” You need to look up “mandarin pancakes.”) The process is a little strange, but it worked out beautifully in the end. Flour is mixed with boiling water, then the dough is allowed to rest. It’s rolled into a rope, then cut into pieces. Each piece is flattened, brushed with oil, and then stacked on another piece with the oiled sides together. Each pair of dough segments is rolled out together, then cooked in an ungreased skillet. The only tricky part is tearing the two pieces apart after they cook, and the only difficulty there stems from the fact that it’s hot!

dscn2752-copy.jpg

dscn2762-copy.jpg

So, in the end, moo shu pork is good. Really good, in fact. I can’t wait to make it again. And hoisin sauce? Also really good. All salty and sweet and just altogether tasty.

Now, Jen insists that these shouldn’t be called Chinese burritos. I can understand this I suppose – after all, I’ve never heard of a burrito referred to as Mexican moo shu. But I’m sure you can see the resemblance. In fact, when I handed Dave his plate, guess what he said? “Oh, cool. It’s a Chinese burrito.”

dscn2763-copy.jpg

Mandarin Pancakes (from Fine Cooking)

The only change I’ll probably make in the future is to add a pinch of salt to the dough.

Makes 12

1¾ cups (8 ounces) unbleached flour
¾ cup boiling water
1 tablespoon toasted sesame oil

In a bowl, mix the flour and the boiling water with chopsticks or a wooden spoon to combine. Turn the shaggy dough onto a lightly floured board, gather it into a heap, and knead it until smooth, about 3 minutes. Cover with a towel and let it rest for about 1/2 hour.

With your hands, shape the dough into an even cylinder about 12 inches long. With a sharp knife, preferably serrated, cut the roll into 1-inch pieces. If the cutting squashes any of the pieces, stand them on end and shape them back into rounds.

Lightly flour your palms and use them to flatten the pieces into 2-inch rounds. Brush the top of each round generously with sesame oil. Lay one round on top of another, oiled sides together. Flatten the pair together with the heel of your hand. Continue until you have 6 pairs.

With a floured rolling pin, roll each pair into a thin pancake about 7 inches in diameter, flipping the pancake over now and again to roll evenly on both sides. Stack the pancakes as you finish rolling them.

In an ungreased cast-iron skillet or nonstick pan over medium-high heat, cook the pancakes one at a time. Heat one side until it becomes less opaque and starts to bubble slightly, and just a few brown spots appear, about 1 min. Flip it over and cook it until a few light brown spots appear on the other side, about 30 seconds.

While the pancake is still hot, pick it up, look for a seam to grab, and separate it into two very thin pancakes. Stack them on a plate as you go and wrap them in foil to keep them warm and prevent drying. If not using right away, refrigerate until ready to use.

For Jen’s mu-shu pork filling, check out her blog.

to clear our sinuses (crockpot rice and beans)

dscn1760.jpg

Well, we can’t eat sandwiches every night! We also had rice two nights in a row. Not a great week for variety.

I realized recently that I only have one crockpot meal that I make regularly. That needs to change! My sister is a crockpot fiend, so I need to ask her for some good ones.

This recipe came from my brother. The first time I had it was when I visited him in Oklahoma. We drove there from Indiana, and our car broke down in Missouri, so…we ate at like 10pm or something. Incidently, while we were waiting around for the car to be fixed in Missouri, we wandered into a bar, where we met up with an older couple who had just gotten married. Cute!

copy-of-img_9807Photo updated 12/02/08

Back to food. I’ve made a few changes to the recipe. It originally called for boneless, skinless chicken thighs, but I decided they weren’t really necessary. There’s plenty of protein from the beans and rice, right? Sometimes I do add bone-in, skinless chicken thighs and then shred the meat right before serving. There’s something about shredded chicken that I just like. Also, it’s supposed to be served over spanish rice, but white rice is easier and there’s plenty of flavor in the beans. Oh, and I changed the beans from pinto to kidney. My friend from Puerto Rico makes rice and beans with kidney beans, so maybe they’re more authentic? I don’t know, I bought them on accident once and liked them better.

And! I had to use actual canned green chiles! My New Mexican green chile supply ran out, and no one resupplied me this year!

Spicy Crockpot Beans
Serves 3

2 (15-ounce) cans kidney beans, drained and rinsed
2 (4-ounce) cans green chile, diced
2 chipotle chiles from adobo sauce, minced
1 (0.85 ounce) package chicken gravy mix (I use Simply Organic)
½ teaspoon sugar
2 tomatoes, chopped, or ½ (14.5 ounce) can diced tomatoes
2 cups cooked white rice

Add first five ingredients to crockpot and cook on low for 3-5 hours. Stir in tomatoes 30 minutes before serving. Serve over white rice. (If you use chicken pieces as well, add them skin side down on the bottom of the pot and cook for 6-8 hours.)

Sandwich week! (tomato soup and grilled cheese)

dscn1711.jpg

Usually I’m pretty careful about planning our weekly dinners with a fair amount of diversity. This week, however, it worked out that we’re having sandwiches three nights. Yay! I love sandwiches!

Sandwich week starts out with a classic, and one of my absolute favorite, meals–tomato soup and grilled cheese. When I was a kid, I loved Campbell’s and Kraft singles. These days, I get just a bit fancier.

The soup is homemade from a Cooks Illustrated recipe. I make the recipe with just a few changes–I leave out the cream at the end because while it certainly doesn’t make the soup worse, it doesn’t make it better either, so I figure I might as well save myself the unhealthiness. I reduce the butter by one tablespoon for the same reason.

The sandwiches are simplicity itself–just slice a roll in half, pile on whatever cheese you like, and roast at 400 degrees until the cheese melts (something like 10 minutes).

I make this meal probably once a month. It’s definitely comfort food for me and Dave. One final touch–we always add just a few cooked macaroni noodles to the soup. I’ve done this since I was a kid, and now tomato soup just seems like it’s missing something when they’re not there.

copy-of-dscn4636.jpg
(Photo updated 3/28/08 )

Cream of Tomato Soup (from Cooks Illustrated)

Serves 6

2 (28-ounce) cans whole tomatoes packed in juice, drained, juice reserved
1½ tablespoons brown sugar, preferably dark
3 tablespoons unsalted butter
4 large shallots, chopped
1 tablespoon tomato paste
Pinch ground allspice
1 tablespoons all-purpose flour
1¾ cups low-sodium chicken broth
2 tablespoons brandy

1. Adjust an oven rack to the upper-middle position and heat the oven to 450 degrees. Line a rimmed baking sheet with foil. Place a strainer in a bowl and remove the seeds and juice of each tomato over the strainer. Place tomatoes in a single layer on the baking sheet. Rub with the brown sugar. Bake until the tomatoes are dry and just starting to brown, about 30 minutes. Let the tomatoes cool slightly, then peel them off the foil.

2. While the tomatoes roast, heat the butter in a large saucepan over medium heat until foaming. Add the shallots, tomato paste, and allspice. Reduce the heat to low, cover, and cook, stirring occasionally, until the shallots are softened, 7 to 10 minutes. Add the flour, stirring constantly, until thoroughly combined, about 30 seconds. Stirring constantly, gradually add the chicken broth; stir in the reserved tomato juice and the roasted tomatoes. Bring to a boil over medium heat, then cover, reduce to heat to low, and simmer for 10 minutes to blend the flavors.

3. Strain the mixture into a medium bowl. Transfer the tomatoes and solids in the strainer to a blender; add enough liquid for the blender to work, then puree until desired consistency. Stir the pureed mixture and remaining strained liquid together. Stir in the brandy and serve.