spanish chickpea and spinach stew

chickpea spinach stew 1

I wasn’t big on life-changing, be-a-better-person resolutions this year, but I did get inspired for a lot of projects. There’s the cookbook goal; a list of house projects; an effort to post on my blog’s Facebook page more often; and a desire to take more pictures. To hold myself accountable (and give myself a satisfying box to check when I complete something), I’m tracking everything.

chickpea spinach stew 5

My goal is to put effort into photography almost every day. It was easy the first few days, when we were traveling, but I was at a loss the first day back at work, when I don’t do much other than sit in my office all day, make dinner, and fold laundry. But of course I love food pictures, and dinner was right there, so I figured I might as well see if I could get a decent shot without much effort.

chickpea spinach stew 6

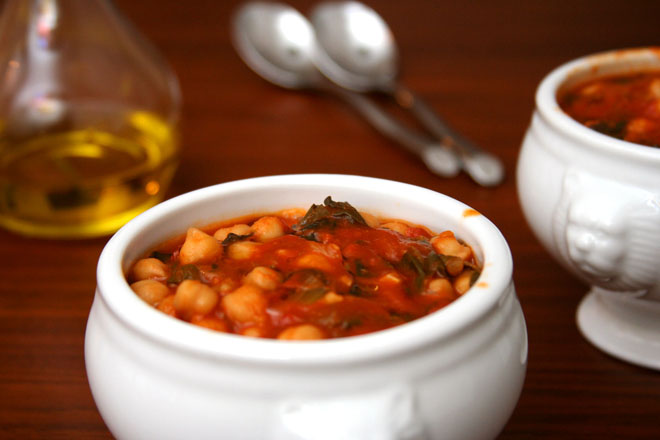
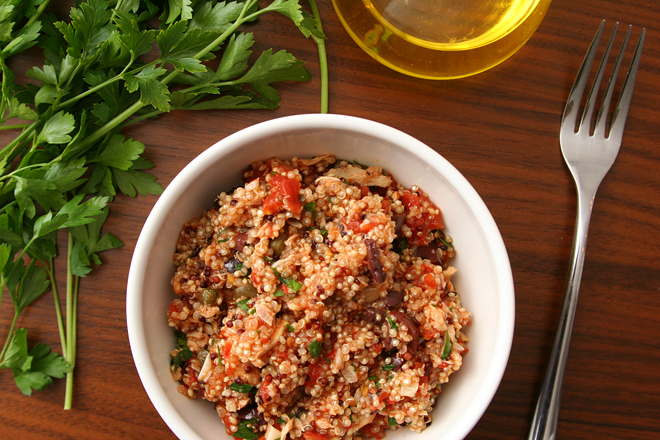
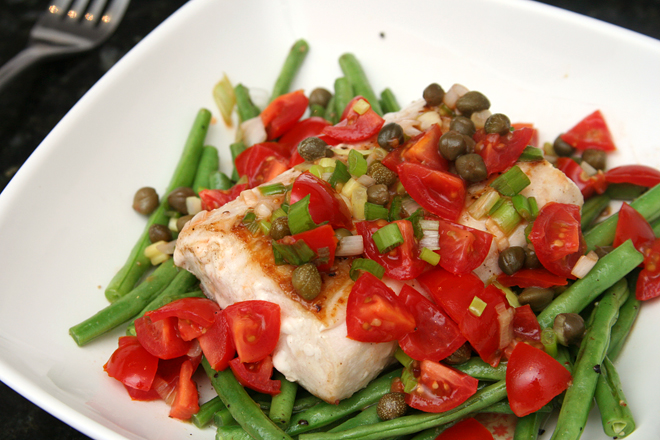
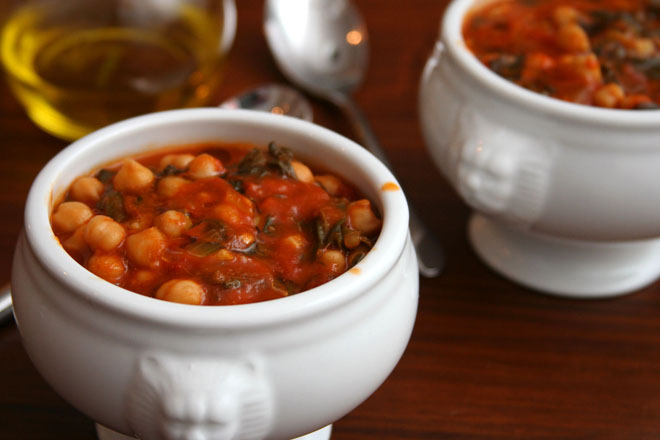
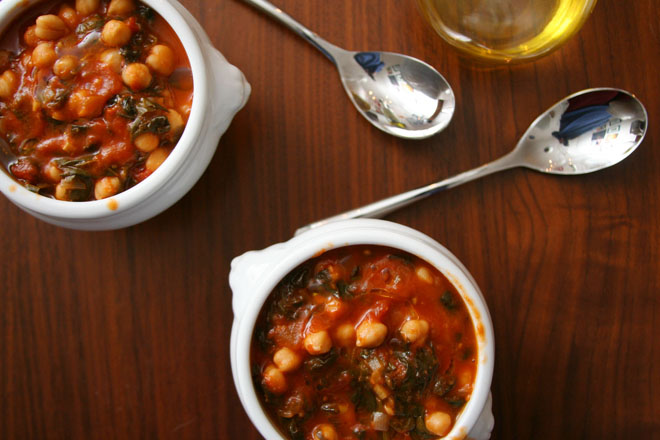
In this case, not only were the shots decent (maybe from all that practice I’ve been getting taking random dinner pictures!), but the meal itself was fantastic. I’m a sucker for tomato-based soups, but with all the other good stuff in there, I didn’t even feel the need to dip a grilled cheese sandwich into the bowl. It’s lucky that I’d snapped a few quick pictures before we ate, because there were no leftovers – not that making it again soon would have been a hardship.

chickpea spinach stew 2

Printer Friendly Recipe
Spanish Chickpea and Spinach Stew
(rewritten but not significantly changed from Serious Eats)

I was worried that the spinach would turn to mush after 40 minutes of simmering, but even the baby spinach I used was okay. A heartier spinach would likely be even better.

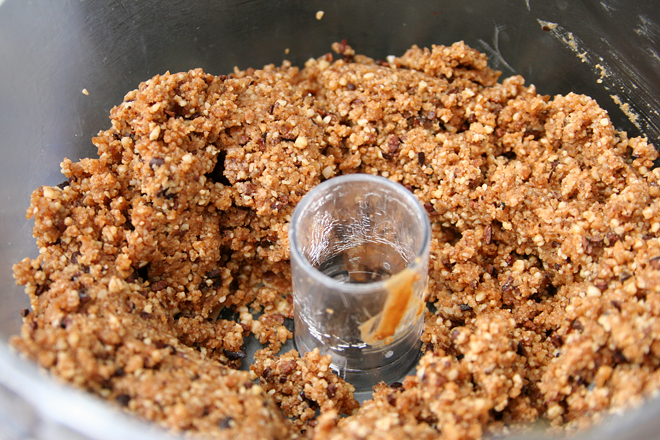
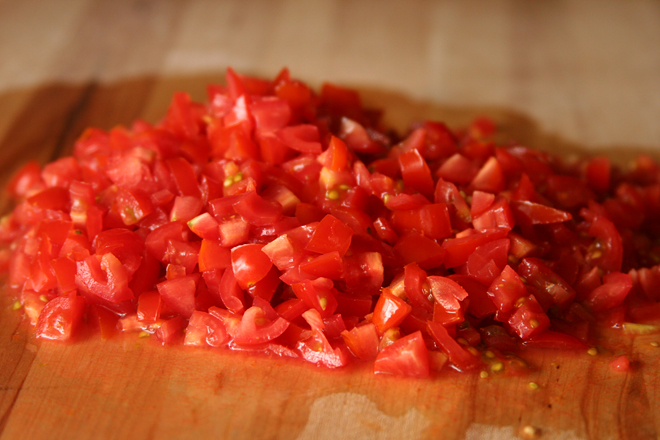
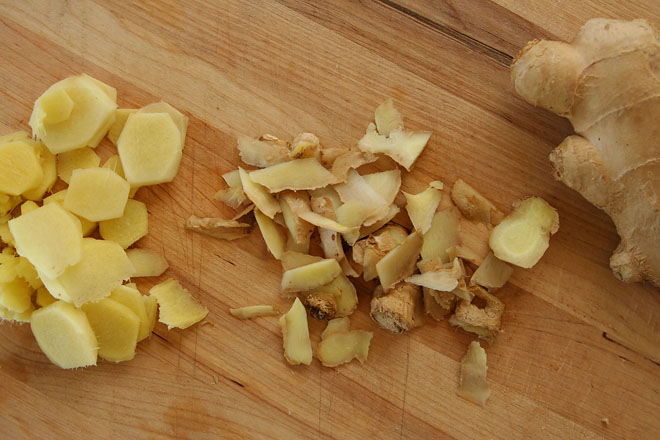
For the tomatoes, I transferred half of the tomatoes from the can to a small bowl and used scissors to chop them. I used an immersion blender to puree the remaining tomatoes and ginger in the tomato can.

1 (28-ounce) can whole peeled tomatoes
1 1-inch knob ginger, peeled
2 tablespoons extra-virgin olive oil (plus more for serving)
1 medium onion, finely sliced
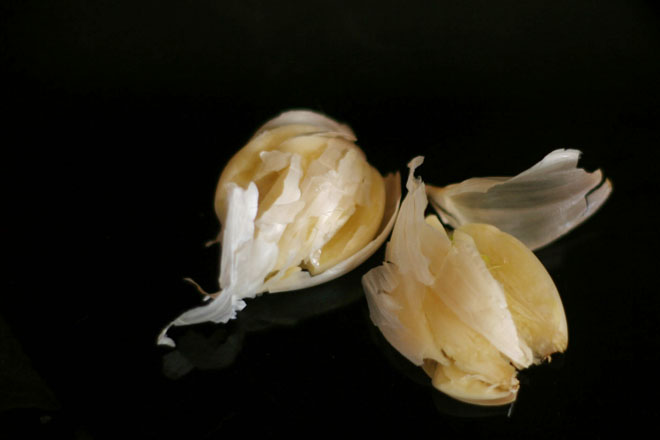
4 cloves garlic, finely sliced
1 teaspoon sweet or hot smoked paprika
12 ounces fresh spinach, roughly chopped
2 (14-ounce) cans garbanzo beans (chickpeas), undrained
2 bay leaves
2 teaspoons soy sauce
Kosher salt
2 teaspoons sherry vinegar (optional)

1. Blend half the tomatoes, all the liquid from the can, and the ginger until smooth. Coarsely chop the remaining tomatoes.

2. In a large skillet over medium-high heat, cook the onion, garlic, and paprika, stirring occasionally, until the onion begins to brown, about 6 minutes. Add the tomato-ginger puree; stir to combine. Gradually add the spinach, then reduce the heat to medium and simmer, stirring occasionally, until the spinach is tender, about 10 minutes.

3. Add the chopped tomatoes, garbanzo beans (with their liquid), bay leaves, and soy sauce, and bring to a boil over high heat. Reduce to a bare simmer and cook, stirring occasionally, until thickened, about 30 minutes. Stir in the sherry vinegar. Season to taste with salt and serve immediately, drizzling with extra virgin olive oil.

chickpea spinach stew 4

pan-seared shrimp with tomatoes and avocado

shrimp tomatoes avocado 2

I hate to be a cliche, but it’s January and I’d like to eat a little healthier for a while. That is, a little healthier than normal, and a whole lot healthier than I did over the holidays. I have no regrets; it was a delicious holiday break, full of cookies, holiday meals, restaurants, and fun new beers. But I’m happy to be back to eating the occasional green thing now.

shrimp tomatoes avocado 5

A book with Light and Healthy in the title was the obvious choice for choosing cookbook recipes in early January. It’s simply shrimp, cooked in just a bit of oil, then topped with barely softened vegetables. A bit of brown rice helps soak up any extra sauce.

shrimp tomatoes avocado 4

As much as I crave healthy foods when I’m eating feasts every night, sometimes when I’m trying to get back into eating lots of vegetables, I find myself missing sugar and fried food and cheese and all those delicious treats. Light, vegetably dishes as good as this one help ease the transition – especially since each serving has plenty of fatty, buttery, creamy avocado.

shrimp tomatoes avocado 1

Printer Friendly Recipe
Pan-Seared Shrimp with Tomatoes and Avocado
(from America’s Test Kitchen Light and Healthy 2011)

Serves 4

I used cherry tomatoes since they tend to be better in the winter than bigger varieties. I also substituted about ¼ cup minced roasted and peeled Hatch green chile for the chipotle.

1 pound tomatoes (2 to 3), cored, seeded, and cut into ½-inch pieces
6 scallions, white and green parts separated and sliced thin
¼ cup minced fresh cilantro
3 garlic cloves, minced
1 tablespoon fresh lime juice
1 teaspoon minced canned chipotle chile in adobo sauce
salt and pepper
1½ pounds extra-large shrimp (21 to 25 per pound), peeled and deveined
⅛ teaspoon sugar
4 teaspoon canola oil
1 avocado, peeled, seeded and cut into ½-inch pieces
lime wedges

1. Combine the tomatoes, scallion whites, cilantro, garlic, lime juice, chipotle, and ¼ teaspoon salt in bowl.

2. Pat the shrimp dry with paper towels and season with the sugar, salt, and pepper. Heat 2 teaspoons oil in a 12-inch nonstick skillet over high heat until just smoking. Add half of the shrimp and cook until curled and lightly browned, about 2 minutes.

3. Transfer the shrimp to a bowl and cover with aluminum foil. Repeat with the remaining 2 teaspoons oil and shrimp; transfer to the bowl.

4. Return the skillet to high heat, add the tomato mixture, and cook until the tomatoes soften slightly, about 1 minute. Off the heat, return the shrimp to the skillet and toss to coat. Transfer the shrimp and tomatoes to a platter, season with salt and pepper to taste, and sprinkle with the scallion greens and avocado. Serve with lime wedges.

shrimp tomatoes avocado 3

pumpkin oatmeal brulee

pumpkin oatmeal brulee 4

This is a great way to make oatmeal a little more special without making it much more work. It’s cooked the same way as regular steel-cut oats, except pumpkin and sugar are stirred in part way through cooking. The only extra step is a fun one – playing with fire.

pumpkin oatmeal brulee 1

The biggest difference between brûléeing a solid custard like crème brûlée compared to brûléeing oatmeal is that oatmeal is wetter. This means the sugar has a tendency to dissolve into the oatmeal. Fortunately, once you pour the oatmeal into serving dishes, a skin starts to form on top after a few minutes, providing a dryer surface for the sugar to rest before it’s caramelized.

pumpkin oatmeal brulee 2

Because of the crackly sweet layer on top of the oatmeal, only half a tablespoon per serving is necessary stirred in the oatmeal itself. That’s enough to bring out the flavor of the pumpkin and still provide a little constrast with the topping. Warm and soothing, spiced and sweet, this is a perfectly comforting cold weather breakfast.

pumpkin oatmeal brulee 5

Printer Friendly Recipe
Pumpkin Oatmeal Brûlée (adapted from Cook’s Illustrated’s Perfect Oatmeal)

I’ve had better luck brûléeing sugar with larger crystals, which is why demerara is recommended. Turbinado or sanding sugar should work too. Without any special sugars, an even mixture of granulated and brown sugar has worked well for me in the past. It’s difficult to estimate how much you’ll need, as it will depend on the size and shape of the bowls.

2½ cups water
1 cup milk
1 tablespoon butter
1 cup steel-cut oats
2 teaspoons pumpkin pie spice
1 cup pumpkin puree
2 tablespoons brown sugar
½ teaspoon salt
demerara sugar, or a mix of white sugar and brown sugar, for topping

1. In a medium saucepan over medium-high heat, heat the water and milk until simmering.

2. Meanwhile, in a medium skillet, melt the butter over medium heat. Add the oats and cook, stirring constantly, until the oats start to smell like butterscotch, 2-3 minutes. Add the spices and continue to stir constantly until the spices are fragrant, about 30 seconds. Pour the oat/spice mixture into the milk and water.

3. Reduce the heat to low and simmer, stirring occasionally, until the mixture is slightly thickened, about 20 minutes. Add the pumpkin, brown sugar, and salt, and continue to simmer lightly, stirring occasionally, until the oatmeal is thick and creamy. Immediately pour the oatmeal into serving bowls. Set aside for 5-10 minutes for a skin to form on top.

4. Working with one bowl at a time, distribute an even layer of the demerara sugar over the oatmeal. With a butane torch, immediately caramelize the sugar. Repeat with the remaining bowls; serve immediately.

pumpkin oatmeal brulee 3

vietnamese shrimp quinoa salad

vietnamese shrimp salad 8

Does anyone else think shrimp can have an off-putting texture sometimes? It’s not just when it’s overcooked and chewy; even cooked correctly, there can be an unevenly textured graininess that I don’t like. The smaller the shrimp, the less that texture is an issue. On the other hand, the smaller the shrimp, the more shrimp you have to peel.

vietnamese shrimp salad 1

However, I love the flavor. Sweet and briny, it’s so good in a huge variety of dishes. This is one of my recent favorites. The vegetables are crunchy and fresh, but the shrimp and quinoa keep it satisfying.

vietnamese shrimp salad 2

I’ve found a trick that seems to solve my texture issues with shrimp, although it’s an extra tedious step on top of the already tedious peeling. After cooking, I cut the shrimp in half lengthwise. As an added bonus, it makes them closer to bite-sized for me, so I can get a forkful with all the goodies – shrimp and quinoa and vegetables and herbs. This one simple trick makes me love shrimp – both the flavor and the texture.

vietnamese shrimp salad 4

Printer Friendly Recipe
Vietnamese Shrimp and Quinoa Salad (adapted from Serious Eats)

You can save some time by cooking the quinoa in water instead of the cooking liquid from the shrimp, starting to cook the quinoa around the same time as the shrimp.

Shrimp:
1 pound shrimp, unpeeled
2 cups water
5 cilantro sprigs
1 tablespoon sugar
1 teaspoon salt
1 lime

Salad:
½ cup uncooked quinoa, rinsed
1 red pepper, diced
1 cucumber, peeled, seeds removed, quartered lengthwise, and sliced
1 large carrot, peeled and shredded
2 scallions, sliced thin
¼ cup cilantro, minced

Dressing:
¼ cup lime juice from 2 limes
1 tablespoon fish sauce
1 tablespoons vegetable oil
2 teaspoons sugar
¼ teaspoon red pepper flakes

1. For the shrimp: In a 2-quart saucepan, combine the shrimp, water, cilantro sprigs, 1 tablespoon sugar, and 1 teaspoon salt. Juice the lime into the saucepan, then add the lime peels to the saucepan. Place the saucepan over medium-high heat and cook until the shrimp turn pink, 8 to 10 minutes. Drain the shrimp, reserving ¾ cup of the shrimp broth. Rinse the saucepan.

2. For the salad: Add the shrimp broth and quinoa to the rinsed saucepan and heat over medium-high heat until the broth boils. Cover, reduce the heat to low, and cook for 15 minutes. Remove from the heat and let set, covered, for 10 minutes.

3. In a large bowl, combine the quinoa, red peppers, cucumber, carrot, scallions, and cilantro. Peel the cooled shrimp and add it to the bowl.

4. For the dressing: Mix everything. Pour over the salad and stir to combine. Serve immediately, or cover and chill for up to four hours.

vietnamese shrimp salad 6

summer vegetable gratin

summer vegetable gratin 6

Can I talk about my garden some more? I’m sorry, I’m just really excited about it. I’m finding that I get nearly the same enjoyment from my vegetable garden as I do from cooking lately. I can’t stop myself from wandering between the beds, just looking at the plants; looking for new fruit growing, checking on whether anything is ripening, plucking weeds, crushing stinkbugs.

summer vegetable gratin 1

I’m so proud that I grew half of the vegetables in this dish. Despite my hit or miss success with gardening, the tomatoes, zucchini, thyme, and basil in this dish all came from the backyard (or the basil would have if I’d remembered to use it).

summer vegetable gratin 5

It’s one of those dishes that toes the line between being healthy and feeling indulgent. I brought it to a comfort food-themed potluck where I knew there would be a lot of (really delicious) cheesy baked pasta, hoping that a second helping of vegetable gratin would keep me from a third helping of macaroni and cheese. It didn’t work – I had both a second helping of gratin and a third helping of mac and cheese – but at least only my healthy-ish gratin leftovers came home with me. My favorite part of gardening is the part that involves eating, and this combination of summer vegetables and herbs is exactly why that is.

summer vegetable gratin 10

Printer Friendly Recipe
Summer Vegetable Gratin (from Cook’s Illustrated)

6-8 servings

I didn’t use this much oil. I sprayed the pan with cooking spray instead of using a tablespoon of oil, and then I used less with the garlic, maybe just 1 tablespoon instead of three.

6 tablespoons extra-virgin olive oil
1 pound zucchini, ends trimmed and sliced crosswise into ¼-inch-thick slices
1 pound summer squash (yellow), ends trimmed and sliced crosswise into ¼-inch-thick slices
2 teaspoons table salt
1½ pounds ripe tomatoes (3 to 4 large), sliced ¼-inch thick
2 medium onions, halved lengthwise and sliced thin pole to pole (about 3 cups)
¾ teaspoon ground black pepper
2 medium garlic cloves, minced or pressed through garlic press (about 2 teaspoons)
1 tablespoon minced fresh thyme leaves
1 large slice white sandwich bread, torn into quarters
2 ounces Parmesan cheese, grated (about 1 cup)
2 medium shallots, minced (about ¼ cup)
¼ cup chopped fresh basil leaves

1. Adjust an oven rack to the upper-middle position and heat the oven to 400 degrees. Brush a 13- by 9-inch baking dish with 1 tablespoon oil; set aside.

2. Toss the zucchini and summer squash slices with 1 teaspoon salt in a large bowl; transfer to a colander set over a bowl. Let stand until the zucchini and squash release at least 3 tablespoons of liquid, about 45 minutes. Arrange the slices on a triple layer of paper towels; cover with another triple layer of paper towels. Firmly press each slice to remove as much liquid as possible.

3. Place the tomato slices in a single layer on a double layer of paper towels and sprinkle evenly with ½ teaspoon salt; let stand 30 minutes. Place a second double layer of paper towels on top of the tomatoes and press firmly to dry the tomatoes.

4. Meanwhile, heat 1 tablespoon of oil in a 12-inch nonstick skillet over medium heat until shimmering. Add the onions, remaining ½ teaspoon salt, and ¼ teaspoon pepper; cook, stirring occasionally, until the onions are softened and dark golden brown, 20 to 25 minutes. Set the onions aside.

5. Combine the garlic, 3 tablespoons oil, remaining ½ teaspoon pepper, and thyme in a small bowl. In a large bowl, toss the zucchini and summer squash in half of the oil mixture, then arrange in the greased baking dish. Arrange the caramelized onions in an even layer over the squash. Slightly overlap the tomato slices in a single layer on top of the onions. Spoon the remaining garlic-oil mixture evenly over the tomatoes. Bake until the vegetables are tender and the tomatoes are starting to brown on the edges, 40 to 45 minutes.

6. Meanwhile, process the bread in a food processor until finely ground, about 10 seconds. (You should have about 1 cup crumbs.) Combine the bread crumbs, remaining tablespoon oil, Parmesan, and shallots in a medium bowl. Remove the baking dish from the oven and increase the heat to 450 degrees. Sprinkle the bread-crumb mixture evenly on top of the tomatoes. Bake the gratin until bubbling and the cheese is lightly browned, 5 to 10 minutes. Sprinkle with the basil and let sit at room temperature for 10 minutes before serving.

summer vegetable gratin 8

quinoa puttanesca

quinoa puttanesca 1

Based on whether it leaves a bunch of half-used ingredients leftover, this may not be the best single-person dinner, but it’s one of my favorite meals for when Dave is out of town anyway. For years, Dave didn’t like anchovies or olives, so those were the things I ate when he traveled. He’s come around to both, but the tradition has stuck, and this has become a treat for myself while he’s gone.

quinoa puttanesca 3

It’s very similar to the pasta version, but I like to think quinoa is a little healthier than pasta. Certainly, quinoa has a stronger, earthier flavor, which required adjustments in the other ingredients. More briny olives, more salty capers, and more bitter parsley were all necessary to stand out next to the quinoa.

quinoa puttanesca 4

Even if it doesn’t fulfill my no-leftover-bits-of-ingredients rule for single-person dinners, it meets the rest of my criteria – easy, healthy, minimal dishes. Fortunately, I like it so much that I’m willing to make it twice in one week while Dave travels, which is the perfect way to use up the half cans of tomatoes and tuna leftover from one serving. That puts this back on the list of great meals for cooking for one.

quinoa puttanesca 2

Printer Friendly Recipe
Quinoa Puttanesca (adapted from Cook’s Illustrated’s Spaghetti Puttanesca)

4 servings

I use the higher amount of anchovies, because I love them, but I understand that not everyone shares that opinion. The tuna is not at all traditional in puttanesca, but it increases the protein of this one-pot dish.

1 tablespoon olive oil
1 teaspoon red pepper flakes
6 cloves garlic, peeled and minced
6-8 anchovies, minced
8 ounces (1⅓ cups) quinoa, rinsed and drained
1 (28-ounce) can whole tomatoes, coarsely diced in the can with scissors
2 (5-ounce) cans solid white tuna in water, drained and flaked into bite-sized pieces (optional)
¼ cup capers, drained
1 cup kalamata olives, finely chopped
¼ cup minced parsley

In the medium saucepan over medium heat, heat the olive oil, red pepper flakes, garlic, and anchovies until sizzling and fragrant, 2-3 minutes. Add the quinoa, tomatoes with their juice, and tuna (if using). Increase the heat to medium-high and bring to a simmer. Once the mixture simmers, cover, reduce the heat to low, and simmer for 15 minutes. Stir once, then replace the cover, remove the pot from the heat, and let set for another 15 minutes. Stir in the capers, olives, and parsley; serve immediately.

cocoa nib peanut butter bites

hippie cookies 4

You can call these Peanut Butter Bites if you want, but for me, they will forever be known as Hippie Cookies. Sweetened with dates? Fat from all-natural peanut butter? Cocoa nibs, of all things?! I kept hearing people talk about cocoa nibs, so I bought some, and it turns out that they’re not even good. They’re like chocolate, but mean. There’s no sugar in them at all, just bitterness, like that time when you were a kid and accidentally ate your mom’s unsweetened baking chocolate.

hippie cookies 2

Still, the cocoa nibs are perfect in these cookies, because it turns out that you don’t need processed sugar to make a very sweet snack; dates are plenty sweet on their own. The bitter cocoa nibs are actually the perfect balance.

hippie cookies 3

I just loved these cookies so much, and not just because I filed them under “snack” instead of “dessert” and therefore enjoyed them without guilt. They’re shockingly good, or maybe it’s just shocking to someone used to adding refined sugar and butter to everything sweet. Who knew hippie cookies would be so delicious?

hippie cookies 6

Printer Friendly Recipe
Cocoa Nib Peanut Butter Bites (adapted from Sprouted Kitchen)

Because these aren’t baked, feel free to taste and add – more salt, more cinnamon, more cocoa nibs – to your taste, as well as more peanut butter to bring the mixture together, if necessary.  The amount of salt you add will also depend on whether you use salted or unsalted peanut butter.  You could also add dark chocolate instead of cocoa nibs, although the cocoa nibs balanced the sweet dates really well.

1 cup almonds
¼-½ teaspoon table salt
1 cup pitted dates
1 teaspoon vanilla extract
¼ teaspoon cinnamon
½ cup natural peanut butter
½ cup cocoa nibs

In the bowl of a food processor, process the nuts and salt until evenly ground; do not, however, process long enough to make almond butter. Add the dates, vanilla, and cinnamon, and process until the dates are minced and evenly dispersed. Add the peanut butter and pulse to combine, then repeat with the cocoa nibs. Form the mixture into 1-inch balls, then flatten gently to about ⅓-inch thick. Cookies can be covered and stored in the refrigerator for up to a week.

hippie cookies 5

pan-seared halibut in white wine sauce with green beans and tomato-scallion relish

halibut green beans 5

I have found the perfect single-person dinner. Not because it’s easy, although that’s nice. Not because it only uses one pan to cook, although I’m not complaining about less dishes to wash. Not because it tastes good, because of course it tastes good or why would I be talking about it?

halibut green beans 0

No, the key for bachelor(ette) meals is that they don’t leave you with half a can of tomatoes or beans, or half a cucumber or pepper, or the vast majority of a roast leftover. If you’re cooking for one, this recipe uses one fish filet, one tomato, one scallion, and a handful of green beans.

halibut green beans 1

Because I have been cooking for one a lot lately, while Dave travels for work, I’ve been making this dish often. The original recipe instructs that the green beans be steamed in a separate pot, but that seemed like a lot of hassle and dishes just for me, so I saute them quickly in a skillet, then add just a bit of water to cook them through. Any remnant green bean bits are scraped up with a glug of wine. I like to transfer the green beans to a pasta bowl and cover them with a big plate while the fish cooks in the same skillet. The fish gets laid over the green beans, the pan is deglazed with wine again, then a simple relish is heated briefly in the pan before it’s time to eat.

halibut green beans 3

I don’t know if fish served over green beans (although you could put yours on the side if that’s more your thing) sounds weird. The relish really brings everything together, since it’s so bright and flavorful, mixing perfectly with both the beans and the fish. It’s an easy, healthy, one-pan, delicious meal that won’t leave you with a bunch of half-used ingredients, and one of my newest favorites.

halibut green beans 6

Printer Friendly Recipe
Pan-Seared Halibut in White Wine Sauce with Haricots Verts and Tomato-Scallion Relish (adapted from Alfred Portale’s The Twelve Seasons Cookbook via epicurious)

4 servings

Regular green beans work just as well as haricots verts in this recipe. I’ve also successfully made it with both halibut and mahi-mahi. The pictures show mahi-mahi.

It’s easy to adapt for one person; just divide all of the ingredients by four and use a small skillet.

2 tablespoons olive oil, divided
16 ounces haricots verts or green beans
Coarse salt and freshly ground pepper to taste
¼ cup water
6 tablespoons white wine, divided
4 halibut or mahi-mahi fillets, each approximately 1 inch thick
2 tablespoons fresh lemon juice
2 tablespoons unsalted butter
4 scallions, finely sliced
2 tablespoons capers, drained
4 small roma tomatoes, diced fine

1. In a large nonstick skillet, heat 2 teaspoons oil over medium to medium-high heat. Add the beans, 1 teaspoon salt, and a pinch of pepper; cook, stirring occasionally, until the beans are spotty brown, 4 minutes. Add the water, cover, and cook until the beans are bright green and still crisp, about 2 minutes. Remove the cover, increase the heat to high, and cook until the water evaporates, 30 to 60 seconds. Divide the beans between four plates or shallow bowls. Add 2 tablespoons of wine to the pan, swirling it around and scraping the pan with a rubber spatula to dissolve any stickiness on the bottom of the skillet. Transfer to liquid to the dishes with the green beans; cover set aside.

2. Season the halibut on both sides with salt and pepper. In the same skillet, heat the remaining 4 teaspoons of oil over medium-high heat. Cook the fish for about 3 minutes, until lightly browned. Flip the fish, reduce the heat to medium, and cook about 4 minutes longer, until the fish is opaque in the center and browned on both sides. Put the fish over the green beans in the bowl; cover again.

3. Remove the pan from the heat and add the remaining 4 tablespoons wine and the lemon juice to the pan. Deglaze the pan by scraping up any browned bits with a rubber spatula. Stir in the butter. Add the scallions, capers, and tomatoes. Season with salt and pepper if necessary, and pour over the fish in the bowls. Serve immediately.

halibut green beans 4

crab towers with gazpacho and avocado salsas

crab towers 6

I once made twenty of these in one night. I also made twenty tiny caramelized onion gruyere tarts, six baguettes, three types of sorbet, and smoked popcorn with bacon. (Not totally true: The baguettes and sorbet were made in advance, just served that night. Thank god.) My friend made Thai chicken slaw, twenty tiny shepherd’s pies, braised venison over mashed potatoes, and chocolate pudding cake. Each dish had its own wine paired with it. It was an epic party. (And the next day was an epic hangover.)

crab towers 8

It was, as you can probably imagine, a lot of work. Building twenty tiny stacks of three different mixtures actually went pretty fast; no, the truly tedious part is creating teeny tiny squares of vegetables. But making your food into confetti is so pretty, sometimes it’s worth it.

crab towers 9

And it isn’t all about looks. It’s about combining my favorite foods into one elegant salad – avocadoes and crab and gazpacho, neatly layered and colorful. And if you aren’t making twenty of them, as well as twenty each of several other small dishes, the mincing isn’t too bad.  You might not have an epic party in that case, but you’ll still have a dish worthy of one.

crab towers 11

Printer Friendly Recipe
Crab Towers with Avocado and Gazpacho Salsas (adapted from Cook’s Illustrated’s Restaurant Favorites at Home)

Even when I’m making these for just a few people at home, I use Dixie cups with the bottoms cut off for the molds. You can make the gazpacho salsa a day in advance.

Makes 8

Gazpacho salsa:
1 cup grape tomatoes, minced
½ yellow pepper, minced
1 Persian or ½ regular cucumber, minced
1 small shallot, minced
¼ teaspoon salt
pinch black pepper
2 teaspoons sherry vinegar
2 teaspoons olive oil

Crab salad:
1 pound crabmeat, shredded
1 tablespoon white wine vinegar
1 tablespoon mayonnaise

Avocado salsa:
2 large avocados, peeled, pitted, minced
¼ teaspoon salt
1 tablespoon lemon juice

1. In a medium bowl, combine the tomatoes, pepper, cucumbers, shallot, salt, pepper, sherry vinegar, and olive oil. In a separate medium bowl, combine the crab, vinegar, and mayonnaise. In a small bowl, combine the avocado, salt, and lemon juice, mashing very lightly so the mixture holds together.

2. Divide the avocado mixture between eight 2-inch molds. Divide the crab salad between the molds on top of the avocados, pressing lightly again. Top with the gazpacho salsa. Serve immediately.

crab towers 7

braised artichokes with creamy dipping sauce

braised artichokes 8

My sister’s kids aren’t particularly picky, but sometimes I push their limits without meaning to. Like the time I thought they’d get a kick out of eggs cooked in bacon toast cups, but instead they were like, Hey, now where does the jelly go? And at least that wasn’t a vegetable.

braised artichokes 2

I don’t even remember why I thought artichokes would be a good idea in the first place, but then when I started thinking about it, I got worried. They tend to turn a military shade of green once they’re cooked. I tried to get the kids excited about saying “okey dokey artichokey”, but I was pulling at strings and knew it.

braised artichokes 4

And then, oddly, they loved the artichokes. I think it was the number one rule of feeding children that worked in my favor – opportunities to dip. Plus, maybe, just maybe, I was right, and the fun of pulling off leaves and scraping the “meat” off with your teeth was more important than the brownish green shade of the vegetables. It certainly is for me, as this is one of my absolute favorite foods.

braised artichokes 7

Printer Friendly Recipe
Braised Artichokes with Creamy Dipping Sauce

Serves 3 to 6 as a first course, depending on how big your artichokes are and how big your appetite is

Trimming artichokes isn’t hard, but you might want to watch a youtube video or two if you’re not familiar with the process.

99% of artichoke recipes call for transferring the trimmed ‘chokes to a bowl of water with a lemon squeezed into it to keep them from browning. Not only does it not work, but they look and taste the same after cooking, so I’ve skipped this step. (But a recent issue of Cook’s Illustrated tested it and found it the lemon water worthwhile.)

If your artichokes are really big, you might need to use a 12-inch sauté pan instead of a Dutch oven to fit them in a single layer.

If you’re mayonnaise-adverse, crème fraiche would be a great substitute. Greek yogurt or sour cream would work if you stir it in off the heat so the dairy doesn’t curdle.

3 medium artichokes
1 tablespoon olive oil
3 cloves garlic, minced
¾ cup water
½ cup white wine
¼ teaspoon black pepper
½ teaspoon salt
2 tablespoons mayonnaise
1 tablespoon parsley leaves, minced

1. Working with one artichoke at a time, cut off the top 2 inches of the artichoke. Working around the artichoke, use scissors to cut off the sharp tips of the leaves. Trim the base of the stem, then trim off the outside millimeter or so of the stem. Cut the artichoke in half from top to bottom and use a paring knife to cut out the sharp purple leaves and fuzzy choke from the center. Rinse the artichoke under running water to remove any remaining fuzz.

2. Heat the olive oil in a 5- or 6-quart Dutch oven over medium heat. Add the garlic and cook, stirring constantly, until fragrant, about 30 seconds. Arrange the artichokes cut-side down in the pot, overlapping the stems in the middle. Add the water, wine, pepper, and salt. Cover the pot, reduce the heat to medium-low, and braise artichokes until tender when pierced with a knife, about 30 minutes for small artichokes and 40 minutes for very large artichokes. (If you’re not ready to serve the artichokes right away, remove the pot from the heat and leave the cover on; the ‘chokes will stay hot for up to 30 minutes.)

3. Transfer artichoke halves to a serving platter or plates. There should about ⅓ cup liquid remaining in the pot; if there’s less, add water until there’s a total of ⅓ cup liquid; if there’s more, simmer the liquid to reduce it slightly. Add the mayonnaise and parsley to the liquid; whisk to combine and pour into individual dipping containers.

braised artichokes 10