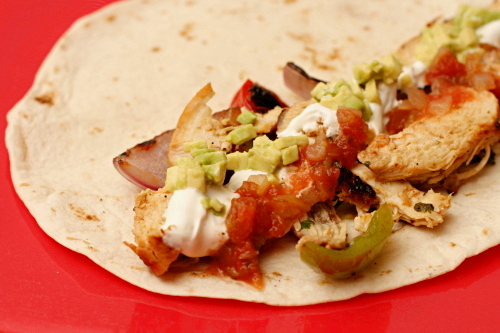
chicken fajitas

I guess they don’t call it “manning” the grill for nothing. Why is it that so many men who have no interest in cooking inside are willing to stand outside and grill? I really thought I’d be the one doing the grilling around here, just like I do the ovening and the stoving, but so far, it’s all Dave. I kind of feel like I should get some practice cooking over fire too, but I can never resist the opportunity to clean up the kitchen or work on the sides or, let’s be honest, mix up my favorite cocktail, while Dave takes care of the cooking.

But while he does enjoy the actual grilling, he really isn’t into the reading the recipe part of the procedure. That means there are constant calls asking me what the next step is. Is there any funny business with the coals? How long does everything cook? What should be on the hotter and on the cooler sides of the grill? And on and on.

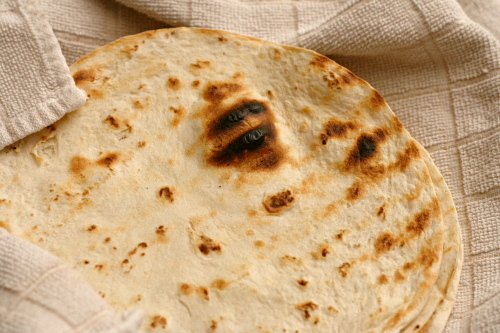
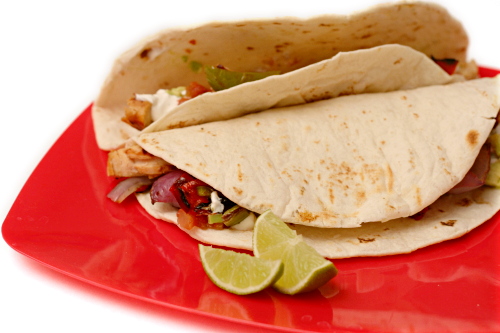
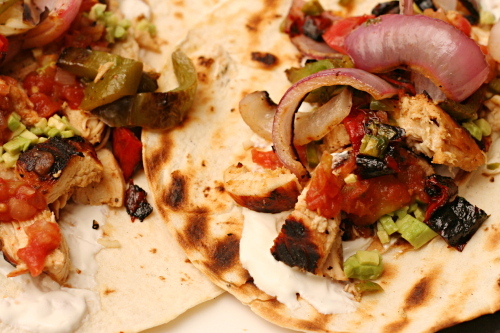
And since this is a Cooks Illustrated recipe, there are a fair amount of details to straighten out. But with only 15 minutes of marinating and 10 minutes of grilling, this really is an easy recipe. And what’s so great about it, besides the obvious – charred flavor on everything from the chicken to the vegetables to the tortillas, is the hit of marinade everything gets after it’s cooked. You marinate the meat beforehand, like you’d expect, and then when it comes off the grill, you dump some more flavor on it, as well as on the vegetables. It makes the whole thing taste fresh and citrusy.

One of the things that makes Dave and I such a great team is that we tend to love the same recipes, like this one. Plus, while he mans the grill, I can rush in to wash his tongs for him, bring a clean plate, or, maybe, if the sides are done and the kitchen is reasonably clean and my cocktail is mixed up, stand over the fire and admire the sunset with my husband. Grilling has more advantages than just great food.

One year ago: Pasta with Roasted Red Pepper Sauce
Two years ago: Cinnamon Rolls

Printer Friendly Recipe
Chicken Fajitas (from Cooks Illustrated)

Serves 4 to 6

CI’s note: The chicken and vegetables in these fajitas are only mildly spicy. For more heat, include the jalapeno seeds and ribs when mincing. When you head outside to grill, bring along a clean kitchen towel or a large piece of foil in which to wrap the tortillas and keep them warm as they come off the grill. Although the chicken and vegetables have enough flavor to stand on their own, accompaniments (guacamole, salsa, sour cream, shredded cheddar or Monterey Jack cheese, and lime wedges) can be offered at the table.

My note: I think the oil can be significantly reduced, especially in the part of the marinade used to flavor the vegetables and chicken after they’re cooked.

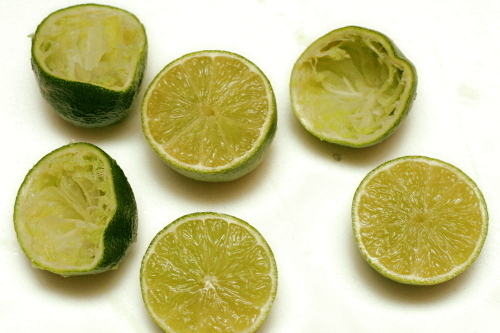
⅓ cup juice from 2 to 3 limes
6 tablespoons vegetable oil
3 medium garlic cloves, minced
1 tablespoon Worcestershire sauce
1½ teaspoons brown sugar
1 jalapeno, seeds and ribs removed, minced
1½ tablespoons minced fresh cilantro leaves
table salt and ground black pepper
3 boneless, skinless chicken breasts (about 1½ pounds), trimmed of fat, tenderloins removed, pounded to ½-inch thickness
1 large red onion (about 14 ounces), peeled and cut into ½-inch-thick rounds (do not separate rings)
1 large red bell pepper (about 10 ounces), quartered, stemmed, and seeded
1 large green bell pepper (about 10 ounces), quartered, stemmed, and seeded
8-12 (6-inch) flour tortillas

1. In a medium bowl, whisk together the lime juice, 4 tablespoons oil, garlic, Worcestershire, brown sugar, jalapeno, cilantro, 1 teaspoon salt, and ¾ teaspoon pepper. Reserve ¼ cup marinade in a small bowl; set aside. Add another teaspoon salt to the remaining marinade. Place the chicken in the marinade; cover with plastic wrap and refrigerate 15 minutes. Brush both sides of the onion rounds and the peppers with the remaining 2 tablespoons oil and season with salt and pepper.

2. Meanwhile, using a large chimney starter, ignite 6 quarts of charcoal briquettes and burn until the coals are fully ignited, about 20 minutes. Empty the coals into the grill, spreading them in a single layer; place an additional 20 unlit coals over the lit coals on one side of grill to create a two-level fire. Position the grill grate over the coals and heat the grate for 5 minutes; scrape clean with a grill brush. (For a gas grill, light all burners and turn to high, cover, and heat the grill until hot, about 15 minutes; scrape the grill grate clean with a grill brush. Leave one burner on high heat while turning the remaining burner(s) down to medium.)

3. Remove the chicken from the marinade and place it smooth side down on the hotter side of the grill; discard the remaining marinade. Place the onion rounds and peppers (skin side down) on the cooler side of the grill. Cook the chicken until it’s well browned, 4 to 5 minutes; using tongs, flip the chicken and continue grilling until it’s no longer pink when cut into with a paring knife or an instant-read thermometer inserted into the thickest part registers about 160 degrees, 4 to 5 minutes longer. Meanwhile, cook the peppers until spottily charred and crisp-tender, 8 to 10 minutes, turning once or twice as needed; cook the onions until tender and charred on both sides, 10 to 12 minutes, turning every 3 to 4 minutes. When the chicken and vegetables are done, transfer them to a large plate; tent with foil to keep warm.

4. Working in 2 or 3 batches, place the tortillas in a single layer on the cooler side of the now-empty grill and cook until warm and lightly browned, about 20 seconds per side (do not grill too long or the tortillas will become brittle). As the tortillas are done, wrap them in a kitchen towel or a large sheet of foil.

5. Separate the onions into rings and place them in a medium bowl; slice the bell peppers lengthwise into ¼-inch strips and place them in the bowl with the onions. Add 2 tablespoons reserved unused marinade to the vegetables and toss well to combine. Slice the chicken into ¼-inch strips and toss with the remaining 2 tablespoons reserved marinade in another bowl; arrange the chicken and vegetables on a large platter and serve with the warmed tortillas.
masa pancakes with chipotle salsa and poached eggs

After buying four and a half pounds of masa harina for a recipe that used, oh, about a cup of it, I completely messed up the recipe I was making. While I learned quite a bit about the chemistry of cooking beans (hint: don’t add tomatoes at the beginning), I have a feeling I won’t be trying that recipe again. Yes, I know it would be much better if I tried that  following-the-directions idea, but the whole thing left me a bad taste in my mouth. Literally.

It also left me with about 4.45 pounds of masa harina. Fortunately, masa is seriously good stuff. It kind of reminds me of Dave’s jokes – intensely corny. Hey, speaking of intensely corny jokes! Anyway, my point is that it’s good, and I was hoping to find something easier than tamales to make with it. (Although I plan on making tamales as well.)

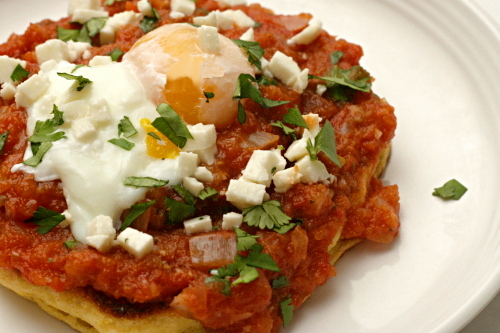
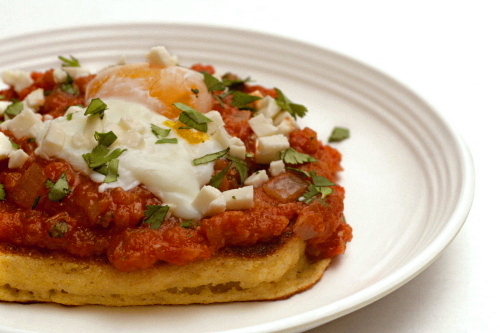
Fortunately, the internet exists, and epicurious had all sorts of fun masa recipes to choose from, like masa pancakes topped with homemade chipotle salsa, poached eggs, and fresh cheese. I thought the recipe had the potential to be complicated, but it’s really just pancakes, sauce, eggs, and some garnish.

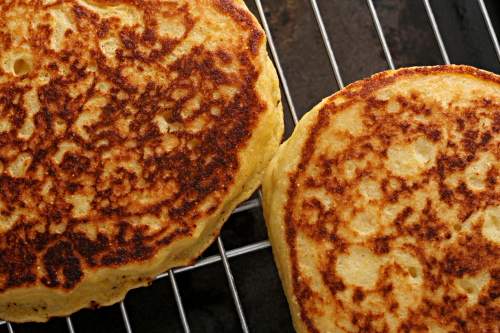
The masa pancakes seemed more like pan-fried cornbread than pancakes, and if there’s anything that sounds better than masa pancakes, well, it’s pan-fried cornbread. No, it’s pan-fried cornbread topped with warm chipotle salsa, eggs, and cheese. Only, let’s see, about 4.40 pounds of masa left to use up! I better get to making more pancakes!

One year ago: Orange Berry Muffins
Two years ago: Rice Pudding

Printer Friendly Recipe
Masa Pancakes Topped with Poached Eggs and Chipotle Ranchera Salsa (adapted from Bon Appétit via epicurious.com)

Serves 6

The poached egg directions that I’ve included here are pretty much directly from the original recipe, and they are…shall we say, vague (or I might just call them crap if I wasn’t trying to be diplomatic). I would offer my own set of instructions for poaching eggs, but I have lost my egg-poaching mojo lately. Instead, I will direct you here. Or I would just fry the damn eggs using my foolproof method (add a bit of water to the skillet after the eggs start to set and cover the pan; no flipping and you can get away with using less oil!). I’m also curious to try cooking the salsa in a skillet and then poaching the eggs right in the finished salsa.

¾ cup masa harina (corn tortilla mix)
½ cup (2.4 ounces) all purpose flour
½ cup yellow cornmeal
1 teaspoon sugar
1 teaspoon salt
1 teaspoon baking powder
½ teaspoon baking soda
1½ cups buttermilk
2 large eggs
3 tablespoons corn oil, plus more for cooking the pancakes
12 large eggs + vinegar + salt
Chipotle Ranchera Salsa (recipe follows)
¼ cup chopped fresh cilantro
¼ cup crumbled queso fresco or shredded Monterey Jack cheese

1. Adjust a rack to the middle position and heat the oven to 350°F. Spread masa harina on a heavy baking sheet and bake until fragrant and golden, stirring often, about 15 minutes. Cool completely. Place a baking sheet lined with a cooling rack in the oven and reduce the oven temperature to 200°F.

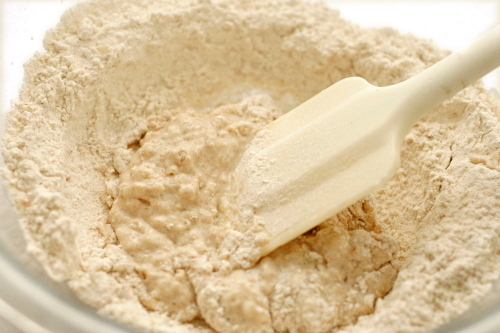
2. Whisk masa, flour, cornmeal, sugar, salt, baking powder, and baking soda in a large bowl. Whisk the buttermilk, 2 eggs and 3 tablespoons oil in a medium bowl to blend. Add the buttermilk mixture to the dry ingredients and whisk just until blended (the batter will be thick).

3. Lightly coat a griddle or 9-inch nonstick skillet with oil. Heat over medium heat. Working in batches, spoon scant ½ cup batter onto the griddle. Using a spoon, spread the batter to a make 4-inch-diameter pancake. Cook until the bottom is golden, about 4 minutes. Turn and cook until the second side is golden, about 3 minutes. Transfer to the baking sheet in the oven to keep warm. Repeat to make 6 pancakes total, brushing the griddle with oil as needed.

4. Meanwhile, bring a large skillet of salted vinegary water to a simmer. Working in batches, crack 12 eggs into the skillet. Simmer until the eggs are softly poached, about 3 minutes. Remove the eggs from the water; drain.

5. Divide the pancakes among plates. Top each pancake with salsa and 2 poached eggs and sprinkle with cilantro and cheese. Serve immediately.

Chipotle Ranchera Salsa (adapted from Bon Appétit via epicurious.com)

2 tablespoons corn oil
1 onion, chopped course
4 garlic cloves, minced
1 jalapeno, minced
1 28-ounce can diced tomatoes in juice
¼ teaspoon salt
1 chipotle chili in adobo, minced
¼ cup chopped fresh cilantro

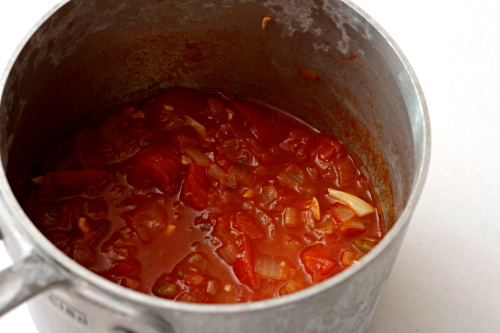
1. Heat the oil in a heavy medium saucepan over medium-high heat. Add the onions and sauté until they begin to soften, about 5 minutes. Add the garlic and jalapeno and cook, stirring continuously, until fragrant, about 30 seconds. Add the tomatoes with their juice, the salt, and the chipotle. Bring to a boil, then reduce the heat to medium-low. Cover and simmer 15 minutes to blend the flavors, stirring occasionally.

2. Puree 1 cup of the salsa in a blender (or blend with an immersion blender). Return to the saucepan and stir in the cilantro. Adjust the salt if necessary. (Can be made 1 day ahead. Cover and chill. Rewarm over medium heat.)

jalapeno-baked fish with roasted tomatoes and potatoes

I need every weekday meal to be exactly like this one.

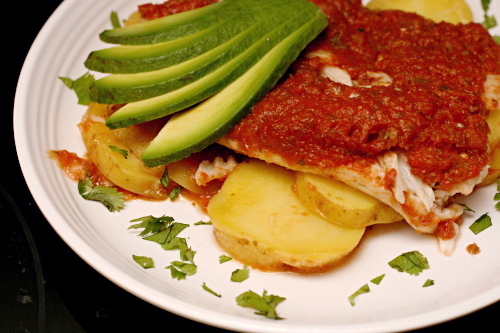
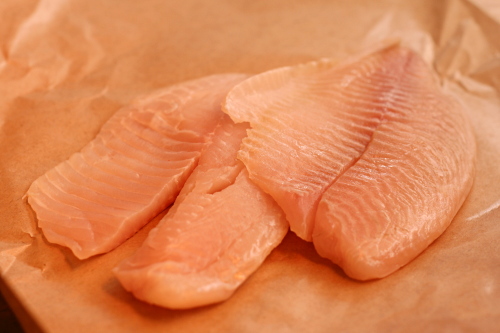
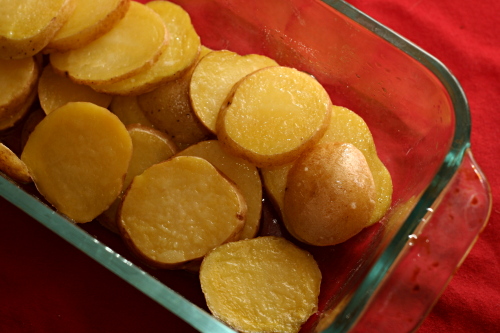
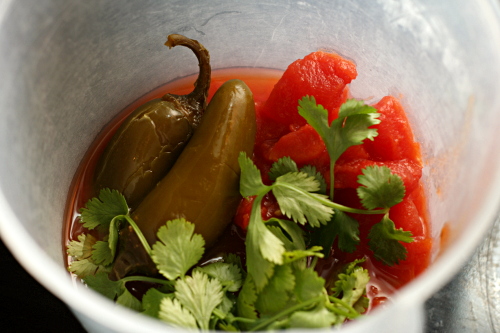
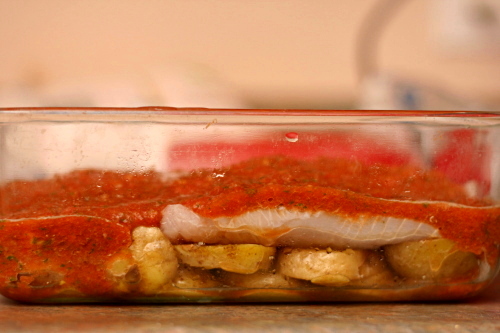
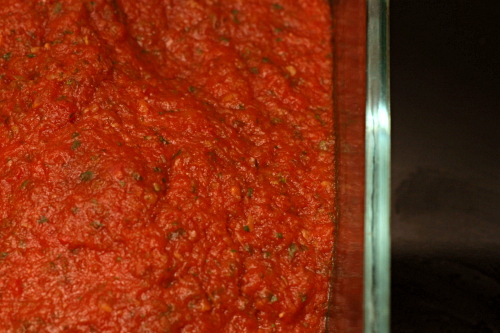
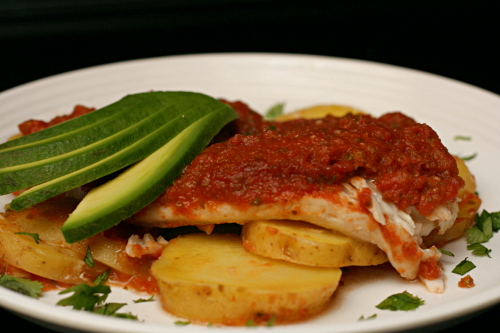
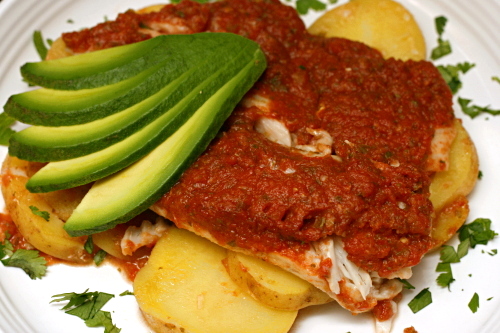
First, it took only 20 minutes of actual effort. Sliced potatoes are softened in the microwave right in the baking dish. Meanwhile, I pureed a few other ingredients, mostly straight from cans, with my immersion blender. Then I laid some fish filets over the potatoes and poured the pureed sauce on top.

Second, it only bakes for 20 minutes. This was the perfect amount of time for me to empty the dishwasher, clean up the kitchen and unpack groceries.

Third, it’s nice and light, with lean white fish, vegetables, and just a small amount of oil to help the potatoes cook.

Fourth, and of course the only point that really matters, it was just so good. The fish, potatoes, and sauce were balanced nicely and the spice level was just right.

My favorite meals have all the ingredients jumbled together like this, protein and starch and vegetables. It’s especially nice on a weeknight so I don’t have to make side dishes as well. I haven’t found many fish recipes like that, so this is perfect – in every way, really.

One year ago: Red Velvet Cake comparison
Two years ago: Olive Oil Bread

Printer Friendly Recipe
Jalapeno-Baked Fish with Roasted Tomatoes and Potatoes
(from Rick Bayless’s Mexican Everyday via Dinner and Dessert)

Serves 4

4 medium (1 pound total) red-skin boiling or Yukon Gold potatoes, sliced 1/8-inch thick
1 tablespoon vegetable or olive oil
Salt
1 (15-ounce) can diced tomatoes in juice
1 large garlic clove, peeled and cut in half
⅓ cup (loosely packed) coarsely chopped cilantro, plus extra for garnish
About ¼ cup sliced canned pickled jalapenos
1 tablespoon jalapeno pickling juice
Four 4- to 5-ounce (1 to 1¼ pounds total) skinless fish fillets, preferably ¾ to 1 inch thick

1. Turn on the oven to 400 degrees. Scoop the sliced potatoes into a microwaveable 8×8-inch baking dish. Drizzle on the oil and sprinkle with ½ teaspoon salt. Toss to coat, then spread the potatoes in an even layer. Cover with plastic wrap and poke a couple of holes in the top. Microwave on high until the potatoes are nearly tender, about 4 to 5 minutes.

2. Meanwhile, in a food processor or blender, combine the tomatoes with their juice, garlic, cilantro, jalapenos, and pickling juice. Process to a puree, leaving just a little texture.

3. Lay the fish fillets in a single layer over the potatoes. Pour the tomato mixture evenly over the fish and potatoes.

4. Slide the baking dish into the oven. Bake for 20 minutes, until the fish flakes when pressed firmly.

5. Scoop a portion of the fish-potato-sauce onto each dinner plate, sprinkle with cilantro, and serve right away.

sopaipillas

Copy of IMG_5080

Moving to a small remote town in the middle of a desert, there are definitely things I’m going to miss.  Other a big grocery store, that is.  Sushi restaurants, for one, and long fall and spring seasons, and skylines, and squirrels and deer in my backyard, and, well, green things.

Copy of IMG_5057

On the other hand, there are things I’m really looking forward to.  Skies that go on forever, shockingly colorful sunsets, lizards and antelope, cacti, two national parks within 50 miles, mountains.  And New Mexican food.  Green chile, red chile, rice and beans, sopaipillas.
Copy of IMG_5059

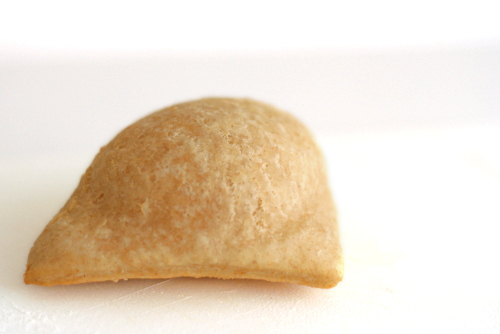
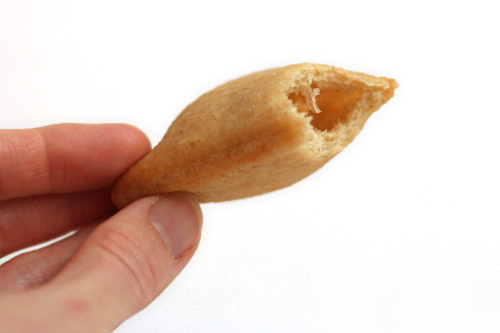
Sopaipillas are maybe the New Mexican equivalent of donuts.  Dough, enriched with lard and leavened with either yeast or baking powder, is rolled flat and fried.  It puffs like a pita in the oil, forming a pocket that’s pretty much designed to be filled with honey.  Or carne adovada, if you’re thinking dinner.
Copy of IMG_5068

A basket of these is served with any meal in a restaurant serving New Mexican food.  Or if it isn’t, it’s cause for complaint about how cheap the restaurant is to charge, even a dollar, for something that by all rights should be included for free with a meal.

Copy of IMG_5074

Everyone has their own tricks for eating their sopaipillas with honey.  Bite a corner off and squirt honey inside?  Drizzle the honey over the top?  My favorite way, for maximum coverage with minimum stickiness, is to form a pool of honey on my plate and dip each bite.

There may not be sushi in Carlsbad, NM, but by god, there’ll be sopaipillas that I don’t have to fry myself.

Copy of IMG_5078

One year ago: Comparison of 4 chocolate chip cookie recipes

Printer Friendly Recipe
Sopaipillas (adapted from Simply Simpatico, by the Junior League of Albuquerque)

Makes about 2 large dozen sopaipillas

4 cups (19.2 ounces) all-purpose flour, plus more if necessary
1 cup whole wheat flour
2¼ teaspoons (1 package) instant yeast
2 tablespoons sugar
1½ teaspoons salt
1½ cups milk, warmed to 100ºF
¼ cup water
3 tablespoons lard or shortening, melted
vegetable or canola oil for frying

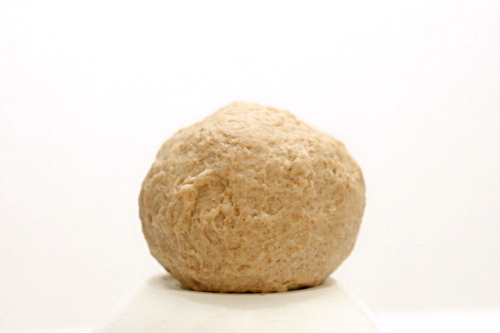
1. Stand mixer: Mix the flours, yeast, sugar, and salt in the bowl of a stand mixer fitted with the dough hook. With the mixer on low speed, gradually add the milk, water, and lard.  Continue mixing on medium-low until the dough is elastic and supple, about 8 minutes. You may need to add a little more flour or water to get the correct consistency – smooth but not sticky. Transfer the dough to an oiled bowl and cover with plastic wrap. (You can refrigerate the dough overnight at this point.)

By hand: Mix the flours, yeast, sugar, and salt in a large bowl. Make a well in the middle of the dry ingredients and pour in the milk, water, and lard. Stir the mixture until the dough comes together. Transfer it to a floured board or countertop and knead, incorporating as little flour as possible, for about 10 minutes, until the dough is elastic and supple. You may need to add a little more flour or water to get the correct consistency – smooth but not sticky. Transfer the dough to an oiled bowl and cover with plastic wrap.

2. Let the dough rise until it’s doubled in size, about 1 hour. Knead it lightly to expel air.

3. When the dough is almost ready, heat 2 inches of vegetable oil in a large Dutch oven to 350ºF.

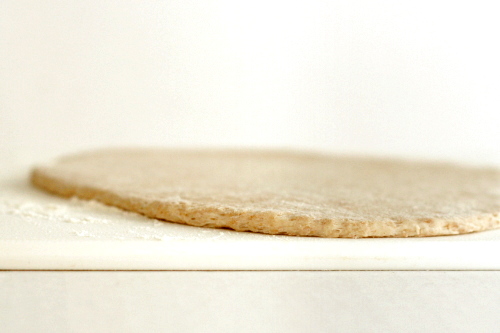
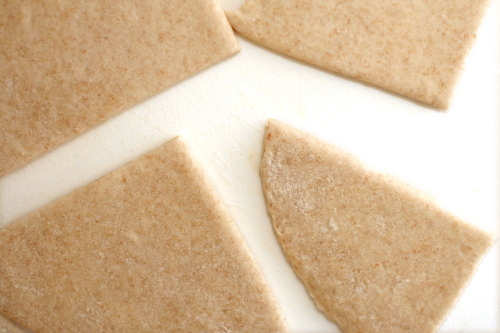
4. On a lightly floured surface, roll out the dough, in portions if necessary, until it’s just under 1/8-inch thick.  Using a pizza cutter, cut the dough into squares or rectangles of whatever size you want – a few inches per side is standard.

5. Place the squares of dough on lightly floured pans and lightly cover.  The cut sopaipillas can stay at room temperature for up to 5 minutes; otherwise, refrigerate them until you’re ready to fry them.

6. Carefully drop two or three sopaipillas into the hot oil.  When the rolls begin to puff, gently push them into the hot oil several times to help them puff more evenly.  Turn several times; fry until pale gold on both sides, 1-2 minutes.  Drain on paper towels.  Serve immediately.

Copy of IMG_5084

carne adovada

Copy of IMG_5067

A carne adovada comparison post is a very bad idea because:

1. I don’t love cooking with meat, with the constant hand-washing and being careful not to contaminate cooked meat tools with raw meat tools.

Copy of IMG_7465

2. My limited counter space makes working with large roasts difficult.

3. The oven was on for four hours – in July.

Copy of IMG_7470

4. One of the recipes includes the warning “Don’t breathe the fumes!”

5. Another warning, this time from my sister: “My coworker said to be careful because red chile can give some people the runs if they aren’t used to eating it.”

Copy of IMG_4864

6. Carne adovada is red. Deep, dark red, and yes, of course it stains.

7. Who, outside of New Mexico, has even heard of carne adovada?

Copy of IMG_7487

Oh, and then, the outcome?

8. Dave thought all three recipes tasted the same anyway.

Copy of IMG_4879

Carne adovada is pork marinated in red chile sauce, then slow roasted. It isn’t something that I’ve eaten a lot of; my dad made it once when I was young and it was crazy ridiculously painfully spicy, and I’ve pretty much been scared of it since. Of course now I realize that the level of spiciness will vary with the heat of the chiles.

Copy of IMG_4881

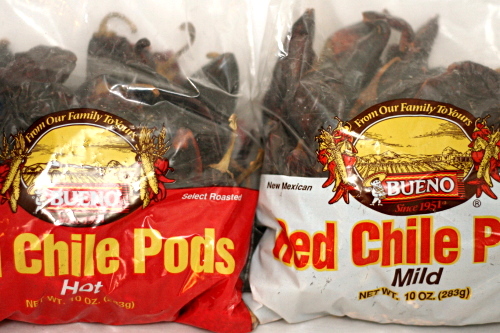
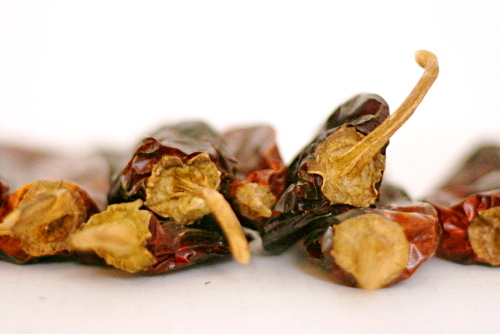
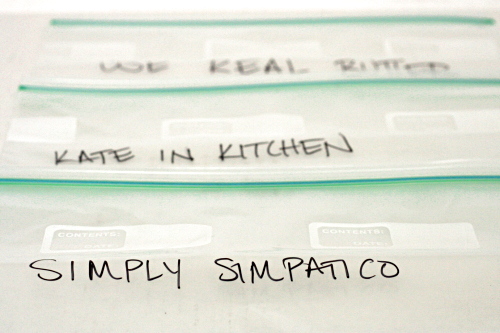
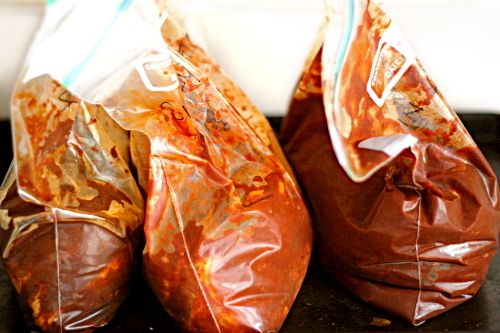
Unable, as usual, to decide on a recipe, I decided to compare a few. The meat in all recipes is marinated and cooked using the same method and cooking time; the difference is in the red chile sauce. At its most simple, the red chiles are soaked in hot water to rehydrate them, then blended with onions, garlic, and salt. Jen’s method is only slightly more complicated, with the added step of toasting the dried chiles before soaking them.

Copy of IMG_4871

Kate’s recipe is a little more complicated – and uses far, far more red chiles. It’s similar but significantly more fussy, with a soak followed by a simmer instead of just a soak, and then the blended ingredients need to be pushed through a sieve, a step I find tedious in most recipes that call for it.

Copy of IMG_7463

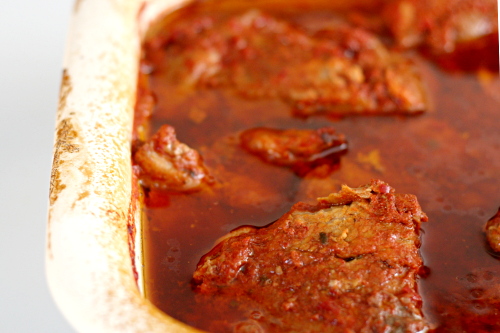
I let the meat marinate for about 24 hours, but if you can swing longer, up to 2 full days, I really think that’s the way to go. The more red chile flavor, the better.

Copy of IMG_7505

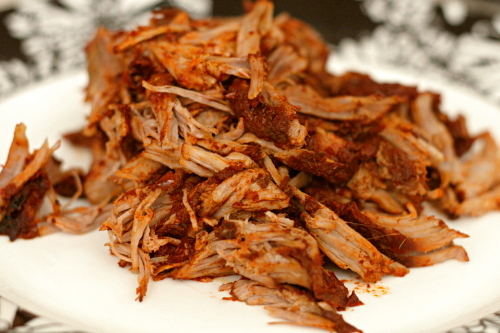
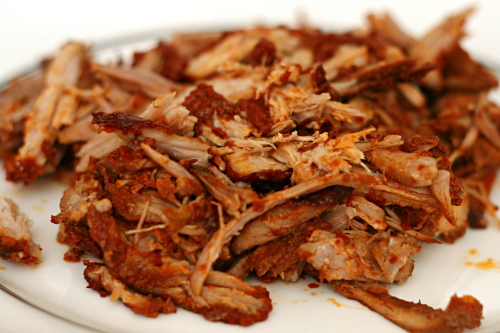
After finding enough properly-sized baking pans, jigsawing the pans into the oven, roasting the meat for hours, letting it cool slightly, and shredding all three pans of meat while trying to keep straight which was which so I could identify the photos, Dave and I decided that they were very, very similar.

Copy of IMG_7514

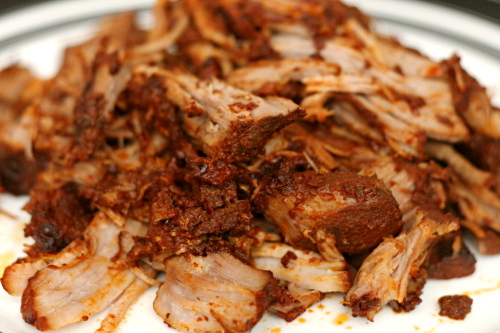
Dave would say identical. I would say that they’re oh-so-slightly different, but equally good. Kate’s recipe, which used so much more chiles, was spiciest. The recipe that did not require toasting the chiles tasted lighter and fresher, while the recipe with toasted chiles had a deeper flavor.

Copy of IMG_7523

My favorite was probably the simplest recipe; I liked that fresh flavor. Plus, if they all taste essentially the same, I might as well make the easiest, right? I guess a comparison was necessary, just so I know that, in this case, simple works just fine.

Copy of IMG_4929

Update: I thought I should add that neither of us had any, ah, digestive issues after eating the red chile, despite the concerns of my sister and her coworker.

One year ago: Baked Eggs with Spinach and Mushrooms

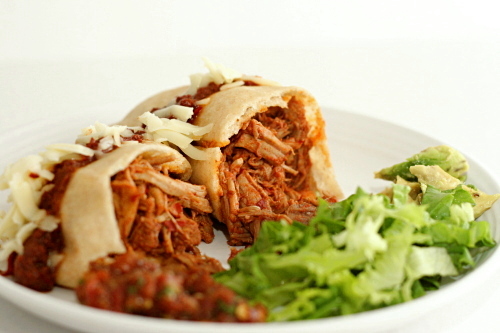
Serving suggestions: Burritos, stuffed sopaipillas (shown in the top photo), quesadillas, tacos, breakfast burritos.  You can also add potatoes to the mixture before cooking, and then serve the potatoes and meat as a main dish with beans and rice as sides.

Printer Friendly Recipe
Carne Adovada
(adapted from Simply Simpatico, by the Junior League of Albuquerque)

16-18 dried red chile pods
hot water
3 cloves garlic
2 teaspoons salt
1 tablespoon dried oregano
4 pounds pork shoulder, trimmed of thick layer of fat and sliced ½-inch thick

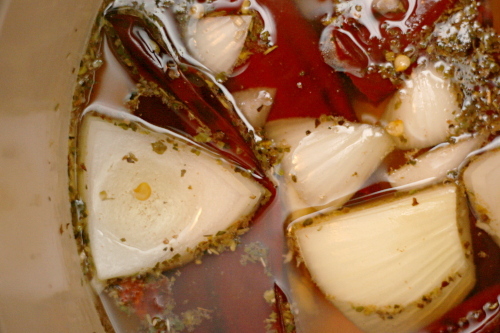
1. Remove stems and seeds from the chile pods. Place the pods in a large bowl or pot and pour in enough hot water to cover them. Soak for 1 hour. Strain, reserving the soaking liquid.

2. Place the chiles, garlic, and salt in a blender and add enough soaking liquid to just cover. Making sure there’s about two inches of headspace, blend until the skins disappear and the mixture is smooth, 2-3 minutes. Pour the sauce over meat, cover tightly, and marinate in the refrigerator for 24-28 hours.

3. Adjust a rack to the middle position and heat the oven to 350ºF. Place the meat and chile sauce marinade in a baking pan and cover tightly with foil. Bake the carne adovada until the meat is falling apart tender, about 4 hours. (You can also cook the carne adovada in a crockpot on low heat for 7-9 hours.) When the meat is done, shred it or cut it into 1-inch pieces. Serve.

Copy of IMG_7527

Printer Friendly Recipe
Carne Adovado
(adapted from Jen at Use Real Butter, who adapted it from Sante Fe Recipe)

16 dried red chile pods
1 tablespoon salt
4 cloves garlic
2 teaspoons oregano
5 pounds pork shoulder, trimmed of thick layer of fat and sliced ½-inch thick

1. Adjust an oven rack to the middle position and heat the oven to 325ºF. Remove the stems from the chile pods; place the pods in a pan and bake for 5-10 minutes, stirring occasionally, until the chiles are lightly roasted. Leave the oven door open, and don’t breathe the fumes! Shake the seeds out of the pods and discard them.

2. Place the chiles in a medium bowl and cover them with boiling water. Let them sit for 30 minutes. Drain the water, reserving about 2 cups. Place the chiles in a food processor or blender; add the salt, garlic, and oregano. Cover the mixture with the reserved chile water, and blend or process for 2 minutes or until the skins disappear.

3. Pour the sauce over meat, cover tightly, and marinate in the refrigerator for 24-28 hours.

4. Adjust a rack to the middle position and heat the oven to 350ºF. Place the meat and chile sauce marinade in a baking pan and cover tightly with foil. Bake the carne adovada until the meat is falling apart tender, about 4 hours. (You can also cook the carne adovada in a crockpot on low heat for 7-9 hours.) When the meat is done, shred it or cut it into 1-inch pieces. Serve.

Copy of IMG_7526

Printer Friendly Recipe
Carne Adovada
(adapted from Kate in the Kitchen , who adapted it from Sante Fe Hot and Spicy Recipes)

12 ounces dried red chile peppers
1 large onion, chopped
8 cloves fresh garlic, smashed with skins removed
2 teaspoons dried oregano
2 teaspoons ground cumin
2 teaspoon kosher salt
3-4 pounds pork shoulder, trimmed of thick layer of fat and sliced ½-inch thick
4 teaspoons red pepper flakes
2 sticks cinnamon

1. De-stem and de-seed chile peppers; place in a large stock pot and cover with hot water. Soak for 30 minutes. Add the remaining ingredients to the pot; bring to a boil. Reduce the heat to low and simmer for 30 minutes.

2. Strain, reserving liquid. Allow to cool slightly, then process solids in batches in a food processor using reserve liquid for proper consistency. Strain through a wire sieve, pressing on the solids to extract the liquids.

3. Pour the sauce over meat, add the cinnamon and red pepper flakes, cover tightly, and marinate in the refrigerator for 24-28 hours.

4. Adjust a rack to the middle position and heat the oven to 350ºF. Remove the cinnamon stick. Place the meat and chile sauce marinade in a baking pan and cover tightly with foil. Bake the carne adovada until the meat is falling apart tender, about 4 hours. (You can also cook the carne adovada in a crockpot on low heat for 7-9 hours.) When the meat is done, shred it or cut it into 1-inch pieces. Serve.

Copy of IMG_7524