farro and pine nut salad

farro tabbouleh 6

It’s a good thing I really like farro, because I accidentally bought 26 dollars worth of it. Apparently I need to pay more attention to the prices on the bulk bins. I should also start enjoying barley or wheat berries or some other equally healthy grain that doesn’t cost $12 per pound. (I actually looked at the prices the next time I was at the store, and farro cost about five times as much as the other grains.)

farro tabbouleh 1

I can’t pinpoint exactly what it is about farro that I like so much. I don’t think the flavor of the different grains are so different that I notice a big difference once dressing and other ingredients are mixed in, so it must be more textural. It’s all about a balance of the tender and the chewy. Rice is soft and tender. Barley is very chewy. Farro is just right.

farro tabbouleh 3

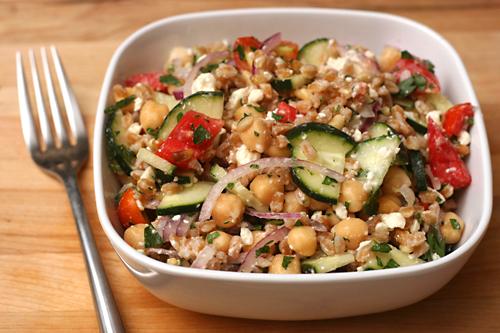
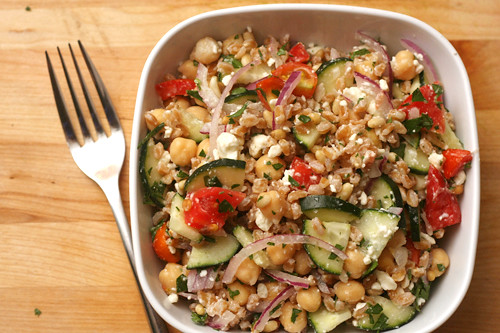
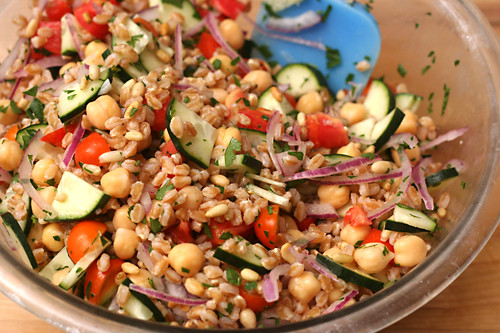
Usually I mix it with caramelized onions and feta, which, with a squirt of hot sauce, becomes one of my favorite meals that also happens to be incredibly healthy. But having two pounds of farro is good incentive to branch out. There are few things that aren’t improved with the addition of summer vegetables, pine nuts, chickpeas, and a squirt of lemon juice, farro included. It looks like I have another delicious farro meal that also happens to be healthy.

farro tabbouleh 4

One year ago: Grilled Potato and Vegetable Salad
Two years ago: Casatiello
Three years ago: Soba Salad with Feta and Peas

Printer Friendly Recipe
Farro and Pine Nut Salad (adapted from Self magazine via epicurious)

If you choose a grain other than farro, your cooking time will probably be different.

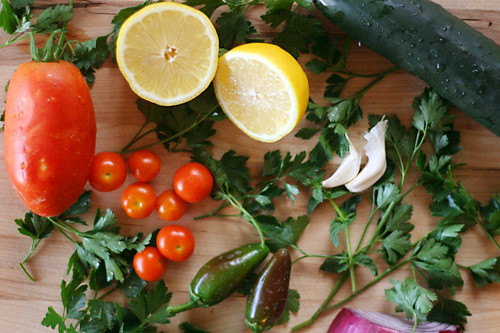
The original recipe included jalapenos, which is why they’re shown in the photo above, but I decided not to use them.

1 cup farro (or another whole grain, such as wheat berries, barley, or brown rice)
salt
1 clove garlic, unpeeled
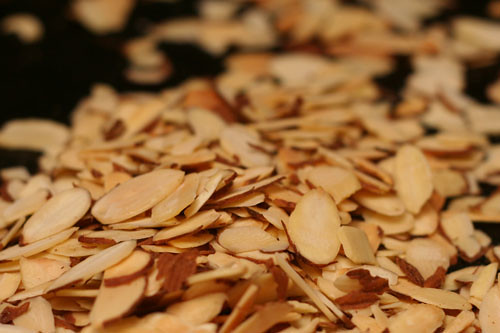
¼ cup pine nuts
Juice from 1 lemon
½ small red onion, very thinly sliced
2 large heirloom tomatoes, chopped, or 1 pint grape tomatoes, halved
1 small cucumber, quartered and sliced ⅛-inch thick
1 (15-ounce) can chickpeas, rinsed and drained
1 cup feta, crumbled
3 tablespoons extra-virgin olive oil
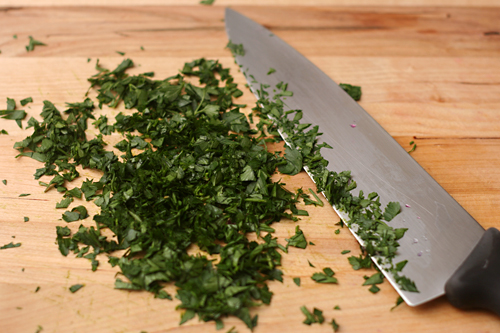
¼ cup chopped fresh parsley

1. Bring 2 quarts of water to a roiling boil; add the farro and 2 teaspoons of salt. Cook for 20 minutes, until the farro is tender but slightly chewy. Drain.

2. Squeeze the juice of the lemon into a large bowl; add the onions and a pinch of salt. Set aside.

3. Heat a small not-nonstick pan over medium heat. Add the garlic and toast it, turning once, until browned, about 2 minutes. Remove the garlic from the pan. Add the pine nuts to the pan and cook, stirring constantly, until fragrant and slightly browned, 3-4 minutes. Remove from the pan. When the garlic is cool enough to handle, peel and mince it.

4. Stir the drained farro into the onion vinegar mixture, then add the remaining ingredients. Let the salad stand at room temperature for at least 10 minutes before serving.

farro tabbouleh 5

peanut butter and jelly muffins

pb jelly muffins 5

I used to make a recipe similar to this – but without the peanut butter – and I loved it. Something about a dollop of jam baked inside of a muffin tastes so much better than a spoonful of jam spread over it once it’s baked. My old recipe also had a warm overtone of nutmeg I enjoyed.

pb jelly muffins 1

The only thing that wasn’t perfect about it was that it seemed too cakey, too dessert-like. These days, I like a heartier muffin. I also like to squeeze protein in wherever I can, and besides, everyone knows that peanut butter is a perfect partner for jelly.

pb jelly muffins 2

These peanut butter muffins are mixed a little differently than a standard muffin, in that the peanut butter is cut into the dry ingredients before the remaining liquids are added. Maybe this contributed to how light and soft the muffins were once baked, or maybe it was just the fat content of the peanut butter. Either way, with a good proportion of whole wheat flour and a layer of fruity jam in the middle, these are even better than my old favorite.

pb jelly muffins 6

One year ago: Lemon Curd Tart
Two years ago: Puff Pastry Dough
Three years ago: Pain a l’Ancienne

Printer Friendly Recipe
Peanut Butter Jelly Muffins (adapted from Real Simple and Jeanne Lemlin’s Vegetarian Classics)

I used half whole wheat pastry flour.

Update 5/5/2014 : I made these again and think they needed more sugar, so I’ve doubled it from the original ¼ cup.

1 cup whole milk
1 egg, beaten
3 tablespoons unsalted butter, melted
1 teaspoon vanilla
2 cups (9.6 ounces) all-purpose flour
½ cup (3.5 ounces) sugar
2 teaspoons baking powder
½ teaspoon salt
Pinch nutmeg
⅓ cup (3 ounces) peanut butter (crunchy or smooth)
About ¼ cup jam

1. Adjust a rack to the middle position and heat the oven to 375 degrees. Spray the bottoms of a 12-cup muffin pan with nonstick spray or line with paper liners. In a large measuring cup, whisk together the milk, egg, butter, and vanilla.

2. In the bowl of a stand mixer (or in a large mixing bowl with a hand mixer), combine the flour, sugar, baking powder, salt, and nutmeg. Add the peanut butter; mix until evenly combined. Turn the mixer off, add all of the milk mixture at once, and mix on low speed just until combined (small lumps are fine).

3. Place one heaping tablespoon of batter into each muffin cup. Spoon about a teaspoon of jam over the batter in the cups. Divide the remaining batter evenly between the cups.

4. Bake until a toothpick inserted into a muffin comes out clean, 15-20 minutes. Set the pan on a rack to cool slightly, about 5 minutes, then use a thin-bladed knife to remove the muffins from the pan.

pb jelly muffins 7

whole wheat almond bread

almond bread 5

I’m not always as practical as I should be. Once I get an idea in my  head, I stubbornly cling to it regardless of whether it makes good sense. For example, yesterday I gathered up my laptop, its mouse, a glass of water, and a bowl of farro and lentils and carried it about twenty feet. The mouse kept falling, the water was sloshing over the rim of the glass, and the bowl was sliding around, precariously balanced on top of the laptop. Why didn’t I just make two trips, which probably would have taken less time in the end?  It is a mystery.

almond bread 2

Why didn’t I bake at least one of the loaves of almond bread in a regular bread pan that I’m familiar with? Why did I insist on baking both loaves in closed pans even though I have no experience baking in covered pans and didn’t know how it would affect the baking time or how I would test for doneness?

almond bread 4

My mom found these pans during a mass cleaning of my grandmother’s kitchen, and although they were in their original packaging, there were no baking instructions with them. And the toothpick test doesn’t work when the center of your bread is five inches from the edge of the pan. The outside few inches of each loaf were perfectly baked, slightly sweet, and intensely nutty. The middle portions were doughy, slightly sweet, and intensely nutty. And that was the case for both loaves, because I just had to take a chance with the whole batch instead of taking the safe route with at least one of them. Typical.

almond bread 3

One year ago: Jamaican Jerk Chicken
Two years ago: Aligot (French Mashed Potatoes)
Three years ago: Poached Eggs with Arugula and Polenta Fingers

Printer Friendly Recipe
Whole Wheat Almond Bread (adapted from Joy the Baker)

Makes 2 small loaves

This is the baking time for a regular, uncovered bread pan. In a covered pan like I used, increase the baking time to 50-60 minutes and use a wooden skewer inserted into the center of the loaf to test for doneness.

2 cups whole wheat flour
2 cups (9.6 ounces) all-purpose flour
¼ cup (1.75 ounces) sugar
1 teaspoon salt
1 cup sliced, toasted almonds, divided
4 teaspoons baking powder
¼ teaspoon baking soda
¼ cup honey
2 large eggs
1½ cups almond milk
¼ teaspoon almond extract
4 tablespoons unsalted butter, melted

1. Preheat oven to 350 degrees F. Spray two 8.5 by 4.5-inch bread pans with non-stick cooking spray.

2. In a large bowl, whisk together the flours, sugar, salt, baking powder, baking soda, and almonds. In a medium bowl, whisk together honey, eggs, milk and melted butter. Add the wet ingredients to the dry ingredients. Fold until the batter is evenly mixed; small lumps of flour are okay.

3. Divide the batter between the prepared pans. Bake for 35-40 minutes, or until a toothpick inserted into the center of a loaf comes out dry. Set the pans on a wire rack and cool 10 minutes. Run a thin knife around the edge of the pans; invert onto the wire rack. Serve warm or at room temperature.

almond bread 6

chocolate-chunk oatmeal cookies with dried cherries and pecans

Mise en place while baking is not my favorite. My favorite is to measure out the sugar while the butter is whipping, crack open the eggs while the sugar aerates the butter, mix the dry ingredients while the eggs are incorporated, cut open the bag of chips while pulsing the flour into the mixture. And then I eat a spoonful of dough. That’s my idea of a good time.

Chopping interrupts this perfect process. The cherries stick to the knife and the chocolate shatters onto the floor, and it certainly can’t be finished by the time the eggs are blended into the butter. But for some cookies, it’s worth it a few minutes of chopping before I get to the fun part of adding ingredients to the mixer.

For the first oatmeal cookies I ever loved, I can handle chopping a few ingredients. One thing that makes these more lovable than your average oatmeal cookie is chocolate (much like the second oatmeal cookies I ever loved). The other treat is tart dried cherries instead of boring raisins. The pecans add bitterness and the oats contribute to chewiness. It might take five more minutes than some desserts, but it makes for a much more interesting cookie.

Two years ago: Black Bean Squash Burritos
Three years ago: Scotch Eggs

Printer Friendly Recipe
Chocolate-Chunk Oatmeal Cookies with Dried Cherries and Pecans (from Cooks Illustrated)

Makes sixteen 4-inch cookies

CI note: We like these cookies made with dried sour cherries, but dried cranberries can be substituted for the cherries. Quick oats used in place of the old-fashioned oats will yield a cookie with slightly less chewiness. If your baking sheets are smaller than the ones described in the recipe, bake the cookies in three batches instead of two. These cookies keep for 4 to 5 days stored in an airtight container or zipper-lock plastic bag, but they will lose their crisp exterior and become uniformly chewy after a day or so.

1¼ cups (6¼ ounces) unbleached all-purpose flour
¾ teaspoon baking powder
½ teaspoon baking soda
½ teaspoon table salt
1¼ cups (6⅓ ounces) rolled oats, old-fashioned
1 cup pecans, toasted
1 cup dried tart cherries (5 ounces), chopped coarse
4 ounces bittersweet chocolate, chopped into chunks about size of chocolate chips (about ¾ cup)
12 tablespoons (1½ sticks) unsalted butter, softened but still cool
1½ cups (10½ ounces) packed brown sugar, preferably dark
1 large egg
1 teaspoon vanilla extract

1. Adjust oven racks to upper- and lower-middle positions; heat oven to 350 degrees. Line 2 large (18 by 12-inch) baking sheets with parchment paper.

2. Whisk flour, baking powder, baking soda, and salt in medium bowl. In second medium bowl, stir together oats, pecans, cherries, and chocolate.

3. In standing mixer fitted with flat beater, beat butter and sugar at medium speed until no sugar lumps remain, about 1 minute. Scrape down sides of bowl with rubber spatula; add egg and vanilla and beat on medium-low speed until fully incorporated, about 30 seconds. Scrape down bowl; with mixer running at low speed, add flour mixture; mix until just combined, about 30 seconds. With mixer still running on low, gradually add oat/nut mixture; mix until just incorporated. Give dough final stir with rubber spatula to ensure that no flour pockets remain and ingredients are evenly distributed.

4. Divide dough evenly into 16 portions, each about ¼ cup, then roll between palms into balls about 2 inches in diameter; stagger 8 balls on each baking sheet, spacing them about 2½ inches apart. Using hands, gently press each dough ball to 1 inch thickness. Bake both baking sheets 12 minutes, rotate them front to back and top to bottom, then continue to bake until cookies are medium brown and edges have begun to set but centers are still soft (cookies will seem underdone and will appear raw, wet, and shiny in cracks), 8 to 10 minutes longer. Do not overbake.

5. Cool cookies on baking sheets on wire rack 5 minutes; using wide metal spatula, transfer cookies to wire rack and cool to room temperature.

pasta with tomatoes, swiss chard, and goat cheese

I think people have the wrong impression about meals around here, particularly on weeknights. The assumption seems to be that someone who loves cooking must be hanging out in the kitchen making elaborate meals every single night. If only.

The reality is that my weeknight evenings are so full of other necessary chores that any meal that takes longer than half an hour stresses me out. A delay in dinner puts me behind schedule for the laundry folding and showering and ultimately ends up cutting into my sleep. And the less sleep I get, the more hateful my alarm is in the morning and the slower I get ready for work and the later I get to work and the later I have to stay at work and the less time I have for cooking the next evening.

Pasta dishes that can be made in the time it takes to boil the pasta are a great option for a quick meal that breaks that cycle.  But the original version of this one wasn’t quite working for me.  I loved the idea of roasting the grape tomatoes before combining them with the other ingredients to accentuate their sweetness.  However, that extra step of heating the oven and throwing in the tomatoes apparently put me over the edge, because I felt vaguely flustered every time I made this.

I needed to simplify it somehow, but I didn’t want to lose that step of concentrating the tomatoes’ flavor.  I love roasted tomatoes, but in this case, where they’re roasted quickly instead of low and slow, it seemed like the stovetop could get the effect right in the same pan used to cook the greens.  In fact, the juice released from the tomatoes helped the chard cook.  With only two dishes, one appliance, and half an hour, this was the perfect weeknight-friendly version of the dish.

One year ago: Artichoke Ravioli
Two years ago:  Cooks Illustrated’s Perfect Chocolate Chip Cookies
Three years ago: Spinach Feta Pine Nut Tart

Printer Friendly Recipe
Pasta with Green, Tomatoes and Goat Cheese (adapted from Food and Wine via Savory Spicy Sweet)

1 pound fusilli pasta
Salt
2 teaspoons olive oil
3 garlic cloves, sliced
Pinch of crushed red pepper
1 pint cherry tomatoes, halved
½ pound swiss chard, rinsed and coarsely chopped
½ pound soft goat cheese, thickly sliced
½ cup walnut halves, toasted
¼ cup freshly grated Parmigiano-Reggiano cheese

1. Bring 4 quarts water to rolling boil, covered, in stockpot. Add 1 tablespoon salt and pasta, stir to separate, and cook until al dente. Drain and return to stockpot.

2. In a large nonstick skillet over medium heat, heat the oil, garlic, and pepper flakes until the oil flows like water when the pan is tilted. Add the cherry tomatoes, swiss chard, and ¼ teaspoon salt; cover the pan and simmer, stirring occasionally and smashing the tomatoes, until the chard is tender and the tomatoes are soft.

3. Reserve 1 cup of pasta cooking water; drain pasta. Return the pasta to the cooking pot; stir in the goat cheese and ½ cup of the reserved cooking water. Add the chard and tomato mixture, walnuts, and cheese; stir to combine, adding more pasta water to loosen sauce if necessary.

honey nut brownies

I was going to focus on how weird these brownies are, but instead I’m going to talk about how weird Dave is.

He doesn’t like brownies. He isn’t really into desserts in general, but brownies in particular just don’t do it for him. They’re too chocolately, he says. So I suspected that he would like these, and I was right. Better than the average brownie, he says.

While I think he’s nuts, I do see what these brownies have going for them. They don’t taste like chocolate, but I do think the bitterness from the chocolate is crucial to balance the sweetness of the honey.

Maybe they shouldn’t be called brownies. The flavor is mostly honey, and the texture is fluffy moist cake, not dense chewy brownie. Or maybe it’s just a brownie for brownie-haters.

Suzy chose this for Tuesdays with Dorie and has the recipe posted. I followed the recipe exactly (including the rather generous, for a Dorie recipe, amount of salt) because I was so curious about the outcome. Dave recommends adding bits of candied ginger to the batter, and I agree that the bite of ginger would offer another contrast to the sweet floral honey.

One year ago: Dulce de Leche Duos
Two years ago: Blueberry Crumb Cake

toasted almond scones

My parents are visiting this weekend (Hi Mom!), so of course I want to figure out the perfect menu that will taste amazing, fit everyone’s food preferences, reflect how I like to cook, and magically prepare itself while we’re out doing touristy things. Wish me luck!

My dinner plans are coming together, but I’ve been stumped at breakfast. Until I remembered that I have almond scones the freezer. Perfect! My mom loves scones and has been eating a lot of almonds lately. I’m sure my dad would rather have bacon (or sausage or ham or really any form of meat) and eggs, but when is it ever about the dad when your parents visit?

I believe my mom started really enjoying scones while she was visiting New Zealand several years ago. Unlike my retired world-traveling parents, I have never been to New Zealand, but I’m guessing the scones there are less sweet than we usually make them here in the US. If that’s the case, my mom will especially love these lightly sweetened biscuits. For eating plain, I might add a bit more sugar next time, but with a generous smear of jam, these were perfect.

Mike chose this recipe for Tuesdays with Dorie, and he has the recipe posted (as a link to the pdf; don’t miss it!). I doubled the salt.

One year ago: Honey Wheat Cookies
Two years ago: Caramel Crunch Bars

almond biscotti

When faced with three bowls of Bolognese and a spoon, Dave declared them all good. “Different, but good.” Which is better? “I don’t know. They’re all good.” Carne adovada? “They all taste the same.” Sugar cookies? “They need frosting.”

I can’t really complain about having someone to cook for who appreciates everything I make (unless it has olives), but feedback isn’t Dave’s strongpoint. He used to tell me that he could only give a good opinion if he was served similar dishes side-by-side, which started this whole thing, but not even that always works.

Unless it concerns almond biscotti. I have made at least four almond biscotti recipes, over the course of well over a year, and Dave has unequivocally identified his favorite. It was the first I tried, and nothing else has ever lived up. He loves these because they’re just crunchy enough to dip into his coffee without getting soggy, but not so crisp that they’re a challenge to bite into.

I like them because the recipe is simple to mix up and is easily adaptable. Usually I use slivered blanched almonds, but if I need to use up sliced almonds, those work just fine as well. If I’m in the mood for variety, I can add different nuts and dried fruit, although if I do, Dave will be disappointed. Pure, unadulterated almond biscotti is one of Dave’s favorites, up there with banana cream pie and salmon pesto pasta. At least this recipe is.

One year ago: Tartine’s Banana Cream Pie
Two years ago: Crispy Baked Chicken Strips
Three years ago: Mu Shu Pancakes

Printer Friendly Recipe
Almond Biscotti (adapted from Bon Appetit via Smitten Kitchen)

There’s no need to toast the nuts before mixing the dough; they’ll brown in the oven.

You’ll only use a bit of the egg white, plus I dislike using only one part of an egg. Instead, I steal just a bit of egg white from one of the eggs that gets mixed into the dough to use for the egg wash instead of using a separate egg white.

1 large egg white
3¼ cups (15.6 ounces) all-purpose flour
1 tablespoon baking powder
3 large eggs
10 tablespoons (1¼ sticks) unsalted butter, melted
1/3 teaspoon salt
1½ cups (10.5 ounces) sugar
1 tablespoon vanilla extract
1 tablespoon Grand Marnier or orange liqueur
1 tablespoon orange zest
1 cup slivered or sliced almonds

1. Heat the oven to 350 degrees. Line a large baking sheet with parchment paper or a silicone mat. Whisk the single egg white until frothy. In a medium bowl or large measuring cup, mix the flour and baking powder.

2. In a large pot over medium-low heat, heat the butter just until melted. Remove the pot from the heat; stir in the sugar and salt. Stir in the eggs, one at time; add the extract, liqueur, and zest. Slowly mix in the flour mixture, then the almonds.

3. Divide the dough in half. On the prepared baking sheet, shape each half into a log 2-inches across and ¾-inch high. Brush with the egg white. Bake for 30 minutes, until puffed and golden.

4. Carefully transfer the logs to a cooling rack (I use two large spatulas for this); cool for 30 minutes.

5. Slice each log on the diagonal into ½-inch thick cookies. Lay half of the cookies cut side down on the baking sheet. Bake 11 minutes; remove the pan from the oven and, using tongs, turn each cookie over onto its other cut side. Bake 7 minutes, until the edges are browned. Transfer to a cooling rack. Repeat with the remaining cookies.

I have blogged about this recipe before. At the time, I could only tell you that they were good. Now I can tell you that they are the best.

nutty chocolately swirly sour cream bundt cake

I’ve got nothing against nuts and chocolate and currants, but you know what I really like best? Cake made with sour cream. For me, it always comes back to the purest form of flour plus butter plus sugar, and adding a tangy fatty dairy into the mix just makes things better. Usually that’s cream cheese, but I have nothing against sour cream either.

I’ve been doing a better job of reining in my batter-eating, but the few spoonfuls I had of this cake’s batter made me crave a bowl of the stuff, a quiet corner, and a cup of coffee. It also made me wish I had more sour cream cake. The swirl was fun, but all I really want is the cake part. Or the batter part.

Jennifer chose this for Tuesdays with Dorie, and she has the recipe posted. I actually didn’t change anything. I don’t think I even added more salt.

One year ago: Coco-Nana Muffins
Two years ago: Fresh Ginger and Chocolate Gingerbread

pasta with brussels sprouts and pine nuts

It sounds plain, doesn’t it? What exactly is offering the flavor here? Is a bowl of carbs, green vegetables and nuts worth eating?

Because there aren’t many ingredients, it’s important to maximize each one. Browning food is key for developing flavor, so that means toasting the nuts and pan-roasting the Brussels sprouts. Plenty of garlic and a pinch of spicy red pepper flakes add another layer of interest. A generous handful of parmesan glues the sauce together, both in texture and taste.

It isn’t much, as you can see. But what it lacks in ingredients – and, therefore, ingredient prep – it makes up for in flavor. It’s a simple dish, but a healthy one that might surprise you by adding up to far more than its individual components hint at.

One year ago: Pizza, Green Tea Crème Brûlée, Herbed Lamb Chops with Pinot Noir Sauce, Soft and Sexy Grits,
Two years ago: Chocolate Truffles (with a chocolate comparison)

Printer Friendly Recipe
Pasta with Brussels Sprouts and Pine Nuts (adapted from Gourmet via epicurious)

4 servings

Please note the very important “reserve a cup of pasta cooking water” step! I sometimes forget, but I’ve found that putting a measuring cup in the colander will remind me to scoop up some water when it’s time to drain the pasta.

If you have bacon fat (or better yet, pancetta fat, which is what I used) available, I highly recommend it. Because there aren’t a lot of ingredients here, the more flavorful each one is, the better. If that sounds too rich for your blood, using olive oil certainly won’t spoil your dish. One tablespoon will be enough if you’re being stingy, but you’ll have better browning of the sprouts with two.

Pasta dishes like this don’t have a high heat capacity. To keep dinner warm until I’m finished eating, I like to warm the serving bowls in the oven while the pasta is cooking.

12 ounces pasta (rotini or another open short shape)
salt and freshly ground black pepper
3 ounces (¼ cup) pine nuts
24 ounces Brussels sprouts, trimmed and quartered
1-2 tablespoons butter, olive oil, or bacon fat
4 cloves garlic, minced
½ teaspoon crushed red pepper flakes
¼ cup water
juice of 1 lemon
2 ounces (1 cup) freshly grated parmesan

1. Bring a large pot of water to a boil over high heat. When it boils, add a tablespoon of salt and the pasta. Cook according to the package directions. Drain, reserving about a cup of the pasta cooking water.

2. Meanwhile, heat a 12-inch not-nonstick skillet over medium heat. Add the nuts; cook and stir until fragrant and lightly toasted, 1-2 minutes. Transfer to nuts to a small bowl; set aside.

3. Add the fat to the now-empty skillet and heat over medium heat. Add the Brussels sprouts and a big pinch of salt; cook without stirring for 2 minutes. Stir; repeat the cooking and stirring twice more, for a total of 6 minutes. Push the sprouts to the edge of the pan and add the garlic and pepper flakes to the cleared center; cook and stir constantly until fragrant, about 30 seconds. Stir into the sprouts.

4. Add the water to the pan; immediately cover and continue cooking for 2 minutes. Remove the lid, scrape up any browned bits on the bottom of the pan, and let any remaining liquid evaporate.

5. Add the drained pasta, Brussels sprouts mixture, lemon juice, and ½ cup of pasta cooking water to the pot the pasta was cooked in. Stirring continuously, sprinkle the parmesan over the pasta, adding more pasta cooking water if necessary to keep the mixture from drying out. Adjust the seasoning with salt and pepper if necessary; serve immediately, preferably in warmed bowls.