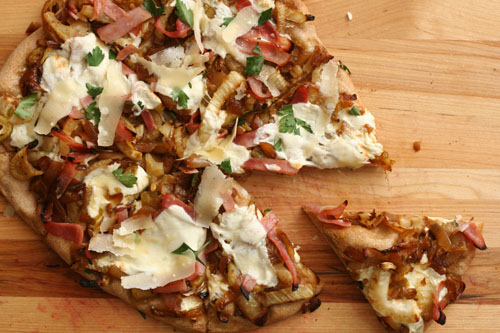
pizza with caramelized onions and fennel

After a year and a half living in a small town, I still haven’t fully adjusted to the grocery store situation. I don’t think I’ve walked out of the store here once without thinking wistfully of Wegman’s. My new store isn’t a bad place; I’m just spoiled. They do occasionally stock random items, and I’ve learned to jump on those opportunities and worry about finding recipes later.

Sometimes I buy the item just to encourage the store to keep it up. In the last few months, we’ve eaten haricot vert, Copper River salmon, yellow carrots, and now fennel. Since I moved here, I’ve bitterly overlooked fennel recipes, thinking my fennel days were over, and then once I found fennel, I could only remember one of those recipes.

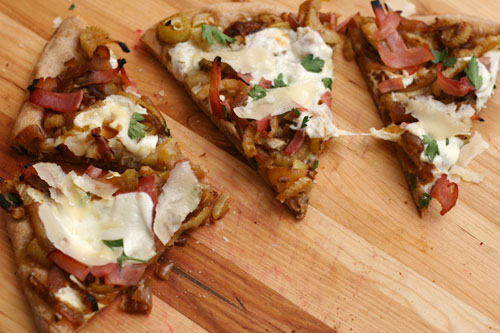
It’s a memorable recipe because it has a lot going for it. For one thing, it’s pizza, which is always good, but it’s even better since I’ve started playing with a new crust recipe recently (which will be the next blog entry). For another, the onions and fennel are caramelized, and who doesn’t like turning vegetables into candy?

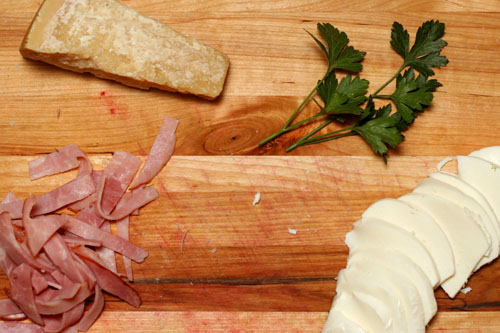
Lindsay laments that this pizza was pale and homely, so I added some color in the form of black forest ham (ideally prosciutto, but my store was out of it) and a sprinkle of parsley. Not only is the splatter of pink and scattering of green welcome, but the salty bites of ham and bitter bits of parsley complimented the sweet onions and the licorice of the fennel. It’s too bad I don’t know when the next time I’ll find fennel is, because I’d love to make this one again.

One year ago: Quinoa Tabbouleh
Two years ago: Croissants
Three years ago: Franks and Beans

Printer Friendly Recipe
Pizza with Caramelized Onions, Fennel, and Fresh Mozzarella (adapted from Love and Olive Oil)

Serves 6

I cooked the onions and fennel separately (not because I love doing dishes and wanted to use more than necessary; I had leftover caramelized onions to be used), and I found that the fennel didn’t caramelize, it just browned slightly. It may behave differently if onions are around.

1 pound pizza dough, fully risen and at room temperature (½ of this recipe)
1 tablespoon olive oil
1 large onion, thinly sliced
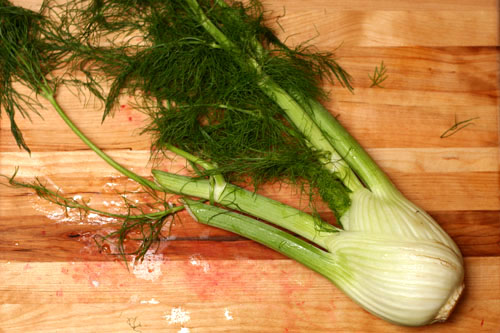
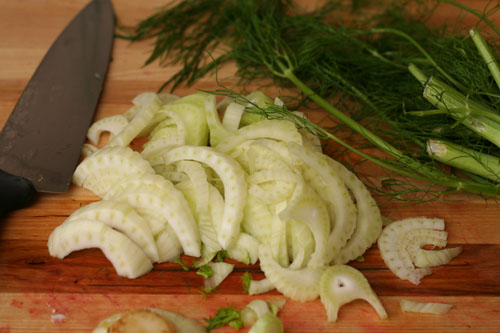
1 large fennel bulb, cored and thinly sliced
Salt
8 ounces whole-milk fresh mozzarella cheese, coarsely grated
4 ounces prosciutto, cut into slivers
freshly shaved Parmesan cheese
sprinkling parsley

1. Place a pizza stone on the bottom rack of the oven and preheat the oven to 500ºF. Divide the dough in two and shape each portion into a ball. Set the balls of dough aside, loosely covered, to allow the gluten to relax.

2. Heat the oil in a medium nonstick skillet over medium heat. Add the onions, fennel, and ¼ teaspoon salt; cook, stirring occasionally, until the onions start to brown, about 5 minutes. Reduce the heat to medium-low and continue cooking and occasionally stirring until the onions are golden brown, about 15 minutes.

3. Work with one ball of dough at a time on a lightly floured surface or a damp cloth. Flatten the dough, then pick it up and gently stretch it out, trying to keep it as circular as possible. Curl your fingers and let the dough hang on your knuckles, moving and rotating the dough so it stretches evenly. If it tears, piece it together. If the dough stretches too much, put it down and gently tug on the thick spots. Transfer the round of dough to a large square of parchment paper; slide onto a pizza peel.

4. Top the dough with half of each of the caramelized vegetables, cheese, and prosciutto. Slide the pizza with the parchment onto the hot baking stone. Bake for 8-10 minutes, until the crust is browned around the edges. Transfer the pizza to a cooling rack without the parchment; top with parmesan slivers and a sprinkle of parsley. Let the pizza rest for 5 minutes before serving. Repeat with the remaining ingredients.
barbecued pulled pork

The best part of barbecuing a whole pork shoulder on the grill is that you are forced to spend all day outside tending the grill. I can’t think of many better ways to spend a Saturday. We started the grill before breakfast, then spent the rest of the day in the backyard.  First we drank coffee, then some water because you have to to survive, even on weekends, and then it was time for afternoon margaritas, and then we capped it off with beer, because what else are you going to drink with pulled pork?

The truth is that while you do need to keep a constant-ish eye on the grill, you don’t need to spend much time actually doing anything with it. Once the pork is cooking, it takes just a couple of seconds every hour or so to add a handful of fresh coals. A thermometer is key to monitor the temperature, although a cheap oven thermometer – which is what I used – will work just fine.  And if you do find the temperature varying widely, it won’t ruin your pork; just let it slowly come down to the right temperature range or add more coals to bring it up and continue cooking. Cooking a whole pork shoulder on the grill is a simple and forgiving process, even if it does take a long time.

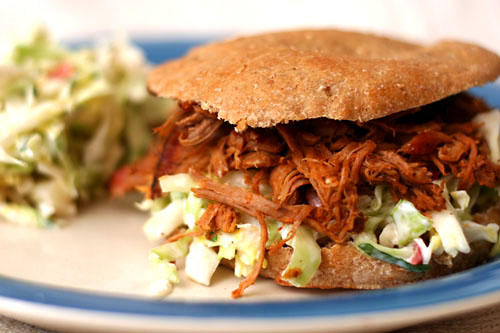
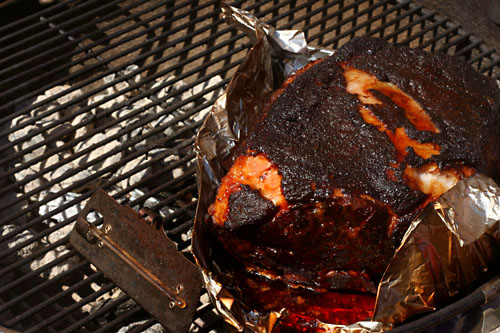
I know the question everyone is asking: Is it really better than crockpot pulled pork? Well, of course it is. Crockpot pulled pork, especially using the same spice rub, is incredible – flavorful, tender, and easy easy easy. Barbecued pulled pork isn’t as moist and as a result, its flavor seems more concentrated. It’s still easy to pull, but it has more chew than crockpot pulled pork, which can get mushy if you’re not careful. The biggest difference were the outside bits of the roast, which were deeply browned and crisp. (This is not the same thing as the blackened top in the photo below, which is a thick layer of fat that I discarded.) Dave and I filled up on those while I was still shredding the roast. But the best part of making pulled pork on the grill as opposed to in the crockpot is that while one method frees you up to do chores and run errands all day, the other keeps you in the backyard with a book and a beer.

One year ago: Home Corned Beef and Corned Beef Hash
Two years ago: Orange Oatmeal Currant Cookies
Three years ago: Hash Browns with Sauteed Vegetables and Poached Eggs

Printer Friendly Recipe
Barbecued Pulled Pork (spice rub from Cooks Illustrated)

Serves a lot

The least messy way I’ve found to add the spices to the meat is to line a rimmed baking sheet with a large piece of plastic wrap. Set the pork on the plastic wrap; add the spice rub, rotating the meat to rub all sides. Wrap the plastic wrap around the meat, then wrap another layer of plastic around in the opposite direction.

I use all of the spice rub on one roast, but if you think it’ll be too much, save half for another use. It’ll keep in the pantry for months.

Spice Rub:
1 tablespoon ground black pepper
1-2 teaspoons cayenne pepper
2 tablespoons chili powder
2 tablespoons ground cumin
2 tablespoons dark brown sugar
1 tablespoon dried oregano
4 tablespoons paprika
2 tablespoons table salt
1 tablespoon granulated sugar
1 tablespoon ground white pepper

1 (6-8 pound) bone-in pork shoulder

1. Combine all of the ingredients in the spice rub. At least one day, and up to three days, before cooking the pork, rub the spice rub onto all sides of the pork (see note). Wrap the pork in a double layer of plastic wrap. Refrigerate overnight or up to three days.

2. About 10 hours before you plan to serve the pork, remove it from the refrigerator; let it set at room temperature for 1 hour. Meanwhile, soak 4 wood chunks (or 4 cups of wood chips) in water for an hour.

3. About 20 minutes before you’re ready to grill, light about 30 charcoal briquettes (half a chimney starter). Once the coals are covered with a layer of ash, dump them into a pile on one side of the grill, then top with ¼ of the wood chunks or chips. Open the bottom vents completely. Place the meat, fat side up, on a double layer of aluminum foil with the edges folded up or in a 9×13-inch disposable aluminum baking pan. Place the meat on the side of the grill opposite the coals. Put the lid on the grill with the vents opposite the coals; adjust vents to be ¾ open.

4. Use a grill or oven thermometer to monitor the temperature of the grill, which should remain between 200 and 250 degrees. Add fresh coals, about 8 every hour, when the temperature drops. Add more wood chips an hour after you start cooking, then again at the 2- and 3-hour mark. (Don’t worry if the top of the meat blackens; you’ll discard that layer of fat anyway.)

5. After about 5 hours, when the internal temperature of the pork reaches 165 degrees, wrap it completely in foil. Continue cooking until the internal temperature of the pork is 195 degrees, another 2-3 hours.

6. Remove the pork from the grill and let it set at room temperature, covered, for one hour.

7. Place the pork on a large rimmed baking sheet. Remove and discard the thick layer of fat. Use your fingers or forks to shred the remaining meat. Serve.

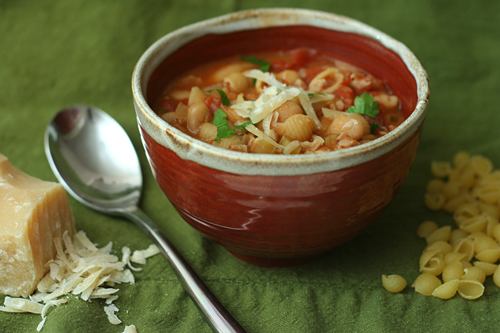
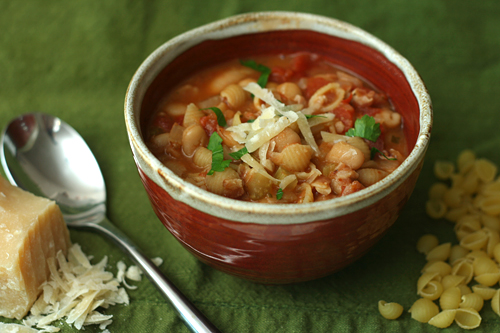
pasta e fagioli

Living in southern New Mexico, I’m out of touch with all of the weather systems the rest of the country gets. The weather here is always the same – sunny, dry, cold at night and warm in the afternoon (hot at night and hotter in the afternoon in the summer), windy in the spring. So even though I know most of you are burned out on cold and snow, I’m very excited right now that we’ve gotten a taste of real winter here.

And, even better, a snow day. A snow day! Not that it takes much snow to get a snow day here, but that’s even better – a snow day with no shoveling to do!

The first time I made this soup was years ago, and it was just as cold that day. I remember that Dave and I went to a political rally in Ithaca, and afterward, we were talking while I made the soup, and I got distracted and added the pepper flakes twice. Sadly, that ruined the soup. It was almost inedibly spicy; so much for the careful balance of flavors I was hoping for.

The soup is a whole lot better when you make it correctly. Just a bit spicy, all mixed in with tomatoes and vegetables and beans. A warm hearty bowl of soup is the perfect way to cap off a snow day.

One year ago: Butternut Squash Macaroni and Cheese
Two years ago: Tofu Croutons
Three years ago: Deviled Eggs with Tuna

Printer Friendly Recipe
Pasta e Fagioli (from Cooks Illustrated)

I added 2 cups less water than the recipe calls for. I’m sure the original recipe is fine too; I was just in the mood for something thicker. If you do this, make sure you decrease the salt to ½ teaspoon.

1 tablespoon extra-virgin olive oil, plus more for drizzling
3 ounces pancetta or bacon, chopped fine
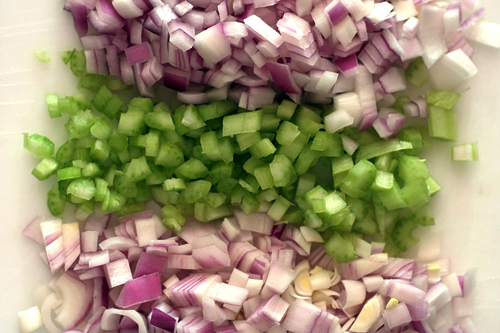
1 medium onion, chopped fine
1 celery rib, chopped fine
4 medium garlic cloves, minced or pressed through garlic press
1 teaspoon dried oregano
¼ teaspoon red pepper flakes
3 anchovy fillets, minced to paste
1 (28-ounce) can diced tomatoes with liquid
1 piece Parmesan cheese rind, about 5 inches by 2 inches
2 (15½-ounce) cans cannellini beans, drained and rinsed
3½ cups homemade or low-sodium chicken broth
2½ cups water
salt
8 ounces small pasta
¼ cup chopped fresh parsley leaves
ground black pepper
2 ounces (1 cup) grated Parmesan cheese

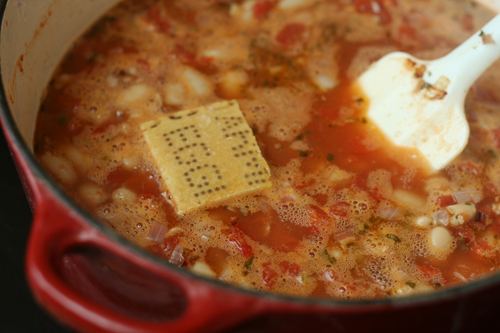
1. Heat the oil in a large Dutch oven over medium-high heat until shimmering but not smoking, about 2 minutes. Add the pancetta and cook, stirring occasionally, until it’s beginning to brown, 3 to 5 minutes. Add the onion and celery; cook, stirring occasionally, until the vegetables are softened, 5 to 7 minutes. Add the garlic, oregano, red pepper flakes and anchovies; cook, stirring constantly, until fragrant, about 1 minute. Add the tomatoes, scraping up any browned bits from bottom of the pan. Add the cheese rind and beans; bring to a boil, then reduce the heat to low and simmer to blend the flavors, 10 minutes.

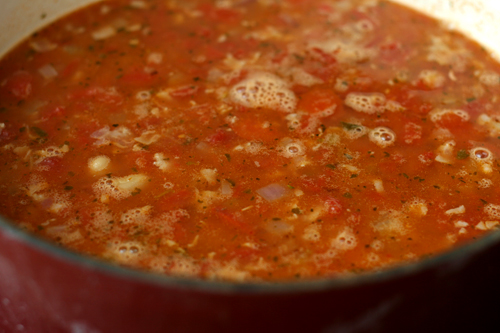
2. Add chicken the broth, water and 1 teaspoon salt; increase the heat to high and bring to a boil. Add the pasta and cook until tender, about 10 minutes (refer to package instructions to better estimate pasta cooking time).

3. Discard the cheese rind. Off the heat, stir in 3 tablespoons of the parsley; adjust the seasoning with salt and pepper. Ladle the soup into individual bowls; drizzle each serving with olive oil and sprinkle with a portion of the remaining parsley. Serve immediately, passing the grated parmesan separately.

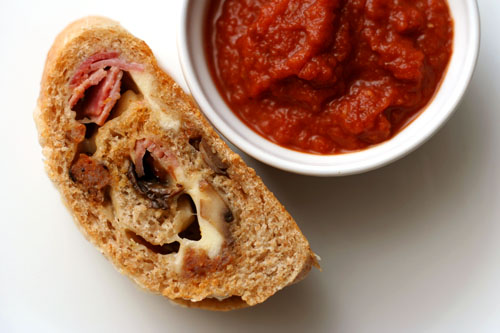
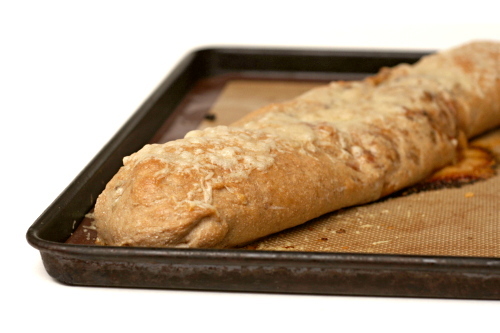
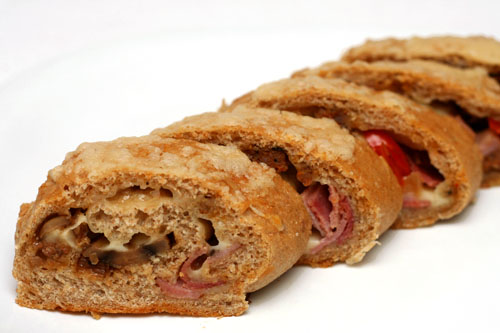
stromboli

If you roll your dough and toppings into a spiral instead of keeping them flat, it’s a whole new recipe and totally different from the normal Friday night pizza routine!

Friday evenings are pretty much my favorite part of the week. It’s one of the only times I just STOP. I don’t worry about chores, or exercise, or even hobbies. I just hang out in the kitchen with a beer, rolling out dough, shredding cheese, slicing toppings.

I’m not too interested in varying from this routine. I’m occasionally willing to get takeout sushi instead of make pizza, and, sometimes, I might really get wild and change the shape of the pizza. Usually that means calzones and this time it was stromboli, but let’s face it, it’s all basically the same thing.

You can certainly roll anything you want up in pizza dough, but sometimes I like to let other people do the thinking for me, so I follow a specific recipe. Emeril’s stromboli has three kinds of pork, green peppers (gross!), and jalapenos, so I was pretty sure I could get away with some paring down of ingredients. With only two kinds of meat and one type of pepper, plus three types of cheese, there were still plenty of flavors for me. Oh Friday. How I love your carbs, cheese, and freedom.

One year ago: Maple Oatmeal Scones
Two years ago: Twice-Baked Potatoes with Broccoli, Cheddar, and Scallions
Three years ago: Country Crust Bread

Printer Friendly Recipe
Stromboli (adapted from Emeril)

Serves 6

Based on the pictures, it appears I sautéed some sliced mushrooms with the peppers. Yum!

1 recipe pizza dough
1 tablespoon milk
⅛ teaspoon salt
¼ teaspoon sugar
8 ounces hot Italian sausage, removed from casings and crumbled
8 ounces ham, diced
1 large red onion, chopped fine
1 red pepper, diced small
4 cloves garlic, minced
8 ounces (2 cups) provolone, shredded
8 ounces (2 cups) mozzarella, shredded
2 ounce (1 cup) finely grated Parmesan

1. Preheat the oven to 375 degrees F. Line two large baking sheets with parchment paper or silicone mats. In a small bowl, mix the milk, salt, and sugar; set aside.

2. In a large skillet, cook the sausage over medium-high heat until it’s browned and the fat is rendered, about 5 minutes. Remove with a slotted spoon. Discard all but 1 tablespoon of fat from the pan. Add the ham, onions, and bell peppers; cook, stirring occasionally, until very soft and slightly browned, 5 to 8 minutes. Add the garlic and cook, stirring constantly, for 1 minute. Remove from the heat and cool.

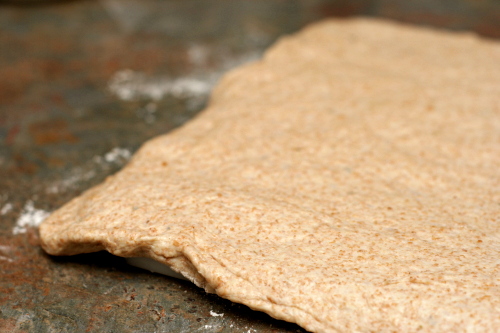
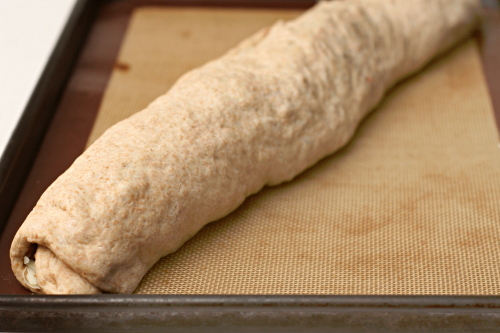
3. Divide the dough in half. On the prepared baking sheet, stretch out one half of the dough to a large rectangle, about 10 by 14 inches. (If it becomes too elastic, let it rest for a few minutes, lightly covered.) Spread half of the cooled sausage mixture across the dough, leaving a 1-inch border. Top with half of each of the mozzarella and provolone. Using a pastry brush, paint the border of a long edge with the milk mixture. Starting at the other long end, roll up the dough into a cylinder, pinching the edges to seal. Repeat with the remaining ingredients. Let the dough rise for 20 to 30 minutes.
4. Brush the top of each stromboli with the milk mixture. Bake, one at a time, until nearly completely golden brown and starting to crisp, about 20 minutes. Sprinkle the stromboli with parmesan cheese and return to the oven until the cheese is melted and the dough is golden brown, about 5 minutes.

5. Remove from the oven and let stand 10 minutes. Slice thickly and serve with your favorite sauce.

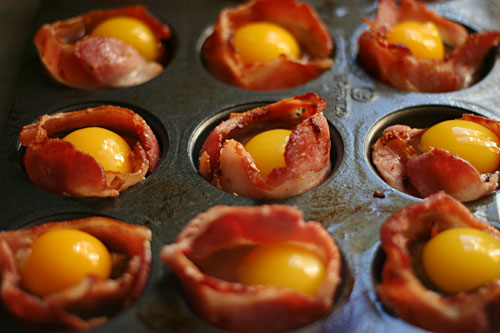
bacon egg toast cups

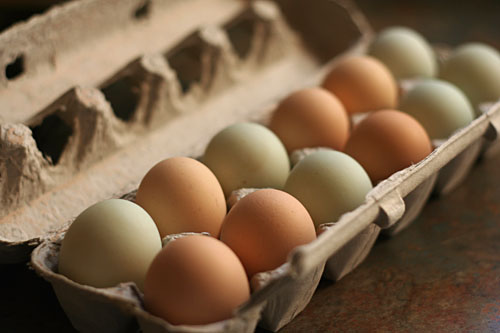
I came face to face with my pickiness last weekend. I’ve been buying eggs from a coworker of Dave’s, which is great because I can finally feel confident that the chickens that hatched my eggs weren’t grossly mistreated, for far cheaper than the supposedly cage-free eggs at the grocery store. When he had duck eggs to sell, I figured it would be a fun new thing to try. Plus, I knew I was making these bacon-egg-toast cups soon, and I mistakingly believed that duck eggs were smaller than chicken eggs, so they would fit perfectly into the muffin cups with all the other goodies.

Not only are duck eggs usually larger, not smaller, than chicken eggs, but they’re different in other ways. For one, the shells are thicker, so it takes a bit of hammering the egg on the counter to break through it. The whites are whiter. Have you ever noticed that the white of a chicken egg is actually kind of yellow? Not so a duck egg.

Also, the white is extremely stretchy; it really never breaks. That means that if you crack an egg into a small bowl and then move it to your muffin cup, bits of white will stick to the bowl and stretch across the counter, and basically your whole kitchen will be coated in egg white by the time you’re done.

But once you’re eating – who cares? Who cares what color the white was when you broke the egg? Who cares if it was extra super freakily stretchy? Once the eggs were cooked, I wouldn’t have known I was eating duck eggs if I hadn’t cracked them open myself. Because I did know, I noticed that the white was firmer. But who cares?

I tried not to, but I have two more duck eggs left, and yet I hard-boiled chicken eggs to bring to work this week. It’s so stupid, because there’s nothing worse about duck eggs compared to chicken eggs; they’re just different. If I was used to duck eggs and someone gave me chicken eggs, I’d think the white was too watery and yellow. The lesson here is one I think we all need reminded of occasionally: Pickiness is all in your head. Still, I’m not sure I’ll be buying duck eggs again anytime soon.

One year ago: Croissants, Pumpkin Biscotti, African Pineapple Peanut Stew, Apple Tart, Vegatarian LasagnaCarne Adovada
Two years ago: Bourbon Pumpkin Cheesecake, Pumpkin Ravioli, Mashed Potatoes, Stuffed Sandwich Rolls, Baked Eggs with Spinach and Mushrooms

Bacon-Egg-Toast Cups (adapted from The Noshery via Annie’s Eats)

I was making these for kids because I thought they’d have a good time with it, but instead they were all, “um, there’s egg on my toast; that’s where I put my jelly.” And then they ate nearly as much as the adults did.

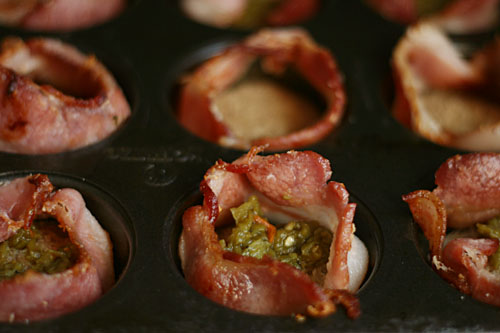
I skipped the cheese and added green chile. Because I live in New Mexico, and that is what we do.

I realized after the fact that I arranged my toast a little differently than the original recipe, by lining just the bottom of the muffin cup with toast instead of the sides as well. I liked my way, so I’ll provide that in the recipe.

Serves 6

6 slices of bread
12 slices of bacon (about 1 pound)
12 eggs
½ cup of shredded cheese (or other flavoring)
salt and pepper

1. Preheat oven to 400 degrees. Spray a 12-cup muffin pan with nonstick spray.

2. Heat a 12-inch skillet over medium-high heat. Arrange the bacon in the skillet in a single layer and cooked until its fat is mostly rendered but it’s still pliable, 4-5 minutes.

3. Using a cookie cutter, cut two 2-inch circles out of each slice of bread. Place a bread circle in the bottom of each muffin cup. Wrap a slice of bacon around the edge of each muffin cup; sprinkle cheese or other flavorings onto the bread in the space lined by the bacon. One by one, crack the eggs into a small bowl and transfer the yolk and some of the white on top of the cheese. (Unless you’re using small eggs, using all of the white will cause the eggs to overflow the muffin cups.) Season with salt and pepper.

4. Bake until the egg white is set, 8 – 10 minutes (longer if you like your yolks firm). Using a thin knife or offset spatula, remove the bacon-toast-egg cups from the pan. Serve warm.

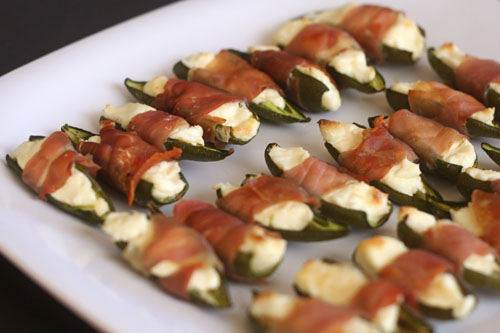
prosciutto-wrapped, neufchatel-stuffed jalapenos

I think it’s about time to pack up my garden for the year. The last month has felt like borrowed time. Homegrown tomatoes on Halloween? Well, yes; in fact, the last few months have been the most successful in my garden because the grasshoppers who I’d been sharing my tomatoes with all summer have flown the coop. But our night lows are starting to drop to near freezing, so I’ll be lucky to get some nice red tomatoes for my burgers tonight.

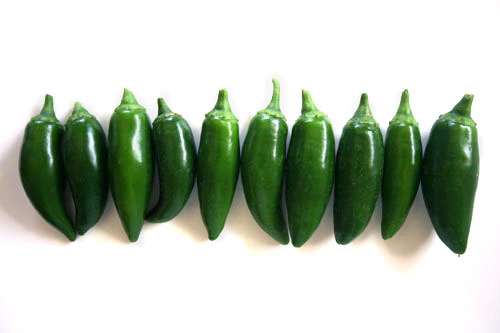
It’s no problem to use up tomatoes. If I found myself with more than I’d expected, I just made some sauce and froze it. But what easy solution is there for at least ten jalapenos per week? Jalapenos are rarely a primary flavor, and even a good batch of pico de gallo only uses a couple.

Bacon-wrapped cream cheese-stuffed jalapenos certainly use up the jalapeno bounty, but I can’t be eating a plate of cream cheese and bacon every week, even if there are vegetables hidden under all that fattening flavor. But is the fat necessary?

It turns out it isn’t. Well, some of it is, but by replacing the bacon with prosciutto and the cream cheese with (American, not French) Neufchâtel, these snacks lose a lot of fat but very little of the flavor. In fact, I preferred the prosciutto to the bacon; it’s easier to work with and bakes up crisper. I’m already looking forward to next year’s gardening season – and not just for the tomatoes this time!

One year ago: Pork Chops Loco Moco, Pumpkin Mushroom Soup, Cranberry Orange Scones, Buttermilk Scones, Pumpkin Scones
Two years ago: Chickpea and Butternut Squash Salad, Brown Sugar Apple Cheesecake, Gratin Dauphinois

Prosciutto-Wrapped, Neufchâtel-Stuffed Jalapenos

Makes 24 appetizers

If you keep gloves in the kitchen, use them when handling jalapenos.

12 jalapenos
4 ounces Neufchâtel
6 ounces prosciutto, sliced lengthwise into 24 strips

1. Adjust a rack to the middle position and heat the oven to 400 degrees. Place an oven-safe baking rack on a baking sheet.

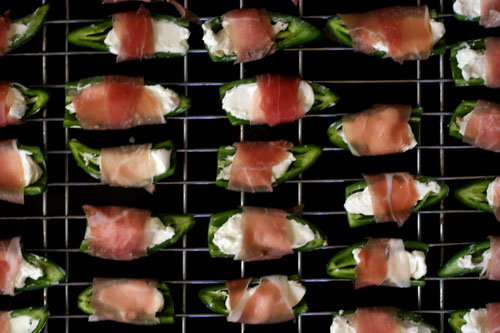
2. Cut the stems off the jalapenos; slice them in half lengthwise and use a spoon to scoop out the seeds. Divide the cheese evenly between the jalapenos, then wrap strips of prosciutto around the jalapenos. Arrange the stuffed jalapenos on the prepared baking pan on the rack.

3. Bake for 20 minutes, until the cheese is browned in places and the prosciutto is crisp. Cool slightly before serving.

tacos al pastor

I try not to be picky. I like to call myself ‘particular’ – about the quality of ingredients and the care put into the preparation of a dish; Dave calls it persnickety. But eliminating whole categories of food from my diet because of a random childhood prejudice seems like a perfect way to cheat myself out of great food; not to mention how annoying pickiness is to the people around you. I’ve known people who wouldn’t eat hot liquids, eggs, anything with vinegar, seafood, mushrooms, you name it. I will eat pretty much anything – even green peppers, if I have to.

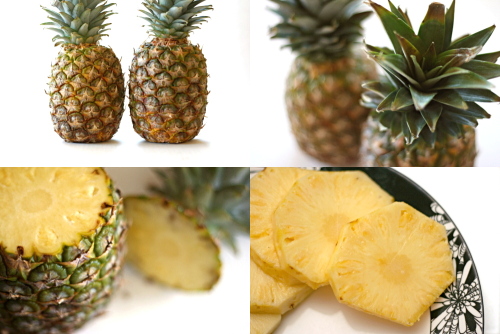
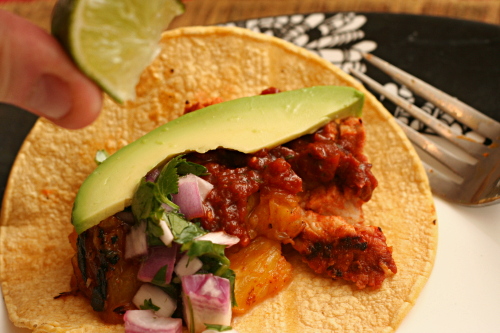
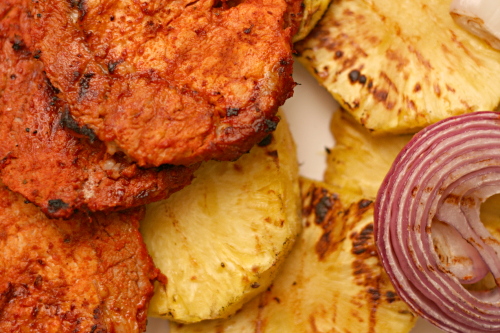
But there are some things I have trouble with (even besides green peppers), and fruit with meat is one of them. Those chicken salads with grapes in them don’t sound appetizing at all, and other than the occasional strawberry and spinach salad, fruit with lettuce doesn’t tempt me. But pineapple with pork is a combination I can hardly get enough of, especially when the pineapple is prepared to its maximum potential – grilled.

There is one thing to beware of when it comes to pineapple and meat though. Pineapple makes meat mushy. It has an enzyme in it that doesn’t just tenderize meat, it nearly dissolves it. The original recipe recommended marinating the pork for up to a day, but I, and the epicurious reviewers, knew better. I left the pineapple out of the marinade until we started heating up the grill. It was perfect, resulting in pork so tender it reminded me of dark chicken meat, but without even a hint of mush.

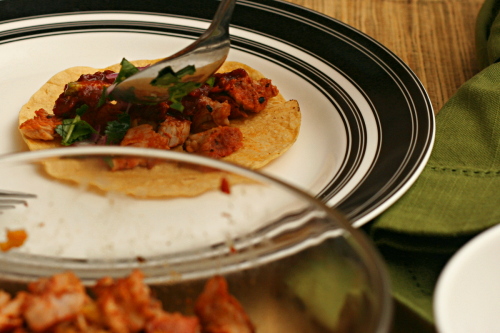
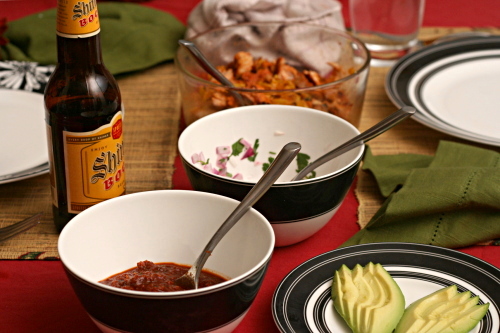
With a smorsgasbord of toppings, each bite of taco hit every flavor note: sweet pineapple-marinated pork, spicy salsa, tart onions, creamy avocado, all combined on corn tortillas, because everything is better on a tortilla – even meat and fruit mixtures.

One year ago: Crockpot Chicken Broth
Two years ago: Chicken with Forty Cloves of Garlic

Printer Friendly Recipe
Tacos al Pastor
(adapted slightly from Bon Apetit via epicurious)

I can never get corn tortillas to be soft and malleable enough to fold into tacos without deep-frying them. Heating them on the grill made them soft enough to fold, but they were too chewy. Maybe if I wrapped them in foil and heated them in the grill? Or brushed them with oil before heating them? Enlighten me.

1 pineapple, peeled, cut crosswise into ½-inch-thick rounds
1 large onion, halved
½ cup fresh orange juice
¼ cup distilled white vinegar
¼ cup guajillo chile powder
3 garlic cloves, halved
2 teaspoons coarse kosher salt
1 teaspoon dried oregano (preferably Mexican)
1 teaspoon ground cumin
1 large or 2 small chipotle chiles and 1 to 2 teaspoons adobo from canned chipotle chiles in adobo
2½-to 3-pounds boneless pork loin, cut into ½-inch slices

Garnishes:
½ red onion, finely chopped
2 tablespoons lime juice from 1-2 limes
½ cup minced cilantro
Smoky Two-Chile Salsa (recipe follows)
1 avocado, sliced, mashed (with salt and lime juice), or diced
corn tortillas
lime wedges

1. Coarsely chop 2 pineapple slices, removing core; thoroughly puree in a blender. Pour the pineapple juice into a storage container and chill until ready to use. Cover and chill the remaining pineapple.

2. Coarsely chop half the onion; place chopped onion in blender. Add the orange juice, vinegar, chile powder, garlic, salt, oregano, cumin, and chipotle chiles; puree marinade until smooth. Place the sliced pork in a large resealable plastic bag. Add the marinade and the seal the bag, releasing excess air. Chill at least 4 hours and up to 1 day. About half an hour before the grill is ready, add the reserved pineapple juice to the marinating meat.

3. Mix the onion and lime juice; set aside. Just before serving, stir in the cilantro.

4. Heat a grill to medium-high heat. Grill the pineapple slices until warm and slightly charred, 4 to 6 minutes per side. Grill the pork, with some marinade still clinging to it, until it’s slightly charred and cooked through, 2 to 4 minutes per side. Grill some onion until charred. Transfer the pineapple and pork to a work surface; chop pineapple into ½-inch cubes, discarding cores. Chop (or shred) the pork. Transfer the pork and pineapple to a platter or serving bowl; toss to combine. Grill the tortillas until warm and slightly charred, about 10 seconds per side.

5. Serve the pork and pineapple with the pickled onion mixture, Smoky Two-Chile Salsa, avocado, warm tortillas, and lime wedges.

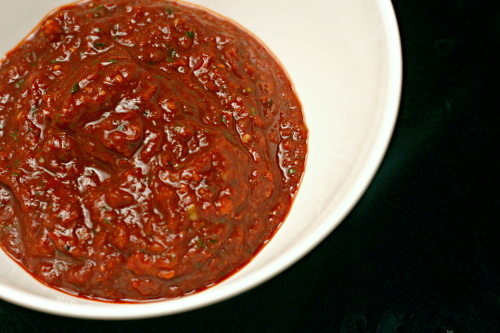
Smoky Two-Chile Salsa

8 large dried guajillo chiles or New Mexico chiles, stemmed, seeded, coarsely torn
2 cups hot water
½ medium onion, halved lengthwise through core end
3 garlic cloves, peeled
1 teaspoon adobo from canned chipotles in adobo
¼ cup chopped fresh cilantro
2 teaspoons fresh lime juice from 1 lime
coarse kosher salt

1. Place the torn chiles in a bowl. Add the hot water and soak for at least 2 hours or overnight. Drain the chiles, reserving the soaking liquid.

2. Heat a small nonstick skillet over medium heat. Add the onion and garlic to the dry skillet; cook until browned in spots, about 6 minutes for garlic and 10 minutes for onion. (I grilled the onion instead of browning it in a skillet, which I recommend as long as you have time to make the salsa right before serving.) Trim the core from the onion; place the onion and garlic in a blender. Add the drained chiles, 1 cup soaking liquid, 1 chipotle chile, 1 teaspoon adobo, cilantro, and lime juice; puree until smooth. Transfer to a bowl, seasoning to taste with coarse salt.

garlic-mustard glazed skewers

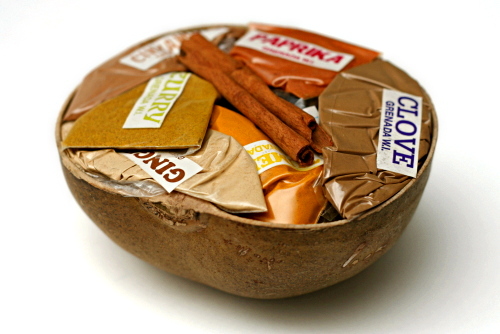
My parents went to Bolivia, Hungary, Hawaii, New Zealand, Romania, Costa Rica, China, Panama, and Peru, and all I got was these lousy spices. Okay, actually, they’re pretty nice spices, especially the saffron (and three mystery spices) my mom just brought back from the Istanbul spice market. Besides, when your parents go on 2-3 international trips per year, you don’t need a cheap T-shirt from each place. Spices, tea, and the occasional funky hat for Dave are perfect.

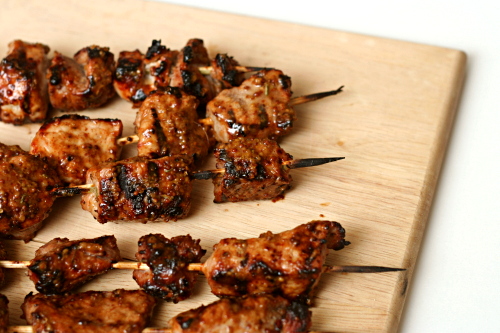
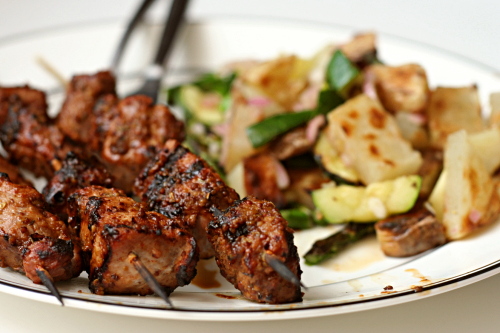
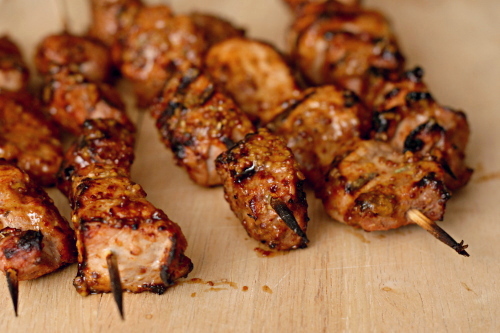
And it was a good thing I had a random set of spices from various foreign countries, because I was out of my normal paprika supply, and it would have been very very sad to miss out on this recipe. My gosh, this was good. Mustardy, garlicky, vinegary, herby – so many complimentary flavors.

Even better, I stumbled upon this weird grilled potato and vegetable salad to go with it that I was expecting to be just edible, and what do you know, it ended up being fantastic.  In all, another Saturday night dinner that knocked my socks off. That’s happened more and more since we got the grill, and I am not complaining one bit.

One year ago: Seafood Lasagna
Two years ago: Vanilla Ice Cream

Printer Friendly Recipe
Garlic-Mustard Glaze (adapted from Bobby Flay via Smitten Kitchen)

Makes about ¾ cup of glaze, or enough to cover and baste 2 pounds of meat

I used pork, but Deb used chicken (I think) and Bobby Flay uses beef tenderloin. Just be sure you choose a cut that is appropriate for fast cooking. Your cooking time will depend on the type of meat you use.

¼ cup whole grain mustard
2 tablespoons Dijon mustard
4 cloves garlic, crushed
2 tablespoons white wine vinegar
1 tablespoon low-sodium soy sauce
1 tablespoon honey
1 tablespoon finely chopped fresh rosemary leaves
2 teaspoons Spanish paprika
¼ teaspoon kosher salt
¼ teaspoon freshly ground black pepper
2 pounds meat, cubed

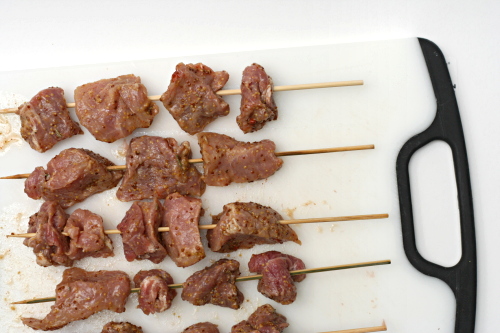
1. In a small bowl, whisk together all of the ingredients except the meat. Reserve ¼ cup of the glaze; add the meat to the remaining glaze, cover, and refrigerate for at least 30 minutes and up to 4 hours before using.

2. Prepare a medium-hot fire. Grill the meat, turning three times and brushing with the reserved glaze, for 4 to 8 minutes, until golden brown, slightly charred, and cooked to your desired level of doneness. Let the meat rest for 5 minutes before serving.

stuffed butterflied leg of lamb

I got some big news last week. I finally got something I’ve wanted for a long time, and life is going to change drastically. I’m a little worried about when I’ll find the time to do the things I like to do – the baking, blogging, and exercising due to the baking – but I’m sure it will be worth it.

I’m not pregnant.

I do, however, have a job; a real one, with 40 hours of work per week and benefits and a retirement plan and everything. See, I’ve kept this on the down-low because I was embarrassed by it, but since I finished graduate school several years ago, I’ve been unemployed or partially employed. But those days are over now.

This was cause for celebration around here, which means that Dave and I have been drinking generous amounts of our favorite champagne. It also means we had an excuse for a fancy dinner. I got to decide whether that meal would be eaten in or out, and it wasn’t a hard decision for me – we don’t exactly live in area known for its restaurants, and spending Saturday night at home, drinking wine, watching the NBA playoffs, and grilling with Dave is pretty much my perfect evening.

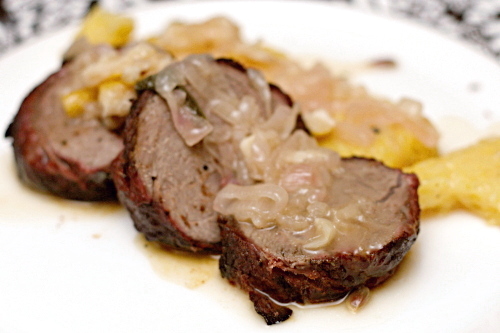
What to make? Lamb, of course. I was deciding between two recipes, and Dave told me to pick the easier one. Yes, the easier option included trimming, butterflying, pounding, rolling, and tying the roast. And then I got to hand it off to Dave to cook…while I worked on the sauce. And the sides.

But in the end, what a great meal. Served with great wine, shared with a great husband, celebrating great news.

Two years ago: Hash Browns with Sauteed Vegetables and Poached Eggs

Printer Friendly Recipe
Stuffed Butterflied Leg of Lamb with Caramelized Lemon Jus
(adapted slightly from Bon Apetit via epicurious; suggested by Cara)

Serves 4-6

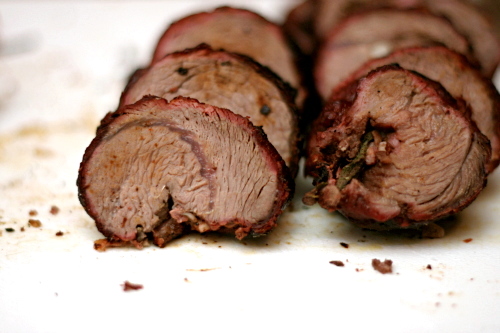
You can probably tell from the photos that my lamb isn’t cooked to rare. Oops. Next time.

4-to 4½-pound boneless leg of lamb, shank end removed
salt and pepper
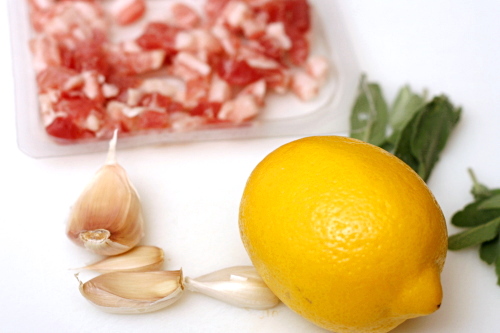
4 large garlic cloves; 3 chopped, 1 sliced
1 teaspoon finely grated lemon zest
20 fresh sage leaves (about), divided
4 ounces thinly sliced pancetta (Italian bacon)
3 tablespoons fresh lemon juice
3 tablespoons extra-virgin olive oil

1. Trim the silver skin and as much fat as possible from the lamb. Butterfly the lamb by making one ¾-to 1-inch-deep full-length cut in each thick portion of the lamb (do not cut through to work surface). Cover the lamb with a sheet of plastic wrap. Using a rolling pin or meat pounder, pound to an even 1- to 1½-inch thickness (lamb will be about 8×19 inches).

2. Remove the plastic wrap and season lamb evenly with salt and pepper, chopped garlic, and lemon zest. Top with 15 sage leaves, spaced evenly apart, then cover with the pancetta. Starting at a long side, fold the lamb in half. Tie the lamb tightly at 2-inch intervals into a long roll. Then, using a small knife, make slits in the lamb and insert a slice of garlic and a piece of sage leaf into each slit. Season the lamb with salt and pepper. (Lamb can be prepared 1 day ahead. Wrap tightly in plastic wrap and refrigerate.)

3. Whisk the lemon juice and oil in a small bowl; season with salt and pepper. Brush the lemon juice mixture all over the lamb and let stand at room temperature 1 hour.

4. Prepare a medium-hot grill. Place the prepared lamb on the grill and sear on all sides, 1 to 2 minutes per side. Continue to grill, brushing with the lemon juice mixture and rotating the lamb about every 5 minutes, until a thermometer inserted into the thickest part registers 130°F for rare.

5. Transfer the lamb to a cutting board, cover it loosely with foil, and let it rest for 10 minutes. Slice the lamb into ½-inch thick slices. Serve immediately with Caramelized Lemon Jus.

Caramelized Lemon Jus

1 large lemon, cut into ½-inch-thick slices
¼ cup extra-virgin olive oil
3 large shallots, thinly sliced (about 1 cup)
10 large fresh sage leaves
1 garlic clove, thinly sliced
3 tablespoons sugar
¾ cup dry white wine
¼ cup vodka
2 cups beef broth

1. Prepare a medium-hot grill. Grill the lemon slices until charred, about 4 minutes per side. Transfer to plate; chop coarsely.

2. Heat the olive oil in a heavy medium saucepan over medium-high heat. Add the shallots and sauté until translucent, about 5 minutes. Add the sage leaves, garlic, and grilled lemon pieces with any juices, then the sugar. Cook until the shallots start to color, about 5 minutes. Add the wine and vodka. Using a long wooden skewer, ignite the liquors and let them burn off, about 4 minutes. Add the beef broth and bring to a boil. Reduce the heat to medium; simmer until jus is reduced to 3 cups, about 15 minutes. Season with salt and pepper. (Can be made 1 day ahead. Cover and chill. Rewarm before serving.)

corned beef hash

One time at the zoo, I walked by the reindeer exhibit, but they weren’t out. Huh, I thought. Bummer. I would have liked to see the reindeer. But on the other side of the path, there was another animal to ooh and ahh over, and I moved on. When the reindeer came back out just a few minutes later, I overheard someone tell her friend that they could go see them now, and the lady said “Reindeer? I was excited about that 10 minutes ago!”

Reindeer lose their interestingness after 10 minutes apparently.

The moral of the story is this: No one cares about corned beef in May. You were excited about that 2 months ago. But, I am not the type of person to sit on an entry (or two, in this case) for 11 months until its season of popularity comes back, so if you’re not one to cook corned beef outside of March, you are missing out you can bookmark this post for next year.

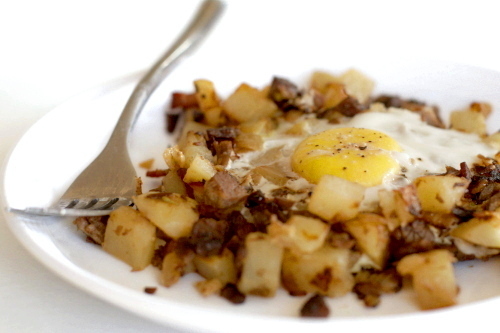
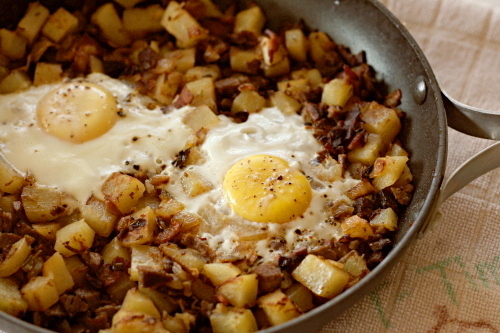
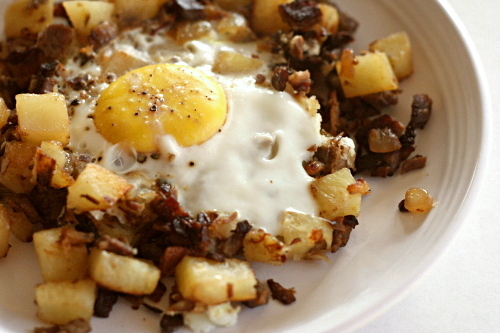
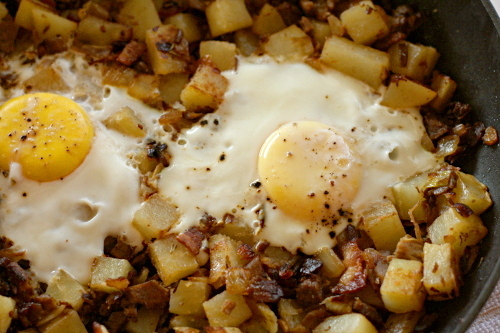
And don’t forget about it! That would be sad, because this is not just the best way to use corned beef leftovers, it is one of the best breakfasts, ever. It’s bacon, browned onions, crispy potatoes, salty seasoned beef, drippy yolks. What more could you ask for for breakfast? I’m excited about corned beef hash all year.

One year ago: Orange-Oatmeal-Currant Cookies (This is the recipe that’s had me complaining about not being able to find currants. But I recently discovered that the flavors are perfect with dried cranberries too.)
Two years ago: Double (or Triple) Chocolate Cookies

Printer Friendly Recipe
Corned Beef Hash (from Cooks Illustrated)

You absolutely do not need corned beef leftovers to make this. I often make it with thick-sliced deli corned beef, and it’s still delicious. That being said, last time I made it, I par-boiled the potatoes in the liquid leftover from cooking the corned beef, and was that ever good!
I like to give Cooks Illustrated recipes exact, because they’re so nicely detailed. However, this is one of those recipes that I’ve made so often that I often cut corners now – skipping the hot sauce, which I never have around; leaving the corned beef in large chunks; using Yukon Gold potatoes so I don’t have to peel them; pouring in a bit of whatever milk I have around instead of using cream. As long as you have the same basic ingredients and everything is crisped and browned, you can’t go wrong here.

2 pounds russet potatoes, peeled and cut into ½-inch dice
salt
2 bay leaves
4 ounces (4 slices) bacon, diced
1 medium onion, diced
2 medium garlic cloves, minced or pressed through a garlic press
½ teaspoon minced fresh thyme leaves
1 pound corned beef, minced (pieces should be ¼-inch or smaller)
½ cup heavy cream
¼ teaspoon hot pepper sauce
4 large eggs
ground black pepper

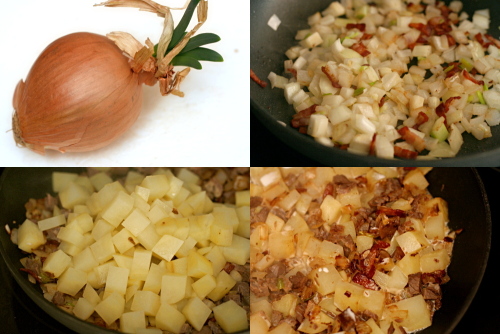
1. Bring the potatoes, 5 cups water, ½ teaspoon salt, and the bay leaves to a boil in a medium saucepan over medium-high heat. Once the water boils, cook the potatoes for 4 minutes, drain, and set aside.

2. Place the bacon in a 12-inch nonstick skillet over medium-high heat and cook until the fat is partially rendered, about 2 minutes. Add the onions and cook, stirring occasionally, until the onion has softened and browned around the edges, about 8 minutes. Add the garlic and thyme and cook until fragrant, about 30 seconds. Add the corned beef and stir until thoroughly combined with the onion mixture. Mix in the potatoes and lightly pack the mixture into the pan with a spatula. Reduce the heat to medium and pour the heavy cream and hot pepper sauce evenly over the hash. Cook, undisturbed, for 4 minutes, then, with the spatula, invert the hash, a portion at a time, and fold the browned bits back into the hash. Lightly pack the hash into the pan. Repeat the process every minute or two until the potatoes are thoroughly cooked, about 8 minutes longer.

3. Make 4 indentations (each measuring about 2 inches across) equally spaced on the surface of the hash. Crack 1 egg into each indentation and season the egg with salt and pepper to taste. Reduce the heat to medium-low, cover the pan, and cook until the eggs are just set, about 6 minutes. Cut the hash into 4 wedges, making sure each has an egg, and serve immediately.