black bean burgers

black bean patties 4

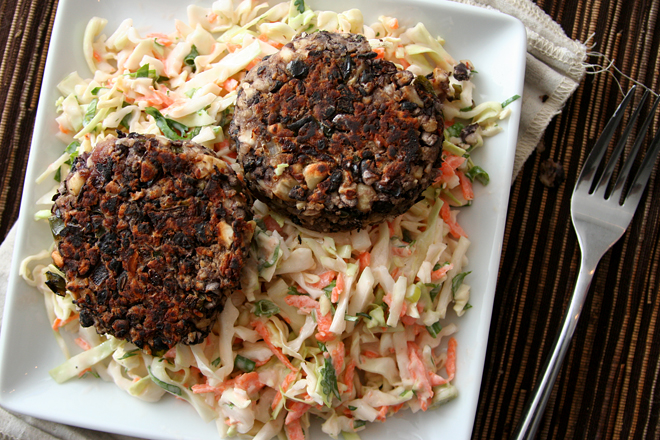
I actually don’t have any need for a black bean burger. Because Dave and I eat either vegetarian or fish during the week, I’m always ready for some meat by the weekend. And I don’t eat much bread on weekdays either (other than my daily bagel at work – best part of the workday!), so I wouldn’t pair vegetarian burgers with buns. But on top of slaw, now that works.

black bean patties 1

This recipe doesn’t have (much of) my other issue with most vegetarian burgers, which is that they’re usually bound with large amounts of breadcrumbs or other grains, so you’re, in essence, putting carbs on a bun. This mix does have some bread crumbs, but it’s also bulked up with extra protein from cheese and nuts. They’re not there for your health though – they provide a nice variation in texture, so the burgers aren’t uniform, and they’re certainly not mushy, thanks to some time the beans spend in the oven getting dehydrated.

black bean patties 3

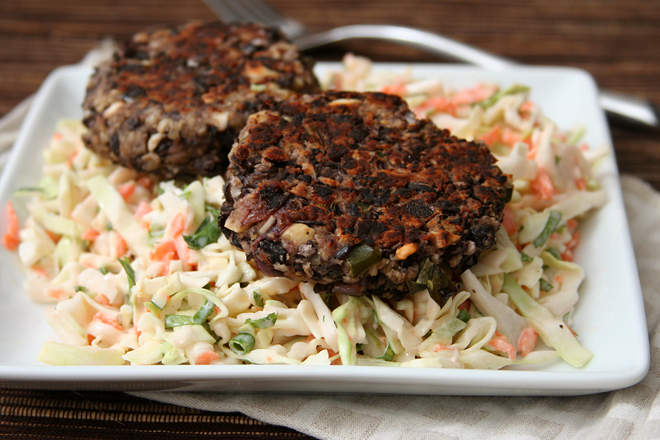
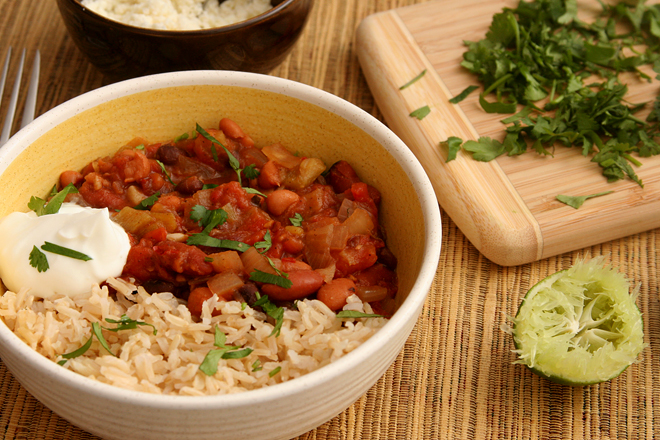
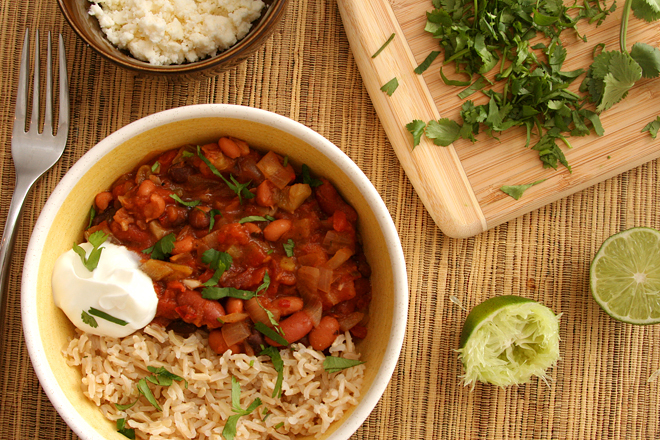
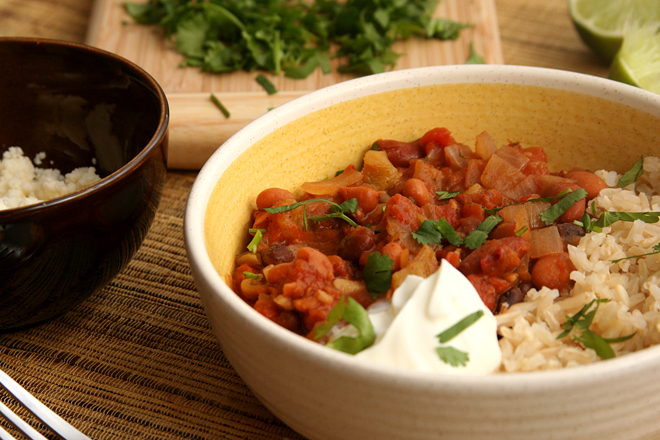
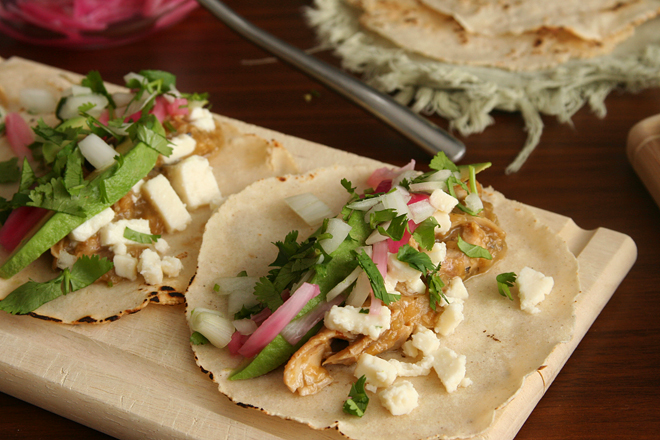
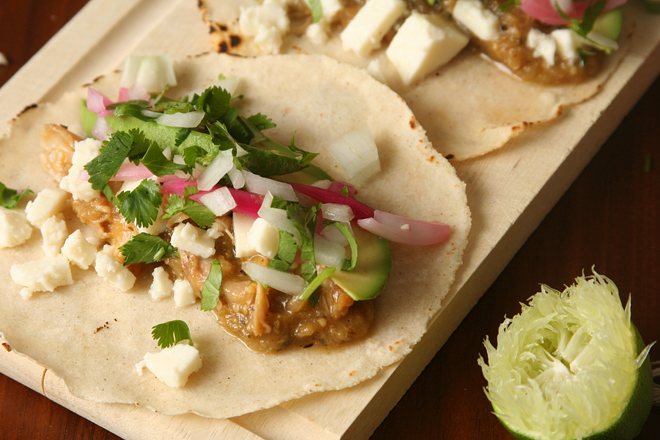
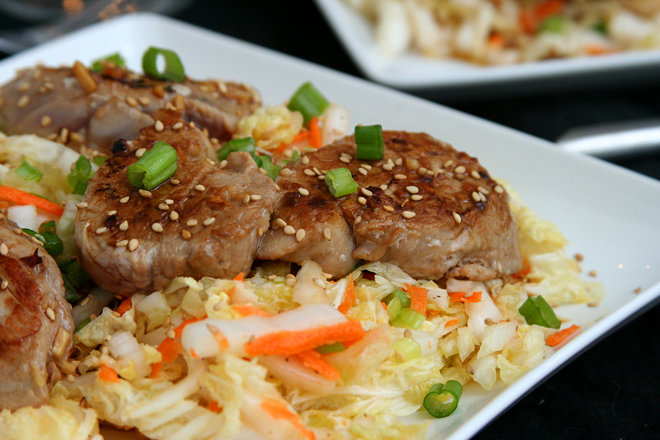
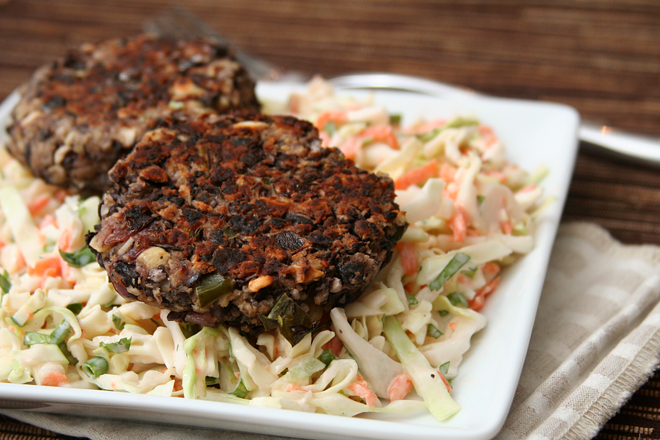
The mix itself was so good that I couldn’t stop eating it. Formed into patties and browned, it was that much better. What isn’t better with crisp, caramelized sides? I’m sure they’re great on a bun with your favorite burger toppings, but I loved them on a simple lime-cilantro slaw. I have finally found a place for black bean burgers in my life, and I have found the black bean burger to take that place.

black bean patties 6

Printer Friendly Recipe
Black Bean Burgers
(rewritten but hardly adapted from The Food Lab)

Makes 8 to 12 burgers (the patties in the pictures are each one-tenth of the recipe)

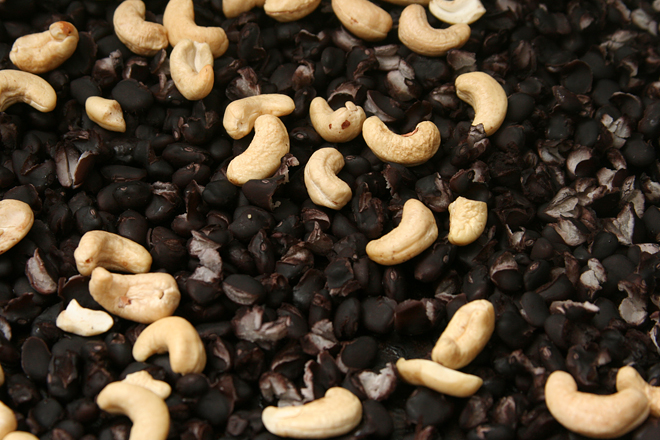
If your cashews aren’t toasted already, put them in the oven before the beans. Don’t do what I did and combine the two on one baking sheet; they’re treated separately in the food processor.

The recipe makes a lot. I formed the mixture into patties and froze most of them. They defrost and cook up perfectly.

According to the original recipe, you can grill these as well as pan-fry them, but I didn’t try it. You’d want to brush the sides with oil before grilling.

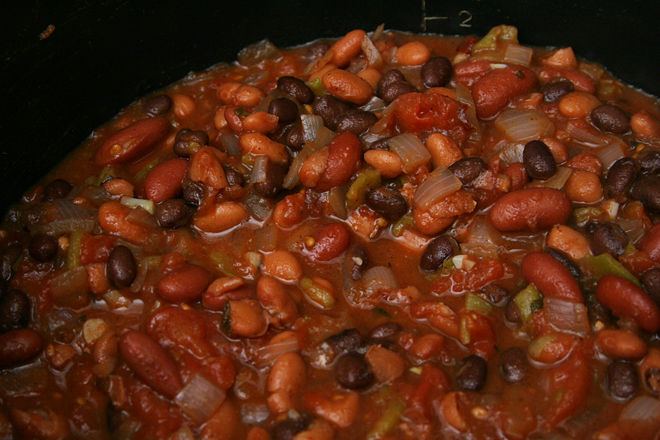
2 (15-ounce) cans black beans, rinsed and drained
3 tablespoons vegetable oil, divided
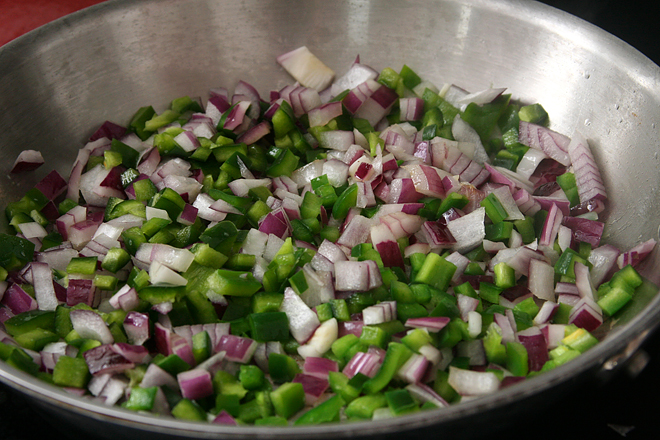
1 medium onion, finely chopped
1 large poblano pepper, finely chopped
3 medium cloves garlic, minced
1 chipotle chile in adobo sauce, finely chopped, plus 1 teaspoon sauce
¾ cup toasted cashews
½ cup finely crumbled feta or cotija cheese
¾ cup panko bread crumbs
2 tablespoons mayonnaise
1 large egg
Kosher salt and freshly ground black pepper

1. Heat the oven to 350 degrees. Spread the black beans evenly on a rimmed baking sheet; bake until the edges are splitting, about 20 minutes.

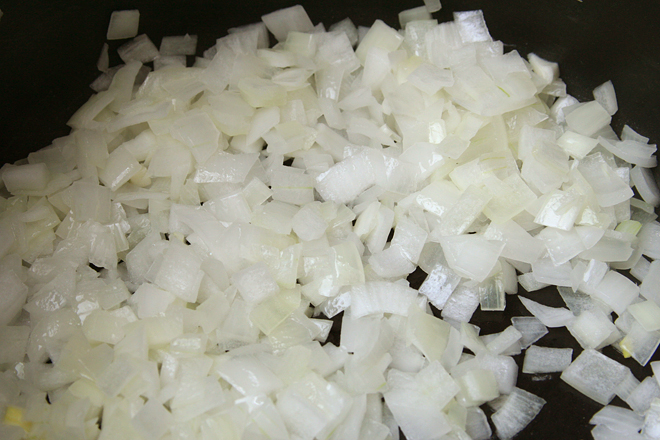
2. Meanwhile, heat 1 tablespoon oil in a large saucepan over medium heat. Add the onion, poblano, and a pinch of salt, and cook, stirring occasionally, until the onion is just beginning to brown at the edges, about 8 minutes. Add the garlic; cook, stirring constantly, until fragrant, about 1 minute. Remove from the heat and stir in the chipotle chile and sauce. Transfer the mixture to a large mixing bowl.

3. In a food process, pulse the cashews until the largest pieces are about ¼-inch. Transfer to the bowl with the vegetables. Transfer the dried black beans and cheese to the food processor and pulse until the largest pieces are about ¼-inch. Transfer to the bowl with the cashews. Add the bread crumbs, mayonnaise, egg, 1 teaspoon salt, and ½ teaspoon pepper to the mixing bowl. Stir until evenly combined.

4. Form the mixture into patties ¾-inch thick. You can make them any size you want; I made about ten patties from this recipe, and they were each about 4 inches in diameter.

5. In a large nonstick skillet, heat 1 tablespoon oil over medium heat. Add half of the patties and cook, without moving, until crisp and browned on the bottom, about 5 minutes. Flip the patties and continue cooking until the second side is browned, another 5 minutes. Repeat with the remaining patties.
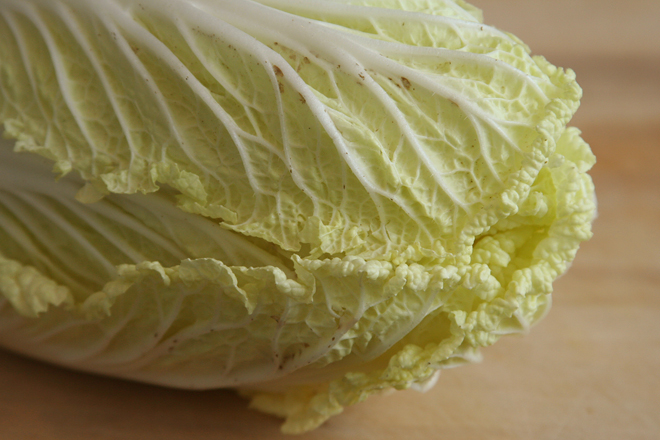
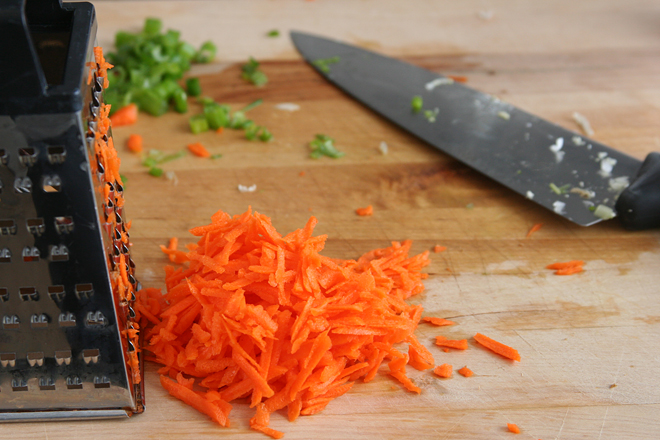
Lime-Cilantro Slaw

½ cabbage, sliced thinly
¼ cup lime juice
½ cup Greek yogurt
4 green onions (or half of a small red onion), minced
¼ teaspoon salt
1 large or 2 small carrots, shredded
2 tablespoons finely chopped cilantro

Combine all ingredients.

black bean patties 5

braised artichokes with creamy dipping sauce

braised artichokes 8

My sister’s kids aren’t particularly picky, but sometimes I push their limits without meaning to. Like the time I thought they’d get a kick out of eggs cooked in bacon toast cups, but instead they were like, Hey, now where does the jelly go? And at least that wasn’t a vegetable.

braised artichokes 2

I don’t even remember why I thought artichokes would be a good idea in the first place, but then when I started thinking about it, I got worried. They tend to turn a military shade of green once they’re cooked. I tried to get the kids excited about saying “okey dokey artichokey”, but I was pulling at strings and knew it.

braised artichokes 4

And then, oddly, they loved the artichokes. I think it was the number one rule of feeding children that worked in my favor – opportunities to dip. Plus, maybe, just maybe, I was right, and the fun of pulling off leaves and scraping the “meat” off with your teeth was more important than the brownish green shade of the vegetables. It certainly is for me, as this is one of my absolute favorite foods.

braised artichokes 7

Printer Friendly Recipe
Braised Artichokes with Creamy Dipping Sauce

Serves 3 to 6 as a first course, depending on how big your artichokes are and how big your appetite is

Trimming artichokes isn’t hard, but you might want to watch a youtube video or two if you’re not familiar with the process.

99% of artichoke recipes call for transferring the trimmed ‘chokes to a bowl of water with a lemon squeezed into it to keep them from browning. Not only does it not work, but they look and taste the same after cooking, so I’ve skipped this step. (But a recent issue of Cook’s Illustrated tested it and found it the lemon water worthwhile.)

If your artichokes are really big, you might need to use a 12-inch sauté pan instead of a Dutch oven to fit them in a single layer.

If you’re mayonnaise-adverse, crème fraiche would be a great substitute. Greek yogurt or sour cream would work if you stir it in off the heat so the dairy doesn’t curdle.

3 medium artichokes
1 tablespoon olive oil
3 cloves garlic, minced
¾ cup water
½ cup white wine
¼ teaspoon black pepper
½ teaspoon salt
2 tablespoons mayonnaise
1 tablespoon parsley leaves, minced

1. Working with one artichoke at a time, cut off the top 2 inches of the artichoke. Working around the artichoke, use scissors to cut off the sharp tips of the leaves. Trim the base of the stem, then trim off the outside millimeter or so of the stem. Cut the artichoke in half from top to bottom and use a paring knife to cut out the sharp purple leaves and fuzzy choke from the center. Rinse the artichoke under running water to remove any remaining fuzz.

2. Heat the olive oil in a 5- or 6-quart Dutch oven over medium heat. Add the garlic and cook, stirring constantly, until fragrant, about 30 seconds. Arrange the artichokes cut-side down in the pot, overlapping the stems in the middle. Add the water, wine, pepper, and salt. Cover the pot, reduce the heat to medium-low, and braise artichokes until tender when pierced with a knife, about 30 minutes for small artichokes and 40 minutes for very large artichokes. (If you’re not ready to serve the artichokes right away, remove the pot from the heat and leave the cover on; the ‘chokes will stay hot for up to 30 minutes.)

3. Transfer artichoke halves to a serving platter or plates. There should about ⅓ cup liquid remaining in the pot; if there’s less, add water until there’s a total of ⅓ cup liquid; if there’s more, simmer the liquid to reduce it slightly. Add the mayonnaise and parsley to the liquid; whisk to combine and pour into individual dipping containers.

braised artichokes 10

spicy mexican beans and rice

mexican rice and beans 6

It’s been a long road since I shared something vaguely similar to this recipe, well over six years ago. At the time, I said that I had a goal to make more crockpot recipes. Since then, I have made exactly three crockpot recipes worth sharing, and one of those I’ve never made again. In general, I’m more into low-and-slow oven cooking than crockpotting. Heck, I recently even made “crockpot” pulled “pork” (it was venison; still delicious) in the oven.

mexican rice and beans 1

The long road of not-crockpotting has led me to adapt my old favorite crockpot recipe for the stove. The way the original recipe is written, with bone-in chicken thighs, the crockpot is a good choice. However, I always make this as an easy, healthy, vegetarian weeknight meal, leaving the chicken out. Why spend 10 hours, the whole day when I’m away for work, slow-cooking canned beans with some seasonings?

mexican rice and beans 3

So instead of adapting stovetop or oven recipes for the crockpot like most people do, I’ve adapted a crockpot recipe for the stove. I replaced the chicken soup mix with aromatics and spices, the chicken with a greater variety of beans, and the fresh tomatoes with canned tomatoes (in season year round!). It really isn’t any harder than the crockpot recipe was, and it tastes just as good.  With this new crockpot-less recipe, it might be time to retire my crockpot entirely.  Surely I can think of another fun new kitchen tool that I don’t really need to take up that cabinet space, right?

mexican rice and beans 5

Printer Friendly Recipe
Spicy Mexican Beans and Rice

8 servings

2 tablespoons vegetable or olive oil
1 large or 2 small to medium onions, diced
salt
4 cloves garlic, minced
2 teaspoons chili powder
1 teaspoon cumin
½ teaspoon oregano
½ cup green chile, roasted, peeled, and diced
2 chipotle chiles, minced
2 (15-ounce) cans black beans, drained and rinsed
1 (15-ounce) can kidney beans, drained and rinsed
1 (15-ounce) can pinto beans, drained and rinsed
1 (14-ounce) diced tomatoes
1 cup chicken broth
juice from 1 lime
6 cups cooked rice from 2 cups uncooked rice
cilantro, minced
optional toppings: queso fresco or cheddar cheese, diced avocado, Greek yogurt or sour cream

Heat the oil in a large saucepan over medium heat. Add the onion and a pinch of salt and cook, stirring occasionally, until just beginning to brown at the edges, about 8 minutes. Add the garlic, chili powder, cumin, and oregano; cook, stirring constantly, until fragrant, about 30 seconds. Add the green chile, chipotle chiles, beans, tomatoes, and broth; cover, bring to a simmer, then reduce the heat to low and lightly simmer until the flavors are blended, at least 20 minutes or up to an hour if you aren’t in a hurry. If the mixture is too liquidy, remove the cover, increase the heat to medium, and simmer until the desired thickness is reached. Taste and add salt if necessary. Stir in the lime juice. Serve over rice, topped with cilantro and other toppings as desired.

mexican rice and beans 8

green chile chicken tacos

chicken tacos 3

Okay, so all my taco recipes are almost the same – I want avocado, and salty cheese, and fresh lime juice, cilantro, maybe some pickled onions, all mixed up in a fresh corn tortilla. Even with just those fixings and no meat, I’d probably be perfectly happy. But, I’ve been spoiled by barbacoa. Tacos are held to a higher standard now.

chicken tacos 1

My first couple attempts at chicken tacos weren’t up to par. I thought grilling sounded promising, but afterward, the chicken just tasted like chicken, with nothing more interesting to contribute. Plus it’s so easy for chicken to dry out on the grill.

chicken tacos 2

This recipe solves any problem of dry, bland chicken by braising chicken thighs directly in a sauce made from blistered tomatillos, onions, and green chiles. The chicken turns out tender and juicy, already tasting like it’s meant for tacos, and then the game is upped even more when the braising liquid is reduced to a sauce. I feel like I should say something about how this filling is so good that I don’t need all those tasty fixings, but no filling is good enough to pass up a slice of avocado in a corn tortilla.  Still, this is the next best thing to barbacoa.

chicken tacos 4

Printer Friendly Recipe
Green Chile Chicken Tacos (almost directly from Kenji Alt-Lopez at Serious Eats)

Serves 4 to 6

2 green chiles, preferably Hatch or Anaheim
2 medium tomatillos, husks removed, split in half
1 small yellow onion, peeled and split in half
3 cloves garlic, unpeeled
2 tablespoons vegetable oil, divided
1 cup fresh cilantro leaves, roughly chopped, divided
Kosher salt and freshly ground black pepper
4 limes
2 pounds chicken thighs (bone-in and skin-on)
1 small white onion, minced
16 to 24 warm corn tortillas
1 batch pickled red onions
½ cup grated queso cotija or jack cheese
1 avocado, sliced

1. Preheat the broiler to high and adjust the broiler rack to 5 to 6 inches below the heating element. Toss the peppers, tomatillos, yellow onion, and garlic in a medium bowl with 1 tablespoon of the olive oil. Place on a foil-lined rimmed baking sheet and broil until the vegetables are completely tender and charred on all sides, turning occasionally, about 20 minutes total. When cool enough to handle, peel the peppers and remove the stems and seeds. Transfer the vegetables to a food processor or blender with half of the cilantro and ½ teaspoon of salt; process on high speed until smooth. Add 2 tablespoons of lime juice from about 2 of the limes, season to taste with salt, and set aside.

2. While the vegetables broil, heat the remaining oil in a Dutch oven over high heat until shimmering. Add the chicken pieces skin side-down and cook, without moving, until well browned, about 6 minutes. Flip and brown the second side, about 3 minutes longer. Transfer to a plate. Pour off the excess fat and deglaze the Dutch oven with 1 cup of water, scraping up the browned bits from the bottom of the pot.

3. Transfer the vegetable puree to the Dutch oven and stir with the deglazing water to combine. Nestle the chicken pieces into the sauce. Bring to a boil, reduce to a bare simmer, cover, and cook until the chicken is completely tender, about 30 minutes. Remove the chicken from sauce and place on a plate to cool.

4. When the chicken is cool enough to handle, discard the skin and bones and shred meat into bite-sized pieces. Return the meat to the sauce and bring to a simmer. Cook until thick and saucy, then season to taste with salt and pepper if desired.

5. Combine the white onion and remaining cilantro in a bowl. Serve chicken with warm tortillas, onion and cilantro mixture, pickled onions, cheese, and avocado.

chicken tacos 5

bacon ranch salad with salmon

salmon ranch salad 3

We had this salad the first time with just greens, salmon, avocado, cucumber, and ranch, and I loved it. But I asked Dave, ‘you know what would make this salad even better?’ ‘Bacon’, he said.

salmon ranch salad 2

Yup. Bacon is a classic in salads, with ranch dressing, with avocados, with tomatoes – with just about every ingredient in this salad. I was so eager to try this salad again, this time with that one extra ingredient, that I decided to make it for lunch on a Sunday afternoon, right before I had to leave for a trip for work.

salmon ranch salad 1

After packing and practicing my presentation for the conference, I had some regrets about planning a real meal before I needed to leave. It was absolutely worth it though. The salad was just as good with the bacon as I was hoping, by which I mean it was even better than the original – not an easy feat.

salmon ranch salad 6

Printer Friendly Recipe
Bacon Ranch Salad with Pan-Seared Salmon (inspired by Handle the Heat via The Barbee Housewife)

Serves 4

Okay, so the salad in the pictures doesn’t have bacon; it’s the original version. I was lucky to make a decent meal before heading out of town, much less take pictures of it!

Dressing:
⅔ cup plain yogurt
2 tablespoons mayonnaise
½ teaspoon salt
1 tablespoon lemon juice
½ teaspoon mustard
¼ cup chives, minced

2 romaine hearts, cored and diced
2-4 slices thick-cut bacon, cooked and chopped
1 pint grape tomatoes, halved
1 cucumber, quartered lengthwise and sliced
1-2 avocados, diced
1 tablespoon vegetable oil
4 (5-ounce) fillets salmon, seasoned

1. For the dressing: Mix everything.

2. Heat a not-nonstick skillet over medium-high heat. Add the oil, spreading it evenly with a spatula, then the salmon, skin-side down. Cook, without moving, for 4 minutes. Flip the fillets and continue to cook for 3 more minutes. Transfer the salmon to a clean plate and let rest for 1 minute.

3. Meanwhile, in a large bowl, mix the romaine, bacon, tomatoes, cucumber, avocados, and dressing. Top with the salmon and serve immediately.

salmon ranch salad 7

shrimp tortilla soup

shrimp tortilla soup 5

Hominy. It just isn’t one of my favorites. It’s no green pepper – blech – but I struggle with the texture. I don’t want soggy popcorn in my soup. I’ve never cooked with it myself, and I almost left it out of this soup – until I saw that it was pureed. That seemed safe enough.

shrimp tortilla soup 1

When I opened the can to make dinner, I noticed that hominy smells like one of my favorite foods – fresh corn tortillas. It’s the same nixtamalization process that it used for masa harina, and I love that intensely corny aroma.

shrimp tortilla soup 2

It was great in this soup; pureeing the hominy binds the broth together and makes it thick but not starchy or gloppy. And now that I know how good hominy tastes, I might try it whole. I could learn to like hominy after all…unlike green peppers, which are a lost cause.

shrimp tortilla soup 3

Printer Friendly Recipe
Shrimp Tortilla Soup (adapted from America’s Test Kitchen’s Simple Weeknight Favorites via Pink Parsley)

4 main course servings

4 (6-inch) corn tortillas
1 tablespoon vegetable oil, plus more for spraying the tortillas
salt
1 large onion, diced
4 garlic cloves, minced
1 teaspoon ground cumin
1 teaspoon chili powder
1 chipotle chile in adobo sauce
4 cups low-sodium chicken broth
2 (15-ounce) cans hominy, drained and rinsed
1 (14.5-ounce) can diced tomatoes (preferably fire-roasted)
2 pounds shrimp, peeled, deveined, and tails removed, halved crosswise
¼ cup chopped fresh cilantro
2 tablespoons fresh lime juice

1. Heat the oven to 425 degrees. Spray the tortilla strips with oil (or nonstick spray) and season with salt. Halve and cut crosswise into ¼-inch strips. Arrange in a single layer on a baking sheet and cook until deep-golden brown and crispy, 10 to 12 minutes, tossing halfway through.

2. Meanwhile, heat the remaining 1 tablespoon of oil in a large pot or Dutch oven over medium-high heat. Add the onion and cook until softened, about 4 minutes. Add the garlic, cumin, chili powder, and chipotle chile; cook, stirring constantly, until fragrant, about 1 minute. Add the broth, hominy, and tomatoes. Increase the heat to medium-high and bring to a simmer, then reduce the heat to medium-low; cover and simmer for 15 minutes.

3. Puree the soup, either with an immersion blender or by transferring it in batches to a standup blender. Add the shrimp and cook, stirring occasionally, until they are just cooked through and opaque, about 3 minutes. Remove from heat and stir in the cilantro and lime juice. Serve immediately, topping each portion with tortilla strips.

shrimp tortilla soup 4

brussels sprouts and kale salad with pecorino and almonds

brussels sprouts kale salad 11

I never would have served my dad kale six months ago. For his whole life, he’s been a classic meat and potatoes guy, heavy on the meat. He’d put vegetables on his plate every night, and he’d always eat them – all two forkfuls that he’d served himself.

brussels sprouts kale salad 2

He made a sudden switch last fall in an attempt to lower his cholesterol and blood pressure. (It worked, by the way.)  However, he didn’t just start eating more vegetables and less meat. He didn’t become a pescatarian, or even a vegetarian. No, he went all the way from meat and potatoes to vegan – vegan with no fat, not even from avocados.

brussels sprouts kale salad 8

He’s loosened up the rules quite a bit since then, although I get the idea that rice and beans still play a big role in his diet. So when my parents visited, I took a chance and served my new favorite salad, almost a slaw of thinly sliced Brussels sprouts and Tuscan kale. It’s bright from lemon juice, but the pecorino provides a bit of richness. I love the crunch of the almonds. It’s a strange world, although not a bad one, where I am comfortable feeding my dad kale but not the Italian sausage dish that was the main course of this meal.

brussels sprouts kale salad 4

Printer Friendly Recipe
Brussels Sprouts Kale Salad with Pecorino (adapted from Bon Appétit via epicurious)

6 to 8 servings

Slicing the Brussels Sprouts isn’t as tedious as it sounds; it’ll probably take you ten minutes. However, the slicing blade on a food processor should do the trick too.

1 teaspoon plus ¼ cup extra-virgin olive oil, divided
½ cup slivered almonds, coarsely chopped
¼ cup fresh lemon juice
2 tablespoons Dijon mustard
1 small shallot, minced
1 small garlic clove, finely grated
¼ teaspoon kosher salt plus more for seasoning
Freshly ground black pepper
16 ounces Brussels sprouts, trimmed, halved and sliced thin
2 bunches Tuscan kale (about 8 ounces total), center stem discarded, leaves thinly sliced
1 cup (2 ounces) finely grated Pecorino

1. In a small skillet over medium heat, heat 1 teaspoon of the olive oil. Add the almonds and toast, stirring constantly, until browned and fragrant, 2-4 minutes. Transfer the almonds to a plate; set aside.

2. In a small bowl, mix the lemon juice, mustard, shallots, garlic, salt, and pepper. Whisk in the remaining olive oil.

3. Combine the Brussels sprouts, kale, dressing, almonds, and pecorino. Serve immediately or cover and chill for up to 8 hours.

brussels sprouts kale salad 9

roasted cauliflower soup with feta

cauliflower feta soup 5

While spinach with feta hasn’t quite reached the level of “Oh my god, if I eat this one more time, I’ll go crazy”, it’s certainly a far cry from the “wow, I can’t believe how delicious something as simple as the combination of spinach and feta is.” (Seriously, if you haven’t tried it, check it out – feta is creamy and salty and briny, so it covers all of the bases that a good salad dressing does.) After I eat a banana with peanut butter about halfway through my workday afternoons, when the only snacks I have left are spinach with feta and vegetables with hummus, I think to myself, “well, that’s it, the rest of the afternoon’s snacks are just to be endured and not enjoyed.”

cauliflower feta soup 1

I don’t always, or even often, for that matter, want to spend part of my weekend making snacks for the week, but it’s occasionally worth it for some variety. This soup covers the same basic nutritional bases as spinach with feta would – vegetables and dairy protein. Surely raw spinach has more fiber and nutrients than roasted and boiled cauliflower, but let’s not overthink things.

cauliflower feta soup 2

The important thing is that I actually look forward to eating this every day, instead of wavering between disinterest and dread. And not just because it isn’t the same thing I’ve eaten everyday for the last three years – it’s a great soup. The pureed cauliflower makes it seem rich and creamy, while the feta and squeeze of lemon juice brighten up the flavors. Having something to look forward to when you’re six hours into a nine-hour workday is worth a bit of extra cooking on the weekend.

cauliflower feta soup 4

Printer Friendly Recipe
Roasted Cauliflower Soup with Feta (adapted from Two Peas and Their Pod)

1 head of cauliflower, cut into 1 to 2-inch florets
2 tablespoons olive oil, divided
Salt
2 stalks celery, diced
1 onion, diced
3½ cups vegetable or chicken broth
2 sprigs thyme
2 ounces feta
1 tablespoon lemon juice
2 tablespoons parsley, minced

1. Place a rimmed baking sheet in the oven and heat the oven to 400 degrees. When the oven is hot, remove the baking sheet, add one tablespoon of olive oil plus a generous sprinkling of salt, then the cauliflower. Spray the top of the cauliflower with cooking spray. Roast, stirring twice, for 20-25 minutes, until a couple sides of each floret are deeply browned.

2. In a 5-quart pot, heat the remaining 1 tablespoon oil over medium heat. Add the celery, onion, and a pinch of salt; cook, stirring occasionally, until softened and the onion is translucent, 6-8 minutes. Add the roasted cauliflower, broth, and thyme. Bring to a simmer over medium-high heat, then reduce the heat to medium-low and simmer for 20 minutes. Puree, either with an immersion blender or in batches with a stand-up blender.

3. Stir the feta, lemon juice, and parsley into the soup. Taste for seasoning, adjusting as necessary, and serve immediately. (Can also be made several days in advance.)

cauliflower feta soup 3

korean pork medallions with asian slaw

asian pork tenderloin with slaw 6

Can you believe we actually ate this in the middle of December? What were we thinking?! We could have been eating roast beef! mashed potatoes! macaroni and cheese! ‘Tis the season (well, ’twas the season) for rich and delicious food!

asian pork tenderloin with slaw 2

This vegetably starchless meal is clearly made for January. It’s actually exactly what I’m craving. Even though I don’t think I’m eating significantly more healthfully lately than I normally do, I’m more bored with healthy foods right now. Maybe it’s an instinctual reaction to winter, although considering that it was almost 70 degrees here last weekend, probably not.

asian pork tenderloin with slaw 3

This meal, although pretty healthy, is also sweet and salty and meaty and therefore comforting. It definitely doesn’t make you feel like you’re choking down health food to make up for December’s transgressions. Sure, there’s a salad involved, but it’s topped with deeply browned meat. It really is a great meal any time of year.

asian pork tenderloin with slaw 5

Printer Friendly Recipe
Spicy Korean Pork Medallions with Asian Slaw (hardly adapted from Fine Cooking)

Serves 4 to 6

1 large or 2 small pork tenderloins (about 1¼ pounds)
⅓ cup soy sauce
¼ cup rice vinegar
3 tablespoons light brown sugar
2 medium cloves garlic, minced
1½ tablespoons minced fresh ginger
1 tablespoon toasted sesame oil
1 tablespoon sriracha
1 pound napa cabbage, thinly sliced (about 6 cups)
2 medium carrots, grated (about 1 cup)
4 scallions (both white and green parts), trimmed and thinly sliced
2 tablespoons canola or peanut oil
kosher salt

1. Trim the pork of any silverskin and excess fat, and cut on the diagonal into ½-inch-thick medallions.

2. In a small measuring cup, whisk together the soy sauce, 2 tablespoons of the rice vinegar, 2 tablespoons of the brown sugar, the garlic, ginger, ½ tablespoon of the sesame oil, and 2 teaspoons of the chile sauce. Toss ½ cup of this mixture with the pork medallions in a large bowl; reserve the remaining mixture to use as a sauce. Let the pork sit at room temperature for 25 minutes or refrigerate for up to 2 hours.

3. Meanwhile, in another large bowl, toss the cabbage and the carrot with half of the scallions, 1 teaspoon salt, and the remaining 2 tablespoons rice vinegar, 1 tablespoon brown sugar, ½ tablespoon sesame oil, and 1 teaspoon chile sauce. Let sit for 15 minutes, toss again, and transfer to a large serving platter.

4. Heat 1 tablespoon of the canola oil in a 12-inch, heavy-based skillet over medium-high heat until shimmering hot. Remove the pork from the marinade, shaking off the excess, and transfer the pork to a clean plate. Discard the marinade. Add half of the pork medallions to the skillet, spacing them evenly. Cook them without touching until well browned, about 2 minutes. Flip and cook until the pork is just cooked through (slice into a piece to check), about 2 more minutes. Set the pork on top of the slaw. Pour out the oil and wipe the pan with paper towels (if the drippings on the bottom of the pan look like they may burn, wash the pan). Return the pan to medium-high heat. Add the remaining 1 tablespoon canola oil, and cook the remaining medallions in the same manner. Top the slaw with the remaining pork, and pour the reserved soy-ginger sauce over the medallions. Serve immediately, sprinkled with the remaining scallions.

asian pork tenderloin with slaw 4

grilled potato salad with watercress

potato salad watercress 5

Dave’s birthday, 2 weeks after Christmas, is at a sort of inconvenient time of year. My dad’s is January 2nd, and even that is better – in my family, the holidays are just one day longer than they are for everyone else. But a week later, you’ve had all the cookies and wine and cheese (or whatever your splurges happen to be) you want, but you haven’t had more than a few days to detox from the decadence. And yet, it’s time for banana cream pie.

potato salad watercress 1

I got Dave a cute little cast iron saucepan for the grill, so I had to plan a meal that would allow him to use it. He also got a new grill for Christmas, so I specifically planned a meal that would use both of our grills – barbecue pork ribs, grilled potato salad, grilled broccoli. And then the weather sucked, although we pushed through and grilled the ribs and potatoes still, but I roasted the broccoli.

potato salad watercress 2

It wasn’t the most indulgent meal ever, but extra vegetables are always welcome this time of year, so I chose the potato salad that actually looked like a salad. It’s not a traditional potato salad coated in mayonnaise, but I didn’t feel like we lost out for the healthier option. This was crisp and fresh, healthy enough for January, but still with satisfying browned potatoes and creamy cheese. It was just light enough to justify a big piece of banana cream pie for dessert.

potato salad watercress 4

Printer Friendly Recipe
Grilled Potato Salad with Watercress (from Bon Appetit via epicurious)

I’ve reduced both the potatoes (because I was trying to be healthier) and the blue cheese (because it can be too intense) from the original recipe, but I’m sure the original amounts are great too.

¼ cup sherry wine vinegar
1 large shallot, chopped
2 teaspoons Dijon mustard
½ cup olive oil, plus more for grilling potatoes
6 medium red-skinned potatoes, unpeeled (about 1½ pounds)
2 bunches watercress, stems trimmed
3 green onions, chopped
¼-½ cup crumbled blue cheese

1. Combine vinegar, shallot, and mustard in medium bowl. Gradually whisk in ½ cup oil. Season vinaigrette to taste with salt and pepper.

2. Cook potatoes in large pot of boiling salted water until almost tender, about 16 minutes. Drain; cool completely. Cut potatoes into ¼- to ½-inch-thick rounds. Brush or spray rounds on both sides with oil; sprinkle with salt and pepper.

3. Prepare grill for medium-high heat. Grill potatoes until golden and cooked through, about 3 minutes per side. Dice the potatoes into ½-inch cubes.

4. In a large serving bowl, mix the watercress, scallions, and most of the vinaigrette. Add the potatoes and the remaining dressing, and gently mix to coat. Top with the blue cheese; serve immediately.

potato salad watercress 3