butternut squash soup with spiced creme fraiche

butternut squash soup 6

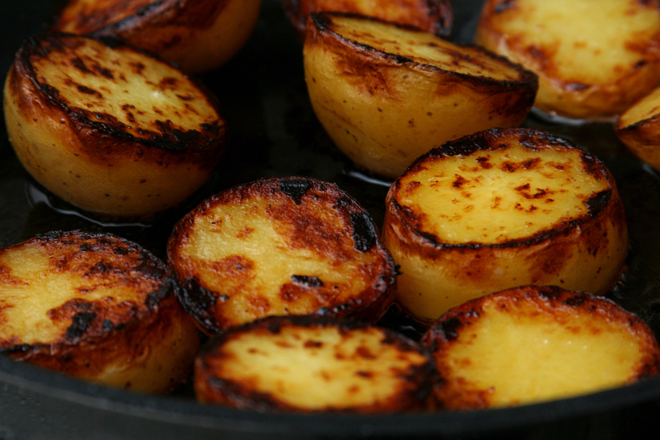
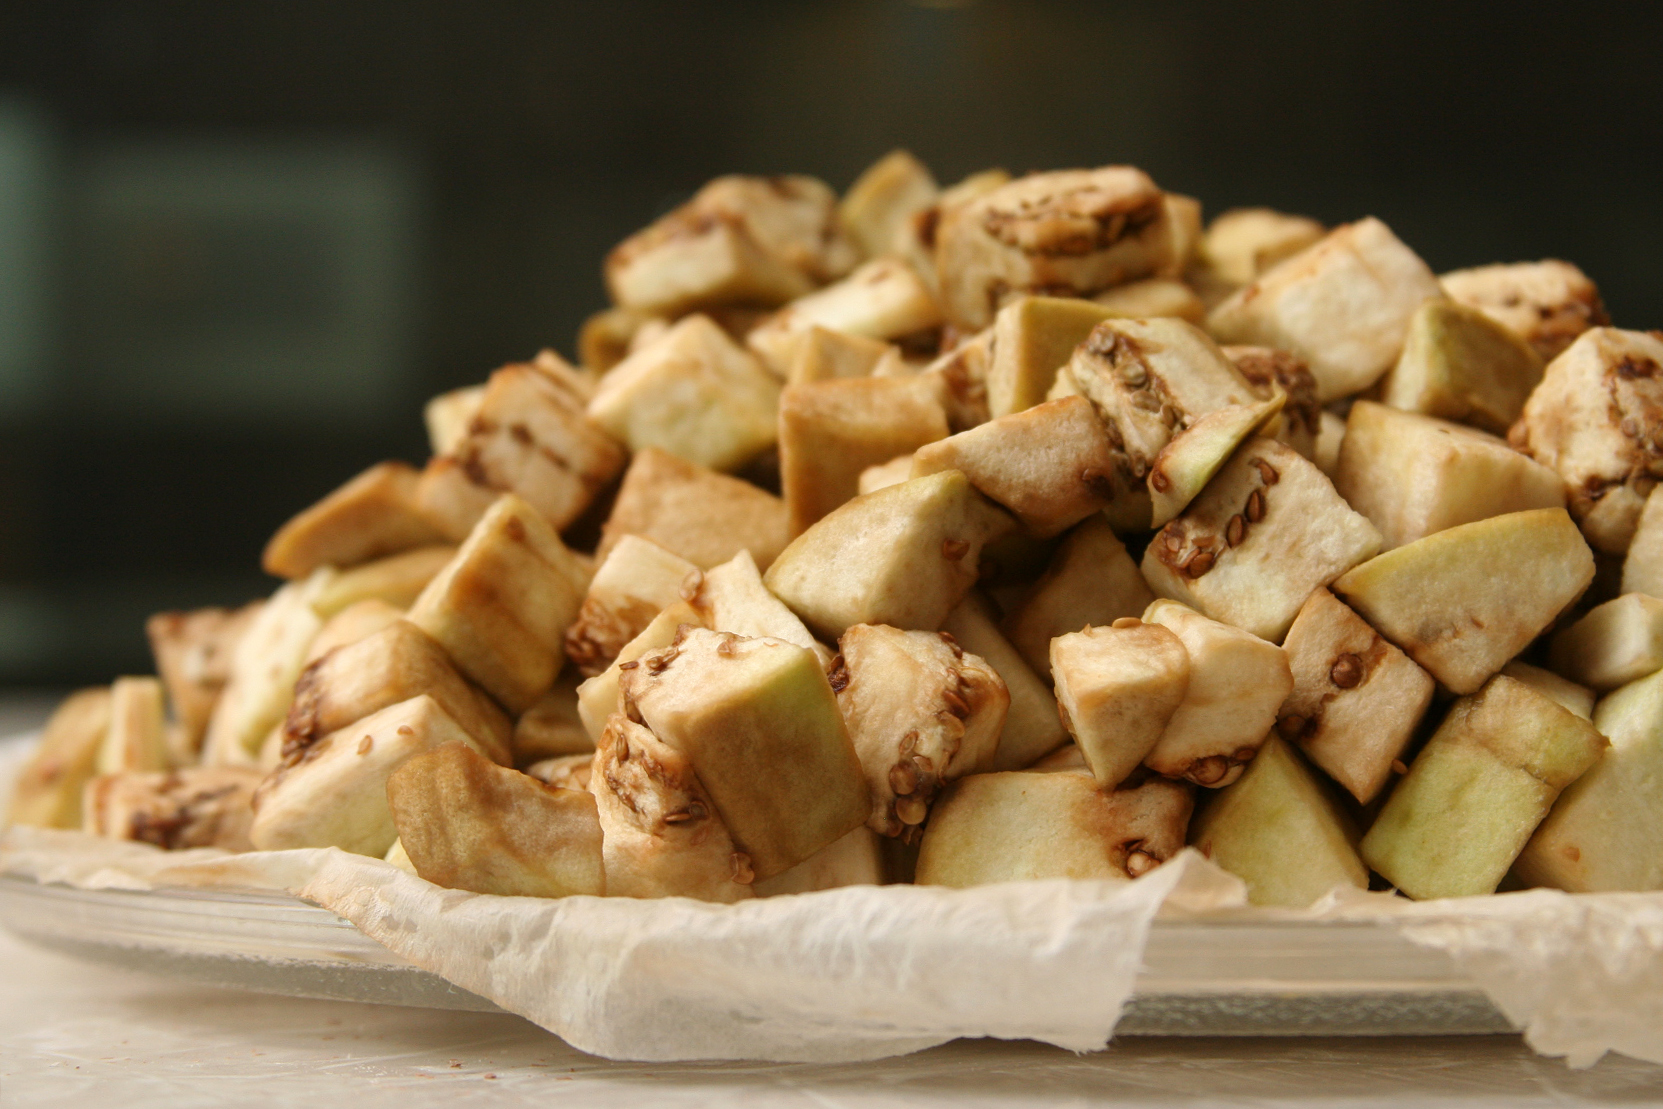
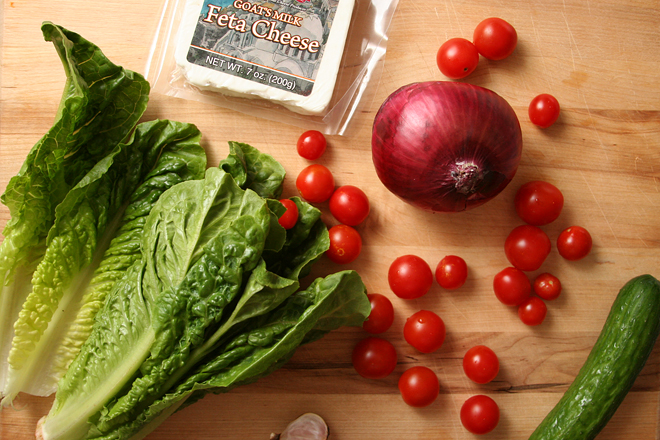
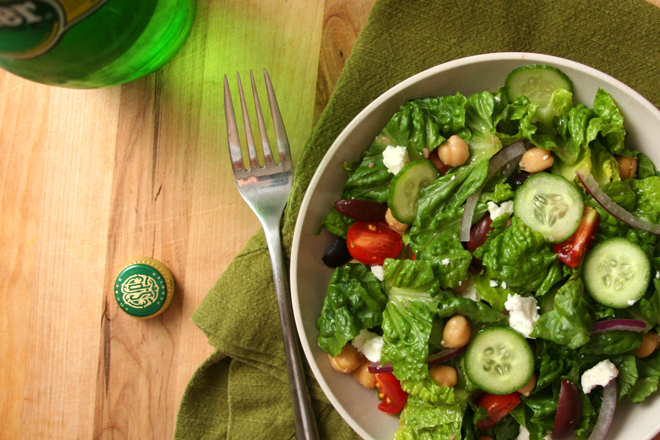
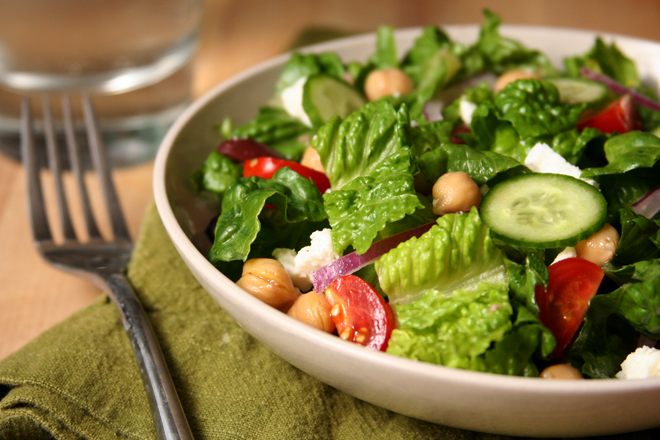
I made this pumpkin mushroom soup a couple days ago using butternut squash instead of pumpkin, and it occurred to me that what was a pumpkin phase four years ago is now a butternut squash phase. I’ve been buying about two a week, and I’ve made all sorts of good stuff, like ravioli, chili, and lentil goat cheese salad. I was going to make squash kale pizza tonight, but some friends are getting together for dinner instead. I’m contributing butternut squash and green chile gratin. I thought about bringing this salad, but I already had it on the menu for next week anyway, so I know I’ll get to eat it soon.

butternut squash soup 2

Butternut squash soup has kind of been on my radar to make, but I tried a recipe a few years ago that was good but nothing special, so I hadn’t gone back to the idea since. I ended up making this for a Saturday night dinner that I wanted to be as fall-y as possible. It was the perfect idea for a first course before roast chicken with potatoes and pan-roasted Brussels sprouts and carrots. Even better, a friend of mine was hosting a fall-themed dinner later that week and didn’t have time to test out a soup recipe, so I was able to help her out.

butternut squash soup 4

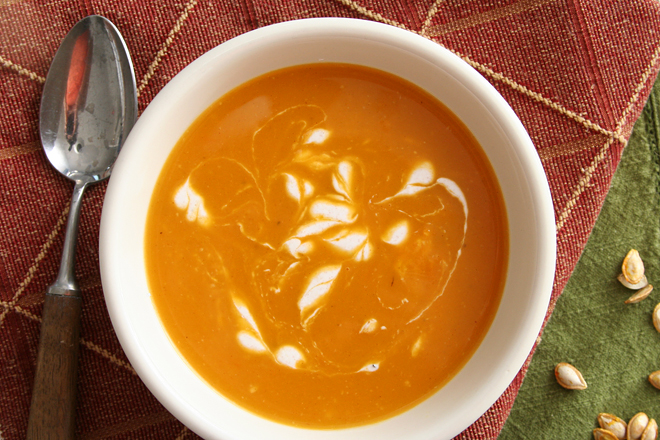
I loved the soup, Dave loved the soup, my friend loved the soup, and then later that week, the rest of our group of friends said they loved the soup, several asking for the recipe. It’s kind of a subtle set of flavors, with nothing jumping out individually, but everything works well together. The star anise is interesting; if you think about it when you’re eating, it’s evident, but it and the cinnamon and nutmeg are balanced by the savory bay and thyme. The tart garnish (I made crème fraiche for the party but used Greek yogurt at home) was a nice complement since the soup is on the sweet side. I’m so glad I have a great butternut squash soup recipe after all these years – and it makes perfect sense that I would find it in the middle of a butternut squash phase.

butternut squash soup 5

Printer Friendly Recipe
Butternut Squash Soup with Spiced Creme Fraiche (slightly adapted from Allison Vines-Rushing and Slade Rushing’s Southern Comfort via epicurious)

The original recipe calls for the big spices to be tied up in a cheesecloth bundle before being added to the soup. I’m sure they’re easier to remove before blending this way, but fishing out a few spices from a pot of soup seemed easier to me than digging out the cheesecloth from the pantry.

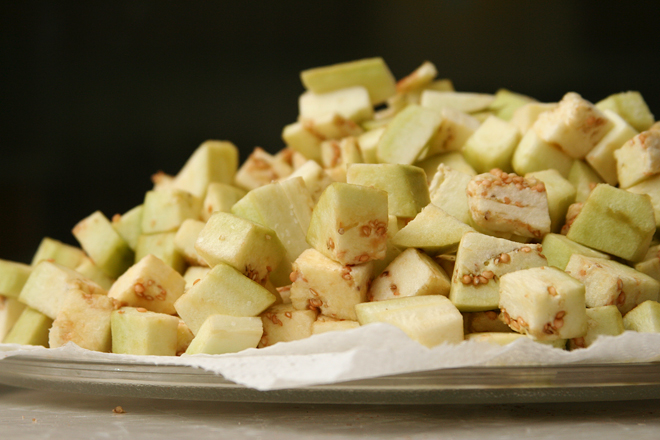
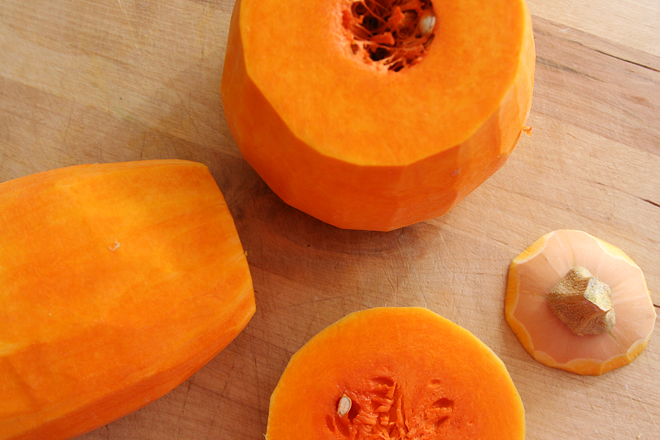
1 large butternut squash, peeled, seeded, and cubed
1 tablespoon olive oil
Salt and pepper
2 tablespoons unsalted butter
4 large shallots, sliced
8 garlic cloves, peeled and smashed
½ teaspoon ground white pepper
1 bay leaf
1 thyme sprig
1 star anise
4 whole peppercorns
½ cup white wine
8 cups chicken or vegetable broth
½ cup heavy cream
1 tablespoon sugar
1 teaspoon salt
¼ teaspoon ground cinnamon
¼ teaspoon freshly grated nutmeg
Spiced Crème Fraîche, for accompaniment

1. Place a rimmed baking sheet in the oven; heat the oven to 425 degrees. When it’s hot, remove the pan from the oven and spread the olive oil evenly over the surface. Transfer the squash and a generous sprinkling of salt and pepper to the hot baking sheet; stir to coat. Roast the squash until browned on at least one side, about 25 minutes, stirring once.

2. Meanwhile, heat the oil in a large pot over medium heat. Add the shallots and cook, stirring occasionally, until the edges start to brown, 6-8 minutes. Add the garlic, pepper, bay, thyme, star anise, and peppercorns; cook, stirring constantly, until fragrant, about 1 minute. Add the wine and cook, scraping the bottom of the pot, until reduced by half. Add the roasted squash, broth, cream, sugar, salt, cinnamon, and nutmeg. Increase the heat to medium-high and bring to a simmer, then reduce the heat to medium-low; cover and simmer for 20 minutes.

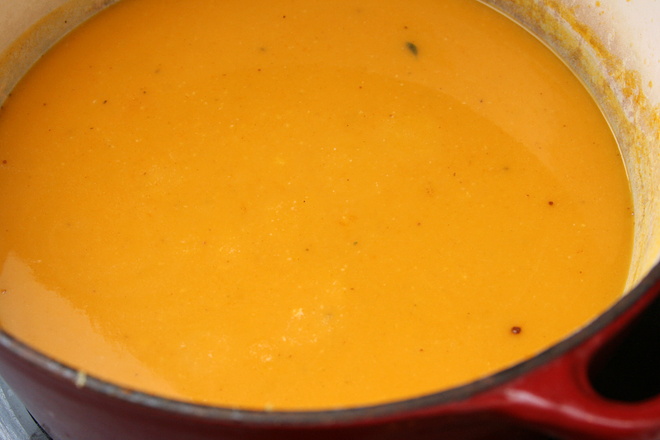
3. Remove and discard the bay, thyme, star anise, and peppercorns. Puree the soup, either with an immersion blender or by transferring it in batches to a standup blender. Taste for seasoning and serve immediately, topped with Spiced Crème Fraîche. (Soup can be chilled for several days and reheated.)

Spiced Crème Fraîche

I actually don’t know how much of a difference the spices make, but I did like the tart dairy with the soup. Greek yogurt, sour creme, and crème fraîche will all work just fine.

1 cup crème fraîche
¼ teaspoon salt
¼ teaspoon freshly ground black pepper
¼ teaspoon freshly grated nutmeg
¼ teaspoon ground ginger

Mix all ingredients.

butternut squash soup 7

shitake mushroom and lentil asian tacos

mushroom lentil tacos 4

Vegetarian food, for me, means something quick and easy, healthy, perfect for a weeknight dinner. There’s no fussing with the handwashing of cooking with chicken, no long braising times. Most are one-bowl meals that don’t require side dishes. The exceptions to these rules invariably include lots of cheese, almost certainly pasta, and a long prep time – and are relegated to weekend meals.

mushroom lentil tacos 6

Few and far between are vegetarian meals that are not only healthy and delicious, but also feel special. This is one. First, it’s tacos, and I’m not out of my taco phase. Second, so many fillings and toppings in the tacos satisfy all sorts of flavor and texture desires.

mushroom lentil tacos 1

The mushroom-lentil mixture has plenty of ingredients that kick up the umami sensation that usually comes from meat. The miso and soy sauce in the sauce don’t hurt either, but the sauce is about more than just umami; it’s sweet and herbal and a bit sour from the rice vinegar. There’s crunch from the carrots and the buttery richness of avocados. All of it combines to form a special occasional dish that is perfectly healthy and not just vegetarian, but vegan. It’s a far cry from most of my favorite vegetarian dishes, and I love it.

mushroom lentil tacos 2

Printer Friendly Recipe
Shitake Mushroom and Lentil Asian Tacos (adapted from Sprouted Kitchen)

Serves 4 to 6

I toasted the garlic, while still peeled, in a small not-nonstick skillet over medium-high heat until the papery peel started to brown on a few sides. This softens the bite of raw garlic, making it sweeter and more mellow.

My favorite new way to soften corn tortillas for tacos is to spray both sides of them with oil, then heat them in a 400 degree oven until pliable, about 5 minutes. Even better, add some of the mushroom-lentil mixture to the tortillas at that point and fold the tortilla over the filling; continue baking until the tortilla starts to crisp, another 3-5 minutes.

I grew radish sprouts just for this recipe, but they didn’t sprout in time. Bummer. They made a good garnish for avocado and shrimp-filled tortilla cups the next day though.

Miso herb sauce:
3 garlic cloves, peeled (see note)
2 packed cups basil leaves
1 packed cup cilantro
2 tablespoons white or yellow miso
1 tablespoon honey
1 tablespoon soy sauce
pinch of red pepper flakes
3 tablespoons orange juice
3 tablespoons rice vinegar
2 tablespoons toasted sesame oil

Tacos:
¾ cup brown or green lentils
salt
2 tablespoons olive oil, divided
1 onion, thinly diced
12 ounces shitake mushrooms, stems discarded, sliced
1 tablespoon apple cider vinegar
about 16 corn tortillas, warmed (see note)
2 large or 3 small avocados, peeled and sliced
5 small carrots, peeled and grated
micro greens, for garnish (see note)

1. For the sauce: Place the garlic in the bowl of a food processor fitted with the cutting blade; process until minced. Add the herbs and process until pureed. Add the remaining ingredients and process until the sauce is evenly mixed. Transfer to a serving bowl; set aside.

2. Bring 6 cups of water to a boil in a 2-quart saucepan. Add the lentils and ½ teaspoon of salt. Reduce the heat to maintain a simmer, partially cover, and cook for about 20 minutes, until tender. Drain.

3. In a medium nonstick skillet over medium heat, heat the oil until it flows like water when the pan is tilted. Add the onion and a pinch of salt; cook, stirring often, until the onion is softened and translucent. Add the mushrooms and another pinch of salt and cook, stirring occasionally, until the mushrooms soften and release their liquid. Once the liquid evaporates, add the remaining 1 tablespoon oil, and cook until the mushrooms and onions brown. Stir in the cooked lentils and the cider vinegar.

4. Stuff each tortilla with the mushroom-lentil mixture, carrots, avocado, microgreens, and miso-herb sauce. Serve immediately.

mushroom lentil tacos 5

braised potatoes

braised potatoes 5

I don’t live in a world (okay, a town) where there are duck fat fries. People are always raving about them – except for the few who claim they’re not all that – but my opportunities to try duck fat anything have been limited. So I do what I usually do when I can’t find a restaurant to serve me something I want to try: I make it myself.

duck fat potatoes 3

Not that I set out to cook with duck fat; mostly I just stumbled onto a container of it at Whole Foods on my last visit to see my parents in Albuquerque. Also I didn’t exactly make fries, but close enough.

braised potatoes 1

On my first attempt to discover what makes potatoes cooked in duck fat so popular, I simply melted a half-inch or so of the fat in a nonstick pan, added the potatoes cut-side down, and let them cook until they were tender inside and nicely browned on the flat edges. They were just fine, but I didn’t see what the fuss was about.

braised potatoes 2

I was planning to give it another try one evening – after all, I had a container of duck fat with no other plans for it – when, a few hours before dinner, I read about Cook’s Illustrated’s braised new potato recipe in their latest issue. In this technique, the potatoes are cooked in a mixture of water, seasonings, and fat (the original recipe uses butter). The water tenderizes the potatoes, and when it evaporates, the potatoes brown in the fat.

braised potatoes 3

These are now a contender for my favorite potatoes ever. I still haven’t tried it with butter, which I’m sure is delicious, but the duck fat makes the kitchen smell like the best of Thanksgiving.  The inside of the potatoes are soft and creamy, and the flat edge is crisp and browned.  I see what all the fuss is about now.

braised potatoes 4

One year ago: California Roll Burgers
Two years ago: Lemon Bar (comparison of 3 recipes)
Three years ago: Grilled Artichokes
Four years ago: Fresh Strawberry Scones
Five years ago: Asparagus and Arugula Salad with Cannellini Beans and Balsamic Vinegar

Printer Friendly Recipe
Braised Red Potatoes with Lemon (from Cooks Illustrated)

Did I mention that they’re almost entirely hands-off?

1½ pounds small red potatoes, unpeeled, halved
2 cups water
3 tablespoons unsalted butter
3 garlic cloves, peeled
3 sprigs fresh thyme
¾ teaspoon salt
1 teaspoon lemon juice
¼ teaspoon pepper
2 tablespoons minced fresh chives

1. Arrange the potatoes in a single layer, cut-side down, in a 12-inch nonstick skillet. Add the water, butter, garlic, thyme, and salt and bring to a simmer over medium-high heat. Reduce the heat to medium, cover, and simmer until potatoes are just tender, about 15 minutes.

2. Remove the lid and use a slotted spoon to transfer the garlic to a cutting board; discard the thyme. Increase the heat to medium-high and vigorously simmer, swirling pan occasionally, until the water evaporates and the butter starts to sizzle, 15-20 minutes. When it’s cool enough to handle, mince the garlic to a paste.  Transfer the paste to a bowl and stir in the lemon juice and pepper.

3. Continue to cook the potatoes, swirling the pan frequently, until the butter browns and the cut sides of the potatoes turn spotty brown, 4 to 6 minutes longer. Off the heat, add the garlic mixture and chives and toss to thoroughly coat. Serve immediately.

braised potatoes 7

pasta with broccoli, chickpeas, and garlic

broccoli chickpea pasta 5

Have I told you that we’re moving? In just a few days, in fact. It isn’t a big move as far as distance, as our new house is just a 15-minute drive away from our old one, but it is big as far as life steps. Having spent the majority of our twenties in graduate school, we watched our friends buy houses while we were still solidly in apartment mode. We’ve rented a nice little house for the last three years since we moved to New Mexico, but now, finally, we’re acting like grown-ups and buying our own place.

broccoli chickpea pasta 1

The process hasn’t been without its hiccups. Who knew that ordering lighting fixtures would be so complicated? I keep telling myself that, when we’re settled and I have bright and colorful pendants hanging over the breakfast bar, it’ll be worth it, but for now, I just wish we could find lights that aren’t actually purple when the website says they’re cobalt, or lights with cords that are long enough, or lights that work with the slopes of our vaulted ceilings. Not to mention the hours of packing, visits to the bank, trips to Lowe’s, and oh yeah, we’re going on vacation a week after closing.

broccoli chickpea pasta 2

When we’re not eating leftovers from the freezer, we’ve been eating a lot of quick meals like this one. Even better, I’ve gotten in the habit of buying those bags of pre-cut broccoli, which shaves another ten minutes off of prep time. At that point, it’s just an issue of boiling pasta while pan-roasting broccoli, pressing garlic into the pan with a pinch of red pepper flakes, and mixing everything together with a whole lot of lemon juice and parmesan to up the flavor ante. Dinner is served in no time at all, which means I can get back to procrastinating on packing by shopping for light fixtures.

broccoli chickpea pasta 4

One year ago: Star Wars Cookies
Two years ago: Cream Cheese Pound Cake
Three years ago: Roll-out Sugar Cookies (comparison of 3 recipes)
Four years ago: Roasted Kale
Five years ago: Spaghetti and Meatballs

Printer Friendly Recipe
Pasta with Broccoli, Chickpeas, and Garlic (adapted from Gourmet via epicurious)

Serves 6

Pasta dishes like this tend to cool quickly after being transferred to serving dishes, so I like to warm the empty bowls in an oven heated to about 200 degrees.

16 ounces whole wheat pasta
salt
3 tablespoons olive oil, divided
2 (12-ounce) bags fresh chopped broccoli (or 3 heads of broccoli, chopped into bite-sized pieces)
12 garlic cloves, minced or pressed through a garlic press
1 teaspoon dried hot red pepper flakes
2 (15-ounce) cans chickpeas, rinsed and drained
juice from 1 lemon
1 cup (2 ounces) finely grated parmesan, plus more for garnish

1. Bring 4 quarts water to a rapid boil over high heat. Add 1 tablespoon salt and the pasta. Cook according to package instructions. Before draining the cooked pasta, put about 1 cup pasta cooking water in a separate bowl and set aside. Return the drained pasta to the cooking pot.

2. Meanwhile, heat 2 tablespoons olive oil in a 12-inch skillet over medium-high heat. When hot, add the broccoli and a pinch of salt and cook, stirring occasionally, until bright green and browned in spots, 4-5 minutes. Add ¼ cup water; cover the pan for 1 minute to cook the broccoli through. Remove the lid and push the broccoli to the edges of the pan. Add the remaining tablespoon of oil, the garlic, and the red pepper flakes to the center of the pan. Cook, stirring constantly and excluding the broccoli as much as possible, for about 1 minute, then add the chickpeas and stir the mixture into the broccoli. Add the lemon juice and 1 teaspoon salt.

3. Transfer the broccoli to the pot with the pasta, stirring to incorporate. Add about half of the reserved pasta cooking water and 1 cup of cheese, stirring until the cheese melts evenly over the pasta. Taste and adjust for seasoning with more salt, lemon juice, or parmesan. Add more pasta cooking water if the pasta seems dry. Serve immediately in warmed bowls.

broccoli chickpea pasta 3

vegetable lasagna

vegetable lasagna 10

After spending the better part of a week visiting my parents and celebrating Christmas, Christmas Eve, my dad’s birthday, and a rare opportunity to eat sushi and get takeout from my favorite pizza joint and carne adovada breakfast burritos from my favorite burrito place (twice!), I thought maybe some vegetables were in order when we got home. On the other hand, we were still on break from work and I got a new lasagna pan for Christmas. Vegetable lasagna was clearly the answer, even if it isn’t necessarily healthy.

vegetable lasagna 1

I was feeling pretty good when I bought three big eggplants, three zucchini, three yellow squash (not the most seasonal recipe, but let’s face it, the quality of zucchini is pretty constant year-round even if it is a summer vegetable), and two bags of baby spinach. It seemed like an awful lot of vegetables for one pan of lasagna, but I figured they’d cook down a bunch. Besides, this is a Cooks Illustrated recipe, so they must know what they’re doing.

vegetable lasagna 3

Maybe they do, but my grocery store apparently doesn’t know what they’re doing when it comes to calibrating their scales in the produce department. Three eggplants resulted in quite an intimidating pile of ½-inch cubes, especially for someone who doesn’t generally love the vegetable. It didn’t lose much volume during its trip to the microwave, and the pan was so crowded when I sautéed the eggplant with the squashes that the vegetables mushed instead of browned.

vegetable lasagna 2

Once it became clear that I had far more vegetables than necessary, I adapted my cooking method and ended up with a big bowl of properly cooked vegetables in addition to a big bowl of mushy vegetables, plenty for two generous layers in my lasagna. The browned squash and wilted spinach were a great match for the bright tomato sauce and cheesey white sauce. But…

vegetable lasagna 5

That eggplant. It was just a bit rubbery and chewy. It tasted okay, but the texture was disappointing enough that I dreaded the eggplant bites, and with as much of the stuff as this lasagna contains, every bite is an eggplant bite.

vegetable lasagna 7

It seems like there’s a simple solution though – mushrooms. Mushrooms would go just as well with the other ingredients in this lasagna, and it’s such an easy fix that there’s no reason not to share this lasagna that has so much else going for it. And even if the eggplant was disappointing, at least I ate some vegetables and used my new pan.

vegetable lasagna 11

One year ago: Rice Noodle Salad with Peanut Dressing
Two years ago: Pasta Puttanesca
Three years ago: Asian-Style Chicken Noodle Soup
Four years ago: Pasta with Broccoli, Sausage, and Roasted Peppers
Five years ago: Pad Thai

Printer Friendly Recipe
Vegetable Lasagna (from Cook’s Illustrated)

I bought three of each of the eggplant, zucchini, and summer squash, but two of each would be plenty. And if you decide to substitute mushrooms for the eggplant, like I will in the future, skip the microwaving step and just sauté them separately from the squashes until they soften, release their water, dry out, and brown.

No-Cook Tomato Sauce:
1 (28-ounce) can crushed tomatoes
¼ cup chopped fresh basil
2 tablespoons extra-virgin olive oil
2 garlic cloves, minced
1 teaspoon kosher salt
¼ teaspoon red pepper flakes

No-Cook Cream Sauce:
4 ounces Parmesan cheese, grated (2 cups)
1 cup whole-milk cottage cheese
1 cup heavy cream
2 garlic cloves, minced
1 teaspoon cornstarch
½ teaspoon kosher salt
½ teaspoon pepper

Vegetable Filling:
1½ pounds eggplant, peeled and cut into ½-inch cubes (about 7 cups)
Kosher salt and ground black pepper
1 pound zucchini, cut into ½-inch pieces (about 4 cups)
1 pound yellow squash, cut into ½-inch pieces (about 4 cups)
5 tablespoons plus 1 teaspoon extra virgin olive oil
2 garlic clove, minced
1 tablespoon minced fresh thyme
12 ounces baby spinach (about 12 cups)
12 no-boil lasagna noodles
12 ounces low-moisture whole-milk mozzarella cheese, shredded (about 3 cups)
2 tablespoons chopped fresh basil

1. FOR THE TOMATO SAUCE: Whisk all ingredients together in bowl; set aside.

2. FOR THE CREAM SAUCE: Whisk all ingredients together in bowl; set aside.

3. FOR THE FILLING: Adjust oven rack to middle position and heat oven to 375 degrees. Toss eggplant with 1 teaspoon salt in large bowl. Line surface of large plate with double layer of coffee filters and lightly spray with vegetable oil spray. Spread eggplant in even layer over filters. Wipe out and reserve now-empty bowl. Microwave eggplant, uncovered, until dry to touch and slightly shriveled, about 10 minutes, tossing once halfway through to ensure that eggplant cooks evenly. Let cool slightly. Return eggplant to bowl and toss with zucchini and squash.

4. Combine 1 tablespoon oil, garlic, and thyme in small bowl. Heat 2 tablespoons oil in 12-inch nonstick skillet over medium-high heat until shimmering. Add half eggplant mixture, ¼ teaspoon salt, and ¼ teaspoon pepper; cook, stirring occasionally, until vegetables are lightly browned, about 7 minutes. Push vegetables to sides of skillet; add half of garlic mixture to clearing and cook, mashing with spatula, until fragrant, about 30 seconds. Stir to combine garlic mixture with vegetables and transfer to medium bowl. Repeat with remaining eggplant mixture, 2 tablespoons oil, and remaining garlic mixture.

5. Return skillet to medium-high heat, add remaining teaspoon oil, and heat until shimmering. Add spinach and cook, stirring frequently, until wilted, about 3 minutes. Transfer spinach to paper towel–lined plate and drain 2 minutes. Stir into eggplant mixture.

6. TO ASSEMBLE: Spray 13 by 9-inch baking dish with vegetable oil spray. Spread 1 cup tomato sauce in bottom of baking dish; shingle 4 noodles on top of sauce. Spread half of vegetable mixture over noodles, half of cream sauce, and 1 cup of mozzarella. Repeat layering with 4 noodles, 1 cup tomato sauce, remaining vegetables, remaining cream sauce, and 1 cup mozzarella. Place remaining 4 noodles on top layer of cheese. Spread remaining 1 cup tomato sauce over noodles and sprinkle with remaining 1 cup mozzarella. Lightly spray large sheet of aluminum foil with vegetable oil spray and cover lasagna. Bake until bubbling, about 35 minutes. Cool on wire rack 25 minutes. Cut into pieces, sprinkle with basil, and serve.

vegetable lasagna 9

quinoa patties

quinoa cakes 5

Probably the most random comment I’ve ever left on someone’s site was when Cara made Moroccan quinoa cakes and I compared them to oolitic limestone. Oolitic limestone, if you don’t happen to have ever taken a stratigraphy class, is a rock formed in the ocean near the shore when waves roll grains of sediment back and forth, and the grains precipitate calcium carbonate in concentric layers. It is made up of perfectly spherical grains, about quinoa-sized, that are glued together by more calcium carbonate.

quinoa cakes 1

In quinoa patties, the spherical grains (okay fine, seeds) are glued together by eggs and maybe bread crumbs. I made the popular recipe from Heidi Swanson’s Super Natural Every Day, but with all those bread crumbs diluting the quinoa, it didn’t look nearly so oolitic. It still tasted good, flavored with onion and parmesan with crisply browned sides.

quinoa cakes 3

But now I want to go back to that quinoa patty that originally caught my eye. Mostly because I love Moroccan flavors and because it doesn’t have bread crumbs, so the quinoa takes a more central role, but it doesn’t hurt that it looks more like oolite either.

quinoa cakes 4

One year ago: Apple Brandy Hand Pies
Two years ago: Coconut Cream Tart
Three years ago: Sweet Potato Hash
Four years ago: Peter Reinhart’s Pizza

Printer Friendly Recipe
Quinoa Cakes (adapted from Heidi Swanson’s Super Natural Every Day)

Makes 12 patties

1 teaspoon plus 1 tablespoon olive oil
2 large shallots, finely chopped
3 cloves garlic, finely chopped
1 cup uncooked quinoa, rinsed
½ teaspoon salt
1 cup (3.5 ounces) bread crumbs
¼ cup (½ ounce) grated parmesan cheese
4 large eggs, beaten

1. In a medium saucepan, heat 1 teaspoon of oil over medium heat. Add the shallots and cook, stirring occasionally, until just starting to brown around the edges, about 5 minutes. Add the garlic and cook, stirring constantly, until fragrant, about 30 seconds. Add 1¼ cups water; increase the heat to medium-high and bring to a boil. Add the quinoa and ½ teaspoon salt. Cover, reduce the heat to low, and cook for 15 minutes, until the quinoa is tender. Once the quinoa is cooked, drain it if necessary.

2. Transfer the quinoa to a large bowl and stir in the bread crumbs and ¼ teaspoon salt, then the parmesan cheese and eggs. Divide the mixture into 12 equal portions, shaping each into a patty ¾-inch thick and about 3 inches in diameter.

3. Heat the remaining 1 tablespoon of oil in a large skillet over medium heat. Add half of the patties to the skillet, cover, and cook for 7 to 10 minutes, until the bottom is browned. Flip the patties and continue cooking for 7 more minutes, until the second side is golden brown. Transfer the patties to a wire rack to cool slightly, then repeat with the remaining patties, adding more oil if necessary.

quinoa cakes 6

black bean-roasted zucchini-goat cheese enchiladas

zucchini goat cheese enchiladas 7

I had a tough week last week. One day I woke up to little ants crawling all over the kitchen. One afternoon I went to the dentist feeling smug about how often I’ve been flossing and left with an appointment to get three cavities filled. One morning I noticed blisters on my waist that were suspiciously familiar – because they’re exactly like the case of shingles* I had just a few weeks ago. The list goes on from there.

zucchini goat cheese enchiladas 3

I also learned that I definitely do not have time to make enchiladas on a weeknight, even if the sauce is made in advance. Mixing the filling, heating tortillas, rolling and baking is too much to fit in on top of the daily dose of exercise, laundry, and spraying the kitchen with Raid.

zucchini goat cheese enchiladas 5

I guess if all’s well that ends well, you could say I had a great week. After a series of challenging days, nothing could have been more relieving than a night spent sipping wine with friends – even if it’s for a wine appreciation class, we’re all furiously scribbling notes, and technically we’re not supposed to be swallowing the wine. And when I got home from class, a delicious dinner was ready, because I’d skipped a workout the day before to fill and roll and all Dave had to do was transfer the enchiladas to the oven while I was out drinking wine. Maybe last week wasn’t so bad after all.

zucchini goat cheese enchiladas 6

(*Getting shingles isn’t fun, but I’m extremely lucky that I only get mild cases.)

One year ago: Fried Eggs with Garlic Yogurt Sauce
Two years ago: Steak Sandwiches
Three years ago: Pumpkin Cupcakes (comparison of 3 recipes)
Four years ago: Pain Ordinaire

Printer Friendly Recipe
Black Bean-Roasted Zucchini-Goat Cheese Enchiladas (filling adapted from Sprouted Kitchen; sauce from America’s Test Kitchen’s Healthy Family Cookbook via Prevention RD)

I roasted the zucchini on a baking sheet immediately after dicing them, but because zucchini is so wet, I think they would benefit from being sprinkled with about a teaspoon of salt, then allowed to drain for half an hour or so before roasting. If you have one, spinning them dry in a salad spinner would also help them pick up more roasted brown color in the oven. On the other hand, the enchiladas were delicious without this extra step.

Serves 4

Enchiladas:
3 large zucchini, cut into ¼-inch dice
1 small onion, coarsely chopped
1 tablespoon extra virgin olive oil, divided
zest from 1 lemon
1 teaspoon kosher salt
1 (15-ounce) can black beans, rinsed and drained
5 ounces goat cheese, divided
12 corn tortillas

Sauce:
1 teaspoon canola oil
½ small onion, finely chopped
2 cloves garlic, minced
1½ tablespoons chili powder
½ tablespoon ground cumin
1 teaspoon sugar
¼ cup water
1 (8-ounce) can tomato sauce
black pepper, to taste

For serving:
2 avocados, diced
½ cup minced cilantro
lime wedges

1. Heat the oven to 450 degrees. On a large rimmed baking sheet, combine the zucchini, onion, oil, lemon zest, and salt. Roast, stirring occasionally, until the zucchini is softened and maybe slightly browned, about 30 minutes. Transfer to a large bowl; stir in the black beans and 4 ounces of goat cheese. Reduce the oven temperature to 350 degrees.

2. While the zucchini roasts, heat 1 teaspoon of canola oil in a medium saucepan over medium heat. Add the onion and cook until translucent and slightly browned around the edges, stirring occasionally, about 8 minutes. Add the garlic, chili powder, cumin, and sugar; cook, stirring constantly, until fragrant, about 1 minute. Add the water and tomato sauce. Increase the heat to medium-high, bring to a simmer, then reduce the heat to medium-low. Maintain a low simmer until slightly thickened, 5 to 10 minutes, stirring occasionally.

3. To soften the tortillas, brush or spray them with a light layer of oil. Arrange 6 tortillas in a single layer on a baking sheet; transfer to the oven and cook for about 3 minutes; flip the tortillas and continue baking for 2 more minutes, until the tortillas are pliable. Repeat with the remaining tortillas.

4. Spread a thin layer of sauce over the bottom of a 9-by-13-inch baking dish. Divide the filling evenly between the tortillas. Roll the tortillas over the filling, arranging the filled tortillas seam-side down in the baking dish. Cover the rolled tortillas with the remaining enchilada sauce. Sprinkle the remaining 1 ounce of goat cheese over the top of the sauce. Bake uncovered for 25-30 minutes, until the enchiladas are evenly heated. Let set for 5 minutes before serving with chopped avocado, cilantro, and lime.

zucchini goat cheese enchiladas 10

mediterranean chopped salad

mediterranean chopped salad 4

I made this salad for the first time the very day that I posted about how I hate making salads because it always takes so dang long. (And indeed, tonight I made a salad for dinner that included no less than 16 ingredients.) This salad, however, breaks the pattern.

mediterranean chopped salad 1

It helps that the chickpeas can be dumped out of a can. Sometimes I buy pre-crumbled feta, and that’s one less ingredient that needs chopped. While I don’t love seeding and chopping olives, my handy dandy cherry pitter (that has never been used on cherries) speeds up that process.

mediterranean chopped salad 3

There are still a good handful of ingredients that must be prepped, to be sure, but it is among the quicker dinner salad recipes I make. And it’s such a great combination; chickpeas, olives, feta, and cucumbers are a classic, to be sure, but for good reason. For as good as this tastes and as quick as is to make, it’s one of the best salad values for your time. And that makes it my new favorite.

mediterranean chopped salad 5

One year ago: Cook’s Illustrated’s Ultimate Banana Bread
Two years ago: Cheesecake (comparison of 3 recipes)
Three years ago: Risotto with Swiss Chard
Four years ago: Gazpacho

Printer Friendly Recipe
Mediterranean Chopped Salad (from Cook’s Illustrated)

Serves 4 as a main dish

I have never added the parsley; nothing against it, I just didn’t notice it in the ingredient list. Also, I like my salads on the vinegary side, so I usually cut the olive oil short.

1 medium cucumber, peeled, halved lengthwise, seeded, and cut into ½-inch dice (about 1¼ cups)
1 pint grape tomatoes, quartered (about 1½ cups)
Table salt
3 tablespoons extra virgin olive oil
3 tablespoons red wine vinegar
1 medium garlic clove, minced or pressed through garlic press (about 1 teaspoon)
1 (14-ounce) can chickpeas, drained and rinsed
½ cup chopped pitted kalamata olives
½ small minced red onion (about ¼ cup)
½ cup roughly chopped fresh parsley
1 romaine heart, cut into ½ inch pieces (about 3 cups)
4 ounces feta cheese, crumbled (about 1 cup)
Ground black pepper

1. Combine cucumber, tomatoes, and 1 teaspoon salt in colander set over bowl and let stand 15 minutes.

2. Whisk oil, vinegar, and garlic together in large bowl. Add drained cucumber and tomatoes, chickpeas, olives, onion, and parsley; toss and let stand at room temperature to blend flavors, 5 minutes.

3. Add romaine and feta; toss to combine. Season with salt and pepper and serve.

mediterranean chopped salad 6

tomato mozzarella tart with basil crust

tomato basil tart 5

I planted tomatoes in my garden this year with high hopes and low expectations. Last year I lost all of my precious tomato plants to fusarium wilt, and even though I didn’t do anything to rid the soil of the fungus, I couldn’t resist planting a few tomato plants this year too. They started strong but succumbed to the disease before setting fruit. At that point, I settled in for a tomato-less summer.

tomato basil tart 1

Instead, I’ve had what’s nearly been a landmark year! After describing my tomato woes to a coworker, she started bringing me some tomatoes from her garden. At first it was a trickle, just enough so I could make each of my favorite tomato dishes once. She also bought me a handful of zebra tomatoes while traveling. And then I bought myself a pound or so of tomatoes from our town’s little farmer’s market. And then the bonanza from my coworker – nearly ten pounds of beefsteak, romas, and cherries. This was enough to make all of my favorites again, plus try some new recipes.

tomato basil tart 2

This was first on my list. It has all the ingredients of pizza, but rearranged and with a whole lot of butter added. How can that be bad?

tomato basil tart 3

The basil crust is fragrant, tender but sturdy enough to hold up the toppings. The mozzarella holds the toppings on. And the real star is those thin but deeply flavorful slices of tomatoes. There is nothing I like more than a landmark year for tomatoes. But next year, I’m determined to successfully plant my own – but maybe I’ll still take some off my coworker’s hands.

tomato basil tart 4

One year ago: Fresh Pasta
Two years ago: Pappa al Pomodoro
Three years ago: 100% Whole Wheat Sandwich Bread
Four years ago: Lemon Pancakes with Blueberry Syrup

Printer Friendly Recipe
Tomato Mozzarella Tart with Basil Crust (adapted from Jack Bishop’s The Complete Italian Vegetarian Cookbook via Ezra Pound Cake; crust adapted from Dorie Greenspan’s Sweet Tart Dough)

I used fresh mozzarella (as seen on Annie’s Eats) both times I made this, but when I removed the tart from the oven, I noticed a puddle of liquid skimming across the baked cheese. Once cooked, I don’t think fresh mozzarella seems so different from the firmer type, which isn’t as moist and won’t release liquid onto the surface of the tart, so in the future, I’ll use regular mozzarella instead of fresh. (Fortunately, the crust didn’t seem to get soggy from the extra liquid.)

The original crust recipe was for a flaky pie type of crust, which used ice water. It shrunk when I baked it, plus I wanted something sturdier, so I adapted a traditional tart crust to include basil. This is a tart after all!

Crust:
½ cup loosely packed basil leaves
1 clove garlic, peeled
1¾ cups (8.4 ounces) all-purpose flour
1 tablespoon cornstarch
½ teaspoon salt
8 tablespoons unsalted butter, cold, cut into ½-inch cubes
1 egg, lightly beaten

Tart:
8 ounces mozzarella, sliced
2 medium tomatoes, thinly sliced
salt
black pepper
parmesan
3-4 basil leaves, slivered

1. In a food processor fitted with the metal blade, process the basil and garlic until finely chopped. Add the flour, cornstarch, and salt; pulse to combine. Add the butter; process in 1-second pulses until the largest pieces of butter are the size of peas. Add about half the egg, pulse, then add the remaining egg. Process continuously until the dough forms clumps and curds. The sound of the food processor will change when it gets to this point.

2. Evenly press the dough onto the sides and bottom of a 9-inch tart pan with a removable bottom. Spray a 12-inch square of aluminum foil with cooking spray and press it, sprayed-side down, onto the tart crust. Freeze for at least 30 minutes.

3. Adjust a rack to the middle position and heat the oven to 375 degrees. Remove the tart crust from the freezer and spread pie weights over the bottom. Transfer the tart pan to a baking sheet and bake for 20 minutes. Remove the foil and bake another 5 minutes, until the crust is just starting to brown. Remove from the oven, maintaining the oven temperature.

4. Line the crust evenly with slices of mozzarella, overlapping if necesary. Top the mozzarella with slices of tomatoes (do not overlap the tomatoes). Season with salt and pepper. Grate a generous layer of parmesan cheese over the tomatoes.

5. Bake the tart for 25-30 minutes, until the crust is brown and the cheese is melted and just starting to brown. Transfer to a cooling rack. Evenly distribute the slivered basil over the top of the tart. Let cool 5 minutes before serving.

tomato basil tart 6

quinoa black bean burrito bowls

quinoa burrito bowls 5

I know there’s nothing groundbreaking about this combination. Topping black beans and starch with lettuce, tomatoes, and cheese is always going to be good. Still, it’s worth talking about, just because it’s such a tasty meal, not to mention it has all of my other favorite dinner characteristics – it’s healthy, easy, and flexible.

quinoa burrito bowls 1

When I made this, I prepared the quinoa and black bean mixture over the weekend. The next night, when I knew I’d be getting home late, all I had to do was heat up the base and chop the toppings. Not that the first step takes long on its own, as it’s just sauteing onions with garlic and spices, adding liquid and quinoa to simmer, and stirring in black beans. But it’s nice to have meals that aren’t any worse for being made ahead and reheated.

quinoa burrito bowls 2

I’ve put these same toppings in tortillas with meat and beans, as well as over rice instead of quinoa, and it never fails to turn into a meal I love. Adding the fresh vegetables provides a bright, fresh contrast to the warm spicy beans and carbs. Classic flavors, combined in a slightly new way – it isn’t groundbreaking, but it’s one of my favorite new weeknight meals anyway.

quinoa burrito bowls 3

One year ago: Chocolate Friands
Two years ago: Baked French Toast
Three years ago: Potato Tomato Tart
Four years ago: Banana Nutella Crepes

Printer Friendly Recipe
Quinoa Black Bean Burrito Bowls (adapted from Shiksa in the Kitchen via Prevention RD)

Serves 4

I also added about 4 ounces of Hatch green chiles, roasted, peeled, seeded, and diced, when I stirred in the lime juice.

1 tablespoon olive oil
1 onion, diced
¼ teaspoon salt
2 garlic cloves, minced
2 teaspoons chili powder
1 cup water
1 cup quinoa, rinsed and drained
2 (15-ounce) cans black beans, rinsed and drained
juice of ½ lime
toppings – shredded lettuce, diced tomatoes, cilantro, cheddar cheese or queso fresco, diced avocado, salsa, sour cream or Greek yogurt, black olives

In a medium saucepan over medium heat, heat the oil until it flows like water when the pan is tilted. Add the onion and salt; cook, stirring occasionally, until the onion is just browned at the edges, 6-8 minutes. Add the garlic and chili powder and cook, stirring constantly, until fragrant, about 1 minute. Add the water, quinoa, and black beans; bring to a simmer, then cover the pot and reduce the heat to low. Simmer 15 minutes; without removing the lid, let the quinoa sit off the heat for an additional 10 minutes, until tender. Remove the lid, add the lime juice, and fluff the quinoa with a fork. Serve with your desired toppings.

quinoa burrito bowls 4