how to adapt any bread recipe to be whole wheat

As much as I love Peter Reinhart’s Whole Grain Breads, I’ve only made a few recipes from the book. Instead, I’ve been busy using his techniques to adapt my old favorite bread recipes to whole wheat versions. While you can, in general, simply substitute up to half of the flour in a bread recipe with whole wheat, I guarantee that you’ll have better results if you use Reinhart’s trick.

Reinhart uses the same method for most of the breads in his book – about half of the whole wheat flour is combined with salt and liquid and the other half is combined with yeast and liquid. Both mixtures sit overnight before they’re mixed and kneaded into the dough. The resting time breaks down the long bran molecules, making the bread smoother, lighter, and sweeter – in short, more like a white bread.

The 100% whole wheat breads that I’ve tried from Reinhart’s book are truly exceptional. However, I guess I’m sort of a wimp about whole grains. I do like the flavor and texture of white bread, but of course I prefer the health factor of whole grain bread. Plus, I’m still interested in bread recipes outside of Reinhart’s book.
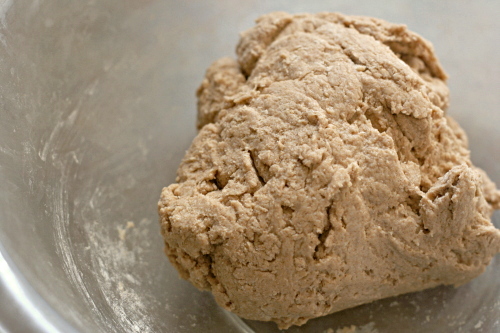
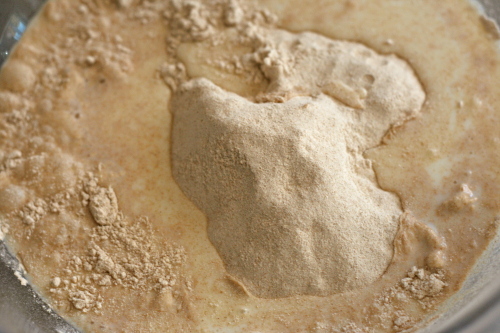
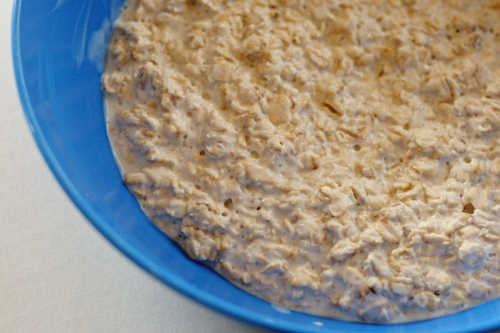
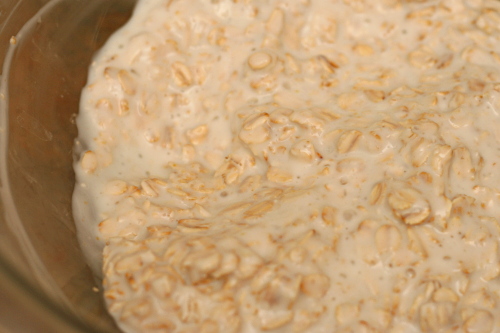
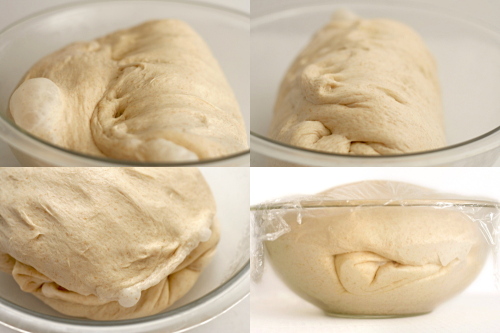
(the pre-dough before resting)

The solution is to mix up just one of Reinhart’s mixtures with whole wheat flour and let that rest overnight (or for around 8 hours), then continue with the recipe as written, mixing in the pre-dough. I’ve done this with all sorts of bread recipes – English muffins, pain ordinaire, light brioche buns, country crust bread, pizza crust.
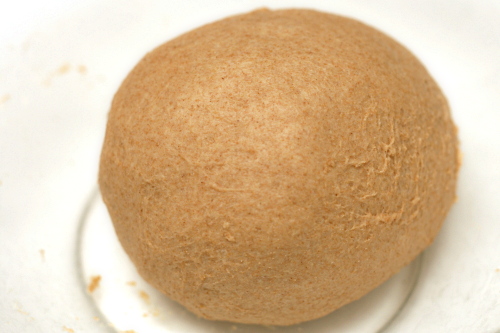
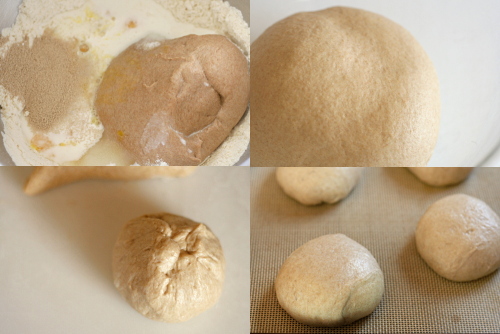
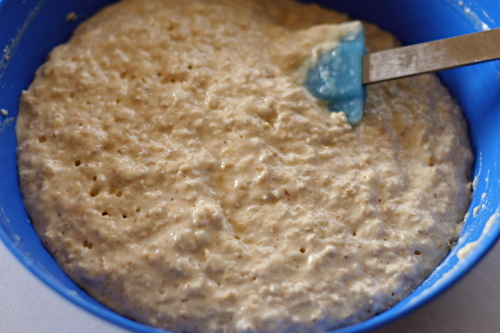
(the pre-dough after resting and a bit of kneading)

In all cases, I take half of the flour in the recipe and mix it with ¼ teaspoon salt for every 4 ounces of flour. Then I mix in enough liquid – whatever liquid the recipe calls for – to moisten the flour until it forms a dough. Most bread recipes call for about 16 ounces flour total, so the pre-dough is simply 8 ounces of whole wheat flour, ½ teaspoon of salt, and ¾ cup of water (or whatever liquid the recipe calls for).  When the final dough is mixed, those ingredients are subtracted from the original recipe.

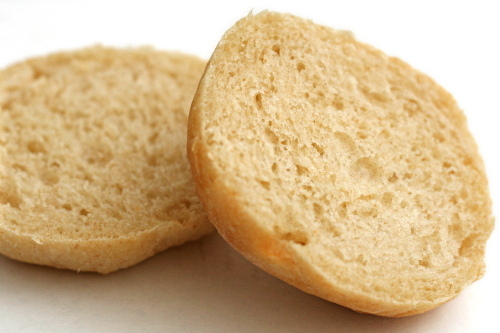
And every time, the result is essentially identical to an all-white version – the dough is smooth, elastic, and easy to work with. The bread is light and flavorful. And, I still get to play with an entire world of bread recipes. Win win win!

One year ago: Roasted Kale
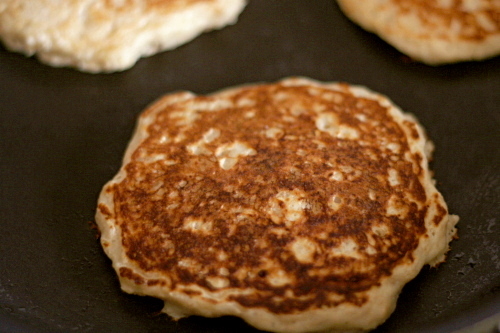
Two years ago: Banana Walnut Pancakes

Printer Friendly Recipe
Whole Wheat Light Brioche Burger Buns (adapted from Smitten Kitchen and Peter Reinhart’s Whole Grain Breads)

Makes 8 buns

Pre-dough:
1¾ cups (8 ounces) whole wheat flour
½ teaspoon salt
¾ cup water

1. Mix all of the soaker ingredients together in a bowl for about 1 minute, until all of the flour is hydrated and the ingredients form a ball of dough.

2. Cover loosely with plastic wrap and leave at room temperature for 12 to 24 hours. (If it will be more than 24 hours, place the soaker in the refrigerator; it will be good for up to 3 days. Remove it 2 hours before mixing the final dough to take off the chill.)

Dough:
8 ounces (about 1⅔ cups) bread flour
1 teaspoon salt
2½ tablespoons unsalted butter, softened
pre-dough
¼ cup warm water
3 tablespoons warm milk
2 teaspoons instant yeast
2½ tablespoons sugar
1 large egg
extra flour or water for adjustments
egg wash: 1 tablespoon milk or 1 egg white or whole egg beaten with 1 tablespoon water
sesame seeds

1. If mixing with a stand mixer: Add the flour and salt to mixer bowl fitted with paddle attachment. Mix on low just to combine. Add the butter and mix on medium-low speed until the mixture resembles crumbs. Cut the pre-dough into about 12 pieces and add them to the flour mixture, tossing the pieces to coat (to keep them from immediately sticking back together). Replace the paddle attachment with the hook. Add the water, milk, yeast, sugar, and egg to the mixer bowl and mix on medium-low until combined, then continue kneading until smooth and elastic, 6-8 minutes. The dough should be just a bit loose and sticky; add flour if necessary.

If mixing by hand: In a large bowl, whisk flours with salt. Add butter and rub into flour between your fingers, making crumbs. Cut the pre-dough into about 12 pieces and add them to the flour mixture, tossing the pieces to coat (to keep them from immediately sticking back together). Add the water, milk, yeast, sugar, and egg and stir with a rubber spatula until a dough forms. Scrape dough onto clean, well-floured counter and knead, scooping dough up, slapping it on counter and turning it, until smooth and elastic, 8 to 10 minutes. The dough will be on the sticky side so it can be a bit messy, but keep in mind that the more flour you knead in, the tougher the buns will get. Try to leave them tackier than you would a round loaf.

2. Spray a bowl with nonstick spray; shape dough into a ball and place it in bowl. Cover bowl with plastic wrap or a damp towel and let rise in a warm place until doubled in bulk, one to two hours.

3. Line a baking sheet with parchment paper or a silicone mat. Divide dough into 8 equal parts. To shape each portion into an even round, gently pull the edges toward a pucker and pinch them together. Gently roll each into a ball and arrange them two to three inches apart on the prepared baking sheet. Cover loosely with a piece of plastic wrap lightly coated in nonstick spray (or a damp towel) and let buns rise in a warm place for about one hour.

4. Preheat oven to 400 degrees with rack in center. Brush egg wash on buns and sprinkle with sesame seeds. Bake, turning sheet halfway through baking, until tops are golden brown and an instant-read thermometer reads at least 185 degrees, about 15 minutes. Transfer to a rack to cool completely.

Printer Friendly Recipe
Whole Wheat Pain Ordinaire (adapted from Eric Treuille and Ursula Ferrigno’s Ultimate Bread and Peter Reinhart’s Whole Grain Breads)

Makes 1 loaf

Pre-dough:
1¾ cups (8 ounces) whole wheat flour
½ teaspoon salt
¾ cup water

1. Mix all of the soaker ingredients together in a bowl for about 1 minute, until all of the flour is hydrated and the ingredients form a ball of dough.

2. Cover loosely with plastic wrap and leave at room temperature for 12 to 24 hours. (If it will be more than 24 hours, place the soaker in the refrigerator; it will be good for up to 3 days. Remove it 2 hours before mixing the final dough to take off the chill.)

Dough:
1¾ cups (9½ ounces) all-purpose or bread flour
pre-dough
2 teaspoons instant yeast
⅔ cup water, room temperature
¾ teaspoon salt

1. Add the flour to a mixer bowl fitted with hook attachment (or a large bowl if mixing by hand). Cut the pre-dough into about 12 pieces and add them to the flour, tossing the pieces to coat (to keep them from immediately sticking back together). Add the water, yeast, and salt to the mixer bowl and mix on medium-low until combined (or stir with a rubber spatula), then continue kneading until smooth and elastic, 6-8 minutes (8-10 minutes if by hand). The dough should be soft but not sticky; add flour if necessary.

2. Lightly oil a large bowl and transfer the dough to the bowl, rolling it to coat with the oil. Cover the bowl with plastic wrap or a damp towel. Let rise until doubled in size, about 1½ to 2 hours.

3. Gently pat the dough into a rough rectangle. Fold the bottom third of dough, letter style, up to the center and press to seal, creasing surface tension on the outer edge. Fold the remaining dough over the top and use the edge of your hand to seal the seam closed and to increase the surface tension all over. Press evenly with the palms of both hands and roll the dough backward and forward until it is 10 inches in length. Line a pizza peel baking parchment. Place the loaf on the peel and lightly dust with flour. Cover loosely with plastic wrap or a damp towel.

4. Proof at room temperature for about 1 hour, or until the loaf has grown to about twice its original size. About half an hour into the second rise, place a baking stone on the bottom rack of the oven and preheat the oven to 500 degrees.

5. Using a very sharp knife or a serrated bread knife, cut 5 diagonal slashes, each about ¼ to ½-inch deep, across the top of the loaf. (Alternatively, cut one long slash that extends for the length of the loaf.)

6. Transfer the dough on the parchment to the baking stone. Close the oven and reduce the temperature to 450 degrees. Bake until golden brown and the temperature is at least 200 degrees at the center. Transfer the loaves to a cooling rack and cool for at least 1 hour before slicing and serving.

Printer Friendly Recipe
Whole Wheat Country Crust Bread (adapted from Betty Crocker and Peter Reinhart’s Whole Grain Breads)

Makes 1 sandwich loaf

Pre-dough:
1¾ cups (8 ounces) whole wheat flour
½ teaspoon salt
¾ cup water

1. Mix all of the soaker ingredients together in a bowl for about 1 minute, until all of the flour is hydrated and the ingredients form a ball of dough.

2. Cover loosely with plastic wrap and leave at room temperature for 12 to 24 hours. (If it will be more than 24 hours, place the soaker in the refrigerator; it will be good for up to 3 days. Remove it 2 hours before mixing the final dough to take off the chill.)

Dough:
1¾ cups (9½ ounces) unbleached flour
1 teaspoon table salt
¼ cup water, warm (110 degrees)
1 egg
2 tablespoons vegetable oil or unsalted butter, melted
¼ cup (1.75 ounces) granulated sugar
2 teaspoons instant yeast

1. Add the flour to mixer bowl fitted with hook attachment (or a large bowl if mixing by hand). Cut the pre-dough into about 12 pieces and add them to the flour, tossing the pieces to coat (to keep them from immediately sticking back together). Add the salt, water, egg, oil, sugar, and yeast to the mixer bowl and mix on medium-low until combined (or stir with a rubber spatula), then continue kneading until smooth and elastic, 6-8 minutes (8-10 minutes if by hand). The dough should be soft but not sticky; add flour if necessary.

2. Lightly oil a large bowl and transfer the dough to the bowl, rolling it to coat with the oil. Cover the bowl with plastic wrap or a damp towel. Let rise until doubled in size, about 1½ to 2 hours.

3. Form dough into loaf by gently pressing the dough into a rectangle, one inch thick and no wider than the length of the loaf pan. Next, roll the dough firmly into a cylinder, pressing with your fingers to make sure the dough sticks to itself. Turn the dough seam side up and pinch it closed. Finally, place dough in greased 9-by-5-by-3-inch loaf pan and press it gently so it touches all four sides of the pan.

4. Cover with plastic wrap or a damp towel; set aside in warm spot until dough almost doubles in size, about 45 minutes. Heat oven to 350 degrees.

5. Remove plastic wrap from loaf pan; place pan in oven. Bake until instant-read thermometer inserted at angle from short end just above pan rim into center of loaf reads 195 degrees, about 40 to 50 minutes. Remove bread from pan, transfer to a wire rack, and cool to room temperature. Slice and serve.
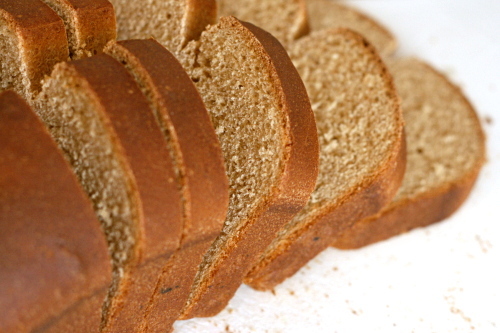
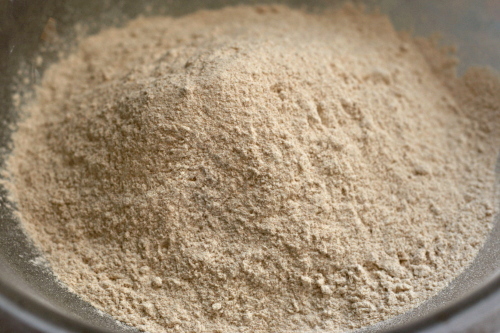
honey-wheat cookies

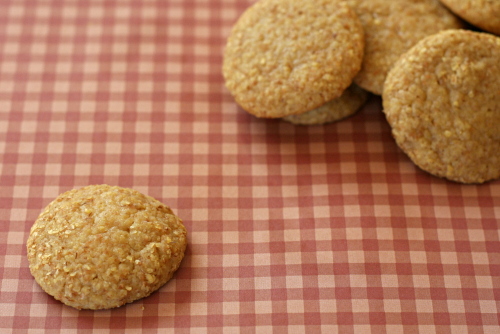
The problem with wheat germ cookies is that my mind focuses on the wheat germ part instead of the cookie part. So then these are healthy and therefore perfectly acceptable to eat with my tea – before breakfast. Wheat germ, people! Whole grains! Cookie schmookie.

Plus – they’re so good! No joke. I had my doubts too, especially after several weeks of baking delicious chocolate treats for Tuesdays with Dorie. Wheat germ in cookies? But the texture is so perfectly soft and chewy. The lemon was evident but somewhat subtle. The wheat germ added just a taste of bitterness. I was surprised to find that the honey was the strongest flavor, which I love because often the flavor of natural sugars gets lost in the oven.

Michelle chose these great cookies for TWD. She has the recipe posted.

One year ago: Devil’s Food White Out Cake

oatmeal pancakes

Dave gets a man magazine – not one with naked ladies, but one about fashion and supposedly culture and, I don’t know, other manly stuff. I know he’ll insist that I clarify that he doesn’t pay for it. Anyway, the last issue had an article about getting in shape in which the author claims that whole wheat gives guys man boobs. Instead, men should focus on grains like oats and quinoa.

Yes, it’s whole wheat that gives you man boobs, and not, you know, overeating. I suspect that eating too much quinoa without exercising would also result in man boobs.

But hey, if you’re concerned about your man boob potential, these pancakes are perfect for you, because they are almost completely oats, with just a small amount of flour. Of course, they have a stick of butter in them, but hey, the problem is whole wheat, right, not fat.

Plus I cut the amount of butter in half and the pancakes were still perfect. I also substituted whole grain pastry flour for half of the flour in the recipe, my new favorite trick with quick breads. I increased the milk a little to make up for the lost liquid from the butter.

I’m loving the result of soaking oats before mixing them into batter. Once the oats are softened, they blend better with the rest of the ingredients. I’m also really eager to try toasting the oats before mixing them with the liquid, because I love the flavor that toasting gives oats. I’ll have to try that next time, which might be soon, since I don’t want to give Dave man boobs by making him regular pancakes.

One year ago: Tofu Croutons
Two years ago: Old-Fashioned Chocolate Layer Cake

Printer Friendly Recipe
Oatmeal Pancakes (adapted from Orangette, who adapted it from the Inn at Fordhook Farm in Doylestown, PA)

4 servings

I replaced ¼ cup of the flour with the equal amount of whole wheat pastry flour, a trick I’ve found very successful with pancakes and muffins.

2 cups old-fashioned oats
2 cups + ½ cup buttermilk
½ cup (2.4 ounces) all-purpose flour
2 tablespoons sugar
1 teaspoon baking powder
1 teaspoon baking soda
½ teaspoon table salt
2 large eggs, lightly beaten
4 tablespoons (½ stick) unsalted butter, melted but not hot
vegetable oil for the pan

1. Combine the oats and 2 cups of the buttermilk in a medium bowl. Cover with plastic wrap and refrigerate overnight.

2. In a medium bowl, whisk together the flour, sugar, baking powder, baking soda, and salt. Whisk the remaining ½ cup buttermilk, the eggs, and then the butter into the oat mixture. Fold the flour mixture into the batter.

3. Brush a large nonstick skillet or griddle with vegetable oil; heat over medium heat. Spoon scant ¼ cups of the batter onto the pan. Cook until the sides of the pancakes start to look dry and the bottom is golden brown, 2-3 minutes. Flip, then continue to cook until the second side is also golden brown, about 2 minutes. Repeat with the remaining pancakes, adjusting the heat if necessary. If you’d like, you can keep the pancakes in a 200 degree oven on a cooling rack set over a baking sheet until the whole batch is cooked.

oatmeal raisin muffins

I must be growing up. Since when do I like raisins? At least I still think green peppers are blech. If that ever changes, I know I’ll be ready to pick up my cane and trade in my real teeth for the kind you take out at night to clean. Oh, and buy one of those plastic bag things to wrap around my head when it rains.

Granted, Dave pointed out that these are particularly good raisins. Even so, these muffins are wonderful – soft and fluffy and tender, and the raisins add some tartness and the pecans a bit of crunch, and all together, kinda sorta perfect actually!

They’re not too bad for you – oats are whole grains, right? I replaced a third of the flour with whole wheat pastry flour, a great trick with muffins. Let’s forget about the butter, okay? You have to pay a small price for muffins this good.

It seems inconceivable, but could oatmeal raisin cookies be my next favorite thing? I did buy yellow peppers for the fajitas we’re making for dinner tonight, instead of the green peppers called for in the recipe, so I feel safe there. Still young! (And picky, apparently.)

Two years ago: Potstickers

Printer Friendly Recipe
Oatmeal Raisin Muffins (adapted from Morning Food, by Margaret S. Fox and John B. Bear, via recipezaar)

Makes 12

I substituted ¼ cup whole wheat pastry flour for an equal amount of white flour, and the muffins were still wonderful.

1 cup old-fashioned oats
1 cup buttermilk
¾ cup (3.6 ounces) all-purpose flour
½ teaspoon baking powder
½ teaspoon salt
¾ teaspoon baking soda
1 teaspoon cinnamon
pinch nutmeg
½ cup pecans or walnuts, chopped
2 eggs, beaten lightly
⅓ cup (2.35 ounces) packed light brown sugar
6 tablespoons melted butter
½ cup raisins

1. Combine the oats and buttermilk and let stand 30 minutes. Adjust a rack to the middle position and heat the oven to 400ºF. Spray the bottoms only of a 12-cup muffin pan with nonstick spray or line with paper liners. Combine the flour, baking powder, salt, baking soda, cinnamon, and nutmeg.

2. Spread the nuts evenly on a baking sheet. Bake, shaking the pan every couple of minutes, until fragrant, about 5 minutes. Transfer the nuts to a small bowl. (If you leave them on the hot pan, they’ll continue to cook and might burn.)

3. Add the eggs to the oatmeal mixture one at a time, whisking thoroughly after each addition. Whisk in the sugar, then the butter. Switch to a rubber spatula and fold in the flour mixture. Once the flour is dispersed, but not completely moistened, gently stir in the raisins and nuts.

4. Divide the batter evenly between the muffin cups. Bake until a toothpick inserted into a muffin comes out clean, 13-18 minutes. Set the pan on a rack to cool slightly, about 5 minutes, then use a thin-bladed knife to remove the muffins from the pan.

butternut squash macaroni and cheese

I don’t think I do too badly with self-control. I can sit at home all day with banana cream pie in the fridge and not even think about it until it’s time for dessert and tea. I don’t drink alcohol on weekdays (those extra calories are saved for dessert), and it isn’t a struggle, even though we have plenty of it around.

But there are two foods that I have no control with – chocolate chip cookie dough and macaroni and cheese. No kidding, I can eat both until I’m feeling not so good, and even that won’t stop me from craving more as soon as I digest a bit. As a result, macaroni and cheese has been allocated to a once-in-a-blue-moon treat.

But…can I make a version of macaroni and cheese that is healthy enough to eat more often, but still worth craving?

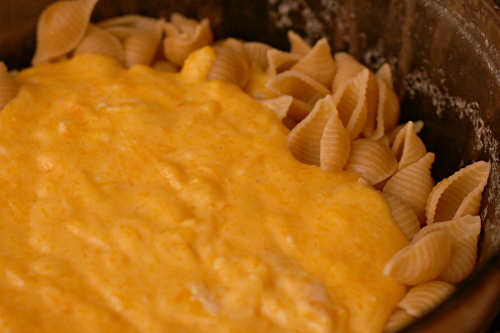
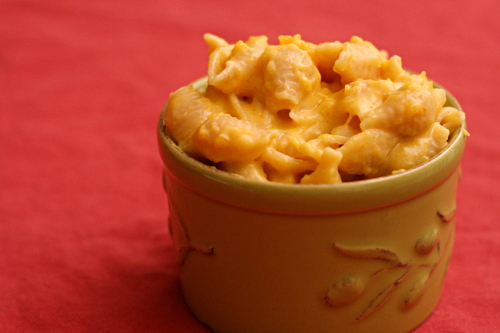
Apparently. I’m not saying that this is hardcore health food, but it’s not so bad nutrition-wise. The squash does an admirable job of replacing some of the cream sauce, and it isn’t just a “hide the vegetables” trick, because the flavor is surprisingly complementary. The final dish was sweeter than regular mac and cheese, but that wasn’t a bad thing. And it doesn’t hurt that the golden color of the squash makes the pasta look even cheesier.

I shouldn’t be shoveling this into my maw without abandon any more than I do regular macaroni and cheese, but at least it’s healthy enough to eat more than twice a year.  Tasty enough too.

One year ago: Fish Tacos

Printer Friendly Recipe
Butternut Squash Macaroni and Cheese (adapted from Branny Boils Over)

You can adapt this in a number of ways. The easiest is by changing the type of cheese, although if you can, using a combination of cheddar and a good melter will give you consistently great results. Branny adds in a couple ounces of cream cheese, which will make the sauce extra creamy, but I decided I could skip it and make this a little healthier.

Most homemade macaroni and cheese recipes call for a final baking step, which I’ve skipped here simply because I wanted to make this as easy as possible for a weeknight dinner. If you prefer your mac and cheese baked, I recommend pouring it into a broiler-safe 8-inch square pan, topping it with bread crumbs made from fresh bread, and heating it about 5 inches from the broiler for a couple of minutes.

Each serving has about 325 calories.

Serves 8

1 small butternut squash
12 ounces elbow macaroni
salt
2 tablespoons unsalted butter
2 tablespoons all-purpose flour
½ teaspoon powdered mustard
2 cups milk
4 ounces Monterey Jack cheese, shredded (1 cup)
4 ounces sharp cheddar cheese, shredded (1 cup)

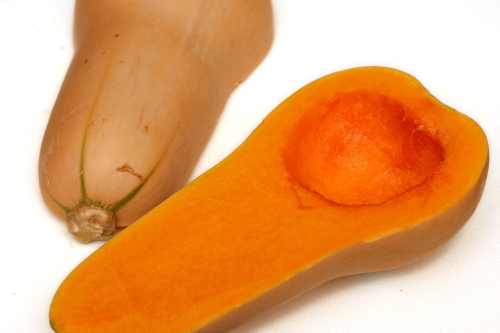
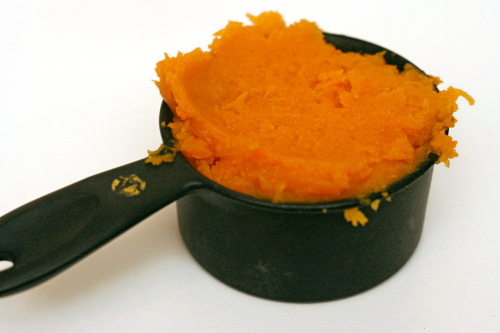
1. Adjust on oven rack to the middle position and heat the oven to 425 degrees. Cut the squash in half lengthwise, scoop out the seeds, and lay the halves cut side down on a parchment-lined baking sheet. Bake for 25-35 minutes, or until a butter knife inserted into the flesh meets no resistance. Scoop 2 cups of flesh from the squash and mash it with a fork, or, if you’re willing to put a bit more effort into it (I wasn’t), puree it in a blender or food processor.

2. Meanwhile, bring a large pot of water to a boil over high heat. Once it boils, add about a tablespoon of salt and the pasta. Cook the pasta until it’s tender. Drain and return the pasta to the pot.

3. Melt the butter in a medium saucepan over medium heat. Once the foaming subsides, add the flour and mustard. Whisk constantly for 1 minute, then gradually whisk in the milk. Bring the mixture to a simmer over medium heat, whisking frequently, then lower the heat to medium-low and simmer for 5-6 minutes, until the mixture has the consistency of heavy cream. Add the cheeses, ½ teaspoon table salt, and the squash, stirring until the cheese melts.

4. Pour the sauce over the drained pasta and stir thoroughly. Serve immediately.

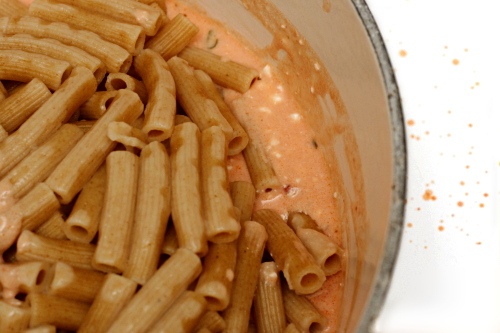
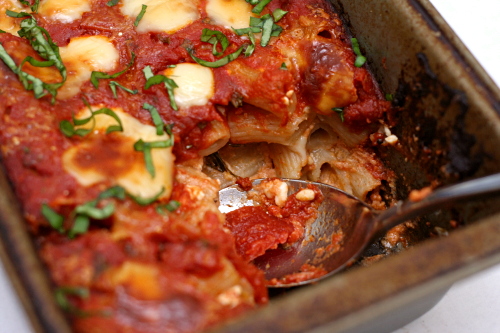
baked ziti

I am officially out of recipes to share. I am now raiding my “Probably Not” folder – the rejects that either didn’t taste good or didn’t photograph well. I’ll spare you that ones that didn’t taste good.

It seems like I could just make something new and blog about it, right? The thing is though, nothing is working quite right for me lately. My delicious banana cream pies keep coming out with a layer of candy armor over the crust; the southwestern pasta salad recipe I patched together was too similar to and probably not quite as good as this one; I never got the ratios right in my cocktail last weekend (despite many attempts), and I forgot to take final photos of my pesto.

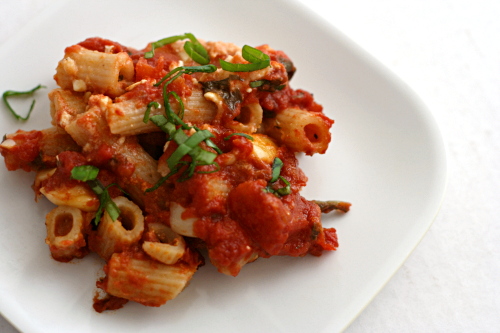
I’m just lucky that the photos of the baked ziti aren’t as ugly as I’d remembered. For this is not in the “didn’t taste good” category. With a mixture of pasta, tomatoes, cheese, and herbs, how could it not be delicious?

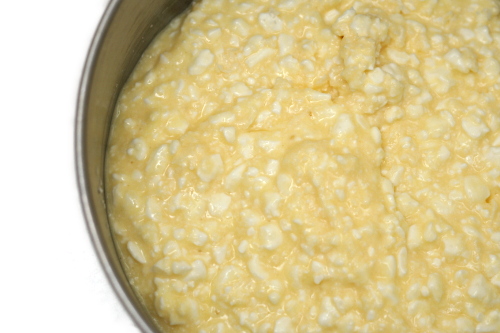
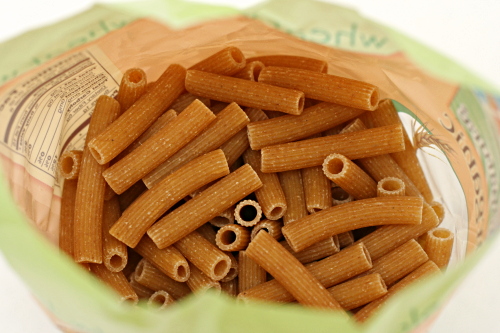
And although it’s hard to believe, you can make it halfway healthy without sacrificing much in the way of flavor or creaminess. In my experience, good whole wheat pasta (I like Bionaturae) is hardly different from refined versions. I’m perfectly happy with 1% cottage cheese and skim mozzarella. That just leaves the heavy cream to worry about, and with a slight increase in the cornstarch, you can get away with using milk instead.

And you can make it ahead, and it freezes well, and it reheats well, and heck, it isn’t half bad cold if you’re too impatient to bother heating it up. This is certainly worth pulling out of the reject file.

One year ago: Herbed Lima Bean Hummus
Two years ago: Country Crust Bread

Printer Friendly Recipe
Baked Ziti (from Cooks Illustrated)

Serves 8-10

Healthy tricks: Use 1% cottage cheese, whole wheat pasta, part-skim mozzarella, and 2 teaspoons cornstarch plus 1 cup milk instead of ¾ teaspoon cornstarch with 1 cup heavy cream.

1 pound whole milk or 1% cottage cheese
2 large eggs, lightly beaten
3 ounces parmesan cheese (about 1½ cups), grated
table salt
1 pound ziti pasta
2 tablespoons extra-virgin olive oil
5 medium garlic cloves, minced (about 5 teaspoons)
1 (28 ounce) can tomato sauce
1 (14.5 ounce) can diced tomatoes
1 teaspoon dried oregano
½ cup plus 2 tablespoons chopped fresh basil leaves
1 teaspoon sugar
black pepper
¾ teaspoon cornstarch
1 cup heavy cream
8 ounces low-moisture mozzarella cheese, cut into ¼ inch pieces (about 1½ cups)

1. Adjust oven rack to middle position and heat oven to 350°F. Whisk cottage cheese, eggs and 1 cup Parmesan together in medium bowl; set aside. Bring 4 quarts of water to boil in large Dutch oven over high heat. Stir in 1 tablespoon salt and pasta; cook, stirring occasionally, until pasta begins to soften but is not yet cooked through, 5 to 7 minutes. Drain pasta and leave in colander.

2. Meanwhile, heat oil and garlic in 12-inch skillet over medium heat until garlic is fragrant but not brown. Stir in tomato sauce, diced tomatoes, and oregano; simmer until thickened, about 10 minutes. Off heat, stir in ½ cup basil and sugar, then season with salt and pepper.

3. Stir cornstarch into heavy cream in small bowl, transfer mixture to Dutch oven set over medium heat. Bring to simmer and cook until thickened, 3 to 4 minutes. Remove pot from heat and add cottage cheese mixture, 1 cup tomato sauce and ¾ cup mozzarella, then stir to combine. Add pasta and stir to coat thoroughly with sauce.

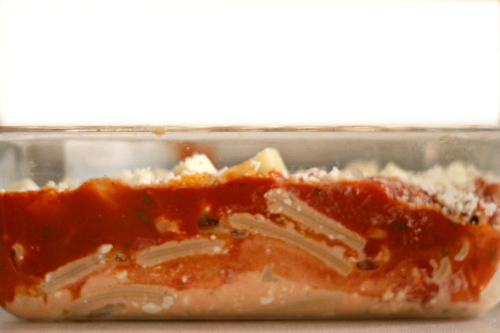
4. Transfer pasta mixture to 13- by 9-inch baking dish and spread remaining tomato sauce evenly over pasta. Sprinkle with remaining ¾ cup mozzarella and remaining ½ cup Parmesan over top. Cover baking dish tightly with foil and bake for 30 minutes.

5. Remove foil and continue to cook until cheese is bubbling and beginning to brown, about 30 minutes longer. Cool for 20 minutes. Sprinkle with remaining 3 tablespoons basil and serve.
apple muffins

I don’t know why I feel the need to state this every year, but, again, for the record: I am pro New Year’s Resolution. Yes, we all know that you can resolve to make changes any day of the year. So what? New Year’s Day is the official last day of holiday craziness. It’s the perfect day to start thinking about new routines.

Besides, this year, I also moved from the East Coast to the Southwest; from a suburb of one of the country’s largest cities to a very small, very isolated town; from an apartment to a house; from the subtropics to the desert. Dave is starting a new job; I’ll be starting one new job this week, plus interviewing for two others. I didn’t just make a New Year’s resolution; I made a resolution for this new life.

My goal is, in a nutshell, to be perfect. That sounds obtainable, right? More realistically, it’s to be a person I can be proud of. And, yes, part of that, the easier part actually, involves fitness.

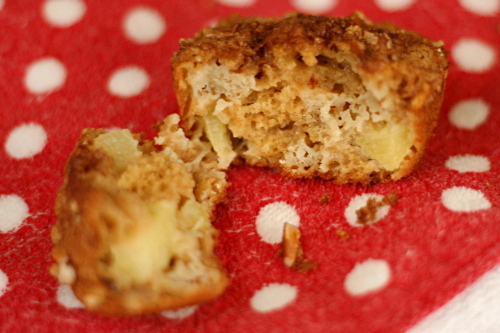
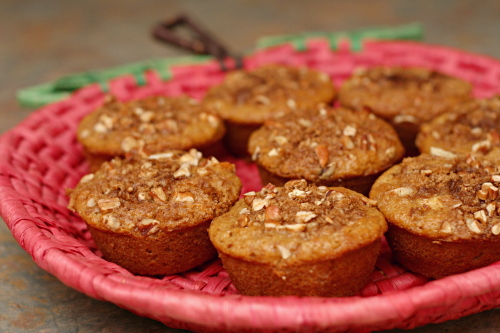
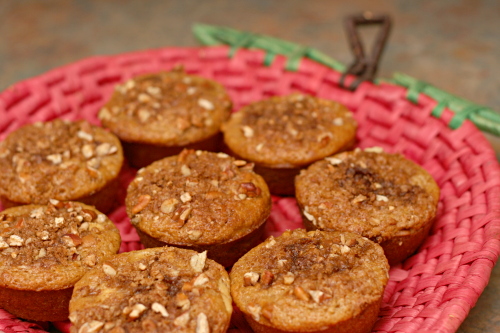
Fortunately, eating healthy isn’t a bit challenging when there are recipes like this one. Nothing about these indicates that they’re better for you than most muffins. But with whole wheat pastry flour substituting for half of the flour and applesauce taking the place of some of the fat, they’re downright wholesome. They’re also fluffy and light and delicious.

Muffins = one small step toward a more perfect me! Now I just need to keep it up for ever or so, plus be more productive, creative, organized, active, outgoing, focused, positive, motivated…

Two years ago: Macaroni and Cheese, Banana Cream Pie

Printer Friendly Recipe
Apple Muffins (from Ellie Krieger)

12-16 muffins

My batter seemed a little too liquidy. Next time I’ll reduce the buttermilk to ½ cup.

The original recipe says it makes 12 muffins, but I had extra batter.

cooking spray
¾ cup (5.25 ounces) plus 2 tablespoons packed brown sugar
¼ cup chopped pecans
½ teaspoon ground cinnamon
1 cup (4.8 ounces) all-purpose flour
1 cup whole-wheat pastry flour
1 teaspoon baking soda
½ teaspoon salt
¼ cup canola oil
2 large eggs
1 cup natural applesauce
1 teaspoon vanilla extract
¾ cup lowfat buttermilk
1 Golden Delicious apple, peeled, cored and cut into ¼-inch pieces

Preheat oven to 400 degrees. Coat a 12-capacity muffin pan with cooking spray.

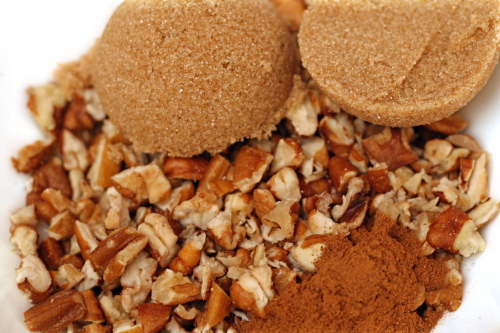
In a small bowl, mix together 2 tablespoons of the brown sugar, the pecans and cinnamon.

In a medium bowl, whisk together the all-purpose and whole-wheat flour, baking soda and salt.

In a large bowl, whisk the remaining ¾ cup sugar and oil until combined. Add the eggs, one at a time, whisking well after each addition. Whisk in the applesauce and vanilla.

Whisk in the flour mixture in two batches, alternating with the buttermilk. Whisk just until combined. Gently stir in the apple chunks.

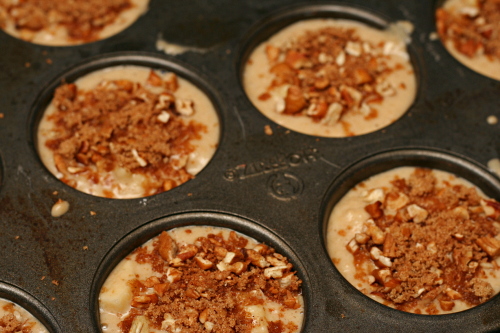
Pour the batter into the prepared muffin pan and sprinkle with the pecan mixture. Tap the pan on the counter a few times to remove any air bubbles. Bake for 20 minutes or until a wooden pick inserted in center of one of the muffins comes out clean.

Let cool on a wire rack for 15 minutes. Run a knife around the muffins to loosen them and unmold. Cool completely on the rack.

asian-style chicken noodle soup

I don’t get sick very often, which I chalk up mostly to luck (or I guess good genes). It probably also helps that I try to eat bunches of fruits and vegetables, drink a lot of water, get plenty of sleep, and exercise regularly.

Of course, over the holidays, I tend to grab a cookie instead of a piece of fruit for a snack, and I sleep less, and I drink wine instead of water, and I spend a lot of time indoors, and…blah, this year, I got the Cold From Hell right after Christmas. I spent the better part of three days sitting on the couch with a book, a mug of tea, and a blanket (which sounds nice, yet wasn’t). I did, however, find enough energy to make chicken soup.

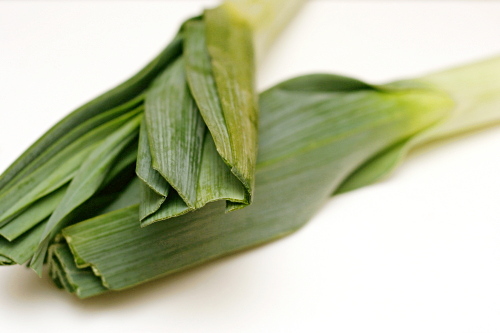
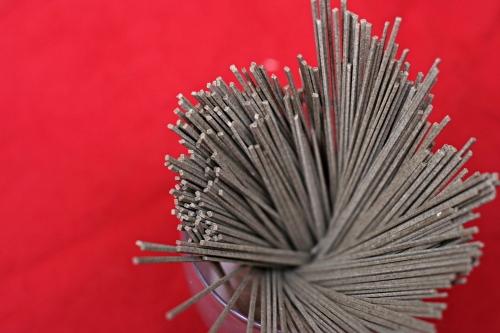
I wasn’t in the mood for a traditional version, which just seemed too hearty for how I was feeling. I wanted a gently flavored broth with ginger and leeks instead of more assertive aromatics like onions and carrots. Mushrooms were a light addition and Japanese soba noodles made the soup into a balanced meal.

It definitely hit the spot, which was good because we didn’t eat much besides this and tomato soup for a few days. It seems to have worked, because this morning – finally! – I’m breathing through my nose. I forgot how wonderful that feels.

Two years ago: Pad Thai
One year ago: Pasta with Broccoli, Sausage, and Roasted Red Peppers

Printer Friendly Recipe
Asian Chicken Noodle Soup

6 main dish servings (probably 12 first-course servings)

My small-town grocery store didn’t have shiitakes, which was very sad, so I used oyster mushrooms. You can use really any type of mushroom, including white button.

2 skin-on, bone-in chicken breasts, 12 to 16 ounces each
2 teaspoons vegetable oil
2 leeks, white and light green parts only
1 tablespoon peeled and minced ginger
2 garlic cloves, minced
4 cups water
4 cups chicken broth
8 ounces soba noodles, broken in half
12 ounces shiitakes, stemmed discarded, caps sliced thin
2 tablespoon rice vinegar
4 tablespoons soy sauce
1 teaspoon chili oil (optional)
1 tablespoon toasted sesame oil
¼ cup chopped cilantro
2 scallions, chopped

1. Adjust an oven rack to the lower-middle position; heat the oven to 450 degrees. Heat the oil in 5-quart Dutch oven over medium-high heat; swirl to coat the pot evenly with oil. Brown the chicken breasts skin side down until deep golden, 3 to 4 minutes; turn the chicken breasts and brown until they’re golden on the second side, 3 to 4 minutes longer. Place the pot with the chicken in the oven; roast until the thickest part of a breast registers 160 degrees on instant-read thermometer, 18 to 25 minutes. Transfer the chicken to a platter and set aside until it’s cool enough to handle, then shred it, discarding the bones and skin.

2. Discard all but about 1 tablespoon of the fat in the Dutch oven. Without rinsing the pot, sauté the leeks, ginger and garlic over medium heat until the leeks are softened, 3-4 minutes, scraping up any browned bits from the bottom of the pot. Add the water and broth; bring to a boil over medium-high heat, then cover the pot and reduce the heat to medium-low. Simmer for 15 minutes.

3. Add the mushrooms, chicken, and soba to the broth mixture and simmer for about 6 minutes, until the noodles are tender. Stir in the rice vinegar, soy sauce, chile oil, sesame oil, cilantro and scallions. Serve.
wheat berries with caramelized onions, feta, and lentils

Copy of IMG_0628

I’m really looking forward to moving to New Mexico. There’s absolutely nothing wrong with Philadelphia; any unhappiness I had here was my own deal and not a result of the location. But I am excited about having a fresh start somewhere.

Copy of IMG_0597

I am a little concerned about the grocery store situation. I have been majorly spoiled the last few years by always living near a Wegman’s. If you’re not familiar, suffice to say that it’s a great store, with a huge selection and high quality. When a recipe says that an ingredient can be found in “any well-stocked grocery store”, I’ve never had to worry about how I’d get a hold of it.

Copy of IMG_0613

The town we’re moving to, though, is small and isolated. It has just one grocery store. My initial explorations during our visit there over the summer indicated that it isn’t terrible but it isn’t great. I should be able to find, say, goat cheese, but only one type.

Copy of IMG_0606

So I’ve been trying to take advantage of the wide selection of my current store while I can, by buying random unusual ingredients that I’m pretty sure I won’t be able to find after the move. My plan was actually to buy farro, but I guess even Wegman’s has its limits because they didn’t have it. I almost went with quinoa, since it’s familiar and safe, but I managed to talk myself into trying wheat berries instead.
Copy of IMG_0618

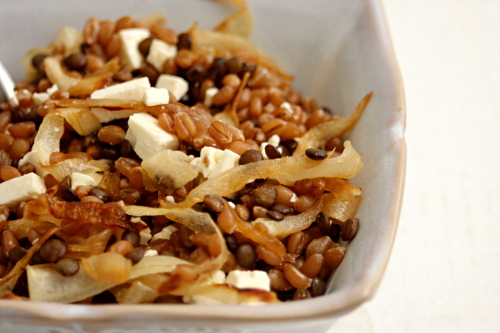
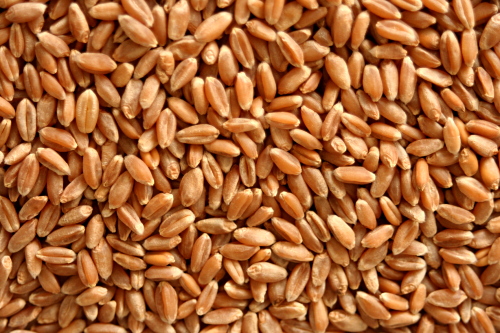
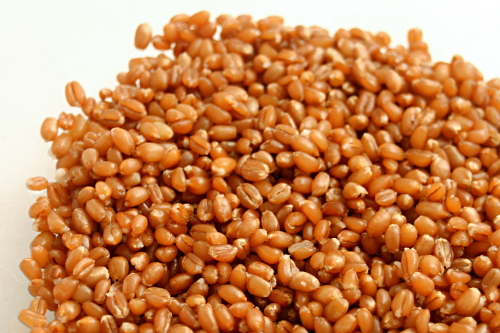
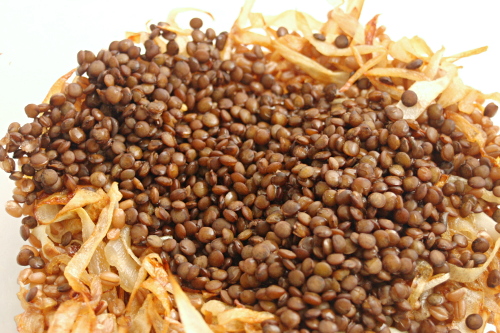
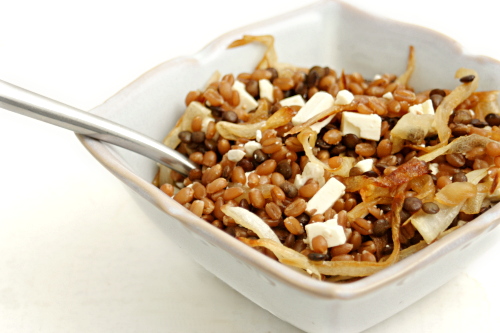
Well, I don’t know about farro, but wheat berries are certainly delicious. They’re nutty, and the texture was chewy, not unpleasantly crunchy or mushy. The sweet caramelized onions were a great compliment, and then the salty feta was perfect on top of all of that. The whole thing was just so good, and I couldn’t believe how healthy it was to boot. I sure hope I can find wheat berries and feta after we move because I want to be making this meal a lot!

Copy of IMG_0621

One year ago: Bacon-Wrapped Pork Tenderloin Medallions

Printer Friendly Recipe
Wheat Berries with Caramelized Onions, Lentils, and Feta (adapted a bit from Orangette; wheat berry cooking method from Deborah Madison’s Vegetarian Cooking for Everyone)

2-3 servings

You might not need a recipe here, because you’re just combining grains and lentils with caramelized onions and feta. If you already have favorite ways to cook grains, lentils, and onions, you should absolutely feel free to use those. In case you don’t, I’ll provide my preferred methods here.
You can probably skip the lentils if you don’t want to deal with an extra ingredient. Also, I haven’t tried it myself, but I don’t see why you couldn’t just add them to the wheat berries at the point when the wheat has 25 minutes of cooking left. Just make sure there’s enough water in the pot.  (Update 6/14/11: You can definitely cook the lentils in the same pot as the wheat berries. I’ve also used farro in this recipe now, which is convenient because it cooks in the same amount of time as lentils.)

I think you could use almost any grain here, as long as you adjust the cooking time. Quinoa would definitely be good (and would make this meal gluten-free).

¾ cup wheat berries
salt
2 onions, sliced
1 tablespoon olive oil
½ cup lentils, preferably lentils de puy, picked over and rinsed
4 ounces feta cheese, crumbled
hot sauce (optional)
lemon wedges (optional)

1. Soak the wheat berries in water for at least an hour and up to overnight. Put them in a pot with enough water to cover by a few inches. Bring to a boil, then lower the heat, cover the pot, and simmer until they’re tender, 1 to 2 hours. Add ½ teaspoon salt once they’ve started to soften.

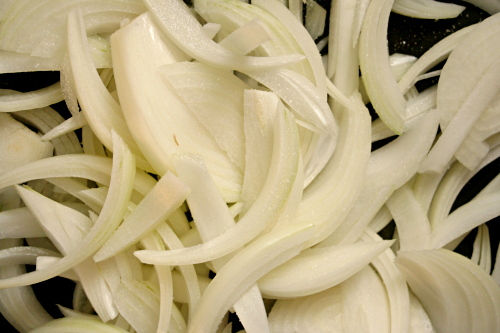
2. Heat the oil in a large nonstick skillet over medium-high heat. Add the onions and ¼ teaspoon salt, reduce the heat to medium, and cook, stirring somewhat frequently, until they just start to brown, about 8 minutes. Reduce to heat to medium-low and continue to cook and stir until the onions are evenly golden brown, about 20 minutes longer.

3. Put the lentils into a small saucepan. Add 3 cups of cold water and ¼ teaspoon salt. Bring to a boil over medium-high heat, then reduce the heat and simmer until tender but not falling apart, about 20 to 25 minutes. Drain.

4. Combine the wheat berries, caramelized onions, lentils, and feta. Adjust the seasonings if necessary and serve with either hot sauce or lemon wedges, if desired.

Copy of IMG_0625

sandwich rolls

Copy of IMG_4632

Allright, so. NaBloPoMo. National Blog Posting Month, or in my case, Clean Out the Crazy-Full Pending Folder Month. I remember it being pretty tough last year, and it’s looking like it’s going to be even more challenging this year, because we finally (!!!) got a move date, and it’s the first week of December. That means November will include not just travel for Thanksgiving, but flying across the country to look for houses, and packing packing packing!

Copy of Copy of IMG_4568

Keeping with NaBloPoMo tradition, I’m starting with the oldest recipe in my Pending folder – from six months ago, yeesh. Please don’t take the delay as a sign of its quality! Truthfully, I’m just lazy and it’s a time-consuming entry.

Copy of Copy of IMG_4605

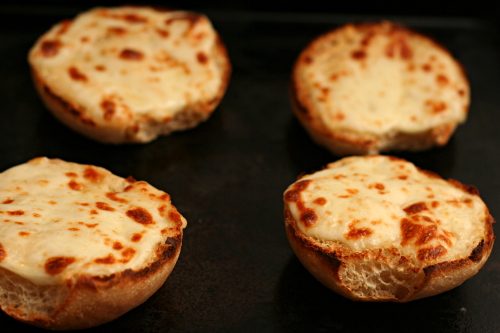
I’ve been battling with finding or developing the perfect sandwich roll recipe for years, and I finally nailed it. My grocery store makes great sandwich rolls – fluffy and with a soft crust so your filling doesn’t squoosh out the other end when you try to bite into your sandwich. The problems with these rolls are twofold: First, they’re completely white bread, and I always like at least a little whole wheat flour in my bread. Second, they’re a bit too big for grilled cheese with tomato soup. And I suppose there’s a third problem: Our grocery store isn’t moving to New Mexico with us. So sad.

Copy of IMG_4620

My initial attempts to make sandwich rolls tended to be either too dense, with a crust too tough, or misshapen. I had difficulty getting round rolls without deflating the risen dough. Or the dough didn’t have enough structure so the rolls turned into pancakes as they expanded instead of balls.

Copy of IMG_4622

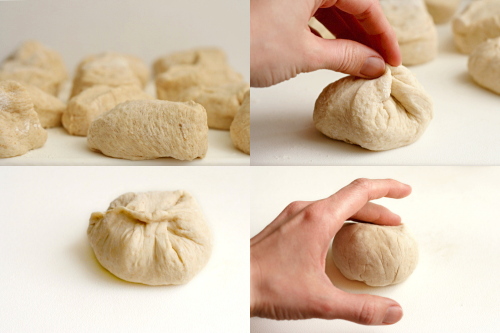
I believe I’ve solved all of those problems with this recipe. A slow overnight cold rise improves flavor, and then two turns of the rising dough gives it plenty of strength, so that when it rises, it rises up and not out. To shape the rolls into even circles, I pulled the edges around and pinched them together to increase the surface tension of the doughballs. This is a bit risky, because you have to be gentle and just tug at the very edges of the dough without deflating the dough. Then just roll it around a bit to even out the edges.

Copy of IMG_4629

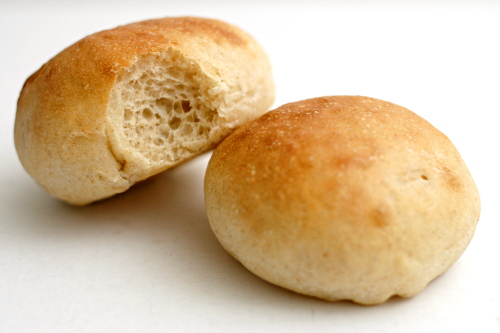
Perfect! Light and fluffy, tall, with a soft crust, and completely adaptable with regards to size and degree of whole wheatiness. And I figured it out just in time – before moving far, far away from my trusty favorite grocery store and their wonderful sandwich rolls.

Copy of IMG_4636

One year ago: Mushroom Phyllo Triangles and Crawfish Phyllo Triangles

Printer Friendly Recipe
Sandwich Rolls

Makes 12

Feel free to substitute whole wheat flour for some of the unbleached flour. If you use 1 cup whole wheat and 3 cups white flour, you’ll hardly notice a difference in flavor, texture, or rising time. At 2 cups whole wheat flour and 2 cups white flour, the difference will be more significant but the rolls will still be excellent. If you want to use even more whole wheat flour, I would adapt 100% whole wheat sandwich bread into rolls.

If it works better for your schedule, go ahead and skip the overnight chill.

4 cups (19.2 ounces) unbleached all-purpose flour, plus
2 teaspoons instant yeast
2 tablespoons granulated sugar
1 teaspoon salt
1½ cups water
2 tablespoons olive oil
2 tablespoons milk for brushing the rolls

1. Stand mixer: Mix the flour, yeast, sugar, and salt in the bowl of a stand mixer fitted with the dough hook. With the mixer on low speed, gradually add the water and oil. Continue mixing on medium-low until the dough is elastic and supple, about 8 minutes. You may need to add a little more flour or water to get the correct consistency – soft but not really sticky. Transfer the dough to an oiled bowl and cover with plastic wrap. Refrigerate overnight.

By hand: Mix the flour, yeast, sugar, and salt in a large bowl. Make a well in the middle of the dry ingredients and pour in the water and oil. Stir the mixture until the dough comes together. Transfer it to a floured board or countertop and knead, incorporating as little flour as possible, for about 10 minutes, until the dough is elastic and supple. You may need to add a little more flour or water to get the correct consistency – soft but not really sticky. Transfer the dough to an oiled bowl and cover with plastic wrap. Refrigerate overnight.

2. Remove the dough from the refrigerator and let it warm and rise at room temperature until it’s double the original volume, 2-4 hours (depending on the temperature of the ingredients you started with and the room temperature).

3. Give the dough one turn, by folding it into thirds like a sheet of paper going into an envelope, than in half the other direction (as shown in the photos above). Allow the dough to rise again, which should take about an hour. Give it another turn, then let it rise again, which will probably take less than an hour.

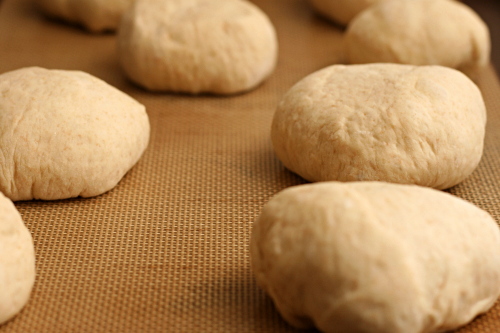
4. Once the dough has doubled in size for the third time, cut it into 12 pieces. Very gently pull the edges of each dough ball around to one side and pinch them together, as shown in the photos above. Roll the dough between the palm of your hand and a board, lightly floured if necessary. Place the formed rolls, pinched side down, on 2 baking pans lined with parchment paper or silicone baking mats.

5. Adjust an oven rack to the middle position and preheat the oven to 400ºC. Let the rolls rise until puffy and about one and a half times their original size, 30-45 minutes. Brush them with milk and bake for 12 minutes, until golden brown and an instant thermometer inserted into the center of one measures 185-200ºC. (I suggest baking just one pan of rolls at a time. An extra 15 minutes of rising won’t ruin your rolls.) Let cool until room temperature before serving, about 45 minutes.