Search Results for: bagels

golden brioche loaves

brioche 6

Saturday I had a cooking extravaganza. I chose five fun recipes and spaced out the eating and the cooking over the course of the evening. I spent hours in the kitchen, and I had a great time.

brioche 3

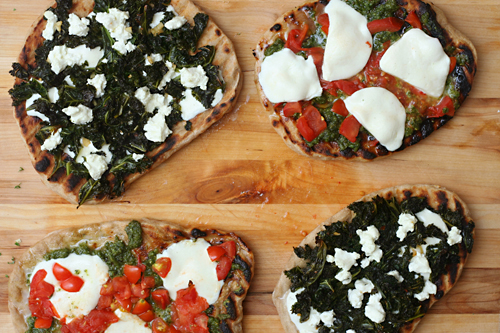
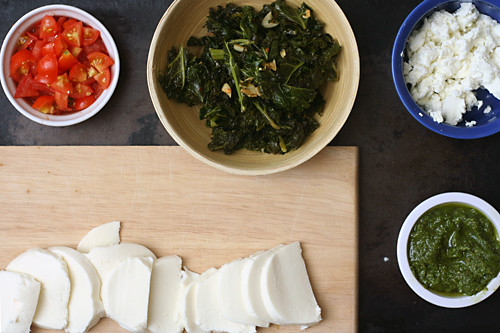
I spent most of Sunday in the kitchen as well, but it wasn’t planned, so it wasn’t as fun. Plus, I made bread dough for three types of bread, but one (completely delicious) grilled pita was the only bread I ate all day. It’s a good reminder that the best part of cooking is eating.

brioche 4

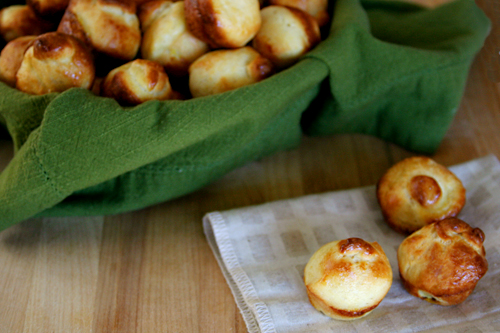
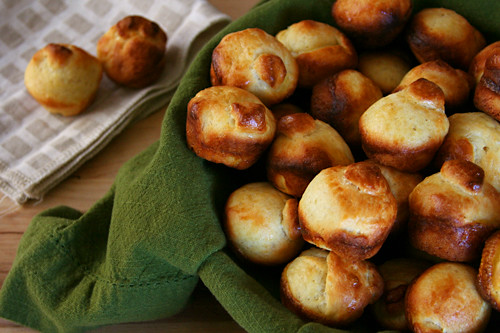
Of course it’s worth it in the end. I was thankful for the Sunday’s batch of bagels at work Monday morning, and I was grateful for the brioche on Tuesday. My coworkers were particularly grateful for the brioche. Who can say no to bread that’s this flakey, and most importantly, buttery?

brioche 9

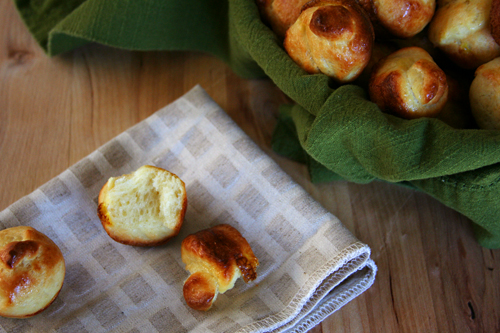
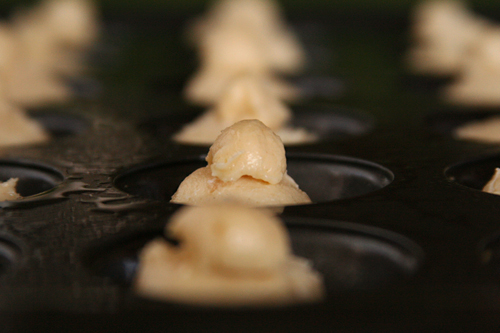
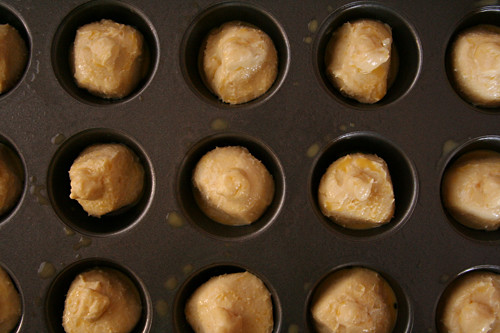
Margie chose brioche for Tuesdays with Dorie, and she has the recipe posted. Despite Dorie’s recommendation that the full recipe (enough for two loaves) of dough be made at once, I was able to make only half the recipe with no problems. For tiny brioches baked in a mini muffin pan, I divided the half recipe into 36 portions and baked them at 450 degrees for 12 minutes.

One year ago: Crunchy and Custardy Peach Tart
Two years ago: Applesauce Spice Bars
Three years ago: Chocolate-Banded Ice Cream Torte

brioche 7

pizza bianca with goat cheese and greens

kale goat cheese pizza 4

When it comes to grilled pizza, I’m a slow learner. We’ve made crusts so burned that we had to chip flakes of blackened bread off before we could eat it. We’ve also made pizza with doughy undercooked crusts and with unmelted cheese and raw toppings. About the only problem we haven’t had is the dough sticking to the grate, so at least there’s that.

kale goat cheese pizza 1

This was my most successful attempt at grilling pizza so far, but even so, it’ll be a while before there’s any kind of grilled pizza tutorial from me. Instead, I will provide my standard foolproof oven method for a very non-standard pizza. My ears perk up whenever anyone mentions goat cheese, which is no surprise since it’s so creamy and tangy. But I like kale almost as much, which is maybe more surprising.

kale goat cheese pizza 2

This is the first time I’ve eaten them together, but it’s a combination that makes good sense, because the tart goat cheese will balance the earthy kale. With crushed red pepper spicing things up and mozzarella holding everything together, this was one different and delicious pizza – with charcoal flavor or not. It was almost as good as the pizza margherita we made to go with it, and that’s really saying something.

kale goat cheese pizza 3

One year ago: Vanilla Bean Cupcakes
Two years ago: Sourdough Bagels
Three years ago: Salmon Clubs with Avocado Butter

Printer Friendly Recipe
Pizza Bianca with Goat Cheese and Greens (adapted from Love and Olive Oil)

1 pound pizza dough (½ of this recipe), fully risen and at room temperature
2 teaspoons olive oil
3 cloves garlic, minced
¼ teaspoon crushed red pepper
1 bunch kale, washed, stems removed
salt
4 ounces (½ cup) part-skim mozzarella, shredded
4 ounces goat cheese, crumbled

1. Place a pizza stone on the bottom rack of the oven and preheat the oven to 500ºF. Divide the dough in two and shape each portion into a ball. Set the balls of dough aside, loosely covered, to allow the gluten to relax.

2. Heat the oil, garlic, and crushed red pepper in a Dutch oven over medium heat until the garlic sizzles. Add the kale, ¼ teaspoon salt, and 2 tablespoons of water; cover and cook, stirring occasionally, until the kale wilts, about 5 minutes. Remove the lid and continue cooking and stirring until the water evaporates, about 1 minute.

3. Work with one ball of dough at a time on a lightly floured surface or a damp cloth. Flatten the dough, then pick it up and gently stretch it out, trying to keep it as circular as possible. Curl your fingers and let the dough hang on your knuckles, moving and rotating the dough so it stretches evenly. If it tears, piece it together. If the dough stretches too much, put it down and gently tug on the thick spots. Transfer the round of dough to a large square of parchment paper; slide onto a pizza peel.

4. Top one round of dough with half of each of the kale mixture and cheeses. Slide the pizza with the parchment onto the hot baking stone. Bake for 8-10 minutes, until the crust is browned around the edges. Transfer the pizza to a cooling rack without the parchment. Let the pizza rest for 5 minutes before serving. Repeat with the remaining ingredients.

kale goat cheese pizza 5

tartine country bread

Sometimes I’ll be reading a recipe, and it’ll say “we simplified this horribly long complicated process with very little effect on the outcome!” and I always think, “nooo! I want to know the horribly long complicated process!” That’s why I made traditional lasagne Bolognese and barbecued a pork shoulder on the grill. And that is why I have now made bread without any commercial yeast – just the wild stuff.

That means that this bread takes at least a week from start to finish, probably a few days longer. Is it worth it? Oh, who knows. I’ve made some pretty fantastic bread using Peter Reinhart’s recipes too. But this isn’t about one loaf of bread. It’s about having a mixture of old fermented flour and wild fungus in your refrigerator, available to add just a little extra oomph to any bread you make.

I’ve jotted down the outline of Tartine’s Country Bread recipe below, but the beauty of this method goes far beyond this one loaf of bread, extraordinary though it may be. Because this isn’t about making sourdough bread. Tartine’s country bread isn’t sour, but it has a layer of complexity to it, a sweet savory-ness that makes it really special, not to mention the beautiful burnt red crust.

Chad Robertson has pages and pages of information in his book (and Martha Stewart has a tutorial on her site); my version here is merely the cliff notes. But the key here isn’t the nitpicky mixing, turning, rising, shaping directions. The key is that magical stinky starter you created. And with the starter mixture in your fridge, you have the power to add some of that complexity to every bread recipe you make. When I mix up a whole wheat pre-dough that uses yeast, I mix in some of this starter instead of instant yeast, which has resulted in some exceptional bagels recently. I’ve also started using the country bread dough for pizza, which makes for a bubbly crust with the bottom so crisp it’s almost crackly. This is why I like to know the whole horribly long complicated process – not only is the outcome often truly special, but it gives me the confidence to take the method and adapt it for my own needs.

One year ago: Turkey Burgers
Two years ago: Potato Galette
Three years ago: Orange Vanilla Opera Cake

Printer Friendly Recipe
Tartine’s Basic Country Bread (rewritten from Tartine Bread)

Makes 2 large loaves

The only ingredients in this bread are flour, water and some salt at the end. However, they’re mixed at so many different stages in the process that I’ve chosen not to include an ingredient list. Instead, the ingredients are bolded in the directions.

For pizza, I like to add a squeeze of honey (or a spoonful of sugar) to the dough to help it brown in the oven. The bread doesn’t get the same beautiful burnished color as the loaf because it isn’t covered while it bakes.

Make the starter:

I’ve provided precise measurements here, but it isn’t necessary to follow them exactly as long as your starter always has the consistency of a thick batter.

1. Mix ½ cup room temperature filtered water with ½ cup white bread flour and ½ cup whole wheat flour. Cover the bowl with a kitchen towel and set aside in a cool, shaded spot for two days.

2. Check the culture to see if any bubbles have formed around the sides and on the surface. If not, let it sit for another day. The culture is ready when it smells like stinky cheese and tastes very acidic. It’s okay if a dark crust has formed on top.

3. Discard three-quarters of the culture. To the remaining culture, add ¾ cup water, 6 tablespoons white bread flour and 6 tablespoons whole wheat flour. Stir vigorously until there are no lumps. Repeat this step once a day until…

4. Your starter is finished when it behaves in a predictable pattern after each feeding, from stinky and sharply acidic before feeding and sweet and milky just after feeding. The volume should increase for several hours after feeding, then begin to collapse.

To store and keep your starter: Lightly covered, the starter can be kept indefinitely in the refrigerator. (My mom keeps hers in a covered pitcher; I keep mine in a canning jar with a paper towel screwed on instead of the lid. A bowl with a cover would work fine.) To keep it active and healthy, feed it every week or two by following the directions below to make leaven for bread (step 1 of the bread part of the recipe).

Make the bread:

1. To make the leaven: Discard all but 1 tablespoon of the starter. Feed the remaining starter with 200 grams of warm water, 100 grams of whole wheat flour, and 100 grams of bread flour. Let the mixture rise overnight at room temperature. When it’s ready, the leaven should have risen slightly, float in room temperature water (test a small piece; you can still use this piece in the final dough), and smell like overripe fruit.

2. In a large (huge, actually) bowl, mix 700 grams of water and 200 grams of the leaven. (The remainder of the leaven is the starter that you’ll store and feed regularly.) Add 800 grams of bread flour and 200 grams of whole wheat flour; stir until the flour is evenly moistened. The dough won’t be smooth. Let it rest for 25 to 40 minutes while the gluten starts forming, the flour starts hydrating, and the flavor starts developing.

3. Add 20 grams of salt and 50 grams of water to the dough, and squeeze the dough to mix them in. This dough isn’t kneaded; instead, fold it a few times by using a dough scraper to scoop up one side of the dough and drape it over the rest of the dough.


before turning

4. Allow the dough to ferment for 3 to 4 hours and give it another few turns every 30 minutes. This takes the place of kneading. Be more gentle with the turning toward the end of the rising time. The dough is ready when it’s slightly increased in volume and is full of air bubbles (which will be visible on the sides if you’ve used a clear container).


after one turn


after two turns


ready to shape

5. Turn the dough out onto floured surface or a damp kitchen towel. Divide it into two portions. To shape each one into a round, cup your hands over the top of the dough and rotate the dough around on the counter. Cover the rounds with a damp towel and set them aside to rest for 20 to 30 minutes.

6. To increase the surface tension of the dough, ensuring that the bread rises up and not out in the oven, perform a series of folds. Working with one ball of dough at a time, stretch it out and fold it over several times, eventually ending up with a neat square. Cup your hands around the dough and rotate it on the counter to smooth the surface again.


one large loaf and several smaller portions instead of two equal portions

7. Transfer each round to a floured towel-lined bowl or basket with the seam facing up. (Actually, I prefer to use an oiled bowl, covered with a damp towel. If you want to freeze the dough, transfer it to a ziptop bag sprayed with nonstick spray and store in the freezer. Let it defrost overnight in the refrigerator before continuing with the recipe.) Let rise for 2-4 hours at room temperature or, for maximum flavor, overnight in refrigerator.

8. Half an hour before you’re ready to bake the bread, remove the dough from the refrigerator. Place a Dutch oven and its lid on the middle rack in the oven and heat the oven to 500 degrees. When the oven is hot, turn the dough out of its bowl onto a floured work surface or a damp kitchen towel so that the seam is down. Use a very sharp or serrated knife to cut four intersecting ½-inch deep slashes in the dough, forming a square of cuts. Carefully place the dough into the heated Dutch oven; cover the pot with its lid and transfer it to the oven. Immediately reduce the oven temperature to 450 degrees. Bake 20 minutes, then remove the lid and bake 20-25 minutes longer, until the bread is deep golden brown and an instant read thermometer inserted into the center of the loaf reads about 205 degrees. Remove the bread from the pan and cool on a wire rack for an hour before serving.

cornmeal shortbread cookies

I had some major Murphy’s Law action going on in my kitchen last week. The first few days of it were subtle, but when my cupcakes exploded all over the pan and then sunk back into themselves like collapsed calderas, it got me thinking. I remembered the bagels I’d forgotten about and left out overnight to harden around the edges, and the crockpot full of red lentil stew that turned into red lentil soup when I accidentally added an extra cup of water. Then there was the leftover lentil soup that I burned. You know you’re having a bad week in the kitchen when you burn leftover soup.

These cookies, made from dough hastily pulled from the freezer after the cupcake debacle, came out wonderfully. I loved their square edges and straight sides. I enjoyed their crisp sandiness with a touch of grit from the cornmeal.

I kept waiting for the other shoe to drop. When the cookies were in the oven, I assumed they’d spread too much. When they didn’t, I assumed I’d over or underbake them. When I didn’t, I assumed I’d drop them. It wasn’t until they were safely in the hands of my coworkers that I breathed a sigh of relief.

In the end, I got more comments on these cookies than any treat I’ve brought to work in months. Most people said that were interesting, but everyone said they were good. If you’d like to try these interesting good cookies that I made for Tuesdays with Dorie, Valerie has the recipe posted.

One year ago: Chockablock Cookies
Two years ago: Chocolate Cream Tart
Three years ago: Fluted Polenta and Ricotta Cake

semolina bread

Supposedly, my freezer is organized to have a shelf for meat, one for bread, one for prepared foods, and one for ingredients (mostly green chile and egg whites). In reality, bread tends to find its way onto each of the other shelves and eventually takes over. During my last freezer overhaul, I gave baked bread its own shelf and bread dough got moved to the ingredient shelf, which has plenty of open space now because we are, sadly, almost out of last year’s crop of green chile.

Besides our weekday snack supply of muffins (for Dave) and whole wheat bagels (for me), there’s usually homemade hamburger buns, hot dog buns, and sandwich thins, several bags of pizza dough, odds and ends of loaves whose genesis I don’t remember, and both baked and unbaked versions of whatever rustic bread I’m playing with at the time. The lovely s-curve of this semolina bread recipe caught my eye as soon as I got Peter Reinhart’s Bread Baker’s Apprentice, years ago. I know I could have used that shape for any free-form loaf, but I saved it until I made the recipe it accompanies.

The three loaves of this semolina bread, one baked immediately and two frozen after shaping, didn’t last long in the freezer. I found every opportunity to bake up another loaf of this chewy golden bread. I’d start a new batch if there was any room in the freezer for what we don’t eat in one night.

One year ago: Brown Sugar Cookies
Two years ago: Brandied Berry Crepes
Three years ago: Breakfast Strata with Mushrooms, Sausage and Monterey Jack

Printer Friendly Recipe
Semolina Bread (adapted from Pane Siciliano from Peter Reinhart’s Bread Baker’s Apprentice)

1 recipe pate fermentée (recipe follows)
1¾ cups (8 ounces) bread flour
1¾ cups (8 ounces) semolina flour
1¼ teaspoon salt
1¼ teaspoon instant yeast
2 tablespoons olive oil
1 tablespoon honey
1¼ cups water, room temperature
sesame seeds

1. Remove the pate fermentée from the refrigerator 1 hour before mixing the final dough.

2. Stand mixer: Mix the pate fermentée, flours, salt, yeast, oil, honey, and water in the bowl of a stand mixer fitted with the dough hook. Mix on medium-low speed until the dough is elastic and supple, about 8 minutes. You may need to add a little more flour or water to get the correct consistency – smooth and tacky, but not sticky. Transfer the dough to an oiled bowl and cover with plastic wrap or a damp dishtowel.

By hand: Cut the pate fermentée into 8-12 pieces. Mix the flours, salt, and yeast in a large bowl. Make a well in the middle of the dry ingredients and add the pate fermentée, olive oil, honey, and water. Stir the mixture until the dough comes together. Transfer it to a floured board or countertop and knead, incorporating as little flour as possible, for about 10 minutes, until the dough is elastic and supple. You may need to add a little more flour or water to get the correct consistency – smooth and tacky, but not sticky. Transfer the dough to an oiled bowl and cover with plastic wrap or a damp dishtowel.

3. Ferment at room temperature for about 2 hours, until the dough doubles in size.

4. Divide the dough into three equal portions. Very gently pull the edges of each portion around to one side and pinch them together to form a ball. Roll the dough between the palm of your hand and a lightly floured board or a damp kitchen towel (my preferred method). With the seam side up, push the sides of your thumbs into the dough, pulling the dough into an oblong. Pinch the seam together; repeat the process once more on the same dough ball to form a rope. Roll the rope, pushing it out into a longer rope, until it’s about 24 inches long. If it resists you at any point, let it rest for a few minutes before trying again. Then, working with each end simultaneously, coil the dough toward the center, forming an S-shape. Arrange the shaped loaves on parchment paper and sprinkle them with sesame seeds. Cover loosely with plastic wrap and refrigerate overnight.

5. The next day, remove the dough from the refrigerator. Let it warm up and, if necessary, finish rising, which will take a couple hours. The dough is ready to bake when it has doubled in size and remains dimpled when poked.

6. While the dough is rising, place a baking stone on the bottom rack of the oven and a heavy metal baking pan on the top rack. Heat the oven to 500 degrees.

7. Transfer the risen loaves with the parchment paper to the hot baking stone. Pour 1 cup hot water into the metal pan on the top rack and close the door. After 30 seconds, open the door and spritz the sides of the oven with water. Repeat twice more at 30 second intervals. After the final spray, lower the oven temperature to 450 degrees and bake for 25 to 30 minutes longer, until the crust is golden brown and the internal temperature is between 200 and 205 degrees.

8. Transfer the bread to a wire rack; cool 45 minutes before serving.

Pate fermentée

1⅛ cups (5 ounces) unbleached all-purpose flour
1⅛ cups (5 ounces) unbleached bread flour
¾ teaspoon salt
½ teaspoon instant yeast
¾ cup to ¾ cup plus 2 tablespoons (6 to 7 ounces) water

1. Stir together the flours, salt, and yeast in a 4-quart bowl (or in the bowl of a standing mixer). Add ¾ cup of the water, stirring until everything comes together and makes a coarse ball (or mix on low speed for 1 minute with the paddle attachment). Adjust the flour or water, according to need, so that the dough is neither too sticky nor too stiff. (It is better to err on the sticky side, as you can adjust easier during kneading. It is harder to add water once the dough firms up.)

2. Sprinkle some flour on the counter and transfer the dough to the counter. Knead for 4 to 6 minutes (or mix on medium speed with the dough hook for 4 minutes), or until the dough is soft and pliable, tacky but not sticky. The internal temperature should be 77 to 81 degrees.

3. Lightly oil a bowl and transfer the dough to the bowl, rolling it around to coat it with oil. Cover the bowl with plastic wrap and ferment at room temperature for 1 hour, or until it swells to about 1½ times its original size.

4. Remove the dough from the bowl, knead it slightly to degas, and return it to the bowl, covering the bowl with plastic wrap. Place the bowl in the refrigerator overnight. You can keep this in the refrigerator for up to 3 days, or freeze it in an airtight plastic bag for up to 3 months.

I’m donating my Bourbon Pound Cake to Bloggers Bake for Hope.  This and over fifty other treats are available to be shipped directly to you. You can bid on your favorites starting May 4th; all proceeds go to Massachusetts Komen for the Cure.


2010 favorites

The food I prepare echoes the events in my life. Last winter, after moving from Philadelphia to New Mexico, we got our first house with a yard – and soon after, our first grill. In May, I started my first full time job and became limited to quicker meals on weekdays. During the fall, I taught in the evenings after working at my day job, and – well, we ate a lot of leftovers for a few months. Now that things are settling down and I should have some more free time, I’m itching to get started on 2011’s list of favorites. But first, I want to make each of last year’s favorites a few more times…

Butternut Squash Macaroni and Cheese – This has all of the creaminess and richness that I love in traditional regular macaroni cheese, with the added sweetness, color, and wholesomeness of winter squash.

Jalapeno-Baked Fish with Roasted Tomatoes and Potatoes – There are very few meals I make more than once a month, and this has become one. I like to make extra sauce to store in the freezer to make this meal even easier.

Mediterranean Pepper Salad – I went through a gyro phase last summer, and this salad started out as the perfect side dish and morphed into the perfect topping. I’m impatient for the weather to warm up enough to grill so I can start another gyro phase.

Roll-Out Sugar Cookie comparison – It’s so rare when my comparisons have a clear result, and I love when it happens. But after spending the holidays at my mother-in-law’s and surviving almost entirely on her perfect sugar cookies, I think a rematch with her recipe is in order.

How to adapt any bread to be whole wheat – I use this trick – just a few minutes to mix up flour, salt, and yeast the night beforehand – nearly every time I make bread.


Vodka Gimlet – I drank a lot of these this summer. And then too many one night in October, and I haven’t had once since.

Chicken Fajitas – Chances were good that if it was a Sunday evening during the summer, if I wasn’t making some sort of gyro, Dave and I were grilling these.

Garlic Mustard Glazed Skewers – I make these when I need to be reminded that recipes don’t have to be complicated to be perfect.

Whole Wheat Bagels – Combined with a mug of strong black tea, these bagels make up the best part of my workday.

Bolognese Sauce – Despite this being one of those dreaded comparisons with no winner, it resulted in a freezer full of one of my favorite foods.

fold-over pear torte

You didn’t think I’d miss a week of Tuesdays with Dorie, did you? I’ve been in the group for two and a half years, haven’t missed a week yet, and don’t plan to start now. Being late is, of course, a different story. Being late is what I do.

Although if I’d realized how involved this recipe was, I might have procrastinated enough to be even later – pie crust, peeled and chopped fruit, and a custard that involves a mixer. Having overzealously planned my weekend cooking (as always), I jumped in, rushed, without looking at the recipe, with the kitchen counters covered in dinner dishes.

My measurements were imprecise, my rolling was sloppy. While the tart baked, I shaped over-risen bagel dough, realizing too late that the tart and the bagels needed the same oven at the same time but at very different temperatures. The bagels won and the tart (torte?) was under-browned.

But good nonetheless. Pears and rummy custard and dough are such a great combination. Even if it was a lot of steps. It’s worth it to keep my unbroken record of not skipping a week (although not necessarily being on time).

Cakelaw chose this for TWD and has the recipe posted.

One year ago: Chocolate-Crunched Caramel Tart
Two years ago: Lenox Almond Biscotti

vanilla bean cupcakes

When I was unemployed, I used to bake nearly everyday. Looking back, I’m not sure who was doing all of the eating. I suppose I was doing a good portion of it. Plus there were more care packages, fresh bagels, muffins for Dave to eat at work, and a freezer overflowing with dough – cookie, pie, tart, whatever.

I still seem to be baking most days now, except instead of starting a recipe and finishing it, all in the same day, I spend a few minutes one evening getting all of my ingredients out. Then the next day I’ll measure the dry ingredients and prepare the pan. The day after that is my favorite, with the mixing and baking. Sometimes there’s an additional day for prettily packaging.

It works pretty well, actually. And even if it wasn’t a great system, it’s a heck of a lot better than not baking at all. I need opportunities to try out fun new recipes, like for vanilla bean cupcakes.

Although adding the ‘bean’ in the title is a bit of a misnomer for me, as I was all out of vanilla beans, so used vanilla sugar and homemade vanilla extract instead. Honestly, I’ve tried using vanilla sugar, Tahitian vanilla beans (which are supposed to be better than Bourbon vanilla beans for baked applications), and vanilla extract all at once in a cake before, and still couldn’t taste any appreciable vanilla-ey-ness, so what I was expecting, and what I got, was a light, fluffy, perfect basic cake. I love cake. I love baking. I especially love the mixing and baking day of baking. And the eating day of baking.

Two years ago: Salmon Clubs with Avocado Butter

Printer Friendly Recipe
Vanilla Bean Cupcakes
(adapted from Confections of a Foodie Bride and Annie’s Eats)

Makes about 30 cupcakes

3 cups (12 ounces) cake flour
1 tablespoon baking powder
1 teaspoon salt
1 vanilla bean, split lengthwise
16 tablespoons (2 sticks) unsalted butter, at room temperature
2 cups (14 ounces) sugar (use vanilla sugar if you have it)
5 large eggs, at room temperature
1¼ cups buttermilk, at room temperature
1 tablespoon vanilla extract

1. Preheat the oven to 350°F. Line two cupcake pans with paper liners. In a medium bowl, combine the cake flour and baking powder.

2. Place the butter and salt in the bowl of an electric mixer fitted with the paddle attachment. Scrape the vanilla bean seeds into the bowl of the mixer with the butter and discard the pod (or reserve for another use). Beat on medium-high speed for 3 minutes, until light and creamy in color. Scrape down the sides of the bowl and beat for one more minute.

3. Add the sugar to the butter mixture, ¼ cup at a time, beating for one minute after each addition. Mix in the eggs one at a time until incorporated. Scrape down the sides of the bowl after each addition. Combine the buttermilk and the vanilla extract in a liquid measuring cup. With the mixer on low speed, add one-third of the flour mixture, followed immediately by half of the buttermilk, mixing just until incorporated. Repeat with another third of the flour and the rest of the buttermilk, then the last of the flour. Scrape down the sides of the bowl and mix for 15 seconds longer.

4. Divide the batter between the prepared paper liners, filling each about 2/3 of the way full. Bake 18-22 minutes, or until a toothpick inserted in the center comes out clean. Allow to cool in the pans 5-10 minutes, then transfer to a cooling rack to cool completely.

roasted red pepper pasta salad with peas and beans

I had my doubts about this salad the whole time I was shopping for it, making it, testing it for seasoning, and serving it. But now, weeks later, my doubts are gone and I want some more. Except with better peas.

Most of the doubts came from an unsuccessful shopping trip for ingredients. Sometimes I complain after shopping at my regular grocery store, but in truth, I usually get by just fine with what I can find there. However, it is a 7-minute drive from my house. Walmart, while not my favorite place on earth, is a 2-minute drive. I tried to cut corners, and I paid the price. Walmart didn’t have whole wheat pasta, any sort of fresh pea or bean, frozen petite peas (which are sweeter and less starchy than regular peas), or shallots.

So, yes, frozen petite peas would be better than the larger starchy ones, and fresh peas are so fun, and I would love some sort of fresh beans, and yellow beans would add a nice contrasting color. But one change I was forced to make, skipping the shallots, actually worked out better I think, with some lightly pickled red onions adding tartness to the salad instead.

And even at its simplest, this salad is unique and interesting, with smoky sweet roasted red pepper dressing coating pasta, creamy white beans, and crisp vegetables. Plus I learned a valuable lesson about driving that extra five minutes to the regular grocery store, and how it’s worth every second.

One year ago: Sourdough Bagels
Two years ago: Danish Braids

Printer Friendly Recipe
Roasted Red Pepper Pasta Salad with Peas and Beans (adapted from Smitten Kitchen)

Deb based this salad on one she had in a restaurant, which also included yellow string beans, fava beans, fresh cranberry beans, among other wonderful bean types that simply aren’t available in small desert towns. I would have loved any or all of those, but the salad was wonderful at its most simple as well.

1 pound small pasta
salt
¼ red onion, very thinly sliced
1 tablespoon red wine vinegar
4 ounces snow pea pods, ends trimmed, cut on an extreme diagonal
1 cup peas (from about 8 ounces with their shells, if you can find fresh)
1 (15-ounce) can great northern (or navy) beans, drained and rinsed
¾ to 1 cup Roasted Red Pepper Vinaigrette (recipe below)

1. Bring a large pot of water to a boil; add the pasta and 1 tablespoon salt and cook according to the package instructions. One minute before the pasta is done, add the peas. Drain the pasta and peas together.

2. Meanwhile, combine the onion, vinegar, and a pinch of salt in a large bowl; set aside for 10 minutes. When the pasta has cooled, add the remaining ingredients and stir thoroughly. Taste and add more salt if necessary, which it probably will be.

Roasted Red Pepper Vinaigrette

Makes about one cup of dressing

1 red bell pepper, roasted, skinned and seeded or the equivalent from a jar, drained
2 tablespoons extra virgin olive oil
2 tablespoons red wine vinegar, plus up to 1 tablespoon more
½ teaspoon salt
freshly ground black pepper

Combine all of the ingredients in a blender or food processor; process until smooth. Taste and add more salt, pepper, or vinegar if necessary.

whole wheat brioche

This recipe cracks me up. Each little brioche roll has 1¼ tablespoons of butter in it, so it doesn’t matter how much whole grain you use – these are not good for you.

They are, however, good. Of course they don’t have much in common with their white flour cousins, which, if we were talking about people, would be one of those unceasingly friendly people who always have something nice to say. The whole wheat version is more akin to a sarcastic friend who always manages to make you laugh, but sometimes at your own expense. Both are good! Just different.

The whole wheat brioche is made along the same lines as the rest of Peter Reinhart’s Whole Grain Breads. What’s fun about this recipe is that the liquid used in one of the pre-doughs is melted butter, and in the other, it’s eggs. The one with the butter had a texture very different from the normal water-hydrated doughs – and not a particularly appetizing one, truth be told, as the best word to describe it would be ‘greasy’. Fortunately, after sitting in the fridge for several hours, the butter hardens and the mixture is more palatable – plus, of course, the liquid has had an opportunity to break down those bran fibers, which is the heart of Reinhart’s whole wheat bread method.

I tried a trick with this bread that was marginally successful. After the final dough is mixed and kneaded, it’s shaped immediately and then needs to rise again – for 3 to 4 hours. We tend to eat breakfast kind of late on weekends, but not that late!

So I reduced the yeast quite a bit, with the goal of extending the rising time to about 8 hours, or overnight. I wanted to wake up, heat the oven and throw the perfectly risen brioche rolls in to bake.

It turns out, though, that I decreased the yeast too much, and the poor little guys didn’t have enough strength to lift up that heavy dough. I still think the method is sound; I just need to use more yeast than I did. (The under-risen after 8 hours brioche were salvageable; I just had to give them an hour or so in a really warm environment before I could bake them.)

Usually my theory is that if food is supposed to be indulgent, then make it indulgent! Why worry about whole grains if you’re mainlining butter? But sometimes it’s just fun to make something weird, and whole wheat brioche is, indeed, weird.

One year ago: Pecan Sour Cream Biscuits
Two years ago: Chocolate Cream Pie

Printer Friendly Recipe
Whole Wheat Brioche (rewritten from Peter Reinhart’s Whole Grain Breads)

I reduced the yeast in the final dough to ½ teaspoon, hoping I could stretch the rising time to 8-10 hours, or overnight. This was too little, but I still think the method is worth trying, but with 1 teaspoon yeast.

I froze the brioche rolls after shaping, before rising. I let them defrost in the fridge for a few hours before moving them to room temperature to rise.

The melted butter kept leaking out of its pre-dough. Once the dough had chilled somewhat, I stirred it back in, so that the pre-dough would be homogeneous.

For the final cup of flour, after both pre-doughs are combined, I used white flour. I know that’s cheating, but I’ve had better results with Reinhart’s whole wheat bagels when white flour is used at the end, and I thought it was probably similar here. The rolls are still 80% whole wheat.

Pre-dough 1:
1¾ cups (8 ounces) whole wheat flour
½ teaspoon salt
½ cup whole milk, scalded and cooled
16 tablespoons (2 sticks) unsalted butter, melted

Mix all of the ingredients until thoroughly combined. Cover and refrigerate at least 8 hours and up to 3 days.

Pre-dough 2:
1¾ cups (8 ounces) whole wheat flour
¼ teaspoon instant yeast
4 large eggs, slightly beaten

Mix all of the ingredients until thoroughly combined. Using a rubber spatula or wet hands, knead the dough in the bowl for a couple minutes; it will be very tacky. Let the dough rest for 5 minutes, then knead again for 1 minute. Cover and refrigerate for at least 8 hours and up to 3 days.

Final dough:
Both pre-doughs
1 cup (4.5 ounces) whole wheat flour (see note)
¾ teaspoon salt
2¼ teaspoons instant yeast (see note)
3 tablespoons sugar

Egg wash:
1 egg beaten with 1 tablespoon water and a pinch of salt

1. Chop the chilled pre-doughs into to 12 pieces each. Combine the pre-doughs, flour, salt, yeast and sugar in the bowl of a standing mixer fitted with the dough hook (or a large bowl if mixing by hand). Mix on slow speed for 3 to 4 minutes, scraping the bowl as needed, (or knead with wet hands) until the pre-doughs are assimilated into each other. Add flour or water, as needed, to form a soft and slightly sticky dough. Knead (either with a mixer or by hand) for 3 to 4 minutes, until the dough is cold, firm, and slightly tacky. Let the dough rest for 5 minutes.

2. Divide the dough into 12 equal pieces and round each into a smooth ball. Spray 12 brioche molds or a 12-cup muffin pan with spray oil. To shape the brioche, roll each piece of dough into a cone; poke a hole through the larger end and slip the small end through the hole. (I also sometimes just formed a much smaller round from a small portion of the dough and stuck that on top of the larger round. I didn’t notice a difference in the baked versions of the two shaping methods.) Place the shaped rolls into the prepared pan and cover loosely with plastic wrap or a damp towel. Let rise at room temperature for 3 to 4 hours, until the dough has grown to about 1½ times its original size.

3. Adjust a rack to the middle position and heat the oven to 425 degrees. Brush the risen rolls with egg wash and place them in the oven, lowering the temperature to 400 degrees. Bake for 17 to 25 minutes, rotating the pan halfway through, until the brioche are dark golden brown, measure 195 degrees in the center, and sound hollow when tapped on the bottom (after one is removed from its pan).

4. Remove the rolls from their molds; cool on a cooling rack for at least 20 minutes before serving.