Search Results for: scones

buttermilk scones

Copy of IMG_0247

Having a great, seemingly perfect recipe for something isn’t enough to stop me from trying new recipes. There’s always something to learn, you know? Even though one of the first biscotti recipes I ever made is still the best, I’ve made many many more recipes and I’ve learned some little biscotti tricks along the way. But I still haven’t found a better biscotti recipe.

Copy of IMG_8357

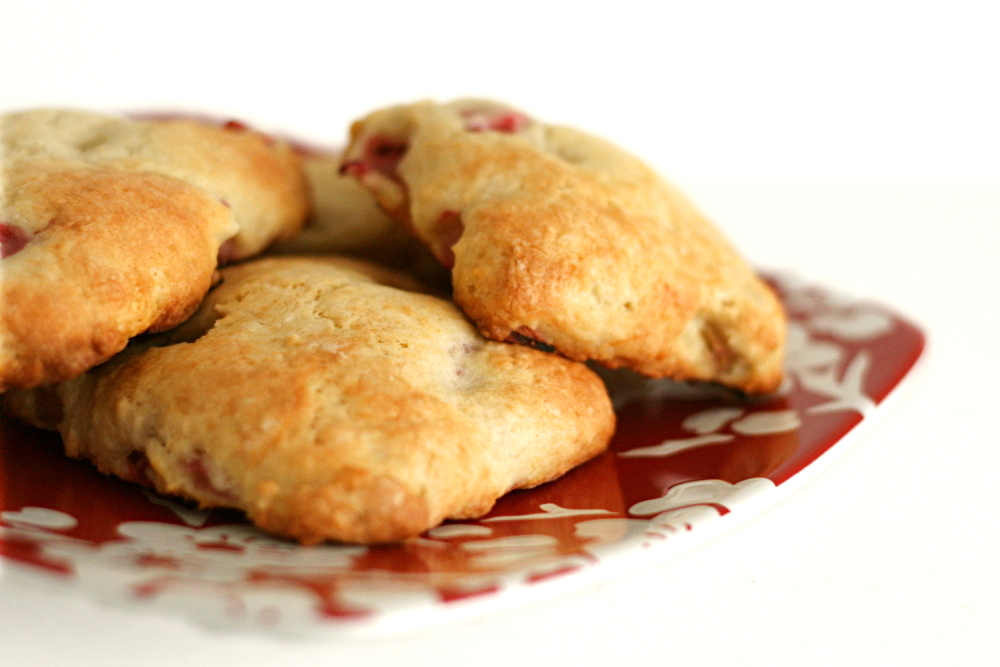
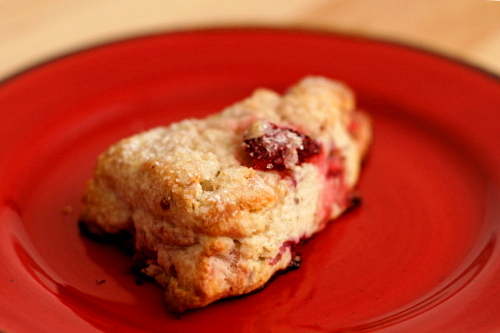
The cranberry scones were one of the first scone recipes I ever made, and certainly the first to knock my socks off. Of course, cranberries aren’t in season year-round anyway, but I successfully adapted the recipe for rhubarb, and I’m sure I could have used most other fruits.

Copy of IMG_8374

But instead, I kept trying new recipes, including this one. And this time…well, I won’t say this recipe is better, but it is definitely as good. Aargh, don’t tell me I need to do a scone comparison!

Copy of IMG_8383

I suppose it’s okay to have two perfect scone recipes, right? And one probably isn’t better than the other anyway. One thing I’ve found from recipe comparisons is that once you have great dependable recipes, it all comes down to personal preference.

Copy of IMG_8385

Well, my personal preference is for whatever gets me a delicious treat on a Saturday morning. This certainly qualifies. And so does this.

Copy of IMG_9868

One year ago: Brown Sugar Apple Cheesecake

Printer Friendly Recipe
Buttermilk Scones (adapted just slightly from Tartine, by Elisabeth Pruett and Chad Robertson)

The measurements are weird because this is half of the recipe in Tartine’s cookbook. But geez, who needs 5 cups of flour worth of scones? I’ve also made them slightly smaller – 8 scones for this half-recipe instead of 6, because 6 would have been huge. (Each scone would have 3 tablespoons of butter in it!)

Zante currants are just standard dried currants.

I skip the melted butter and just use milk on top of the unbaked scones.

6 tablespoons zante currants (1.75 ounces) or 3 ounces fresh berries
2¼ cups + 2 tablespoons (12 ounces) all-purpose flour
1½ teaspoon baking powder
¼ + 1/8 teaspoon baking soda
¼ cup (1.75 ounces) granulated sugar
½ teaspoon + 1/8 teaspoon salt
9 tablespoons butter, very cold
¾ cup buttermilk
½ teaspoon lemon zest
3 tablespoons unsalted butter, melted
large crystal sugar or granulated sugar for sprinkling

1. Preheat the oven to 400 degrees. Line a baking sheet with parchment paper or a silicone baking mat.

2. To make the dough, first combine the currants with warm water to cover in a small bowl and set aside for about 10 minutes until the currants are plumped. Drain well. If you’re using berries instead of currants, put them in the freezer.

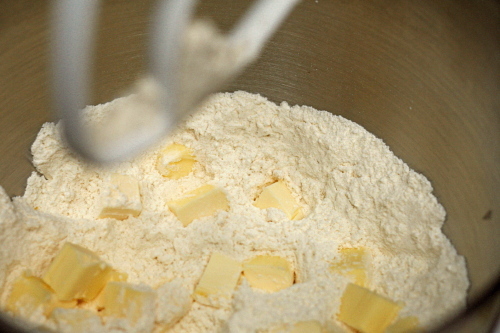
3. While the currants are plumping (or the berries are freezing), whisk the flour, baking powder, and baking soda in a large mixing bowl if making by hand, or into the large bowl of a stand mixer fitted with the paddle attachment. Add the sugar and salt and stir to mix with a rubber spatula. Cut the butter into ½-inch cubes and scatter the cubes over the dry ingredients. If you are using a mixer, pulse on and off so that you don’t break down the butter too much. You want to end up with a coarse mixture with pea-sized lumps of butter visible.

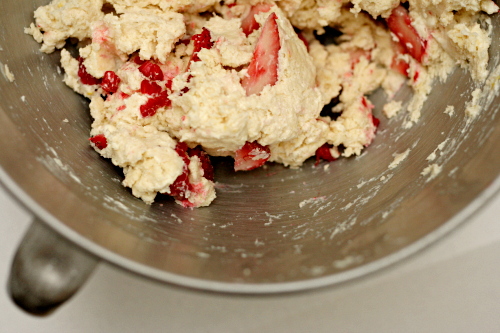
4. Add the buttermilk all at once along with the lemon zest and currants. (If you’re using berries, don’t add them yet.) Mix gently with a rubber spatula by hand or on low speed if using the mixer. Add the berries and continue to mix just until you have a dough that holds together. Be careful not to mash the berries into the dough, or you will color it with their juice. If the mixture seems dry, add a little more buttermilk. You still want to see some of the butter pieces at this point, which will add to the flakiness of the scones once they are baked.

5. Dust your work surface with flour, and turn the dough out onto it. Using your hands, pat the dough into a rectangle about 9 inches long, 5 inches wide, and 1½ inches thick. Brush the top with the melted butter and sprinkle with the sugar. Using a chef’s knife, cut the dough into 8 triangles. Transfer the triangles to the prepared baking sheet.

6. Bake the scones until the tops are lightly browned, 25 to 30 minutes. Remove from the oven and serve immediately.
Copy of IMG_9863

cranberry orange scones

Copy of IMG_1625

This recipe changed the whole shape of my last year. Before making these great scones, I’d spend a large part of both weekend mornings cooking, usually something sweet one day and something savory the other. It made for a nice breakfast category here, but it wasn’t the best way to relax on the weekend.

Copy of IMG_1123

Not anymore. I still often cook something one morning, but on the other, it’s all about scones. I make the dough early in the week and freeze it, then on a lazy weekend morning, I just have to bake them, make coffee (or, more often, wait for Dave to), and sit down to flip through a cookbook. It’s become one of my favorite times of the week.

Copy of IMG_1126

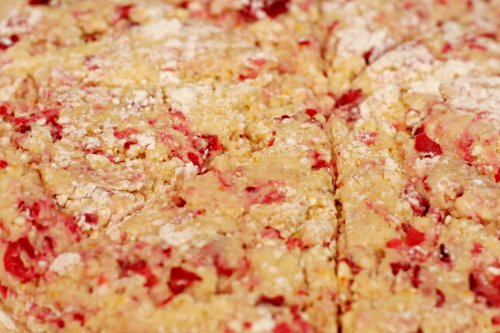
These pictures? They’re from when I made the scones last winter, but it was way past cranberry season, so I’ve been holding onto this blog entry for months and months.

Copy of IMG_1137

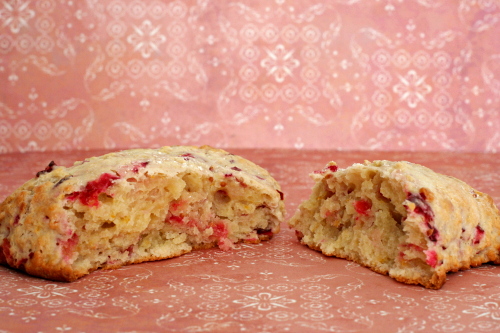
It’s time. Cranberries are showing up in stores, and there is no better way to enjoy them. These are so tender, have just the right sweetness, and make for a stress-free weekend breakfast, even with guests. Even after a year of making scones, these are still one of my favorites.

Copy of IMG_1631

One year ago: Warm Chickpea and Butternut Squash Salad

Printer Friendly Recipe
Cranberry Orange Scones (adapted from Gourmet via Smitten Kitchen)

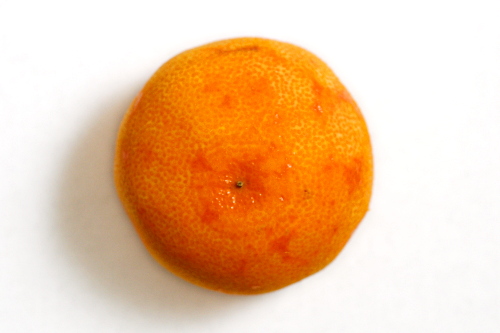
The recipe originally calls for (Meyer) lemon zest, but orange – or tangerine, which I’ve also used – is such a great partner for cranberry that I couldn’t resist using it instead. I also like increasing the cranberries a bit (already reflected in the recipe).

I’ve baked this recipe at high altitude (at least 5000 feet) with good results. They weren’t quite as pretty, but the taste and texture weren’t affected.

I always flash-freeze scones, then bake them straight from the freezer, adding a couple extra minutes to the baking time.

Makes 8 scones

1½ tablespoons freshly grated orange zest
2½ cups (12 ounces) all-purpose flour
½ cup (3.5 ounces) sugar plus 3 tablespoons
1 tablespoon baking powder
½ teaspoon salt
¾ stick (6 tablespoons) cold unsalted butter, cut into bits
1½ cups fresh cranberries, chopped coarse (I usually do this in the food processor)
1 large egg
1 large egg yolk
1 cup heavy cream

1. Adjust an oven rack to the middle position and heat the oven to 400°F. Line a large baking sheet with parchment paper or a silicone baking mat.

2. In a small bowl, toss together fresh cranberries and 3 tablespoons sugar. In another small bowl, lightly beat the egg and yolk, then stir in cream.

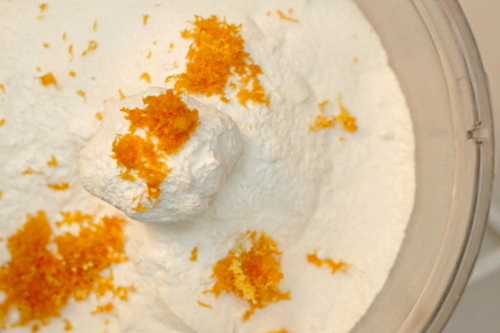
3. In a food processor, pulse the flour, ½ cup sugar, baking powder, salt, and zest until combined. Add the butter and process until the mixture resembles coarse meal. Transfer to a large bowl. (You can also just smoosh the butter into the dry ingredients with your fingers instead of using a food processor.) Stir the cranberries into the flour mixture. Then gently fold the egg mixture into the flour until just combined.

4. On a well-floured surface with floured hands, pat the dough into a 1-inch-thick round (about 8 inches in diameter). With a 2-inch round cutter or the rim of a glass dipped in flour, cut out as many rounds as possible, rerolling the scraps as necessary. (Or cut the circle into wedges, which is my standard method.) Arrange the scones about 1 inch apart on the prepared baking sheet and bake 15 to 20 minutes, or until pale golden. Cool about 10 minutes, then serve.

Copy of IMG_1626

rhubarb scones

copy-of-img_5500

Scones get a seriously bad rap. People think they’re bland, dense, and/or crumbly. People think you can only enjoy them if you have a mug of coffee or tea with them. Branny told me that her husband thinks they taste like chalk. And these people aren’t completely wrong – some scones are pretty terrible. As for the whether they need to be accompanied by a hot drink, I happen to think that everything even a little sweet is better with coffee or tea.  But that doesn’t mean that I can’t enjoy a cookie without coffee.

copy-of-img_5281

Like a lot of foods, you might have to make scones yourself to get good ones. I can’t personally attest to the scones at coffee shops, but if they’re on par with every other baked treat I’ve ordered from a national coffee shop chain, they’ll be stale and bland. Don’t judge scones based on this example.

copy-of-img_5288

Scones are similar to biscuits, although many scone recipes have eggs included, which is rare in biscuits. In both, the dry ingredients are mixed first, and cold butter is cut in, then cold liquid is gently stirred in. Compared to the last scone recipe I made, this one has less butter, but richer dairy (cream as opposed to yogurt + milk).

copy-of-img_5517

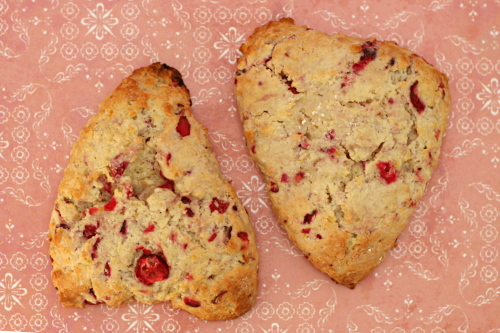
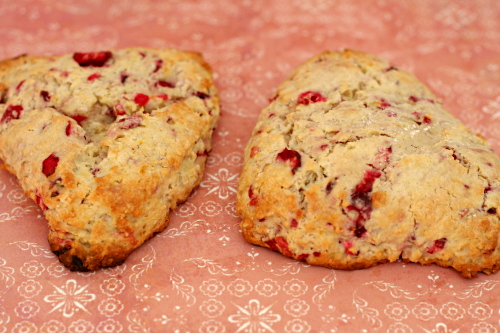
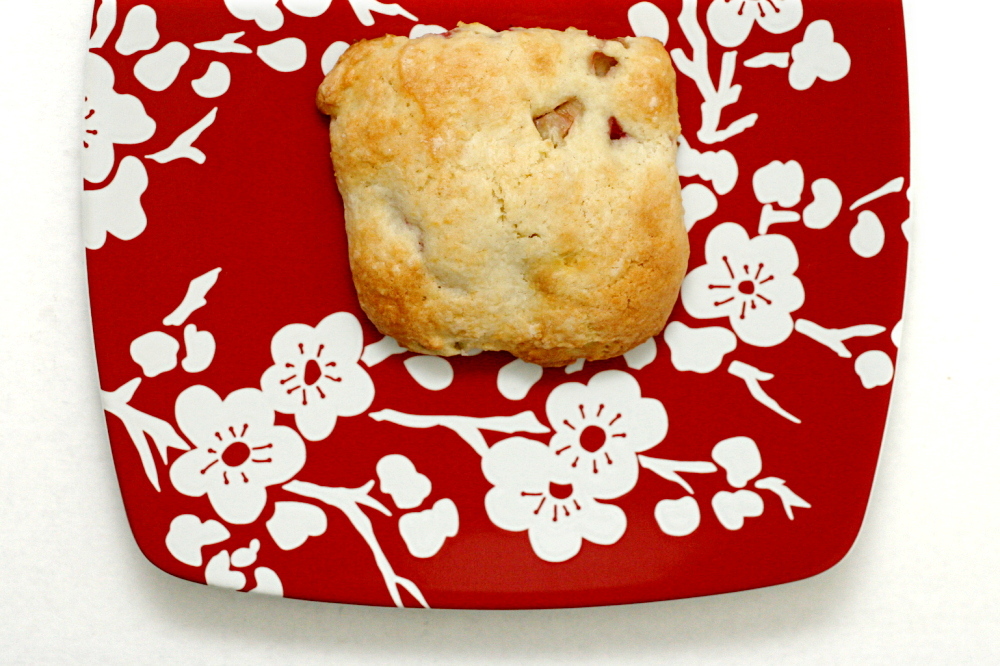
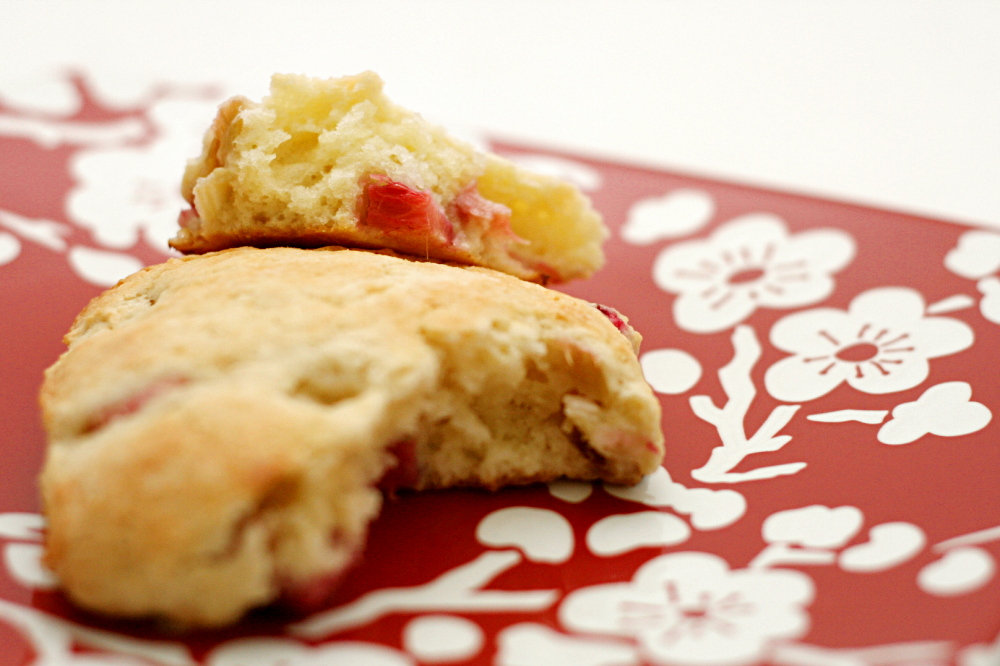
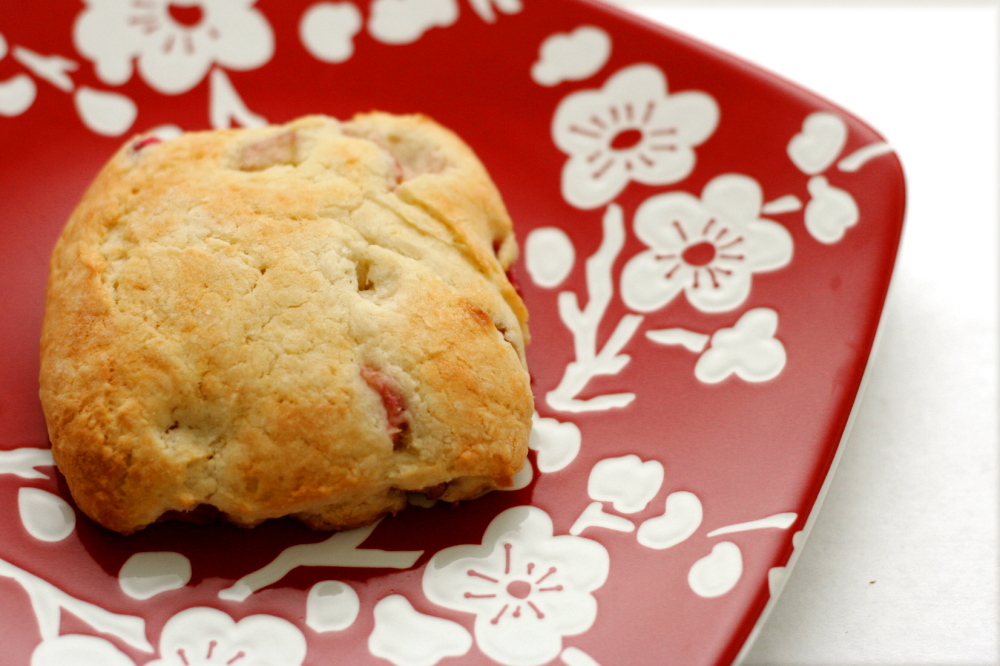
The cream changes the texture from flaky to melt-in-your-mouth tender. They’re sweet, but only slightly so, and studded by juicy, tart bits of rhubarb. There’s nothing bland, dense, crumbly, or chalky about these scones, and while I enjoyed mine with my Saturday cup of coffee, a hot drink is not required to appreciate these. If you think you don’t like scones, try these.

copy-of-img_5496

One year ago: Kaiser Rolls – I have to admit that I’ve made these twice and have decided that they’re just not worth the effort.  I like using this much easier dough instead.

Printer Friendly Recipe
Rhubarb Cream Scones
(adapted from Gourmet via Smitten Kitchen)

I only used 1½ cups (2 stalks) of rhubarb, but it wasn’t nearly enough. I would even err on the high side of 2 cups.

Update 5/8/2012 – While many people have had good results with this recipe, a few commenters have complained that their dough was too wet. This might have to do with imprecise volume measurements of flour, variability in rhubarb juiciness, or perhaps the size of the eggs used. Regardless, start with ½ cup of cream, then add more until the dough comes together but holds its shape. It might be sticky, but you should be able to pat it out with floured hands.

2½ cups (12 ounces) all-purpose flour
½ cup sugar (3.5 ounces) plus 3 tablespoons
1 tablespoon baking powder
½ teaspoon salt
¾ stick (6 tablespoons) cold unsalted butter, cut into bits
2 cups diced rhubarb (¼-inch cubes), about 3 stalks
1 large egg
1 large egg yolk
1 cup heavy cream (see update)

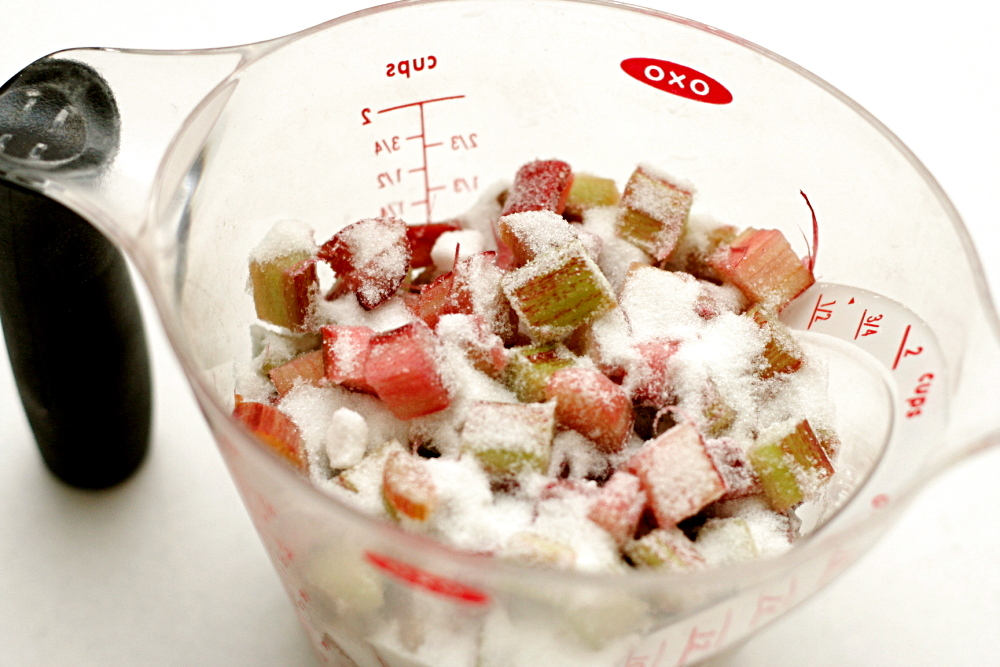
1. Preheat oven to 400F and line a large baking sheet with parchment paper. Adjust a baking rack to the middle position. In a small bowl, mix the rhubarb with 3 tablespoons sugar.

2. In a food processor, pulse the flour, ½ cup sugar, baking powder, and salt a few times, just to mix. Distribute the butter evenly over the dry ingredients and pulse until the mixture resembles coarse meal. Transfer to a large bowl.

3. Stir the rhubarb into the flour mixture. Lightly beat the egg, yolk, and cream together in a bowl (use the same one you used for the rhubarb), then add this mixture to the flour mixture. Stir until just combined.

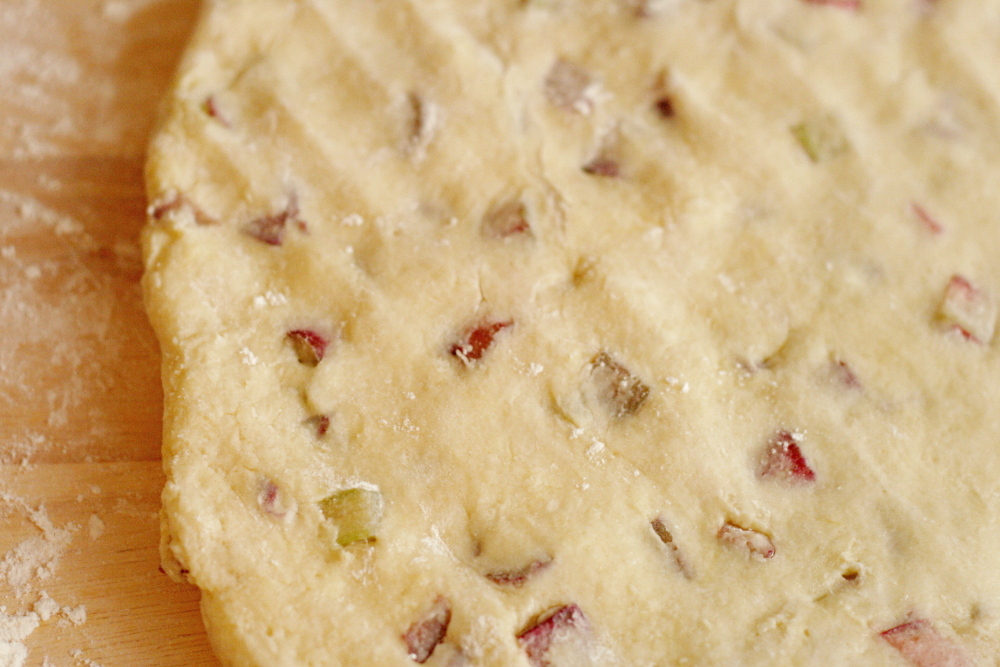
4. On a well-floured surface with floured hands, pat the dough into a 1-inch-thick round (about 8 inches in diameter). Using a 2-inch round cutter or rim of a glass dipped in flour, cut out as many rounds as possible, rerolling scraps as necessary. Arrange rounds about 1 inch apart on baking sheet and bake for 15 to 20 minutes, or until pale golden.  Transfer the scones to a cooling rack and let them cool slightly before serving.

copy-of-img_5495

fresh strawberry scones

copy-of-img_3628

What’s fun about going through phases with certain foods, like my recent scone phase, is that it gives you a chance to really explore that category. I’ve made all sorts of scones in the past few months – cream scones, scones made with lighter dairy but more butter, scones filled with fresh fruit and with nuts. So far I’ve avoided scones with dried fruit, even though it’s traditional.

Instead, I tried scones with one of the juiciest fruits. Katie’s recipe for strawberry scones closely resembles most other scone recipes, with butter cut into the dry ingredients before dairy is gently stirred in. The recipe includes yogurt and milk instead of the richer cream often called for in scones.

copy-of-img_3487

The recipe was a little tricky for me. Because strawberries vary so much in water content, Katie recommends a range of flour. I knew my early season berries weren’t at their juicy peak, so I kept to the lower end of the range. However, I still needed far more liquid than the original recipe requires before the dough would come together. Kelsey indicated that she had a similar problem. Fortunately, it was easy enough to increase the milk until all of the flour was evenly moistened.

copy-of-img_3488

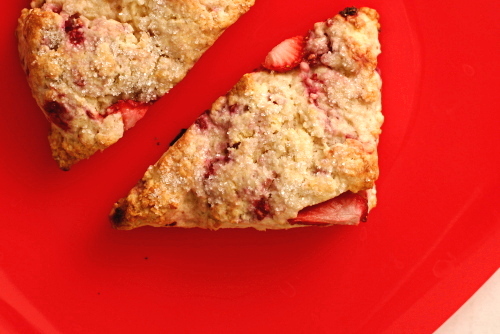
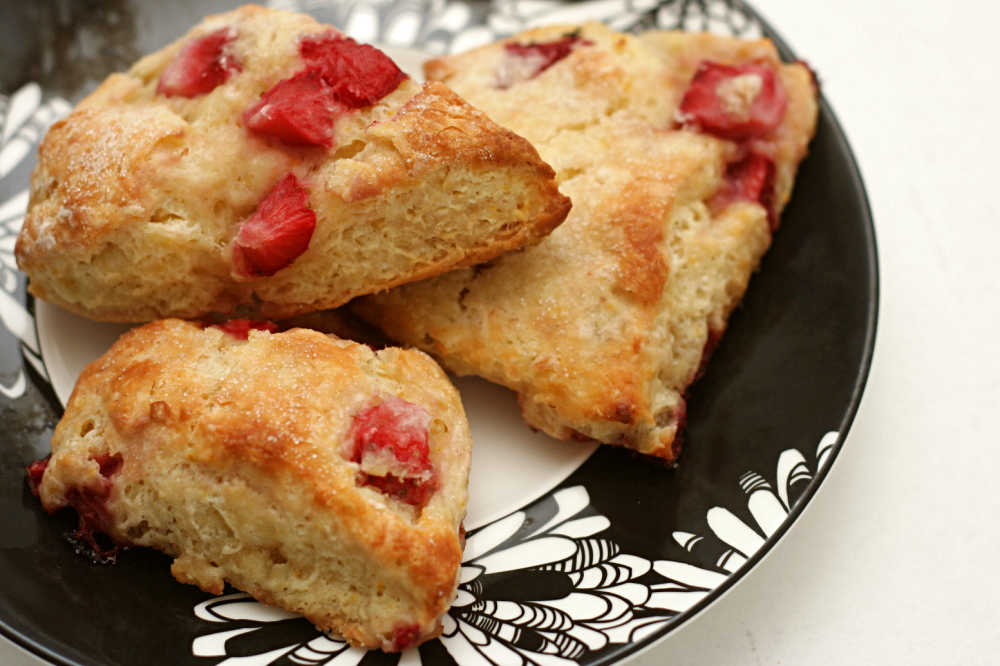
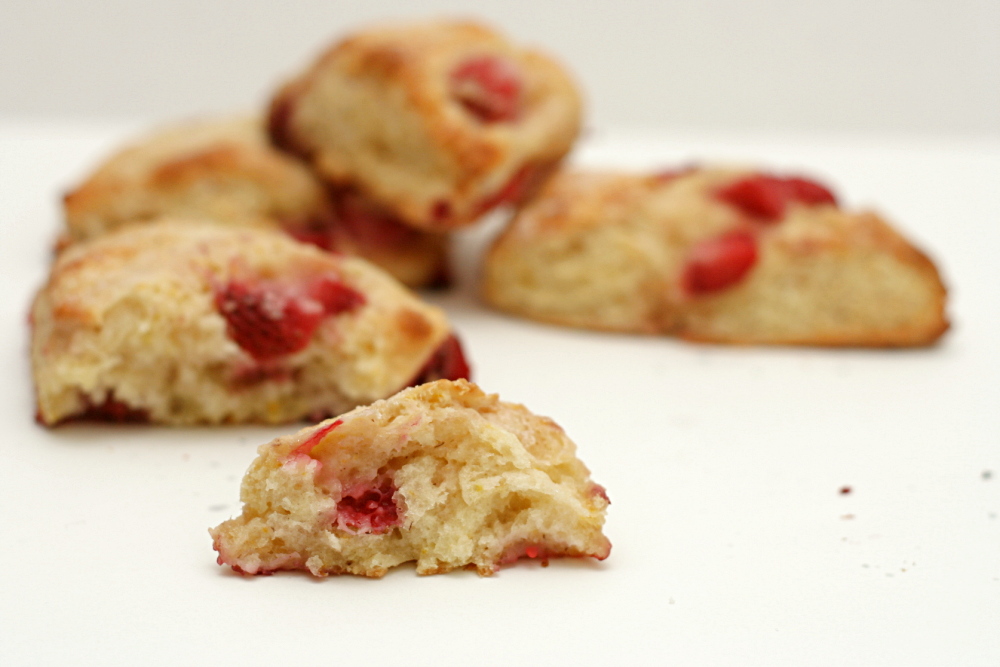
I’ve found that I generally prefer cream scones for their rich tender crumb that has no trace of dryness. These scones were a little different, and my first instinct was to prefer the cream scones that I’m used to, but then I realized that these were every bit as good. Because of the higher amount of butter compared to flour, the scones had crisper edges, especially the bottom, but it was good, almost like a flaky pie crust. And you know how scones are so good topped with jam? Putting strawberries right in the scone is ten times better.

One year ago: Peanut Butter Torte

copy-of-img_3626

Strawberry Scones (adapted from Good Things Catered)

When I make scones, I almost always prepare them up to just before baking (through step 5 in this recipe), then freeze the shaped dough. The scones can be baked straight from the freezer, with just a few minutes added to the baking time.

2¼ cups (10.8 ounces) all purpose flour
¼ cups (1.75 ounces) granulated sugar, plus extra for sprinkling
1 tablespoon baking powder
½ teaspoon salt
8 tablespoons (1 stick) butter, chilled and cut into small pieces
1 egg
¼ cup plain yogurt
½ cup milk
1 teaspoons orange zest
1 cup diced fresh strawberries

1. Adjust an oven rack to the middle position and heat the oven to 425F. Line a baking sheet with parchment paper or a silicone mat.

2. In a small bowl, combine the egg, yogurt, milk and zest and whisk to thoroughly combine. Set aside.

3. Place the flour, sugar, baking powder, and salt in the work bowl of a food processor. Pulse to combine (or mix with a whisk in a large bowl). Add the cubes of butter and pulse several times, until the butter pieces are all smaller than pea-sized (or cut the butter into the flour with a pastry cutter or two knives). Transfer the mixture to a large bowl.

4. Add the strawberries to the flour mixture and toss to coat. Add the wet ingredients and fold them into the dry ingredients, mixing just until the dough comes together and all of the flour is hydrated.

5. Turn the dough out onto a well-floured work surface and pat it into a large ball. Cut the ball in half, and shape each half into a flat disk about ½-inch thick. Cut the discs into 8 wedges.

6. Place the wedges on the prepared baking sheet and sprinkle sugar on top. Bake until slightly browned on top, about 15 minutes. Remove the baking sheet from the oven and let the scones cool on the sheet for a few minutes before transferring to a wire rack. The scones are best served when still slightly warm.

copy-of-img_3630

apple cheddar scones (twd)

Apple and cheddar is a combination of flavors that I’ve heard about often but had never tried, so I was happy that Karina’s choice of Apple-Cheddar Scones for this week’s TWD recipe would give me that chance. Also, while I’m not sure if this is supposed to be a sweet or savory recipe, I served it with soup for dinner, which means I actually got to choose my own dessert to make last week! How exciting.

I made the full recipe, a rarity for me, and froze most of the shaped scones. The recipe came together with no hitches, although the dough was a bit stickier than I was expecting.

Although we ate these for dinner twice last week, situations beyond my control prevented me from enjoying one fresh from the oven. However, they were great even at room temperature. They were very light and tender.

That being said, I’ll tweak the recipe a bit for the next time I make it. Most importantly, I double the salt, because I kept hoping for just a bit more flavor from each bite, and this recipe calls for significantly less salt than most other biscuit recipes. I’d also cut the cheese into tiny squares instead of grating it, because I think the flavor almost gets lost when it’s evenly mixed in with the flour. I want little bursts of cheddar flavor. And I might increase the apples a bit, because I didn’t get as much apple flavor as I wanted either.

But they were still really good. I’m glad I have four more in the freezer. I’m also more interested in other apple-cheddar recipes now.

Karina has posted the recipe.

lox and goat cheese omelets

lox goat cheese omelets 4

I stopped at the grocery store today and bought salmon, green beans, scallions, cream cheese, chocolate chips, and oreos. This pretty much sums up my overall diet – very healthy, except for when it isn’t.

lox goat cheese omelets 1

Weekend breakfasts used to sit more in the “isn’t” category, but I’ve been moving them more often than not over into the healthy side (especially, I have to admit, in the month or two before our annual trip to the beach). Of course healthy means different things to different people, but one thing I try to do when I step it up a notch is increase my protein and reduce my starches. This means less scones and more omelets.

lox goat cheese omelets 2

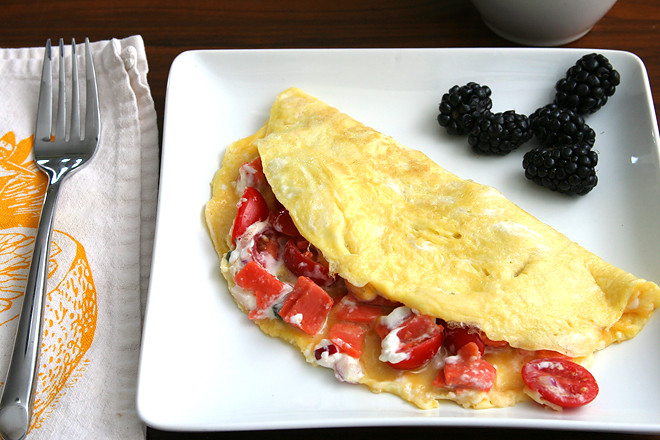
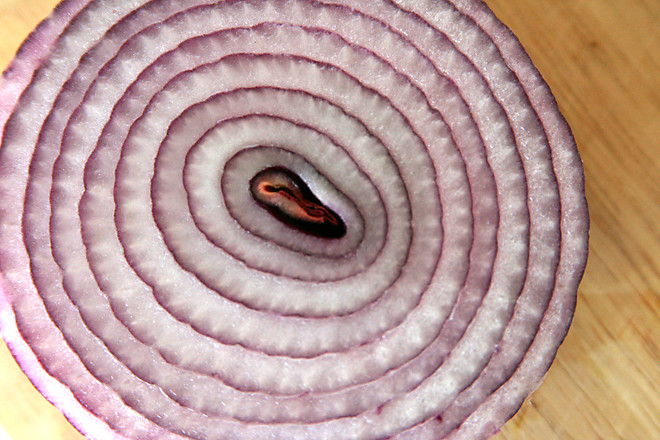
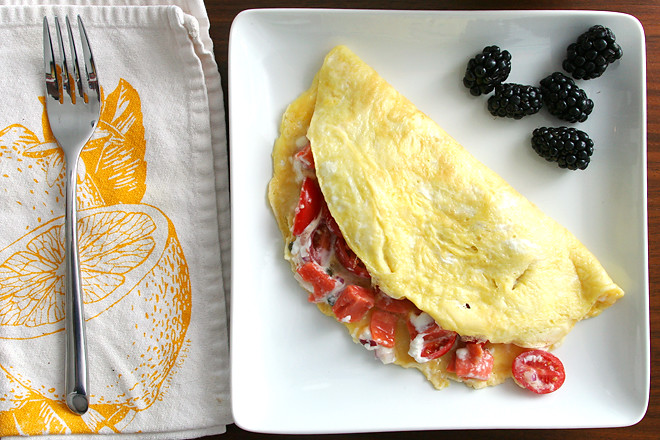
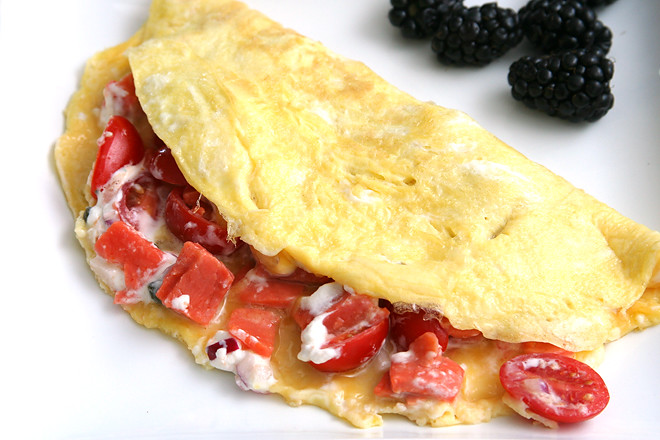
This recipe takes my favorite bagel toppings and mixes them with eggs instead of bread. I replace the traditional cream cheese with goat cheese not just because goat cheese isn’t quite as rich as cream cheese, but because the stronger flavor of goat cheese holds its own better with the salty salmon and capers and sharp bites of onion. Eggs instead of bread might sound like a sad substitution, especially for a bagel lover like me, but I never feel like I’m missing out when I’m eating these omelets.

lox goat cheese omelets 3

Printer Friendly Recipe
Lox and Goat Cheese Omelets

4 servings

I like a little raw onion on my lox bagels, but if you don’t, you probably won’t like it here either.

10 large eggs
¼ teaspoon salt
5 ounces goat cheese, crumbled
1 pint grape tomatoes, halved
¼ red onion, minced (optional)
2 tablespoons capers
6 ounces lox, diced
2 tablespoons olive oil

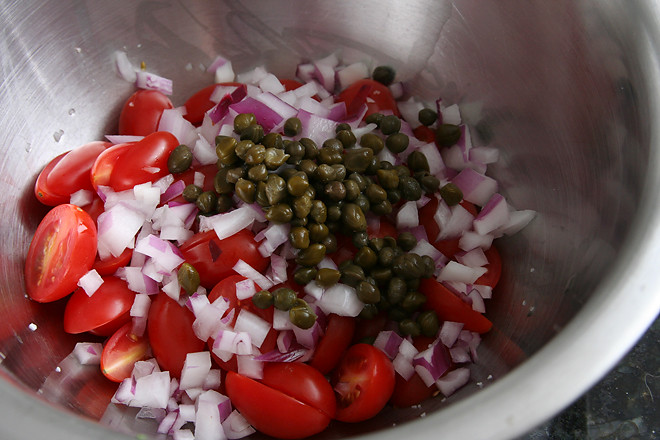
1. In a medium bowl, whisk the eggs, salt, and 2 ounces of goat cheese. In a second bowl, combine the remaining goat cheese, tomatoes, onion, capers, and lox.

2. Heat 1½ teaspoons olive oil in a medium skillet over medium heat. Add one-quarter of the egg mixture. Use a rubber spatula or wooden spoon to gently stir the eggs in a circular motion for about fifteen seconds. Reduce the heat to medium-low and let the eggs cook, without moving, for about a minute. Use the spatula to lift up a small section of cooked egg along the edge of the pan; tilt the pan so raw egg can flow underneath the lifted portion. Repeat this motion around the edge of the skillet. Add one-quarter of the lox mixture, spreading evenly over half of the eggs in the pan. Cover the pan and let cook for 2-4 minutes, until the eggs are just set. Fold the bare half of the eggs over the filling, then slide the omelet onto a plate. Repeat with the remaining eggs and filling.

lox goat cheese omelets 5

beef barbacoa

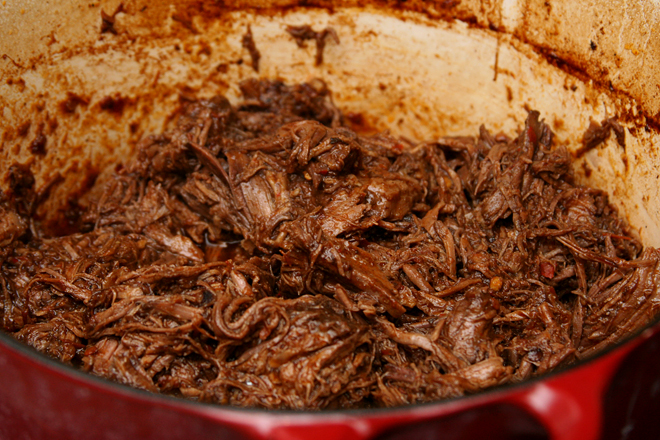
barbacoa 8

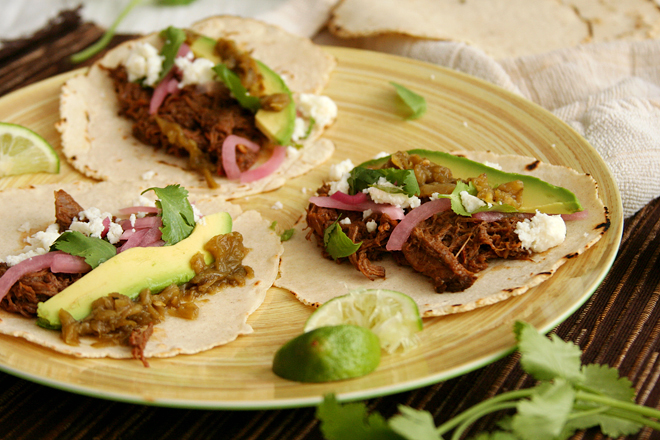
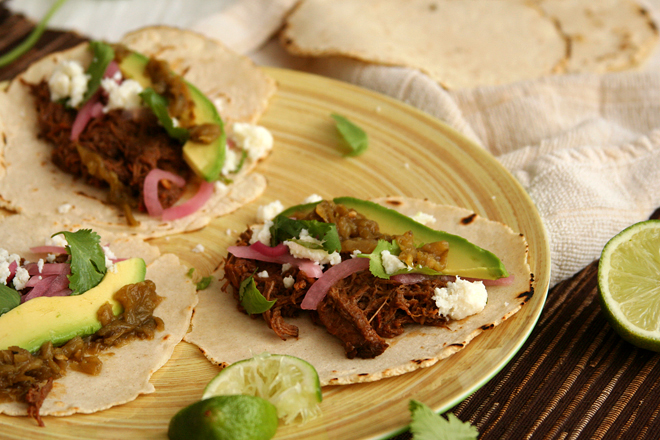
I am going through a taco phase, and it might have started out with these. Well, mostly I just really like tacos, because who doesn’t, but things have ramped up in recent weeks. We’ve had all sorts of tasty fillings recently, but it’s hard to beat barbacoa.

barbacoa 2

Barbacoa has so many satisfying flavors – it’s a little sweet, a little sour with a squeeze of lime juice, plenty meaty of course. It definitely has a spicy kick. It’s coated in a rich layer of sauce that delivers loads of flavor, with nothing left behind in the pot.

barbacoa 3

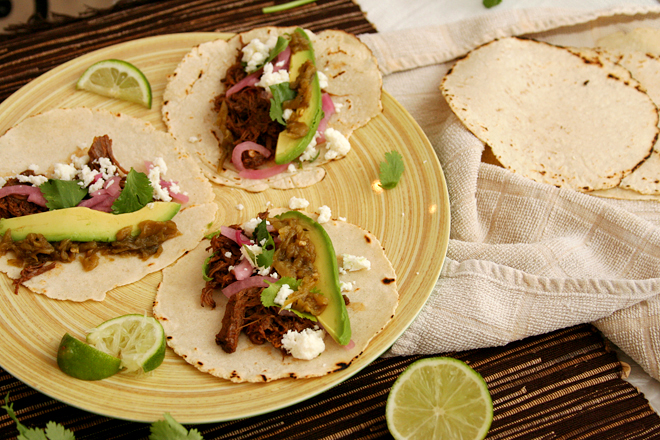
It only gets better with toppings. Avocado is arguably my favorite part of most tacos (not these; the barbacoa wins by a mile), and queso fresco is the perfect salty fresh compliment to the rich meat. Those two and a wedge of lime are my only requirements, but pickled onions and a smattering of cilantro are nice too.

barbacoa 4

This isn’t a hard recipe, although it’s far from fast. The long ingredient list looks worse than it is. There’s a lot of spices, chiles, and condiments, but nothing other than an onion and some garlic require a cutting board. Not even the beef needs to be sliced or cut into cubes. What I thought was going to be a significant project took me about half an hour.

barbacoa 6

Of course, you don’t actually get to eat until almost 5 hours layer, after the beef has become tender and rich and the broth has been reduced down to a sauce. It’s getting warm out and you might not want to leave your oven on for four hours while the beef cooks, but the result is worth some air-conditioning. Plus, it reheats great, maybe even better than it was the first day. I have to admit that I haven’t really been in a taco phase, just a barbacoa phase. I’ve got one more batch stored in the freezer, and I can’t wait.

barbacoa 9

One year ago: California Roll Burgers
Two years ago: Basic Coleslaw
Three years ago: Quinoa Tabbouleh
Four years ago: Fresh Strawberry Scones
Five years ago: Ricotta Spinach and Tofu Ravioli

Printer Friendly Recipe
Beef Barbacoa
(very slightly adapted from The Food Lab on Serious Eats)

About 6 servings

I think the crockpot is a definite possibility here, but it’ll take you a lot longer to reduce the liquid to a sauce after the cooking time.  You’ll still need to brown the oxtails and onions beforehand, because that adds tons of flavor.  That’s an easy tradeoff to save 4 hours of oven use when the weather’s warm!

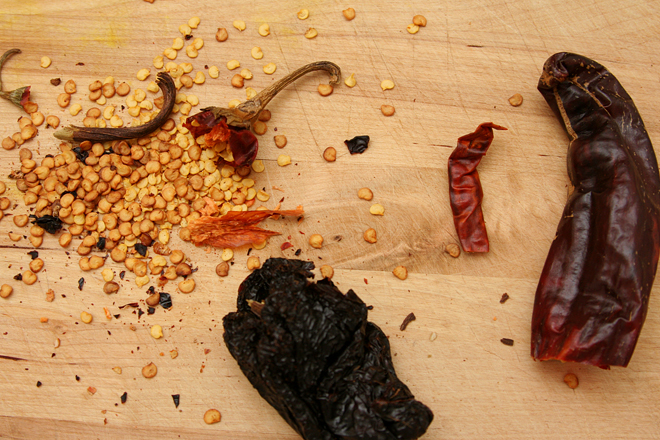
If you can’t find these exact types of chiles, any combination of mild, fruity and bright-tasting chiles will do, such as guajillo or Colorado.  I used a New Mexico, an ancho, and an arbol chile.  I couldn’t find oxtails either, so I used beef ribs.

1 whole dried New Mexico, costeño, or choricero chili, seeds and stem removed
1 whole chile ancho or pasilla, seeds and stem removed
1 whole chile negro, seeds and stem removed
4 cups low-sodium chicken stock, divided
3 tablespoons vegetable or canola oil, divided
1 pound oxtails
1 small onion, diced
6 medium cloves garlic, peeled and smashed
2 teaspoons ground cumin
½ teaspoon ground cloves
2 teaspoons dried oregano
4 chipotle chiles packed in adobo, chopped, with 2 tablespoons adobo sauce
¼ cup apple cider vinegar
2 teaspoons fish sauce
1 whole chuck roast (about 4 pounds)
Kosher salt and freshly ground black pepper
2 whole bay leaves
Kosher salt
Warm corn tortillas, avocados, queso fresco, pickled onions, cilantro, salsa, limes, and other condiments for serving

1. Adjust an oven rack to the lower-middle position and preheat the oven to 275 degrees. Place the dried chiles in the bottom of a large Dutch oven and heat over high heat. Cook, turning the chiles with tongs occasionally, until fragrant and toasted, about 3 minutes. Transfer the chiles to a small saucepan and cover with 2 cups of chicken broth. Bring to a boil over high heat, reduce to a simmer, and cook until chiles are completely tender, about 15 minutes. Set aside.

2. Meanwhile, heat 1 tablespoon of oil in the now-empty Dutch oven over high heat until shimmering. Cook the oxtails until they’re well-browned on all sides, about 8 minutes total. Remove the oxtails and set aside. Reduce the heat to medium.

3. Add the remaining two tablespoons oil and heat along with the onions and garlic, and cook, stirring frequently, until deep brown and just starting to burn, about 10 minutes. Add the cumin, cloves, and oregano, and cook, stirring constantly until fragrant, about 30 seconds. Add the chipotle chiles, vinegar, and remaining chicken broth. Scrape up the browned bits from the bottom of the pan, simmer until reduced by about half, then transfer the entire contents to the jar of a blender.

4. Add the soaked chiles and their liquid to the blender along with the fish sauce. Start the blender on low (be careful of blowups!) and slowly increase the speed to high. Puree until smooth, about 1 minute. Set aside.

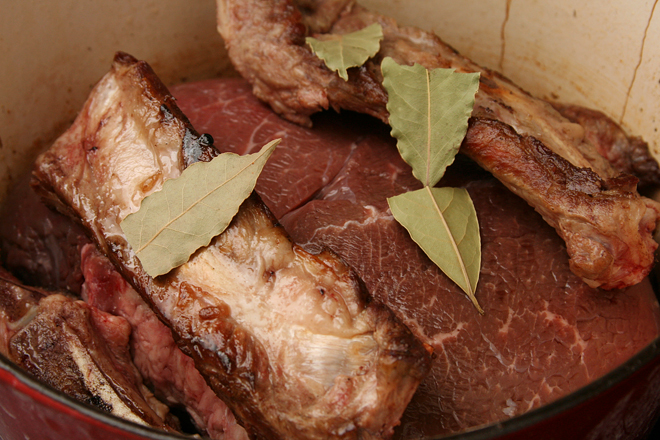
5. Place the beef roast in the Dutch oven. Add the browned oxtails, 2 teaspoons salt, 1 teaspoon black pepper, the bay leaves, and the sauce. Bring to a boil over high heat. Place the lid on the pot, slightly cracked, then transfer to the oven. Cook, turning the beef occasionally, until completely tender and a cake tester or metal skewer inserted into the meat shows little to no resistance, about 4 hours. Discard the bay leaves and oxtails (meat from oxtails can be eaten if desired). Transfer the chuck to a large plate. Return the Dutch oven to the stovetop, and cook, stirring frequently, over medium-high heat until the liquid is reduced to about 1½ cups, about 5 minutes.

6. Beef can be shredded and served immediately or transferred to a sealed container along with the liquid and refrigerate up to five days. When ready to serve, shred into large chunks with your fingers or two forks. Return the beef to a pot along with the sauce. Bring to a simmer and cook, gently stirring and folding until the beef is hot, tender, and coated in sauce. Season to taste with salt. Serve immediately, piling the beef into warm corn tortillas with onions, queso fresco, avocados, cilantro, salsa, limes, or other condiments as desired.

barbacoa 10

braised potatoes

braised potatoes 5

I don’t live in a world (okay, a town) where there are duck fat fries. People are always raving about them – except for the few who claim they’re not all that – but my opportunities to try duck fat anything have been limited. So I do what I usually do when I can’t find a restaurant to serve me something I want to try: I make it myself.

duck fat potatoes 3

Not that I set out to cook with duck fat; mostly I just stumbled onto a container of it at Whole Foods on my last visit to see my parents in Albuquerque. Also I didn’t exactly make fries, but close enough.

braised potatoes 1

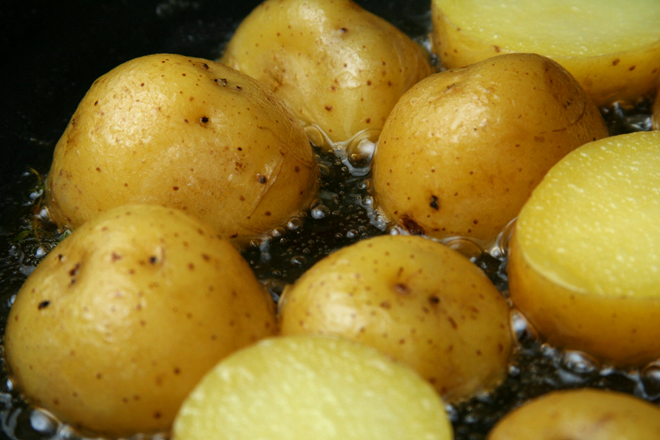
On my first attempt to discover what makes potatoes cooked in duck fat so popular, I simply melted a half-inch or so of the fat in a nonstick pan, added the potatoes cut-side down, and let them cook until they were tender inside and nicely browned on the flat edges. They were just fine, but I didn’t see what the fuss was about.

braised potatoes 2

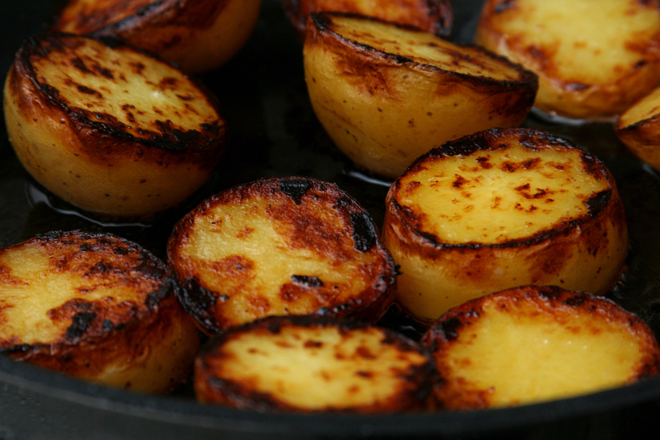
I was planning to give it another try one evening – after all, I had a container of duck fat with no other plans for it – when, a few hours before dinner, I read about Cook’s Illustrated’s braised new potato recipe in their latest issue. In this technique, the potatoes are cooked in a mixture of water, seasonings, and fat (the original recipe uses butter). The water tenderizes the potatoes, and when it evaporates, the potatoes brown in the fat.

braised potatoes 3

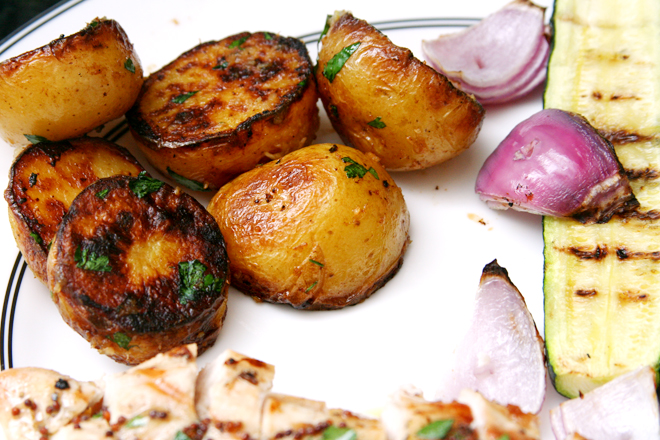
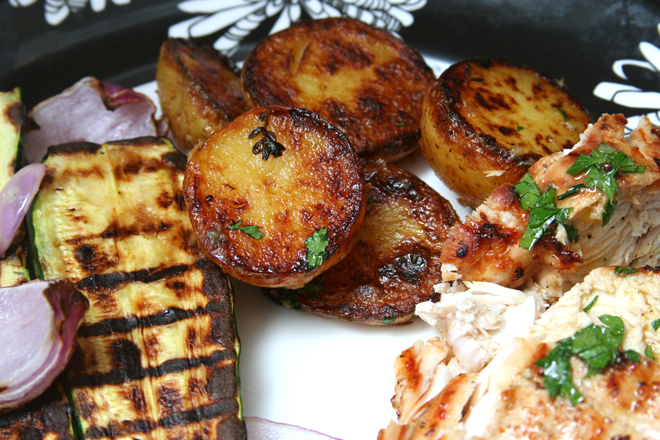
These are now a contender for my favorite potatoes ever. I still haven’t tried it with butter, which I’m sure is delicious, but the duck fat makes the kitchen smell like the best of Thanksgiving.  The inside of the potatoes are soft and creamy, and the flat edge is crisp and browned.  I see what all the fuss is about now.

braised potatoes 4

One year ago: California Roll Burgers
Two years ago: Lemon Bar (comparison of 3 recipes)
Three years ago: Grilled Artichokes
Four years ago: Fresh Strawberry Scones
Five years ago: Asparagus and Arugula Salad with Cannellini Beans and Balsamic Vinegar

Printer Friendly Recipe
Braised Red Potatoes with Lemon (from Cooks Illustrated)

Did I mention that they’re almost entirely hands-off?

1½ pounds small red potatoes, unpeeled, halved
2 cups water
3 tablespoons unsalted butter
3 garlic cloves, peeled
3 sprigs fresh thyme
¾ teaspoon salt
1 teaspoon lemon juice
¼ teaspoon pepper
2 tablespoons minced fresh chives

1. Arrange the potatoes in a single layer, cut-side down, in a 12-inch nonstick skillet. Add the water, butter, garlic, thyme, and salt and bring to a simmer over medium-high heat. Reduce the heat to medium, cover, and simmer until potatoes are just tender, about 15 minutes.

2. Remove the lid and use a slotted spoon to transfer the garlic to a cutting board; discard the thyme. Increase the heat to medium-high and vigorously simmer, swirling pan occasionally, until the water evaporates and the butter starts to sizzle, 15-20 minutes. When it’s cool enough to handle, mince the garlic to a paste.  Transfer the paste to a bowl and stir in the lemon juice and pepper.

3. Continue to cook the potatoes, swirling the pan frequently, until the butter browns and the cut sides of the potatoes turn spotty brown, 4 to 6 minutes longer. Off the heat, add the garlic mixture and chives and toss to thoroughly coat. Serve immediately.
braised potatoes 7

banana cream pie cupcakes

banana cream pie cupcakes 7

This is the first of his birthdays since I met Dave over eleven years ago that I haven’t made a banana cream pie. This is okay with me; for one thing, it isn’t one of my favorite things to make; I don’t get to use the mixer and there’s no batter to eat, where’s the fun in that? For another, I’ve pretty much expended the banana cream pie category, making versions with regular and graham cracker crusts, richer and lighter pastry creams, traditional and tweaked whipped cream toppings, even additional layers of chocolate and caramel. There’s not much for me left to explore in the banana cream pie realm.

banana cream pie cupcakes 1

Except turning it into cake. Dave actually requested green tea crème brûlée for his birthday dessert this year instead of pie, but I also offered to make cupcakes to bring to work. This would hopefully head off our standard office procedure of a coworker making an emergency trip to the grocery store to pick up a cake for an afternoon birthday celebration. (It sort of worked; instead, someone made an emergency trip to the store for cheese and crackers and fruit for the afternoon birthday celebration.)

banana cream pie cupcakes 4

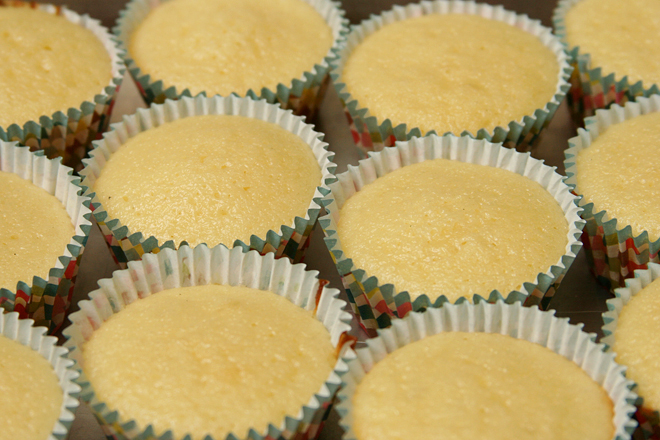
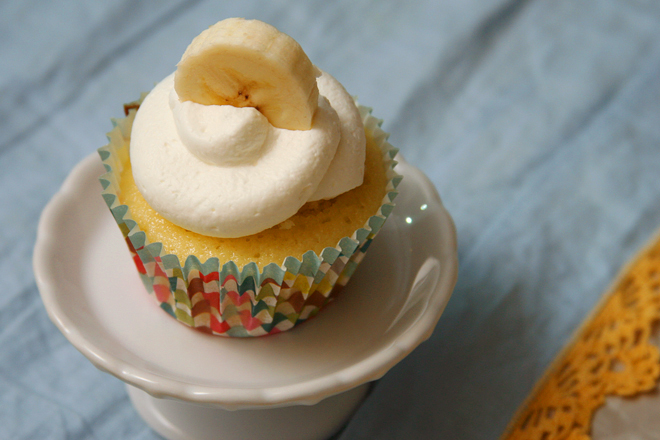
These are not so different than all the various banana cream pies I’ve made over the years. There are still sliced bananas, pastry cream, whipped cream, and a buttery mixture of sugar and flour. The difference is that the butter and flour is baked into cupcakes instead of rolled into a pie crust. Dave is generally a bigger fan of pie than cake, but he enjoyed these, and our coworkers raved. And by my standards, they’re a heck of a lot more fun to bake than a pie, so everybody wins.

banana cream pie cupcakes 6

One year ago: Asian Lettuce Wraps
Two years ago: Feta and Shrimp Macaroni and Cheese
Three years ago: Maple Oatmeal Scones
Four years ago: Savory Corn and Pepper Muffins
Five years ago: Lasagna Bolognese

Printer Friendly Recipe
Banana Cream Pie Cupcakes
(from Annie’s Eats and Cooks Illustrated’s Yellow Cake recipe)

Makes 24 cupcakes

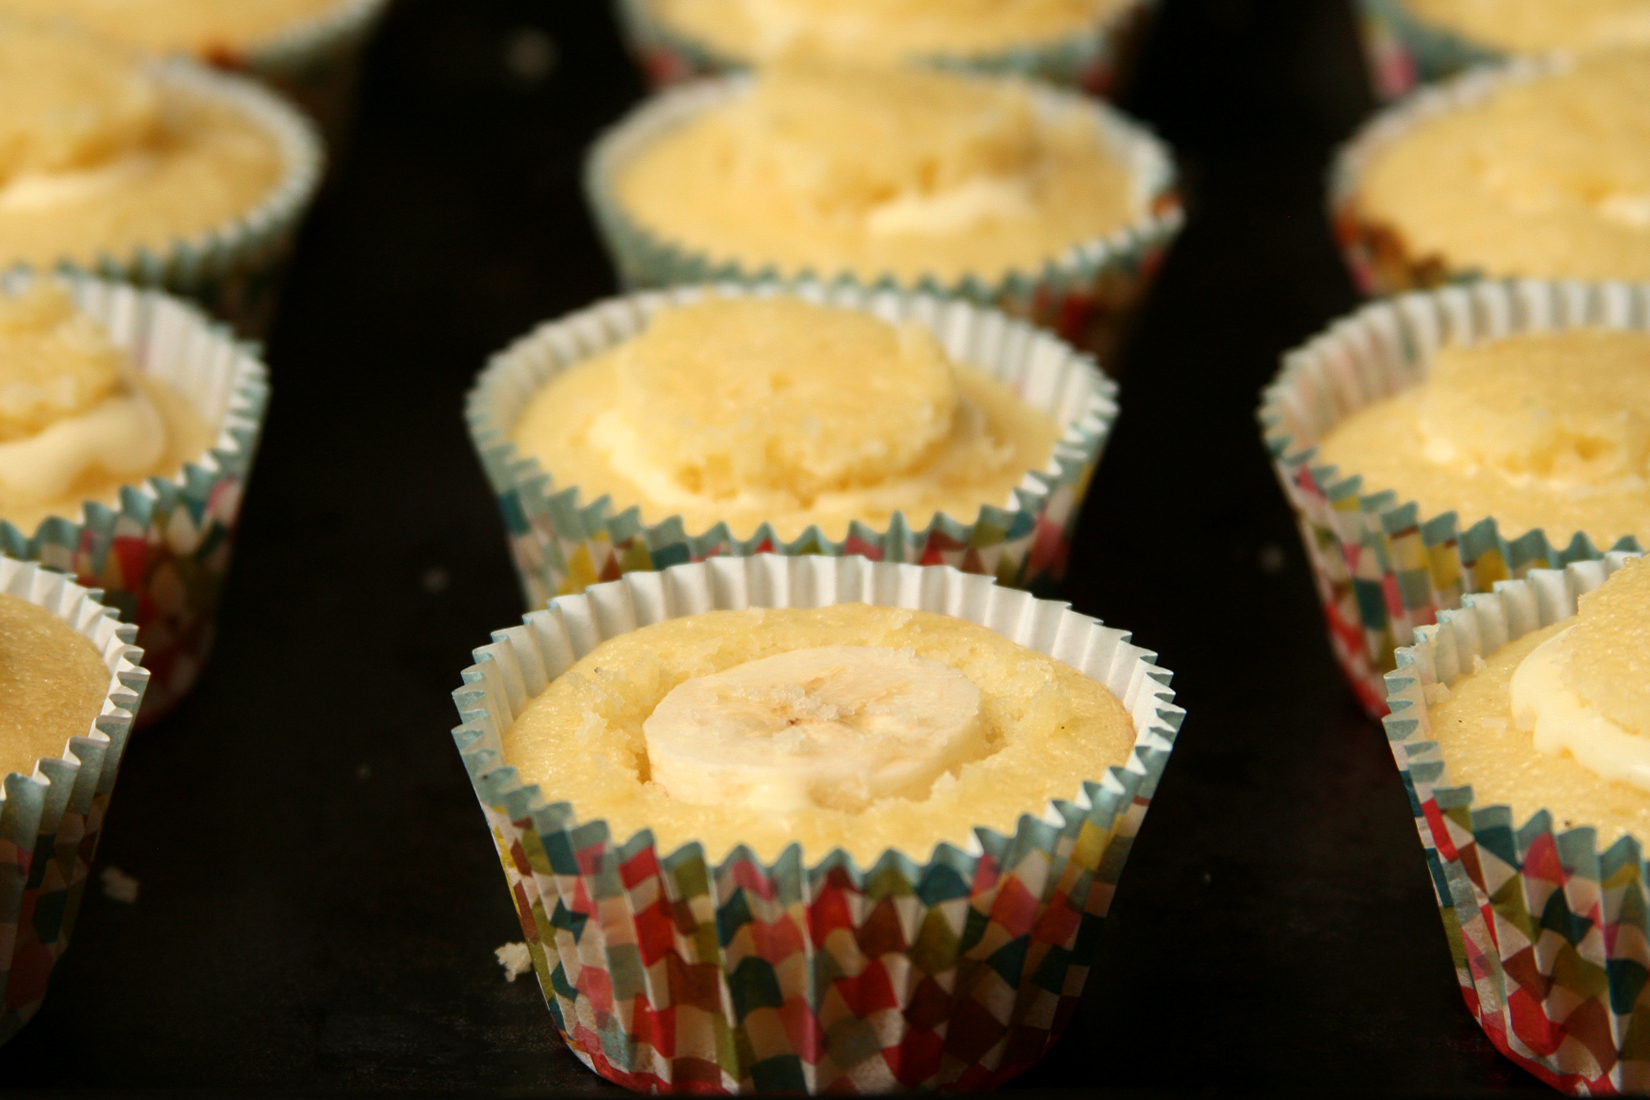
For 23 cupcakes, I fitted a slice of banana into the bottom of the carved out center before spooning on pastry cream and topping with a portion of the removed cone. For the last cupcake, I decided to try adding the pastry cream first and then topping with a banana and discarding the entire cone. This was much more successful because you can fit in more pastry cream and the banana makes a stable surface for the whipped cream topping.

Filling:
1 cup half-and-half
¼ cup (1.75 ounces) sugar, divided
Pinch of salt
3 large egg yolks
1½ tablespoons cornstarch
2 tablespoons cold unsalted butter, cut into 4 pieces
¾ teaspoon vanilla extract

Cake:
2½ cups (10 ounces) cake flour, plus extra for dusting pans
1¼ teaspoon baking powder
¼ teaspoon baking soda
¾ teaspoon table salt
1¾ cups (12.25 ounces) sugar
10 tablespoons unsalted butter, melted and cooled slightly
1 cup buttermilk, at room temperature
3 tablespoons vegetable oil
2 teaspoons vanilla extract
6 large egg yolks plus 3 large egg whites, at room temperature

Topping:
1½ cups heavy cream
½ cup (1 ounce) powdered sugar
1 teaspoon vanilla
1½ bananas, peeled and sliced

1. To make the filling, heat the half-and-half, 3 tablespoons of the sugar, and the salt in a saucepan over medium-high heat until simmering, stirring occasionally to dissolve the sugar. Meanwhile, combine the egg yolks and remaining 2 tablespoons sugar in a medium bowl and whisk until the sugar has begun to dissolve and the mixture is creamy, about 15 seconds. Whisk in the cornstarch until combined and the mixture is pale yellow and thick, about 30 seconds. When the half-and-half mixture has reached a simmer, slowly add it to the egg yolk mixture to temper, whisking constantly. Return the mixture to the saucepan, scraping the bowl with a rubber spatula. Return the mixture to a simmer over medium heat, whisking constantly, until a few bubbles burst on the surface and the mixture is thickened and glossy, about 30 seconds. Off the heat, whisk in the butter and vanilla. Strain the pastry cream through a fine mesh sieve set over a medium bowl. Press plastic wrap directly on the surface to prevent a skin from forming and refrigerate until cold and set, at least 3 hours and up to 2 days.
2. To make the cupcakes, adjust an oven rack to the middle position and heat the oven to 350 degrees. Line 24 cupcake wells with paper liners. Whisk the flour, baking powder, baking soda, salt, and 1½ cups (10.5 ounces) sugar together in a large bowl. In a 4-cup liquid measuring cup or medium bowl, whisk together the melted butter, buttermilk, oil, vanilla, and yolks.

3. In the clean bowl of a stand mixer fitted with the whisk attachment, beat the egg whites at medium-high speed until foamy, about 30 seconds. With the machine running, gradually add the remaining ¼ cup (1.75 ounces) sugar; continue to beat until stiff peaks just form, 30 to 60 seconds (whites should hold peak but mixture should appear moist). Transfer to a bowl and set aside.

4. Add the flour mixture to the now-empty mixing bowl fitted with the whisk attachment. With the mixer running at low speed, gradually pour in the butter mixture and mix until almost incorporated (a few streaks of dry flour will remain), about 15 seconds. Stop the mixer and scrape the whisk and sides of the bowl. Return the mixer to medium-low speed and beat until smooth and fully incorporated, 10 to 15 seconds.

5. Using a rubber spatula, stir ⅓ of the whites into the batter to lighten the mixture, then add the remaining whites and gently fold into the batter until no white streaks remain. Divide the batter evenly between the cupcake liners. Lightly tap the pans against the counter 2 or 3 times to dislodge any large air bubbles.

6. Bake until a toothpick inserted into the center of a cupcake comes out clean, 18-20 minutes. Cool the cupcakes in the pans on a wire rack for 5 minutes, then remove them from the wells and cool completely on a wire rack.

7. Use a paring knife to remove a 1½ inch-diameter cone from the center of each cupcake; discard the cones. Spoon 2 teaspoons of pastry cream into the well of each cupcake, then top with a slice of banana.

8. To make the topping, beat the heavy cream on medium-high speed in the bowl of a stand mixer fitted with the whisk attachment until frothy. Add the sugar and vanilla and beat until the mixture holds stiff peaks, scraping the bowl as necessary.
9. Pipe the whipped cream onto the cupcakes. Top with a slice of banana.

banana cream pie cupcakes 5

strawberry poptarts

poptarts 9

I like to keep track of things. This is why I have a website showcasing new recipes. But I also have calendars (printed out and filled in with pencil, old school) logging all the workouts I’ve done for years, a list updated daily of which projects I spend time on at work, and a color-coded Google Calendar that I check and update several times a day.

poptarts 4

This apparently wasn’t enough for me, so I’ve recently started tracking some new things – indulgences. Desserts, alcohol, restaurant meals, snacking on ingredients while making dinner – those are the biggies for me. I set goals for the month, and they are generous, and I don’t get bent out of shape if I miss them (and I always go over on both alcohol and desserts), but having it laid out in front of me in a spreadsheet does help my self-control sometimes. Is munching on this cucumber, even if it’s dipped in dressing, really worth having to log a day of ingredient snacking?

poptarts 3

There are loopholes though. Shortcake, obviously that’s dessert. But scones are breakfast, so I don’t need to record those, even if they do contain just as much butter and sugar as shortcake. Cupcakes, dessert; muffins, breakfast. Poptarts are breakfast, right?

poptarts 6

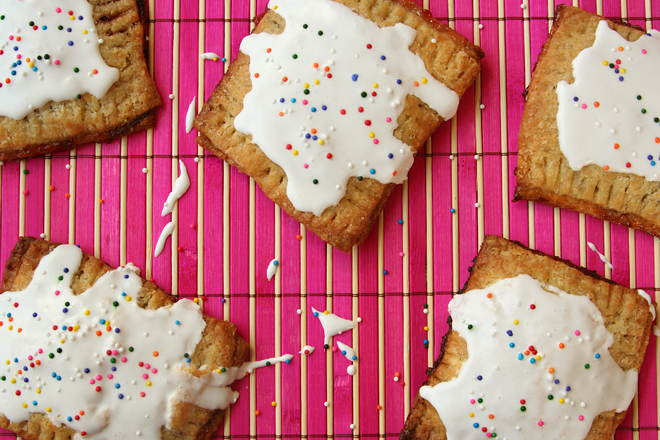
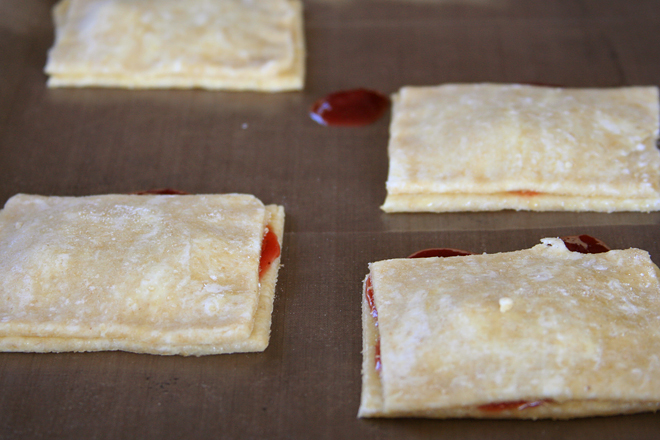
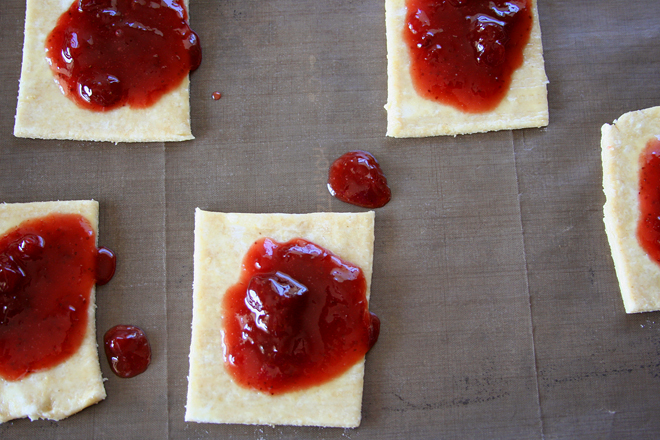
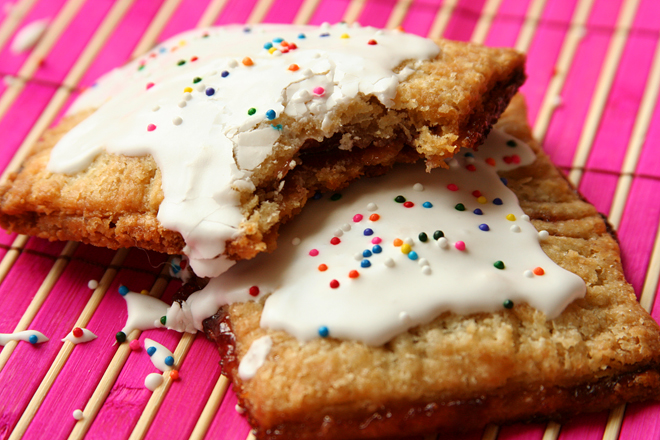
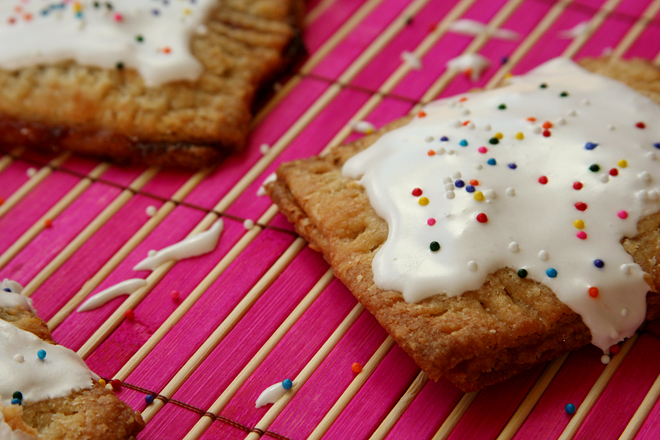
That might be a stretch, even by my standards. Yes, there is jam involved, but a spoonful of jam is squeezed between two sheets of buttery delicious pie crust. And that’s all there is to it, unless you add icing. But once you add icing, any hope of calling this anything but a treat of the most indulgent manner is lost. It went on the list as dessert, and it was worth every mark on the spreadsheet.

poptarts 10

One year ago: Banh Mi (I absolutely love this recipe)
Two years ago: Taco Pasta Salad
Three years ago: Twice Baked Potato Cups
Four years ago: Banana and Peanut Butter Stuffed French Toast

Printer Friendly Recipe
Strawberry Pop-Tarts (adapted from King Arthur Flour via Smitten Kitchen)

Makes 9 (although I made 10 out of a half recipe)

My dough was too crumbly with just one egg, so I also used part of the egg used for the egg wash.

I used the icing because I wanted my tarts to be as traditional as possible, but, it turns out, royal icing on pie just isn’t that good. It’s pretty, but I don’t recommend it for the best flavor.

I replaced a quarter of the flour with whole wheat pastry flour.

Pastry:
2 cups (8½ ounces) all-purpose flour
1 tablespoon sugar
1 teaspoon salt
2 sticks (16 tablespoons) unsalted butter, diced
1 large egg, lightly beaten
2 tablespoons milk

Filling:
1 tablespoon cornstarch
1 tablespoon water
¾ cup (8 ounces) strawberry jam

Egg wash:
1 large egg
salt

Icing:
½ cup (2 ounces) powdered sugar
1 teaspoon meringue powder
1 tablespoon water

1. For the dough: Combine the flour, sugar, and salt in a food processor. Add the butter and pulse until it is cut into pea-sized pieces. Add the egg and milk and pulse until the dough looks crumbly but stays together when pinched. Turn the dough out onto a work surface or shallow bowl, forming it into a ball and kneading a few times. Divide the dough in half and shape each half into a rectangle, about 3 by 5 inches. Wrap the dough tightly in plastic wrap; chill for at least 30 minutes or up to 2 days.

2. Meanwhile, make the filling: In a small saucepan, stir together the cornstarch and water. Mix in the jam. Bring the mixture to a simmer over medium heat; simmer for 2 minutes. Remove from the heat; cool completely before using.

3. On a lightly floured work surface, roll one portion of the dough to ⅛-inch thick, slightly larger than a 9 by 12-inch rectangle. Repeat with the second piece of dough. Trim each portion of dough into a 9 by 12-inch rectangle. Cut each piece of dough into thirds both lengthwise and crosswise, forming a total of 18 3 by 4-inch rectangles.

4. Beat the additional egg with a pinch of salt and brush it over the entire surface of half of the dough. Place a heaping tablespoon of filling into the center of each egg-brushed rectangle, keeping a bare ½-inch perimeter around the jam. Place a second rectangle of dough on top of the jam, using your fingertips to press firmly around the pocket of filling, sealing the dough well on all sides. Press the tines of a fork all around the edge of the rectangle. Repeat with remaining rectangles of dough to form 9 tarts.

5. Transfer the tarts to a baking sheet lined with parchment paper or a silicone mat. Prick the top of each tart multiple times with a fork to allow steam to escape. Refrigerate the tarts (they don’t need to be covered) for 30 minutes (or freeze for 15 minutes), while you heat your oven to 350 degrees.

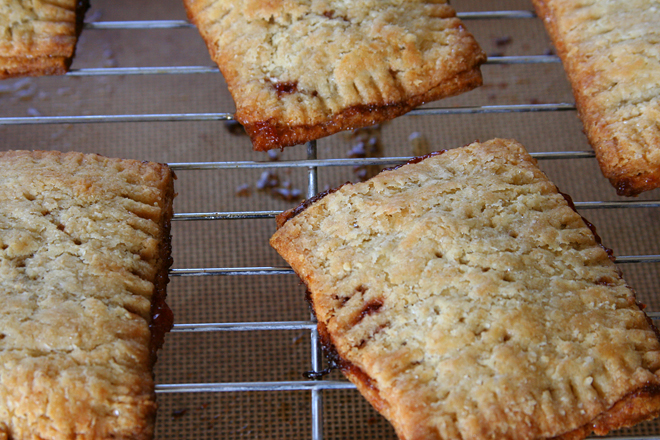
6. Bake the tarts for 20 to 25 minutes, until they’re light golden brown. Transfer them to a wire rack to cool for at least 10 minutes before icing.

7. In a small bowl, beat the powdered sugar, meringue powder, and water with a hand mixer until soft peaks form. Dribble over the tarts. Let set at least 20 minutes for the icing to set.

poptarts 8