Archives for February 2008

daring bakers feb 2008: julia child’s french bread

18.jpg

I was excited to see that this month’s Daring Baker hosts, Mary and Sara, chose Julia Child’s french bread recipe. I’d heard of this recipe before and wanted to try it, but I didn’t want to buy the book it’s in, so this worked out great for me. The recipe is really long, and it sounds like that intimidated a few Daring Bakers. However, much of that length is because Julia’s writing style is so personal and friendly, and she gives a lot of detail. I really enjoyed making my way through her recipe. This is a quote I particularly liked, which also sums up my philosophy toward homemade bread: “It will turn into bread in the oven whatever happens, but you will have an easier time and a better loaf if you aim for ideal conditions.” Homemade bread is good even if you screw it up.

28.jpg

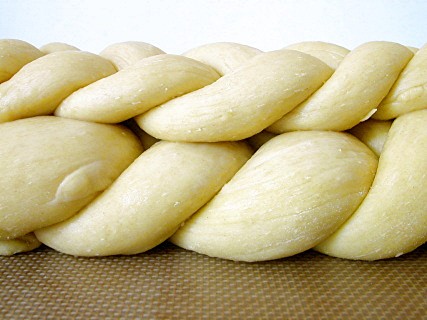
While I’m not a bread novice, I picked up a few tips from this recipe. One is to let the dough rise seam-side up and then flip it over before baking. This way the dough on top in the oven has no hardened crust that might impede the oven-rise. I also like the idea of using water to estimate what level the dough should rise to in its bowl.

All in all, this was great bread (although most of it is still in my overly stocked freezer). I have some other French bread recipes that I like at least as much, that have the added advantage of providing the baker with some more freedom in the timing. Probably the biggest difficulty of this recipe is finding the time to do it all in one day.

37.jpg

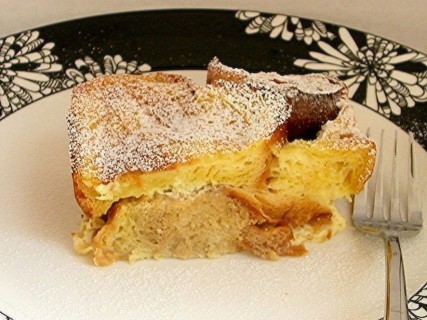
I made myself a tasty little sandwich with one of my mini-loaves, and now I’m trying to think of a great accompaniment to the baguette. I hear Julia Child’s coq au vin is amazing, and I do have the cookbook with that recipe. Although I hear that recipe is quite a project as well!

You can find the whole recipe here, and be sure to check out the rest of the Daring Bakers‘ bread!

46.jpg
Heehee…

smitten kitchen recipes

t1.jpg

Smitten Kitchen is my new favorite cookbook. In the past month since discovering Deb’s blog, I’ve made seven of her recipes. When I’m trying to come up with cooking ideas, I just scan through her recipe page. Rather than rehash each dish in detail, I’m combining them into one entry.

bft.jpg

Boozy Baked French Toast

Of all of Deb’s recipes that I’ve made recently, this is my and Dave’s favorite. For one thing, it takes all of 10 minutes to put together, and that can be done the night before. In the morning, just cook it in the oven for half an hour, and voila – a great breakfast. The recipe is supposedly adaptable to whatever flavors you’re in the mood for or you have available, but I’ve only made it one way. I was planning to follow Deb’s recent favorite, with triple sec and orange zest, but I use “planning” loosely, as I didn’t actually bother to get either triple sec or orange zest. Instead, I used Grand Marnier as the alcohol, the zest of one grapefruit, and a splash of vanilla extract. It was fantastic. It was like Creamsicle French Toast. I made it again a week later, exactly the same way. This is why I have a loaf of challah in my freezer right now, and a grapefruit languishing in my crisper drawer, waiting for me to get back from New Mexico and make this great and easy dish for my friends who will be visiting.

copy-of-dscn3652.jpg

Artichoke Ravioli

I love the idea of homemade ravioli. I enjoy working with fresh pasta, and I like the option of customizing my ravioli filling to whatever strikes my interest – mushrooms, squash, seafood, and in this case, artichokes. The problem is, I sort of suck at making it. Both times I’ve tried, the pasta has been too watery after being boiled. This particular recipe is baked after being boiled, which helped dry it out somewhat, but clearly I need to work on my technique. Ravioli is too much tedious work to get anything less than amazing results. I’m not ready to give up yet. This filling was, fortunately, very good. The simple sauce was good too, although I used canned tomatoes instead of fresh, it being February and all.

copy-of-dscn3833.jpg

Creamy Baked Macaroni and Cheese

I already have a macaroni and cheese recipe that I love, but Deb’s photos of a crispy cheesy crust and creamy cheesy sauce had me intrigued to try a new recipe. Did I mention that it’s cheesy? This recipe uses twice as much cheese per pasta as my other favorite recipe. So I made it, and it was delicious, but Dave and I couldn’t decide if it was as good as my other favorite. So I made them side-by-side, which was, well, confusing. Neither recipe is particularly difficult, but I was making half recipes of each sauce, then storing half of that in the fridge so we could have an easy but fresh meal a few days later, which means that each sauce was topping only a quarter recipe of pasta. There was a screw-up here and there, but nothing vital. We weren’t able to pick a favorite. I know they’re both macaroni and cheese, but it felt like comparing apples and oranges. The Cooks Illustrated recipe is creamy and smooth, both in texture and flavor, while the new recipe was far sharper (did I mention that it has twice as much cheese as the other?) and a bit grainy, but oh, that crisp crust was fun. I think I’ll be combining the two in the future. I know Cooks Illustrated uses half cheddar because of its great flavor, and half Monterey jack because of its smooth melting qualities, but I’m going to try using 75% cheddar and 25% Monterey jack next time to get some more of that sharp flavor. I’m also going to skip the bread crumb topping and use more cheese instead, then put that under the broiler to brown the cheese. I think this will combine my favorite aspects of each recipe. (I was also just reminded of a recipe I used to love that uses smoked gouda, so I need to revisit that one. Hey, I love cheesy pasta.)

ribs.jpg

Hoisin and Honey Pork Ribs

When I was a kid, pork ribs were my favorite meal, and I requested them for every birthday. I grew out of that when I decided that ribs were too much effort and mess to eat when there was so little meat. But these ribs were certainly worth the effort. I wanted to make them because I recently tried hoisin sauce for the first time and loved it. This was my first time cooking pork ribs, plus I’m not usually very good with the broiler, but everything worked out great. Because the ribs are boiled first, the broiler is just to crisp them and caramelize the sauce, so it was easy.

ddl2b.jpg

Dulce de Leche Cheesecake Squares

This recipe called to me as soon as Deb posted it. Cheesecake filling, graham cracker crust, chocolate glaze, all mixed up with dulce de leche. I’m not really familiar with dulce de leche, but caramelized milk certainly sounds great. But wow, these were rich. I can usually handle rich foods without a problem, but these were too much even for me. It helped when I thought of them like candy instead of like a bar cookie and started cutting them into the 1-inch squares that the recipe recommends. I did enjoy them, but I don’t think I’ll be making them again.

t3.jpg

Truffles

It sounds like Valentine’s Day is becoming mostly an excuse for couples to enjoy a good meal together, which I think is great. Dave and I weren’t even going to do that (we were having the second day of mac and chz comparison on V-Day), and I was okay with that. I found out on February 13th that Dave wanted to do something extra, so I surprised him by making truffles the next day. I loosely followed the recipe for Robert Linxe’s truffles, except, less fancy. I didn’t use Volrhona chocolate, I didn’t wear gloves, and I didn’t simmer the cream multiple times. It wasn’t worried about details this time. It was my first time making truffles, and I think they came out well. I want to try them again, but comparing a number of different quality chocolates to see how much it really matters.

Pizza Dough

Deb discussed a recipe for pizza dough that replaced some of the water with white wine and added a little honey. I tried it, and while the dough wasn’t sweet and the wine flavor wasn’t obvious, it made a really good pizza crust. Even Dave, who didn’t know that I had changed the recipe, pointed out that it was particularly good. I forgot that this recipe was related to this entry in my blog, so I didn’t think to take a picture, which is unfortunate because the crust was really crisp and light.

Next on the list is Lighter-Than-Air Chocolate Cake. Flourless chocolate cakes are usually dense confections, so I’m interested in this very light version. And then, who knows? World Peace Cookies? Pretzel rolls? Risotto alla Barolo? There’s so many great recipes to choose from, all beautifully photographed and enticingly described.

ddl1.jpg

challah

17.jpg

Obviously I like to cook. Hence the food blog. And I like to eat, so that works out well, but I also like to show off what I cook. (Hence the food blog.) Dave and I live hours away from his family and days away from mine, and we haven’t made many friends since we moved two months ago, so my opportunities to cook for people are few and far between.

The last time our best friends visited us, I was so busy getting married that all I managed to do was bake some brownies for intermittent snacking. I even had the bad manners to wake up the morning of the wedding and make myself some breakfast and then tell my friends “um, there’s probably more bagels.”

They’re visiting again in two weeks, and I’d love to make up for lost time. But they’re getting here the same day I get back from a trip to New Mexico to see my new nephew, so it’s going to be tricky. I’m trying to stock the freezer with some goodies. (They’re going to be here for less than 2 days. I’m ridiculous, I know.)

27.jpg

Challah, like all breads, happens to take well to freezing. It also happens to make some excellent French toast, which is (sort of) what I plan to do with this loaf.

This bread is beautiful, tender, and slightly sweet, with a subtle butter flavor. I did put most of it in the freezer, but the one slice I ate was delicious. Hopefully the breakfast I make out of it in a few weeks is just as good.

36.jpg

Challah (from Cooks Illustrated, January 2006)

CI note: We prefer to knead this dough in a standing mixer, but a food processor or your hands can do the job. If using a food processor, place the flour mixture in a processor fitted with the dough blade. Mix together the eggs, yolk, butter, and water in a large measuring cup and, with the processor running, add the egg mixture in a steady stream. Process until a ball of dough forms, about 1 minute. Remove the dough to a lightly floured surface and knead by hand for an additional minute, or until the dough becomes smooth and elastic. Alternatively, you can mix the dough by hand in a large bowl with a wooden spoon, until the dough comes together. Then transfer the dough to a lightly floured surface and knead until the dough forms a smooth ball. If the dough remains tacky, add more flour 1 tablespoon at a time. This method will take longer than using a standing mixer, but you will get the same results.

Makes 1 large loaf

3-3 ¼ cups unbleached all-purpose flour (15-16 ¼ ounces), plus more for dusting work surface
¼ cup sugar (1¾ ounces)
1 envelope instant yeast (about 2¼ teaspoons)
1 ¼ teaspoons salt
2 large eggs plus 1 large egg yolk
4 tablespoons unsalted butter (½ stick), melted
½ cup warm water plus 1 tablespoon (about 110 degrees)
1 large egg white (for wash)
1 teaspoon poppy seeds, or sesame (optional)
1. Whisk together 3 cups of flour, sugar, yeast, and salt in medium bowl; set aside. Mix together 2 eggs, egg yolk, melted butter, and ½ cup of water in bowl of standing mixer fitted with dough hook. Add flour mixture to wet mixture; knead at low speed until dough ball forms, about 5 minutes, adding remaining ¼ cup flour, 1 tablespoon at a time, as needed to prevent dough from sticking. Whisk reserved egg white with remaining 1 tablespoon water in small bowl, cover with plastic wrap, and refrigerate.

2. Transfer dough to very lightly oiled large bowl, turning dough over to coat with oil. Cover with plastic wrap and let rise in warm place until doubled in size, 1 ½ to 2 hours. Gently press dough to deflate, cover with plastic wrap, and let rise until doubled in size again, 40 to 60 minutes.

3. Lightly grease large baking sheet and set aside. Transfer dough to lightly floured work surface. Divide dough into 2 pieces, one roughly half size of other. (Small piece will weigh about 9 ounces, larger piece about 18 ounces.) Divide large piece into 3 equal pieces. Roll each piece into 16-inch-long rope, about 1 inch in diameter. Line up ropes of dough side by side and pinch ends together. Take dough rope on bottom and lay it over center rope. Take dough rope on top and lay it over center rope. Repeat until ropes of dough are entirely braided, then pinch ends together. Place braid on baking sheet. Divide smaller piece of dough into 3 equal pieces. Roll each piece into 16-inch-long rope, about ½ inch in diameter. Braid together, pinching ends to seal. Brush some of egg wash on top of large loaf and place small braid on larger braid. Loosely drape loaf with plastic wrap and let rise in warm place until loaf becomes puffy and increases in size by a third, 30 to 45 minutes.

4. Adjust oven rack to lower-middle position and heat oven to 375 degrees. Brush loaf with remaining egg wash and sprinkle with poppy or sesame seeds, if using. Bake until loaf is golden brown and instant-read thermometer inserted into side of loaf reads 190 degrees, 30 to 40 minutes. Place baking sheet on wire rack. Cool loaf completely before slicing.

45.jpg

green chile chicken enchiladas

16.jpg

I’m from New Mexico, but I’m not one of those New Mexicans who like green chile in everything. I don’t want it in my eggs, and not really on my pizza, and I’m just coming around to the idea of it in burgers. I do love green chile in traditional New Mexican food though, and chicken enchiladas are my favorite dish.

Not that my recipe is similar to what you’d get in a New Mexican restaurant in Albuquerque. There, chicken enchiladas have nothing but shredded chicken in them, with green chile sauce on top and melted cheddar garnishing. I prefer all of those flavors mixed together right inside the tortilla.

This recipe began with a recipe for Sour Cream Chicken Enchiladas in Pillsbury’s Complete Cookbook. I took that base and combined it with some techniques from my favorite chicken pot pie recipe (coming soon), which is all about maximizing the flavor of the each ingredient, especially the chicken.

After seasoning the bone-in, skin-on chicken breast, I sear it on the stove and then roast it in the oven. When it’s done roasting, I deglaze the pan with some chicken broth to get any remnant tasty chicken-ness. Then I shred the chicken.

26.jpg

The filling is an embellished béchamel. I sauté onions and garlic in the butter before adding the flour, then add milk (and the broth used to deglaze the pan with the chicken), green chile and sour cream. Some of this mixture is set aside to become the sauce, and the chicken and some cheese is added to the remaining filling. The sauce is loosened with some additional milk and sour cream.

35.jpg

The first time I cooked with corn tortillas was a disaster, because I didn’t know that they need to be heated before they’ll roll without cracking. Now I wet the tortillas a bit, then heat them in the oven for a few minutes before attempting to fill and roll them. Once they’re all in the pan, I pour the sauce over them, sprinkle some more cheese on top, and bake until everything is heated through.

44.jpg

These are the best enchiladas I’ve ever had, putting traditional New Mexican recipes to shame.

Green Chile Chicken Enchiladas

Note: To wet the tortillas before heating and rolling them, I usually hold them under running water for a second. Alternatively, you could brush water on them using a pastry brush.

1 bone-in, skin-on chicken breast (12-16 ounces)
salt and pepper
1 tsp vegetable oil
2 tablespoons water
3 tablespoons butter
½ large onion, chopped fine
3 cloves garlic, minced
3 tablespoons flour
1 cup milk plus ¼ cup
4 ounces chopped green chiles, undrained
½ cup sour cream plus 2 tablespoons
1 cup (4 ounces) cheddar, shredded, plus ¾ cup (3 ounces)

1. For chicken: Adjust oven racks to the lower-middle and upper-middle positions; heat oven to 450 degrees. Heat oil in heavy-bottomed 9-inch ovenproof skillet over medium-high heat until oil just begins to smoke; swirl skillet to coat evenly with oil. Brown chicken breast skin side down until deep golden, 3 to 4 minutes; turn chicken breast and brown until golden on second side, 3 to 4 minutes longer. Place in oven on lower-middle rack. Roast until thickest part of breast registers about 160 degrees on instant-read thermometer, 18 to 25 minutes. Using potholder or oven mitt, remove skillet from oven. Transfer chicken to platter and set aside until cool enough to handle. Pour water into hot skillet and scrape with a heat-proof spatula or wooden spoon to loosen browned bits. Pour liquid into small bowl. Reduce oven temperature to 375 degrees.

2. For filling: Melt butter until foaming in medium saucepan over medium heat; add onions and garlic and cook, stirring frequently, until translucent, about 4 minutes. Add flour and cook, stirring constantly, for about 1½ minutes. Do not brown. Gradually whisk in milk and reserved water from deglazing. Bring mixture to boil over medium-high heat. Stir in green chiles, 1/8 teaspoon salt, and a pinch of pepper. Remove from heat, and stir in ½ cup sour cream.

3. For sauce: Set aside ¼ cup of filling mixture. Add an additional ¼ cup milk and 2 tablespoons sour cream and stir until blended.

4. Remove and discard chicken skin. Using fingers or fork, pull chicken off bones into 2-inch shreds and 1-inch chunks. Stir shredded chicken and 1 cup shredded cheddar into filling mixture. Spread ¼ of sauce in bottom of 9×13-inch pan.

5. Lightly wet both sides of four tortillas; place on baking sheet in oven for 3-4 minutes, until soft. Spread approximately ¼ cup of filling down center of each tortilla. Fold in sides and place enchilada, seam side down, in prepared pan. Repeat with remaining tortillas until all the filling has been used, wetting and warming tortillas as necessary.

6. Pour remaining sauce over enchiladas and top with remaining ¾ cup cheese. Bake on upper-middle rack until the sauce is bubbling and the cheese is melted, 20-25 minutes. Let rest 5-10 minutes and serve.

salmon cakes, flaky biscuits, hashed brussels sprouts

salmon cakes new
(Photo updated 12/30/12)

I made the best meal for dinner one Saturday a few weeks ago. It was one of those “I really want to cook something great tonight. Don’t worry, it won’t take too long” kind of meals. Famous last words. But it was worth it.

15.jpg

My favorite part of the meal was these biscuits. Look at those layers! They’re not quite the pain in the ass I remember them being from the last time I made them. They involve all of the steps required for regular biscuits, plus some extra rolling and folding. Not simple, but not a huge deal either.

25.jpg

The hashed Brussels sprout recipe comes from Orangette’s blog. I love Brussels sprouts, and my favorite way of cooking them is braised in heavy cream. I know, yikes on the health-factor of that, but it’s so good. Too heavy to go with this meal though, so I thought I’d try this recipe, in which they’re sliced, then braised in wine. I used sesame seeds instead of poppy seeds, because it’s what I had. It was good and light. It went with the rest of the meal wonderfully.

34.jpg

43.jpg

These were accompanying salmon cakes, and really, how can you go wrong? Chopped fresh salmon, mayonnaise, a few flavorings, all breaded and pan-fried. As I was breading the cakes, they seemed like they were falling apart, but once I got them into the frying pan, they become more structurally sound. I served them with a lemon-herb dipping sauce, but I think it was overkill – they would have been fine with just a wedge of lemon.

Altogether, one of the best meals I’ve eaten in a while.

Oh…there was one casualty.

51.jpg

Pan-Fried Fresh Salmon Cakes (from Cooks Illustrated January 2000)

CI note: A big wedge of lemon is the simplest accompaniment to salmon cakes, but if you decide to go with dipping sauce, make it before preparing the cakes so the sauce flavors have time to meld. If possible, use panko (Japanese bread crumbs).

Makes eight 2½- by ¾-inch cakes

1¼ pounds salmon fillet
1 slice white sandwich bread, such as Pepperidge Farm, crusts removed and white part chopped very fine (about 5 tablespoons)
2 tablespoons mayonnaise
¼ cup grated onion
2 tablespoons chopped fresh parsley leaves
¾ teaspoon table salt
1½ tablespoons lemon juice from 1 lemon
½ cup unbleached all-purpose flour
2 large eggs, lightly beaten
½ cup vegetable oil, plus 1 1/2 teaspoons vegetable oil
¾ cup fine, unflavored dried bread crumbs, preferably panko

1. Locate and remove any pin bones from salmon flesh. Using sharp knife, cut flesh off skin, then discard skin. Chop salmon flesh into ¼- to 1/3-inch pieces and mix with chopped bread, mayonnaise, onion, parsley, salt, and lemon juice in medium bowl. Scoop a generous ¼-cup portion salmon mixture from bowl and use hands to form into a patty measuring roughly 2½-inches in diameter and ¾-inch thick; place on parchment-lined baking sheet and repeat with remaining salmon mixture until you have 8 patties. Place patties in freezer until surface moisture has evaporated, about 15 minutes.

2. Meanwhile, spread flour in pie plate or shallow baking dish. Beat eggs with 1½ teaspoons vegetable oil and 1½ teaspoons water in second pie plate or shallow baking dish, and spread bread crumbs in a third. Dip chilled salmon patties in flour to cover; shake off excess. Transfer to beaten egg and, using slotted spatula, turn to coat; let excess drip off. Transfer to bread crumbs; shake pan to coat patties completely. Return now-breaded patties to baking sheet.

3. Heat remaining ½ cup vegetable oil in large, heavy-bottomed skillet over medium-high heat until shimmering but not smoking, about 3 minutes; add salmon patties and cook until medium golden brown, about 2 minutes. Flip cakes over and continue cooking until medium golden brown on second side, about 2 minutes longer. Transfer cakes to plate lined with paper towels to absorb excess oil on surface, if desired, about 30 seconds, and then serve immediately, with one of the sauces that follow, if you like.

Creamy Lemon Herb Dipping Sauce (from Cooks Illustrated January 2000)

Makes generous ½ cup

½ cup mayonnaise, preferably homemade
2½ tablespoons lemon juice from 1 lemon
1 tablespoon minced fresh parsley leaves
1 tablespoon minced fresh thyme leaves
1 large scallion, white and green part minced
½ teaspoon table salt
Ground black pepper

Mix all ingredients in small bowl; season to taste with ground black pepper. Cover with plastic wrap and chill until flavors blend, at least 30 minutes.

Flaky Buttermilk Biscuits (from Cooks Illustrated January 2006)

CI note: The dough is a bit sticky when it comes together and during the first set of turns. Set aside about 1 cup of extra flour for dusting the work surface, dough, and rolling pin to prevent sticking. Be careful not to incorporate large pockets of flour into the dough when folding it over. When cutting the biscuits, press down with firm, even pressure; do not twist the cutter. The recipe may be prepared through step 2, transferred to a zipper-lock freezer bag, and frozen for several weeks. Let the mixture sit at room temperature for 15 minutes before proceeding.

Makes 12 biscuits

2½ cups unbleached all-purpose flour (12½ ounces), plus additional flour for work surface
1 tablespoon baking powder
½ teaspoon baking soda
1 teaspoon table salt
2 tablespoons vegetable shortening, cut into ½-inch chunks
8 tablespoons unsalted butter (1 stick), cold, lightly floured and cut into 1/8-inch slices
2 tablespoons unsalted butter, melted
1¼ cups low-fat buttermilk, cold

1. Adjust oven rack to lower-middle position; heat oven to 450 degrees. Whisk flour, baking powder, baking soda, and salt in large bowl.

2. Add shortening to flour mixture; break up chunks with fingertips until only small, pea-sized pieces remain. Working in batches, drop butter slices into flour mixture and toss to coat; pick up each slice of butter and press between floured fingertips into flat, nickel-sized pieces. Repeat until all butter is incorporated; toss to combine. Freeze mixture (in bowl) until chilled, about 15 minutes.

3. Spray 24-inch-square area of work surface with nonstick cooking spray; spread spray evenly across surface with kitchen towel or paper towel. Sprinkle 1/3 cup of extra flour across sprayed area; gently spread flour across work surface with palm to form thin, even coating. Add all but 2 tablespoons of buttermilk to flour mixture; stir briskly with fork until ball forms and no dry bits of flour are visible, adding remaining buttermilk as needed (dough will be sticky and shaggy but should clear sides of bowl). With rubber spatula, transfer dough onto center of prepared work surface, dust surface lightly with flour, and, with floured hands, bring dough together into cohesive ball.

4. Pat dough into approximate 10-inch square; roll into 18 by 14-inch rectangle about ¼ inch thick, dusting dough and rolling pin with flour as needed. Following illustrations below, using bench scraper or thin metal spatula, fold dough into thirds, brushing any excess flour from surface; lift short end of dough and fold in thirds again to form approximate 6 by 4-inch rectangle. Rotate dough 90 degrees, dusting work surface underneath with flour; roll and fold dough again, dusting with flour as needed.

5. Roll dough into 10-inch square about ½ inch thick; flip dough and cut nine 3-inch rounds with floured biscuit cutter, dipping cutter back into flour after each cut. Carefully invert and transfer rounds to ungreased baking sheet, spaced 1 inch apart. Gather dough scraps into ball; roll and fold once or twice until scraps form smooth dough. Roll dough into ½-inch-thick round; cut three more 3-inch rounds and transfer to baking sheet. Discard excess dough.

6. Brush biscuit tops with melted butter. Bake, without opening oven door, until tops are golden brown and crisp, 15 to 17 minutes. Let cool on baking sheet 5 to 10 minutes before serving.

Hashed Brussels Sprouts with Poppyseed and Lemon (from Orangette)

Makes 4-6 servings

1¼ pounds Brussels sprouts
1½ tablespoon lemon juice
2 tablespoon olive oil
1 garlic clove, minced
1 tablespoon poppy seeds
¼ cup white wine
¼ teaspoon salt

Cut the stems from the Brussels sprouts and remove any blemished leaves. When all the sprouts are trimmed, you should be left with about 1 pound total. Halve each sprout lengthwise, and slice each half into thin slices, about 1/8 inch thick; or, alternatively, hash them in a food processor fitted with the slicing disc attachment.

In a large bowl, toss the hashed Brussels sprouts with the lemon juice.

In a large skillet or sauté pan, warm the olive oil over high heat, almost to the smoking point. Stir in the hashed sprouts, garlic, and poppy seeds. Add the wine, and cook for about 3-4 minutes, stirring constantly, until the sprouts are bright green and lightly softened but still barely crunchy. Reduce the heat to low, season with salt, and cook for 1 minute more. Remove the pan from the heat, and serve.

cream cheese brownies

14.jpg

I’m torn on my opinion of these brownies. On the one hand – totally delicious. But on a continuum from brownies to cheesecake, these may be too far on the cheesecake side for my preference. The chocolate part is intensely fudgy, the brownies are best served cold, and there’s a full 8-ounce package of cream cheese in an 8-inch square pan. They’re rich, and I love rich. But they’re not really brownies.

I made these for SuperBowl Sunday, and in a surprising display of self-control, it was a full 5 days before Dave and I finished the whole pan. What Dave doesn’t know is that in addition to the squares we’d have together with tea in the evenings, I kept shaving off bits of brownie for myself during the day. Just to “even out” a row. And then even it out some more.

Obviously I liked these! And I whole-heartedly recommend them if you want something that walks the line between brownie and cheesecake.

24.jpg 33.jpg

Cream Cheese Brownies (from Cooks Illustrated January 1999)

CI note: Knowing when to remove a pan of brownies from the oven is the only difficult part about baking them. If you wait until an inserted toothpick comes out clean, the brownies are overcooked. But if a toothpick inserted in the middle of the pan comes out with fudgy crumbs, remove the pan immediately. If you are a nut lover, you can stir 1 cup toasted walnuts or pecans into the brownie batter. To melt the chocolate and butter in a microwave oven, microwave chocolate alone at 50 percent power for 2 minutes. Stir chocolate; add butter; and continue microwaving at 50 percent for another 2 minutes, stopping to stir the mixture after 1 minute. If chocolate is not entirely melted, microwave an additional 30 seconds at 50 percent power.

Makes 16 2-inch brownies

2/3 cup unbleached all-purpose flour
¼ teaspoon table salt
½ teaspoon baking powder
2 ounces unsweetened chocolate
4 ounces bittersweet chocolate or semisweet chocolate
1 stick unsalted butter (4 ounces)
1¼ cups granulated sugar
2½ teaspoons vanilla extract
3 large eggs
8 ounces cream cheese at room temperature
1 egg yolk

1. Adjust oven rack to lower-middle position, and preheat oven to 325 degrees. Whisk flour, salt, and baking powder in a small bowl; set aside. Coat an 8-inch-square baking pan with cooking spray, and, fit an 8-by-16-inch sheet of aluminum foil in bottom of pan. (Foil overhangs both sides of the pan; use as handles to remove baked brownies from pan.) Coat foil with cooking spray.

2. In a medium heat-proof bowl set over a pan of almost simmering water, melt chocolate and butter, stirring occasionally until mixture is smooth. (Alternatively, melt chocolate and butter in microwave oven.) Remove melted chocolate mixture from heat; whisk in 1 cup sugar and 2 teaspoons vanilla; then whisk in 3 eggs, one at a time, fully incorporating each before adding the next. Continue whisking until mixture is completely smooth. Add dry ingredients; whisk until just incorporated.

3. In a small bowl, beat cream cheese with remaining ¼ cup sugar, ½ teaspoon vanilla, and egg yolk until of even consistency.

4. Pour half the brownie batter into prepared pan. Drop half the cream cheese mixture, by spoonfuls, over batter. Repeat layering and swirling with remaining brownie batter and cream cheese filling. Use blade of a table knife or a spoon handle to gently swirl batter and cream cheese filling, creating a marbled effect.

5. Bake until edges of brownies have puffed slightly, center feels not quite firm when touched lightly, and a toothpick or cake tester inserted into center comes out with several moist, fudgy crumbs adhering to it, 50 to 60 minutes.

6. Cool brownies in pan on a wire rack for 5 minutes. Use foil sling handles to lift brownies from pan. Place brownies on wire rack; allow them to cool to room temperature. Refrigerate until chilled, at least 3 hours. (To hasten cooling, place brownies in the freezer for about 1½ hours.) Cut into squares and serve. (Do not cut brownies until ready to serve. Whole bar can be wrapped in plastic wrap, then foil, and refrigerated up to 5 days.)

42.jpg

apple galette

13.jpg

It turns out that being unemployed is sort of boring. To procrastinate on being responsible and looking for a job, I cook a lot. (Then I eat a lot and then I work out a little. I’m gaining weight.) I’ve gotten in the habit of undertaking big cooking-fests on Fridays. For a few weeks in a row, I’ve planned and shopped for a big Friday meal, but didn’t plan anything for dessert. And I do not skip dessert. Unacceptable. I don’t keep a well-stocked pantry (not including the 7 different kinds of vinegar), so it can be difficult to find a recipe that works with what I have on hand. But I managed okay so far.

That’s how I ended up making this galette. I know, what kind of bored housewife “just throws together” a galette while also making homemade ravioli? And what kind of bad time-manager thinks that everything will still be done and the kitchen clean before her husband gets home?

But whatever, the galette was worth spending a couple hours in the kitchen after Dave was home and relaxing and probably hungry. Not that the galette was too time-consuming, so don’t worry about that. I managed to put it together in between kneading pasta dough, making ravioli filling, and roasting garlic for the leftover olive oil bread. And it was definitely worth the extra effort to make a dessert – the galette had the flakiest and most tender crust I’ve ever made, even though I didn’t use the instant flour that the recipe prefers. Plus, it’s beautiful, and can be made in advance – we ate it hours after I made it on Friday. When we finished it off the next day, I didn’t notice any loss of flavor or flakiness in the crust. It would be wonderful with vanilla ice cream, but I didn’t have any – and I couldn’t just throw that together without some advance planning!

23.jpg

Apple Galette (from Cooks Illustrated September 2007)

CI note: The galette can be made without instant flour, using 2 cups of all-purpose flour and 2 tablespoons of cornstarch. However, you might have to increase the amount of ice water. Although any apple will work in this recipe, we prefer Golden Delicious, Granny Smith, and Empire. If you don’t have an apple corer, halve the peeled apples and then use a melon baller or paring knife to remove the core from each half. Make sure to cut the apples as thinly as possible. If they are cut thicker than 1/8 inch, they will be hard to shingle. If the dough has chilled longer than 1 hour, let it stand at room temperature for 15 to 20 minutes to soften. If the dough becomes soft and sticky while being rolled, transfer it to a baking sheet and refrigerate it for 10 to 15 minutes. Check the bottom of the galette halfway through baking-it should be a light golden brown. If it is darker, reduce the oven temperature to 375 degrees. Serve with vanilla ice cream, lightly sweetened whipped cream, or creme fraiche.

Bridget note: I halved the recipe, and that’s what the pictures show.

Serves 8 to 10

Dough
1½ cups unbleached all-purpose flour (7½ ounces)
½ cup Wondra flour or Pillsbury Shake and Blend instant flour (2½ ounces)
½ teaspoon salt
½ teaspoon sugar
12 tablespoons cold unsalted butter , cut into 5/8-inch cubes (1½ sticks)
7-9 tablespoons ice water

Apple Filling
1½ pounds apples (3-4 medium or 4-5 small), see note above
2 tablespoons unsalted butter, cut into ¼-inch pieces
¼ cup sugar
2 tablespoons apricot preserves
1 tablespoon water
1. CUT IN BUTTER: Combine flours, salt, and sugar in food processor with three 1-second pulses. Scatter butter pieces over flour, pulse to cut butter into flour until butter pieces are size of large pebbles, about ½ inch, about six 1-second pulses.

2. ADD WATER: Sprinkle 1 tablespoon water over mixture and pulse once quickly to combine; repeat, adding water 1 tablespoon at a time and pulsing, until dough begins to form small curds that hold together when pinched with fingers (dough should look crumbly and should not form cohesive ball).

3. FORM MOUND: Empty dough onto work surface and gather into rough rectangular mound about 12 inches long and 5 inches wide.

4. FRAISAGE AND CHILL: Starting at farthest end, use heel of hand to smear small amount of dough against counter, pushing firmly down and away from you, to create separate pile of dough (flattened pieces of dough should look shaggy). Continue process until all dough has been worked. Gather dough into rough 12 by 5-inch mound and repeat smearing process. Dough will not have to be smeared as much as first time and should form cohesive ball once entire portion is worked. Form dough into 4-inch square, wrap in plastic, and refrigerate until cold and firm but still malleable, 30 minutes to 1 hour.

5. CUT APPLES: About 15 minutes before baking, adjust oven rack to middle position and heat oven to 400 degrees. Peel, core, and halve apples. Cut apple halves lengthwise into 1/8-inch-thick slices.

6. ROLL AND TRIM DOUGH: Place dough on floured 16 by 12-inch piece of parchment paper and dust with more flour. Roll dough until it just overhangs all four sides of parchment and is about 1/8 inch thick, dusting top and bottom of dough and rolling pin with flour as needed to keep dough from sticking. Trim dough so edges are even with parchment paper.

7. FORM BORDER: Roll up 1 inch of each edge and pinch firmly to create ½-inch-thick border. Transfer dough and parchment to rimmed baking sheet.

8. LAYER APPLES AND BAKE: Starting in one corner, shingle sliced apples to form even row across bottom of dough, overlapping each slice by about one-half. Continue to layer apples in rows, overlapping each row by half. Dot apples with butter and sprinkle evenly with sugar. Bake until bottom of tart is deep golden brown and apples have caramelized, 45 to 60 minutes.

9. GLAZE: While galette is cooking, combine apricot preserves and water in medium microwave-safe bowl. Microwave on medium power until mixture begins to bubble, about 1 minute. Pass through fine-mesh strainer to remove any large apricot pieces. Brush baked galette with glaze and cool on wire rack for 15 minutes. Transfer to cutting board. Cut in half lengthwise and then crosswise into individual portions; serve.

32.jpg

salmon pesto pasta

opener1.jpg

This is Dave’s most-requested meal, and it’s gotten to the point where I purposefully don’t make it so that it will always be a treat. Yeah, I’m a bad wife. Also, I think making pesto is sort of a pain in this ass. Back in the old days, before I took over the kitchen and we actually cooked together on occasion, Dave would prepare the fish while I worked on the pesto. Over time, I tweaked the recipe here and there without writing it down, and it became easier to just do it myself. And now I complain that Dave doesn’t like to cook with me…

Updated photo 5/27

I’ve found that if I allow my life to be easy and just buy pesto, this recipe is actually a quick weeknight-appropriate meal. We’re picky about pesto, but I’ve found that my grocery store stocks some good stuff in their olive bar. But…this was for Dave’s birthday, so I went all out and made it from scratch.

(Wait a minute…wasn’t Dave’s birthday last month? Yes yes, the problem is, I didn’t like the picture I took of the final dish, so I wanted to make it again and hope for a better picture. I made it again last weekend, but the pictures from that night aren’t any better, so I’m sticking with the original. Sorry the colors are all funky. We eat dinner at night. There’s no natural light at night. My pictures of dinner tend be funky colors.)

I am, of course, a big fan of my homemade pesto. My trick (okay, Cooks Illustrated’s trick that I stole) is to squeeze the maximum amount of flavor out of each ingredient. I toast the pine nuts, I toast the garlic so that it loses that sharpness that raw garlic has, and I bruise the basil leaves. Before I did all this, I would often end up with grassy-smelling pesto, but now I make basily-smelling pesto. Gotta love that.

garlic.jpg pine-nuts.jpg

basil.jpg process.jpg

The salmon, brushed with oil and sprinkled with lemon zest, is broiled. The sauce is made from evaporated milk that’s boiled to reduce it even further. The pasta is mixed with the milk, then the salmon, and finally, off the heat to preserve the basil’s delicate flavor (Marcella Hazan is getting to me), the pesto is stirred in. Top with a little more parmesan, and you’ve got my and Dave’s favorite way to eat salmon. And Dave’s favorite way to eat pesto…and pasta…

raw-salmon.jpg copy-of-cooked-salmon.jpg

Salmon Pesto Pasta (substantially adapted from the Pillsbury Complete Cookbook)

Serves 2

8 ounces pasta
12 ounces salmon
salt and pepper
1 teaspoon grated lemon zest
1 tablespoon olive oil
1 teaspoon lemon juice
5 ounces evaporated milk
½ cup pesto (recipe follows)
grated parmesan, for serving

1. Bring a large pot of water to a boil. When water is boiling, add 1 tablespoon salt and pasta; stir to separate pasta. Cook pasta until al dente; drain. Pour evaporated milk into empty pot and simmer over medium-high heat until reduced to ¼ cup. Add cooked pasta to pot and stir to combine.

2. Adjust oven rack to upper-middle position and heat broiler. Line a baking sheet or pan with aluminum foil. Season skinless side of salmon liberally with salt and pepper, sprinkle with zest, then rub with olive oil. Broil until salmon is no longer translucent and is firm when pressed, about 10 minutes. Remove from broiler and sprinkle with lemon juice. Use fork to flake into bite-sized pieces. Skin will stick to foil and can be discarded.

3. Add salmon to pasta mixture and stir over medium heat until hot. Remove from heat and stir in basil. Top with parmesan.

Pesto (adapted from Cooks Illustrated)

Bridget note: I haven’t found a good way to measure basil leaves by volume. I just add all of the leaves from a hydroponic basil plant or a large herb container from the grocery store.

CI note: Basil usually darkens in homemade pesto, but you can boost the green color a little by adding the optional parsley.

Update 6/18/08 – After flipping through Jamie’s Dinners, I have found a far easier and just as effective method for bruising the basil leaves.  Simply add the unbruised basil leaves to the food processor bowl and process with the plastic dough hook until they’re thoroughly bruised.  Switch back to the blade and continue with the recipe as written.

Makes ½ cup

¼ cup pine nuts, toasted (or substitute almonds or walnuts)
5 medium cloves garlic, unpeeled
2 cups packed fresh basil leaves, rinsed thoroughly
2 tablespoons fresh parsley leaves, Italian (optional)
¼ cup extra-virgin olive oil
Pinch table salt
¼ cup (½ ounce) finely grated Parmesan cheese

1. Toast nuts in small heavy skillet over medium heat, stirring frequently, until just golden and fragrant, 4 to 5 minutes. Transfer the nuts to bowl of food processor fitted with steel blade.

2. Add the unpeeled garlic to empty skillet and toast until, shaking the pan occasionally, until fragrant and the color of the cloves deepens slightly, about 7 minutes. Let the garlic cool, then peel and add to food processor bowl.

3. Place basil and parsley in heavy-duty, quart-size, zipper-lock bag; pound with flat side of meat pounder until all leaves are bruised.

4. Process nuts and garlic until finely chopped. Add remaining ingredients except cheese; process until smooth, stopping as necessary to scrape down bowl with flexible spatula.

5. Transfer mixture to small bowl, stir in cheese(s) and adjust salt. (Can be covered with a sheet of plastic wrap placed directly over the surface or filmed with oil and refrigerated up to 5 days.)

four vanilla frostings

opener.jpg

A week ago, I published a post on chocolate cupcakes and vanilla frosting. It’s already become my most popular post, because my site comes up when people search for vanilla frosting recipes. The problem is that I didn’t love the frosting I made to go with those cupcakes. I decided to do a more thorough test of frostings to help out the random internet searcher.

Oh, also, it’s my nephew’s 0th birthday. He was born on Monday. Isn’t he just the cutest little cuddly thing? I haven’t seen him in person yet, but when I do, he’d better be prepared to get some major squeezing. (And today is that cuddly little guy’s brother’s birthday, as well as my brother’s birthday.)

bryce.jpg 0th.jpg

Right, and I apparently need lots of justification to make some more cake.

A few notes on my methods. These frostings topped Cooks Illustrated’s Old-Fashioned Chocolate Layer Cake. CI has two recipes with this title – this is the one published in April 2006. It is, quite frankly, better than the one published in The New Best Recipe.

Also, I made the smallest practical amount of each frosting. This was ¼ of the recipe for everything except the Fluffy Icing, which I made half of.

The first frosting (blue) is Easy Vanilla Buttercream. This appears to be the most common vanilla frosting. It’s also called decorator’s icing, and it’s what I ate as a kid, because my mom decorated fancy cakes for us on our birthdays. You simply mix powdered (confectioner’s) sugar and butter together, with a bit of vanilla extract for flavor and a little milk or cream (you could easily use soy milk if necessary) to achieve the right consistency. This was my favorite of these four frostings, even though I know that I pooh poohed as too simple last week. It was Dave’s second favorite.

The second frosting (yellow-orange) is a Vanilla Buttercream from epicurious. For this buttercream, egg whites are whipped in a bowl while sugar is heated on the stove. When the sugar is hot and the egg whites are frothy, the hot sugar is drizzled into the egg whites with the mixer beating continuously, and then butter is slowly added. I had a bit of stress with this recipe because it provides a temperature for the sugar to be heated to without giving any visual clues, and I don’t have a candy thermometer. A quick check on the internet gave me some useful information, so I waited until a drop of the liquid sugar formed a ball that could be squeezed before beginning to add the sugar into the egg whites. A few of the reviewers on epicurious recommended using only ¾ of the butter. I like this idea because I like a sweeter and less buttery frosting, but the buttercream looked curdled until I added just about all of the butter. In the end, though, it was pretty good. It was Dave’s favorite and my second favorite of these four recipes.

The next frosting (green) is Cooks Illustrated’s Classic Buttercream. In this recipe, whole eggs, sugar, and vanilla are heated in a double boiler, then whipped until airy, when softened butter is slowly added. It was my least favorite and Dave’s second to least favorite. It had significantly less flavor than the other three frostings, to the point where I wonder if I forgot to add the vanilla. (I’m almost positive I didn’t forget.)

The last frosting (pink) is Cooks Illustrated’s Fluffy Icing. This is a seven-minute frosting. Egg whites, sugar, water, vanilla extract and cornstarch are heated in a double boiler, then whipped to stiff peaks. Mine refused to form stiff peaks, even after whipping for well beyond the recipe’s suggested times. I thought it was okay, although I liked the Easy Buttercream and epicurious’s recipe better. It didn’t necessarily go with the chocolate cupcakes, but I think it would be great with the lemon cake that CI originally published it to accompany. Dave didn’t like it at all, but I’ve had my eye on that lemon cake for a while, so he’ll have to try it again when I make that. And hey – no fat in this recipe!

To conclude, my preference, from most to least favorite, is Easy, epicurious, Fluffy, Classic. Dave’s are epicurious, Easy, Classic, Fluffy. I think the secret to making the Easy Vanilla Buttercream great is to whip it – whip it good. It becomes lighter and fluffier and easier to work with if it’s beat at high speed for several minutes. It had the strongest flavor, tasting somewhat tangy, and didn’t feel as buttery as the other two buttercreams.

Like I said before, I do think that the Fluffy Icing has its place, but its place isn’t topping chocolate cake. The Cooks Illustrated Classic Buttercream was lacking flavor, and both Magnolia’s Bakery and epicurious’s buttercreams were buttery and sweet. I’d probably choose Magnolia’s recipe over this epicurious one because Magnolia’s seems a bit stabler, and there’s no messing around with raw egg.

Easy Vanilla Buttercream (from Cooks Illustrated April 2007)

The buttercream frosting can be made ahead and refrigerated; if refrigerated, however, it must stand at room temperature to soften before use. If using a hand-held mixer, increase mixing times significantly (at least 50 percent). This recipe can be doubled to make enough for a two-layer cake.

Makes 3 cups

20 tablespoons (2½ sticks) unsalted butter, softened
2½ cups Confectioners’ sugar (10 ounces)
1/8 tablespoons table salt
2 teaspoons vanilla extract
2 tablespoons heavy cream

In standing mixer fitted with whisk attachment, beat butter at medium-high speed until smooth, about 20 seconds. Add confectioners’ sugar and salt; beat at medium-low speed until most of the sugar is moistened, about 45 seconds. Scrape down bowl and beat at medium speed until mixture is fully combined, about 15 seconds; scrape bowl, add vanilla and heavy cream, and beat at medium speed until incorporated, about 10 seconds, then increase speed to medium-high and beat until light and fluffy, about 4 minutes, scraping down bowl once or twice.

Vanilla Buttercream (from epicurious.com and Gourmet January 2004)

Makes about 6 cups.

4 large egg whites at room temperature for 30 minutes
Rounded ¼ teaspoon salt
2/3 cup water
1 1/3 cups plus 2 tablespoons sugar
4 sticks (2 cups) unsalted butter, cut into tablespoon pieces and softened
2 teaspoons vanilla

Combine whites and salt in a very large bowl. Stir together water and 1 1/3 cups sugar in a 3- to 4-quart heavy saucepan until sugar is dissolved, then bring to a boil over moderate heat, without stirring, brushing any sugar crystals down side of pan with a pastry brush dipped in water.

When syrup reaches a boil, start beating egg whites with an electric mixer at medium-high speed until frothy, then gradually add remaining 2 tablespoons sugar and beat at medium speed until whites just hold soft peaks. (Do not beat again until sugar syrup is ready.)

Meanwhile, put thermometer into sugar syrup and continue boiling until syrup registers 238 to 242°F. Immediately remove from heat and, with mixer at high speed, slowly pour hot syrup in a thin stream down side of bowl into whites, beating constantly. Beat, scraping down side of bowl with a rubber spatula, until meringue is cool to the touch, about 10 minutes in a standing mixer or 15 with a handheld. (It is important that meringue is properly cooled before proceeding.)

With mixer at medium speed, gradually add butter 1 piece at a time, beating well after each addition until incorporated. (Buttercream will look soupy after some butter is added if meringue is still warm. If so, briefly chill bottom of bowl in a large bowl filled with ice water for a few seconds before continuing to beat in remaining butter.) Continue beating until buttercream is smooth. (Mixture may look curdled before all of butter is added but will come back together by the time beating is finished.) Add vanilla and beat 1 minute more.

Classic Vanilla Buttercream Frosting (from Cooks Illustrated March 2000)

The whole eggs, whipped until airy, give this buttercream a light, satiny-smooth texture that melts on the tongue.

Makes about 4 cups

4 large eggs
1 cup granulated sugar
2 teaspoons vanilla extract
pinch table salt
1 pound unsalted butter (4 sticks), softened, each stick cut into quarters

1. Combine eggs, sugar, vanilla, and salt in bowl of standing mixer; place bowl over pan of simmering water. Whisking gently but constantly, heat mixture until thin and foamy and registers 160 degrees on instant-read thermometer.

2. Beat egg mixture on medium-high speed with whisk attachment until light, airy, and cooled to room temperature, about 5 minutes. Reduce speed to medium and add butter, one piece at a time. (After adding half the butter, buttercream may look curdled; it will smooth with additional butter.) Once all butter is added, increase speed to high and beat 1 minute until light, fluffy, and thoroughly combined. (Can be covered and refrigerated up to 5 days.)

Fluffy Vanilla Icing (from Cooks Illustrated March 2007)

3 cups, enough to frost one 4-layer cake

2 large egg whites
1 cup granulated sugar (7 ounces)
¼ cup water plus 1 tablespoon
1 teaspoon vanilla extract
1 tablespoon corn syrup

Combine all ingredients in bowl of standing mixer or large heatproof bowl and set over medium saucepan filled with 1 inch of barely simmering water (do not let bottom of bowl touch water). Cook, stirring constantly, until sugar is dissolved and mixture registers 160 degrees on instant-read thermometer, 5 to 10 minutes. Remove bowl from heat and transfer mixture to standing mixer fitted with whisk attachment. Beat on medium speed until soft peaks form, about 5 minutes. Increase speed to medium-high and continue to beat until mixture has cooled to room temperature and stiff peaks form, 5 minutes longer.

closer.jpg

olive oil bread

8.jpg

My plan for this loaf of bread was to have it and the rest of dinner ready before Dave got home from work on a Friday evening. The kitchen would be clean, a bottle of wine would be open, garlic would be roasted. We’d sit down together, drink the wine, spread roasted garlic on fresh bread while the rest of dinner was on hold until we were good and ready. Doesn’t that sound nice?

It didn’t work out that way. I was still rolling out pasta for the lasagna and because I was behind on cooking, I was way behind on cleaning. It was almost an hour after Dave got home before the lasagna was built and I could take a break to enjoy this bread and drink some wine. We spread roasted garlic on it (the bread, not the wine – ew), and when we ran out of garlic, we dipped it in green extra virgin olive oil.

Eventually I got the lasagna in the oven, but ignored the mess in the kitchen. When the lasagna was done baking, it was apparent that something had gone very wrong with it. In my hurry to finish cooking, I had taken some shortcuts. I skipped a step that Marcella Hazan specifically calls “something of a nuisance, but necessary.” All too true. The lasagna was sort of a disaster actually, but that was fine, because I was happy to fill up on bread.

The bread is based on two recipes – the method comes from Peter Reinhart’s recipe for Italian Bread in The Bread Baker’s Apprentice. This is a great book if you’re pretty serious about baking bread at home. Reinhart is all about forcing the maximum flavor out of each ingredient, which I love. The addition of olive oil stems from a recipe for Mantovana Olive Oil Bread in Ultimate Bread, by Eric Treuille and Ursula Ferrigno. This book is great for the less-serious home bread baker. The pictures throughout the book are wonderful and the recipes are varied and interesting, but I think you’ll have more consistent results following Reinhart’s methods.

The olive oil bread was delicious, although I would have preferred an even stronger olive oil flavor. I admit that I got a little scared by the amount of olive oil Treuille and Ferrigno call for and went easy on it. Also, I used regular olive oil, when I meant to use extra virgin. In short, it was really good – but there’s a potential for it could be even better. That just gives me an excuse to try it again soon.

Mantovana Olive Oil Bread (adapted from Peter Reinhart’s The Bread Baker’s Apprentice and Eric Treuille and Ursula Ferrigno’s Ultimate Bread)

Makes one 1-pound loaf

1 recipe biga (recipe follows)
4½ ounces (1 cup) unbleached bread flour
1¼ ounce (¼ cup) whole wheat flour
1 teaspoon salt
½ teaspoon instant yeast
½ teaspoon barley malt syrup (optional)
¼ cup water
¼ cup olive oil

1. Remove the biga from the refrigerator 1 hour before making the dough. Cut it into about 10 small pieces with a pastry scraper or serrated knife. Cover with a towel or plastic wrap and let sit for 1 hour to take off the chill.

12.jpg

2. Stir together the flour, salt, sugar, and yeast in a 4-quart bowl (or in the bowl of an electric mixer). Add the biga pieces, olive oil, barley malt, and water, and stir together (or mix on low speed with the paddle attachment) until a ball forms, adjusting the water or flour according to need. The dough should be slightly sticky and soft, but not batterlike or very sticky. If the dough feels tough and stiff, add more water to soften (it is better to have the dough too soft than too stiff at this point).

3. Sprinkle flour on the counter, transfer the dough to the counter, and begin kneading (or mixing on medium speed with the dough hook). Knead (or mix) for about 10 minutes, adding flour as needed, until the dough is tacky, but not sticky, and supple. The dough should pass the windowpane test (see below) and register 77 to 81 degrees. Lightly oil a large bowl and transfer the dough to the bowl, rolling it to coat it with the oil. Cover the bowl with plastic wrap.

To perform the windowpane test, cut off a small piece of dough from the larger batch and gently stretch, pull, and turn it to see if it will hold a paper-thin, translucent membrane. If it falls apart before it makes this windowpane, continue mixing for another minute or two and test again.

22.jpg

4. Ferment at room temperature for approximately 2 hours, or until the dough doubles in size.

31.jpg

5. Gently pat the dough into a rough rectangle. Without degassing the piece of dough, fold the bottom third of dough, letter style, up to the center and press to seal, creasing surface tension on the outer edge. Fold the remaining dough over the top and use the edge of your hand to seal the seam closed and to increase the surface tension all over. Lightly dust with a sprinkle of flour, cover with a towel or plastic wrap, and let rest for 5 minutes. Then complete the shaping, extending the loaves to about 12 inches in length. Line a sheet pan with baking parchment and dust with semolina flour or cornmeal. Place the loaves on the pan and lightly mist with spray oil. Cover loosely with plastic wrap.

41.jpg

6. Proof at room temperature for about 1 hour, or until the loaves have grown to about 1½ times their original size.

7. Place an empty heavy-duty sheet pan or cast-iron frying pan on either the top shelf of the oven or the oven flour. Preheat the oven to 500 degrees. Have hot water standing by. Score the bread with 2 parallel, diagonal slashes or 1 long slash.

5.jpg

8. Transfer the dough on the parchment paper to a peel or the back of a sheet pan. Transfer the dough to the baking stone (or bake on the sheet pan). Pour 1 cup hot water into the steam pan and close the door. After 30 seconds, spray the walls of the oven with water and close the door. Repeat once more after another 30 seconds. After the final spray, lower the oven setting to 450 degrees and bake until done, rotating 180 degrees, if necessary, for even baking. It should take about 20 minutes. The loaf should be golden brown and register at least 200 degrees at the center.

9. Transfer the loaves to a cooling rack and cool for at least 1 hour before slicing or serving.

6.jpg

Biga

Biga will keep in the refrigerator for up to 3 days, or in the freezer for about 3 months. You can use it as soon as it ferments, but I prefer to give it an overnight retarding to bring out more flavor.

5½ ounces (1¼ cups) unbleached bread flour
¼ teaspoon instant yeast
7 tablespoons to ½ cup water, at room temperature

1. Stir together the flour and yeast in a 4-quart bowl (or in the bowl of an electric mixer). Add 7 tablespoons of the water, stirring until everything comes together and makes a coarse ball (or mix on low speed for 1 minute with the paddle attachment). Adjust the flour or water, according to need, so that the dough is neither too sticky nor too stiff. (It is better to err on the sticky side, as you can adjust easier during kneading. It is harder to add water once the dough firms up.)

2. Sprinkle some flour on the counter and transfer the dough to the counter. Knead for 4 to 6 minutes (or mix on medium speed with the dough hook for 4 minutes), or until the dough is soft and pliable, tacky but not sticky. The internal temperature should be 77 to 81 degrees.

3. Lightly oil a bowl and transfer the dough to the bowl, rolling it around to coat it with oil. Cover the bowl with plastic wrap and ferment at room temperature for 2 to 4 hours, or until it nearly doubles in size.

4. Remove the dough from the bowl, knead it lightly to degas, and return it to the bowl, covering the bowl with plastic wrap. Place the bowl in the refrigerator overnight. You can keep this in the refrigerator for up to 3 days, or freeze it in an airtight plastic bag for up to 3 months.