chocolate hazelnut tarte soleil

nutella pastry 5

After the last two years, I feel like I have a certain standard to uphold for my contribution to the office holiday potluck. However, there was simply no time this year for a time-consuming project. I needed to find a recipe that looked like a showstopper but didn’t require the work of one.

nutella pastry 1

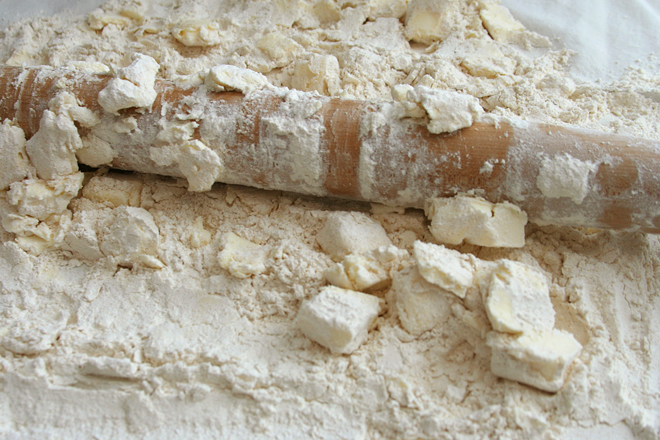
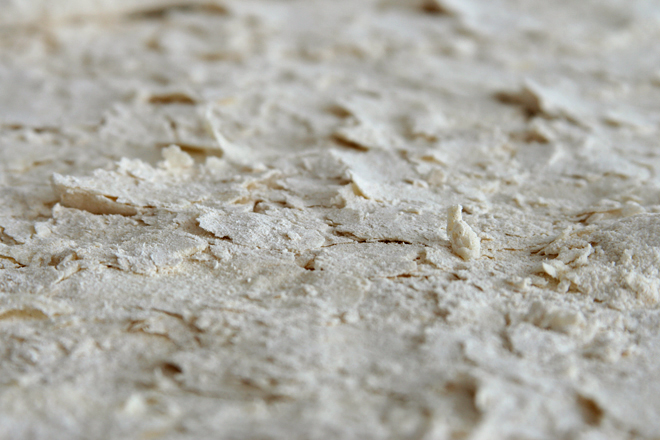
Two ingredients? This recipe fit the bill. Although, since, where I live, I can’t buy puff pastry made with real butter, I did make my own. (I used this recipe; while I think this one puffs more and isn’t much, if any, more effort, I didn’t have the mental fortitude for the multiple steps, even if each step takes just a minute or two.) In another life (like one before this), I would have made my own chocolate hazelnut spread too, but for once, I managed to be reasonable and bought this instead. As I’d hoped, It was more chocolately and less sweet than Nutella, although it still wasn’t particularly nutty.

nutella pastry 3

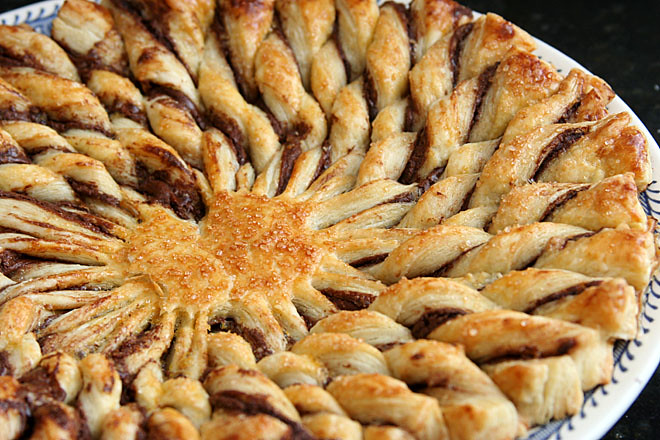
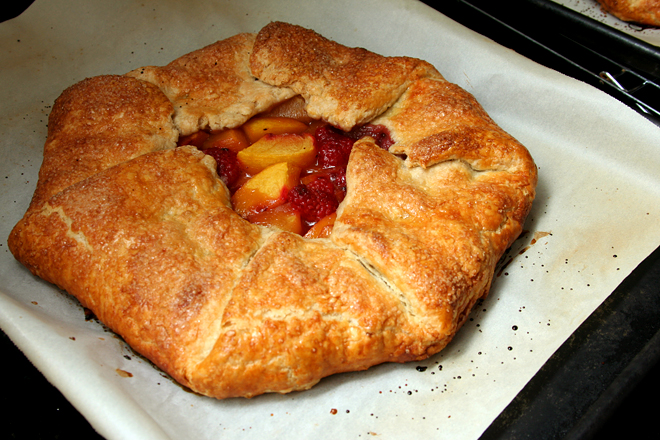
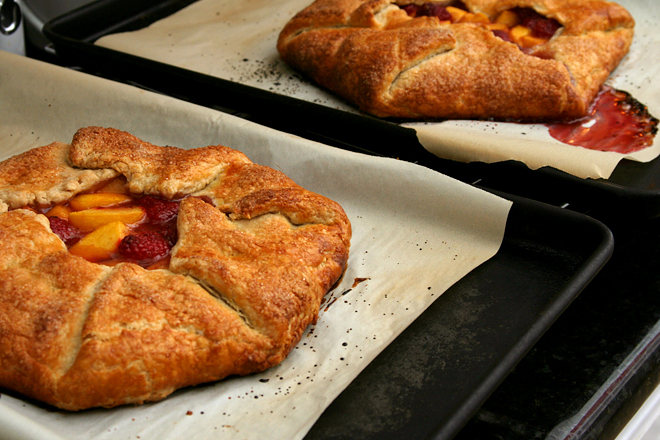
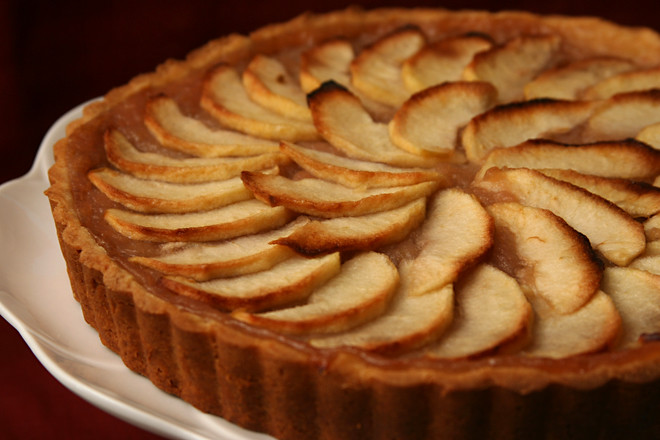
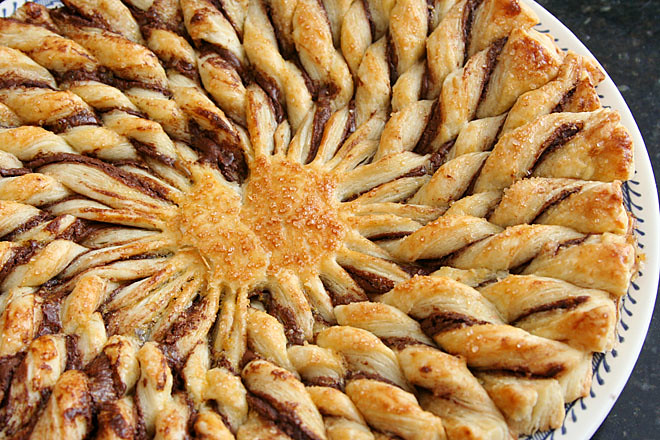
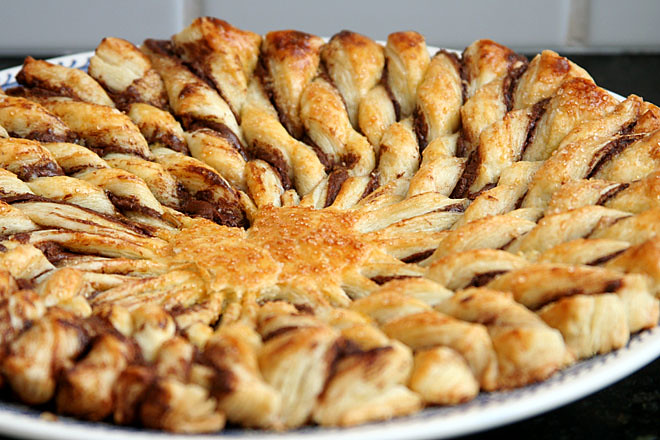
Okay, so this wasn’t as visually impressive as a foot-tall cake. But it’s pretty, and it tasted just as good as those past projects. It was flaky and buttery, chocolately without being too sweet. At this point in my life, it was perfect.

nutella pastry 6

Printer Friendly Recipe
Chocolate Hazelnut Tarte Soleil (adapted from Smitten Kitchen)

2 (1-pound sheets) thawed puff pastry dough
½ cup Nutella or other chocolate hazelnut spread
1 egg yolk beaten with 1 teaspoon water (for egg wash)

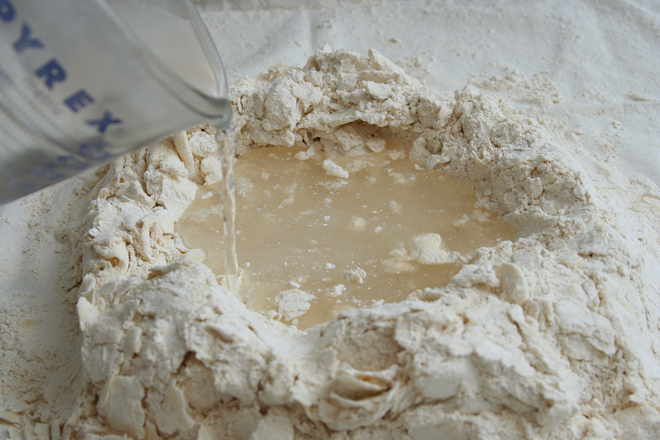
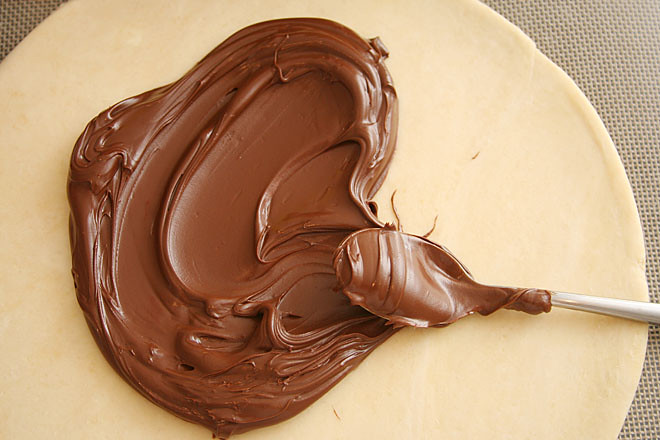
1. Adjust a rack to the middle position and heat the oven to 350 degrees. On a sheet of parchment paper or a silicone mat, roll one sheet of puff pastry dough into an approximate 12-inch circle. Use a 12-inch round plate or bowl as a guide to cut a 12-inch circle into the dough.

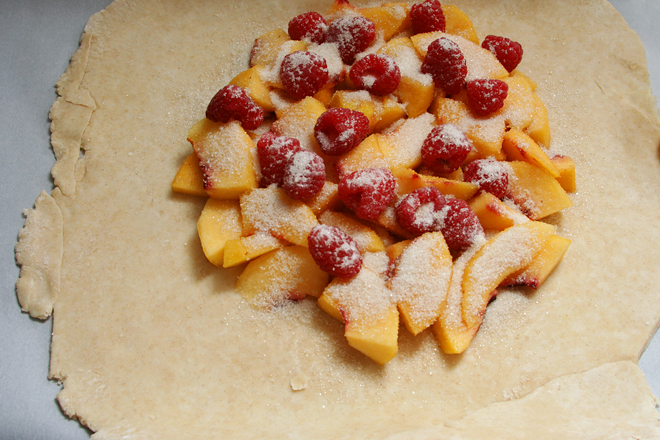
2. Spread the filling in an even layer over the round of puff pastry dough, leaving the outer 1-inch of the circle bare.

3. Repeat the rolling and cutting of the second portion of puff pastry dough to form another 12-inch round. Transfer this portion of dough to the top of the Nutella-covered puff pastry round, aligning it with the bottom ricle.

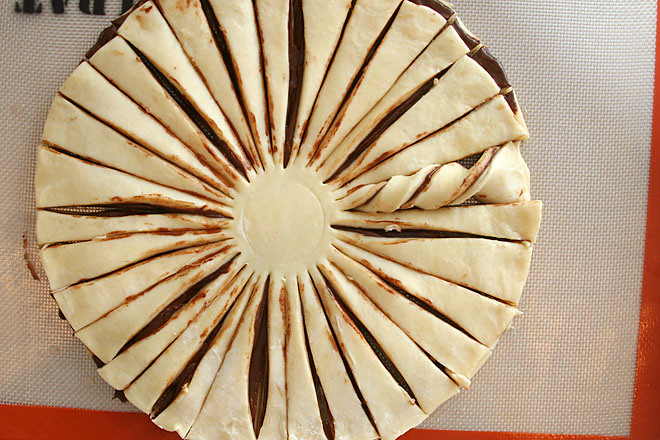
4. Place a small round cup or dish in the center of the circle, pressing it lightly to form a visual indentation without pressing through the dough. Remove the cup. Use a pizza roller to cut slits into the dough from the edge to the center circle. Each slit should be about an inch apart on the outer edge of the dough round, for a total of about 32 slits. Once all the slits are cut, pick up the outer edge of each segment while pressing gently on the center edge of the segment. Twist a couple times; repeat with all segments.

5. Transfer the pastry, still on the parchment paper or silicone mat, to a baking sheet. Brush with the egg wash. Bake for 30 to 35 minutes, until browned. Transfer the tart, still on the pan, to a cooling rack and allow to cool for ten minutes. Slide the tart onto a serving plate. Serve immediately or within about twelve hours.

nutella pastry 7

julia child’s boeuf bourguignon

boeuf bourguignon 6

I wanted winey beef stew. I knew there were easier recipes out there, and maybe even better recipes, but Julia Child’s boeuf bourguignon is a bucket list recipe for me. I guess sometimes I can’t resist using every pot and skillet I own just to make one dish.

boeuf bourguignon 3

But it was worth it for one single thing I learned from this recipe: how to enjoy pearl onions. The French seem to love using them in their fancy braises, but I’ve never liked their texture in the coq au vin or other beef burgundy recipes I’ve tried. Instead of the quick saute most recipes call for, Julia braises them in broth for almost an hour. At the end, they’re meltingly tender – okay, maybe they’re mushy. But that’s a lot better than the feeling that there are crunchy eyeballs in my stew. They also soak up meaty flavor from the broth, which doesn’t hurt matters.

boeuf bourguignon 1

Other than that, the stew was very good, but probably not any better than my favorite pot roast recipe. Am I allowed to say that about one of Julia Child’s most famous recipes? It’s not that it wasn’t good, because I always really enjoy braising beef in wine. It’s just that I also enjoy using one pot for that braise. But now I can check this one off the bucket list, and that, plus those soft pearl onions, makes this a win.

boeuf bourguignon 7

Julia Child’s Boeuf Bourguignon (adapted from Mastering the Art of French Cooking)

Serves 4

I liked the onions a lot, but I would have preferred the mushrooms cooked until they were drier and browner.

6 ounces (about 6 slices) bacon, sliced ¼-inch thick
2 tablespoons vegetable oil, divided
3 pounds chuck roast, trimmed, cut into 2-inch cubes
salt
1 large or 2 small carrots, cut into ½-inch dice
1 medium onion, diced
ground black pepper
2 tablespoons flour
1 (750-liter) bottle medium red wine, such as pinot noir, cotes du rhone, or chianti
2 cups beef broth, plus ½ cup to cook the onions
1 tablespoon tomato paste
2 cloves garlic, smashed
1 bay leaf
4 tablespoons butter, divided
24 pearl onions, peeled (or frozen)
1 sprig fresh thyme
1 small bay leaf
4 sprigs parsley, plus more for garnish
1 pound mushrooms, halved or quartered in large

1. Heat the oven to 450 degrees. In a medium saucepan over high heat, bring the bacon and 6 cups of water to a simmer. Reduce the heat to medium and simmer for 10 minutes. Drain and dry the bacon. In a 5-quart Dutch oven over medium heat, cook the bacon until it’s slightly browned, 2 to 3 minutes. Use a slotted spoon to remove it from the pot, leaving the rendered fat in the pot; set the bacon aside.

2. Add 1 tablespoon of oil to the pot with the bacon fat and heat over medium-high heat until just smoking. Season the beef generously with salt. Add half of the beef in a single layer, leaving space between each piece. Cook without moving until the bottom side is browned, about 2 minutes. Rotate each piece, searing and rotating until all sides are browned. Transfer to a plate and repeat with the remaining beef.

3. Add the carrots and diced onion to the pot and cook until lightly browned, about 2 minutes. Return the beef and bacon to the pot with the vegetables; add 1 teaspoon salt and ¼ teaspoon ground black pepper; stir to combine. Sprinkle the flour evenly over the mixture; stir to evenly distribute the flour. Transfer the pot to the oven and cook for 4 minutes. Stir, then cook in the oven for an additional 4 minutes. Transfer the Dutch oven back to the stove. Reduce the oven temperature to 325 degrees.

4. Add the wine and 2 cups of broth to the pot with the beef and vegetables. Add the tomato paste, garlic, and herbs. Bring to a simmer over medium-high heat. Cover the pot, transfer it to the oven, and cook until the meat is tender, 2½ to 3 hours, stirring about once an hour.

5. Meanwhile, in a medium skillet over medium heat, melt 2 tablespoons butter. Add the pearl onions and cook, stirring frequently, until they’re browned. Add ½ cup of broth, the thyme, bay leaf, parsley, and a generous sprinkling of salt, then cover the skillet, reduce the heat to low, and cook until the onions are very tender, about 40 minutes. If there is any liquid left in the pan at this point, let it evaporate. Set aside.

6. In a medium skillet over high heat, heat 2 tablespoons butter and the oil. Add the mushrooms and cook, stirring constantly, until they are lightly browned, 4 to 5 minutes. Set aside.

7. Remove the Dutch oven from the oven. Strain the liquid into a separate saucepan, returning the beef and bacon to the Dutch oven or a serving dish. Add the mushrooms and onions to the beef. Skim the liquid in the saucepan of fat and simmer until it’s reduced to about 2½ cups and is thick enough to lightly coat a spoon. Pour the reduced sauce over the meat and vegetables. Serve, topped with minced parsley.

boeuf bourguignon 8

peach raspberry galette

peach raspberry galette 10

I know this is crazy, but I’ve already started on my New Year’s resolutions for 2015. Resolution-haters are always saying that they don’t need to make resolutions at the new year, because if they see changes they want to make, they just make them, regardless of the date. And I get their point, but I also think that right after the busy, indulgent holiday season when things slow down to a more manageable pace is a great time to think about personal changes. While I am expecting the next four months to be rushed, I was worried I would lose momentum by the new year, so I’m dipping my toe in now.

peach raspberry galette 2

My goals are mostly cooking-related, as usual:

1) Use more cookbooks. It’s not the first time I’ve made this resolution, but I didn’t do a great job before. This time, I’m going to make myself a schedule to stick to, and hopefully that will lead to a routine. Because I love cookbooks so much, but if I don’t use them, I feel guilty for having them.

peach raspberry galette 3

2) Cook a wider variety of cuisines. There is delicious food out there that isn’t Italian, and maybe I should try some of that once in while. I’m particularly interested in Asian food. I’m intimidated by the ingredient availability issue, but if I’m cooking more of it, I should be able to use up ingredients before they get lost in the back of the refrigerator or pantry.

peach raspberry galette 4

3) Read Harold McGee’s On Food and Cooking. Also not the first time I’ve made this resolution. I started it but got bogged down.

4) Bake more pastries. I’ve gotten into a bit of a bar cookie rut, partly because almost everything I bake is brought to work to share, and it’s easier for coworkers to grab a fruit crisp bar than a slice of pie. But after four years of almost weekly treats, my coworkers seem happy with anything I bring in.

peach raspberry galette 5

So far, I’m doing good with my not-New Year resolutions. I’ve been going to bed a little earlier almost every night to read On Food and Cooking. I recently made kung pao tofu, and last night, we had summer rolls for dinner. And I made these galettes from Tartine, perhaps my favorite baking book. Since they’re sort of pastries, so I killed two birds with one stone.

peach raspberry galette 6

My coworkers, as expected, did not mind cutting themselves a slice of galette, transferring it to a plate, and spooning a dollop of whipped cream on top. And I had fun tackling a more ambitious baking project than usual, even on a weeknight. Maybe I need to join the New Year’s resolution haters and create my own not-New Year’s resolution tradition.

peach raspberry galette 7

Printer Friendly Recipe
Raspberry Peach Galette (adapted from Elisabeth Prueitt and Chad Robertson’s Tartine)

Makes two 10-inch galettes, serving about 16

Galettes are often lauded as the lazy man’s pie, with only one crust and no crimping. This recipe belies that description. In order to maximize the flakiness of the crust, the butter is rolled into the flour several times, then the dough is rolled several more times after the water is added. I was pleasantly surprised that this process only took half an hour.

I didn’t use quite enough fruit, mostly because I was too lazy to peel and slice a fifth peach and too cheap to buy a second container of raspberries. However, I am recommending that you use the extra fruit, as my crust to fruit ratio was slightly high, even as delicious as this crust is. Tartine recommends substantially more crust, but the reduced amounts listed here (which are what I used) were perfect for two galettes (or it would be, with a little more fruit than I used).

24 tablespoons (3 sticks) unsalted butter
18 ounces (3¾ cups) unbleached flour
2 teaspoons sugar
1¼ teaspoons salt
¾ cup ice water
4 cups peaches (4-5 large peaches), peeled and pitted, sliced ⅛-inch thick
2 (6-ounce) containers raspberries
¼ to ½ cup (1.75 to 3.5 ounces) sugar, plus more for sprinkling
1 small egg, whisked with a pinch of salt

1. Cut the butter into ½-inch cubes; freeze for 10 minutes. In a medium bowl, mix the flour, sugar, and salt.

2. Transfer the dry ingredients to a pastry cloth or clean work surface; spread out to ⅓-inch thickness. Scatter the butter pieces over the flour, tossing them to coat with flour. Use a rolling pin to flatten the butter pieces into the flour. When the flour/butter mix has been rolled to the edge of your work surface, shape it back together to a ⅓-inch thickness. Repeat the rolling and reshaping three more times, until the mixture resembles large flakes.

3. Form the mixture into a pile and clear a well in the middle of the pile. Pour in the water, then use a bench scraper to mix the dough into the water with a cutting motion. Use a well-floured rolling pin to roll the dough into a rectangle about 10 by 14 inches. Fold it into thirds, then in half the opposite direction. Repeat the rolling and folding three more times. Roll the dough into a 14-inch by 7-inch rectangle. Cut the dough in half to form two 7-by 7-inch squares. Wrap the dough tightly and refrigerate for at least an hour or overnight.

4. Adjust an oven rack to the middle position and heat the oven to 375 degrees. Line two baking sheets with parchment paper or silicone mats. Roll each square of dough into a 14-inch round. Transfer the rounds to the prepared baking sheets; chill 10 minutes.

5. Divide the peaches evenly between the two dough rounds, leaving a 2-inch border. Top with the raspberries, then sprinkle 2-4 tablespoons of sugar (depending on how ripe and sweet your fruit is) over each pile of fruit. Fold the sides of dough over the fruit, pleating as necessary. Brush the dough with the egg wash, then sprinkle with sugar.

6. Bake until the fruit is bubbling and the crust is browned, 45-55 minutes. Remove from the oven and let cool on the pan. Serve warm or at room temperature.

peach raspberry galette 8

green pig macarons (green tea macarons with vanilla bean swiss meringue buttercream)

pig macarons 14

These might have come out okay in the end, but it was looking bleak at first – and in the middle, and even a bit toward the end. I might have been overly confident when I agreed to make shaped macarons, with just one previous attempt at the notoriously finicky cookie. To make matters worse, the inspiration blog entry was written in Hebrew.

pig macarons 1

I’m not the first person to make shaped macarons, but most people are using the traditional method for macarons, the one I used last year, in which egg whites are beaten with granulated sugar until stiff peaks form, then almond meal and powdered sugar are folded into the mixture. It’s fussy – the egg whites need to be aged overnight, just the right amount of folding is necessary to deflate the meringue just so, and the piped batter needs to sit at room temperature for an hour before baking. Annie promised to have a simpler, more dependable method, and I wanted to try it.

pig macarons 2

In this method, half of the egg whites are mixed into the almond meal and powdered sugar; the other half are whipped into a meringue with hot sugar syrup, then folded into the pasty almond meal mixture. The cookies are piped and baked immediately.

pig macarons 5

It sounded simple enough, but things started going wrong early on. First I ran out of almond meal, which I discovered after I’d measured out egg whites, sugar, and water to the gram. I had some slivered (not blanched; they still had skins) almonds in the pantry, so I ground those up and mixed them into the batter. One obstacle was overcome.

pig macarons 6

My next mistake was adding too much of the meringue mixture to the almond meal mixture. You’re only supposed to add as much of the meringue mixture for “thick ribbons to batter to run off the spatula”, but that required all of the meringue for me, and at that point, the batter was too loose, and the cookies spread when I piped them.

pig macarons 7

My next problem – there was always a next problem on this particular day – was trying to get the nose and ears on top of the main body of the cookie. Eventually I found that the best method seemed to be baking the plain macarons for the specified time, then piping the nose and ears on the firm surface of the cookie and rebaking them for a few minutes until the smaller portions set. The cookies seemed no worse for the extra time in the oven.

pig macarons 10

It’s a good thing that the Angry Birds pigs aren’t pristine shapes even in their original format on the game, because my cookies were anything but round, with ears of indeterminate size and shape. Sometimes the ears blended right into the rest of the cookie; sometimes the noses caved in. And by this point, my kitchen was covered in macaron batter, which, by the way, turns into concrete when it dries, and my bread dough was overrising while seemingly infinite batches of macarons hogged the oven.

pig macarons 11

The piggie faces, thankfully, were mostly saved by the addition of nostrils and pupils. Eyebrowns drawn on with a edible marker didn’t hurt either. And I think it speaks volumes about the dependability of this recipe that with all my foibles, the macarons rose enough to somewhat form those elusive foamy feet. (Not that my troubles were completely over.) But while they might not be as pristine as I had intended, the 6-year-old birthday boy didn’t seem to mind. I’m going to call this kitchen battle conquered, though it wasn’t easy.

pig macarons 13

One year ago: Chocolate Sugar Cookies
Two years ago: Fettuccini Alfredo
Three years ago: Toasted Vegetable Subs
Four years ago: Red Velvet Cake (comparison of 5 recipes)
Five years ago: Vanilla Frosting (comparison of 4 recipes)

Printer Friendly Recipe
Green Pig Macarons (Green Tea Macarons with Vanilla Bean Swiss Meringue Buttercream) (adapted from Thomas Keller and Sebastien Rouxel’s Bouchon Bakery via Annie’s Eats)

Makes 24 sandwich cookies

The very small amounts of almond meal, powdered sugar, and egg whites are for the white eyes. If you’re just making regular green tea macarons, you can skip that.

Where I went wrong with the batter was adding too much meringue. Once I got to the point where I had thick ribbons of batter, it was definitely too much meringue and the batter was too loose, spreading on the baking sheet. All I can recommend to correct this, until I gain more experience with macaron-making, is that you watch for VERY thick ribbons of batter falling off the spatula.

Green tea cookies:
212 grams almond meal, plus 16 grams
212 grams powdered sugar, plus 16 grams
1½ teaspoons matcha powder
82 and 90 grams egg whites, plus 6 grams (about 6 eggs total)
236 grams granulated sugar, plus ¼ teaspoon
158 grams water

Vanilla bean buttercream:
2 egg whites
½ cup (3.5 ounces) granulated sugar (vanilla sugar if you have it)
pinch table salt
12 tablespoons (1½ sticks) unsalted butter, softened
seeds from ½ vanilla bean
1 teaspoon vanilla extract

1. For the cookies: Preheat the oven to 350 degrees and place a rack in the middle of the oven. Line baking sheets with parchment paper. Fit one pastry bag with a ½-inch round tip and two with ¼-inch round tips (for the white eyes and the green ears and nose).

2. In a large bowl, combine the 212 grams almond meal, 212 grams powdered sugar, and matcha powder. Whisk together to blend and break up any clumps. Make a well in the center of the dry ingredients and pour in 82 grams of the egg whites. Blend the egg whites into the dry ingredients until evenly mixed. The mixture will be thick and paste-like. For the white eyes, in a small bowl, mix together the 16 grams of powdered sugar, 16 grams of almond meal, and 6 grams of egg whites.

3. Combine 236 grams granulated sugar and the water in a small saucepan over medium-high heat. When the temperature is around 210 degrees, combine the 90 gram portion of egg whites with ¼ teaspoon sugar in the bowl of a stand mixer. Begin whipping on medium-low speed. Continue whipping the whites on medium speed until they form soft peaks. If soft peaks are achieved before the syrup reaches the target temperature, reduce the speed to low to keep the whites moving.

4. Once the syrup reaches 248 degrees, immediately remove it from the heat. Increase the mixer speed to medium and pour the syrup down the side of the bowl in a slow drizzle until fully incorporated. Increase the mixer speed to medium-high and whip the meringue until stiff, glossy peaks form.

5. Add one third of the meringue mixture to the bowl with the almond mixture with the matcha. Fold in gently until the mixture is smooth. A bit at a time, gently fold in the remaining meringue until the batter is smooth and runs in thick ribbons off of the spatula. You may not need all of the meringue, so add it gradually. Repeat the process with the white batter.

6. Add most of the green batter to the pastry bag with the ½-inch tip. Hold the bag perpendicular to the baking sheet about ½-inch above the surface of the pan. Steadily pipe rounds about 1¼- to 1½-inches in diameter. The batter may create small peaks immediately after piping, but if it is the correct texture these will smooth themselves away after a minute or two. If the batter is too stiff, the peaks will remain and the tops of the shells may not be totally smooth. If the batter is too thin, the rounds will spread further.

7. For the ears: Transfer some green batter to a piping bag with a ¼-inch tip. Pipe small ears adjacent to the larger circles of batter.

8. Transfer the baking sheet to the oven and immediately reduce the temperature to 325 degrees. Bake for 9-12 minutes, until the tops are smooth and set and “feet” have formed around the bottom.

9. Transfer the white batter to a piping bag with an ⅛-inch tip. Remove the baked cookies from the oven and immediately pipe on a green nose in the middle of the circle and 2 white eyes to the side of the nose. Return the cookies to the oven for 3-4 minutes, until the nose and eyes are set. Add noses and eyes only to every other batch; the backs of the sandwiches will just need ears.

10. Transfer the baking sheet with the cookies to a cooling rack; cool 5 minutes, then peel the cookies away from the parchment and transfer to a cooling rack. Repeat as needed with the remaining batter, replacing the parchment paper with each batch, bringing the oven temperature back up to 350 degrees before baking each sheet.

11. For the buttercream: In the bowl of a stand mixer (or a large bowl if using a hand-held mixer), combine the egg whites, sugar, and salt. Set the bowl over a pot of simmering water, making sure the bottom of the bowl does not touch the water. Whisk constantly until the mixture reaches 160 degrees.

12. Fit the mixer with the whisk attachment; beat the egg white mixture on medium-high speed until stiff peaks form and it has cooled to room temperature, about 8 minutes. Reduce the mixer speed to medium and add the butter 2 tablespoons at a time, adding more once each addition has been incorporated. Increase the mixer speed to medium-high and beat until the buttercream is thick and smooth, 3-5 minutes. Add the vanilla seeds and extract; mix until incorporated.

13. To assemble: Pipe the buttercream onto the flat sides of half of the cookies. Top with the remaining cookies. Serve immediately or cover and store overnight in the refrigerator (bring to cool room temperature before serving).

Thirteen steps, and I forgot to tell you how to make the project-saving eyes and nostrils. Powdered sugar + milk + food coloring, stirred until smooth and dripped off the end of a toothpick.  Tedious, but it got the job done.

pig macarons 15

cinnamon macarons with apple buttercream

apple cinnamon macarons 4

Macarons have been all the rage recently, and yet, I’ve had no real desire to make them myself. This, even though they’re known to be finicky, and I do love making my life unnecessarily complicated. But while I do love a challenge, I don’t particularly love meringue cookies.

apple cinnamon macarons 1

This is probably because I’ve never gotten them quite right, as they always seem to be chewy in the center instead of crisp the whole way through. Maybe the precise directions included with many macaron recipes could help me avoid this pitfall. If not, at least they’d be filled with swiss meringue buttercream.

apple cinnamon macarons 2

One of the hallmarks of good macarons is the foamy feet around the bottom edge, which show that your macarons rose up in the oven instead of spreading out. When I started to see those feet form, I made Dave come over to look through the oven window with me and give me a high-five. I was also happy with the smooth tops of the cookies, and it goes without saying that I was happy with the apple buttercream, which was noticeably and pleasantly appley.

apple cinnamon macarons 3

The only problem? A chewy center. I guess practice makes perfect. Fortunately, I think it’s safe to say that meringues are good enough to make again.

apple cinnamon macarons 6

One year ago: Butternut Squash Risotto
Two years ago: Pomegranate Glazed Salmon
Three years ago: Sun-Dried Tomato Jam
Four years ago: Sushi Bowls

Printer Friendly Recipe
Cinnamon Macarons with Apple Buttercream (adapted from Tartelette)

Makes about 20 sandwich cookies

For a lot of meringue-making tips, read Tartelette’s article.

Meringues:
110 grams blanched almonds or almond meal
200 grams powdered sugar
½ teaspoon cinnamon
100 grams egg whites (from about 3 large eggs), aged overnight
25 grams sugar
Pinch salt

Apple buttercream:
4 egg whites
1¼ cups (8.75 ounces) granulated sugar
Pinch salt
24 tablespoons (3 sticks) unsalted butter, softened
⅓ cup apple butter
1 teaspoon vanilla extract

1. In a food processor, process the almonds and powdered sugar until the nuts are finely ground. In a stand mixer fitted with the whisk attachment (or a large bowl with a handheld mixer), beat the egg whites, sugar, and salt on medium-high speed (high speed if using a stand mixer) until soft peaks form. Use a large rubber spatula to fold the nut mixture into the egg mixture. After about 50 folds, the batter should be evenly mixed, with no streaks of egg white.

2. Line 2 baking sheets with parchment paper or silicone mats. Spray the lined sheets lightly with cooking spray. Transfer the batter to a piping bag fitted with a wide (about ½-inch) round tip. Pipe quarter-sized rounds onto the prepared pans, leaving about an inch between rounds. Gently rap the baking sheet against the counter to pop any large bubbles. Set the piped dough aside for 1 hour.

3. Adjust a rack to the middle position and heat the oven to 300 degrees. Bake one sheet at a time until the cookies are lightly browned around the bottom edges, about 15 minutes. Transfer the baking sheet to a wire rack; cool for about 5 minutes, then use a thin spatula to transfer the cookies from the pan to the wire rack. Cool completely before filling.

4. In the bowl of a stand mixer (or a large bowl if using a hand-held mixer), combine the egg whites, sugar, and salt. Set the bowl over a pot of simmering water, making sure the bottom of the bowl does not touch the water. Whisk constantly until the mixture reaches 160 degrees.

5. Fit the mixer with the whisk attachment; beat the egg white mixture on medium-high speed until stiff peaks form and it has cooled to room temperature, about 8 minutes. Reduce the mixer speed to medium and add the butter 2 tablespoons at a time, adding more once each addition has been incorporated. Increase the mixer speed to medium-high and beat until the buttercream is thick and smooth, 3-5 minutes. Add apple butter and vanilla; mix until incorporated.

6. Pipe the buttercream onto the flat sides of half of the cookies.  Top with the remaining cookies.  Serve immediately or cover and store overnight in the refrigerator (bring to cool room temperature before serving).

apple cinnamon macarons 5

gougeres

gougeres 4

My list of 2012 goals isn’t going too well. I’m keeping up, for the most part (although it has not escaped my attention that the date on this April entry is May 1st), but I haven’t had great successes with all of the recipes. January started off strong, with the lettuce wraps and black bean brownies – which I even made far enough before the deadline that I could try them again with some changes. I was also happy with the ranch dressing.

gougeres 1

But then things started going downhill. The fancy rice krispy treats fell victim to my refusal to go back to the store for a missing ingredient; the mozzarella got skipped entirely while I search for the right type of milk; the dolmades tasted good but mostly fell apart; and the gougères? I suppose they had the opposite problem. They look just fine – puffy and golden – but they were sadly lacking in cheese flavor.

gougeres 2

And so, I’m writing this down so I don’t forget: Stop buying the Gruyere sold in this little town. I did this once before and didn’t learn my lesson then. It has the fancy label, but it tastes like wax.

gougeres 3

So maybe this wasn’t my greatest cooking success, although at least it wasn’t a huge fail – they look nice, after all. And as an added bonus, I realized that I’ve already made a recipe that, while it didn’t hold the title of gougères, is nearly the same thing made with cheddar and green onions. I guess I could have checked this one off the list of goals years ago! Maybe this list isn’t going so badly after all.

gougeres 7

One year ago: Fig-Glazed Burgers with Onion Jam
Two years ago: Home Corned Beef
Three years ago: Chocolate Cream Tart
Four years ago: Fluted Polenta and Ricotta Cake

Printer Friendly Recipe
Gougères (reworded slightly from David Lebovitz)

Makes 24-30

I was paranoid about my eggs cooking in the hot saucepan before they could be incorporated into the dough, so I transferred the flour mixture to another bowl before adding the eggs.

½ cup water
3 tablespoons butter, cut into cubes
¼ teaspoon salt
big pinch of chile powder, or a few turns of freshly-ground black pepper
½ cup (2.4 ounces) all-purpose flour
2 large eggs
¾ cup (about 3 ounces) grated gruyere, or another hard cheese

1. Preheat the oven to 425 degrees. Line a baking sheet with parchment paper or a silicone baking mat.

2. Heat the water, butter, salt, and chile or pepper in a saucepan until the butter is melted. Add the flour all at once and stir vigorously until the mixture pulls away from the sides of the pot into a smooth ball. Remove from heat and let rest two minutes.

3. Add the eggs, one at a time, whisking constantly. The batter will first appear lumpy, but after a minute or so, it will smooth out. Add most of the grated cheese, reserving some for topping; stir until well-mixed.

4. Scrape the mixture into a pastry bag fitted with a wide plain tip and pipe the dough into mounds, evenly-spaced apart, making each about the size of a small cherry tomato. (You can also divide the dough into mounds using two spoons.) Top each puff with a bit of the remaining cheese.

5. Bake for 10 minutes, then turn the oven down to 375 degrees; bake for an additional 20 to 25 minutes, until the gougeres are golden brown. Serve warm.

gougeres 6

yogurt hollandaise

yogurt hollandaise 4

I am totally fascinated by emulsions, those silky mixtures of water-based liquids and fat. I’d love to claim this has something to do with my chemistry background and an interest in immiscible liquids and amphiphilic molecules, but, in truth, I think it’s because I like the creamy rich mixtures that result. I love mayonnaise, an emulsion of oil and vinegar; vinaigrettes, in which mustard holds the oil and vinegar together, although not as well as the egg yolks in mayonnaise; and even cake batters, in which a few egg yolks work to hold the butter and milk (or whatever liquid) together, and have such trouble doing it that the ingredients need to be as close in temperature as possible to prevent curdling.

Hollandaise, an emulsion of butter and lemon juice, again held together by egg yolks (the kitchen’s favorite emulsifier), isn’t my thing though. It isn’t that I don’t like it – what isn’t to like, other than blowing your entire day’s worth of calories for breakfast? It’s just that I don’t see the point, when my old favorite pretend-fattening ingredient, Greek yogurt, does such a good job of mimicking the richness of traditional hollandaise.

yogurt hollandaise 1

You still add egg yolks to make the sauce silky smooth, and this yogurt-based sauce has all the same flavorings as a full-fat version, with the lemon juice, salt, and spice (hot sauce here instead of cayenne powder). A pinch of sugar and tiny squeeze of mustard round out the flavors. And in the spirit of being healthier but maybe not perfectly healthy, I usually stir some tiny cubes of butter into the sauce to add richness.

yogurt hollandaise 3

There’s no question that the main advantage of this sauce over traditional hollandaise is that you’re not pouring nearly pure butter over your eggs. But it doesn’t hurt that it’s easier and less finicky either, requiring nothing more than a quick whisk over a double boiler, with no worries about the emulsion breaking. I guess I like fake emulsions just as much as real ones.

yogurt hollandaise 2

One year ago: Yellow Cake (comparison of 3 recipes)
Two years ago: Rich Katz’s brownies for Julia Child
Three years ago: Red Velvet Cake (comparison of 5 recipes)
Four years ago: Salmon Pesto Pasta

Printer Friendly Recipe
Yogurt Hollandaise (adapted from Fine Cooking and A Food Centric Life)

Enough for 6 servings of eggs benedict

You can use any fat level of Greek yogurt you like. I always use low-fat, because that’s the easiest to find where I live.

Sometimes I also add a tablespoon of butter, cut into small cubes, and heat it with the other ingredients.

I didn’t make traditional eggs Benedict; I topped my English muffins with green chile, avocado, poached eggs, and hollandaise.

¾ cup plain Greek yogurt
1 tablespoon fresh lemon juice
3 egg yolks
½ teaspoon Dijon mustard
¼ teaspoon sea salt
¼ teaspoon granulated sugar
pinch of white pepper
dash hot Tabasco sauce

1. In the top of a double boiler or a heatproof bowl set over a saucepan of simmering water, whisk together the yogurt, lemon juice, egg yolks, mustard, salt, sugar, pepper and Tabasco sauce.

2. Cook over simmering water, stirring constantly, until the sauce is thick enough to coat the back of a spoon, 6 to 8 minutes. (The sauce can be set aside at room temperature for up to 1 hour; reheat gently in double boiler.)

yogurt hollandaise 5

earl grey madeleines

earl grey madeleines 3

Coffee makes me feel like bees are buzzing in my head, so I save it for the weekends. At work, I stick to tea, and I’ve developed a little ritual with my electric kettle, collection of looseleaf teas, and steeper that drips from below when I set it onto my mug. I’m picky about my teas too; I don’t like any teas with weird fruity flavors, and I prefer my black tea with some bitter bite to it.

earl grey madeleines 1

I like Earl Gray tea, but it can’t be too orangey. I once bought one that tasted like a creamsicle, and I threw the whole tin away. Rishi makes my favorite black tea, but their Earl Grey is too strong for me. For months, I’ve been mixing Rishi Earl Grey tea leaves with another black tea I have that isn’t as bitter as I like. My morning mug of tea is an art.

earl grey madeleines 2

Overly strong tea leaves are perfect for putting into dessert though, where they have to battle to be noticed past the sugar and butter. The batter for these madeleines smelled and tasted noticeably of Earl Grey, but the flavor was muted once baked. They smelled more tea-y than they tasted. Clearly, the perfect way to really taste your Earl Grey with your Earl Grey madeleines is to have a mug of tea alongside your tea cake.

earl grey madeleines 4

Nicole chose these madeleines for Tuesdays with Dorie and has the recipe posted. Watch them carefully if you make them! I baked mine for 9 minutes, and it was definitely too long.

One year ago: Maple Tuiles
Two years ago: All-Occasion Sugar Cookies
Three years ago: Rosy Poached Pear and Pistachio Tart

earl grey madeleines 5

normandy apple tart

normandy apple tart 7

There seems to be a misconception among some people that I have my act together. Something like this tart, with its carefully arranged apple slices, presents an image of someone organized and calm and productive. Who knows – they might even think that I regularly clean my bathrooms.

normandy apple tart 2

The truth is that I forgot about the apples while they were cooking down into sauce and was lucky that there was no harm done. The truth is that I sliced and arranged the topping while singing Chicago hits (you’re the inspiration!) and drinking champagne late Sunday night when I should have been getting ready for bed.

normandy apple tart 4

I took the tart out of the oven long after my normal bed time. Then my hand slipped and mussed the carefully arranged apples and scalloped edge. The truth is that photographing the tart Monday morning made me even later for work than usual.

normandy apple tart 6

Maybe the moral of the story is that even if you’re just fumbling through, things will probably turn out just fine. You can use two forks to carefully unmuss your carefully arranged apple slices. You can eat the broken edge first. And none of those surficial imperfections spoiled how incredible this tart tasted, with the apples in the sauce adding a bright contrast to the sweet browned apples on top. This tart, Chicago’s greatest hits, and champagne were worth staying up for – even if it means that any image of me having it all together is just smoke and mirrors.

normandy apple tart 8

Tracey chose this tart for Tuesdays with Dorie, and she has the full recipe posted.  I followed it exactly, except, remembering a Cook’s Illustrated testing of applesauce and how the version with a pinch of salt was the favorite, I was sure to add a smidgen of salt to my sauce as well.

One year ago: Devilish Shortcakes
Two years ago: All-in-One Holiday Bundt
Three years ago: Linzer Sables

normandy apple tart 9

cranberry apple brandy

cranberry apple brandy 3

When I was simmering sugar syrup, smashing fruit, and measuring alcohol for these cocktails, my mom made the excellent point that opening a bottle of wine is a heck of a lot easier. And while I appreciate how wine compliments food and how beer signals relaxation, I love cocktails too. Cocktails are special. They mean fun and celebration. You can’t help but be happy when enjoying a cocktail with friends and family. And that’s why they’re worth the trouble.

cranberry apple brandy 1

This one takes more work than the citrus squeezing, liquor measuring, and syrup simmering of my favorite vodka gimlets and magaritas, as apples need to be sliced, then crushed along with cranberries before the liquor and syrup are stirred in – and that’s in addition to the squeezing, measuring, and mixing of citrus, liquor, and syrup, respectively.

cranberry apple brandy 2

It’s a strong drink, undoubtedly, as it is mostly brandy.  But it has all of the ingredients in a good apple dessert – sugar, a touch of citrus to brighten the flavors, cranberries in case you needed another reminder that it’s the end of fall and the beginning of winter.  Fortunately, that’s just the time for celebrations worthy of the trouble involved with mixing up a seasonal cocktail.

cranberry apple brandy 4

One year ago: Cranberry Apple Galette
Two years ago: Carne Adovada
Three years ago: Baked Eggs with Spinach and Mushrooms

Printer Friendly Recipe
The Normandy
(from The Essential New York Times Cookbook by Amanda Hesser)

Serves 1

9 cranberries
2 thin slices green apple
1 teaspoon dark brown sugar
1 tablespoon fresh lemon juice
1 tablespoon simple syrup
2 ounces Calvados or other good-quality apple brandy

Combine 6 cranberries, 1 apple slice, the brown sugar, and lemon juice in a cocktail shaker and muddle (crush with a muddler or the back of a wooden spoon). Add the simple syrup, Calvados, and a few ice cubes, cover, and shake well. Strain into a rocks glass filled with ice and garnish with the remaining 3 cranberries and apple slice.