pull-apart stuffing knots

pull apart stuffing knots 7

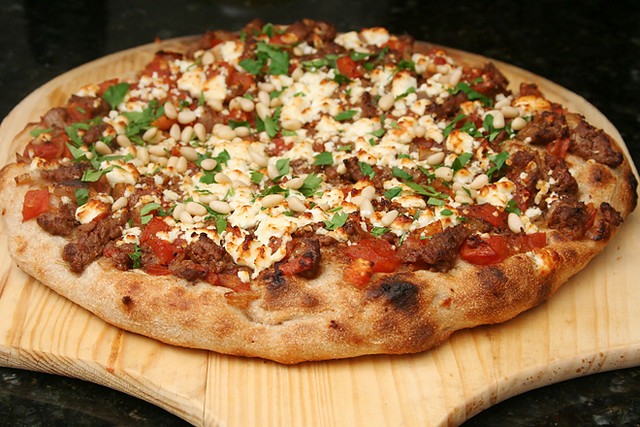
There’s a conflict between the recipes you want to make for Thanksgiving because they’re traditional and the recipes you want to make for Thanksgiving because they’re new and interesting. Every year, magazines have to come up with creative Thanksgiving recipes that no one makes because Thanksgiving only comes once a year, and everyone wants their old favorites.

pull apart stuffing knots 2

Last November was my turn to host my monthly get-together with friends, and I suggested we do a Thanksgiving theme, but not with our standard recipes. I made a turkey roulade with mushroom stuffing, sweet potato meringue pie, and these stuffing rolls. I don’t know where you’d fit stuffing rolls on the normal Thanksgiving menu – would you replace rolls or stuffing or both? But they were perfect for my nontraditional dinner.

pull apart stuffing knots 5

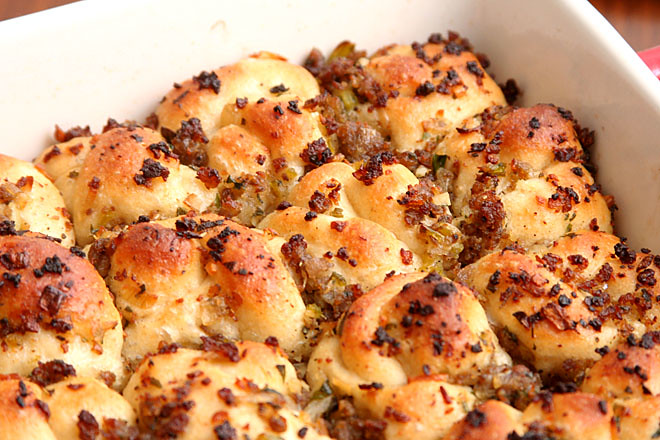
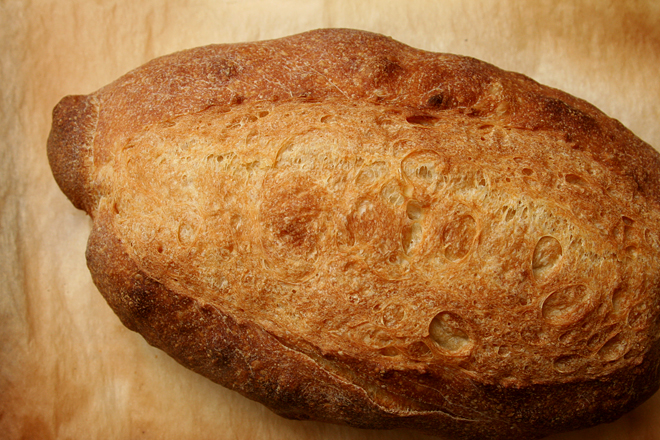
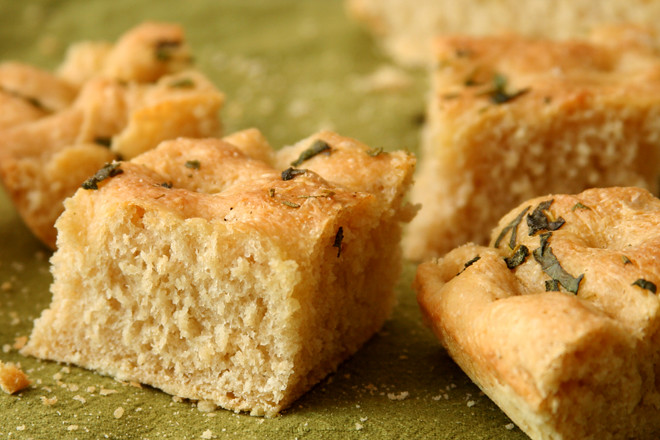
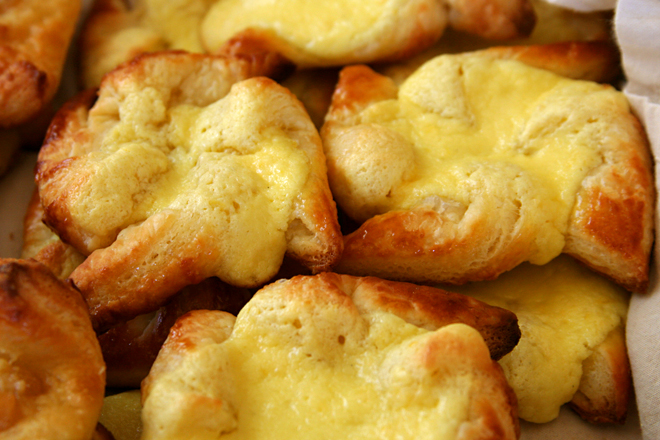
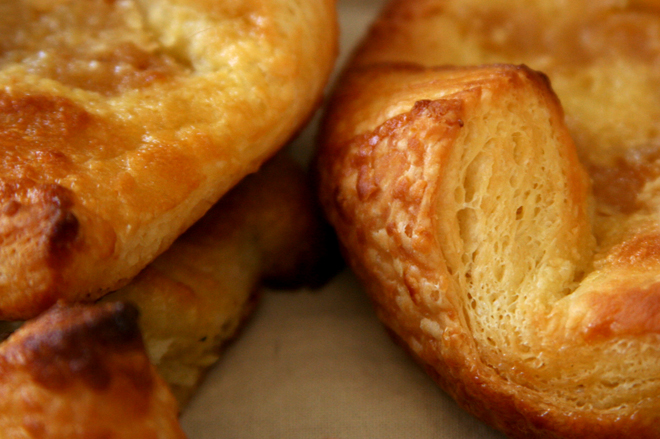
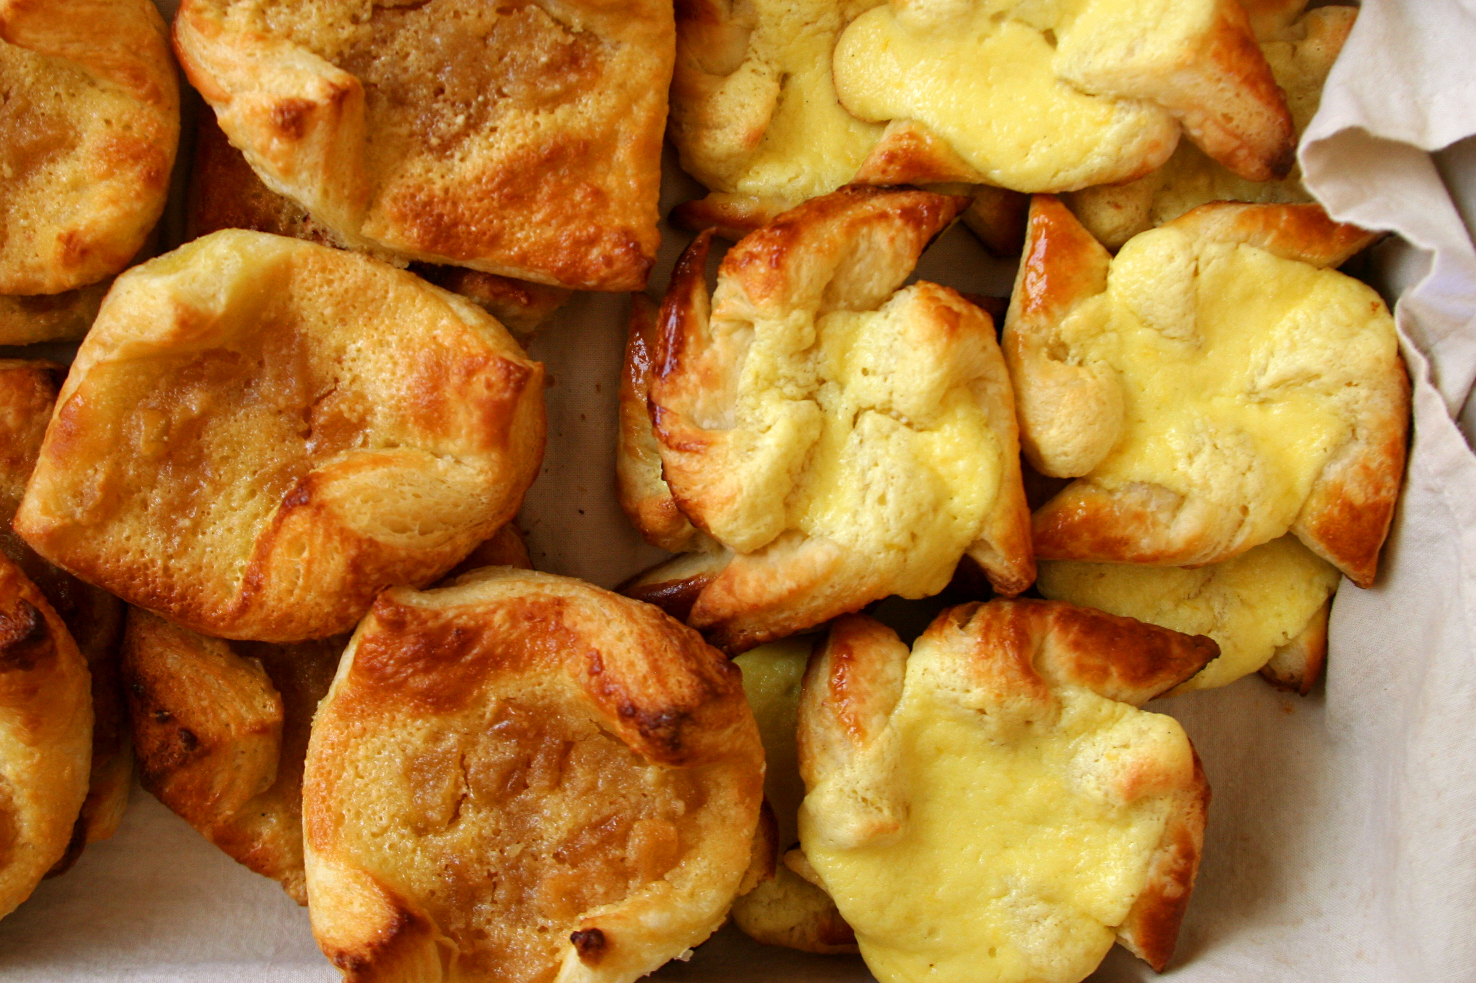
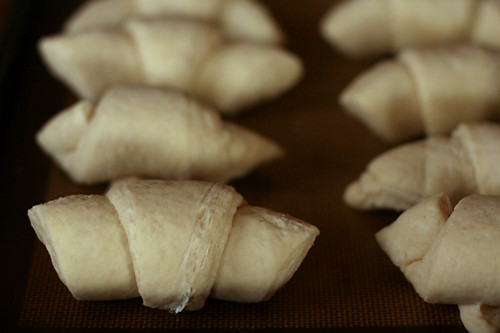
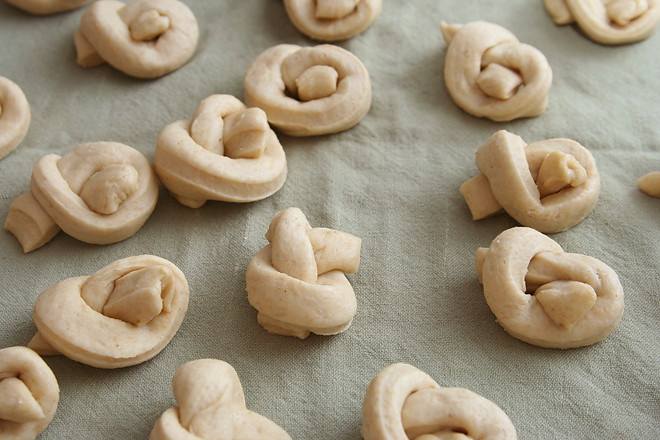
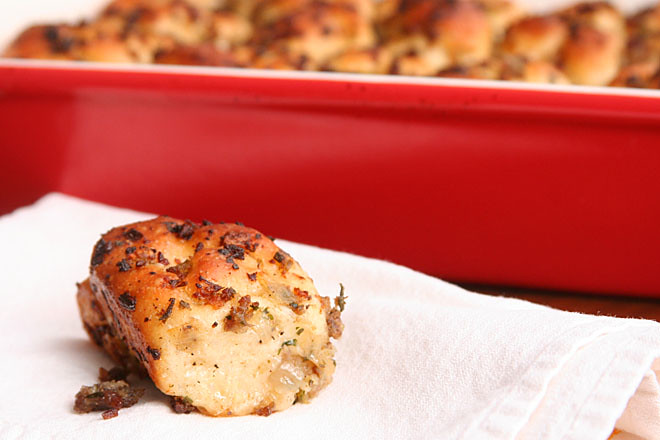
Stuffing rolls are knots – because their irregular shape increases the surface area that can be coated with flavorful ingredients – covered in an herbed sausage and celery mixture. It’s as if you replaced the dried bread cubes in regular stuffing with freshly baked rolls. Wherever you can manage to fit these into your Thanksgiving traditions, they’re worth trying something new.

pull apart stuffing knots 8

Printer Friendly Recipe
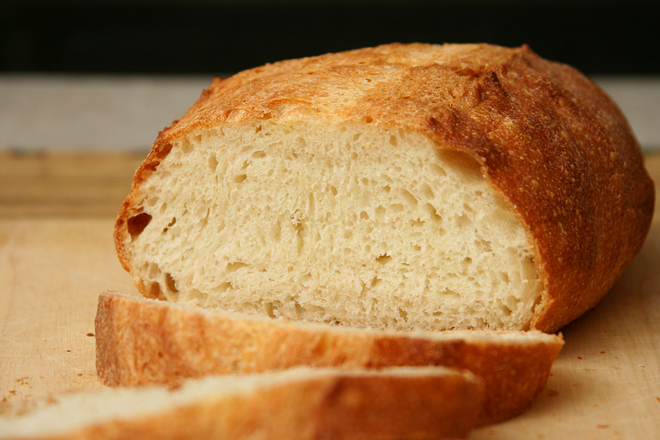
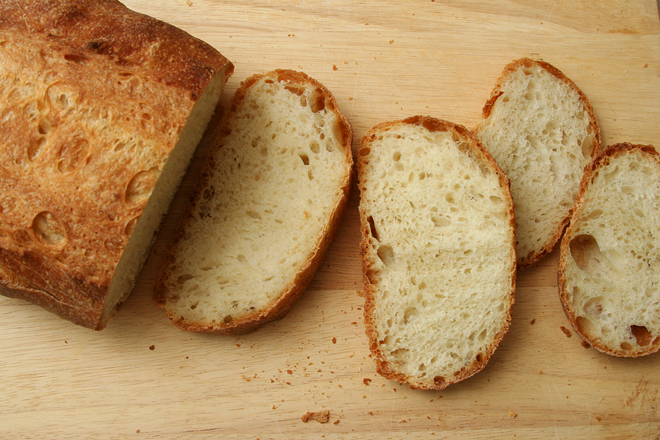
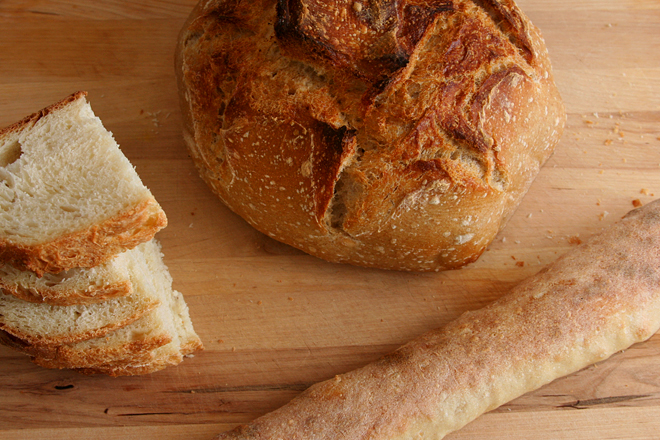
Pull-Apart Stuffing Knots (slightly adapted from The Food Lab)

You can use 1 pound of store-bought pizza dough instead of making your own bread dough. You can also replace up to half of the flour with whole wheat flour.

Dough:
11 ounces all-purpose flour
½ cup water
1½ tablespoons oil
1½ tablespoons sugar
1½ teaspoons yeast
¾ teaspoon salt

Rolls:
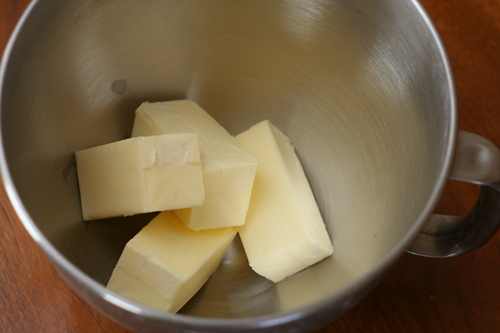
4 tablespoons butter, divided
8 ounces sage sausage or breakfast sausage, removed from casings
1 small onion, finely chopped (about ¾ cup)
1 stalk celery, finely chopped (about ½ cup)
4 medium cloves garlic, finely chopped
¼ cup minced fresh sage leaves
¼ cup minced fresh parsley leaves
Kosher salt and freshly ground black pepper

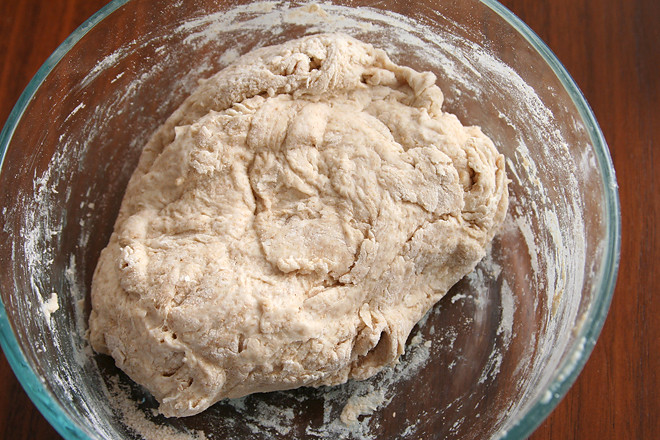
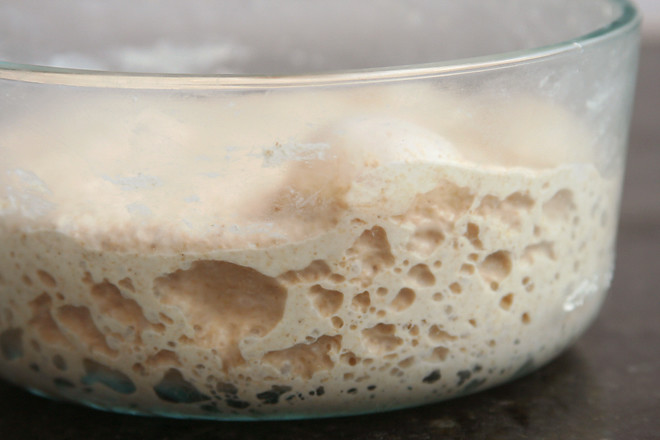
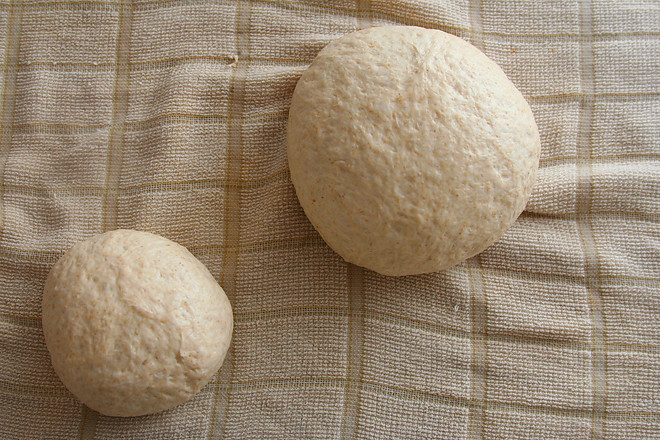
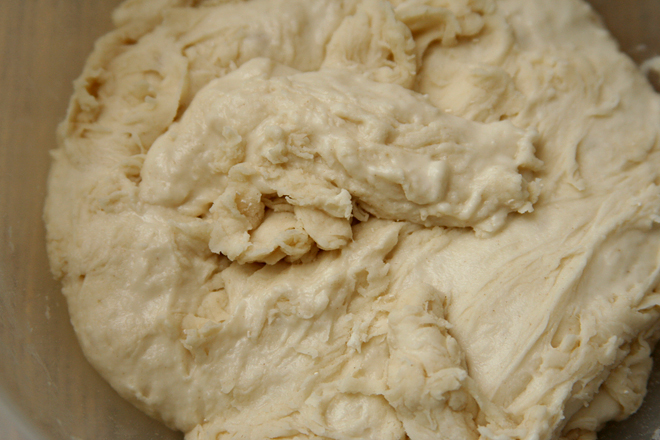
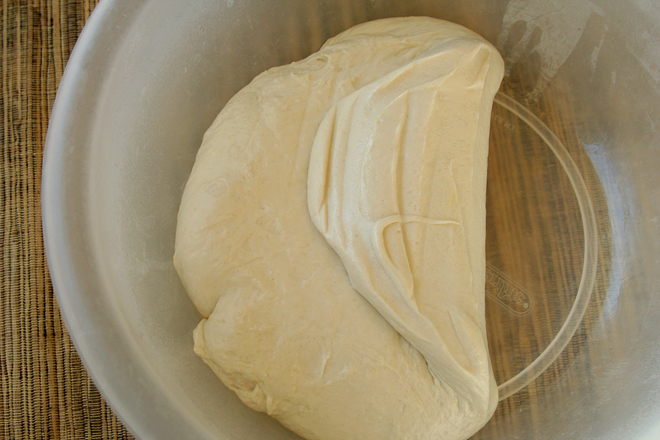
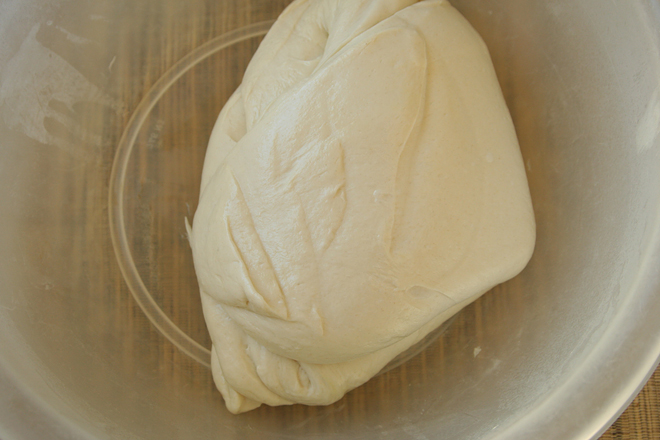
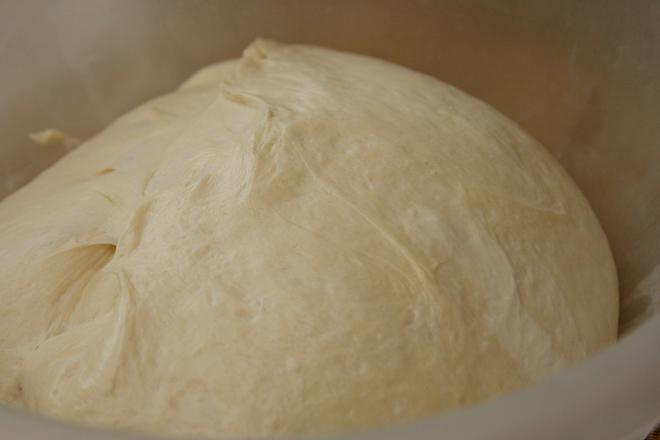
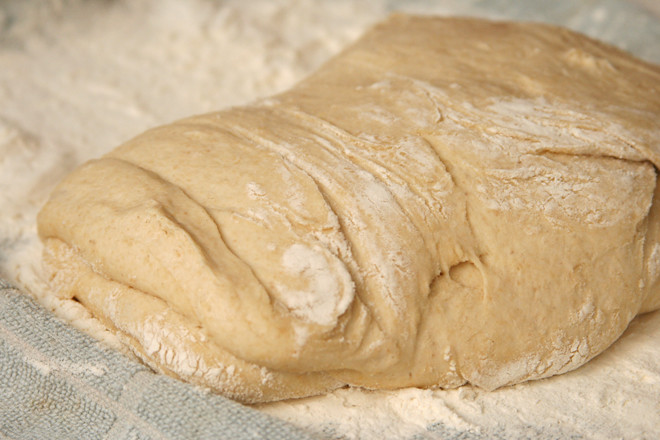
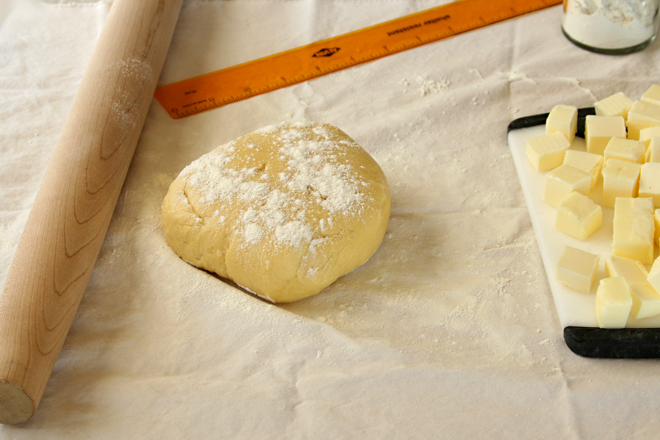
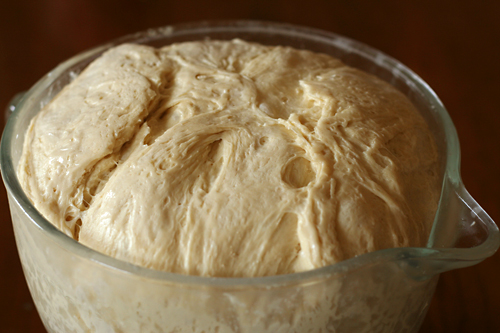
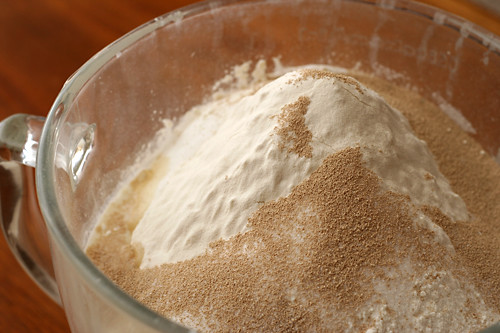
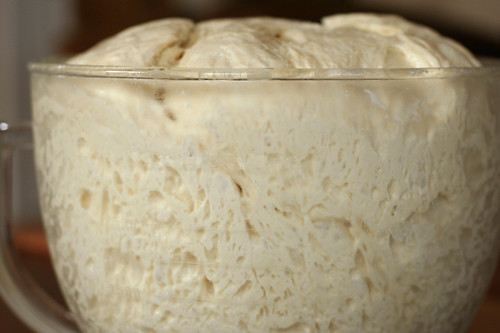
1. Mix pre-dough. The next day, mix and knead the dough. Let rise slightly and refrigerate overnight.

2. Melt 2 tablespoons butter in a large skillet over medium-high heat. Add sausage and mash with stiff whisk or potato masher to break up into fine pieces (largest pieces should be no greater than ¼-inch). Cook, stirring frequently until only a few bits of pink remain, about 8 minutes. Add onions, celery, garlic, and sage and cook, stirring frequently, until vegetables are softened, about 10 minutes. Add parsley and season to taste with salt and pepper. Transfer contents to a large bowl and set aside until completely cool.

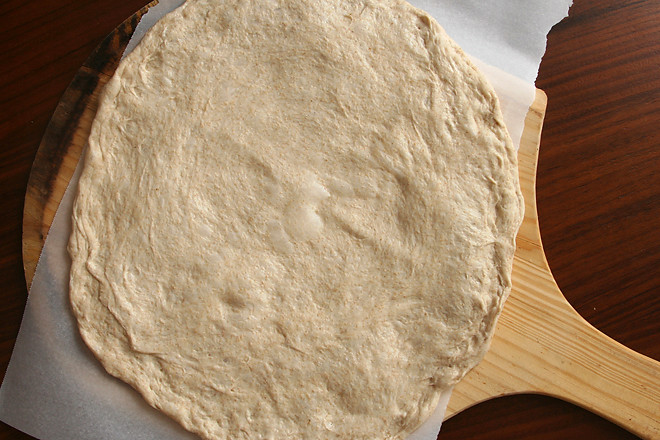
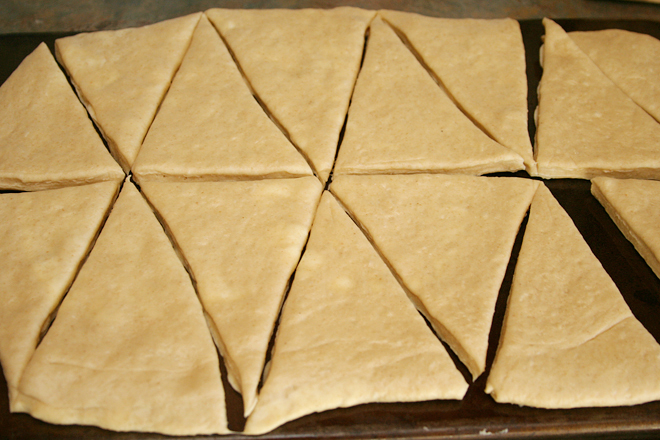
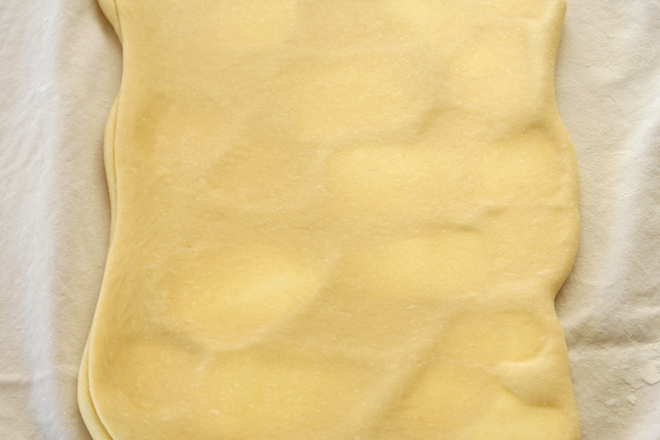
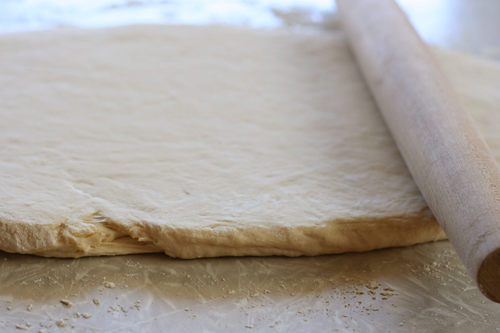
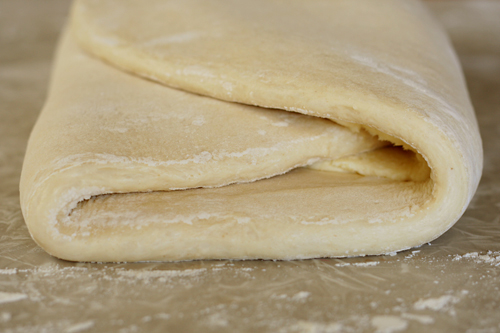
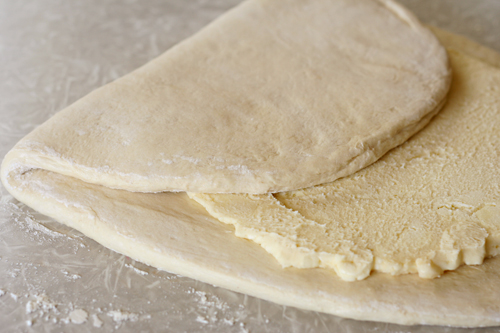
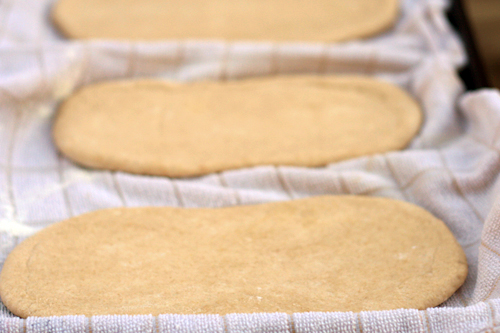
3. While filling cools, make knots. On a lightly floured surface, divide dough into two even pieces. Working with one piece at a time, roll or stretch into an oblong strip about 8 inches long and 4 inches wide. With a bench scraper or knife, cut crosswise into 12 strips. Repeat with other half of dough.

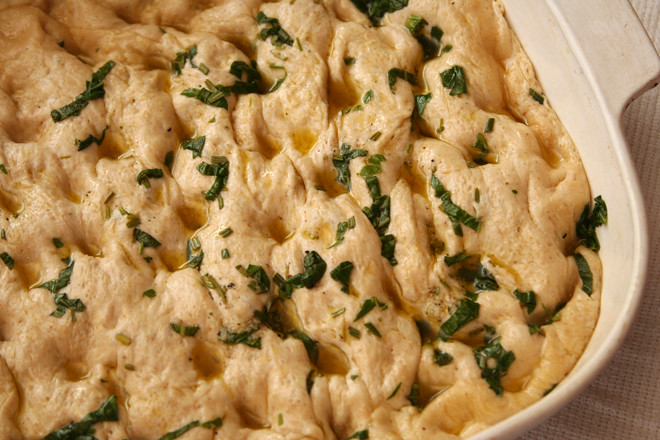
4. Tie each strip into a knot and transfer to the bowl with sausage mixture. Toss and fold with your hands until every knot is thoroughly coated in the mixture. Grease a 9- by 13-inch casserole pan with 1 tablespoon butter. Transfer the knots to the casserole dish in a single layer. Spray with oil, cover tightly with plastic, and set aside until doubled in size, about 4 hours. Alternatively, refrigerate until doubled in size, 12 to 16 hours.

5. When ready to bake, preheat oven to 425°F and adjust oven rack to center position. Unwrap rolls. Transfer to oven and bake until golden brown and crisp, 25 to 30 minutes.

6. When rolls are almost ready, melt remaining tablespoon butter in the microwave or stovetop. Remove rolls from oven and immediately brush with butter.

pull apart stuffing knots 6

Save

lahmahjoon (armenian lamb pizza)

lamb pomegranate pizza 3

Pizza was the first thing I cooked after having the baby. I’d prepped the dough, made the sauce, shredded the cheese, and sliced the pepperoni before going to the hospital, but even so, three days after giving birth, putting it all together and sliding it into the oven was about all I could handle. I was grateful that my mom and mother-in-law cooked the rest of the meals that first week.

lamb pomegranate pizza 1

It’s over a month later, and now I’m actually able to make a pizza with toppings that require chopping and pre-cooking. This pizza isn’t difficult, and it’s one of my favorites for when I want something nontraditional. I have a bottle of pomegranate molasses that I impulse-bought from The Spice House, but I think you could just add twice the amount of pomegranate juice and let it reduce. I often don’t like cinnamon in savory recipes, but the flavor blends in perfectly here.

lamb pomegranate pizza 2

We still took turns eating while the other soothed the baby, but at least we got to eat something that wasn’t made specifically because it takes well to freezing. We’re making progress! And I’m grateful, because it means more meals like this.

lamb pomegranate pizza 6

Lahmahjoon (Armenian Lamb Pizza) (adapted from Eating Well)

See here for baking instructions using a baking steel.

I used a slicing tomato instead of plum tomato because Dave did the shopping and I forgot to specify which type I wanted. But you should use plum tomatoes if you can.

1 tablespoon olive oil
2 shallots, minced
8 ounces ground lamb
½ teaspoon salt
4 medium plum tomatoes, chopped
1 tablespoon pomegranate molasses
1 teaspoon ground cinnamon
½ teaspoon freshly ground pepper
1 pound prepared pizza dough
⅓ cup (2 ounces) crumbled feta
1 tablespoon pine nuts
2 tablespoons minced fresh parsley

1. Place a pizza stone on the lowest rack in the oven; heat the oven to its highest setting, at least 500 degrees. Line a pizza peel or the back of a baking sheet with parchment paper.

2. In a medium skillet over medium heat, heat the oil, then add the shallots. Cook, stirring occasionally, until softened, about 2 minutes. Add the lamb and salt, and cook, stirring to break up the meat, until lightly browned, about 5 minutes. Add the tomatoes and cook until they begin to break down, about 3 minutes. Stir in the pomegranate molasses, cinnamon, and pepper.

3. Divide the dough in half. Stretch a portion of dough to a 10-inch round; lay it on the parchment paper. If necessary to even out thick areas and fix the shape of the dough, pull the edges to an even circle. Spread half of the lamb mixture over the dough, then top with half of the feta and pine nuts.

4. Transfer the pizza on the parchment paper to the heated stone. Cook until the bottom of the crust is spottily browned, 6-7 minutes. Use the metal spatula and pizza peel to remove the pizza from the oven and transfer it to a cooling rack. Sprinkle half of the parsley evenly over the pizza. Cool for about 5 minutes before cutting and serving. Repeat with the remaining dough and toppings.

lamb pomegranate pizza 5

slow ferment pizza dough

pizza dough 9

Since I make pizza once every two weeks or so, it’s only natural that my dough recipe has evolved over the years. The recipe I’ve been using lately doesn’t bear much resemblance to my favorite from several years ago beyond the obvious flour, water, and yeast. My current favorite couldn’t be easier to make – with a few caveats.

pizza dough 2

The first is that it’s best if you think ahead – far ahead, if you can. I usually mix the dough on Monday night to cook it on Friday night. That being said, if I didn’t decide I wanted pizza until Thursday, I’d still use this recipe, with just a one-night rest.

pizza dough 4

The second is that I’m using flour I special-ordered from Italy. I’ve entered the deep end, where flour for pizza is no longer taken out of the grocery budget, it comes out of my fun money allowance. But then I tried the recipe with bread flour (King Arthur), and to be honest, it was so good that it doesn’t seem like the special flour is worth the splurge.

pizza dough 5

So, thinking in advance helps, and fancy flour might help, but after that, it’s just mixing up flour, water, yeast, sugar, and salt. I don’t bother with a whole wheat pre-dough; I just use half whole wheat flour in the dough, and the long wait in the fridge is plenty of time to soften the grains. I also don’t put much effort into kneading the dough. I mix it, put it in the fridge overnight, and spend a minute or two kneading it once it’s evenly hydrated. If you’d rather do all the work up front and forget about it for a few days, you can just knead it longer right after you mix it up.

pizza dough 6

Then it sits in the back of the fridge until I’m ready for it at the end of the week. I come home from work on Friday, take the dough out to warm up, and go sit in my favorite chair with a book and my cat. An hour or two later, somewhat refreshed, the dough is easy to stretch out to a circle and ready to top.

pizza dough 14

Another pizza splurge I indulged in last year was a Baking Steel. It does make homemade pizza better, and I recommend it, but of course a pizza stone will do a fine job too. With the Baking Steel, it gets so hot that the dough crisps and browns within a few minutes, so I put it on a high rack and turn the broiler on when the pizza goes in. This is not recommended with a stone, since the direct heat could cause it to crack (heck, in my experience, anything causes them to crack!).

pizza dough 15

And then you’ve got pizza as good as you can get with a home oven. The bottom is crisp and browned, the middle is full of bubbles, the dough has great flavor on its own, even without whatever delicious toppings you pile on top. I’ve been making this new favorite for almost a year, and I have no plans to change it up – but you never know. There’s always something new to try, so maybe in a few years, I’ll be sharing yet another new and improved pizza method.

pizza dough 13

Printer Friendly Recipe
Slow Ferment Pizza Dough
(adapted from Serious Eats’ Cold-Fermented Pizza Dough)

I’ve reduced the yeast from Kenji’s recipe, because with the full amount, my fermented dough was developing an unpleasant sour aroma.

Whether baking on a steel or a stone, I’ve found that the dough is easiest to transfer to the oven with parchment paper, but it crisps and browns better if the paper is removed once the dough sets. Furthermore, a baking steel is hot enough to burn the paper after a couple minutes in the oven, creating a mess.

10 ounces (2 cups) bread flour or 00 flour
10 ounces (2 cups) whole wheat flour
2 teaspoon salt
⅔ teaspoon yeast
½ teaspoon sugar
1¾ cups water

1. In a medium bowl, combine all of the ingredients until there are no dry bits remaining. Tightly cover and store in the refrigerator, at least overnight or up to 5 days. The following day, knead the dough for about a minute, until it’s smooth and elastic. Cover and refrigerate. (Alternatively, the dough can be kneaded for about 5 minutes right after mixing, with no additional kneading necessary.)

2. About two hours before baking, remove the dough from the refrigerator. Use a dough scraper or rubber spatula to transfer the dough from the bowl to a damp dishtowel or a lightly floured surface. Use a knife to divide the dough in half. Shape each portion into a ball. Cover the dough balls loosely with plastic wrap; leave at room temperature for 1½ to 2 hours, until the dough is easily stretched.

3. About 45 minutes before baking the pizzas, place a baking steel (about 6 inches from the broiler) or pizza stone (lowest rack) in the oven; heat the oven to its hottest setting. Line a pizza peel or the back of a baking sheet with parchment paper.

4. Stretch one portion of dough to a 10- to 12-inch round; lay it on the parchment paper. If necessary to even out thick areas and fix the shape of the dough, pull the edges to an even circle. Top with desired toppings.

5. Transfer the pizza on the parchment paper to the heated steel or stone. If using a steel, immediately turn the oven off and the broiler on to its hottest setting. After 1 minute, use a metal spatula to lift the pizza while using tongs to remove the parchment paper. Continue cooking until the cheese is bubbling and the bottom of the crust is spottily browned, about 4 additional minutes for a baking steel or 6-7 minutes for a baking stone. Use the metal spatula and pizza peel to remove the pizza from the oven and transfer it to a cooling rack. Cool for about 5 minutes before cutting and serving. Repeat with the remaining dough.

pizza dough 10

caramel apple cinnamon rolls

apple cinnamon rolls 5

Okay, my coworkers are officially spoiled. Usually I pass off the treats I share with them as more for me to play in the kitchen than for them to indulge, but when your coworker brings you a pan of homemade cinnamon rolls still warm from the oven, covered in caramelly cream cheese frosting, you’re spoiled. And I’m spoiled too, because I got to eat a nice warm sweet roll (or two) at work too.

apple cinnamon rolls 1

It did take me all week, but that’s how yeast breads go on workdays. I could have skipped a whole wheat pre-dough on something so obviously not health food, but since it’s so easy and I knew it wouldn’t make anything worse, I figured a little extra fiber couldn’t hurt. After that rested overnight, I mixed the rest of the dough and let it rise most of the way before stashing it in the fridge. The third night, I rolled, filled, and cut the dough, then again let it partially rise before putting it in the fridge overnight. Finally, three days after starting the rolls, I woke up in the morning and preheated the oven to bake them.

apple cinnamon rolls 2

Well, the rolls took a little longer than I expected to bake and I was late to work that day, but no one minded. (My diabetic boss couldn’t care less about cinnamon rolls; he’s just a nice guy.) And I got a few “this is the best thing you’ve ever made” comments from my spoiled but appreciative coworkers, which, combined with indulging myself, makes it all worth it.

apple cinnamon rolls 4

Printer Friendly Recipe
Caramel Apple Cinnamon Rolls (adapted from Annie’s Eats)

Makes 12 full-size cinnamon rolls or 24 smaller cinnamon rolls

I made these partially whole wheat by making a pre-dough by stirring together 5 ounces whole wheat flour, ¼ teaspoon salt, and ½ cup water and letting it sit, covered, at room temperature overnight. The next day, I mixed this pre-dough with the butter, milk, yeast, sugar, and eggs before adding the remaining 1¼ teaspoons salt and 15-16 ounces flour.

Because I made small cinnamon rolls to share at work, even ¼-inch diced apples seemed too big. I gave them a few pulses in the food processor to chop them finer. The larger dice would work fine for full-size rolls though.

Dough:
6 tablespoons unsalted butter
½ cup milk
½ cup water
1 envelope (2¼ teaspoons) yeast
¼ cup (1.75 ounces) granulated sugar
2 large eggs
1½ teaspoons salt
4-4¼ cups (20 to 21¼ ounces) unbleached all-purpose flour, plus more for dusting the work surface

Filling:
2 tablespoons unsalted butter
3 large apples, peeled, cored and cut into ¼-inch cubes
¾ cup (5.25 ounces) brown sugar, divided
⅛ teaspoon salt
1 tablespoon ground cinnamon

Icing:
¼ cup caramel sauce
1 cup (4 ounces) powdered sugar
4 ounces cream cheese, softened

1. For the dough: Melt the butter in the microwave or in a small saucepan over medium-low heat. Add the milk and water. Transfer this mixture to the mixer bowl with the yeast, sugar, eggs, and salt. Mix on medium-low speed with the paddle attachment until evenly combined. Attach the dough hook, and, with the mixer running on medium-low speed, gradually add 4 cups (20 ounces) of flour. If the dough sticks to the bottom of the mixer bowl during kneading, add the remaining ¼ cup flour, 1 tablespoon at a time. Knead for 6 to 8 minutes, until the dough is smooth and elastic (or knead for about 10 minutes by hand). It will be soft. Coat the bowl and dough with a thin layer of vegetable oil. Cover and set aside to rise until doubled in size, 1½ to 2 hours.

2. For the filling: Meanwhile, melt the butter in a medium skillet over medium heat. Add the apples, ¼ cup (1.75 ounces) brown sugar, and salt. Cook, stirring occasionally, until the apples are softened, about 12 to 16 minutes. Remove from the heat and let cool. When cool, add the remaining ½ cup (3.5 ounces) brown sugar and the cinnamon.

3. Spray a 9-by-13-inch baking dish with oil. When the dough is sufficiently risen, transfer it to a lightly floured work surface. Roll it out to a 12-inch by 16-inch rectangle. (If you want to make small rolls, divide the dough in two and roll each portion out to 12-inches by 8-inches.) Spread the filling evenly over the dough, leaving a ½-inch border along one longer edge free of filling. Starting at the longer edge with filling (for both full-size and smaller rolls), roll the dough tightly, sealing it with the clean edge. Using either a serrated knife or unflavored dental floss, cut the dough into 12 (or 24, for smaller rolls) evenly-sized rolls. Arrange cut-side up in the prepared pan. Cover and set aside to rise until puffy, about 1 hour.

4. Adjust a rack to the middle position and heat the oven to 350 degrees. Uncover the rolls and transfer the dish to the oven. Bake until the tops are browned and an instant-read thermometer inserted near the center of the pan reads about 185 degrees. Transfer the pan to a cooling rack.

5. For the icing: Using a whisk or electric mixer, combine the caramel sauce and powdered sugar. Mix in the cream cheese until the mixture is smooth. Once the rolls have cooled for about 10 minutes, pour the icing over them. Serve warm.

apple cinnamon rolls 7

rustic bread (comparison of 3 recipes)

rustic bread 23
baguette: PR; slices: CI; round loaf: T

I love bread so much. I always have – who doesn’t? – but I’ve been having even more fun with it lately. Besides hot dog and burger buns, my focus has almost exclusively been on rustic breads for the last couple years. If we spend Saturday night at home, I’ll often make a really nice meal, and wine seems like a natural accompaniment (to be honest, often the meal is planned around the wine), and bread and wine are so good together.

rustic bread 1
CI biga

With all these opportunities to experiment, I started working on this comparison years ago. I slowly narrowed down recipes until I had three that were so good that the comparison would undoubtedly be a reflection of personal taste and not quality of the recipe, thus defeating the purpose of doing a tasting at all. But at least I (and my friends) got to eat a lot of good bread along the way.

rustic bread 2
CI dough

The recipes that made the cut were Cook’s Illustrated’s Italian Bread recipe (CI), Peter Reinhart’s Pain a l’Ancienne (PR), and Tartine’s Country Bread (T). I’d previously made all three of these recipes many times and loved them all. I’d need to taste them side-by-side to choose a favorite.

rustic bread 3
CI dough mid-turn

CI – This bread starts with a biga, a mixture of flour, water, and yeast that’s stirred together, left at room temperature for a few hours to ferment, then transferred to the refrigerator overnight. A second mixture of flour, water, and yeast is later mixed and allowed to set for just 20 minutes before the biga and salt is added and the dough is kneaded.

rustic bread 5
CI dough completed turn

The dough goes through a long rise at room temperature with several “turns” in the middle – basically folding the dough over itself a couple times. It’s supposed to lead to the final loaf rising up and not out, and it’s a trick I like enough that I incorporate it in other bread recipes. After shaping, the dough goes through a second rise and is baked on a stone at 500 degrees for 10 minutes and then 400 degrees. The dough is sprayed with water before baking, but no other steam is added.

rustic bread 8
CI risen dough

PR – This is the easiest bread in this lineup. Flour, yeast, salt, and ice water are mixed and kneaded, then chilled overnight. The next day, after it warms up and rises a bit, the very sticky dough is cut into smaller portions, which are pulled and pushed into something vaguely baguette-like. These are baked soon after shaping. Reinhart calls for a few shots of water to be sprayed on the sides of the oven, plus a pan of hot water in the oven with the bread to create steam during baking.

rustic bread 9
CI ready to bake

T – This dough requires a lot of babysitting and a lot of patience, although not necessarily a lot of work. The flour and water are mixed with sourdough starter and allowed to rest for a bit, then salt is mixed in. The dough isn’t kneaded, it’s just turned, as described above, every half an hour or so for about four hours. After being shaped into rounds, it’s chilled overnight in the refrigerator. It’s kept covered in a heavy Dutch oven for the first part of baking to trap steam, then the lid is removed so the crust can brown.

rustic bread 10
CI

In retrospect, the breads are pretty different. The Italian bread (CI) has an even, relatively tight structure, while the pain a l’ancienne (PR) is open and airy. Tartine’s country bread (T) has a slight but unignorable sourdough flavor.

rustic bread 11
CI

CI – Described as denser and drier. The chewy crust got compliments. While one friend thought it was sweeter than the other breads, to me, it didn’t have as much flavor. This might be because I eat so many whole grains lately that a bread made with all white flour seems plain.

PR – Tasters thought the bread might be buttery or eggy, despite a lack of both of those ingredients in the recipe. They also thought it was chewy and moist and liked the crust.

T – The sourdough flavor was picked out immediately. It was also described as yeastier and more floury.

rustic bread 12
CI

With five people comparing the breads, no clear winner emerged. A friend who grew up eating sourdough pancakes preferred Tartine’s country bread. An Italian friend loved CI’s Italian bread, as did a friend who liked the sweeter flavor. PR’s pain a l’ancienne was Dave’s favorite and no one’s least favorite. Those who favored Tartine country bread said CI’s Italian bread was their least favorite and vice versa, although everyone liked all of the breads. I was just happy because I got to eat — and bake — so much bread.

rustic bread 25
clockwise from top: PR, T, CI

Tartine Country Bread

Pain a l’ancienne

Printer Friendly Recipe
Italian Bread (from Cook’s Illustrated’s The New Best Recipe)

This recipe requires a standing mixer to make the dough, a spray-bottle filled with water for spritzing, a rectangular baking stone, and an instant-read thermometer for gauging doneness. It also requires a bit of patience — the biga, which gives the bread flavor, must be made 11 to 27 hours before the dough is made.

This recipe makes a gigantic loaf of bread.  I always divide the dough into two portions and make smaller loaves.

I really didn’t intend for all of the pictures in this post to be of this recipe.  Fortunately, there are separate entries dedicated to the other two recipes.

Biga:
11 ounces bread flour (2 cups)
¼ teaspoon instant yeast
8 ounces water (1 cup), room temperature

Dough:
16½ ounces bread flour (3 cups), plus extra for dusting hands and work surface
1 teaspoon instant yeast
10.7 ounces water (1⅓ cups), room temperature
2 teaspoons table salt

1. For the biga: Combine flour, yeast, and water in bowl of standing mixer fitted with dough hook. Knead on lowest speed (stir on KitchenAid) until it forms a shaggy dough, 2 to 3 minutes. Transfer biga to medium bowl, cover tightly with plastic wrap, and let stand at room temperature until beginning to bubble and rise, about 3 hours. Refrigerate biga at least 8 hours or up to 24 hours.

2. For the dough: Remove biga from refrigerator and let stand at room temperature while making dough. Combine flour, yeast, and water in bowl of standing mixer fitted with dough hook; knead on lowest speed until rough dough is formed, about 3 minutes. Turn mixer off and, without removing dough hook or bowl from mixer, cover bowl loosely with plastic wrap; let dough rest 20 minutes.

3. Remove plastic wrap, add biga and salt to bowl, and continue to knead on lowest speed until ingredients are incorporated and dough is formed (dough should clear sides of bowl but stick to very bottom), about 4 minutes. Increase mixer speed to low (speed 2 on KitchenAid) and continue to knead until dough forms a more cohesive ball, about 1 minute. Transfer dough to large bowl (at least 3 times dough’s size) and cover tightly with plastic wrap. Let dough rise in cool, draft-free spot away from direct sunlight, until slightly risen and puffy, about 1 hour.

4. Remove plastic wrap and turn the dough by sliding a plastic bench scraper under one side of the dough; gently lift and fold one third of the dough toward the center. Fold the opposite side of the dough toward the center. Finally, fold the dough in half, perpendicular to first folds. Dough shape should be a rough square. Replace plastic wrap; let dough rise 1 hour. Turn dough again, replace plastic wrap, and let dough rise 1 hour longer.

5. To shape the dough: Dust work surface liberally with flour. Gently scrape and invert dough out of bowl onto work surface (side of dough that was against bowl should now be facing up). Dust dough and hands liberally with flour and, using minimal pressure, push dough into rough 8- to 10-inch square. Fold the top left corner diagonally to the middle; repeat step 2 with top right corner. Gently roll dough from top to bottom until it forms a rough log. Roll the dough into its seam, and, sliding hands underneath each end, transfer the dough to parchment paper. Gently shape dough into 16-inch football shape by tucking bottom edges underneath. Dust loaf liberally with flour and cover loosely with plastic wrap; let loaf rise until doubled in size, about 1 hour. Meanwhile, adjust oven rack to lower-middle position, place baking stone on rack, and heat oven to 500 degrees.

6. To bake: Using a lame, single-edged razor blade, or sharp chef’s knife, cut slit ½ inch deep lengthwise along top of loaf, starting and stopping about 1½ inches from ends; spray loaf lightly with water. Slide parchment sheet with loaf onto baker’s peel or upside-down baking sheet, then slide parchment with loaf onto hot baking stone in oven. Bake 10 minutes, then reduce oven temperature to 400 degrees and quickly spin loaf around using edges of parchment; continue to bake until deep golden brown and instant-read thermometer inserted into center of loaf registers 210 degrees, about 35 minutes longer. Transfer to wire rack, discard parchment, and cool loaf to room temperature, about 2 hours.

rustic bread 24

crescent rolls

crescent rolls 5

I want my crescent rolls to bridge the gap between a regular dinner roll and a croissant. I want them intensely buttery, soft in the middle, with a slight crackle to the crust. I want the rolled layers to come apart when you bite into a browned edge. I don’t want them to be flaky; that’s too far down the croissant path. Basically, I want what you get when you pop open one of those tubes from the grocery store, except those tend to be soft to the point of mushy and too pale on the outside. It’s been surprisingly hard to find this ideal.

crescent rolls 3

Most recipes turn out rolls that are too similar to dinner rolls, without enough butter and without distinct layers. The recipe I started from for these rolls looked like they’d go too far the other direction, with flaky layers of dough separated by butter, like a croissant. You get those layers through folding butter into the dough and rolling it flat, then folding the dough into thirds and rolling again. In a croissant, this process is repeated to make hundreds of alternating paper-thin dough and butter layers.

crescent rolls 4

By reducing the number of turns, I was able to create the layers I wanted without making them so thin they’d turn flaky, so the dough layers were distinctly bread-like. The bread needed to be tender, which I guaranteed by adding a couple tablespoons of oil. The butter layers would add plenty of butter flavor, but the oil would keep the bread soft and moist. At last – the perfect crescent roll, halfway between a dinner roll and a croissant.

crescent rolls 8

One year ago: Yogurt Hollandaise Sauce
Two years ago: Yellow Cake (comparison of 3 recipes)
Three years ago: Jalapeno Baked Fish with Roasted Tomatoes and Potatoes
Four years ago: Pot Roast
Five years ago: Salmon Cakes, Flaky Biscuits, Hashed Brussels Sprouts

Printer Friendly Recipe
Crescent Rolls (adapted from eat live run)

Makes 16 rolls

I made these slightly whole wheat by using this trick, but if you’d rather they were made completely with white flour, just skip step one, adding the pre-dough ingredients (white flour instead of whole wheat) with the rest of the dough ingredients.

Pre-dough:
4 ounces (about ¾ cup) whole wheat flour
⅓ cup (2.67 ounces) water
¼ teaspoon salt

Dough:
2½ cups (12 ounces) all-purpose flour
2 teaspoons instant yeast
2 tablespoons sugar
¾ teaspoon salt
¾ cup milk plus 1 tablespoon
1 egg
2 tablespoons vegetable or canola oil
6 tablespoons butter, softened
egg wash

1. For the pre-dough: Combine the flour, salt, and water, mixing until a shaggy dough forms. Cover and set aside at room temperature for at least 8 hours or overnight.

2. Combine the pre-dough, flour, yeast, sugar, salt, ¾ cup milk, egg, and oil in the bowl of a stand mixer. Knead about 4 minutes. (You can mix and knead the dough by hand in a large bowl.) Cover and refrigerate for 1 hour.

3. Roll the dough out to about ¼-inch thick. Starting at a short end, spread the softened butter over two-thirds of the dough. Fold the unbuttered third of dough over the buttered middle. Fold the other buttered side over the middle. You’ve just folded the dough in thirds, like a letter, with the butter trapped inside between layers of dough. Wrap the dough in plastic wrap and chill 30 minutes. Roll out to ¼-inch thick again; fold in thirds again; chill another 30 minutes.

4. Roll the dough to ¼-inch thick to a rectangle about 10 by 14-inches. Slice in half lengthwise, creating two 5 by 14-inch rectangles, then alternate diagonal cuts to make 8 triangles from each half of dough. Cut a 1-inch slit in the wide end of each triangle (the side opposite the point). Roll up the triangles, starting at the wide end and pulling the corners away from the slit in the middle. Arrange the rolls on parchment- or silicone-lined baking sheets, about 2 inches apart. Spray with nonstick spray, cover with plastic wrap and let rise until doubled in size, about 1 hour.

5. Meanwhile, heat the oven to 400 degrees. About 5 minutes before baking, remove the plastic wrap and brush the rolls with the egg wash; leave them uncovered. Bake until golden brown, about 18 minutes.

crescent rolls 6

focaccia

focaccia 7

I’ve made focaccia before, years ago, but since Peter Reinhart claims so assertively that his recipe is superior to most focaccia found in America, I thought I’d better give it a try. It has a lot of good things going for it, like herb-scented oil poured on top and a cold overnight fermentation – always a sign of good flavor to come in yeast breads.

focaccia 3

It’s fun to make too. The mixer (if you have one) does most of the messy work, but you still get to play with the soft and stretchy dough to shape it. Then you stick your fingers in the oiled dough to create dimples and spread it into the pan. After that, you throw it in the fridge until you’re ready for it, which is always a good trick for convenience.

focaccia 4

It was definitely good bread, soft in the middle, just a little crisp and almost flaky on top, scented with herbs and olive oil. But – I’m not sure it was the height of focaccia perfection, despite Reinhart’s usually well-deserved swagger. For me, adding a touch more salt or a spoonful of sugar would have given the bread a welcome flavor boost. On the plus side, this gives me the perfect excuse to make more focaccia.

focaccia 5

One year ago: Tartine Country Bread
Two years ago: Spinach Artichoke Pizza
Three years ago: Tofu Mu Shu
Four years ago: Crockpot Pulled Pork

Printer Friendly Recipe
Focaccia (slightly reworded from Peter Reinhart’s Bread Baker’s Apprentice)

For the herb oil:
½ cup olive oil
4 tablespoons chopped fresh herbs (any combination of basil, parsley, rosemary, sage)
¾ teaspoon coarse salt
¼ teaspoon ground black pepper
1 garlic clove, minced

For the bread:
5 cups (22.5 ounces) high-gluten or bread flour
2 teaspoons salt
2 teaspoons instant yeast
2 cups water, at room temperature
6 tablespoons olive oil
½ cup herb oil
Extra olive oil for the pan

1. For the herb oil: Warm the olive oil to about 100 degrees. Add the remaining ingredients; let steep while you prepare the dough.

2. For the bread: In the bowl of a stand mixer, stir together the flour, salt, and yeast. Add the water and oil; mix on low speed with the paddle attachment until all the ingredients form a wet, sticky ball. Switch to the dough hook and mix on medium speed for 5 to 7 minutes, or as long as it takes to create a smooth, sticky dough. The dough should clear the sides of the bowl but stick to the bottom of the bowl. You may need to add additional flour to firm up the dough enough to clear the sides of the bowl, but the dough should still be quite soft and sticky.

3. Sprinkle enough flour on the counter to make a bed about 6 inches square. Using a scraper or spatula dipped in water, transfer the sticky dough to the bed of flour and dust liberally with flour, patting the dough into a rectangle. Let the dough relax for 5 minutes.

4. Coat your hands with flour and stretch the dough from each end to twice its size. Fold it, letter style, over itself to return it to a rectangular shape. Loosely cover with plastic wrap and let it rest for 30 minutes. Repeat the stretching, folding, and resting twice more. After the last (third) fold, cover the dough and let it ferment at room temperature for 1 hour. It should swell but not necessarily double in size.

5. Oil an 18-by-13-inch pan and line with parchment paper. Use a pastry scraper and lightly oiled hands to lift the dough off the counter and transfer it to the prepared pan, maintaining the rectangular shape as much as possible.

6. Spoon half of the herb oil over the dough. Use your fingertips to dimple the dough and spread it to fill the pan simultaneously. Try to keep the thickness as uniform as possible across the surface. If the dough becomes too springy, let it rest for about 15 minutes and then continue dimpling. Don’t worry if you are unable to fill the pan perfectly, especially the corners. As the dough relaxes and proofs, it will spread out naturally. Use more herb oil as needed to ensure that the entire surface is coated with oil.

7. Loosely cover the pan with plastic wrap. Refrigerate the dough overnight (or for up to 3 days).

8. 3 hours before baking, remove the dough from the refrigerator and drizzle the remaining herb oil over the surface; dimple it in. This should allow you to fill the pan completely with the dough to a thickness of about ½-inch. Cover the pan with plastic and proof the dough at room temperature for 3 hours, or until the dough doubles in size, rising to a thickness of nearly 1 inch.

9. Preheat the oven to 500 degrees.

10. Place the pan in the oven. Lower the oven temperature to 450 degrees and bake for 10 minutes. Rotate the pan 180 degrees and continue baking the focaccia for another 5 to 10 minutes, or until it begins to turn a light golden brown. The internal temperature of the dough should register above 200 degrees (measured in the center).

11. Remove the pan from the oven and immediately transfer the focaccia out of the pan onto a cooling rack. Allow the focaccia to cool for at least 20 minutes before slicing or serving.

focaccia 8

pear almond danishes and lemon ricotta danishes

danish 14

I went through a baking drought early this year that lasted a few weeks, maybe a month. I couldn’t explain it, but I just wasn’t interested in baking for the first time in years. I was kind of worried – how long would this last? When would my drive to bake come back?

danish 1

Oh it’s back. It crept back in, but it’s in full force now. The last few weeks, in particular, I’ve taken on some ambitious projects. It started with these danishes, made for a brunch potluck that was in the evening after work. The very next day, I stayed up until midnight flooding sugar cookies with royal icing. A week after that, I made two batches of fancy cupcakes for a bridal shower. I breathed a sigh of relief when that was over, but mixed up another batch of sugar cookie dough just one day later. I’ll decorate those sugar cookies this week, plus make a double batch of tiramisu for my friend’s rehearsal dinner on Friday.

danish 5

Baking projects that are for an event in the evening after work are particularly complicated, especially if the event is toward the end of the week instead of shortly after the weekend. It requires careful balancing of chilling time, lunch hours, and evening schedules. Of course it’s worth it when you’re sitting around with your friends, drinking bellinis and eating eggs Benedict and buttery, flaky danishes on Thursday evening after work. Not just worth it, but so enjoyable that I did it again a week later with cupcakes, and a week after that I’m sure it will be something else. My baking obsession is back.

danish 12

One year ago: Chocolate Pots de Creme
Two years ago: Toasted Coconut Custard Tart
Three years ago: Lemon Cream Cheese Bars
Four years ago: Raspberry Bars

Printer Friendly Recipe
Danishes (adapted from Martha Stewart’s Baking Handbook)

I made 18 danishes from this batch of dough, and they were about 3-inches on a side after baking. Bigger danishes are probably easier to work with; many of mine unfolded when the dough expanded during baking, particularly the square shape with the corners folding in.

½ cup warm milk
2 teaspoons instant yeast
10 ounces (about 2 cups) all-purpose flour
3 tablespoons sugar
1 teaspoon table salt
2 sticks butter, room temperature
1 large egg
1 batch of filling (recipes follow)
egg wash (1 egg mixed with ⅛ teaspoon salt and 1 teaspoon water)

1. In a small measuring cup, stir the yeast into the milk. In the bowl of a stand mixer fitted with the paddle attachment, combine the flour, sugar, and salt. Add 2 tablespoons of butter; mix until evenly combined. Pour in the yeast and milk; mix until the dough starts to look shaggy. Switch to the dough hook; add the egg and knead until the dough just starts to look smooth, 2-3 minutes. Wrap the dough in plastic wrap and refrigerate for at least 2 hours or overnight.

2. On a lightly floured surface, roll the dough out to a 12-inch by 8-inch rectangle, about ¼ inch thick. Distribute the softened butter over two-thirds of the dough, leaving a short end free of butter. Fold the non-buttered third over the middle, then fold the last third over the middle, like folding a letter. Pinch the edges to seal. Roll the dough out to a 12-by-8-inch rectangle again, then fold it in thirds again. Rewrap the dough in plastic wrap; chill 1 hour.

danish 3
(see here for an explanation of the creases on the dough)

3. After the dough has chilled, roll it out and fold it in thirds twice more, then chill another hour, and roll and fold twice more. Wrap tightly and refrigerate for at least four hours or overnight. (This is a good point to freeze the dough too; thaw in the refrigerator overnight.)

4. Roll the dough out to a 12-by-18-inch rectangle about ⅛-inch thick. If the dough becomes too elastic and springs back, cover it and place it in the refrigerator for at least ten minutes, then try rolling again. Be patient; the rolling and chilling could take up to an hour. Cut 12 to 18 squares (see note).

5. For pinwheels: Cut from each corner halfway to the center of each square. Dab about ¼ teaspoon of filling into the center of each square, then fold every other corner toward the center, pressing to seal. Top with one (for smaller danishes) to two (for the larger size) tablespoons of filling.

danish 8

For squares with folded corners: Spoon one (for smaller danishes) to two (for the larger size) tablespoons of filling into the center of each square. Fold each corner to the middle of the dough; press to seal.

danish 9

6. Transfer the danishes to a baking sheet lined with parchment paper or a silicone mat. Cover and either chill overnight or set aside to rise. Heat the oven to 400 degrees. When the danish dough is about doubled in height and is starting to look puffy, brush the danishes with the egg wash. Bake one baking sheet at a time until the danishes are golden brown, 20-25 minutes. Transfer the pan to a wire rack; let the danishes cool on the pan for a few minutes before transferring them to cooling racks to cool to room temperature. Serve within a day.

danish 10

Cheese Danish Filling

Makes enough for 1 batch of danishes

1 cup ricotta cheese
6 tablespoons (2.6 ounces) sugar
⅛ teaspoon salt
1 tablespoon lemon zest
1 large egg
2 teaspoons vanilla
2 tablespoons unsalted butter, melted and cooled

Combine all ingredients. Chill.

danish 11

Pear Almond Danish Filling (rewritten from Martha Stewart’s Baking Handbook)

Makes enough for 1 batch of danishes

⅔ cup slivered almonds, toasted and cooled completely
2 tablespoons flour
½ cup (3.5 ounces) sugar, plus 1 tablespoon
¼ teaspoon salt
2 tablespoons butter
1 large egg
2 pears, peeled, cored, diced finely
¼ cup lemon juice

1. In a food processor, grind the almonds, flour, ½ cup sugar, and salt; add the butter and egg; chill.

2. Heat the pears, lemon juice, and 1 tablespoon sugar in a medium nonstick skillet over medium heat, stirring occasionally, until the pears caramelize, 8-10 minutes. Chill.

danish 15

croissants (tartine bread)

croissants tartine bread 20

My coworker seemed surprised when I told him I was going home at lunch to work on croissants. He wondered if all croissant recipes are so complicated. No. But I chose the most complicated one.

croissants tartine bread 4

I seem to have convinced myself that the recipe with the most steps must produce the best result. By no means is this rule always true, but in this case, it was. Spending my lunch break rolling and shaping buttery dough was a small price to pay for croissants this good.

croissants tartine bread 7

And that’s just the beginning (well, it’s the end of the recipe, but it’s the beginning of me telling you about the recipe). The process starts a couple days earlier, when you feed your starter. If you don’t have a starter, you should make one! It isn’t hard, and I’m more proud of my all wild-yeast bread than anything else I’ve accomplished in the kitchen this year.

croissants tartine bread 11

Once your starter is awake and you’ve mixed up another pre-dough with instant yeast, you’ll make your dough, but instead of kneading it, you’ll spend a minute or so fussing with it every half an hour for a few hours. Once it’s risen and chilled, you can roll it out and start working in the butter, and this process takes a few minutes of fussing over the course of several hours too. Then chill the dough some more. Then roll it out some more. Then, finally, you can shape your croissants! But then you have to let them rise for a couple hours before baking.

croissants tartine bread 16

I actually love recipes like this. I love getting to play with dough for just a few minutes at a time, and because the dough is chilled in between, it’s adaptable to my schedule. And in this case, all that fussing paid off with the best croissants I’ve made yet. My coworker grabbed two, and then he didn’t seem to doubt my lunchtime fussing at all.

croissants tartine bread 18

More experiments with croissants:
Tartine Bakery (the recipe in their first book is different than the recipe in their bread book)
Martha Stewart (using fresh yeast)
Martha Stewart (using instant yeast)

One year ago: Taco Pasta Salad
Two years ago: Green Chile Huevos Rancheros
Three years ago: Pan-Seared Steak with Red Wine Pan Sauce

Printer Friendly Recipe
Croissants (adapted from Tartine Bread)

Makes 16 croissants

I’ve shortened the instructions and added volume measurements. Keep in mind though, that the weight measurements are more precise, so if you have a scale, use it (as always).

The original recipe recommends an egg wash made from 2 egg yolks and 1 teaspoon of heavy cream, but I used a whole egg whisked with a pinch of salt (which loosens the protein structure of the egg) because I didn’t want 2 extra egg whites to use up.

I wouldn’t have minded the croissants being just a little bit sweeter. Next time I’ll increase the sugar to ½ cup (100 grams).

You don’t use all of the leaven, because the leftover leaven becomes the starter that you keep and feed and use in the future.

Poolish:
200 grams (1½ cups) all-purpose flour
200 grams (⅔ cup) water, room temperature
3 grams (1 teaspoon) instant yeast

Leaven:
1 tablespoon starter
220 grams (1⅔ cups) all-purpose flour
220 grams (¾ cup) water, room temperature

Dough:
450 grams (1¾ cup) whole milk, room temperature
300 grams leaven
400 grams polish (this is all of the poolish)
1000 grams (7 cups) bread flour
28 grams (4½ teaspoons) salt
85 grams (7 tablespoons) sugar
10 grams (1 tablespoon) instant yeast

400 grams (28 tablespoons, although I used a full pound (32 tablespoons)) unsalted butter
½ cup all-purpose flour
Egg wash

1. To make the poolish: In a small bowl, mix the flour, water, and yeast. Cover and let stand at room temperature for 3-4 hours or store overnight in the refrigerator.

2. To make the leaven: In a small bowl, mix the starter, flour, and water. Cover and let rise overnight.

croissants tartine bread 2

3. Add the milk, leaven, and poolish to a large mixing bowl; stir to break up the doughs. Add the flour, salt, sugar, and yeast; mix thoroughly until there are no bits of dry flour. Cover and let rest for 25-40 minutes. Fold the dough a few times by using a dough scraper to scoop up one side of the dough and drape it over the rest of the dough.

croissants tartine bread 3

4. Allow the dough to ferment for 3 to 4 hours and give it another few turns every 30 minutes. This takes the place of kneading. Be more gentle with the turning toward the end of the rising time. The dough is ready when it’s slightly increased in volume and is full of air bubbles. Flatten the dough into a rectangle, wrap it in plastic wrap, and refrigerate for 2-3 hours.

croissants tartine bread 5

5. Just before rolling out the dough, cut the cold butter into cubes. Gradually adding the ½ cup flour, pound the butter with a rolling pin until it comes together into a cohesive mass. Alternatively, use a stand mixer fitted with the paddle attachment to mix the cold butter and flour. Mold the butter into a rectangle measuring 8 by 14 inches.

croissants tartine bread 6

6. On a work surface dusted with flour, roll the dough out to a rectangle measuring 12 by 20 inches. Lay the butter block over the dough so that it covers about two-thirds of the dough. Fold the uncovered third of dough toward the center over the butter. Fold the other end of the dough, with the butter, over the center, as if you’re folding a letter. Turn the dough a quarter turn; roll it again into a 12 by 20-inch rectangle, then fold it in thirds. Wrap the dough in plastic wrap and refrigerate for 1 hour. (You can chill the dough longer, but you’ll need to let it warm up a few minutes before rolling so the butter isn’t too stiff.)

croissants tartine bread 10

7. Remove the dough from the refrigerator. Roll it out to a 12 by 20-inch rectangle, fold it in thirds, rotate it a quarter-turn, and repeat the rolling and folding. Chill for an hour. Repeat the rolling, folding, rotating, rolling and folding once more. Wrap the folded dough in plastic wrap and freeze it for 1-2 hours. If you don’t plant to finish the croissants until the next morning, transfer the dough to the refrigerator after a couple hours in the freezer. (You can store the dough in the freezer for several days at this point, letting it defrost overnight before using.)

croissants tartine bread 14

8. Roll the dough into a rectangle that is 18 by 24 inches and is about ½-inch thick. If the dough becomes very elastic, let it rest (preferably in the refrigerator) for several minutes before continuing the rolling. Cut the dough in half to form two 9 by 24-inch rectangles. Cut each rectangle into 8 triangles. Roll up each triangle, starting at the wide side. Transfer the croissants to a parchment-lined baking sheet, spacing them at least an inch apart. Cover them loosely and let rise until they are about 50 percent larger than their original size, about 2 hours. They will be firm, but puffed. (You can also refrigerate them overnight at this point, which is what I did.)

croissants tartine bread 15

9. Heat the oven to 425 degrees. Brush the croissants with the egg wash. Bake until they are deep golden brown, crisp, and flaky, about 30 minutes. Let cool slightly before serving.

croissants tartine bread 17

grilled pita

pita 4

It’s news to no one that homemade pita is a hundred times better than storebought pita. But it might be news to some that grilled homemade pita is a hundred times better than baked homemade pita. True story.

pita 7

Pita dough and pizza dough are so similar that I keep batches in the freezer (actually lately I’ve been using Tartine’s country bread dough) and use them interchangeably. Both are rounds of dough that are stretched out thin, and when cooked, are expected to be spotty browned but still tender. So if grilled pizza is so popular lately, why not grilled pita?

pita 6

Grilling pita is particularly convenient for me because all of my favorite pita fillings are grilled. So once the chicken comes off the grill and is resting, I plop a round of dough on the hot coals, wait a minute until it bubbles and browns, then flip it. Your pita breads likely won’t be perfectly round, because transferring sticky stretchy dough to hot hot coals isn’t a trivial process. But what they might lack in symmetry, they make up for in grill lines – not to mention crisp edges, soft middles, and that touch of smoke that only the grill can provide.

pita 1

One year ago: Baked French Toast
Two years ago: Pasta with No-Cook Tomato Sauce and Fresh Mozzarella
Three years ago: Blackberry Swirl Ice Cream

Printer Friendly Recipe
Grilled Pocketless Pitas

12 pitas

2½ pounds pizza dough, fully risen
nonstick spray or olive oil

1. Working on a damp towel, cut the dough into 12 pieces. Shape each into a ball by gently pulling the edges toward one side and pinching the seam to seal it. Roll the ball of dough on the towel to smooth and even the shape. Let the dough rest for 15-30 minutes. Meanwhile, heat the grill to medium-high heat.

2. Pick up one ball of dough by an edge; stretch and pull it into a 5- to 6-inch round. If it becomes too elastic to shape, set it aside, loosely covered, for 5 minutes before trying again. Spray the tops of the shaped rounds with nonstick spray or brush with olive oil.

3. Carefully lay the pita rounds, oiled side down, directly on the grill. When the pita bubbles and the bottom is spottily browned, after 1-2 minutes, use tongs to flip the pita. Continue cooking until the second side begins to brown, about 1 minutes. Serve immediately or wrap in a kitchen towel for up to 30 minutes.

pita 3