Archives for July 2008

filbert gateau with praline buttercream (daring bakers)

There were a lot of similarities between the Filbert Gateau that Chris chose for this month’s Daring Baker challenge and the opera cake we made a few months ago. This works out well for me, because I could definitely use the cake-building practice. And I don’t know if I’m getting better at this whole baking thing or what, but this cake came together quite nicely for me.

I made the entire opera cake, from start to finish, in one day. I thought it would be fun, and while there were fun aspects, by the end, I never wanted to bake again (for two days). This time I got smart and did at least a small portion of the recipe ahead of time. There was still a good amount of baking to be done on the final day – most of the cake, the buttercream, the ganache, and the assembly, but it was manageable and fun.

The only part of the recipe that gave me fits was the praline. I have made caramel so many times before with nary a problem. But this time, I screwed it up four times in a row. I tried different methods, but each time, sugar crystals formed, interrupting my smooth caramel. I never did get it right – on the last attempt, there were only a few crystals in the liquid, and I decided that it would be a good learning experience for me to see what a screwed-up caramel was like. (How’s that for justification?) It turns out that screwed-up caramel is opaque and looks milky instead of being shiny and amber-colored and jewel-like. The taste was fine though, and I was grinding a good portion of it into paste anyway.

Everything else went smoothly. This was my most successful experience with these light egg-leavened cakes. But cutting the cake into layers created a lot of crumbs. I think I’ve heard that if I refrigerate or partially freeze the cake (wrapped well with plastic, I assume), it makes this process easier with no detrimental effects on the cake? Is this true?

This is the first time I’ve covered a cake with chocolate ganache. It’s not as smooth on the sides as I’d prefer, which I think is because my cake had fallen in the middle just a bit, so a lot of the ganache pooled there and there wasn’t as much to cover the sides. Even with my less-than-perfect coating, I think ganache makes for an impressive presentation.

Dave and I both enjoyed the flavor of the cake as well. The unsweetened whipped cream in between layers kept the cake from being too sweet, and the bittersweet chocolate was the perfect contrast to the sweet cake and buttercream. The cake wasn’t as praliney as I might have liked though. I wonder if I could mix in more praline paste with the buttercream? In the end though, this was a great learning experience and a lot of fun, with tasty results.

Filbert Gateau with Praline Buttercream (from Great Cakes, by Carol Walter)

Makes 1 10-inch cake, about 12 servings

1 Filbert Genoise
1 recipe sugar syrup, flavored with dark rum
1 recipe Praline Buttercream
½ cup heavy cream, whipped to soft peaks
1 recipe Apricot Glaze
1 recipe Ganache Glaze, prepared just before using

Filbert Genoise
Because of the amount of nuts in the recipe, this preparation is different from a classic genoise.

1½ cups hazelnuts, toasted/skinned
⅔ cup (2.65 ounces) cake flour, unsifted
2 tablespoons cornstarch
7 large egg yolks
1 cup (7 ounces) sugar, divided ¼ and ¾ cups
1 teaspoon vanilla extract
½ teaspoon grated lemon rind
5 large egg whites
¼ cup warm, clarified butter (100 – 110 degrees)

Position rack in the lower 3rd of the oven and preheat to 350 degrees. Grease and flour a 10″ X 2″ inch round cake pan.

Using a food processor, process nuts, cake flour, and cornstarch for about 30 seconds. Then, pulse the mixture about 10 times to get a fine, powdery mixture. You’ll know the nuts are ready when they begin to gather together around the sides of the bowl. While you want to make sure there aren’t any large pieces, don’t over-process. Set aside.

Put the yolks in the bowl of an electric mixer, with the whisk attachment, and beat until thick and light in color, about 3-4 minutes on med-high speed. Slowly, add ¾ cup of sugar. It is best to do so by adding a tablespoon at a time, taking about 3 minutes for this step. When finished, the mixture should be ribbony. Blend in the vanilla and grated lemon rind. Remove and set aside.

Place egg whites in a large, clean bowl of the electric mixer with the whisk attachment and beat on medium speed, until soft peaks. Increase to med-high speed and slowly add the remaining ¼ cup of sugar, over 15-20 seconds or so. Continue to beat for another ½ minute. Add the yolk mixture to the whites and whisk for 1 minute.

Pour the warm butter in a liquid measure cup (or a spouted container). Put the nut meal in a mesh strainer (or use your hand – working quickly) and sprinkle it in about 2 tablespoons at a time – folding it carefully for about 40 folds. Be sure to exclude any large chunks/pieces of nuts. Again, work quickly and carefully as to not deflate the mixture. When all but about 2 tablespoons of nut meal remain, quickly and steadily pour the warm butter over the batter. Then, with the remaining nut meal, fold the batter to incorporate, about 13 or so folds.

With a rubber spatula, transfer the batter into the prepared pan, smoothing the surface with the spatula or back of a spoon. (If collected butter remains at the bottom of the bowl, do not add it to the batter! It will impede the cake rising while baking.)

Tap the pan on the counter to remove air bubbles and bake in the preheated oven for 30-35 minutes. You’ll know the cake is done when it is springy to the touch and it separates itself from the side of the pan. Remove from oven and allow to stand for 5 minutes. Invert onto a cake rack sprayed with nonstick coating, removing the pan. Cook the cake completely.

*If not using the cake right away, wrap thoroughly in plastic wrap, then in a plastic bag, then in the refrigerator for up to 3 days. If freezing, wrap in foil, then the bag and use within 2-3 months.

Sugar Syrup
Makes 1 cup, good for one 10-inch cake – split into 3 layers

1 cup water
¼ cup (1.75 ounces) sugar
2 tablespoons dark rum or orange flavored liqueur

In a small, yet heavy saucepan, bring the water and sugar to a boil and simmer for 5 minutes. Remove from heat, add the liqueur. Cool slightly before using on the cake. *Can be made in advance.

Praline Buttercream
1 recipe Swiss Buttercream
⅓ cup praline paste
1½-2 tablespoons Jamaican rum (optional)

Blend ½ cup buttercream into the paste, then add to the remaining buttercream. Whip briefly on medium-low speed to combine. Blend in rum.

Swiss Buttercream
4 large egg whites
¾ cup sugar
1½ cups (3 sticks) unsalted butter, slightly firm
1½-2 tablespoons Grand Marnier or liqueur of your choice
1 teaspoon vanilla

Place the egg whites in the bowl of a electric mixer and beat with the whisk attachment until the whites are foamy and they begin to thicken (just before the soft peak stage). Set the bowl over a saucepan filled with about 2 inches of simmering water, making sure the bowl is not touching the water. Then, whisk in the sugar by adding 1-2 tablespoons of sugar at a time over a minutes time. Continue beating 2-3 minutes or until the whites are warm (about 120 degrees) and the sugar is dissolved. The mixture should look thick and like whipped marshmallows.

Remove from pan and with either the paddle or whisk attachment, beat the egg whites and sugar on medium-high speed until it’s a thick, cool meringue – about 5-7 minutes. (Do not overbeat). Set aside.

Place the butter in a separate clean mixing bowl and, using the paddle attachment, cream the butter at medium speed for 40-60 seconds, or until smooth and creamy. (Do not overbeat or the butter will become too soft.)

On medium-low speed, blend the meringue into the butter, about 1-2 tablespoons at a time, over about 1 minute. Add the liqueur and vanilla and mix for 30-45 seconds longer, until thick and creamy.

Refrigerate 10-15 minutes before using.

Wait! My buttercream won’t come together! Reheat the buttercream briefly over simmering water for about 5 seconds, stirring with a wooden spoon. Be careful and do not overbeat. The mixture will look broken with some liquid at the bottom of the bowl. Return the bowl to the mixer and whip on medium speed just until the cream comes back together.

Wait! My buttercream is too soft! Chill the buttercream in the refrigerator for about 10 minutes and rewhip. If that doesn’t work, cream an additional 2-4 tablespoons of butter in a small bowl – making sure the butter is not as soft as the original amount, so make sure is cool and smooth. On low speed, quickly add the creamed butter to the buttercream, 1 tablespoon at a time.

Refrigerate in an airtight container for up to 5 days, or can be frozen for up to 6 months. If freezing, store in 2 16-oz. plastic containers and thaw in the refrigerator overnight or at room temperature for several hours.

Praline Paste
1 cup (4½ ounces) hazelnuts, toasted/skinless
⅔ cup (4.65 ounces) sugar

Line a jelly roll pan with parchment and lightly butter.

Put the sugar in a heavy 10-inch skillet. Heat on low flame for about 10-20 min until the sugar melts around the edges. Do not stir the sugar. Swirl the pan if necessary to prevent the melted sugar from burning. Brush the sides of the pan with water to remove sugar crystals. If the sugar in the center does not melt, stir briefly. When the sugar is completely melted and caramel in color, remove from heat. Stir in the nuts with a wooden spoon and separate the clusters. Return to low heat and stir to coat the nuts on all sides. Cook until the mixture starts to bubble. (Remember – extremely hot mixture.) Then onto the parchment lined sheet and spread as evenly as possible. As it cools, it will harden into brittle. Break the candied nuts into pieces and place them in the food processor. Pulse into a medium-fine crunch or process until the brittle turns into a powder. To make paste, process for several minutes. Store in an airtight container and store in a cook dry place. Do not refrigerate.

Apricot Glaze
Good for one 10-inch cake

⅔ cup thick apricot preserves
1 tablespoon water

In a small, yet heavy saucepan, bring the water and preserves to a slow boil and simmer for 2-3 minutes. If the mixture begins to stick to the bottom of the saucepan, add water as needed.

Remove from heat and, using a strainer, press the mixture through the mesh and discard any remnants. With a pastry brush, apply the glaze onto the cake while the cake is still warm. If the glaze is too thick, thin to a preferred consistency with drops of water.

Ganache Glaze
Makes about 1 cup, enough to cover the top and sides of a 9 or 10 inch layer or tube cake

6 oz. (good) semisweet or bittersweet chocolate, like Lindt
6 oz. (¾ cup heavy cream
1 tablespoon light corn syrup
1 tablespoon Grand Marnier, Cointreay, or dark Jamaican rum (optional)
¾ teaspoon vanilla
½ – 1 teaspoon hot water, if needed

Blend vanilla and liqueur/rum together and set aside.

Break the chocolate into 1-inch pieces and place in the basket of a food processor and pulse until finely chopped. Transfer into a medium sized bowl and set aside.

Heat the cream and corn syrup in a saucepan, on low, until it reached a gentle boil. Once to the gently boil, immediately and carefully pour over the chocolate. Leave it alone for one minute, then slowly stir and mix the chocolate and cream together until the chocolate is melted and incorporated into the cream. Carefully blend in vanilla mixture. If the surface seems oily, add ½ – 1 teaspoon hot water. The glaze will thicken, but should still be pourable. If it doesn’t thicken, refrigerate for about 5 minutes, but make sure it doesn’t get too cold!

Assembling Cake

Cut a cardboard disk slightly smaller than the cake. Divide the cake into 3 layers and place the first layer top-side down on the disk. Using a pastry brush, moisten the layer with 3-4 tablespoon of warm sugar syrup. Measure out 1 cup of praline buttercream and set aside.

Spread the bottom layer with a ¼-inch thickness of the remaining buttercream. Cover with ½ of the whipped cream, leaving ¼-inch border around the edge of the cake. Place the middle layer over the first, brush with sugar syrup, spreading with buttercream. Cover with the remaining whipped cream.

Moisten the cut side of the third layer with additional sugar syrup and place cut side down on the cake. Gently, press the sides of the cake to align the layers. Refrigerate to chill for at least 30 minutes.

Lift the cake by sliding your palm under the cardboard. Holding a serrated or very sharp night with an 8-inch blade held parallel to the sides of the cake, trim the sides so that they are perfectly straight. Cut a slight bevel at the top to help the glaze drip over the edge. Brush the top and sides of the cake with warm apricot glaze, sealing the cut areas completely. Chill while you prepare the ganache.

Place a rack over a large shallow pan to catch the ganache drippings. Remove the gateau from the refrigerator and put it the rack. With a metal spatula in hand, and holding the saucepan about 10 inches above the cake, pour the ganache onto the cake’s center. Move the spatula over the top of the ganache about 4 times to get a smooth and mirror-like appearance. The ganache should cover the top and run down the sides of the cake. When the ganache has been poured and is coating the cake, lift one side of the rack and bang it once on the counter to help spread the ganache evenly and break any air bubbles. (Work fast before setting starts.) Patch any bare spots on the sides with a smaller spatula, but do not touch the top after the “bang”. Let the cake stand at least 15 minutes to set after glazing.

Garnish.

summer fruit galette (twd)

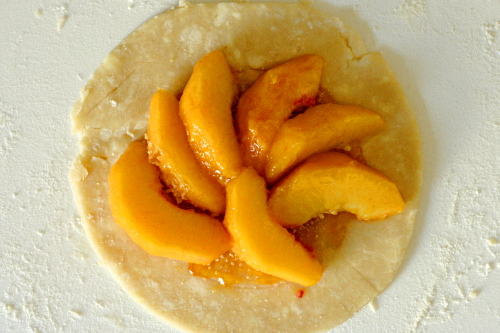
It’s safe to say that this Summer Fruit Galette, chosen for TWD by Michelle, wasn’t my best effort. My baking has gotten really out of control lately – my freezer is full of cupcakes, cookies, muffins, and breads. There’s cookie dough and half a cake in my refrigerator. (But I finally found someone to offload some of this excess onto, so I’m excited about that!) My capacity to bake has far outstripped our capacity to eat. I thought the galette would fit into this pattern perfectly because I could pare down the recipe, which would be tricky with a regular pie.

Last time I made Dorie’s pie crust, I was pretty happy with it, but was put off by the shortening. Mari suggested substituting lard for the shortening, and since the galette uses the same dough as the blueberry pie did, I had that opportunity. I didn’t notice any big differences between the crusts made with shortening and with lard – they seemed equally easy to work with and flavorful. But a few weeks ago, I had noticed two or three TWD members who had problems with the pie crust sort of melting in the oven, and I had a little of that problem this time. In short, I’m going to stick with my old favorite pie crust. They’re both good, but I’ve been using that one for years and I’ve always been happy with it. (I’ll put it on my blog at some point or another – probably the next pie recipe TWD makes.)

The rest of my problems with the galette were my fault. I only made a quarter of the recipe, and I’m afraid that that’s an impractically small fraction. The ratio between the area necessary to hold fillings and the area necessary to pleat the edges gets thrown off, and you end up with far more crust per filling than the recipe intended. And one of the parts of this recipe that I was very interested in was the custard topping that gets poured over the fruit, but again, with so little filling exposed, I was only able to dribble in the slightest amount of custard mix before it overflowed and made a mess.

Despite all of my foibles making this dessert, I still really enjoyed it. I can tell the potential for a really amazing dessert is there. This is another example of how Dorie takes just a few ingredients and shows them off to their best advantage.

The recipe can be found on Melissa’s website.

white cake comparison

Several months ago for the Daring Bakers, I made Dorie Greenspan’s Perfect Party Cake. Most of the group members, including myself, had very positive things to say about this cake. However, many of us, again including myself, found that the cake didn’t rise much. Granted, the copy of the recipe I used had a typo in it regarding the amount of flour, but that wasn’t the case with everyone who had problems.

So a few weeks ago when I made white cupcakes, I used a different recipe, by Nick Malgieri. The recipe calls for 2 cups all-purpose flour, but I was pretty sure I’d like it better with cake flour, so I used 2¼ cups cake flour instead. The cupcakes were definitely good, but just the slightest bit dry.

Now I was on a mission. Is it just a characteristic of white cake that it’s dry? Would Dorie’s recipe be perfect if I used the correct amount of flour, or would Nick’s be better if I followed it exactly? And why not throw a third recipe into the mix, and try one from my old favorite, Cooks Illustrated?

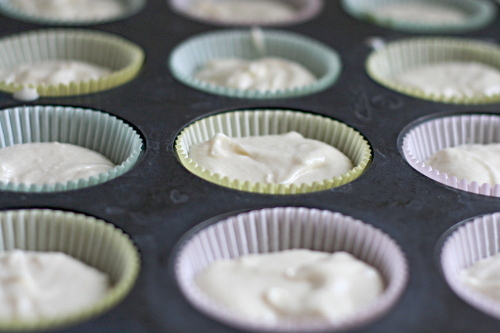
I pared the recipes down so that they each used 2 eggs, and I made cupcakes. I made them all in one afternoon, leaving the oven on between batches and not adjusting the dial, to make sure oven temperature wasn’t a factor in any differences. I left out any flavorings besides vanilla, used the same amount of vanilla in each, and used whole milk in all three recipes.

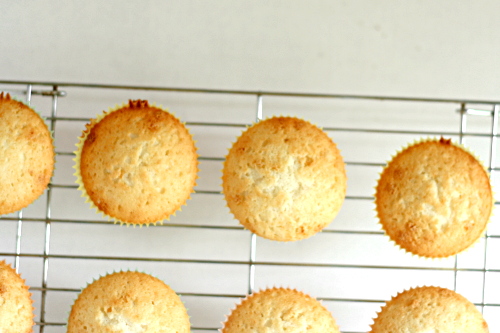
You can see that the three look very different. Left to right, the photos show Dorie’s, Nick’s, and CI’s. Nick’s looks drastically different, which I can attest is due to the all-purpose flour. The photo below shows the result of Nick’s recipe when made with cake flour. It more closely resembles the other two.

The difference in taste and texture mirrors the difference in looks. Nick’s cupcakes are far drier than Dorie’s and CI’s. You can see that their texture looks more muffin-like with a coarser crumb. Dorie and CI’s are more similar. They’re both fluffy and light with a nice resiliency. Dorie’s cupcakes rose nicely, in contrast to when I made the layer cake in March.

At first, Dave and I agreed that CI’s beat out Dorie’s by a hair. They seemed moister and more flavorful. But later on, I did a comparison of just those two, unfrosted, and I was able to spot some subtle differences. CI’s cupcakes are undeniably moister. They are also sweeter. Dorie’s cupcakes aren’t as sweet, but I do like their flavor. Without the sweetness, some of the other flavors in the cupcake are noticeable.

The question then arises – what causes these differences? I’ve laid out the points of the recipe that I think would have the most significant impact on the outcome. I’ve entered Malgieri’s recipe as using 9 ounces (2¼ cups) cake flour instead of 10 ounces (2 cups) flour, since it seems pretty clear that all-purpose flour in a cake as light as white cake is a bad idea. I’m guessing Malgieri’s cupcakes are drier because they use less milk. Obviously CI’s are sweeter because they have more sugar. Dorie’s and CI’s recipes, which produced similar results, are actually pretty different. Dorie’s uses less butter and sugar, which I’m assuming is balanced by more milk and less egg whites so the cupcakes aren’t dry. I think the coarser, more muffin-like texture of Malgieri’s cupcakes might arise from the lack of a final beating step after all the ingredients are added.

I wonder if I can tweak the recipes to get my favorite aspects of each. It’s not as simple as just reducing the sugar in CI’s recipe, because sugar contributes moistness. But maybe I should reduce the sugar by 2 tablespoons and increase the milk by 2 tablespoons. It’s worth trying, but to be honest, after this experiment, I think it’s going to be a while before I feel the urge to make white cake again!

Classic White Layer Cake (from Cooks Illustrated)

Serves 12

CI note: If you have forgotten to bring the milk and egg white mixture to room temperature, set the bottom of the glass measure containing it in a sink of hot water and stir until the mixture feels cool rather than cold, around 65 degrees. Cake layers can be wrapped and stored for one day.

Nonstick cooking spray
2¼ cups cake flour (9 ounces), plus more for dusting the pans
1 cup whole milk, at room temperature
6 large egg whites (¾ cup), at room temperature
2 teaspoons almond extract
1 teaspoon vanilla extract
1¾ cups granulated sugar (12¼ ounces)
4 teaspoons baking powder
1 teaspoon table salt
12 tablespoons unsalted butter (1½ sticks), softened but still cool

1. For the Cake: Set oven rack in middle position. (If oven is too small to cook both layers on a single rack, set racks in upper-middle and lower-middle positions.) Heat oven to 350 degrees. Spray two 9-inch round cake pans with nonstick cooking spray; line the bottoms with parchment or waxed paper rounds. Spray the paper rounds, dust the pans with flour, and invert pans and rap sharply to remove excess flour.

2. Pour milk, egg whites, and extracts into 2-cup glass measure, and mix with fork until blended.

3. Mix cake flour, sugar, baking powder, and salt in bowl of electric mixer at slow speed. Add butter; continue beating at slow speed until mixture resembles moist crumbs, with no powdery streaks remaining.

4. Add all but ½ cup of milk mixture to crumbs and beat at medium speed (or high speed if using handheld mixer) for 1½ minutes. Add remaining ½ cup of milk mixture and beat 30 seconds more. Stop mixer and scrape sides of bowl. Return mixer to medium (or high) speed and beat 20 seconds longer.

5. Divide batter evenly between two prepared cake pans; using rubber spatula, spread batter to pan walls and smooth tops. Arrange pans at least 3 inches from the oven walls and 3 inches apart. (If oven is small, place pans on separate racks in staggered fashion to allow for air circulation.) Bake until thin skewer or toothpick inserted in the center comes out clean, 23 to 25 minutes.

6. Let cakes rest in pans for 3 minutes. Loosen from sides of pans with a knife, if necessary, and invert onto wire racks. Reinvert onto additional wire racks. Let cool completely, about 1½ hours.

Dorie Greenspan’s Perfect Party Cake recipe can be found here.

Classic White Cake (from Nick Malgieri)

12 tablespoons (1½ sticks) unsalted butter, softened
1½ cups sugar
2 cups all-purpose flour
2 teaspoons baking powder
¼ teaspoon salt
6 large egg whites (¾ cup)
¾ cup milk
2 teaspoons vanilla extract
2 (9-inch) diameter by 1 ½ -inch deep layer pans or 1 (13 by 9 by 2-inch) pan, buttered and bottoms lined with parchment or waxed paper

Set a rack at the middle level of the oven and preheat to 350 degrees. In a large mixing bowl, beat butter and sugar for about 5 minutes, until light and fluffy. Stir together flour, baking powder and salt. Set aside. Combine egg whites, milk and vanilla extract. Add ⅓ of the flour mixture to butter mixture then add half the milk mixture. Continue to alternate beginning and ending with flour mixture. Scrape bowl and beater often. Pour batter into prepared pan(s) and smooth top with a metal spatula. Bake cake(s) about 25 to 30 minutes, or until a toothpick inserted in the center emerges clean. Cool in pan on a rack for 5 minutes, then turn out onto a rack, remove paper and let cool completely.

*To make cupcakes from any of these recipes, line a standard-sized muffin pan with baking-cup liners. Fill cups just over ½ full with batter. Bake at 350 degrees for 18-21 minutes.

summer rolls

I am not a collector of cookbooks. I do have one full shelf of about twenty or so, but I’m not one to idly buy any book I get excited about. Unless I’m interested in a very good proportion of the recipes in the book, I won’t buy it.

Unless it’s only three dollars, and every recipe has several pictures, and a surprising number of those recipes look good. I recently found a Thai Cooking Step-by-Step book in the bargain aisle and couldn’t pass it up.

The first recipe, and probably the one I was the most excited about, is for summer rolls, rice paper wrappers rolled around vegetables, rice vermicelli, and shrimp. I checked out a few recipes before making them, but most were similar, so I only slightly adapted the one in the book.

Every recipe included shrimp, rice vermicelli, cilantro and carrots. A few also included cucumber and Boston lettuce, both of which I wanted to include. One added mint, one Thai basil, and one preferred Thai basil but offered mint as an alternative. I haven’t been able to find Thai basil (although I haven’t looked very hard), so I used mint the first time I made these. Dave and I both hated the mint. I skipped the extra herbs entirely the second time, just using cilantro, and we much preferred it that way.

I struggled with what to do with the lettuce. I really wanted it inside the roll, similar to spider rolls. I tried it, but it was so bulky that I couldn’t get the summer rolls to make a tight wrap. Leaving the lettuce on the outside was preferable.

I thought the dipping sauce made from the recipe included in the step-by-step book was too pungent. The second time I made these, I used a recipe from another recently-acquired Asian cookbook (but I thought I didn’t buy many cookbooks?), and it was very good.

Admittedly, this isn’t the quickest recipe to put together. I kept thinking it would be pretty fast, since there’s very little cooking. Of course whenever you have to individually prepare fillings and wrappers, there will be a significant time investment. But for such a healthy and delicious meal, it’s worth it to me.

As per Joelen’s suggestion, I am submitting this entry to her Asian Appetizers event.

Update 9.21.08: I made this again and decided the recipe I originally had here needed a few tweaks.  I reduced the vermicelli from 2 ounces to 1.5 ounces and cut all of the dip ingredients in half.  Also, it only took me 45 minutes to make these, so it’s not quite the “significant time investment” that I originally thought.

Summer Rolls (adapted from Fresh Spring Rolls in Thai Cooking Step-by-Step, from the Confident Cooking Series)

Makes 8 rolls

16 medium shrimp, peeled and deveined
1.5 ounces rice vermicelli
8 rice paper wrappers
½ medium cucumber, cut into matchsticks
1 medium carrot, cut into matchsticks
16 Thai basil leaves (optional)
½ cup (0.5 ounces) loosely packed cilantro leaves
8 small leaves Boston lettuce (or 4 large leaves, torn in half)

1. Fill a medium skillet with water and bring to a boil. Add 1 teaspoon salt and the shrimp and cook just until the shrimp are opaque, about 3 minutes. Remove the pan from the heat and remove the shrimp from the pan using a slotted spoon. Cut the shrimp in half lengthwise. Add the vermicelli to the hot liquid and let set until tender, about 5 minutes. Remove the vermicelli from the pan.

2. Place a rice paper wrapper in the hot liquid and leave until softened, about one minute. Remove it from the water and place it on a work surface. Place 4 shrimp halves side-by-side in center of wrapper and top with 2 basil leaves, 1 tablespoon cilantro, a few carrot and cucumber strips, and a small amount of rice noodles.

3. Fold up bottom 2-inch border of wrapper over filling. Fold left, then right edge of wrapper over filling. Roll filling to top edge of wrapper to form tight cylinder.  Lay each roll in a leaf of lettuce and place on a serving platter.  Serve with dipping sauce.

Summer Roll Dipping Sauce (adapted from Nouc Cham in Corinne Trang’s Essentials of Asian Cuisine)

1 tablespoons granulated sugar
1.5 tablespoons fish sauce
1/4 cup lime or lemon juice
1 tablespoon water
1 small garlic clove, minced
1/8 teaspoon crushed red pepper flakes

Combine all ingredients. Let stand for 30 minutes to allow the flavors to come together.

cherry rhubarb cobbler (twd)

Amanda chose possibly the healthiest recipe in the TWD cookbook. A portion of the flour in the biscuits is whole wheat and there’s <gasp> less than a tablespoon of butter per serving.

Combining rhubarb and cherries is a little unusual – Dorie does it because they have contrasting and complimentary flavors. Fair enough, but they also both have notoriously short seasons that only slightly overlap. I was lucky to find fresh rhubarb still available.

I love rhubarb in uses like this – it cooks down so soft as to be unnoticeable except for the sweet-tart flavor it lends. Sweet cherries, it turns out, I’m not so fond of in cooked fruit desserts. It sounds weird, but I’m annoyed at how well they hold their shape. I guess I want them to cook down and blend in with the other filling ingredients.

The biscuits were fine. Not as light and tender as the ones from Dorie’s other cobbler; these were more dense and bready. (I swear I didn’t overmix them.) They weren’t bad by any means, but maybe a little more wholesome than I prefer for dessert.

Dave, of course, loved the whole thing. He generally prefers healthier food than I do. When we eat out, I order steak and potatoes while he gets fish and vegetables. This cobbler was right up his alley.

Amanda will post the recipe on her blog.

soba salad with feta and peas

Apparently I can’t always predict when a dish is going to be good. The only reason I made this was to use up some soba noodles and scallions. Then I found two opened bags of peas in the freezer and half a lemon in the refrigerator, so the meal seemed worth making even if it ended up being no better than edible.

There are some unusual ingredient combinations in this recipe. Soba noodles and feta? Soy sauce and lemon juice? This is why I had my doubts.

I was really surprised when the meal wasn’t just edible, but I loved it. Between the lemon juice and the feta, I was expecting it to be too sour, but the tartness was nicely balanced by the soy sauce and sugar.

Not only was this delicious, it’s one of the easiest meals I’ve made recently. Only one ingredient needs to be chopped, which is a such a welcome change from the meals I normally cook. It’s nutritionally balanced on its own, requiring no side dishes to be a full meal. It can be served warm or cold. I had it ready as soon as Dave got home from work, but when he decided to work out and shower before eating, it was no problem to set the salad aside until we were ready.

Really, this might be the perfect dish – tasty, healthy and easy. I’m already looking for the next opportunity to make it.

Soba Salad with Feta and Peas (adapted from Gourmet July 2006)

Makes 4 servings

1 (10- to 12-ounce) package soba noodles*
1 (10-ounce) package frozen baby peas
3 tablespoons olive oil
2 tablespoons fresh lemon juice
2 teaspoons soy sauce
1 teaspoon sugar
¾ teaspoon salt
¾ teaspoon black pepper
6 oz feta, crumbled (¾ cup)
4 scallions, finely chopped

1. Cook noodles and peas together in a 6- to 8-quart pot of lightly salted boiling water until noodles are tender, 4 to 6 minutes.

2. While noodles cook, whisk together olive oil, lemon juice, soy sauce, sugar, salt, and pepper in a large bowl.

3. Drain noodles and peas well in a colander, then rinse under cold running water to stop cooking. Drain well again, then add to dressing along with feta and scallions. Grind more black pepper to taste over salad.

pain a l’ancienne

Cooks Illustrated’s Chicken with 40 Cloves of Garlic recipe is cooked through a combination of roasting and braising, which keeps the meat moist and the skin crisp. Once the chicken is cooked, the braising liquid is made into a delicious garlicky herbed sauce. I supposed you could make some creamy rich mashed potatoes to serve with the sauce, but I love to dip bits of delicious artisan breads in it. For this meal, I think you need the absolutely best bread you can get. I haven’t found a fantastic bakery in my area, so that means I have to make it myself.

I know this is supposed to be the Dinner Party Menu Ode to Cooks Illustrated, but I strayed from them for the bread. They do have a great recipe for baguettes that you should check out if you have access to it, but I wanted to try Peter Reinhart’s pain a l’ancienne. Reinhart loves this recipe – he discusses it in length in the introduction before providing his recipe later in the book. I had made it once before with mixed results.

The recipe is actually less work than many other bread recipes, especially flavorful artisanal breads. Like all of Reinhart’s recipes, it’s developed to squeeze out as much flavor as possible from the simplest list of ingredients (flour, salt, yeast, water). Instead of requiring a pre-ferment, which basically means that the dough has to be made twice, pain a l’ancienne needs only be mixed and kneaded once, and there’s not even any proofing to worry about.

The key is that the dough is made with ice water and then immediately refrigerated overnight. The yeast slowly wakes up and does its thing, making its way through the flour and releasing every bit of flavor possible. All that’s left to do the day of baking is give the dough a chance to warm up and rise some more, mold the very wet dough into some semblance of loaves, and bake.

The result is some of the best bread I’ve ever made. I can’t think of how to describe the smell, but it’s so much more than homemade bread. The flavor matches the rich smell, and the crumb is chewy and tender.

The problem I’m having with the bread is the crust. The first time I made this recipe, which was a year or two ago, I followed Reinhart’s instructions to sprinkle the parchment paper with cornmeal before putting my dough on it. The result was a bottom crust ingrained with cornmeal. It wasn’t like pizza, where you don’t even notice the few grains; the wet dough had incorporated a thick layer of cornmeal. This time, I skipped the cornmeal, which is unnecessary anyway since the bread is baked on parchment paper. However, the crust was still far too thick, much thicker than is shown in Reinhart’s photo. It’s a straightforward problem to fix by adjusting the baking time and temperatures, and I put notes in the recipe instructions for how I’ll cook it next time.

With that small problem worked out, this is a truly fantastic bread recipe. The flavor is just about unbeatable. And, again – it’s less work than other recipes. You can’t go wrong.

Pain a l’Ancienne (from Peter Reinhart’s Bread Baker’s Apprentice)

Bridget note: The only alteration I made to the recipe was to skip the cornmeal Reinhart calls for. I did put a note at the bottom about the cooking temperature and time, in order to correct the crust problem I had.

Yields 6 baguettes

6 cups (27 ounces) unbleached bread flour
2¼ teaspoons salt
1¾ teaspoons instant yeast
2¼ cups plus 2 tablespoon to 3 cups ice-cold (19 to 24 ounces) water

1. Combine the flour, salt, yeast and 19 ounces water in the bowl of the electric mixer with the paddle attachment and mix for 2 minutes on low speed. Switch to the dough hook and mix for 5 to 6 minutes on medium speed. The dough should be sticky on the bottom of the bowl but it should release from the sides of the bowl. If not, sprinkle in a small amount of flour until this occurs (or dribble in water if the dough seems too stiff and clears the bottom as well as the sides of the bowl). Lightly oil a large bowl and immediately transfer the dough with a spatula or bowl scraper dipped in water into the bowl. Mist the top of the dough with spray oil and cover the bowl with plastic wrap.

2. Immediately place the bowl in the refrigerator and chill overnight, to retard fermentation.

3. The next day, check the dough to see if it has risen in the refrigerator. It will probably be partially risen but not doubled in size (the amount of rise will depend on how cold the refrigerator is and how often the door was opened). Leave the bowl of dough out at room temperature for about 2 to 3 hours (or longer if necessary) to allow the dough to wake up, lose its chill, and continue fermenting.

4. When the dough has doubled from its original prerefrigerated size, liberally sprinkle the counter with bread flour (about ½ cup). Gently transfer the dough to the floured counter with a plastic dough scraper that has been dipped in cold water, dipping your hands as well to keep the dough from sticking to you. Avoid punching down the dough as you transfer it, to expel as little as possible of the carbon-dioxide gas that has built up in the dough during fermentation. If the dough is very wet, sprinkle more flour over the top as well as under it. Dry your hands thoroughly and then dip them in flour. Roll the dough gently in the sprinkled flour to coat it thoroughly, simultaneously stretching it into an oblong about 8 inches long and 6 inches wide. If it is too sticky to handle, continue sprinkling flour over it. Dip a metal pastry scraper into cool water to keep it from sticking to the dough, and cut the dough in half widthwise with the pastry scraper by pressing it down through the dough until it severs it, then dipping it again in the water and repeating this action until you have cut down the full length of the dough. (Do not use this blade as a saw; use it as a pincer, pinching the dough cleanly with each cut.) Let the dough relax for 5 minutes.

5. Prepare the oven for hearth baking, making sure to have an empty steam pan in place. Preheat the oven to 500 degrees, or 550 degrees if your oven goes this high. Cover the back of two 17-by-12-inch sheet pans with baking parchment. (I just used my pizza peel.) Take one of the dough pieces and repeat the cutting action, but this time cut off 3 equal-sized lengths. Then do the same with the remaining half. This should give you 6 lengths. Flour your hands and carefully lift one of the dough strips and transfer it to an inverted parchment-lined pan, gently pulling it to the length of the pan or to the length of your baking stone. If it springs back, let it rest for 5 minutes and then gently pull it out again. Place 3 strips on the pan, and then prepare another pan and repeat with the remaining strips.

6. Score the dough strips as for traditional baguettes, slashing the tops with 3 diagonal cuts. Because the dough is sticky, you may have to dip the razor blade, serrated knife or scissors in water between each cut. You may also omit the cuts if the dough isn’t cooperating. (I tried cutting, but the dough was so wet that it didn’t seem to make a difference.)

7. Take one pan to the preheated oven and carefully slide the dough, parchment and all, onto the baking stone (depending on the direction of the stone, you may choose to slide the dough and parchment off the side of the sheet pan instead of off the end); or bake directly on the sheet pan. Make sure the pieces aren’t touching (you can reach in and straighten the parchment or the dough strips, if need be). Pour 1 cup of hot water into the steam pan and close the door. After 30 seconds, spray the oven walls with water and close the door. Repeat twice more at 30-second intervals. After the final spray, reduce the oven setting to 475 degrees and continue baking. Meanwhile, dust the other pan of strips with flour, mist with spray oil, and cover with a towel or plastic wrap. If you don’t plan to bake these strips within 1 hour, refrigerate the pan and bake later or the next day.

8. The bread should begin to turn golden brown within 8 or 9 minutes. If the loaves are baking unevenly at this point, rotate them 180 degrees. Continue baking 10 to 15 minutes more, or until the bread is a rich golden brown and the internal temperature registers at least 205 degrees. (I think this is the part that didn’t work for me. I think I should have left it at the high heat and cooked it for only about 15 minutes.)

9. Transfer the hot breads to a cooling rack. They should feel very light, almost airy, and will cool in about 20 minutes. While these are cooling, you can bake the remaining loaves, remembering to remove the parchment from the oven and turn the oven up to 500 degrees or higher before baking the second round.

Other recipes part of this recommended dinner party menu:
Salad with Herbed Baked Goat Cheese
Chicken with Forty Cloves of Garlic
Sauteed Shredded Zucchini

Just about any dessert works well with this meal.
Many wines work well with this meal, but I especially like full-flavored whites such as Chardonnay, and medium-bodied reds such as Pinot Noir.

chocolate pudding (twd)

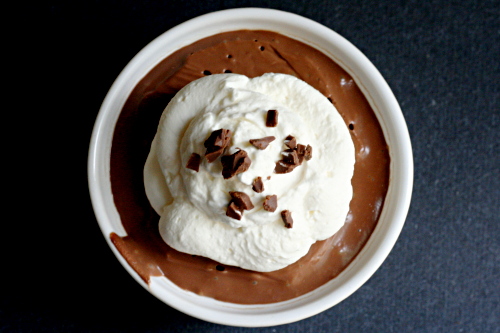
Melissa’s TWD pick of chocolate pudding really hit the spot for me this week. I hadn’t made anything chocolately in a while, and something smooth and cool like pudding is perfect for the hot summer weather right now. Also, as much as I like to cook, it’s nice to have something simple every once in a while.

Oh, except that I’m incapable of keeping things simple in the kitchen. I’ve had my eye on the chocolate pudding recipe that Deb posted a few months ago. Deb was looking for an easy pudding recipe after making her way through a disappointing one that sounds suspiciously familiar now that I’ve made Dorie’s pudding recipe. Deb’s pudding looks dark and chocolately and delicious, and as an added bonus, there’s no egg yolks to mess with. I decided to make both recipes and compare them. (I made a third recipe as well, but it didn’t set properly, so I’m not going to review it on the assumption that I screwed something up.)

Both puddings had their strong points. The eggless pudding had a much darker chocolate flavor, which I like but Dave isn’t crazy about. It was also really firm. Overall, it reminded me more of chocolate pots de crème than good ol’ pudding. In contrast, the chocolate flavor of Dorie’s pudding seemed weak, at least to me. However, the texture was that of a perfectly smooth and refreshing pudding.

Clearly, Dorie’s recipe requires more effort, what with moving the pudding back and forth between the food processor and the stove. I haven’t decided if it was worth it. I’d like to take Deb’s recipe (or maybe the third recipe I tried, which was similar), and tweak it. I think if I just add a little more milk, it won’t be so overpoweringly chocolately and the texture will soften to be more like a pudding. But we’ll see.

Dorie’s pudding recipe can be found on her blog.

Silky Chocolate Pudding (adapted from Smitten Kitchen; originally from John Sharffenberger)

Serves 6

Bridget note: There was no coating the back of a spoon after 20 minutes on a double boiler over gently simmering water. I’m assuming this is because I used a glass bowl instead of a metal bowl. I cranked the heat up and cooked it for another 10 minutes or so over a very lively simmer, and that did the trick.

¼ cup cornstarch
½ cup sugar
⅛ teaspoon salt
3 cups whole milk
6 ounces 62% semisweet chocolate, coarsely chopped
1 teaspoon pure vanilla extract

1. Combine the cornstarch, sugar and salt in the top of a double boiler. Slowly whisk in the milk, scraping the bottom and sides with a heatproof spatula to incorporate the dry ingredients. Place over gently simmering water and stir occasionally, scraping the bottom and sides. Use a whisk as necessary should lumps begin to form. After 15 to 20 minutes, when the mixture begins to thicken and coats the back of the spoon, add the chocolate. Continue stirring for about 2 to 4 minutes, or until the pudding is smooth and thickened. Remove from the heat and stir in the vanilla.

2. Strain through a fine-mesh strainer into a serving bowl or into a large measuring cup with a spout and pour into individual serving dishes.

3. If you like pudding skin, pull plastic wrap over the top of the serving dish(es) before refrigerating. If you dislike pudding skin, place plastic wrap on top of the pudding and smooth it gently against the surface before refrigerating. Refrigerate for at least 30 minutes and up to 3 days.

sauteed shredded zucchini

The side I originally served with Chicken with Forty Cloves of Garlic was shredded sautéed zucchini with tomatoes and basil. While it’s a very good dish, in retrospect, I don’t think the Italian bent in the zucchini matched the flavors and French feel of the chicken. My goal for the vegetable served alongside this flavorful garlicky chicken was something that would play backup well while offering a bit of contrast in flavors. While any simply prepared vegetable would work nicely, I also wanted something that my guests probably hadn’t made for themselves.

I do like the shredded sautéed zucchini, so I didn’t want to completely alter my original meal plan. I love when vegetables get just a little crispy and browned, and something about shredded zucchini instead of slices makes me happy. All of the prep work for this dish can be completed a few hours before dinner, which means the vegetables just need a quick stay on a hot burner and a few turns before they’re ready to be served.

The problem is that it’s not a simple task getting something as watery as zucchini to caramelize. Just like cabbage, the best way to get water out of zucchini is to sprinkle some salt on it and set it aside in a strainer. Then squeeze the hell out of it. I made only two servings of this recently, and squeezed out almost half a cup of (vividly green) water.

The original recipe makes this a bit more work than I like to put into a side dish. For one, it gives instructions for shredding the zucchini by hand. That isn’t happening; that is why I have a food processor with a shredding disk. You’re also supposed to discard the watery middle of the zucchini where the seeds are, but I disregard that too, so that I can just throw the whole vegetable through the feed tube of the food processor.

Once the zucchini are shredded and squeezed, you can mix them with your flavorings and some oil and set them aside until you’re ready to cook them. For serving with the chicken, I like to use just olive oil and minced shallots with a bit of lemon juice squeezed on at the end. It’s the perfect side dish – interesting and flavorful on its own right without overpowering the star of this show, which is the chicken.

Zucchini with Shallots and Lemon (adapted from Cooks Illustrated)

Serves 4

Bridget note: Five zucchini for four servings sounds like a lot, but you lose a lot of volume with the water, so it really is the right amount. I’ve added all of the oil to the zucchini mixture and added all of that to a preheated, non-oiled pan, and that works too.

5 medium zucchini (about 8 ounces each), ends trimmed
Table salt
2 shallots, minced
1 tablespoon olive oil
1-2 teaspoons fresh lemon juice from 1 lemon
Ground black pepper

1. Shred zucchini with shredding disk of food processor or large holes of a box grater. Toss zucchini with 1½ teaspoons salt and place in colander set in medium bowl; let drain 5 to 10 minutes. Wrap zucchini in kitchen towel, in batches if necessary, and wring out excess moisture.

2. Place zucchini in medium bowl and break up any large clumps. Add shallots and 2 teaspoons oil to zucchini and toss to combine thoroughly.

3. Heat remaining 1 teaspoon oil in 12-inch nonstick skillet over high heat. Add zucchini mixture and spread evenly in pan with tongs; cook without stirring until bottom layer browns, about 2 minutes; stir well, breaking up any clumps with tongs, then cook until “new” bottom layer browns, about 2 minutes more. Off heat, stir in lemon juice and salt and pepper to taste. Serve immediately.

For the tomato-basil variation: Combine 3 cored, seeded and diced plum tomatoes, 1 clove of minced garlic, 1 teaspoon balsamic vinegar, 2 teaspoons extra-virgin olive oil, ¼ teaspoon salt, and 2 tablespoons chopped fresh basil leaves in small bowl and set aside. When the zucchini has finished cooking, remove it from the heat and stir in tomato mixture and salt and pepper to taste. Transfer to serving platter, sprinkle with ¼ cup finely grated Parmesan, and serve immediately, drizzling with additional olive oil, if desired.

Other recipes part of this recommended dinner party menu:
Salad with Herbed Baked Goat Cheese
Chicken with Forty Cloves of Garlic
Pain a l’Ancienne (baguettes)

Just about any dessert works well with this meal.
Many wines work well with this meal, but I especially like full-flavored whites such as Chardonnay, and medium-bodied reds such as Pinot Noir.

chicken with forty cloves of garlic

This chicken is the main dish of my favorite dinner party menu. But I’m not going to lie – there are good and bad aspects to making this dish for company. The advantage is that I’m pretty sure this is the best chicken I’ve ever eaten (although this comes close). It’s infused with the flavors of garlic and wine, it’s juicy, the skin is crispy, and it’s served up with a handful of roasted garlic cloves that are perfect for smearing on slices of baguette.

On the other hand, it’s fairly work-intensive. A lot of that work can be finished a few hours before dinner, but you can’t avoid some last minute cooking here. Years ago, I thought that if I had to do any cooking once my guests arrived, it meant I was being a bad host. These days, I don’t worry so much. My friends like to help, and they’re also perfectly happy to chat and drink their wine while I finish up the sauce for the chicken. I like to have a bit of a break between courses, so I’ll generally serve the salad, then finish the chicken.

But again, much of this dish can be prepared in advance. The chicken can be brined early in the day, then rinsed, dried, and refrigerated until needed. The recipe calls for a whole chicken to be cut in pieces, but I’ve used pre-cut pieces with no problem. The garlic and shallots can be roasted in advance and set aside. Of course all of the ingredients can be measured and set right where you need them. The most important thing is to relax – you fed your guests salad so they aren’t starving, they hopefully have good wine to drink, and this chicken is absolutely worth the wait.

I’m looking over the recipe right now, and I’m wondering if you could actually make everything ahead of time and just keep it in a slightly warm oven? (You’ll have to take it out to bake the goat cheese rounds if you’re making those, but that’s easy enough.) I think it would work. I’m going to try it tonight, and then I’ll update with the results.  (Update: I tried it and it was a huge failure.  Not saying it can’t be done correctly somehow, but what I did certainly didn’t work.)

Chicken with 40 Cloves of Garlic (from Cooks Illustrated)

Serves 3 to 4

CI note: Try not to purchase heads of garlic that contain enormous cloves; if unavoidable, increase the foil-covered baking time to 40 to 45 minutes so that the largest cloves soften fully. A large Dutch oven can be used in place of a skillet, if you prefer. Broiling the chicken for a few minutes at the end of cooking crisps the skin, but this step is optional. Serve the dish with slices of crusty baguette for dipping into the sauce and onto which the roasted garlic cloves can be spread.

Table salt
1 whole chicken (3½ to 4 pounds), cut into 8 pieces (4 breast pieces, 2 thighs, 2 drumsticks) and trimmed of excess fat.
Ground black pepper
3 large heads garlic (about 8 ounces), outer papery skins removed, cloves separated and unpeeled
2 medium shallots, peeled and quartered pole to pole
1 tablespoon olive oil
2 sprigs fresh thyme
1 sprig fresh rosemary
1 bay leaf
¾ cup dry vermouth or dry white wine
¾ cup low-sodium chicken broth
2 tablespoons unsalted butter

1. Adjust oven rack to middle position and heat oven to 400 degrees. Dissolve ¼-cup salt in 2 quarts cold tap water in large container or bowl; submerge chicken pieces in brine and refrigerate until fully seasoned, about 30 minutes. Rinse chicken pieces under running water and thoroughly pat dry with paper towels. Season both sides of chicken pieces with pepper.

2. Meanwhile, toss garlic and shallots with 2 teaspoons olive oil and salt and pepper to taste in 9-inch pie plate; cover tightly with foil and roast until softened and beginning to brown, about 30 minutes, shaking pan once to toss contents after 15 minutes (foil can be left on during tossing). Uncover, stir, and continue to roast, uncovered, until browned and fully tender, 10 minutes longer, stirring once or twice. Remove from oven and increase oven temperature to 450 degrees.

3. Using kitchen twine, tie together thyme, rosemary, and bay; set aside. Heat remaining 1-teaspoon oil in 12-inch heavy-bottomed ovenproof skillet over medium-high heat until beginning to smoke; swirl to coat pan with oil. Brown chicken pieces skin-side down until deep golden, about 5 minutes; using tongs, turn chicken pieces and brown until golden on second side, about 4 minutes longer. Transfer chicken to large plate and discard fat; off heat, add vermouth, chicken broth, and herbs, scraping bottom of skillet with wooden spoon to loosen browned bits. Set skillet over medium heat, add garlic/shallot mixture to pan, then return chicken, skin-side up, to pan, nestling pieces on top of and between garlic cloves.

4. Place skillet in oven and roast until instant-read thermometer inserted into thickest part of breast registers about 160 degrees, 10 to 12 minutes. If desired, increase heat to broil and broil to crisp skin, 3 to 5 minutes. Using potholders or oven mitts, remove skillet from oven and transfer chicken to serving dish. Remove 10 to 12 garlic cloves to mesh sieve and reserve; using slotted spoon, scatter remaining garlic cloves and shallots around chicken and discard herbs. With rubber spatula push reserved garlic cloves through sieve and into bowl; discard skins. Add garlic paste to skillet. Bring liquid to simmer over medium-high heat, whisking occasionally to incorporate garlic; adjust seasoning with salt and pepper to taste. Whisk in butter; pour sauce into sauceboat and serve.

Other recipes part of this recommended dinner party menu:
Salad with Herbed Baked Goat Cheese
Sauteed Shredded Zucchini
Pain a l’Ancienne (baguettes)

Just about any dessert works well with this meal.
Many wines work well with this meal, but I especially like full-flavored whites such as Chardonnay, and medium-bodied reds such as Pinot Noir.