Archives for October 2008

peter reinhart’s pizza

This makes two Daring Baker recipes in a row that were already on my mental to-do list. It’s perfect because otherwise who knows when I actually would have gotten around to making them. I would have been making my standard pizza recipe, too lazy to try this new one which I’ve heard great things about, and wondering if mine is as good as it gets.

I’ve been using Cooks Illustrated’s crust recipe for years, which has the same ingredients as Peter Reinhart’s in only slightly different proportions. I started adding some sugar and white wine to it after Deb discussed it, and I found that my crust was a little more light, crisp and bubbly, which I liked.

But the CI recipe hasn’t always been perfect for me. Lately when I try to stretch it out, it has a tendency to rip, even when the dough is warm enough and risen completely. It’s not an elasticity issue either – it’s not like the dough is bouncing back on itself when I try to stretch it out.

One of the keys to Reinhart’s recipe is that he uses very cold water in the dough, then refrigerates the dough immediately after kneading, similar to his pain a l’ancienne. To be honest, I usually do this – albeit somewhat half-assed – with CI’s recipe, just because it’s more convenient for me to make the dough the night before I want it for dinner.

The biggest difference between the two recipes is that Reinhart mixes and kneads his dough with a stand mixer, while CI uses a food processor.  Despite the similarity between CI’s and Reinhart’s recipes, their outcomes were relatively distinct. Reinhart’s dough did not rip – it seemed capable of stretching to infinite lengths. Rosa, this month’s host, requested that we take a photo of the dough being tossed and spun, but this dough was so floppy, there’s no way I was going to chance throwing it around the kitchen.

Baked, the pizza wasn’t very different from my normal recipe. In fact, Dave didn’t notice that I had changed it. However, it wasn’t quite as crispy, and it wasn’t substantial enough to hold up my toppings, even though I don’t think I overloaded it. I think I might have gone overboard in making it thin.

I think in the future, I’ll stick with the ingredient proportions from CI’s recipe, adding the the sugar and white wine. However, I’ll use Reinhart’s method of preparing the dough with the stand mixer and using refrigerated ingredients. Hopefully this way I’ll get the best of both worlds. It’ll be a while before I have a chance to try it though, because right now, I have a half recipe of both doughs in my freezer.

Update: At some point I’ll get around to posting my method for making pizza (exact crust instructions, sauce, etc.), but I want to do some refining first.  In the meantime, you can find blog entries on Cooks Illustrated’s basic recipe here, here and here.

Basic Pizza Dough (adapted from The Bread Baker’s Apprentice by Peter Reinhart)

Makes 6 pizza crusts, about 9-12 inches/23-30 cm in diameter.

4½ cups flour (bread, high-gluten, or all-purpose), chilled
1¾ teaspoons salt
1 teaspoon instant yeast
¼ cup olive oil or vegetable oil (both optional, but it’s better with)
1¾ cups water, ice cold (40 degrees)
1 tablespoon sugar
cornmeal for dusting

1. Mix together the flour, salt and instant yeast in a big bowl or stand mixer. Add the oil, sugar and cold water and mix well (spoon or paddle attachment) to form a sticky ball of dough. On a clean surface, knead for about 5-7 minutes, until the dough is smooth. If it is too wet, add a little flour and if it is too dry add 1 or 2 teaspoons extra water. If you are using an electric mixer, switch to the dough hook and mix on medium speed for the same amount of time. The dough should clear the sides of the bowl but stick to the bottom of the bowl. If the dough is too wet, sprinkle in a little more flour. If it clears the bottom of the bowl, dribble in a teaspoon or two of cold water. The finished dough should be springy, elastic, and sticky, not just tacky, and register 50°-55° F/10°-13° C.

2. Flour a work surface or counter. Line a jelly pan with baking paper/parchment. Lightly oil the paper. Cut the dough into 4-6 equal pieces. Sprinkle some flour over the dough. Make sure your hands are dry and then flour them. Gently round each piece into a ball. Transfer the dough balls to the lined jelly pan and mist them generously with spray oil and cover with plastic wrap.

3. Put the pan into the refrigerator and let the dough rest overnight or for up to thee days. NOTE: You can store the dough balls in a freezer bag if you want to save some of the dough for any future baking. In that case, pour some oil (a few tablespooons only) in a medium bowl and dip each dough ball into the oil, so that it is completely covered in oil. Then put each ball into a separate bag. Store the bags in the freezer for no longer than 3 months. The day before you plan to make pizza, remember to transfer the dough balls from the freezer to the refrigerator.

4. On the day you plan to eat pizza, exactly 2 hours before you make it, remove the desired number of dough balls from the refrigerator. Dust the counter with flour and spray lightly with oil. Press the dough into disks about 1/2 inch/1.3 cm thick and 5 inches/12.7 cm in diameter. Sprinkle with flour and mist with oil. Loosely cover the dough rounds with plastic wrap and then allow to rest for 2 hours.

5. At least 45 minutes before making the pizza, place a baking stone on the lower third of the oven. Preheat the oven as hot as possible (500° F/260° C). If you do not have a baking stone, then use the back of a jelly pan. Do not preheat the pan.

6. Generously sprinkle the back of a jelly pan with semolina/durum flour or cornmeal. Take 1 piece and lay the dough across your fists in a very delicate way and carefully stretch it by bouncing it in a circular motion on your hands, and by giving it a little stretch with each bounce. Once the dough has expanded outward, move to a full toss. Make only one pizza at a time. During the tossing process, if the dough tends to stick to your hands, lay it down on the floured counter and reflour your hands, then continue the tossing and shaping. In case you would be having trouble tossing the dough or if the dough never wants to expand and always springs back, let it rest for approximately 5-20 minutes in order for the gluten to relax fully,then try again.You can also resort to using a rolling pin.

7. When the dough has the shape you want, place it on the back of the jelly pan, making sure there is enough semolina/durum flour or cornmeal to allow it to slide and not stick to the pan. Lightly top it with sweet or savory toppings of your choice.

8. Slide the garnished pizza onto the stone in the oven or bake directly on the jelly pan. Close the door and bake for about 5-8 minutes.

dorie’s chocolate cupcakes

I was excited all day about baking the chocolate cupcakes that Clara chose for TWD. I almost always look forward to baking, but I was downright giddy this time. With the variety of desserts I make lately, I guess I forgot that classic chocolate cake is my favorite!

Clara also suggested that we decorate these for Halloween. Ack…even simple cake decorating inevitably ends up as a huge mess for me, and I’m incapable of making things easy on myself. My six little cupcakes required four colors of frosting, one of which I didn’t actually have food coloring for (orange – I had to mix yellow and red) and another that involved chocolate (black – to give it a head start toward being dark enough). And I am far from an expert cake decorator, so my design options were limited to the few piping tips that I know how to use properly.

The cake itself was a little disappointing. I was getting worried that I would start to sound like a Negative Nellie when it comes to Dorie’s recipes, but this time it seems that a lot of people ended up with dry cupcakes that were a little too tame in chocolate flavor. Not that they were inedible or anything, but Dave and I didn’t need a side-by-side comparison to recognize that we like my other recipe a lot more. One nice thing, since it took a few days for us to eat all of them, was that these seemed to get denser and fudgier with time instead of tasting stale.

Whether I think it’s the best chocolate cake ever or not, I’m always happy to eat cupcakes. I made my favorite Easy Vanilla Buttercream instead of Dorie’s ganache frosting since I needed something that would pipe well. To check out Dorie’s recipe, go to Clara’s blog.

sushi bowls

I’m so proud of this recipe. I actually came up with the idea on my own. Whoa. Not that sushi ingredients mixed up in a bowl is a groundbreaking idea, but that isn’t the point. The point is that I didn’t know there was already a recipe out there when I came up with it. I was creative! That never happens!

The inspiration behind my big idea was that Dave and I love sushi, but making it is a pain in the ass and going out to eat all the time isn’t feasible. So I figured, why bother making cute little sushi rolls – it’s the ingredients that we like, not their shape. I decided to mix up the ingredients in a bowl and call it a day.

And that makes this a pretty darn easy meal. Sushi rice takes only a little more effort than basic long-grain rice does, and that’s the only ingredient in this recipe that needs to be cooked.

I’ve made this a few times now, and once I used smoked salmon instead of raw tuna. I used smoked salmon twice when I made sushi rolls, and I thought it was good. It’s convenient, and I thought it might be a good option for people who aren’t comfortable eating raw fish. But when I used it in the sushi bowls, it was so salty that it kind of ruined the whole dish. I’m not sure if there’s a difference between brands or if all smoked salmon is so salty. I bought the cheapest brand, because that stuff always surprises me by how expensive it is.

But, every other time I’ve made this, it’s been just so good. And healthy! Look at all that green stuff. There’s no added fat in the recipe; the only fat involved is what’s naturally in avocado, sesame seeds, and the fish. That makes this a super tasty, easy, healthy, balanced meal on its own. It’s perfect.

Printer Friendly Recipe
Sushi Bowls

I’ve used raw tuna, smoked salmon, and imitation crab in this, all with very good results.  If you’re using salty smoked salmon, reduce the salt in the rice mixture slightly.

4 servings

1⅓ cups rice, rinsed well
1⅓ cups water
¼ cup soy sauce
wasabi to taste, probably at least 2 teaspoons
4 teaspoons rice vinegar
4 teaspoons sugar
½ teaspoon salt
2 (8 by 7-inch) sheets nori, cut into strips 1½ inches long and ⅛ inch wide
1 avocado, pitted, flesh scooped from skin and cut into chunks 1 inch long and ¼ inch wide
1 cucumber, peeled and cut into matchsticks 1½ inches long and ⅛ inch wide
2 green onions, halved lengthwise and cut into strips 1 inch long
8 ounces sushi-grade fish
¼ cup sesame seeds, toasted

1. Rinse the rice. Place the rice and water in a medium saucepan and bring to a boil over high heat, uncovered. Once it begins to boil, reduce the heat to the lowest setting and cover. Cook for 15 minutes. Remove from the heat and let stand, covered, for 10 minutes.

2. Meanwhile, combine the soy sauce and wasabi in a small bowl. Combine the rice vinegar, sugar and salt in a separate small bowl and heat in the microwave on high for 30 to 45 seconds, until the sugar dissolves. Transfer the rice into a large wooden or glass mixing bowl and add the vinegar mixture. Fold and cut thoroughly to combine and coat each grain of rice with the mixture. Fan until rice is near room temperature. (If you use an electric fan, this will only take about a minute.) Do not refrigerate.

3. Combine rice, wasabi mixture, and remaining ingredients. Serve.

pumpkin muffins

I’ve been on the lookout for a pumpkin quick bread recipe for a couple of years. I like quick breads to have some textural contrast with add-ins, but I couldn’t think of anything that seemed to fit with the flavors of the pumpkin. Of course Dorie could, as Kelly’s choice for this week’s TWD recipe made evident.

Dorie adds raisins and walnuts (or pecans) to her pumpkin muffins. Like I almost always do, I replaced the raisins with something else; in this case, dried cranberries. I wasn’t sure if the flavors would get along – they’re both common fall ingredients, but I don’t often see them together. I topped the muffins with pumpkin seeds instead of sunflower seeds. I’m not sure why Dorie calls for sunflower seeds; pumpkin seeds seem so perfect for these muffins.

The muffins were good. The walnuts and dried cranberries were fine as additions. However, shortly after I made them, one of my friends told me about a pumpkin muffin recipe she makes that has a lot of ginger in it, and then it occurred to me that the perfect add-in for pumpkin muffins is crystallized ginger. Now I’m looking forward to trying this combination.

Dorie’s recipe is posted on Kelly’s blog.

mulled cider

I held off fall for as long as I could, mostly because I hadn’t (and still haven’t!) gotten my fill of fresh tomatoes. Plus I don’t like to be cold. But I can’t deny it anymore – there’s a chill in the air, and the trees are looking absolutely beautiful. It’s time for cider.

I looked up a few recipes for mulled cider, and they were all basically the same. But the first recipe I made, Ina Garten’s, was too sweet and not spicy enough. The next time, I eliminated all of the orange juice and just added the peel without the juice. Dave and I agreed that it was still two orangey, so I cut down the amount of peel even more. I also increased all of the spices, plus added one that wasn’t in the original recipe – allspice, which was perfect with the cider.

Ina’s recipe says to simmer for just 5 to 10 minutes, which doesn’t seem like nearly enough time to extract much flavor from whole spices. Most of the reviewers said that they simmered the mixture for far longer, and I agree with them. I generally brought the cider to a hard simmer, then turned off the heat, covered it, and forgot about it for an hour or so. Then Dave would say “didn’t you make cider?” and I’d remember and be excited and drink some and love October.

Hot Mulled Cider (adapted from Ina Garten)

Serves 4-6

8 cups (½ gallon) pure apple juice or fresh apple cider
2 (2-inch) cinnamon sticks
4 whole cloves
2 star anise
6 allspice berries
2 strips orange zest, removed with vegetable peeler, each strip about 2 inches long by ½-inch wide, cleaned of any white pith

Combine all the ingredients in a saucepan and bring to a simmer over medium-high heat. Turn off heat, cover, and let sit for 30 minutes. Pour into mugs, straining if desired, and serve.

green chile rellenos

I think my brother-in-law is a fairly typical New Mexican – he likes green chile on pizza, on his grilled cheese sandwiches, and in his burgers. I mostly just want it in Mexican food. (Mostly – it is great in burgers.) It’s a good thing too, because the Hatch green chile supply is limited out here in Pennsylvania. My mom is kind enough to send me a box of fresh green chiles every fall, and then I have to dedicate the better part of a day to roasting, peeling, and seeding them. My mom sends a box to my brother in Iowa as well, and we agreed that it’s a lot of work for basically one gallon-size zip-top bag of chiles.

Obviously it’s worth it in the end, or we wouldn’t do it. Dave and I have had green chile huevos twice since the shipment of green chiles came a few weeks ago, and we agree that it’s our favorite breakfast. The only other thing I’ve made with them so far is these chile rellenos, although I’m looking forward to green chile chicken enchiladas, cream of green chile chicken soup, green chile burgers, and a lot more huevos.

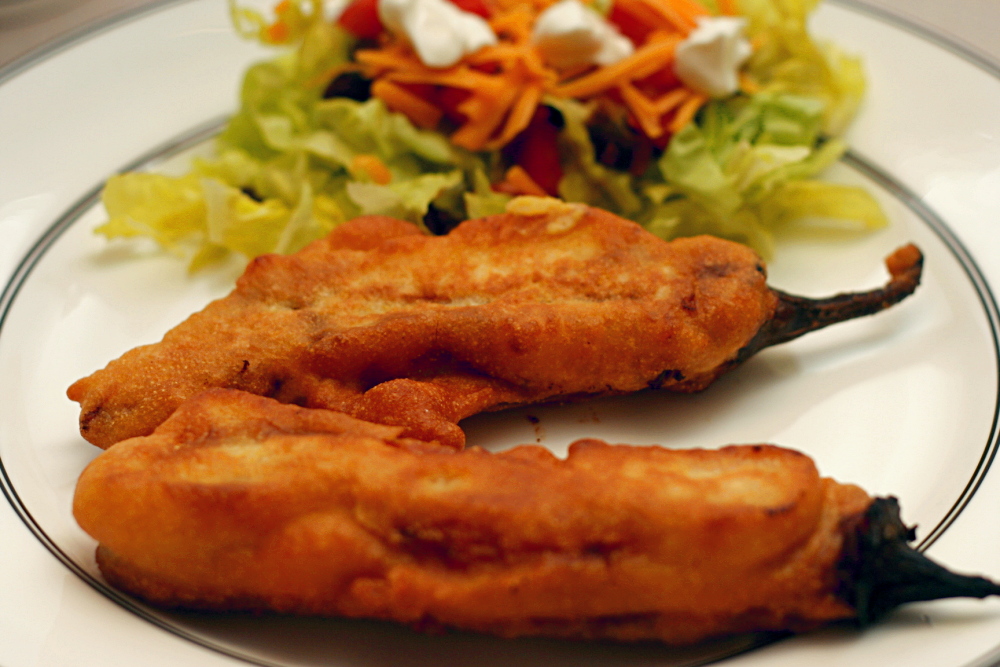
Chile rellenos aren’t something I tend to order at restaurants, but Dave likes them and they really are better than I usually expect. They’re simply cheese stuffed in a whole (roasted and peeled) chile, dipped in cornmeal batter, then fried. They’re usually served with green chile sauce, but I didn’t want to make any, and I didn’t miss it. Without the sauce, the green chile, cheese, and batter get equal billing, instead of the green chile dominating.

I chopped most of the green chiles before I froze them, but I have one more set of non-chopped chiles in the freezer waiting to be made into rellenos. They were so good this time, I’m definitely looking forward to making them again.

(I just realized that, although I keep talking about green chiles, they look more red in the picture above.  That’s what happens went they’re shipped across the country before they can be roasted – they turn from green to slightly red.  I haven’t noticed a difference in flavor though.)

Green Chiles Rellenos (Stuffed Green Chiles) (adapted from Simply Simpatico, from the Junior League of Albuquerque, New Mexico)

If Hatch green chiles aren’t available, poblanos are supposedly more authentic anyway.

1 quart vegetable or peanut oil
1 cup all-purpose flour
1 teaspoon baking powder
½ teaspoon salt
¾ cup cornmeal
1 cup milk
2 eggs
10 green chiles, roasted and peeled* (canned chile may be used)
10 ounces Longhorn cheese or Monterey Jack cheese

1. Heat the oil in a 12-inch skillet over medium-high heat to 350-375 degrees.

2. Combine flour, cornmeal, baking powder, and salt. Blend milk with egg, then combine milk and eggs mixture with the dry ingredients.

3. Cut cheese into slices ½-inch thick and the length of the chile. Make a small slit in chile just big enough to insert cheese.

4. Dip stuffed chiles in batter, using a spoon to coat the chile with batter. (I didn’t want to turn the chile in the batter because I was worried about the cheese coming out.)

5. Add 5 battered chiles to hot oil. Fry until first side is golden brown, 2-3 minutes, then turn the chiles over and fry until the second side is golden brown. Drain on a paper towel-lined plate. Serve.

*To roast chiles, grill or broil them until the skin is spotty black (blacker than you think it should be probably), then put them in a covered bowl or a bag for 10 minutes or so. After that, the skin should slip off easily. Be sure to leave the stem attached for rellenos.

lenox almond biscotti

Dave loves biscotti, especially almond biscotti, so he was really happy about Gretchen’s pick for TWD this week. I do like biscotti, but I have trouble figuring out where it should fit into my routine. They’re too snack-like for dessert, but too unhealthy for a snack. Plus they’re kind of a hassle to make, with the slicing and the double-baking and all.

Ah, but almond extract, how I love it. The dough for this biscotti tasted really good.

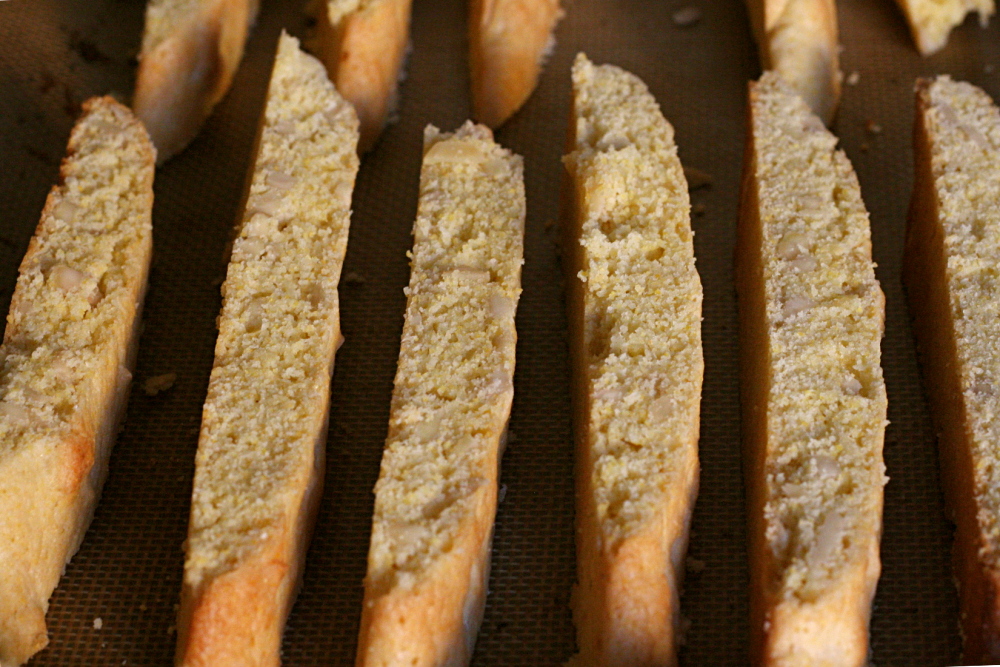
There was some confusion among TWD members about what Dorie meant by “standing the biscotti slices up like a marching band” for the second baking, but looking at it now, I’m thinking she means that they should bake on the flat non-cut side of each slice. I laid them on a cut side instead, oops. I didn’t bother to flip them, but both sides seemed evenly browned regardless.

There is a reason why I do a lot of side-by-side comparisons of recipes. Not only is it the best way to spot small differences, but Dave, who is actually pretty good at picking out subtle differences in recipes, has a very bad memory for food. Whenever I ask him how one recipe compares to another, he says he’d need to taste them side-by-side.

Not so this biscotti. He knew immediately that he preferred the last biscotti recipe I made, even though I hadn’t made it in over 6 months. He likes that the other recipe is crunchier. Dorie’s biscotti were more tender than most that I’ve tried, which I don’t necessarily mind, but I’m not the main biscotti-eater around here. The reason for the difference is easy to see from a quick comparison of the recipes – Dorie’s uses almost twice as much butter.

So it looks like I’ll be sticking with my old biscotti recipe for now. If you’d like to check out Dorie’s recipe, Gretchen has it on her blog.

spinach, artichoke, and red pepper strata

This recipe has a lot of ingredients in it, and I wasn’t sure how well they would all go together. Cheddar and parmesan and spinach and red peppers and marinated artichokes don’t seem like natural compliments. But I wanted to make a strata, and I had some spinach and scallions and cheddar to use up.

Typing up the recipe now, it really doesn’t seem like a lot of work, but it certainly seemed so at the time. Stratas are supposed to be convenient because you can make them the night before and just pop them in the oven in the morning. However, I’m rarely in the mood to make breakfast the night before. On the weekends, I’ve usually just made an ambitious dinner and probably dessert, and the last thing I want to do after enjoying that is go back into the kitchen and make breakfast.

I made a third of the recipe in a loaf pan, since it was just for me and Dave. I used fresh spinach, sautéed for a few seconds in the same pan the red peppers had just been removed from. I had the spinach leftover from something else, and I’m not generally a huge fan of frozen spinach anyway – too stemmy. I used Country Crust bread, which is my favorite recipe anytime white sandwich-type bread is called for.

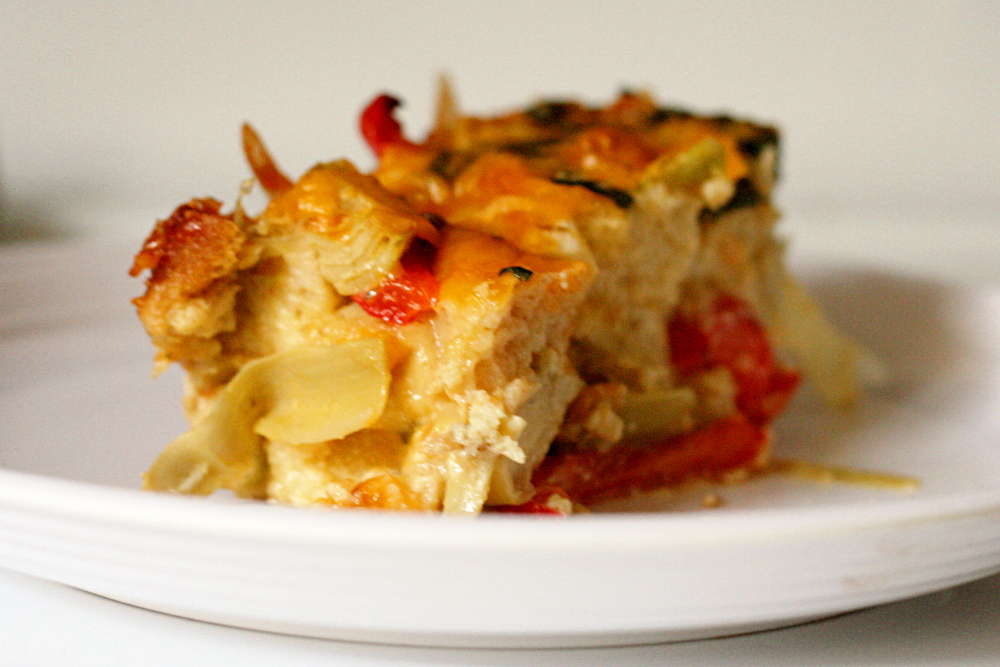
The strata exceeded my expectations. All of the flavors meshed quite well. I had also been concerned that it wouldn’t be rich enough, since my other favorite strata recipe uses half and half instead of milk, but the texture of this one was great. It’s a fairly healthy, and very tasty, take on a breakfast strata.

Spinach, Artichoke, and Red Pepper Strata (from Vegetarian Classics, by Jeanne Lemlin)

JL notes: Choose a firm homemade-style bread such as sourdough, a Tuscan-style chewy bread, or a day-old loaf of Italian or French bread. Avoid very soft packaged bread. Make sure the strata is cooked enough when you remove it from the oven. Test it like a cake. A knife inserted in the center should come out clean.

1 tablespoon olive oil
1 large red bell pepper, cut into thin strips 2 inches long
1 (10-ounce) package frozen chopped spinach, thawed
9 large eggs
3½ cups milk
½ cup (1 ounce) grated Parmesan cheese
¼ teaspoon nutmeg
1 teaspoon salt
generous seasoning freshly ground black pepper
2½ tablespoon butter, softened
9 slices firm white bread
2 (6-ounce) jars marinated artichoke hearts, well drained
2 scallions, very thinly sliced
3 cups (12 ounces) grated extra-sharp cheddar cheese

1. Heat the oil in a medium-size skillet over medium heat and sauté the red pepper until tender, about 7 minutes. Set aside.

2. Place the thawed spinach in a strainer and press out all of its liquid with the back of a large spoon. Set aside.

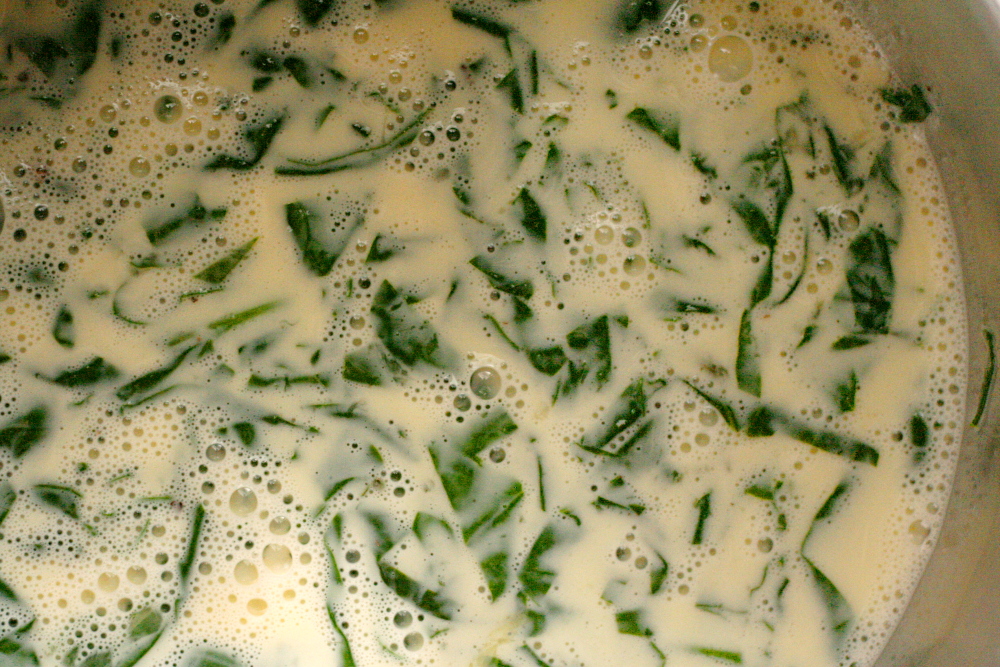
3. Thoroughly beat the eggs in a large bowl. Beat in the spinach, milk, Parmesan cheese, nutmeg, salt and pepper.

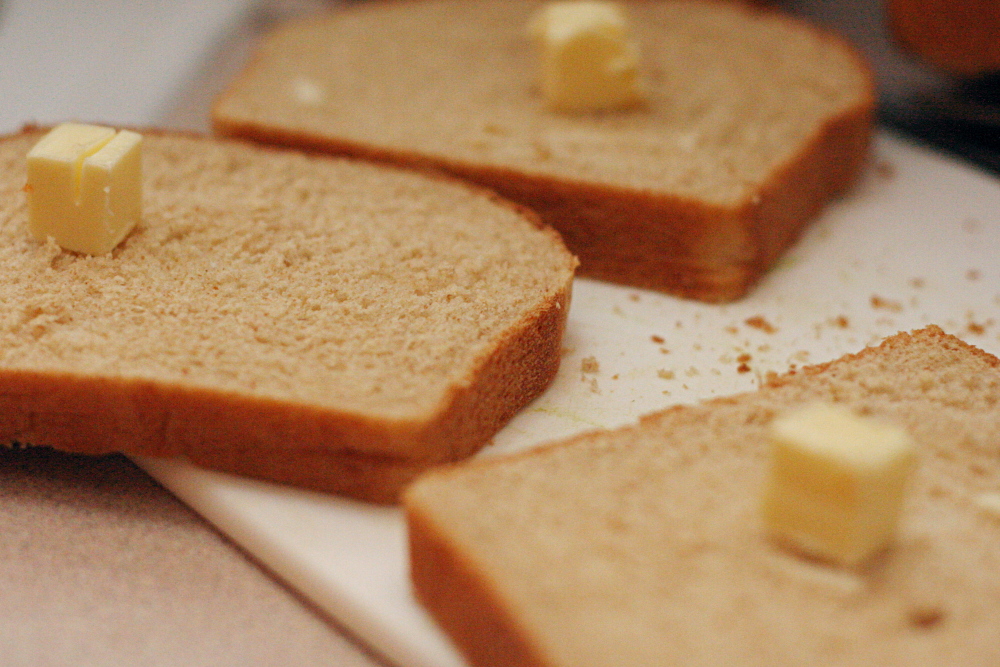
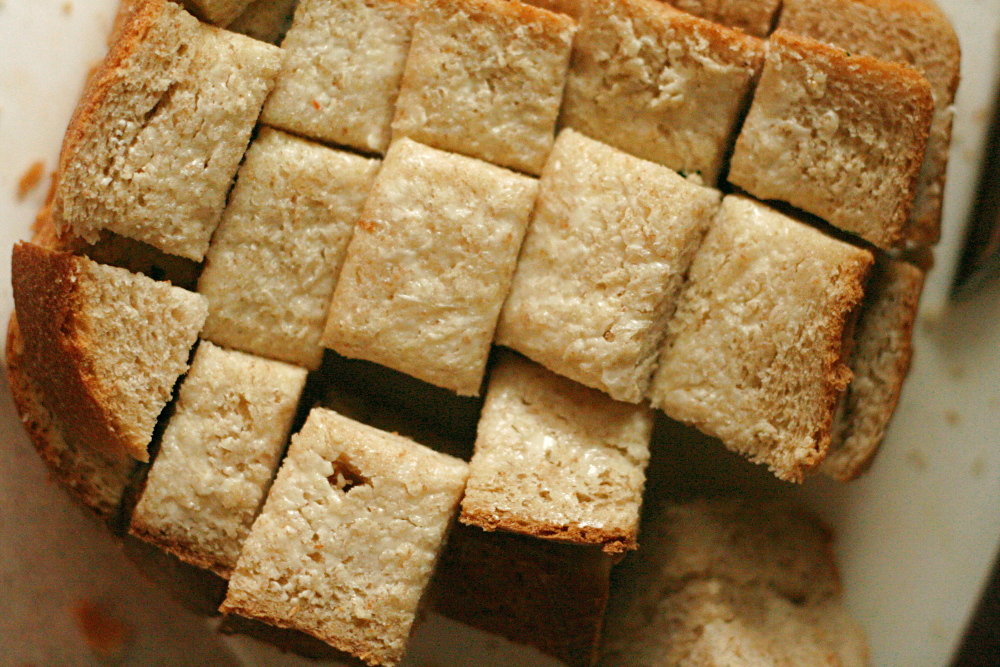
4. Using ½ tablespoon butter, grease a 13x9x2-inch baking dish. With the remaining 2 tablespoons butter, coat 1 side of each slice of bread. Cut the bread into 1-inch cubes. You should have about 9 cups of cubed bread.
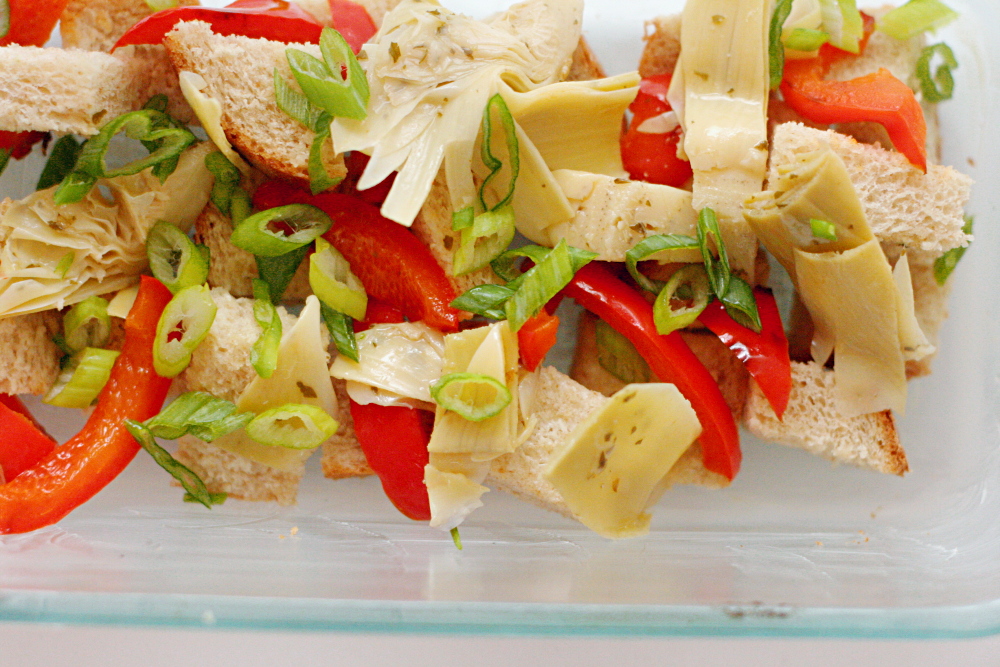
5. Place half the bread cubes in the baking dish. Sprinkle on half of the red peppers strips, 1 jar of artichokes, and half of the scallions. Ladle on half of the spinach mixture, then sprinkle on half of the cheddar cheese. Repeat this layering and end with the cheddar cheese.  Cover the dish with place wrap or foil and refrigerate overnight.
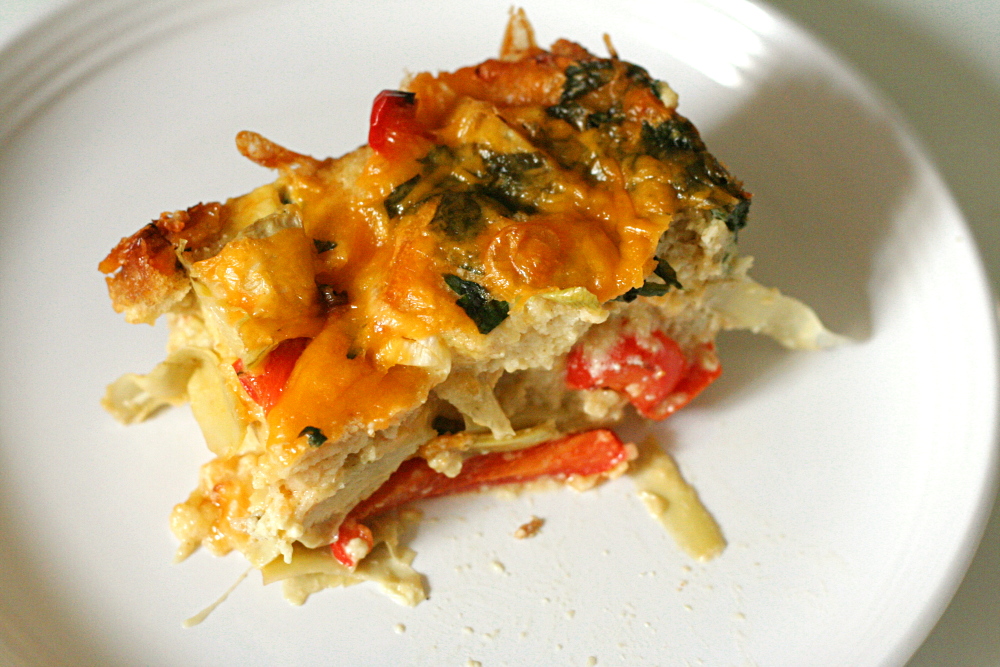
6. Remove the dish from the refrigerator at least 30 minutes before baking. Preheat the oven to 350 degrees. Bake the strata, uncovered, for 1 hour, or until golden brown on top and firm in the center. Let the strata sit 15 minutes before cutting it into squares.

caramel peanut-topped brownie cake

I have a hard time believing that anyone who owns Dorie’s Baking book has flipped past the photo of this cake without their mouth watering at least a little. When most recipes for TWD are announced, I have to look them up to get an idea of what we’ll be making. But when Tammy chose this cake, I could picture exactly what it was. Dark chocolate cake with peanuts and dripping caramel is hard to ignore.

Although I think my 4-inch diameter springform is ridiculously cute, I wish the sides were a little higher. A 4-inch diameter circle has exactly one quarter the area of an 8-inch diameter circle, but my pan can’t fit one quarter of the batter because the sides are about an inch shorter. Plus I actually made a third of the recipe, not a quarter. The batter didn’t seem like it filled the pan very much, but it rose higher than I was expecting.

It did rise higher than the sides of the pan, but fortunately it didn’t spill over. I managed to overcook the cake part somehow, which is a bummer because a brownie-type cake had the potential to be amazing. It was still good, but definitely too dry.

The caramel portion of this recipe went smoothly for me, which was a relief because I hadn’t worked with caramel since the debacle with the filbert cake. Plus, Dorie specifically says that it’s difficult to work with less sugar than the recipe calls for, but I only made a third of the recipe anyway.

Before adding the peanut caramel topping, I carved off the top somewhat burned part of the cake. I didn’t put the cake back into the springform ring before adding the caramel – since my cake was higher than the sides anyway, I don’t think it would have made a difference. However, I can see why she recommends doing so – it gives the caramel a chance to set a little, so it doesn’t all drip down the sides and pool on the plate.

Even with overcooked cake and drippy caramel, this was a fun dessert. The ratio of caramel to peanut to cake was spot on. The cake was nice and chocolately, and the high rise made it attractively tall. For the recipe, go to Tammy’s blog.

roasted carrots

Carrots, like bananas, make a perfect snack. They’re easy, they travel well, and they’re healthy. They make such a great snack, in fact, that I’ve eaten one almost every weekday for several years. Oh my gosh, I am so sick of the daily carrot.

And I work at home three days per week. So why am I eating raw carrots day in and day out, when I could have sweet, crispy-on-the-outside, soft-on-the-inside roasted carrots with just five minutes of effort?

I know they lose nutrients (and fiber? I’m not sure) when you cook them, but for me, it’s a compromise that I have to make. If I tried to force myself to eat them raw when that doesn’t sound at all appealing, it’s a pretty safe bet that I’d end up eating cookie dough instead.

Although I tend to eat carrots as a snack, this would make a great side dish for all kinds of meals. Roasting brings out the best in carrots.

Roasted Carrots (from Ina Garten)

Bridget note: There’s quite a bit of flexibility in this recipe. I use regular table salt and just enough oil to coat the carrots. I mix those ingredients right in the pan instead of dirtying another bowl. I tend to roast the carrots at a higher temperature, simply because I forget the right temperature and am too lazy to check the recipe. I always skip the fresh herbs at the end.

12 carrots, peeled
3 tablespoons good olive oil
1¼ teaspoons kosher salt
½ teaspoons freshly ground black pepper
2 tablespoons minced fresh dill or parsley

Preheat the oven to 400 degrees F.

If the carrots are thick, cut them in half lengthwise; if not, leave whole. Slice the carrots diagonally in 1½-inch-thick slices. (The carrots will shrink while cooking so make the slices big.) Toss them in a bowl with the olive oil, salt, and pepper. Transfer to a sheet pan in 1 layer and roast in the oven for 20 minutes, until browned and tender.

Toss the carrots with minced dill or parsley, season to taste, and serve.