Archives for November 2008

bacon-wrapped pork tenderloin medallions

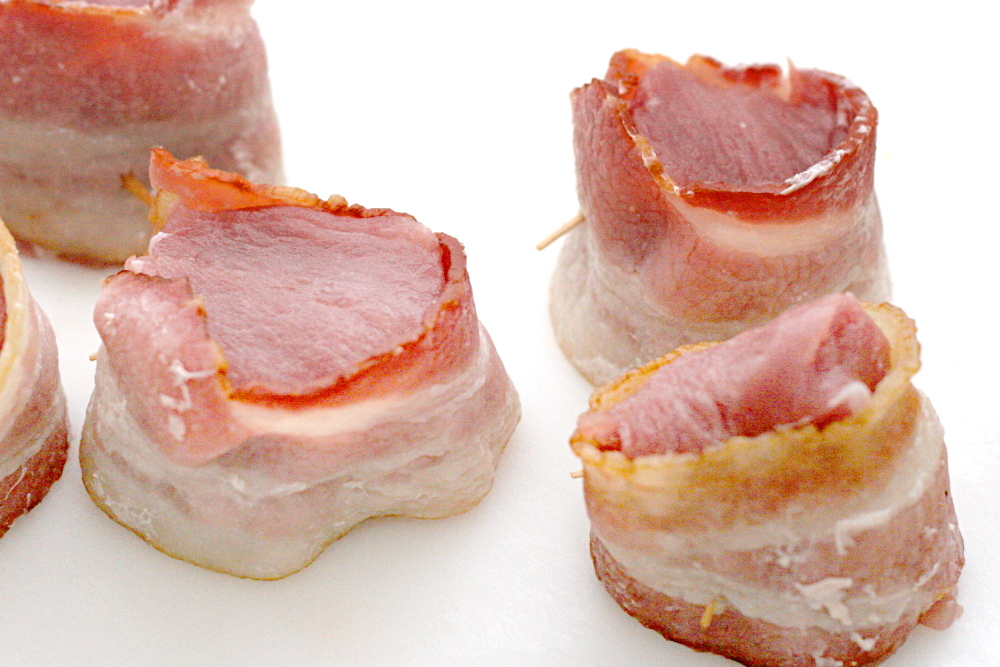
copy-of-img_8222I almost never serve meals that consist of a meat, a starch, and a vegetable. This was never a conscious decision on my part; it was more of a slow realization. I’ve not sure why I don’t, but I think it’s because they’re usually more work. I tend to save meat-starch-vegetable meals for the weekend when I have more time. And when I do, I find it’s best to wrap the meat in bacon.

copy-of-img_8213

Okay, so this is the only meat I’ve ever wrapped in bacon. But I can’t deny that it made for some tasty pork tenderloin. Bacon makes everything better.

copy-of-img_8217

The recipe is not difficult at all. It only has a few ingredients, so it’s kept very simple. The only time consuming step was wrapping the bacon around the pork tenderloin medallions, but it takes less than a minute per medallion, and if you were serving this for guests, I don’t see any reason why that couldn’t be done ahead of time.

copy-of-img_8227

The tenderloin was, unsurprisingly as it’s wrapped in bacon, very good. However, next time I think I’ll brine it before cooking it, as maybe it was a little dry. (I might have overcooked it though – cooking big chunks of meat is probably my weakest skill in the kitchen.) The recipe is supposed to be served with a pan sauce, but somehow I missed that until too late.  I didn’t miss it.

copy-of-img_8234

Bacon-Wrapped Pork Tenderloin Medallions (from Cooks Illustrated)

CI note: We prefer natural to enhanced pork (pork that has been injected with a salt solution to increase moistness and flavor), though both will work in this recipe. Begin checking the doneness of smaller medallions 1 or 2 minutes early; they may need to be taken out of the pan a little sooner.

12-14 slices bacon (1 slice for each pork medallion)
2 pork tenderloins (1 to 1¼ pounds each), trimmed of fat and silver skin, cut crosswise into 1½-inch pieces; thinner end pieces scored and folded
Kosher salt and ground black pepper
2 tablespoons vegetable oil

1. Place bacon slices, slightly overlapping, in microwave-safe pie plate and cover with plastic wrap. Cook in microwave on high power until slices shrink and release about 1/2 cup fat but are neither browned nor crisp, 1 to 3 minutes. Transfer bacon to paper towels until cool, 2 to 3 minutes.

2. Wrap each piece of pork with 1 slice bacon and secure with 2 toothpicks where ends of bacon strip overlap, inserting toothpicks on angle and gently pushing them through to other side.

3. Season pork with pepper. Heat oil in 12-inch skillet over medium-high heat until shimmering. Add pork cut side down and cook, without moving pieces, until well-browned, 3 to 5 minutes. Turn pork and brown on second side, 3 to 5 minutes more. Reduce heat to medium. Using tongs, stand each piece on its side and cook, turning pieces as necessary, until sides are well browned and internal temperature registers 145 to 150 degrees on instant-read thermometer, 8 to 14 minutes. Transfer pork to platter and tent lightly with foil; let rest 5 minutes, then serve.

copy-of-img_8229

wheatmeal shortbread cookies

copy-of-img_8467

I’ve only recently started to appreciate whole grain food as anything other than a healthy alternative that requires a compromise in flavor. For some foods, this is true – pizza crust is less tender and the dough harder to work with when whole wheat flour is substituted for a portion of the white flour; many rustic breads get most of their flavor from a slow fermentation of white flour; and certainly I’m not interested in making chocolate chip cookies with whole wheat flour.

copy-of-img_8427

But that doesn’t mean that whole grain food can’t be enjoyed for what it is, and not just as a healthy substitute. These cookies are unabashedly whole grain, and that’s part of their charm. But don’t worry – I wouldn’t call them healthy.

copy-of-img_8429

The recipe is straightforward and I had no real problems. I did rework it to be baked in a square pan because I don’t have the 10-inch springform pan that it calls for. Who has all these crazy pans that Martha’s recipes always call for? One step that I followed, but didn’t really understand the point of, was scoring the edges of the cookies halfway through baking. Also, my skewer pricks in the cookies got covered by the granulated sugar sprinkled on top. In retrospect, I could have repricked the cookies after the sugar was added to keep the design.

copy-of-img_8434

Besides that small nitpicking, the recipe was easy. And the cookies were so good! They’re really tender from all that butter. I’m having trouble describing the flavor; all I can think of is “earthy” but that doesn’t sound like a compliment. But the bran really added an extra dimension of flavor that was balanced wonderfully by the butter and sugar.

copy-of-img_8448

Wheatmeal Shortbread Cookies (from Martha Stewart’s Baking Handbook, slightly reworded)

MS note: Be sure to sprinkle the shortbread with granulated sugar as soon as it comes out of the oven; this will help the sugar adhere to the cookie.

1 cup (5 ounces) unbleached flour, plus more for dusting
¾ cup whole wheat flour
¼ cup wheat bran
¾ teaspoon salt
14 tablespoons (1¾ sticks) unsalted butter, room temperature
½ cup (3.5 ounces) packed light brown sugar
granulated sugar, for sprinkling

1. Preheat the oven to 325F. Have ready a 10-inch round springform pan or a 10-inch tart pan with a removal bottom. Alternatively, line a 9-inch square pan with parchment paper.

2. In the bowl of an electric mixer fitted with the paddle attachment, mix both flours, the bran, and the salt on low speed just to combine. Add the butter and brown sugar, and beat until all the ingredients come together and form a smooth dough, about 3 minutes, scraping down the sides of the bowl as needed.

3. Turn the dough out into the pan. Using your fingers, spread out the dough evenly while pressing it firmly into the pan. Use a spoon to flatten the edges.

4. Place pan in oven, and reduce temperature to 300F. Bake until the edges just begin to turn golden, about 30 minutes. Remove pan from oven; using a bench scraper or long, sharp knife, score the cookie into 8 wedges (if using round pan) or 16 squares (if using square pan). Using the tip of a wooden skewer or the tines of a fork, prick the shortbread all over in a decorative pattern, if desired. Return pan to oven, and bake until golden all over, about 15 minutes more.

5. Transfer pan to a wire rack. Sprinkle shortbread with granulated sugar. Remove the sides of the pan (if using pan with removable bottom/sides) or use the parchment paper to lift the cookies out of the pan (if using a square pan). Let stand until completely cool before cutting into wedges. Shortbread can be kept in an airtight container at room temperature for up to 1 week.

copy-of-img_8468

gallitos (costa rican breakfast tacos)

copy-of-img_8282

Dave lived in New Jersey for half a year while I was finishing up graduate school three hours away in upstate New York. We took turns visiting each other on the weekends, but the weekends in NJ were undoubtedly more fun, because we always took the train into Manhattan. I love Manhattan.

copy-of-img_8258

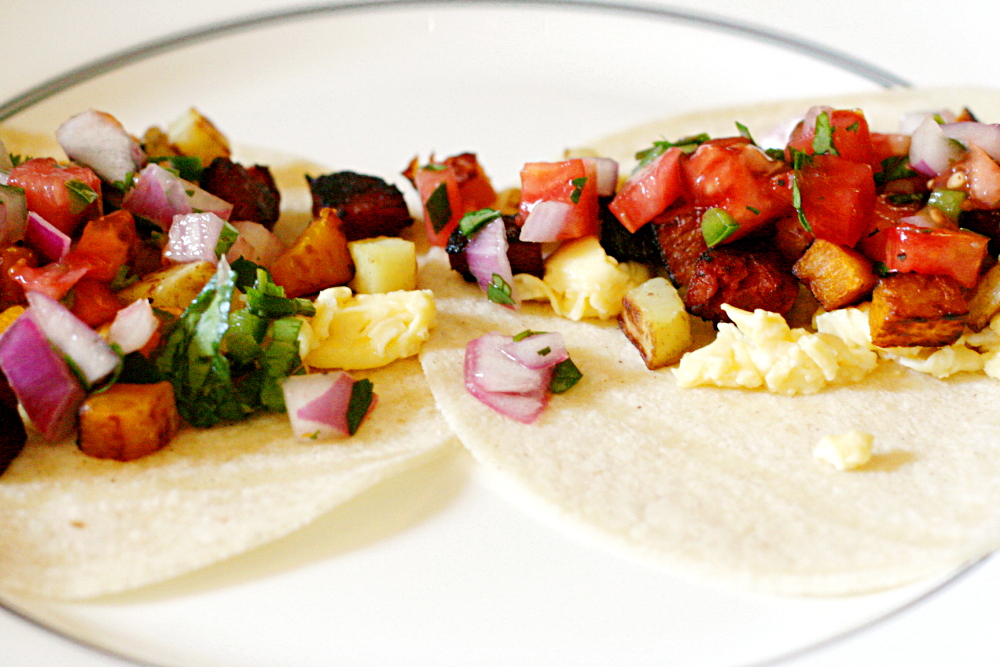
Just about every meal I’ve eaten in Manhattan has been exceptional, but one of my favorites was at Calle Ocho. We went for brunch and ordered the gallitos. I love tacos any time of the day. Dave and I don’t live as close to Manhattan anymore, so I can’t just go order gallitos whenever I want. But it took me two years to realize that there was nothing stopping me from making them myself.

copy-of-img_8267

I don’t remember the meal exactly, but the menu description helps – “Platter of Traditional Costa Rican Tacos, Scrambled Eggs, Chorizo, Calle Ocho Fries.” I could have sworn there was squash too, and pico de gallo just makes sense.

copy-of-img_8274

I will admit that this recipe is a bit of a project, and not much of it can be prepared in advance. I think it would be great for guests arriving late morning for brunch. Everyone can build their own tacos, which would be fun, and I imagine it’s not something many people have had before. Of course you should serve it with mimosas, as is fitting for any brunch, and which also accompanied my gallitos at Calle Ocho.  You can never go wrong serving champagne with breakfast.

copy-of-img_8260

The only problem I’ve had with the recipe is figuring out what to do with the tortillas. I feel like corn tortillas is more appropriate than flour, and they’re also a little lighter. However, they tend to crack instead of bend, even after being warmed and wrapped in foil. I’m not willing to fry them individually for breakfast. Unless someone has a better recommendation, I’m thinking I’ll start using flour tortillas instead. I did recently see a brand of corn tortillas that looked more flexible, so I’ll try those as well.

The gallitos are pretty great. There’s so many flavors working together – the sweet squash, salty potatoes, spicy chorizo, and fresh pico de gallo are wonderful. For me, this is definitely worth the effort involved.

copy-of-img_8284

Gallitos

Serves 4 to 6

To save time, you can cook the potatoes and squash together.

2½ tablespoons canola or vegetable oil
12 ounces (about 2 medium) Yukon Gold potatoes, diced into ¼-inch cubes
salt
16 small flour or corn tortillas
16 ounces (1 medium) butternut squash, peeled and diced into ¼-inch cubes
½ teaspoon sugar
12 ounces chorizo, diced into ½-inch cubes
4 eggs
2 tablespoons milk
Pico de gallo (recipe follows)

1. Heat oven to 200F. Wrap tortillas in foil and place in warm oven.

2. Heat 1 tablespoon oil in large nonstick skillet over medium heat. Add potatoes and ¾ teaspoon salt and stir until the potatoes are coated with oil. Cover the pan and cook, stirring occasionally, until potatoes are browned and tender, about 20 minutes. (If potatoes aren’t beginning to brown after 12 minutes, remove lid.) Pour potatoes into heatproof serving bowl and place in warm oven.

3. Meanwhile, in small nonstick skillet, cook chorizo over medium heat until evenly browned. Place chorizo in heatproof serving bowl and place in warm oven. Wipe pan with paper towels.

4. In now empty large nonstick pan (no need to clean or wipe), heat 1 tablespoon oil over medium heat. Add squash, ½ teaspoon salt, and sugar and sauté, uncovered, until browned and tender, about 20 minutes.

5. Meanwhile, heat remaining ½ tablespoon oil in small nonstick pan over medium heat. Crack eggs into a medium bowl. Add ¼ teaspoon salt, pinch black pepper, and milk. Whisk until evenly combined. Pour the egg mixture into the pan and reduce the heat to medium-low. Gently lift and stir the eggs until they form large, mostly dry curds. Pour eggs into serving bowl.

6. Serve tortillas, potatoes, squash, chorizo, eggs and pico de gallo separately, allowing each person to build their tacos as they please.

Pico de gallo: (adapted from the Pioneer Woman)
4 roma tomatoes, diced fine
1 small red onion, diced fine
1-2 jalapenos, minced
½ cup cilantro, chopped fine
juice of half a lime
salt to taste

Mix all ingredients.

copy-of-img_8287

gratin dauphinois (potatoes au gratin)

copy-of-img_67821

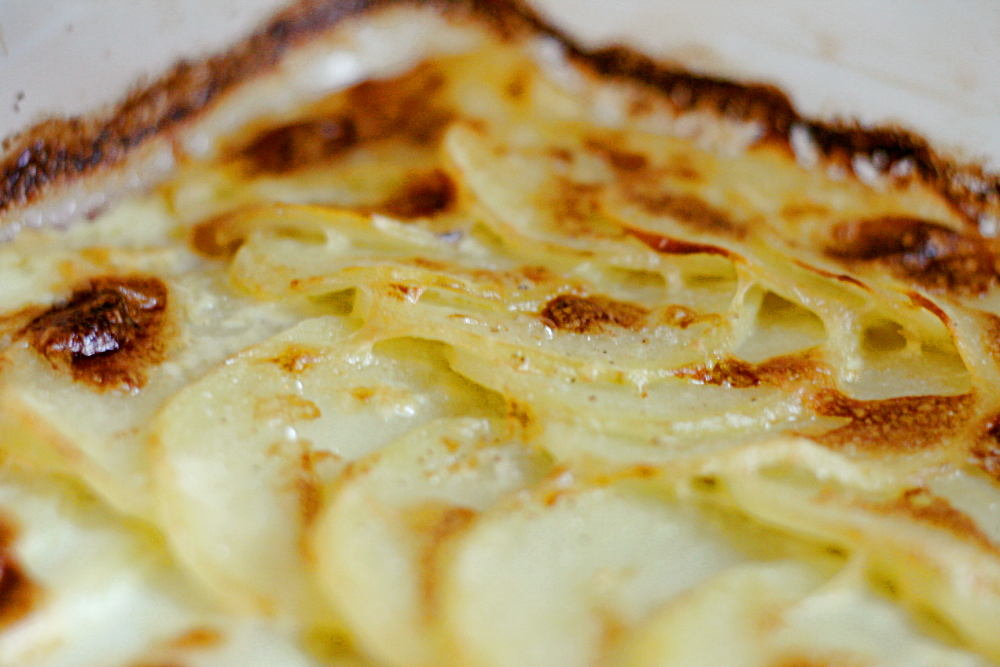
One advantage of screwing up a recipe is that at least you know when you don’t screw it up. The first time I made this recipe, I thought I might have overcooked it. The second time, I knew I overcooked it.

I’m a big fan of Jeffrey Steingarten, the food writer for Vogue. I have two of his books and I’ve enjoyed them both. He claims to have made a gratin once a week for the past ten years and calls this one “so fantastically good that [he has] made it every day for the past few weeks.” I’m not capable of resisting that recommendation, regardless of the half stick of butter and 1½ cups of cream. (Yikes.)

copy-of-img_67171

Steingarten developed his recipe to maximize the crispy parts, so the potatoes are placed in the baking pan in a single layer. Steingarten considers cheese in this type of gratin “a gross and pitiful imposture”, because the cream should reduce to a cheese-like flavor, so adding cheese is unnecessary. I have to do one more quote, because there’s no way I’ll be able to describe this as accurately and enticingly as Steingarten (which is why he is a professional and I am a blogger). “[The liquid] will coat the vegetable with an intensely flavorful concentrate…and the surface…is beautifully browned and crusty and delicious.”

copy-of-img_67291

Steingarten also says “if your gratin is truly brilliant, the bottom will become golden and crisp as well.” My gratin was not, and has never been with this recipe, truly brilliant. I’m not sure why; my only theory is that I’m using Pyrex when cast iron would be a better choice. The only cast iron cook/bakeware I have is my Dutch oven, but maybe I’ll try baking this is an All-Clan stainless steel skillet next time to see if I can get the bottom crust to form.

copy-of-img_67361

The recipe isn’t particularly difficult; it looks long due to Steingarten’s very detailed instructions. I typed out the recipe in Steingarten’s exact words because they have so much of his writing style in them, which I thought was worth keeping. However, there are aspects of the recipe that I change. A minor one is replacing the white pepper with black pepper, not only because I keep the black pepper on the counter and the white pepper requires some digging in the pantry, but because I think the flavor is better with the potatoes. Also, Steingarten calls for a pound and a half of potatoes, and says that “you will undoubtedly have some slices leftover.” With the pan size he calls for, I tend to have at least a third of the slices leftover. I’ve found that I should either increase the pan size or decrease the potatoes I slice.

copy-of-img_67471

Steingarten is also careful to instruct that the potatoes should be removed from the oven before “the cream has broken down into clear, foamy butterfat”. Oops. Good advice. Otherwise you end up with a disgusting greasy mess that makes it all too obvious that there’s a dismaying amount of fat in the recipe.

copy-of-img_67551

But, if you do it right, you have deliciously tender, creamy, crisp potatoes that don’t need cheese to taste cheesey or bread crumbs to be crispy. On the top. If you try the recipe and get a crispy bottom too, let me know!

copy-of-img_67831

Gratin Dauphinois (from Jeffrey Steingarten’s It Must’ve Been Something I Ate)

4 tablespoons (½ stick) butter
1 (scant) cup milk
1 large garlic clove, peeled and lightly crushed
½ teaspoon freshly ground white pepper
¾ teaspoon salt
1/8 teaspoon freshly grated nutmeg, about a dozen gratings
1½ pounds baking potatoes
1½ cups heavy cream

Special equipment: A large, low baking dish made of enameled iron, glass, or earthernware. The quantities in this recipe work out perfectly when baked in a dish measuring about 120 square inches on the inside bottom, where the slices of potato will lie. This translates into a rectangle 9-by-13 inches, or 10-by-12 inches; an 11-inch square; a 12-inch circle; or an oval 10-by-15 inches. An enameled iron baking dish is preferred – mine is made by Le Creuset – because it produces a delectable crust underneath the potatoes. A hand-sliced device, such as a traditional French stainless-steel mandoline or a much less expensive but excellent plastic Japanese-made device manufactures by Benriner.

Let the butter soften at room temperature for an hour or so. Meanwhile, preheat your oven to 425F.

Place the milk, garlic clove, pepper, salt, and nutmeg in a small saucepan, bring to a boil, and remove from the heat.

Meanwhile, liberally butter the bottom of the baking dish using about half the butter. Peel the potatoes, rinse them, and pat them dry. Then, slice them 1/8-inch thick, discarding the smallest slices. (This is easier with a slicing machine, inexpensive or elaborate. The quantities and cooking times given here work out best when the slices are even and close to 1/8 inch. Just keep adjusting your slicing machine until a little pile of eight slices measures an inch high.) Under no circumstances should you wash the potatoes after they have been sliced – the surface starch is absolutely indispensable.

Evenly arrange the potatoes in the buttered dish in one layer of overlapping slices. (Begin by laying out a row of slices along one narrow end of the baking dish, overlapping each one about a third of the way over the slice that came before. Repeat with a second row. Continue until the baking dish is neatly paved.) You will undoubtedly have some slices left over. Please do not try to cram them in.

Bring the milk to the boil again and pour it over the potatoes, removing the garlic. Cover the pan with a sheet of aluminum foil. Bake in the middle of the oven for about 15 minutes, until most of the milk has been absorbed. Meanwhile, bring the cream to a boil, and remove from the heat. When the potatoes are ready, remove and discard the aluminum foil. Bring the cream back to the boil and pour it over the potatoes, dotting the surface with the remaining butter.

Bake, uncovered, for another 20 to 25 minutes, until the potatoes have turned a golden brown, spotted with darker, crisp area. (Rotate the baking dish halfway through if the gratin is browning unevenly.) The underside of the gratin will also be brown and crispy in spots. But do not wait until most of the cream has broken down into clear, foamy butterfat. The potatoes should be dotted with thickened, clotted cream, especially between the slices.

Let the gratin settle for 10 minutes. (This will allow the excess butterfat to drain to the bottom of the dish.) Then eat immediately – taste and texture suffer with each passing minute. Cut into 6 or 8 rectangles with a blunt knife and serve each one with a thin, wide metal slotted spatula.

brown sugar apple cheesecake

copy-of-copy-of-morning-awb

I’ve been avoiding buying apples so far this fall. I like them, quite a bit in fact, but I have to pace myself. I eat a lot of fruit, and apples are pretty much the only fruit in season for a good portion of the year. I try to maximize my opportunities to eat the fruit with shorter seasons. But it’s getting to be time to move on to apples, and what better way to kick off apple season than with cheesecake? I should start using every fruit in cheesecake to kick off its season.

copy-of-img_8570

Tuesdays with Dorie made this cheesecake long before I joined, and it definitely contributed to my eventual purchase of the book. I don’t know why apple cheesecake never occurred to me before, but what a fantastic idea. Dorie has tweaked traditional cheesecake to include brown sugar, cinnamon and apple cider, and I’m sure you can imagine how well that compliments the apples.

copy-of-img_8581

The recipe went off without a hitch, despite making just 1/6 of it in a tiny but cute springform pan. With three components, it isn’t the quickest recipe to put together, but it’s worth it even before the cheesecake – because you also get to eat the batter. My favorite is when it’s just cream cheese and sugar, but I make sure I test every stage.

copy-of-img_8583

The cheesecake is delicious, although I think I’ll slice the apples a lot thinner next time because I’m picky about texture. Dorie describes the texture as middle-of-the-road as far as cheesecakes go, and I think she’s right on; it’s not exceptionally dense. The mini-cheesecake was a mistake, because I definitely did not get enough.

PS – The apples decoration on top was shamelessly copied from foodie bride.

copy-of-img_8647

Brown Sugar-Apple Cheesecake (from Dorie Greenspans’s Baking: From My Home to Yours)

For the Crust
30 gingersnaps (or a scant 2 cups graham cracker crumbs)
2 tablespoons light brown sugar
½ teaspoons ground cinnamon (optional)
½ stick (4 tablespoons) unsalted butter, melted

For the Apples
½ stick (4 tablespoons) unsalted butter
3 large Golden Delicious or Fuji apples, peeled, cored and cut into eighths
2 tablespoons (packed) light brown sugar

For the Filling
1½ pounds (three 8-ounce packages) cream cheese, at room temperature
¾ cup (packed) light brown sugar
6 tablespoons sugar
3 tablespoons apple cider
2 teaspoons pure vanilla extract
2 teaspoons ground cinnamon
3 large eggs
¾ cup sour cream
⅓ cup heavy cream

Apple jelly, for glazing, or confectioner’s sugar, for dusting (optional)

To Make the Crust:
Butter the bottom and sides of a 10-inch springform pan.

Put the gingersnaps in a food processor and whir until you have crumbs; you should have a scant 2 cups. (If you are using graham cracker crumbs, just put them in the food processor.) Pulse in the sugar and cinnamon, if you’re using it, then pour over the melted butter and pulse until the crumbs are moistened. Turn the crumbs into the springform pan and, using your fingertips, firmly press them evenly over the bottom and up the sides of the pan as far as they’ll go. Put the pan in the freezer while you preheat the oven. (The crust can be covered and frozen for up to 2 months.)

Center a rack in the oven and preheat the oven to 350 degrees F.

Remove the pan from the freezer and wrap the bottom tightly in aluminum foil, going up the sides. Place the pan on a baking sheet and bake for 10 minutes, or until the crust is set and lightly browned. Transfer to a rack to cool while you make the apples and the filling. Leave the oven at 350 degrees F.

To Make the Apples:
Melt 2 tablespoons of the butter in a large nonstick skillet over medium-high heat. When the foam subsides, toss in half of the apple slices and cook, turning once, until they are golden brown, about 3 minutes. Sprinkle the apples with 1 tablespoon of the sugar and cook them, turning, just until coated, another minute or so. Scrape the apples onto a plate, wipe out the skillet and repeat with the remaining apples. Let the apples cool while you make the filling.

Getting Ready to Bake:
Have a roasting pan large enough to hold the springform pan at hand. Put a kettle of water on to boil.

To Make the Filling:
Working with a stand mixer, preferably fitted with a paddle attachment, or with a hand mixer in a large bowl, beat the cream cheese on medium speed, scraping down the bowl often, for about 4 minutes, or until it is velvety smooth. Add the sugars and beat for another 2 minutes. Beat in the cider, vanilla, and cinnamon. Reduce the speed to low and beat in the eggs one by one, beating for 1 minute after each egg goes in. Finally, beat in the sour cream and heavy cream, beating just until the batter is smooth.
Pour about one third of the batter into the baked crust. Drain the apples by lifting them off the plate with a slotted spoon or spatula, and spoon them into the pan. Cover with the remaining batter and, if needed, jiggle the pan to even the top. Place the springform pan in the roasting pan and pour in enough boiling water to come halfway up the sides of the springform pan.

Bake the cheesecake for 1 hour and 30 to 45 minutes, covering the cake loosely with a foil tent at the 45-minute mark. The cake will rise evenly and crack around the edges, and it should be fully set except, possibly, in the very center-if the center shimmies, that’s just fine. Gently transfer the cake, still in the pan, to a cooling rack and let it cool to room temperature, then refrigerate it for at least 6 hours; overnight would be better.

Run a blunt knife around the edges of the pan to loosen the crust, open the pan’s latch and release and remove the sides.

copy-of-copy-of-day1

chickpea and butternut squash salad

copy-of-img_8391

Do you like squash? It seems like as soon as we were past Labor Day, everyone went squash crazy. I have reservations about squash that I think can be traced back to childhood.

copy-of-img_8381

I remember one Halloween, my mom roasted acorn squash for me and my brother, with brown sugar in the middle. We were less than pleased. I can’t remember any other squash experiences until I was cooking on my own, and I’m not the only one in my family who is inexperienced in squash. A year or two ago, my older sister called me to ask what she was supposed to do with the butternut squash she had bought.

copy-of-img_8386

I do like squash these days, but every time I eat it, I’m surprised I like it. “Wow! This is actually good!” That’s exactly how I felt about this recipe, which I heard about from Deb, but is actually from Molly. Both tend to recommend recipes that are right up my alley, so that made this recipe worth trying even with the less than familiar squash.  (This is only the third recipe I’ve ever used winter squash in.)

copy-of-img_8390

My doubts did go beyond just the squash issue. I wasn’t so sure about combining sweet squash with hummus ingredients – chickpeas and tahini, lemon juice and cilantro. And then I was worried that the sauce wouldn’t come together and be smooth (somehow it did) and that there would be too much sauce (I ended up adding it all).

copy-of-img_8383

The recipe was easy, aside from my snail-like squash peeling and cutting pace. And I was, yes, surprised by how much I liked it. The sweet squash was balanced so well by the bitter tahini and sour citrus. What a great combination.

copy-of-img_8395

Butternut and Chickpea Salad with Tahini (reworded slightly from Orangette, who adapted it from Casa Moro)

Thoughts: I’m anti raw garlic lately, so I threw the garlic in the oven with the squash for a few minutes, just to tame its sharpness a little before adding it to the sauce.

For salad:
1 medium butternut squash (about 2 to 2½ pounds, seeded, and cut into 1½-inch pieces)
1 medium garlic clove, minced or pressed
½ teaspoon ground allspice
2 tablespoons olive oil
Salt
1 (15-ounce) can chickpeas, drained and rinsed
¼ medium red onion, finely chopped
¼ cup coarsely chopped cilantro leaves

For tahini sauce:
1 medium garlic clove, finely minced with a pinch of salt (or shredded on a Microplane)
3½ tablespoons lemon juice
3 tablespoons well-stirred tahini
2 tablespoons water
2 tablespoons olive oil, plus more to taste

Preheat the oven to 425F.

In a large bowl, combine the butternut squash, garlic, allspice, olive oil, and a good pinch or two of salt. Using a large spoon or your hands, toss until the squash pieces are evenly coated. Turn them out onto a baking sheet, and bake for 15 to 25 minutes, or until soft. Remove from the oven and cool.

Meanwhile, make the tahini sauce. In a small bowl, whisk together the garlic and lemon juice. Add the tahini, and whisk to blend. Add the water and olive oil, whisk well, and taste for seasoning. The sauce should have plenty of nutty tahini flavor, but also a little kick of lemon.

To assemble the salad, combine the squash, chickpeas, onion, and cilantro in a mixing bowl. Add tahini sauce to taste, and toss carefully. (Alternatively, you can also serve the salad undressed, with the tahini sauce on the side. That way, each person can use as much or as little as they want, and the individual ingredients taste a little brighter, too.) Serve, with additional salt for sprinkling.

Note: This salad, lightly dressed, keeps beautifully in the fridge. (Hold a little of the tahini sauce on the side, for dressing at the table.) Before serving, warm slightly with quick jolt in the microwave.

copy-of-img_8391

rugelach

copy-of-img_8773

The closest I’ve ever come to making, or even eating, rugelach is spreading jam on scraps of pie dough, rolling them up, sprinkling them with sugar, and baking them. So pretty close actually. Except that it never occurred to me to add chocolate, so I’ve been missing out.

copy-of-copy-of-img_8728

Dave loves jam+scraps of dough, so I was confident that he’d enjoy these. I was right, and he was not pleased when I sent the first batch to a soldier in Iraq. That gave me a great reason to make them again, with a few changes I had in mind.

copy-2-of-copy-of-img_8741

Dorie practically insists that we play with the filling recipe, so I took it upon myself to do so. For the first batch I followed the recipe exactly, and it was no bad thing. However, they were, if such a thing is possible, too chocolately. Not that they weren’t still delicious, but I happened to know that I added all sorts of other tasty things in the filling, and I wanted to taste all of it!

copy-of-img_8761

For the second batch, I cut the chocolate in half and reduced the jam a little, since so much of it oozed out from the first batch. And in a weird reversal, after months of replacing Dorie’s raisins with other dried fruit, I ran out of currants and substituted raisins. Still good. So many flavors playing along nicely together.

copy-of-img_8770

The recipe, chosen for TWD, can be found on Grace’s site. Changes I made include cutting the amount of chocolate in half, reducing the jam to ½ cup, and increasing the cinnamon to ¾ teaspoon. I also found that it was best to cut the dough into triangles before adding the chunks of chocolate, which blocked my pizza cutter when I added it before cutting.

copy-of-img_8767

decorated sugar cookies

copy-2-of-img_8949

Decorated sugar cookies are a basic recipe that every established baker needs in their arsenal. I’ve got the frosting down, but I’ve haven’t quite found the right cookie.

It’s a tall order. I want a sugar cookie that’s super tender with only, maybe, if absolutely necessary, the smallest bit of crispness to it, just on the edges. I want it to be flavorful enough to eat on its own, but made that much better by frosting. I want it to be easy to roll out. And I want it to use butter and no shortening.

copy-of-img_8910

These cookies were described as soft and chewy with great butter flavor, so it seemed like a good recipe to try. Except that they weren’t soft. Damn it. The recipe specifically says bake for 6-9 minutes or they’ll be crisp, and it’s possible that I, um, didn’t bother to set a timer. In my defense, I took them out of the oven when they were just showing a bit of browning on the bottom edge; the bottom of each cookie is a nice light gold.

copy-of-img_8923Whether they’re overcooked or not, I have a feeling this isn’t my ideal sugar cookie recipe. My problem is actually that the dough doesn’t need to be refrigerated before being rolled out. For the dough to be unsticky enough to be rolled without chilling, it has to have quite a bit of flour in it. I think the flour contributes to the crispness of the cookie, and of course it detracts from the butter and sugar flavors that cookies are all about.

copy-of-img_8932

If you have the perfect sugar cookie recipe, please let me know! In the meantime, I’ll be making this one with a half cup less flour. And then trying not to eat frosting by the spoonful.

copy-of-img_8939

Update 11.4.08: I still had dough in the fridge after I posted this entry.  After reading bakingblonde’s comment below, I tried rolling it thicker and was careful to bake the cookies for only 6 minutes.  They were so much better – soft and tender.  I do think next time I’ll reduce the flour just a bit, and I’ll add some lemon zest.  I also plan on going through all of the recipes everyone recommended below (which, from my initial glance at each, are quite similar to this one) and taking my favorite aspects of each.

Famous Sugar Cookies (adapted from bakingblonde)

2¾ cups (13.75 ounces) flour
½ teaspoon salt
2 teaspoons baking powder
16 tablespoons (2 sticks) butter, very soft
1 cup (7 ounces) sugar
1 large egg
1 teaspoon vanilla extract

1. Preheat oven to 375F. In a small bowl, stir together the flour, salt, and baking powder.

2. Beat butter until smooth, about 1 minute. Add sugar and continue beating until light and fluffy, about 3 minutes. Add egg and vanilla and beat until combined, about 30 seconds. Add dry ingredients and beat at low speed until just combined, about 30 seconds, scraping down bowl as needed.

3. Place dough on floured work surface and roll to ⅓-inch thickness. Use cookie cutter to cut desired shapes.

4. Place cookies on baking sheets and bake for 6-9 minutes, until cookies are beginning to brown on bottom and around edges. Don’t overbake or they will be crisp.

5. Transfer to wire racks to cool. Cool completely before frosting.

I decorated the cookies with Easy Vanilla Buttercream.

copy-of-img_8953

pumpkin pancakes

Dave loves fall. Besides feeling cozy and the pretty leaves, he gets excited about two things – candy corn, which he can and will eat until he’s sick, and pumpkin pancakes. Not that there’s anything keeping us from eating pumpkin pancakes year-round, except for my stubbornness. If we eat pumpkin pancakes in June, what will we have to look forward to in October? I guess I enforce seasonal eating even when it involves canned ingredients.

I’ve played around with my pumpkin pancake recipe for years. The first recipe I tried made pancakes that were a little too thin, too sweet, and not pumpkiny enough. I spent a few years trying to perfect that recipe, and then eventually gave up and started adding pumpkin and spices to a regular pancake recipe. But that wasn’t as easy as it should have been either, because I only recently found a pancake recipe that I’m completely happy with.

Because pumpkin puree has a viscosity pretty similar to pancake batter, I haven’t had any problems adding it to pancake recipes without changing the flour to liquid ratio. I also like to replace the white sugar with brown sugar, and of course I add some spices, but overall, it’s a pretty straightforward transition from plain to pumpkin pancakes.

I do have one caveat about this recipe. I’ve been using powdered buttermilk for the last few months, which is much more convenient than buying liquid buttermilk and then struggling to use it all up before it goes bad. But I think it’s thinner than liquid buttermilk. If you’re using liquid buttermilk instead of reconstituted powdered buttermilk, you may need to add a little more liquid.

This is, finally, a tried and true pumpkin pancake recipe, and one more great reason to look forward to fall.

Pumpkin Pancakes (adapted from Cathy Lowe’s Simple Homemade Pancakes, found through My Apples and Oranges)

Serves 2-3

1 cup (5 ounces) flour
1 tablespoon brown sugar
1 teaspoon baking powder
½ teaspoon baking soda
½ teaspoon salt
½ teaspoon cinnamon
¼ teaspoon allspice
¼ nutmeg
1 egg
2 tablespoons butter, melted and cooled
½ cup pumpkin
1 cup buttermilk
vegetable oil for the pan

1. In a large mixing bowl, stir together the flour, sugar, baking powder, baking soda, salt and spices. In a separate mixing bowl, whisk the egg until thoroughly combined, then add the butter, pumpkin, and buttermilk. Pour the liquid ingredients into the dry ingredients and whisk gently until batter is mostly mixed but still contains small lumps. Let batter rest while pan heats, at least 5 minutes.

2. Heat non-stick skillet or griddle over medium heat. Add a few drops of oil and spread it over the bottom of the pan. Using a ¼ cup measure, pour pancake batter onto hot griddle. When pancake is golden brown, flip to cook other side. Keep warm in oven heated to 275 degrees.

phyllo triangles: crawfish and mushroom fillings

I have had this recipe in my “To Blog” folder for months. It has sat there, ignored, while flashier ideas or more seasonal recipes or better photos or easier stories made other entries come first. In fact, I now have 33 recipes that are ready to be written about, just waiting for me to get up the motivation. I have decided that the only way to get my To Blog folder back under control will be a commitment to publish a blog entry every day for a month – which I could easily do even if I didn’t make one new recipe for the rest of the month.

These crawfish phyllo triangles caught my eye when Jen wrote about them because I remembered really liking crawfish the one time I’d had them before. But it was a few months before I discovered a great fish market nearby where I could actually buy crawfish. I served these with Deb’s mushroom phyllo triangles, thinking that it wouldn’t be much more work to make another filling as long as I was already dealing with phyllo.

I changed the season in the filling recipe, as Jen didn’t seem completely pleased with it. I love Old Bay, which is what she recommended using instead of the paprika in the original recipe. I also left out a few ingredients that didn’t seem really necessary. The recipe is originally from Emeril, and if there’s one thing I’ve learned from the number of Emeril recipes I’ve made, it’s that they can usually be simplified.


Here’s the most important lesson I learned from this experience: You cannot skimp on the butter used to brush the phyllo layers. I was making these for dinner on a weeknight (um, back when I was unemployed – I’m a little more practical about weeknight dinners now), and it wasn’t until I already had the filling made that I noticed the 2 sticks of butter used to brush the phyllo. I’m okay with splurging once in a while, but I just wasn’t mentally prepared for that.

So I did an internet search and saw that you can spray the sheets with nonstick spray instead of brushing them with butter. I did a hybrid – I gave the sheet a quick spray, and then a light brush with butter.  The problem is that, once baked, the phyllo triangles were clearly missing something. They were a little dry and not as flavorful or crisp as they should have been. Next time I work with phyllo, I’ll be sure to keep in mind that a lot of butter is absolutely necessary to make phyllo as good as it should be.


Despite this (and crawfish tails’ creepy similarity to insect abdomens), both of these fillings made for some tasty snacks. Dave and I liked the crawfish filling more than the mushroom filling, which seemed a little flat in comparison. But hey – at least they were a little healthier than normal. And most importantly, they’re finally out of my To Blog folder.


Crawfish Phyllo Triangles (adapted from Use Real Butter, who adapted it from Louisiana Real & Rustic by Emeril Lagasse)

Makes about 24 triangles

2 tablespoons butter
1 pound crawfish tails, peeled and cooked
1 medium onion, diced small
2 stalks celery, minced
1½ teaspoon salt
1 teaspoon Old Bay seasoning
3 tablespoon parsley, chopped
½ pound phyllo dough sheets, thawed
16 tablespoons (2 sticks), melted

1. Melt 2 tablespoons butter of medium-high heat in 12-inch skillet. Add the onions, celery, salt, and Old Bay and sauté until soft and brown, about 6 minutes, stirring occasionally. Add the crawfish and cook for about 5 minutes, stirring occasionally, until the crawfish tails begin to curl. Remove from heat. Stir in parsley. Let cool.

2. To make each triangle, set one sheet of phyllo on a clean work surface and brush melted butter on half of the sheet lengthwise. Fold the phyllo on its long axis in half. Brush melted butter on half of the phyllo lengthwise again, and fold on the long axis once more. You should have a long narrow strip of phyllo with 4 layers.

3. Place a heaping tablespoon of filling on one corner of the strip and begin folding the dough over the filling like a flag. Continue folding until the dough is completely wrapped around the filling. Brush a little butter on the end to seal it down. Repeat with remaining phyllo and filling.

4. Place triangles on a baking sheet so they are not touching one another. Bake at 375F for 18-20 minutes. Serve hot.

Mushroom Strudel (from Smitten Kitchen, who adapted it from The Complete Mushroom Book, by Antonio Carluccio)

Makes 18 triangles

18 sheets phyllo
8 tablespoons (1 stick) butter, melted
1 pound mixed, fresh, wild and cultivated mushrooms
1 medium onion, minced
3 tablespoons butter
Freshly grated nutmeg
1 tablespoon dry sherry
1 tablespoon all-purpose flour
Leaves from 1 sprig marjoram or thyme
6 tablespoons freshly grated Parmesan, plus extra for sprinkling, if you wish
Salt and pepper to taste

1. Preheat the oven to 400F (200C). Line a baking sheet with parchment paper. Clear a large work surface for this, big enough for two full sheets of phyllo, your egg wash, parmesan and filling.

2. Make the filling: Make sure the mushrooms are dust- and sand-free, wash if necessary, and trim if need be. Cook the onion in the butter and, when soft, add the mushrooms with the nutmeg. Sauté for 5 to 7 minutes, until liquid has been released and has partially evaporated. Add the sherry and evaporate the alcohol by cooking over low heat for 2 to 3 minutes. Stir in the flour, herbs, and some salt and pepper, and let cool. The mixture will be moist.

3. Take one sheet of phyllo at a time from their package; cover the remaining sheets with plastic and then a damp towel, ensuring they are completely covered. Brush one half of the sheet lengthwise with butter. Fold the unbuttered side over the buttered side, carefully, smoothing out any wrinkles and bubbles but not worrying if you can’t get them all. Again, brush one half of this lengthwise with butter, and fold the unbuttered side over it again. You’ll end up with one long column.

4. Dollop a spoonful of the mushroom filling near the end and sprinkle a teaspoon of parmesan over it. Begin folding one bottom corner of the phyllo strip over the filling until it meets the opposite edge, forming a triangle, as if you were folding a flag. Place the triangle seam side down on the baking sheet, brush lightly with egg wash and sprinkle with parmesan.

5. Bake in the preheated oven for 15 minutes. Serve warm.