Archives for September 2009

bran muffins

Copy of IMG_7107

Everything I eat is evaluated based on its ratio of nutrition to flavor. That sounds tedious but it isn’t. It’s really just answering one simple question that I think most of us ask before we dig in: Is it worth it?

Copy of IMG_7017

For example, macaroni and cheese: very indulgent, but also very delicious. Definitely worth it, at least once in a while.

Copy of IMG_7022

Raw carrots? Very healthy, but, eh, not my favorite thing to eat. I tend to ignore them unless there’s nothing else. But add some hummus, and you’ve increased the flavor significantly without decreasing the nutrition drastically, and hey, I’ll eat that.

Copy of IMG_7100

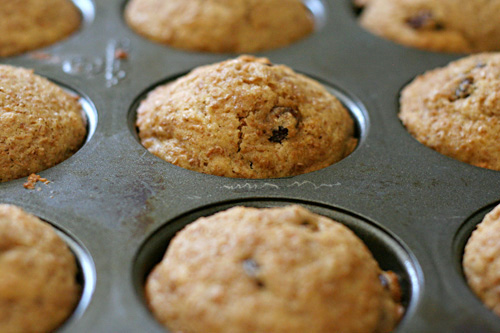
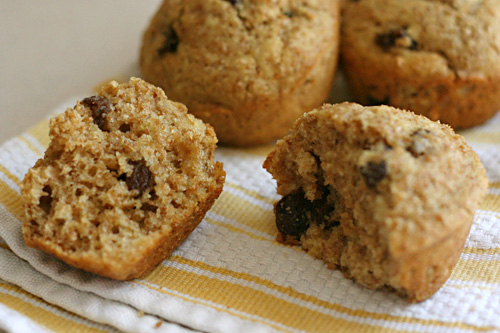
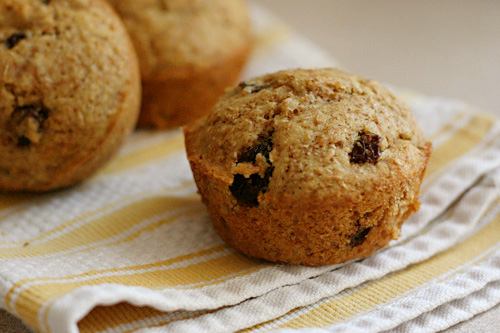
Sometimes I forget that something can be both ridiculously good for you and ridiculously good. And something like these muffins comes along, perfect in every way, both taste and health, and I’m oh-so-pleasantly reminded. Nutrition to flavor ratio? Off the charts.

Copy of IMG_7104

One year ago: Pain Ordinaire

Printer Friendly Recipe
Moist Bran Muffins
(from the King Arthur Flour’s Whole Grain Baking)

Makes about 18

Note that this is a two-day process, as the dough needs to set overnight before baking. Fortunately, at that point it can actually wait in the refrigerator for several days.

I’ve used both raisins and dried cranberries in these, and both are good. Of course most any dried fruit would work. I’ve also used clementine juice instead of orange juice, and that worked just fine.

¾ cup boiling water
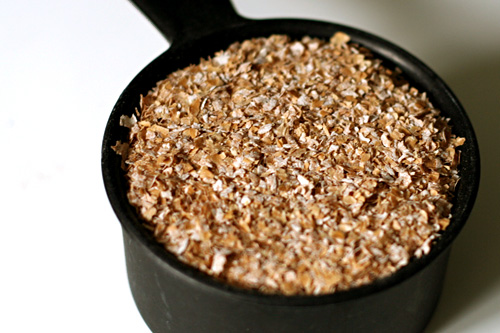
1¼ cups unprocessed wheat bran, divided
¾ cup dried fruit, chopped if large raisins
¾ cup packed light or dark brown sugar
¼ cup vegetable oil
2½ cups whole wheat flour, traditional or white whole wheat
1 teaspoon baking soda
½ teaspoon baking powder
1 teaspoon salt
1 large egg
¾ cup buttermilk
½ cup orange juice

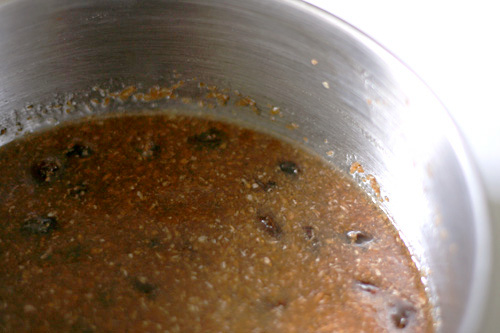
1. Pour boiling water over ¾ cup of the bran cereal in a small mixing bowl. Add the raisins, brown sugar and oil. While the bran mixture cools, blend together the flour, baking soda, baking powder, and salt in a large mixing bowl.

2. Beat the egg with the buttermilk and orange juice in a large measuring cup. Add this mixture to the dry ingredients. Stir in remaining ½ cup bran cereal, and then the bran-raisin mixture. Cover the bowl and refrigerate overnight.

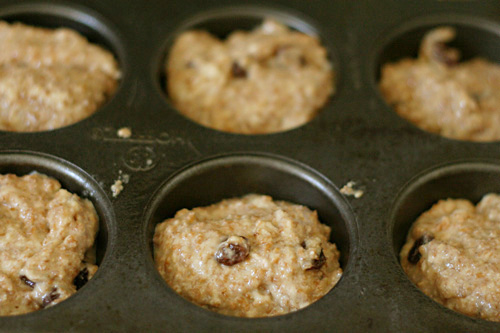
3. The next day, preheat the oven to 375 degrees. Lightly grease a muffin tin. Fill each cup two-thirds full. Bake the muffin until a tester comes out clean, about 23 to 26 minutes.

4. Remove from oven and allow to cool in pan for 5 minutes, then turn out onto a rack to finish cooling, or serve warm.
Copy of IMG_7111

chocolate-crunched caramel tart

Copy of IMG_9889

My favorite way to spend my oh-so-generous three-dollar allowance as a kid, was, surprise!, candy. Well, that and cheap stationary from Walgreens (which I still have, because, I don’t know why). Once a week, my friend Katie and I would walk to Walgreens and wander up and down the candy aisle, picking out favorites. I remember one road trip, sitting in the backseat, each digging through the boxes of candy we’d brought, trading Now and Later flavors (mm, sugary colorful wax) and rationing Sixlets.

I guess this explains all the cavities, huh?

Copy of IMG_9870

But these days, candy isn’t really my thing, in nearly any form. Oh, I’ll eat it; I don’t hate it. But when it comes to almost any confection, the truth is that I’d rather mix it up with flour and butter and bake something. Give me good brownies over the best truffle any day.
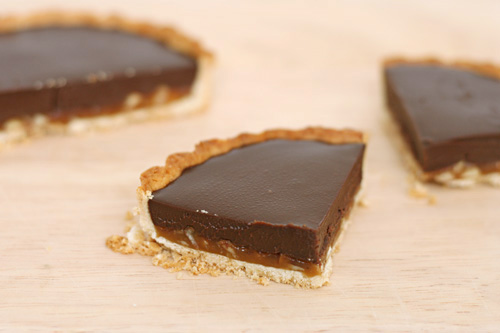
Which gives me a bit of a problem with this tart, which is filled with caramel, nuts, and ganache. It’s basically a piece of candy in a tart crust, and, eh. I ate it, it was fairly enjoyable, it just wasn’t really my thing. I demand more refined flour!

Copy of IMG_9882

I hate saying anything negative about recipes. I really want to clarify that there is absolutely nothing wrong with this recipe, and I did not dislike it. It just isn’t my favorite.  If you think you’ll feel differently, check out the recipe at Carla’s site. She chose this recipe for Tuesdays with Dorie this week.

One year ago: A comparison between two crème brûlée recipes

Copy of IMG_9897

herb-roasted onions

Copy of IMG_8470

I’m pretty sure I’m the worst yoga-er ever. I think it provides a pretty good workout, but, honestly, it kind of bores me. I know I’m supposed to get all meditative and stuff, but I don’t, and I end up bored, and I end up not doing yoga at all, and that’s no good.

Copy of IMG_8402

So my new trick is to watch the Food Network while I do yoga. See? Worst yoga-er ever.

Copy of IMG_8414

But if I think of yoga as “ooh, I get to watch Barefoot Contessa!” instead of “bleah, exercise”, I actually look forward to it. I recently saw her make chicken piccata, buttermilk mashed potatoes, and roasted onions, and I decided right there, in the middle of the warrior series, that I was making the whole meal that weekend.

Copy of IMG_8417

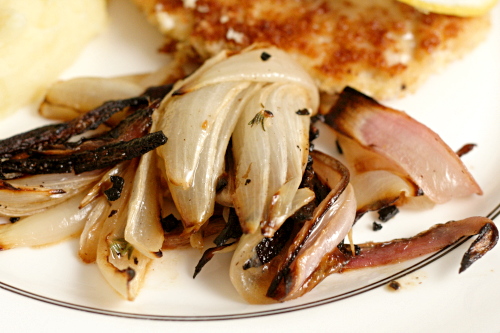
The buttermilk mashed potatoes were just as good as you’d expect (in other words, very, although I didn’t follow her recipe to a tee), and the chicken was actually a big failure, but the onions were what really stole the show. They get two major hits of flavor, a quick soak in lemony herb mustard vinaigrette before baking, and then another dip in the same dressing after they’re cooked.

Copy of IMG_8425

This was my first experience serving onions on their own instead of as a support to a dish’s main flavor, and, damn! I’ve been missing out. I really do love onions when they’re soft and caramelized, and the dressing brightened and enhanced the onions’ own sweetness. All that and stretchier muscles. Not bad for half an hour of watching television.

Copy of IMG_8439

Printer Friendly Recipe
Herb-Roasted Onions
(from Barefoot Contessa)

2 red onions
1 yellow onion
2 tablespoons freshly squeezed lemon juice
1 teaspoon Dijon mustard
1 teaspoon minced garlic
½ tablespoon minced fresh thyme leaves
¾ teaspoon kosher salt
¼ teaspoon freshly ground black pepper
¼ cup good olive oil
½ tablespoon minced fresh parsley leaves

1. Preheat the oven to 400F.

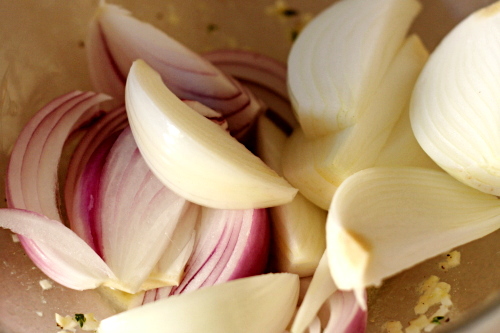
2. Remove the stem end of each onion and carefully slice off the brown part of the root end, leaving the root intact. Peel the onion. Stand each onion root end up on a cutting board and cut the onion in wedges through the root. Place the wedges in a bowl.

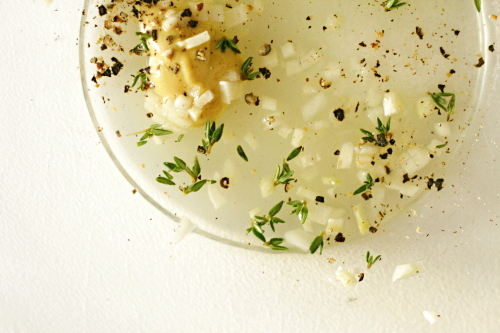
3. For the dressing, combine the lemon juice, mustard, garlic, thyme, salt, and pepper in a large bowl. Slowly whisk in the olive oil. Pour the dressing over the onions and toss well.

4. With a slotted spoon, transfer the onions to a sheet pan, reserving the vinaigrette that remains in the bowl. Bake the onions for 30 to 45 minutes, until tender and browned. Toss the onions once during cooking. Remove from the oven, and drizzle with the reserved dressing. Sprinkle with parsley, season to taste and serve warm or at room temperature.

Copy of IMG_8472

pumpkin cupcake comparison

Copy of IMG_9772

You know what’s totally unfair, considering that I’m in general more interested in food than Dave? He has a more sensitive palate than me. What the hell?

I made these cupcakes when he wasn’t around, and I had to do three separate “tastings” (eating all three in one sitting, unfrosted) over a couple of days before I could really narrow down my opinion. Dave came home, ate one of each, and described them almost exactly as I would have. Gah!

My primary goal for the pumpkin cupcakes was for them to be pumpkin cupcakes, not pumpkin muffins with frosting. I originally thought I’d make this recipe from Smitten Kitchen, but then I found two other recipes, one from the newest issue of Bon Appetit which everyone is raving about, and one from Martha Stewart, and of course I’m incapable of making a decision, so: comparison time!

batter combo
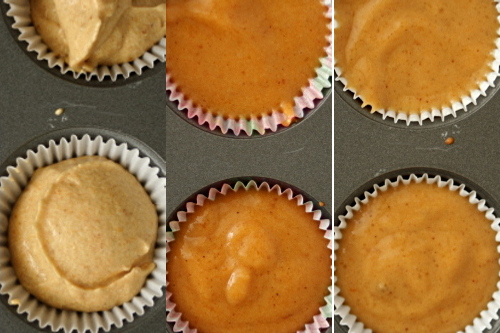
left to right: david leite, martha stewart, bon appetit

Method:
Bon Appetit: This recipe got demerit points from the start for calling for self-rising flour and pumpkin pie spice, both of which I had to look up conversions for. (And I was surprised to find that there apparently is no straight substitution for self-rising flour.) Plus it called for the brown sugar to be mixed with the dry ingredients – clumps!  The mixing method is a simple wet ingredients-dry ingredients-combine process, which…sounds like a muffin. It was the only recipe that used oil instead of butter, and it included sour cream.
Martha Stewart: This was also mixed similar to muffins are, with the pumpkin added after the wet and dry ingredients are combined.
David Leite (via Smitten Kitchen): This recipe was the most promising from the beginning, because it’s actually mixed using the cake method, where butter and sugar are creamed, the eggs are mixed in, then the dry ingredients and liquid (buttermilk in this case) are alternately added.

Copy of IMG_9566
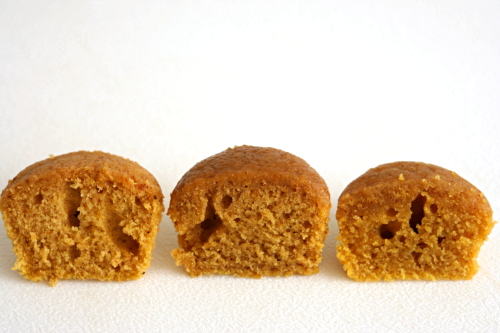
left to right: david leite, martha stewart, bon appetit

Results:
Bon Appetit: They were very dense; I could always identify these cupcakes just by the weight of them. The tangy flavor of the sour cream was definitely noticeable, which I thought masked the flavor of the pumpkin. This was both Dave and my least favorite.

Martha Stewart: These were good – light and moist, with a nice pumpkin flavor. The tops were sticky, but that doesn’t matter after they’re frosted. I was impressed with these until I tried the David Leite cupcakes, and then these seemed too muffiny.

David Leite: Perfect. So light, with just the right amount of resiliency. (It’s hard to describe this trait of cakes, but I like when they’re a little springy.) The pumpkin flavor was nicely balanced. They were just really good cupcakes, pumpkin flavored.

Copy of IMG_9573
left to right: david leite, martha stewart, bon appetit

For once, a comparison post where the results are clear! Even my dumb palate can tell the difference between these three cakes. David Leite’s recipe is certainly the way to go, unless you’re in a big hurry or hate to bake or something, in which case nobody is going to complain about Martha Stewart’s recipe.

Copy of IMG_9771

Printer Friendly Recipe
Pumpkin Cupcakes
(adapted from David Leite via Smitten Kitchen)

18 cupcakes

1 stick unsalted butter, room temperature, plus more for greasing pans
1 cup firmly packed dark-brown sugar
⅓ cup granulated sugar
2 cups cake flour
2 teaspoons baking powder
1 teaspoon baking soda
1 teaspoon ground cinnamon
1 teaspoon ground ginger
½ teaspoon ground nutmeg
⅛ teaspoon ground cloves
½ teaspoon salt
¼ teaspoon freshly ground black pepper
2 large eggs
½ cup buttermilk mixed with 1 teaspoon vanilla
1¼ cups canned solid-pack pumpkin

1. Preheat the oven to 350° (175°C). Line a cupcake pan with 18 liners.

2. In a stand mixer, beat the butter and sugars on medium speed until fluffy, about 5 minutes. Meanwhile, sift the flour, baking powder, baking soda, cinnamon, ginger, nutmeg, cloves, salt, and pepper into a medium bowl.

3. Add the eggs 1 at a time to the mixer, scraping down the sides after each addition. Alternate adding the flour and milk mixtures, beginning and ending with the flour. Beat in the pumpkin until smooth. Divide the batter equally between the cups. (They’ll be about ¾ full.) Rap the filled pans once on the counter to release any air bubbles. Bake the cakes until a toothpick inserted into the center comes out clean, about 20 to 25 minutes. Cool the cupcakes on racks completely.

Printer Friendly Recipe
Pumpkin Cupcakes
(from Martha Stewart)

Makes 18

2 cups all-purpose flour
1 teaspoon baking soda
1 teaspoon baking powder
1 teaspoon coarse salt
1 teaspoon ground cinnamon
1 teaspoon ground ginger
¼ teaspoon freshly grated nutmeg
¼ teaspoon ground allspice
1 cup packed light-brown sugar
1 cup granulated sugar
1 cup (2 sticks) unsalted butter, melted and cooled
4 large eggs, lightly beaten
1 can (15 ounces) pumpkin puree

1. Preheat oven to 350 degrees. Line cupcake pans with paper liners; set aside. In a medium bowl, whisk together flour, baking soda, baking powder, salt, cinnamon, ginger, nutmeg, and allspice; set aside.

2. In a large bowl, whisk together, brown sugar, granulated sugar, butter, and eggs. Add dry ingredients, and whisk until smooth. Whisk in pumpkin puree.

3. Divide batter evenly among liners, filling each about halfway. Bake until tops spring back when touched, and a cake tester inserted in the center comes out clean, 20 to 25 minutes, rotating pans once if needed. Transfer to a wire rack; let cool completely.

Printer Friendly Recipe
Mini Pumpkin Cupcakes
(adapted from Bon Appétit October 2009)

24 mini-cupcakes

The original recipe called for self-rising flour and pumpkin pie spice, but in the absence of both of those, I had to make substitutions.

½ cup cake flour
½ cup all-purpose flour
¼ teaspoon salt
1½ teaspoon baking powder
⅔ cup (packed) golden brown sugar
½ teaspoon cinnamon
¼ teaspoon ground ginger
⅛ teaspoon allspice
⅛ teaspoon nutmeg
2 teaspoons pumpkin pie spice
1 large egg
½ cup canned pure pumpkin
⅓ cup vegetable oil
⅓ cup sour cream
1½ teaspoons vanilla extract

Preheat oven to 350°F. Line 24 mini muffin cups with 1¾ x 1-inch paper liners. Mix flour, golden brown sugar, and pumpkin pie spice in large bowl. Whisk egg, canned pure pumpkin, vegetable oil, sour cream, and vanilla extract in medium bowl. Add mixture to dry ingredients; stir to fully combine. Spoon batter into paper liners (batter will almost fill liners). Bake cupcakes until tester inserted into center comes out clean, about 16 minutes. Remove cupcakes from pan and let cool completely on rack.

Copy of IMG_9773

goat cheese, pesto, and sun-dried tomato terrine

Copy of IMG_9428

Dave is, it should come as no surprise to me by now, quite a good match for me. I used to wish that he was as excited about food as I was. I’d ask him for meal ideas, I’d demand feedback after trying a new recipe, and I wished he’d cook with me. Invariably, his replies were, respectively, “salmon pesto pasta”, “good”, and “sure, someday.”

Which, actually – is fine by me. Do I really need someone picking apart each dish I make? Or adding even more ideas to an already overstuffed recipes-to-try folder? Or taking up valuable cooking opportunities?

Copy of IMG_9404

No, his uncritical, always-appreciative, open-minded attitude toward food is perfect. And when he does get excited by a dish, I know to take note, like when he came home from a work party raving about a goat cheese pesto spread someone had brought.

Copy of IMG_9406

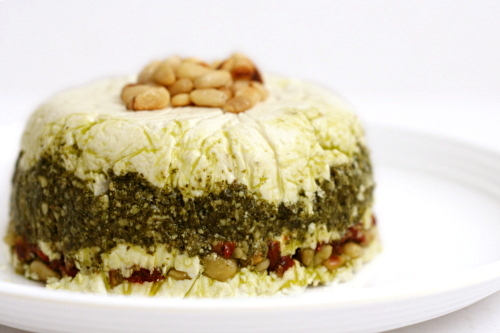
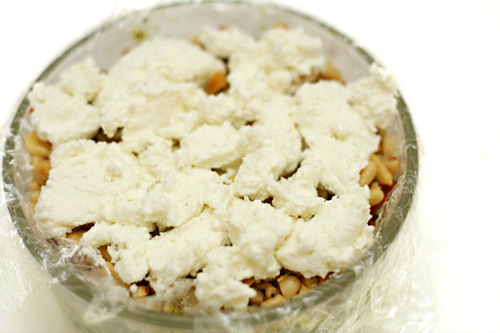
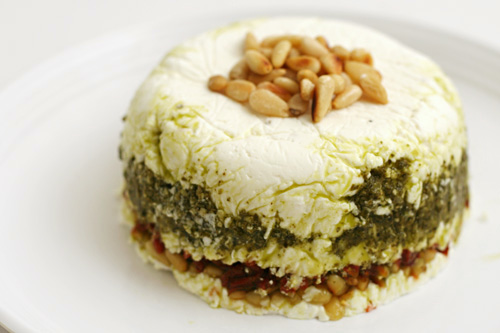
What you do is line a bowl with plastic wrap, then spread some softened goat cheese in the bottom. You’re supposed to make the goat cheese spreadable by adding cream, but I used milk and it worked just fine. Over the first layer of goat cheese, you add some pesto, then more goat cheese, then minced sun-dried tomatoes and chopped toasted pine nuts, then more goat cheese. After chilling for a few hours, it inverts nicely, and you pull the plastic wrap off to reveal nice layers.

Copy of IMG_9411

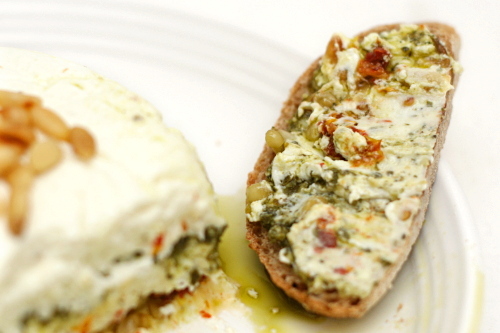
Wow, what a great combination of ingredients. The sweetness of the sun-dried tomatoes balances the tart goat cheese, and pesto is always delicious.  I served it with a whole wheat baguette, and we ate, um, a lot of it. It was completely irresistible.

Copy of IMG_9433

One year ago: Lavash Crackers and Pesto Goat Cheese Spread (Hi! I like pesto! And goat cheese!)

Printer Friendly Recipe
Goat Cheese, Pesto, and Sun-Dried Tomato Terrine
(from Fine Cooking)

Dave did tell me, too late, that his coworker had advised that one of the tricks to making the terrine look neat was to not overfill the intervening layers. That would have been nice to know before I spooned in a bunch of extra pesto.

My personal preference would have been for one more tomato. Dave didn’t agree.

10 ounces goat cheese
¼ to ½ cup heavy cream
Kosher salt and freshly ground black pepper
3 tablespoons basil pesto (homemade or store-bought)
5 oil-packed sun-dried tomatoes, drained and finely chopped
¼ cup pine nuts, toasted and coarsely chopped
Extra-virgin olive oil for drizzling

1. Line the inside of a 2-cup sharply sloping bowl (about 4 inches across the top) with plastic; let the ends extend over the sides a few inches. In a mixing bowl, mash the goat cheese and ¼ cup of the cream with a fork and season with ¼ teaspoon salt and a few grinds of pepper; add more cream if the cheese hasn’t softened.

2. Spoon about one-third of the cheese into the lined bowl and pack it into an even layer. Spread the pesto almost completely to the sides of the first layer of cheese. Top with another third of the cheese, the sun-dried tomatoes, and all but ½ tablespoon of the pine nuts. Top with the remaining cheese. Pack down, fold the plastic over, and refrigerate for at least 30 minutes.

3. Half an hour before serving, take the bowl out of the refrigerator. Pull on the edges of the plastic to loosen the terrine from the bowl. Invert the terrine onto a plate, drizzle with a little olive oil, and let sit for ½ hour to warm up. Sprinkle with the remaining pine nuts, season liberally with pepper, and serve.

Copy of IMG_9427

cottage cheese pufflets

Copy of IMG_9500

I often write blog entries in my head while I cook. While I was rolling out the dough and forming these pufflets, I was planning to tell you that I do not recommend this recipe. That it was my least favorite Dorie Greenspan recipe so far. That the dough was impossible to work with. (I was also thinking: God [bleep] damn it, this stuff [bleep] sucks, give me a [bleep] break.)

Copy of IMG_9480

In other words, the dough was really sticky. It’s a mixture of pureed cottage cheese, butter, flour, and just a bit of sugar. It wasn’t very sweet, and honestly, just didn’t taste all that great as dough.

Copy of IMG_9484

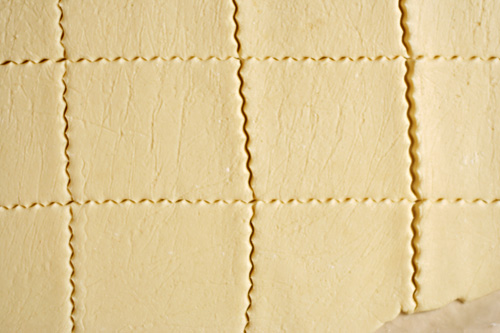
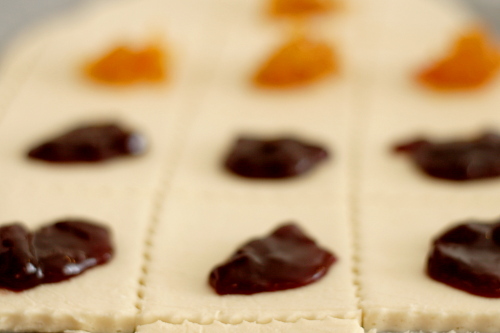
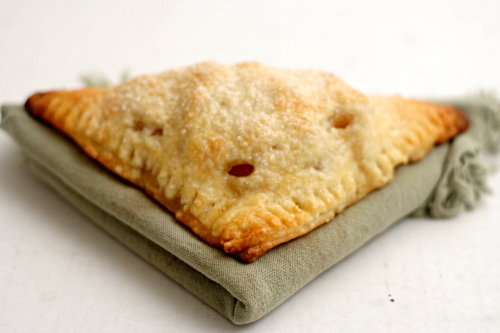
After the dough is chilled, it’s rolled out, cut into squares, filled with jam, folded to enclose the jam, and baked. And this is where I was getting so frustrated, because the dough was so. darn. sticky. The whole thing was turning into a mess, so I baked the few I’d formed and threw the rest back in the fridge to worry about later.

Copy of IMG_9489

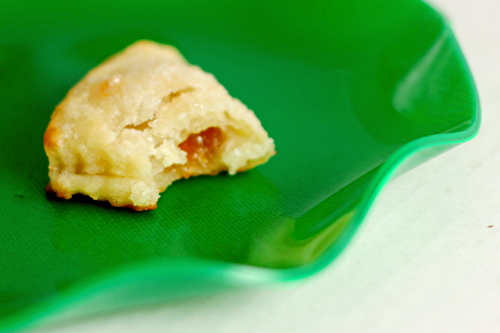
But then when I ate one, I changed my tune entirely! They’re so good! The crust does puff up and get really light, and it’s a good thing it isn’t too sweet, because of course the jam provides plenty of sweetness.

Copy of IMG_9493

The resulting treats are just too good to give up on this recipe because of the sticky dough. I think the best advice is just to leave yourself plenty of time while working with the dough to refrigerate it as soon as it gets sticky. Dorie doesn’t recommend a chilling time between rolling the dough flat and forming the pastries, but I really think it’s best to add one, probably about an hour long. With that in mind, I think these will be a lot easier to work with.

Copy of IMG_9504

Jacque has the recipe posted for Tuesdays with Dorie. I didn’t make any changes, but I did find that marmalade (the same ginger zucchini marmalade I used on the brioche tart) didn’t leak nearly as much as the raspberry jam I also used.

One year ago: Pan-Seared Steak with Red Wine Pan Sauce

Copy of IMG_9501

green chile huevos rancheros

Copy of IMG_7337

Do you have a food you love from your hometown that you can’t get anymore? For New Mexicans, that food will always be Hatch green chile. It’s ubiquitous in New Mexico, and you won’t just find it in enchiladas and chile rellenos and the like, but in more unexpected places, like eggs and burgers and pizza. New Mexicans are addicted.

Copy of IMG_7321

So what is a displaced New Mexican to do? Decent green chile simply isn’t available everywhere – the 4-ounce cans of chile that most stores do carry are, sadly, largely devoid of flavor. No, the only way to get good Hatch chile outside of the state it’s grown in is to know someone kind enough to send it to you.

Copy of IMG_7327

So every year during chile season (approximately right now), my mom sends me and my brother each a big box of fresh green chiles. She packs the chiles with newspaper to soak up moisture so they don’t rot (learned that the hard way), pokes holes in the boxes, and sends it 2-day mail. And once we have the chiles, they have to be roasted, peeled, and seeded. The whole process isn’t easy or cheap.

This year, Dave and I have decided that to skip the hassle, we’ll move to New Mexico.

Copy of IMG_7324

Well, no, that isn’t why we’re moving. Really, it just worked out with our job situation. But green chiles (and easier access to some squeezy nephew cheeks that are also in New Mexico) is definitely icing on the cake.

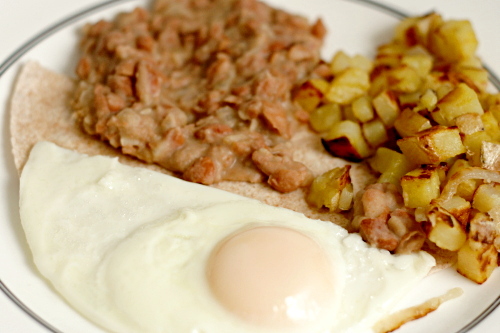
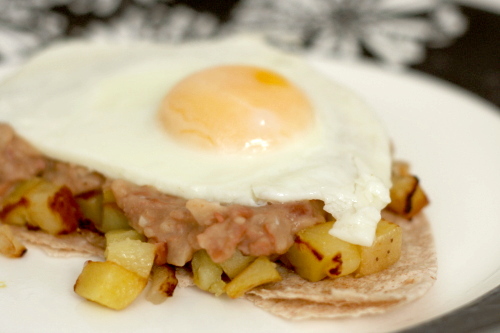
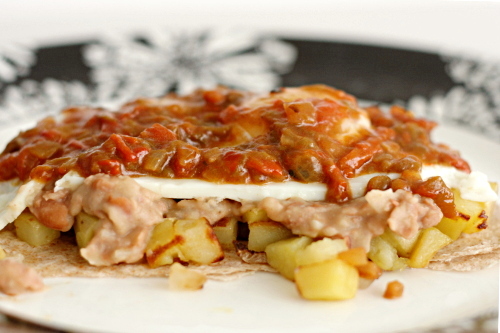
Green chile huevos rancheros is my favorite way to eat green chiles, as well as probably my favorite breakfast. The way I like it, there’s a flour tortilla base, then beans, eggs (over-medium for me) and home fries on the tortilla, all topped by green chile sauce. Definitely a meal worth moving across the country for.

Copy of IMG_7336

One year ago: Dimply Plum Cake

Printer Friendly Recipe
Green Chile Huevos Rancheros

4 servings

If you already have favorite recipes for home fries, pinto beans, and eggs, by all means, use them.

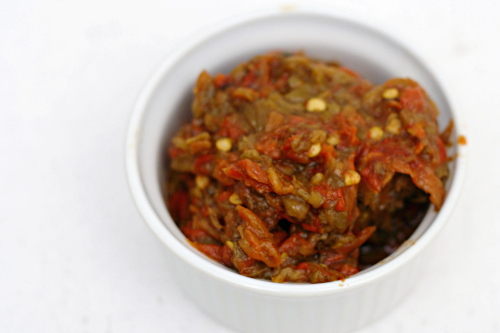
Green chile sauce:
1 tablespoon olive oil
¼ medium onion, chopped
1 garlic clove, minced
½ tablespoon flour
½ cup chicken broth
4 ounces green chile, diced
pinch sugar
1 tablespoon chopped tomatoes (or tomato juice or sauce)
salt

In a medium saucepan, heat the oil over medium heat. Add the onion and cook, stirring occasionally, until it’s just browned around the edges. Add the garlic and stir constantly for about 30 seconds, until fragrant. Mix in the flour, and continue to stir, for about one minute. Slowly add the broth, still stirring, then the chile, tomatoes, sugar and salt. Bring to a simmer, then adjust the heat to low, cover, and let cook for 10-15 minutes, stirring occasionally. (If your sauce is thinner than you like, remove the lid while it simmers.) Taste and adjust the seasonings, if necessary.

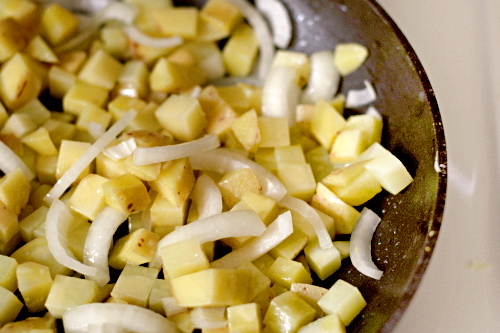
Home fries:
1 tablespoon olive oil
¼ medium onion, thinly sliced
16 ounces Yukon gold potato, diced into ¼ inch cubes
½ teaspoon salt (kosher)

Heat the oil in a nonstick pan over medium heat. (You can use a traditional skillet if you heat it well before adding the oil.) Add the potatoes, onions, and salt, and cover the pan. Cook over medium heat until the potatoes are tender and lightly browned, about 10 minutes, stirring occasionally. Remove the cover and cook until the onions and potatoes are cooked through and nicely browned, another 5-10 minutes. Adjust the seasonings if necessary.

Refried beans:
1 (15 ounce) can pinto beans, drained and rinsed
½ cup chicken broth
1 tablespoon olive oil
¼ medium onion, minced
1 garlic clove, minced
1 teaspoon cumin
¼ teaspoon salt

Heat the oil over medium heat in a medium nonstick saucepan or skillet. Add the onions and cook until the edges start to brown. Meanwhile, using a potato masher, mash the beans until they’re mostly broken up. It’s fine if there are still some whole beans. (If you prefer your beans completely smooth, puree them in a food processor.) Stir the chicken broth into the beans. Add the garlic and cumin to the onions in the pan, and cook, stirring constantly, until fragrant, about 30 seconds. Add the bean mixture and salt and bring to a simmer. Lower the heat to low to medium-low to maintain a bare simmer, and cook the beans until they’re your desired consistency, stirring often. It should only take a few minutes. Adjust the seasonings to taste. If they’re ready before everything else, just cover them.

Eggs:
1 teaspoon oil
4 eggs
salt

Heat the oil in a medium nonstick skillet over medium-low heat. Crack each egg into a small dish. Carefully transfer the eggs to the skillet, then sprinkle them with salt. Add 2 tablespoons water and raise the heat to medium-high. Once the water simmers, cover the pan and lower the heat back to medium-low. Cook for about 3-6 minutes for over-medium eggs. Remove the lid and let the water evaporate.

Assembly:
Place a warmed 6-inch flour tortilla on each of four plates. Top each tortilla with one egg, a quarter of the beans, and a quarter of the potatoes. Divide the sauce evenly between each plate. (Alternatively, layer a tortilla, then beans, potatoes, an egg, and the sauce.)

Copy of IMG_7333

twice-baked potato cups

Copy of IMG_4842

Bad habit: I cook new recipes at a much faster rate than I get around to writing about them here.  By the time I’m ready to put them in the blog, I can’t remember what motivated me to make them in the first place.  So instead of including some sort of personalized story that hopefully makes blog a little interesting, I end up writing about something lame like how I have nothing to say.  Um.

Copy of Copy of IMG_4788

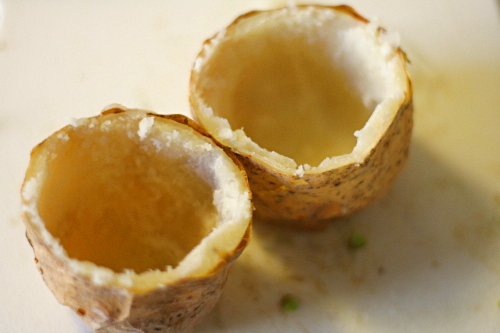
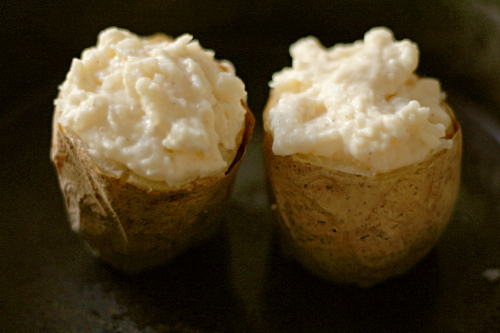
Anyway, twice baked potatoes!  You can’t go wrong, you know?  But these are way cuter than regular ones, because they stand up on their small sides and form little cups.  Love!

Copy of IMG_4815

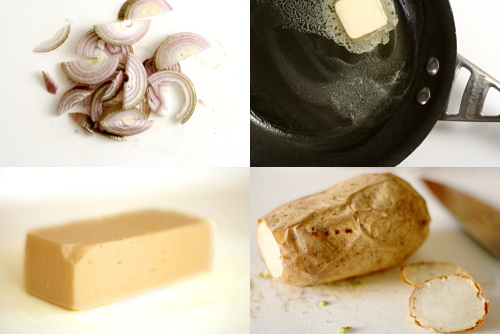
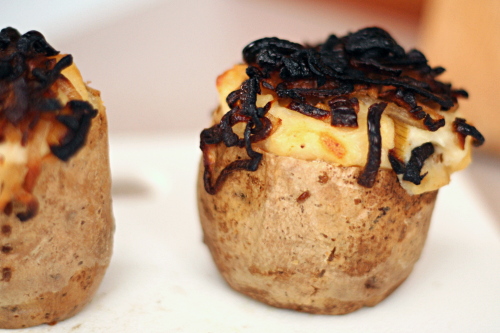
Also, shallots – so good.  So sweet and flavorful.  And charred, in this case, so watch out for that.

Harvati isn’t a cheese I’m too familiar with, but mmm, it was good.  Tasted a bit like a good cheddar, but it was softer and smoother.

Copy of IMG_4822

These were exactly as good as you’d expect based on the ingredients.  They’re also as good as any other twice baked potatoes, but they’re more interesting, not just in their shape, but with a nontraditional cheese choice and wonderful caramelized shallots.  Maybe something as good as this doesn’t need a personalized story.

Copy of IMG_4839

One year ago: Banana and Peanut Butter Stuffed French Toast

Printer Friendly Recipe
Twice-Baked Potato Cups with Caramelized Shallots
(from epicurious.com)

Serves 4 generously

I skipped the vegetable oil.  Also, I think you could substitute buttermilk for some or all of the sour cream.

4 12-ounce russet potatoes, scrubbed
Vegetable oil
1 cup coarsely grated Havarti cheese (about 4 ounces)
½ cup sour cream
¼ cup whole milk
¼ teaspoon cayenne pepper
3 tablespoons butter
1½ cups thinly sliced shallots (about 8 ounces)
1 tablespoon chopped fresh Italian parsley

1. Preheat oven to 400°F. Pierce potatoes in several places with fork, then brush lightly with oil. Place potatoes directly on oven rack and bake until tender when pierced with fork, about 55 minutes. Cool potatoes slightly.

2. Cut off thin slice from both short ends of each potato and discard. Cut each potato crosswise in half; stand each half on its small flat end. Using teaspoon, scoop out cooked potato pulp from each half, leaving ⅓-inch-thick shell and forming potato cup. Place potato cups in 13x9x2-inch glass baking dish. Place potato pulp in medium bowl; add cheese, sour cream, milk, and cayenne. Using potato masher or fork, mash until well blended and almost smooth. Season to taste with salt and pepper. Mound mashed potato mixture in potato cups.

3. Melt butter in heavy medium skillet over medium heat. Add shallots and sauté until tender and deep brown, about 12 minutes. Top potato cups with shallots. (Can be made 1 day ahead. Cover and chill.)

4. Preheat oven to 350°F. Bake potato cups until heated through, about 20 minutes. Sprinkle with parsley and serve.

Copy of IMG_4845

flaky apple turnovers

Copy of IMG_9396

I have officially relinquished my annual Fight Against Fall. Usually I’m very stubborn about waiting until October before I want to think about apples, pumpkin, or candy corn. But, eh. It got cold early this year, and we’re going to be really busy in October, so I figured I’d better soak up this time while I can.

Copy of IMG_9374

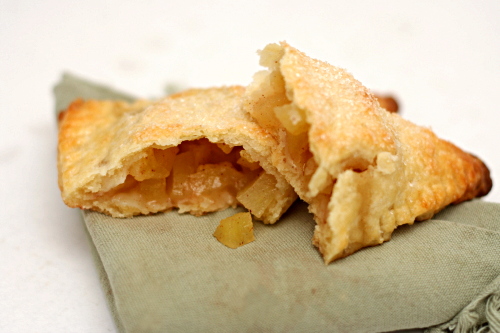
So bring on the apples! These turnovers are interesting because the dough has a bit of puff pastry-ness to it. It’s made kind of like pie crust, with butter cut into flour, but then instead of stirring in ice water, it’s hydrated with sweetened sour cream. Yum! If I wasn’t severely trying to curb my dough-eating, there might have been a problem. A there’s-not-enough-pastry-left-for-the-apples problem.

Copy of IMG_9379

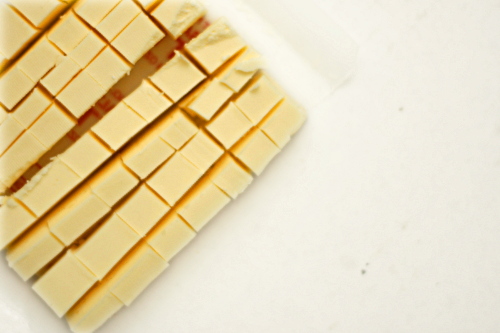
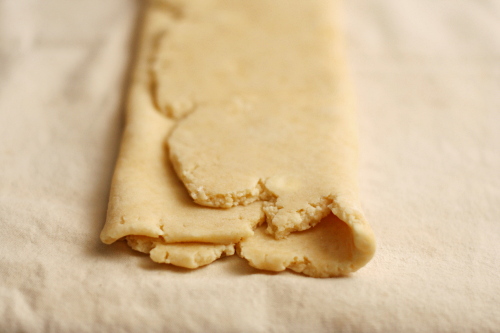
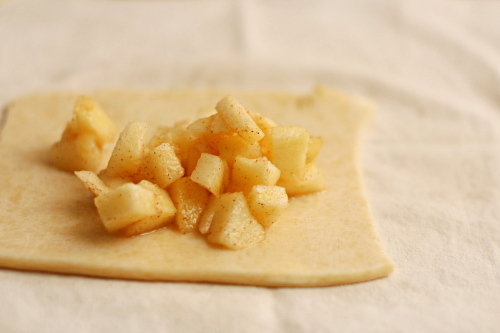
The dough only has one turn (roll it out and fold into thirds like a piece of paper going into an envelope), but it has to be chilled before and after. Then it’s rolled out again and filled with a simple mixture of apples, cinnamon, sugar, and flour.

I will admit that I was starving when I ate this, but oooh, so delicious. The filling is a no-brainer; it’s just apple pie filling. But you know how sometimes you’ll be eating a turnover, and the corner bites are disappointing because there’s no fruit there? That isn’t an issue with these, because the crust is so darn good! And, as an added bonus, I got the best whiff of apples and spices while these were baking, and we had football on, and I don’t care how green the trees still are, it’s definitely fall for me.

Copy of IMG_9380

Julie chose this recipe for Tuesdays with Dorie, and she has it posted.  I skipped the butter in the filling.  I baked some of the turnovers immediately, and froze the rest and baked them a few days later, with absolutely no negative effects.  The second time, I brushed the turnovers with milk instead of egg, which worked very well.

One year ago: Chocolate Chunkers

Copy of IMG_9398

risotto with swiss chard

Copy of IMG_6075

Although I think that adding green pepper is the easiest way to ruin otherwise perfectly good pizza, I’m not in general a picky eater. There are no common ingredients that I refuse to eat, I’m game to try just about anything, and I think even green pepper has its place. (Caveat: margarine and the like – gross. But that stuff doesn’t count.)

On the other hand, sometimes I do have problems wrapping my mind around certain things. For example, I love sushi, love it, and make an opportunity to eat it once every week or two, but somewhere, in the back of my mind, when I eat tuna sashimi, I’m still thinking “ew, raw fish.”

Copy of IMG_6060

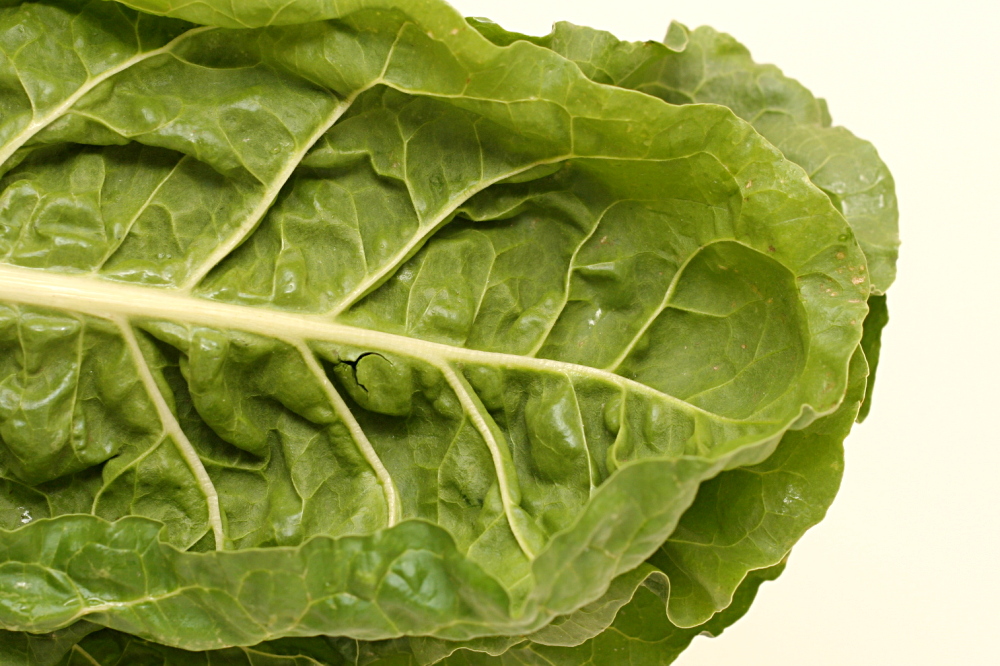
A year or two ago, I realized that I really like kale, and you might think that would lead me to believe I’d also enjoy other hearty greens, like swiss chard. But I had it in my head that swiss chard would be bitter and mushy. It took me a long time to convince myself to try it.

Risotto is a really good way to introduce new vegetables. For one thing, it’s so freakin’ good on its own, and the flavors go with a lot of different ingredients. For another, it makes a convenient side dish to a nice piece of meat, because it often incorporates both a starch and vegetables, so you only need to make one side instead of two.

Copy of IMG_6064

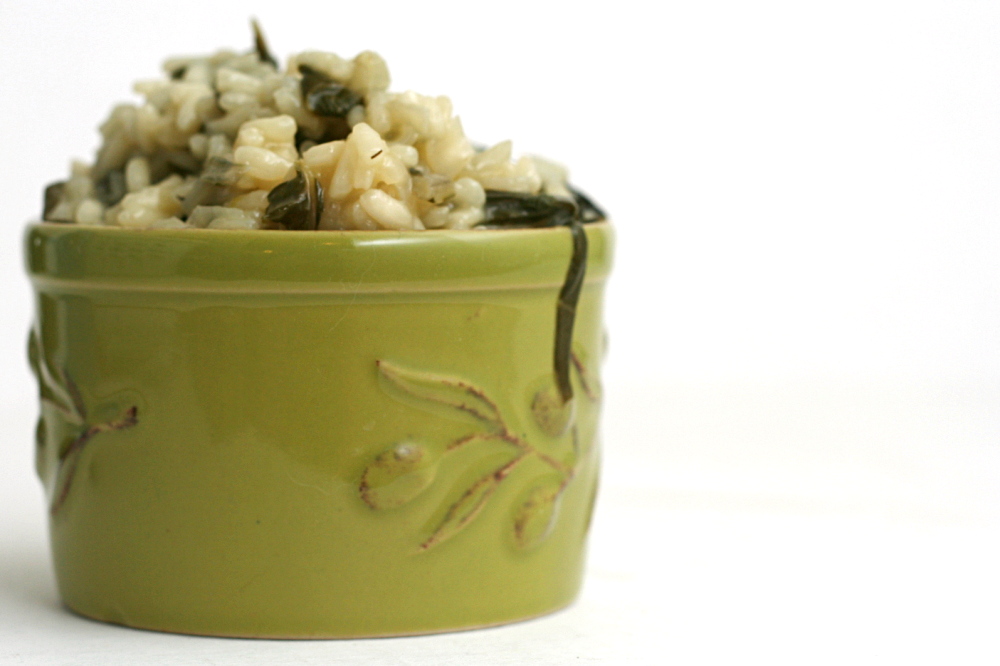
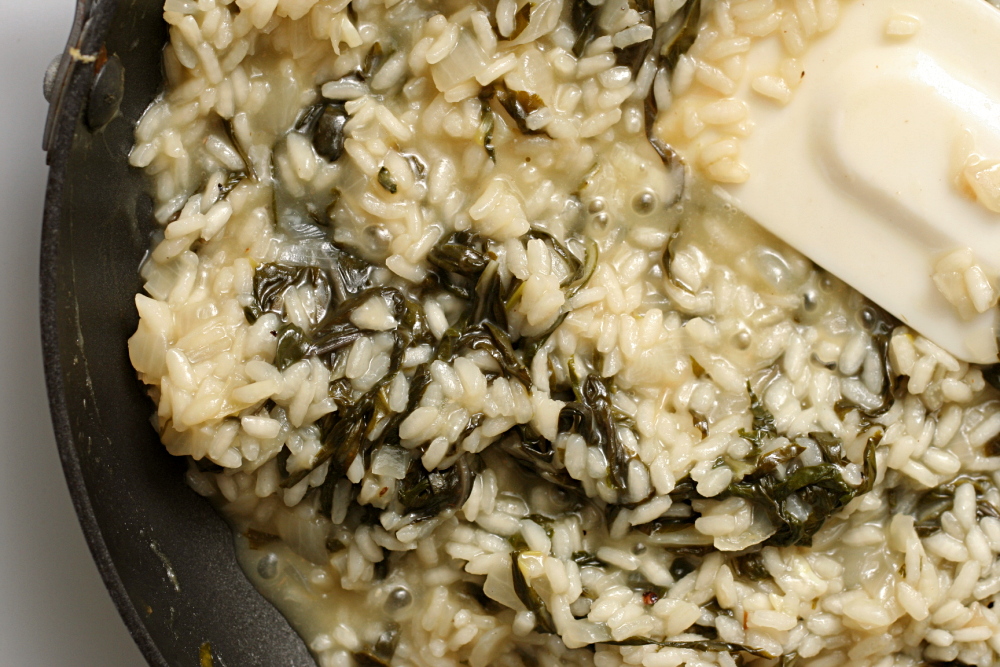
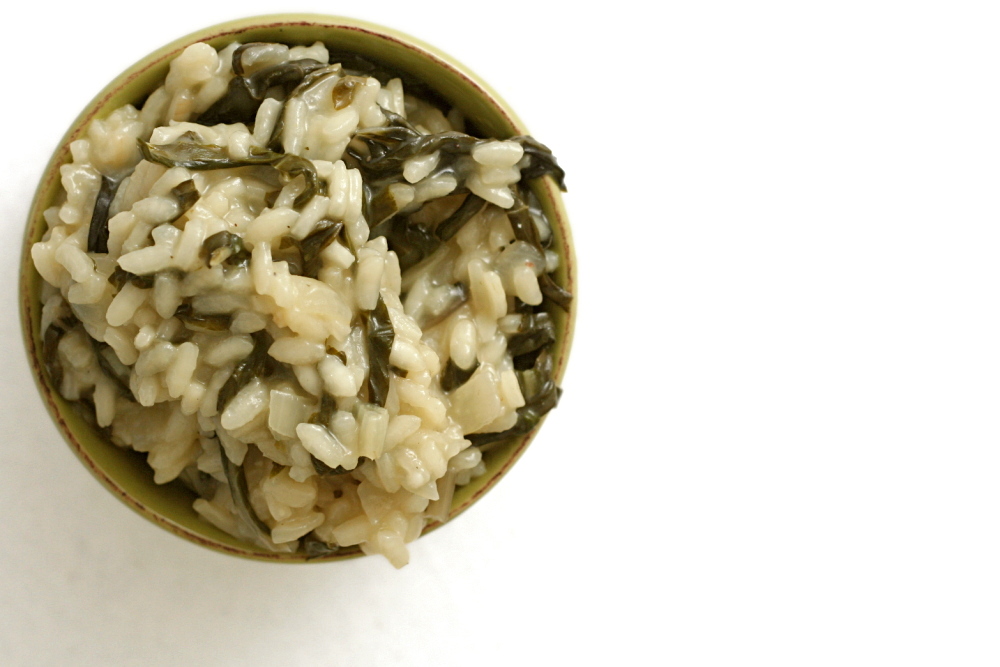
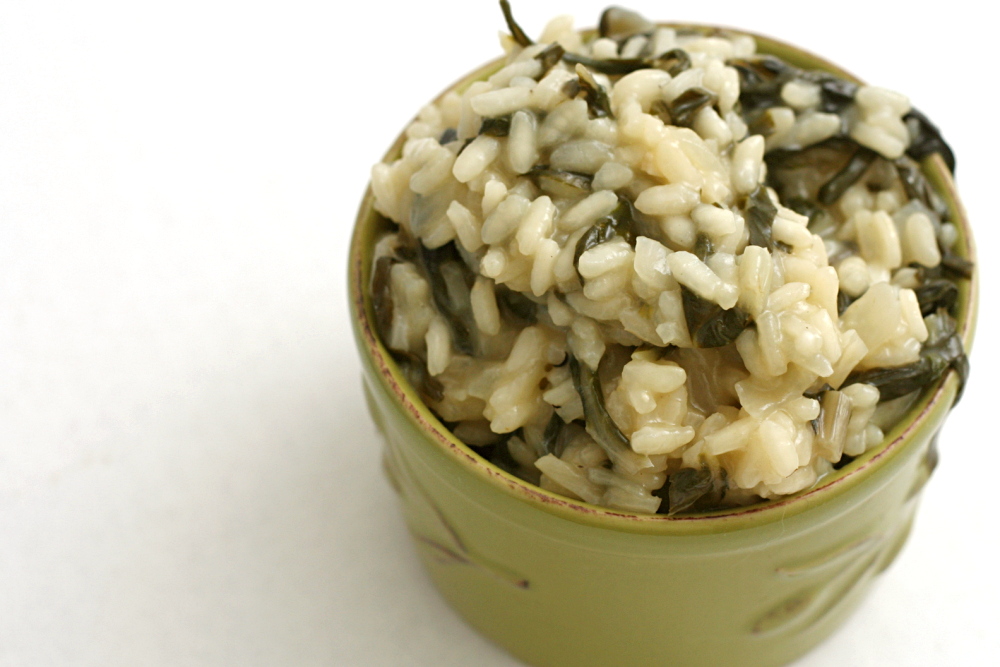
I did look at a recipe for risotto with swiss chard, but ultimately decided to just add chard to my standard risotto recipe. I tried adding it with the rice at first, but I was worried that it was overcooking, and even though the final result was actually very good, I had hoped to hold on to the bright green color that the chard turns midway through cooking. I tried again, this time adding the greens later, with the broth. And it made no difference that I could tell. Once cooked, chard turns a dark olive green, and there’s no getting around it.

Copy of IMG_6074

The earthiness of swiss chard goes really well with risotto. And one thing that’s satisfying about eating hearty greens like this is that they lose so much volume during cooking that I feel like it’s easy to eat a whole lot of greens! As usual, I’m glad I tried and managed to accept a new ingredient. Maybe raw oysters will be next?

Copy of IMG_6080

One year ago: Gazpacho

Printer Friendly Recipe
Risotto with Swiss Chard

6 servings

3½ cups low-sodium chicken broth
3 cups water
2 tablespoons olive oil
1 medium onion, diced fine
2 cloves garlic, minced
salt
2 cups Arborio rice
1 large bunch swiss chard, coarsely chopped (4-5 cups)
1 cup dry white wine
2 ounces (1 cup) parmesan cheese
pepper

1. Bring the broth and water to a simmer in a medium saucepan over medium-high heat. Cover; turn the burner off but keep the pot on the burner.

2. Heat the olive oil over medium heat until the foaming subsides. Add the onion and sauté until softened, about 5 minutes. Add the garlic and cook until fragrant, about 30 seconds. Add the rice, chard, and 1 teaspoon salt and cook, stirring constantly, until the rice is opaque, about 2 minutes. Add the wine and cook, stirring until the rice nearly completely absorbs all the liquid, about 1 minute.

3. Add 2 cups of the hot stock and stir occasionally until it’s mostly absorbed (the spoon will leave a trail on the bottom of the pan), about 6 minutes. Continue to add stock, 1 cup at a time, stirring frequently, until each addition is absorbed. Cook until rice is creamy but still somewhat firm in center (add more water in ½ cup increments if broth/water mixture runs out), 10 to 12 minutes longer.

4. Stir in the cheese. Season with salt and pepper, if necessary. Serve.

Copy of IMG_6079