My guidelines for nutrition can pretty much be summed up by:
- Only eat when hungry. But don’t eat too much.
- Don’t eat processed crap.
- Eat as many fruits and vegetables as you can stand.
- Don’t be a baby about whole grains.
I’ve been getting worse and worse about that last one recently. I’ve walked by Reinhart’s book on whole grain breads in the bookstore so many times and never even bothered to pick it up. It’s just that white bread, made well, is so darn good, you know? I’m not talking about Wonder Bread or something, I mean a nice sweet tender sandwich bread or a fantastic complex rustic baguette.
But my interest was sparked when I saw the whole wheat bagels that Stefany made from this book. They look at least as good as any bagels I’ve made – but they’re so much healthier. Within a week, I tried the recipe, was pleased with the results, and bought the book.
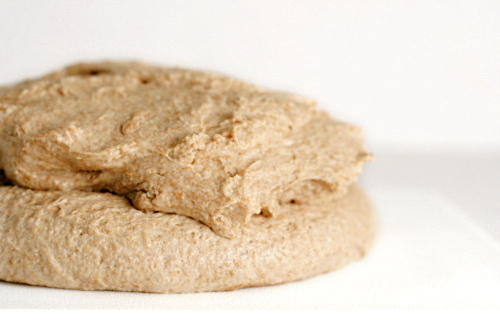
It’s Peter Reinhart, so we’re not talking about the most simple recipes here. In general, they’re two day affairs. The first day, you mix two things. One is a thick paste of whole wheat flour, liquid, and salt, and the other one is a mixture of whole wheat flour, liquid, and yeast. These both set overnight (or longer, if necessary) and are incorporated into the rest of the dough the next day. On the day of baking, you follow essentially a normal bread-baking procedure, from mixing and kneading, through rising, shaping, proofing, and baking.
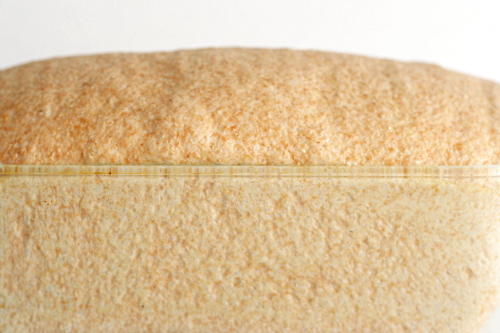
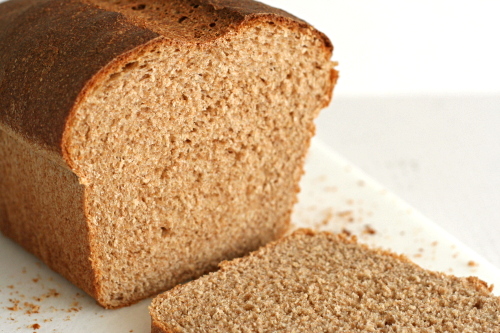
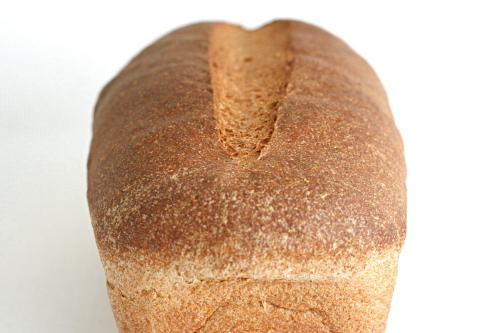
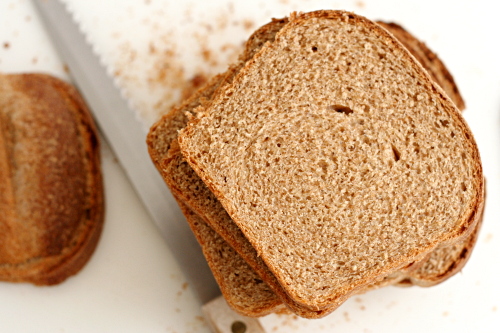
Most homemade whole wheat bread recipes call for, at most, half whole wheat flour. This recipe uses 100% whole wheat flour, and it’s as good as any of those other recipes. It’s tender and light, just like you want from a sandwich bread. And it tastes seriously good. Obviously it tastes whole wheaty, but it has more to it than that. The long soaks from the pre-doughs give the bread a full flavor that includes sweetness and a bit of acidity. I am officially hooked on 100% whole wheat breads.
One year ago: Lemon Pancakes with Blueberry Syrup
Printer Friendly Recipe
100% Whole Wheat Sandwich Bread (from Peter Reinhart’s Whole Grain Breads)
Reinhart also has a “Transitional Whole Wheat Sandwich Bread” that is made the same way, except it uses white unbleached bread flour in the biga. If you decide to make this version instead, keep in mind that you’ll need a little less water when working with white flour (1-2 teaspoons per ounce of flour).
Soaker:
1¾ cups (227 grams) whole wheat flour
½ teaspoon (4 grams) salt
¾ cup plus 2 tablespoons (198 grams) milk, buttermilk, yogurt, soy milk, or rice milk
1. Mix all of the soaker ingredients together in a bowl for about 1 minute, until all of the flour is hydrated and the ingredients form a ball of dough.
2. Cover loosely with plastic wrap and leave at room temperature for 12 to 24 hours. (If it will be more than 24 hours, place the soaker in the refrigerator; it will be good for up to 3 days. Remove it 2 hours before mixing the final dough to take off the chill.)
Biga:
1¾ cups (227 grams) whole wheat flour
¼ teaspoon (1 gram) instant yeast
¾ cup (170 grams) filtered or spring water, at room temperature (about 70F)
1. Mix all the biga ingredients together in a bowl to form a ball of dough. Using wet hands, knead the dough in the bowl for 2 minutes to be sure all of the ingredients are evenly distributed and the flour is fully hydrated. The dough should feel very tacky. Let the dough rest for 5 minutes, then knead it again with wet hands for 1 minute. The dough will become smoother but still be tacky.
2. Transfer the dough to a clean bowl, cover tightly with plastic wrap, and refrigerate for at least 8 hours and up to 3 days.
3. About 2 hours before mixing the final dough, remove the biga from the refrigerator to take off the chill. It will have risen slightly but need not have risen significantly in order to use it in the final dough.
Final dough:
All of the Soaker
All of the biga
7 tablespoons (56.5 grams) whole wheat flour, plus extra for adjustments
5/8 teaspoon (5 grams) salt
2¼ teaspoons (7 grams) instant yeast
2¼ tablespoons (42.5 grams) honey or agave nectar
1 tablespoon (14 grams) unsalted butter, melted, or vegetable oil
1. Using a metal pastry scraper, chop the soaker and the biga into 12 smaller pieces each (sprinkle some of the extra flour over the pre-doughs to keep the pieces from sticking back to each other).
2. If mixing by hand, combine the soaker and biga pieces in a bowl with all of the other ingredients except the extra flour and stir vigorously with a mixing spoon or knead with wet hands until all of the ingredients are evenly integrated and distributed into the dough. It should be soft and slightly sticky; if not, add more flour or water as needed.
If using a stand mixer, put the pre-dough pieces and all of the other ingredients except the extra flour into the mixer with the paddle attachment (preferable) or dough hook. Mix on slow speed for 1 minute to bring the ingredients together into a ball. Switch to the dough hook and mix on medium-low speed, occasionally scraping down the bowl, for 2 to 3 minutes, until the pre-doughs become cohesive and assimilated into each other. Add more flour or water as needed until the dough is soft and slightly sticky.
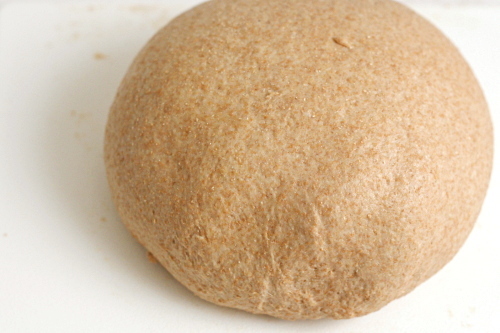
3. Dust a work surface with flour, then toss the dough in the flour to coat. Knead by hand for 3 to 4 minutes, incorporating only as much extra flour as needed, until the dough feels soft and tacky, but not sticky. Form the dough into a ball and let it rest on the work surface for 5 minutes while you prepare a clean, slightly oiled bowl.
4. Resume kneading the dough for 1 minute to strengthen the gluten and make any final flour or water adjustments. The dough should have strength and pass the windowpane test, yet still feel soft, supple, and very tacky. Form the dough into a ball and place it in the prepared bowl, rolling to coat with oil. Cover loosely with plastic wrap and let rise at room temperature for approximately 45 to 60 minutes, until it is about 1½ times its original size.
5. Transfer the dough to a lightly floured work surface. To shape it for a loaf pan, pat it out to a square approximately 1-inch thick, then roll the dough into a cylinder. Place the dough in a greased 4 by 8½-inch bread pan. Cover the dough loosely with plastic wrap and let rise at room temperature for approximately 45 to 60 minutes, until it is about 1½ times its original size.
6. Preheat the oven to 425F. When the dough is ready to bake, place it in the oven and bake for 20 minutes. Rotate the loaf 180 degrees and continue baking for another 20 to 30 minutes, until the loaf is a rich brown on all sides, sounds hollow when thumped on the bottom, and registers at least 195F in the center.
7. Transfer the bread to a cooling rack and allow it to cool for at least 1 hour before serving.


Wow Bridget. That looks fantastic. Again, I’m a little intimidated by the recipe but I REALLY want to try this! It looks like fantastic bread for my lunches.
I have been wanting to make some homemade sandwich bread for a while now. The only bread I have made is challah, so I would love to take a shot at this. Yours look great!
Do you know what the shelf-life of homemade bread is? Does it need to be refrigerated after cooling to extend its shelf life?
Looks amazing! Thanks for trying this recipe, I’ve been wondering about it for a while!
Wow, I wish there were a way to print this recipe without printing the rest of the page. I can just smell the bread dough rising.
I would like to link to this recipe from my Tea Sandwiches pages.
Margaret Studer
National Tea Examiner
Examiner.com
Chaitali – You generally don’t want to refrigerate bread, because it messes with its texture. Instead, I freeze bread. I usually slice it, store it in a ziploc bag, and freeze it. It only takes half an hour or so for a slice or two to defrost.
Whole wheat bread is my favorite. Lovely loaf!
Wow, this loaf looks perfect! I’ve been meaning to make 100% whole wheat bread lately, I think I’ll have to try this recipe. The whole wheat bread at the grocery store are usually not very tasty and the texture always sucks, not to mention half the time they aren’t even 100% whole wheat and have a bunch of high fructose corn syrup!
I’ve been a long time lurker and because of some prodding from my girlfriend I wanted to say that I love your recipes, photos and commentary. I’d also like to say that I envy your ability to make bread. Anytime I’ve ever attempted it – culinary disaster.
Keep up the great work!
Looks fabulous! I think once I get through Reinhart’s BBA book I’ll pick up his Whole Grain one!
looks great, love that it’s smooth and not chunky like a lot of whole wheat breads…
I’m impressed – what a perfect loaf of bread! I own that book too but haven’t used it yet because I haven’t gotten through the intro yet – I need to pick it up again because this looks great!
This is so perfect. It’s not easy to make a great Whole-Wheat bread. Peter Reinhart is the best.
I love love love this bread! Only made it once (so many others to make…), but it’s one of my favorites. Not too whole-grain-y, but wonderful for sandwiches.
Your loaf turned out so fluffy! I will definitely have to try this technique out.
Beautiful loaf of bread. And it’s healthy with whole wheat flour 🙂 I started a bread contest. You should submit one of your wonderful recipes. The winner gets a $179 Super Bread bread knife from New West Knifeworks. You can get more info here:
http://www.phamfatale.com/id_570/title_18-More-Days-until-the-End-of-the-Bread-Contest/
This bread looks beautiful. I’ve been having trouble finding a good whole wheat bread recipe so I’ll definitely have to give this one a try! Gorgeous photos, as always! :o)
Hi. are you supposed to refrigerate the biga? You gave the directions to make it and then said 2 hours before making the final dough take it out of the refrigerate. For the Soaker you said to put it in the fridge only if it would be 24 hours or more before making the dough. is this what you meant to specify about the biga? Is it best to NOT refrigerate the biga and leave it out in room temp for 12 to 24 before finishing the dough?
also one more question…. in step one of making the dough you said chop up the predoughs into 12 pieces and sprinkle with flour to keep them from sticking together again…. but the very next step is to combine them into one dough???
April – You do want to refrigerate the biga. There was a mistake in the recipe. Thanks for calling that to my attention; it’s corrected now.
The point of flouring the predough pieces so that they don’t stick together is that they’ll more get more evenly incorporated into the dough. That being said, I never do it. I don’t even cut them up into pieces before adding the other dough ingredients. I also knead with the mixer the entire time instead of switching to hand-kneading after a few minutes.
oh thank you! This will be my first bread, besides quickbreads. Im excited and terrified. Thanks for this wonderful recipe and for the tips!
ok, so i just got around to making this for the first time today, my first loaf of bread EVER! I was shocked how great it turned out! perfect texture, wonderful flavor, tall and fluffy… Im so proud of myself!
One thing that took me by surprise though was the baking time. after the initial 20 minutes it looked almost OVERdone. but i decided to trust the recipe and i turned it and shut the oven. 5 minutes later i was a bit nervous about it and decided to take its temp. I used a meat thermometer and it registered 195. so i took it out of the oven.
At first the top crust seemed really dried out and hard and i thought i had failed somehow, but i let it cool and it softened as it did. and hour later i cut a few slices out of it and like i said earlier it was perfect! I will be using this recipe for years to come!
April – I’m so glad it worked out for you! I’m also relieved that you took the temperature early so that your bread didn’t overcook. I have noticed that breads tend to bake faster for me than recipes indicate they will, even though I have (and use) 2 oven thermometers.
Fantastic! Since we moved, my “no fail” bread recipe has failed me TWICE and I was getting quite dismayed. I just took a loaf of this out of the oven and am so excited for it to be cool enough to cut. The dough was absolutely gorgeous and rose perfectly. It’s a little dark, but this oven has a crazy range of fluctuation that I haven’t quite learned to outsmart yet.
I also added PR’s whole grains book to my Christmas list since I already have BBA.
Hi! Just made this and it turned out great!!!
Have you ever doubled or tripled the recipe? For sake of time, I wanted to freeze a few loafs and maybe limit bread baking to once a month or so. I am wondering how to do the conversions since I don’t know how that works with yeast exactly.
Thanks!
Christe – I have never doubled this particular recipe, but I often cut bread recipes in half (or less). You don’t need to do anything besides multiply the ingredients – the amount of the yeast and the rising times should be the same.
I just made this bread and love it! Wonderful bread for sure… Check out my post at
http://homecookinginmontana.blogspot.com/2010/01/peter-reinharts-100-whole-wheat.html
Thanks for the inspiration!
Hello! I’ve been trying to make a loaf of Peter Reinhart’s 100% wheat bread but i feel that the biga is very dry after all the ingredients are mixed in. Is this normal and does anyone have a picture of what the biga should look like? Mine still has flour unmixed because it is such a dry mixture. Thanks for the tips!
Anna – The second photo down shows the biga and the soaker. I’m pretty sure the biga is on the bottom. Both should basically look like bread dough; I guess probably a stiffer dough. I’ve had to add more water than Reinhart instructs as well, but it’s more important to get the right consistency than it is to stick to the recipe.
Thanks, Bridget! I made this over the weekend and it turned out pretty well. I used to make a lot of yeast breads with white flour, but lately I’ve just been doing no-knead whole wheat breads. How do you get the loaves into such perfect shapes? Also, when kneading dough with the mixer, how do you know when it is done and how long does it usually take?
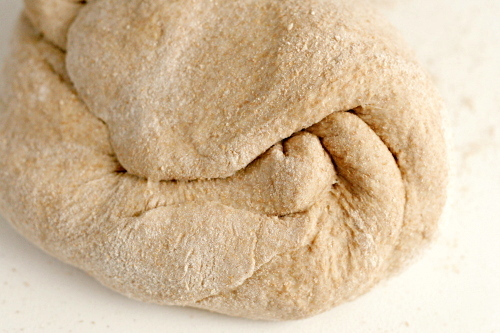
Emily – All of the recipes in Reinhart’s Whole Grain Baking book call for the dough to be just mixed in the mixer, and then kneaded by hand, but I always knead them in the mixer as well. It usually takes 6-8 minutes, and you’re looking for a very smooth dough that springs right back when you press it. You can also use the windowpane test, which means that if you slowly stretch out the dough, you should be able to get it thin enough to see light through it, like in this picture.
I just checked my recipe for this bread and realized I didn’t include detailed instructions for shaping the dough for a loaf pan. I’ll add that now.
The ‘printer friendly’ page returns a 404 error – could you fix the link?
Ann Rein – Fixed. Thanks for the heads up.
Thank you, Bridget!! 🙂
hi, i just tried this recipe and after mixing the biga and soaker and all the other ingredients, the dough didnt come out smooth and elastic. it was still 1 whole dough but would break in some parts. i couldn’t try the windowpane test nor the poking with finger test to see if dough springs back. any idea why? thanks for your time.
mb – You let the biga and soaker sit overnight right? And after kneading the whole dough for 5-10 minutes, it wasn’t smooth and elastic? Maybe it needed more water? What kind of flour did you use?
I tried this over the weekend. I tried with half the recipe. All my bread baking efforts were not successful till now and I didn’t want to waste a pound of flour 🙂
Anyhow, by far this is the closest to bread structure. Inside is soft, not too dense. To me, it looked like had it raised as explained, it would have been perfect. The bread didnt raise as explained after mixing all the ingredients 🙁 I don’t have a mixer and i did it by hand. Any ideas to what went wrong.
Thanks.
Souj – To clarify, the dough didn’t rise either right after kneading or after shaping? It didn’t rise at all? If this is the case, it sounds like your yeast weren’t alive. Either the yeast you used was expired or the liquid you used in the dough was too hot and killed them.
The raised a little after 3 hours. The liquid I used is at room temp. I took the filtered tap water at room temp and used it. So, It may be the yeast. I will try again with a different yeast.
Regards
To clarify, about the biga you say:
2. Transfer the dough to a clean bowl, cover tightly with plastic wrap, and refrigerate for at least 8 hours and up to 3 days.
3. About 2 hours before mixing the final dough, remove the biga from the refrigerator to take off the chill
Then, in a comment, “April – You do want to refrigerate the biga. There was a mistake in the recipe. Thanks for calling that to my attention; it’s corrected now.”
So, do you refrigerate the biga, or not?
Thanks so much! I can’t wait to try it!
Rebecca – Yes. Mix the biga and refrigerate it for at least 8 hours. Then remove it from the fridge two hours before you want to combine it with the soaker and remaining ingredients.
Thanks for the quick response. 🙂 I just pulled my loaf out of the oven and it’s gorgeous! I hope it tastes as good as it looks.
Hi Bridget, I just found your blog when I was looking for this recipe. It’s a great blog! I made this bread today from the book and it was so delicious I took a photo of it and did my own blog post. My blog is a “keep in touch with family and friends” blog, not a food blog, and I don’t get much traffic. But I did add a link to the recipe here. Thanks for posting it!
Hi Bridget,
I have been checking this recipe out on a few different bloggers’ sites and noticed one thing . . . in your recipe you say to preheat the oven to 425, AND to bake at 425. Most of the other pages that feature this recipe say to preheat to 425, however, when you put the bread in, the temp gets lowered to 350. Can you confirm this? Also, your measurement for salt in the Final Dough I believe should be 5/8 of a tablespoon, not a teaspoon, according to your gram measurements. Thanks for all of the tips, I’ve been compiling thoughts from many different blogs before I try this this weekend. Thank you!
It’s definitely 5/8 teaspoon; I like to increase it to 3/4 teaspoon, but 5/8 tablespoon would be far too much. You are correct about lowering the heat midway through baking. I’ll update the recipe when I get a chance.
Can I use Active Dried Yeast and if so how much?
Jane – You can use active dried yeast instead of instant. You’ll use the same amount; the biggest difference is that you’ll need to proof it before adding it to the flour. To do this, mix the yeast with some (about 1/2 cup) water from the recipe and set it aside for a few (not more than five) minutes. Once the yeast is dissolved in the water, you can mix in the remaining ingredients and continue with the recipe.
Hi there! I just found this blog post. I know I’m YEARS late here (lol) but, I had a quick question.
You mentioned in 2009:
“April – You do want to refrigerate the biga. There was a mistake in the recipe. Thanks for calling that to my attention; it’s corrected now.”
Then you mentioned in 2010:
“Rebecca – Yes. Mix the biga and refrigerate it for at least 8 hours. Then remove it from the fridge two hours before you want to combine it with the soaker and remaining ingredients.”
I am just not sure which it is, sorry! – And I read all of the comments; so I wasn’t sure if the biga should be refrigerated or not. (I’ve made many yeast/artisan breads and instinctively I wouldn’t usually refrigerate a yeast-base dough, but would cover it in a warm place.)
Thanks! and thanks for the post! I’m looking forward to seeing how this comes out.
~ Matt
Matt – Mix the biga; refrigerate it for at least 8 hours (or up to a few days); remove it from the fridge and leave it at room temperature for 2 hours before mixing the final dough. The biga will only rise slightly. At this point, the goal is to slowly break down the bran, not to activate the yeast. However, even in cold temperatures, the yeast does some reacting, and that actually leads to really good flavor in the final bread. Even white breads often benefit from being chilled, like this one.
Bridget,
Awesome, thanks for the quick reply! that makes sense too, looking at the relatively small amount of yeast added in the the making of the biga. I did go ahead and refrigerate it. I also doubled the batch. I figured use a loaf, and freeze the other. Thanks again!
~ Matt
Hi! Tried this bread today- I’ve made a lot of 100% whole wheat before, but never soaked it overnight. What a difference in flavor! Sweeter (and less honey added), and richer. The texture was different, too: chewier. I quadrupled the recipe, did all the mixing in my Bosch, with a little stretching and folding at the end before the rise. I ground the wheat (hard winter red, I like the nutty flavor) just before the soak. I also rolled them into batards and steamed them a bit to get a harder crust, and then cooking them hotter and faster than the recipe called for. It was a lot more work,( and more more dirty bowls), but the flavor is a lot better, too. I’m sold on soaking!
This bread turned out to be delicious. I moved to another country where u won’t find whole wheat bread. My husband and I enjoyed every bite. 😉 thank u very much!
Thanks for the recipe, however, thought you might want to update it as you don’t mention the step of lowering the heat to 350 for the actual baking temp. I suspected something was amiss when my bread was very dark brown and nearly done after only 20 min, so quickly cross checked with a couple other blogs and found that critical step. It still turned out but is a bit too dark and dry in the crust. It would have been much too overdone after a full 40 at 425!