Archives for April 2011

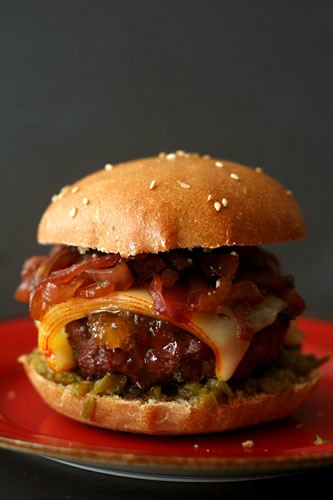
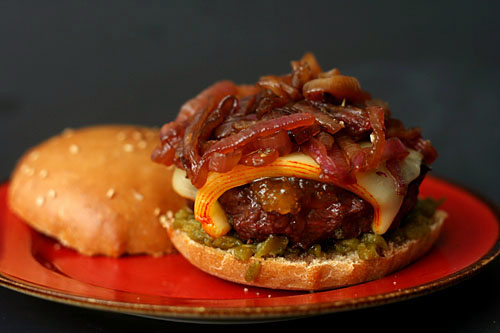
fig-glazed burgers with onion jam

We’ve gotten into a loose routine with our weekend meals. Friday is usually some sort of pizza, unless we get takeout sushi; Saturday with its meat-carb-vegetable makeup is the only day of the week I bother with side dishes; and Sunday is something sandwich-like. I’m not going to say that sandwich night is my favorite, but there’s something undeniably happy-making (or maybe that’s the Sunday champagne habit) about carbs and their fillings, whether its tacos, gyros, burgers, or whatever else.

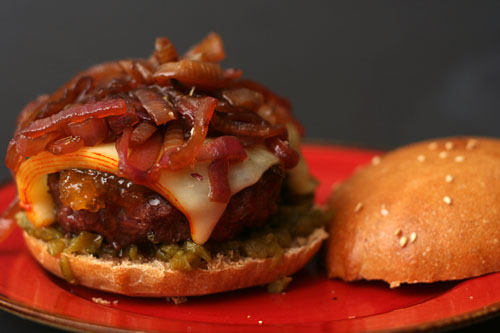
We’re pretty attached to our backyard these days, so Sunday sandwiches are usually cooked on the grill. Not that I’m bored of green chile cheeseburgers (or that I won’t put green chile on a fig-glazed burger), but there are so many great burger ideas out there, it would be a shame to stick to one favorite. This is just the first on a long list of great options.

It’s odd that I chose the sweet plus meat burger off of that list, since it isn’t a combination I often crave. Or it wasn’t. It might be now. It doesn’t hurt that it’s also mixed with vinegary onion jam and melty cheese. Our Sunday dinner sandwich habit might turn into a Sunday fig-glazed burgers habit.

One year ago: Pizza with Figs, Prosciutto, Gorgonzola, Balsamic, and Arugula (oddly similar flavors)
Two years ago: Pasta with Cauliflower, Walnuts, and Ricotta Salata
Three years ago: Creamy Buttermilk Coleslaw (This is no longer my favorite classic coleslaw. I’ll post the new recipe soon.)

Printer Friendly Recipe
Fig-Glazed Burgers with Red Onion Jam (adapted from Southern Living via Pink Parsley)

Makes 4 burgers

I like my burgers a little smaller, so I made six out of this amount of meat mixture instead of four.

Red onion jam:
1 teaspoon olive oil
1 large red onion, sliced thin
Pinch salt
2 tablespoons brown sugar
¼ cup balsamic vinegar
¾ teaspoon chopped fresh thyme

Cheeseburgers:
1½ pounds ground chuck
2 tablespoons chopped fresh oregano
1 teaspoon kosher salt
1 tablespoon Dijon mustard
¼ teaspoon garlic powder
½ teaspoon ground black pepper
3 tablespoons fig preserves
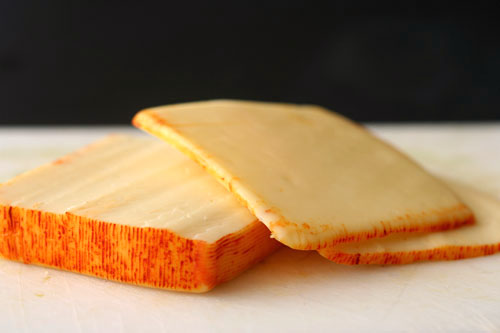
4 (½-oz) Muenster cheese slices
4 hamburger buns, split and toasted

1. In a large skillet, heat the oil over medium-high heat until it flows like water when you tilt the pan. Add the onions and salt; cook, stirring often, for 5 minutes, until the onions are just golden around the edges. Reduce the heat to medium-low; add the sugar, vinegar, and thyme; cover and cook 10 minutes, until the onion is tender and most of the liquid is absorbed.

2. Gently mix the beef, oregano, salt, mustard, garlic powder, and black pepper. Divide the mixture into four portions and shape each one into a ½-inch thick patty. Form a divot in the center of each patty.

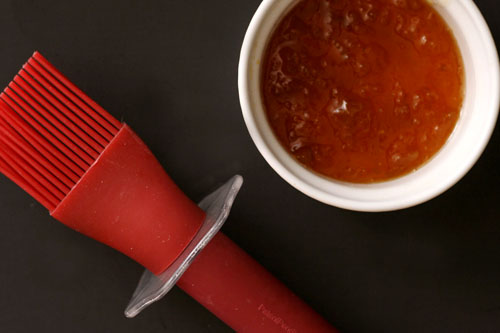
3. Prepare a medium-hot grill. Using a paper towel, grease the grates with vegetable oil. Grill the patties for 5 minutes; flip, and continue grilling another 5 minutes. Brush each patty with fig preserves and top with a slice of cheese. Grill an additional 2 minutes, or until the beef is cooked and the cheese is melted. Serve on buns with onion jam.
cornmeal shortbread cookies

I had some major Murphy’s Law action going on in my kitchen last week. The first few days of it were subtle, but when my cupcakes exploded all over the pan and then sunk back into themselves like collapsed calderas, it got me thinking. I remembered the bagels I’d forgotten about and left out overnight to harden around the edges, and the crockpot full of red lentil stew that turned into red lentil soup when I accidentally added an extra cup of water. Then there was the leftover lentil soup that I burned. You know you’re having a bad week in the kitchen when you burn leftover soup.

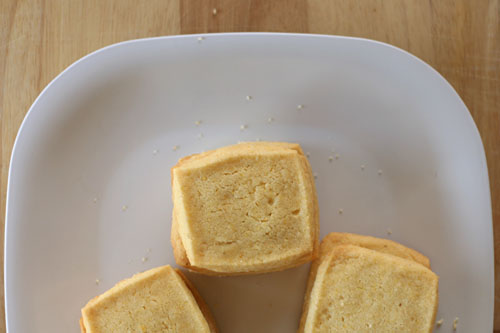
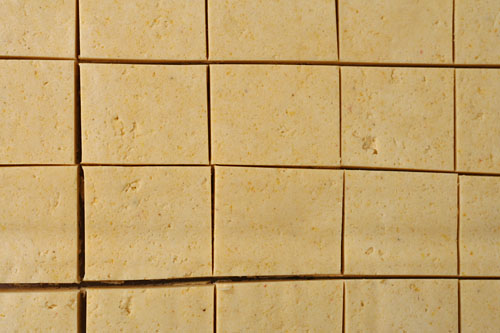
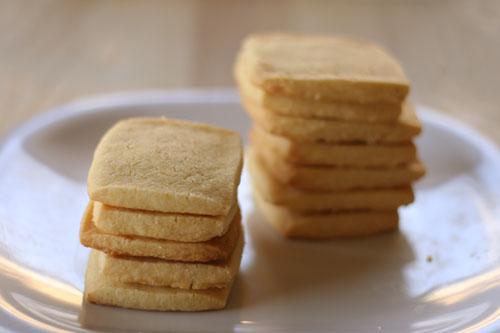
These cookies, made from dough hastily pulled from the freezer after the cupcake debacle, came out wonderfully. I loved their square edges and straight sides. I enjoyed their crisp sandiness with a touch of grit from the cornmeal.

I kept waiting for the other shoe to drop. When the cookies were in the oven, I assumed they’d spread too much. When they didn’t, I assumed I’d over or underbake them. When I didn’t, I assumed I’d drop them. It wasn’t until they were safely in the hands of my coworkers that I breathed a sigh of relief.

In the end, I got more comments on these cookies than any treat I’ve brought to work in months. Most people said that were interesting, but everyone said they were good. If you’d like to try these interesting good cookies that I made for Tuesdays with Dorie, Valerie has the recipe posted.

One year ago: Chockablock Cookies
Two years ago: Chocolate Cream Tart
Three years ago: Fluted Polenta and Ricotta Cake

semolina bread

Supposedly, my freezer is organized to have a shelf for meat, one for bread, one for prepared foods, and one for ingredients (mostly green chile and egg whites). In reality, bread tends to find its way onto each of the other shelves and eventually takes over. During my last freezer overhaul, I gave baked bread its own shelf and bread dough got moved to the ingredient shelf, which has plenty of open space now because we are, sadly, almost out of last year’s crop of green chile.

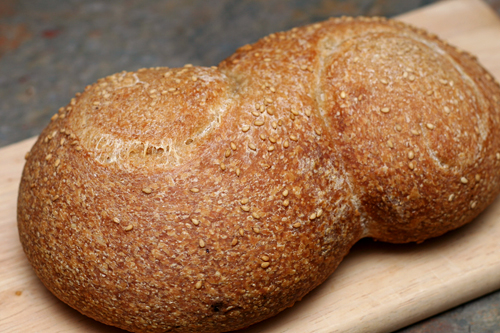
Besides our weekday snack supply of muffins (for Dave) and whole wheat bagels (for me), there’s usually homemade hamburger buns, hot dog buns, and sandwich thins, several bags of pizza dough, odds and ends of loaves whose genesis I don’t remember, and both baked and unbaked versions of whatever rustic bread I’m playing with at the time. The lovely s-curve of this semolina bread recipe caught my eye as soon as I got Peter Reinhart’s Bread Baker’s Apprentice, years ago. I know I could have used that shape for any free-form loaf, but I saved it until I made the recipe it accompanies.

The three loaves of this semolina bread, one baked immediately and two frozen after shaping, didn’t last long in the freezer. I found every opportunity to bake up another loaf of this chewy golden bread. I’d start a new batch if there was any room in the freezer for what we don’t eat in one night.

One year ago: Brown Sugar Cookies
Two years ago: Brandied Berry Crepes
Three years ago: Breakfast Strata with Mushrooms, Sausage and Monterey Jack

Printer Friendly Recipe
Semolina Bread (adapted from Pane Siciliano from Peter Reinhart’s Bread Baker’s Apprentice)

1 recipe pate fermentée (recipe follows)
1¾ cups (8 ounces) bread flour
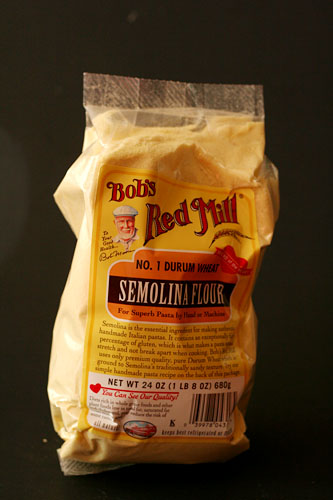
1¾ cups (8 ounces) semolina flour
1¼ teaspoon salt
1¼ teaspoon instant yeast
2 tablespoons olive oil
1 tablespoon honey
1¼ cups water, room temperature
sesame seeds

1. Remove the pate fermentée from the refrigerator 1 hour before mixing the final dough.

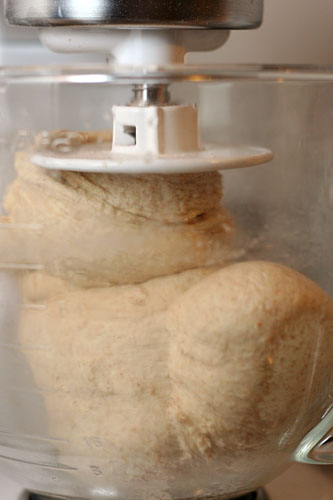
2. Stand mixer: Mix the pate fermentée, flours, salt, yeast, oil, honey, and water in the bowl of a stand mixer fitted with the dough hook. Mix on medium-low speed until the dough is elastic and supple, about 8 minutes. You may need to add a little more flour or water to get the correct consistency – smooth and tacky, but not sticky. Transfer the dough to an oiled bowl and cover with plastic wrap or a damp dishtowel.

By hand: Cut the pate fermentée into 8-12 pieces. Mix the flours, salt, and yeast in a large bowl. Make a well in the middle of the dry ingredients and add the pate fermentée, olive oil, honey, and water. Stir the mixture until the dough comes together. Transfer it to a floured board or countertop and knead, incorporating as little flour as possible, for about 10 minutes, until the dough is elastic and supple. You may need to add a little more flour or water to get the correct consistency – smooth and tacky, but not sticky. Transfer the dough to an oiled bowl and cover with plastic wrap or a damp dishtowel.

3. Ferment at room temperature for about 2 hours, until the dough doubles in size.

4. Divide the dough into three equal portions. Very gently pull the edges of each portion around to one side and pinch them together to form a ball. Roll the dough between the palm of your hand and a lightly floured board or a damp kitchen towel (my preferred method). With the seam side up, push the sides of your thumbs into the dough, pulling the dough into an oblong. Pinch the seam together; repeat the process once more on the same dough ball to form a rope. Roll the rope, pushing it out into a longer rope, until it’s about 24 inches long. If it resists you at any point, let it rest for a few minutes before trying again. Then, working with each end simultaneously, coil the dough toward the center, forming an S-shape. Arrange the shaped loaves on parchment paper and sprinkle them with sesame seeds. Cover loosely with plastic wrap and refrigerate overnight.

5. The next day, remove the dough from the refrigerator. Let it warm up and, if necessary, finish rising, which will take a couple hours. The dough is ready to bake when it has doubled in size and remains dimpled when poked.

6. While the dough is rising, place a baking stone on the bottom rack of the oven and a heavy metal baking pan on the top rack. Heat the oven to 500 degrees.

7. Transfer the risen loaves with the parchment paper to the hot baking stone. Pour 1 cup hot water into the metal pan on the top rack and close the door. After 30 seconds, open the door and spritz the sides of the oven with water. Repeat twice more at 30 second intervals. After the final spray, lower the oven temperature to 450 degrees and bake for 25 to 30 minutes longer, until the crust is golden brown and the internal temperature is between 200 and 205 degrees.

8. Transfer the bread to a wire rack; cool 45 minutes before serving.

Pate fermentée

1⅛ cups (5 ounces) unbleached all-purpose flour
1⅛ cups (5 ounces) unbleached bread flour
¾ teaspoon salt
½ teaspoon instant yeast
¾ cup to ¾ cup plus 2 tablespoons (6 to 7 ounces) water

1. Stir together the flours, salt, and yeast in a 4-quart bowl (or in the bowl of a standing mixer). Add ¾ cup of the water, stirring until everything comes together and makes a coarse ball (or mix on low speed for 1 minute with the paddle attachment). Adjust the flour or water, according to need, so that the dough is neither too sticky nor too stiff. (It is better to err on the sticky side, as you can adjust easier during kneading. It is harder to add water once the dough firms up.)

2. Sprinkle some flour on the counter and transfer the dough to the counter. Knead for 4 to 6 minutes (or mix on medium speed with the dough hook for 4 minutes), or until the dough is soft and pliable, tacky but not sticky. The internal temperature should be 77 to 81 degrees.

3. Lightly oil a bowl and transfer the dough to the bowl, rolling it around to coat it with oil. Cover the bowl with plastic wrap and ferment at room temperature for 1 hour, or until it swells to about 1½ times its original size.

4. Remove the dough from the bowl, knead it slightly to degas, and return it to the bowl, covering the bowl with plastic wrap. Place the bowl in the refrigerator overnight. You can keep this in the refrigerator for up to 3 days, or freeze it in an airtight plastic bag for up to 3 months.

I’m donating my Bourbon Pound Cake to Bloggers Bake for Hope.  This and over fifty other treats are available to be shipped directly to you. You can bid on your favorites starting May 4th; all proceeds go to Massachusetts Komen for the Cure.


lemon ricotta strawberry muffins

Sometimes it bothers me that I can’t buy any locally produced food. I get to thinking that if food can’t be grown here, maybe we shouldn’t live here. Clearly it’s an unenvironmental place to live if everything from greens to beef to beans has to be shipped here.

Then I remember that I’m here for an environmental reason. I work for a radioactive waste disposal site. And it’s here because there aren’t a lot of people here. Do you want radioactive waste stored anywhere near your city? Probably not. (Although the truth is that most of the locals here appreciate the repository’s presence, as it brings good jobs to the area and has had no environmental effect.) And there aren’t a lot of people here because stuff doesn’t grow here.

The upshot of this is that I have no qualms about buying California strawberries or Florida peaches. If I tried to follow a 100-mile diet in southern NM, we’d have to survive on pecans. Even the state’s prized green chiles are grown almost 200 miles away. I draw the line at Chilean berries, but anything from the US or Mexico is fair game.

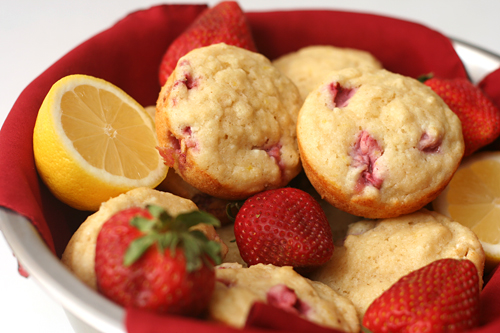
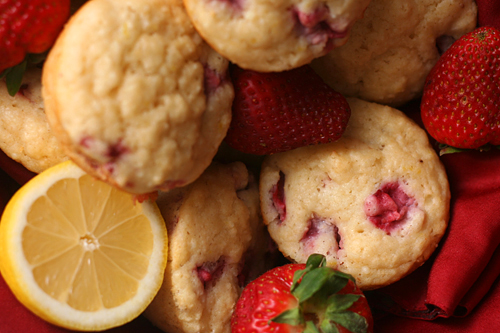
If you try to eat local and you live farther north, you probably don’t have strawberries yet. When you do, here’s a great way to use them. These light, tender muffins are fragrant with lemon and studded with sweet berries. We enjoyed them while sitting outside in our sunbaked parched desert.

One year ago: Cauliflower Cheese Pie with Grated Potato Crust
Two years ago: Pan-Roasted Asparagus
Three years ago: Hazelnut Dried Cherry Biscotti

Printer Friendly Recipe
Lemon Ricotta Strawberry Muffins (adapted from Mollie Katzen via Apple a Day)

Makes 12 muffins

I substituted ½ cup whole wheat pastry flour for an equal amount of the all-purpose flour.

2 cups (9.6 ounces) all-purpose flour
1½ teaspoon baking powder
½ teaspoon salt
⅛ teaspoon baking soda
½ cup (3.5 ounces) granulated sugar
1 tablespoon lemon zest
1 cup ricotta cheese
2 large eggs
1 cup buttermilk
1 tablespoon vanilla extract
1 tablespoon lemon juice
4 tablespoons unsalted butter, melted and cooled
1½ cups strawberries, chopped

1. Heat the oven to 350ºF. Spray the bottoms only of a 12-cup muffin pan with nonstick spray or line with paper liners. In a large bowl, combine the flour, baking powder, salt, and baking soda.

2. In a medium bowl, rub the lemon zest into the sugar. Whisk in the eggs, ricotta, buttermilk, vanilla, lemon juice, and butter. Pour the ricotta mixture into the flour mixture and fold until the flour is evenly dispersed but not completely mixed in. Add the strawberries and fold until the flour is moistened (some lumps are okay) and the strawberries are evenly distributed.

3. Divide the batter evenly between the muffin cups. Bake until a toothpick inserted into a muffin comes out clean, 18-22 minutes. Set the pan on a rack to cool slightly, about 5 minutes, then use a thin-bladed knife to remove the muffins from the pan.

tourtely apple tart

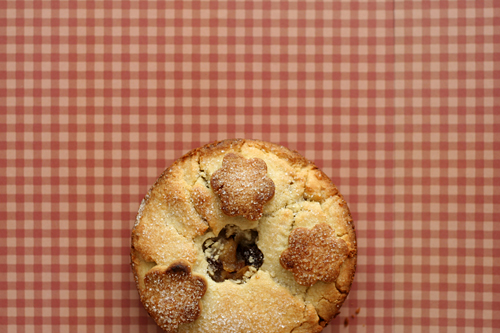
Sometimes I think I can multitask, but I am wrong. While Dave and I were having an interesting conversation about our almost-teenaged nephew gaining independence and confidence, I was jotting down the ingredients for the tart crust. (I don’t bring cookbooks into the kitchen; I don’t want them getting dirty.) I was also congratulating myself on how I was paying attention to the conversation and making insightful responses – although Dave might disagree – while getting a cooking task done.

Nope. I messed it up. I wrote down the version without nuts, even though I had specifically bought walnuts because I thought they’d complement the apples nicely.

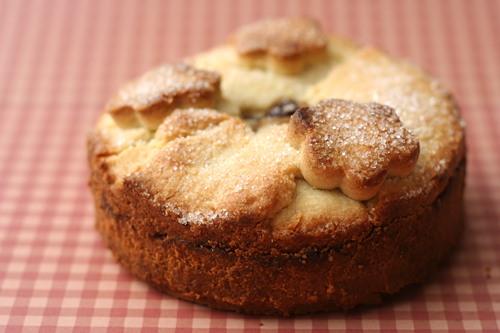
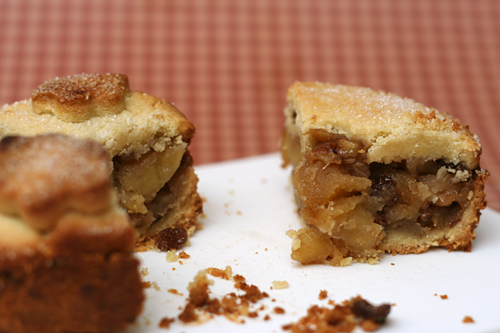
So perhaps I didn’t make quite the dessert I was meant to.  In the end, I liked the filling just fine, but the crust wasn’t the right match for it.  It was too simple, too sugary, too cookie-like.  I suspect some bitter earthy walnuts was just the flavor I was craving.  And I suspect this is a lesson I’m going to have to learn over and over again before it sticks.

Jeannette chose this apple tart pie thing for Tuesdays with Dorie, and she has the recipe posted.  I tweaked a bunch of little things with the filling, but nothing crucial.

One year ago: Sweet Cream Biscuits
Two years ago: Chocolate Bread Pudding
Three years ago: Carrot Cake

brown rice

I thought I’d already nailed my favorite brown rice recipe, but over time, I found myself not using it. There were two issues I was having.  One was that it takes an hour and a half, and I don’t have that kind of foresight on an average weeknight.  The other problem is that it starts on the stovetop and is transferred to the oven, which sounds simple enough, but I could never remember the cooking times and didn’t want to check a recipe for a basic side dish.  I have too much else to do and think about; rice can’t be complicated.

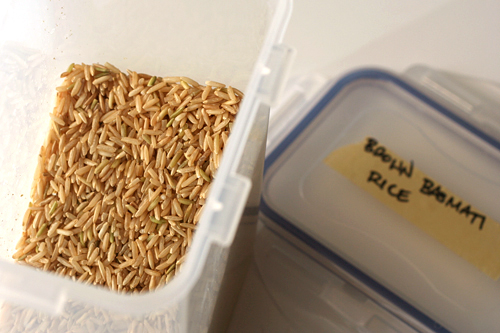
In the comments of that baked brown rice post, I was pointed toward a recipe for rice cooked like pasta. Also, Stacy recommended basmati brown rice over other varieties, claiming that it’s more fragrant and flavorful. Because the nutty scent of white rice is one of my favorite aspects of it, I was eager to try any trick to get that experience with brown rice.

This worked. The basmati rice smells sweet and nutty while it boils, exactly how white rice smells while it steams. And the best part is that it’s so simple to make that even I can get it done on an average weeknight.  That means we’ve pretty much eliminated another refined grain from our diets, with very little compromise in terms of effort or flavor.

One year ago: Chicken Fajitas
Two years ago: Anadama Bread
Three years ago: Sichuan Green Beans

Printer Friendly Recipe
Brown Rice
(adapted from Saveur via Pinch My Salt)

This recipe can be scaled up or down as much as you want.

8 cups water
1 cup rice, rinsed
2 teaspoons salt

Bring the water to a boil over high heat. Add the rice and salt; reduce the heat to medium and simmer uncovered, stirring occasionally, for 30 minutes. Drain the rice in a strainer and return it to the pot, off the heat. Cover tightly and let set for 10 minutes. Fluff with a fork; serve.

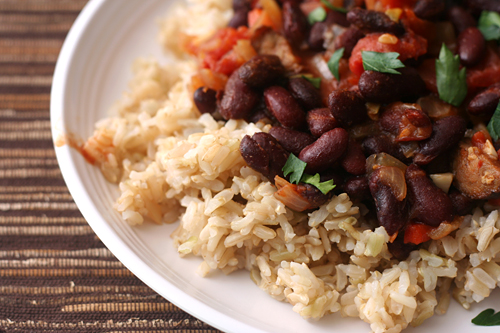
(This is Red Beans and Rice.)

green pea ravioli in lemon broth

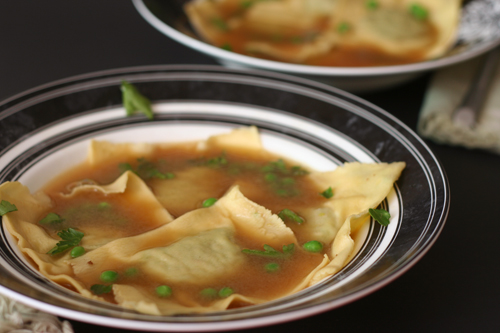
My notes call this Saturday night cooking adventure “Light Italian Meal”. I was experimenting with wet scallops – scallops that have been treated with sodium triphosphate to help them retain moisture. Cooks Illustrated has a recipe designed to make wet scallops palatable, so I gave it a go. I tried to keep the rest of the meal relatively light to compliment the scallops, starting with these ravioli, then moving onto insalata di crudita before serving the seared scallops with almond cream sauce. Pinot grigio and whole wheat ciabatta accompanied every part of the meal.

This was the only recipe I made that night that I was really excited by. The only reason the ciabatta doesn’t qualify is because I didn’t follow much of a recipe, and the salad, although crisp and fresh, was a fairly typical side salad. The scallops were a disaster. Not only was the almond cream sauce too rich, but the scallops themselves didn’t brown until they had overcooked into balls of rubber. What’s worse, while I set them aside to finish the sauce, the cooked scallops released a freaky blue liquid. I choked a down few and filled up on bread.

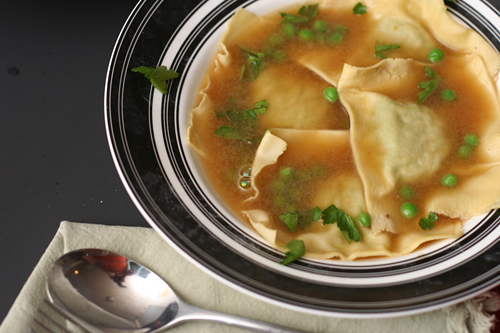
I wish I had made enough ravioli to fill up on those, rather than teasing myself with a small starter course serving. These pasta pouches with their vibrant filling were the highlight of my meal that night. There aren’t many ingredients in the filling, but each one has something to offer: the peas are both sweet and earthy, the shallots are bright, the parmesan salty. This humble mixture might have not had much to live up to compared to the rest of the meal, but it would have been just as special on its own.

One year ago: Vodka Gimlets
Two years ago: Pasta with Roasted Red Pepper Sauce
Three years ago: Cinnamon Rolls

Printer Friendly Recipe
Green Pea Ravioli with Lemon Broth (adapted from Gourmet via epicurious)

6 servings

I’ve doubled the amount of filling, because I only had enough filling for 9 ravioli, not the 18 the original recipe indicates.

Pasta:
1⅓ cups (6.4 ounces) all-purpose flour
2 eggs, lightly beaten

Filling:
2 cups baby peas, defrosted
1 tablespoon olive oil
2 shallots, minced
Salt
6 tablespoons freshly grated parmesan
6 tablespoons fresh bread crumbs

Broth:
4 cups chicken broth
2 garlic cloves, smashed
1 teaspoon freshly grated lemon zest
Squeeze fresh lemon juice

Garnish: fresh chervil or parsley and cooked peas

1. Combine the flour and eggs until smooth (either by hand, with a food processor, or with a stand mixer). Add more flour if the dough is sticky or more water if it’s crumbly. If you stick a dry finger into the center of the dough, it should come out nearly clean. Wrap the dough in a damp towel and set aside to rest while you prepare the filling.

2. Force the peas through the fine disk of a food mill into a bowl to remove their skins. Heat the oil in a small skillet over medium heat; add the shallot and a pinch of salt; cook until shallot is softened, 3-4 minutes, stirring occasionally. Combine the pea puree, cooked shallot, parmesan, and bread crumbs.

3. Divide the dough into 6 portions. Working with one portion at a time, flatten it and fold in thirds, like a letter. Roll it through the widest setting on a pasta roller. Repeat the folding and rolling 3-4 more times, flouring the dough as needed to prevent sticking. Adjust the pasta roller to the next thinnest setting; roll the pasta sheet through. Continue thinning the pasta until the next-to-thinnest setting. Lay the thinned pasta sheet on a dry dish towel. Repeat with the remaining portions of pasta.

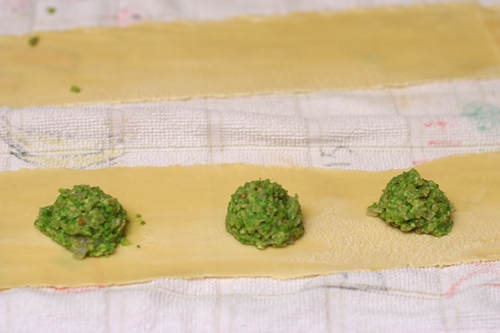
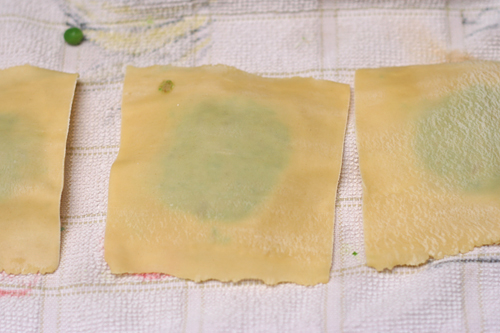
4. Place one rounded teaspoon of filling every 3 inches along the length of a pasta sheet. Using a pasta brush or your fingers, wet the pasta in between the rounds of filling. If the pasta sheet is at least 4 inches wide, fold it lengthwise over the filling. If the pasta sheet is too thin to fold lengthwise, lay a second pasta sheet over the filling. Press around each ball of filling to seal the two layers of pasta together. Use a pizza roller to cut between the filling to form squares of ravioli. Store the ravioli on a dry dish towel (there’s no need to cover it). Repeat with the remaining dough and filling.

5. Combine the broth, garlic, lemon zest, and salt and pepper to taste in a saucepan; bring to a simmer. Lower the heat and cover to keep warm.

6. Bring a large pot of water to a boil; add a tablespoon of salt and lower the heat until the water is at a lively simmer. Cook the ravioli in small batches until al dente, 2 to 3 minutes, using a skimmer or large slotted spoon to remove the ravioli from the boiling water. Divide the cooked ravioli between six soup bowls.

7. Discard the garlic in the broth. Ladle the hot broth over the ravioli. Garnish with herbs and cooked peas, if desired; serve immediately.

strawberry double crisp

There’s an inverse relationship between how doughy a dessert is and how often I’ll make it. That means that I will never make something for dessert that doesn’t contain anything resembling flour and butter, like poached pears. Pound cake, on the other hand, is my favorite thing to bake, because it’s nothing but dough. I hardly ever make crisps, and cobbler is only slightly more popular in my kitchen; at least cobbler biscuits are based on dough, even if there is all kinds of fruit mucking up the pureness of the butter and flour mixture.

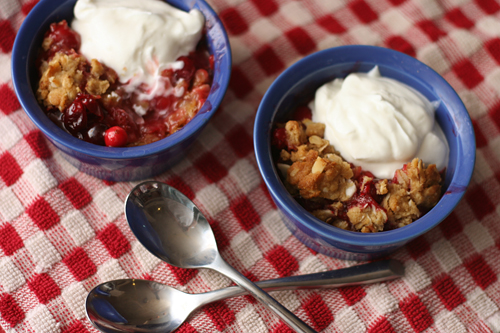
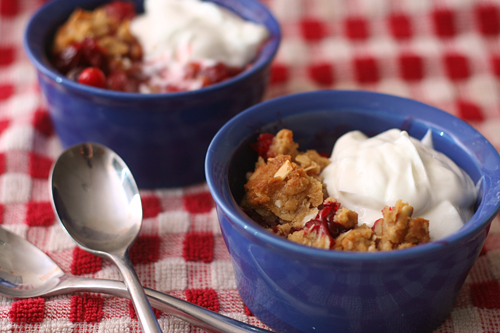
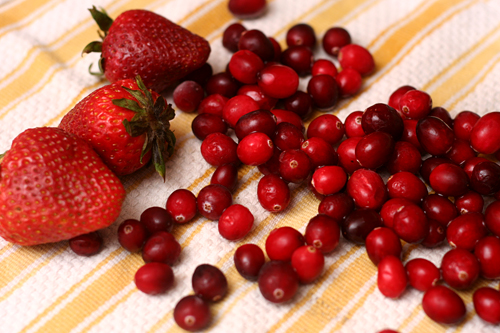
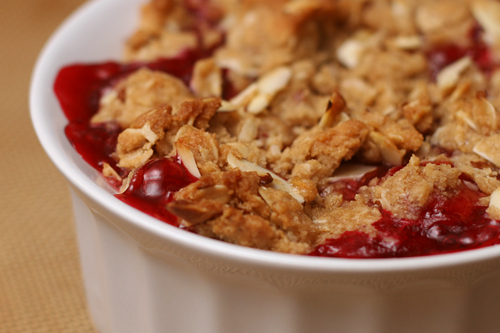
But oh, this was good. I loved how the strawberries were simmered and crushed into a jam, I loved the combination of strawberries and cranberries (standing in for the unavailable rhubarb), and most of all, I loved how there was crisp topping lining the bottom of the pan as well as sprinkled on top. That bottom layer of topping (bottoming?), which contains both butter and flour and thus resembles dough, baked into something almost cookie-like.

The ratio of fruit to topping was perfect. The combination of berries and plain Greek yogurt was perfect. And most of all, the presence of baked dough was perfect.

Sarah chose this for Tuesdays with Dorie and has the recipe posted. I substituted cranberries for rhubarb, although I’m sure rhubarb would be delicious. I used almond slivers instead of walnuts, then added a dribble of almond extract for good measure. I didn’t have crystallized ginger, so minced up a cube of fresh ginger. I melted the brown sugar with the butter for the topping instead of adding it to the dry ingredients.

One year ago: Swedish Visiting Cake
Two years ago: Chocolate Amaretti Torte
Three years ago: Marshmallows


strawberry daiquiri ice cream

When it comes to alcohol, I pretty much like it all. Red wine, white wine, dark beers, light beers, vodka cocktails, straight whiskey. It’s all good. I don’t drink foo-foo drinks often, only because they’re too much work to mix up at home and too low on alcohol to pay for in a bar. But that doesn’t mean I have anything against the combination of fruit and liquor.

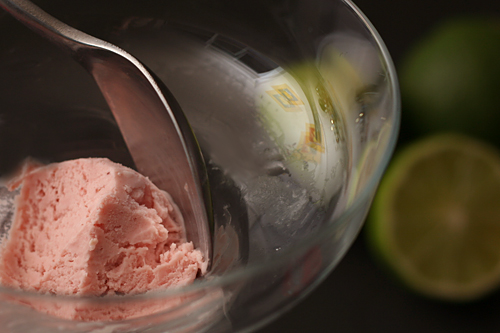
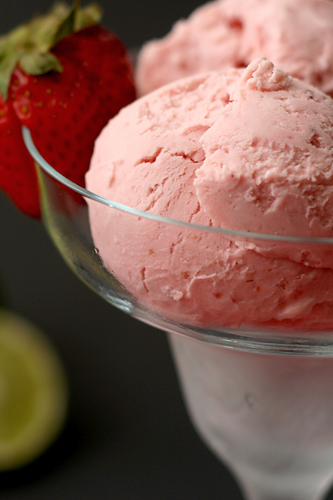
Still, doesn’t it seem like fruit puree, citrus, alcohol, and the cream that’s inevitably served, whipped, on top, would be an even better combination churned into ice cream?  The same combination of strawberries and lime, but smoother, richer, and, okay, less alcoholic.

I wish it had occurred to me earlier – like before we ate all the ice cream – to pour rum over the ice cream. Rum float!  Or to mix so much rum into the base that the ice cream doesn’t freeze completely.  Rum slushy!  Or I suppose we could keep this recipe as a dessert and not a cocktail.  If I must.
One year ago: Artichoke Ravioli
Three years ago: Blueberry Poppy Seed Brunch Cake

Printer Friendly Recipe
Strawberry Daiquiri Ice Cream (adapted from David Lebovitz’s Raspberry Ice Cream recipe in The Perfect Scoop)

Makes about 1 quart

Mine wasn’t as limey as I would have liked, so I’ve doubled both the zest and the juice from what I used. I don’t believe the extra juice will be detrimental to the smoothness of the ice cream. You could also let the half-and-half mixture steep with the zest for up to an hour before reheating it and mixing it with the yolks.
When strawberries are pureed, I often prefer to use frozen berries that have been defrosted. Because they are picked at their peak and immediately frozen, they are often of higher quality than fresh strawberries. Furthermore, they make a smoother puree.

To make this more kid-friendly, feel free to use only half the rum.  Don’t leave it all out, as it helps keep the ice cream softer.

1 cup (7 ounces) sugar, separated
Zest from 2 limes
Pinch salt
1½ cups half-and-half
1½ cups heavy cream
4 yolks
1½ cups (6 ounces) strawberry puree
¼ cup lime juice (2 limes)
2 tablespoons rum

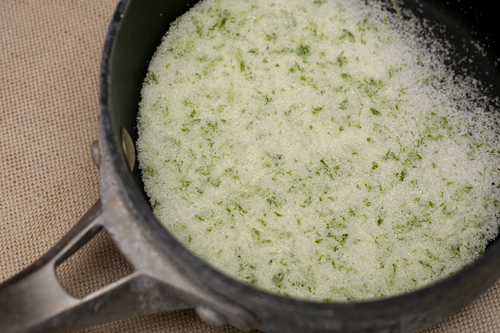
1. In a medium saucepan, rub the lime zest into ½ cup (3.5 ounces) of the sugar until fragrant. Add the half-and-half and heat the mixture over medium-high heat until it simmers. Meanwhile, pour the cream into a large bowl; set a fine-mesh strainer over the bowl.

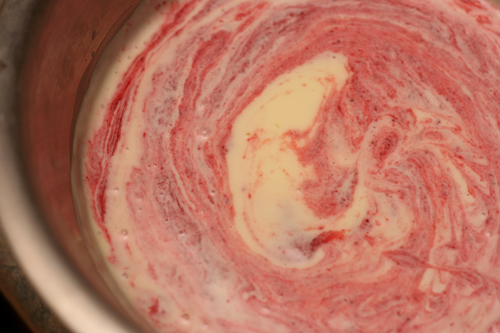
2. In a separate medium bowl, beat the egg yolks with the remaining ½ cup (3.5 ounces) sugar. When the half-and-half simmers, very slowly pour it into the beaten egg yolks, whisking constantly. Pour the mixture back into the pot and bring just to a simmer over medium heat, still whisking constantly. Pour through the strainer into the bowl with the cream; stir to combine. Mix in the strawberry puree, lime juice, and rum. Chill until cold, at least 4 hours or up to overnight.

3. Freeze the ice cream custard in your ice cream maker according to the manufacturer’s instructions. Once frozen to the consistency of soft serve ice cream, transfer the ice cream to a chilled bowl and freeze until firm.


ice cream tart

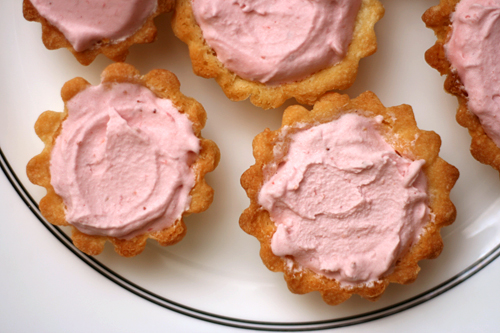
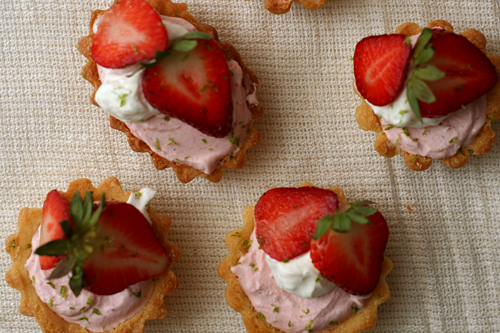
It was 96 degrees here on Saturday, which is hot for this time of year even by southern New Mexico standards. Ice cream tartlets on the hottest day of the year would have been perfect. Too bad I was so busy sitting outside enjoying the heat to get the tarts made.

I’m surprised by how well we weathered the heat this weekend. I guess between the breeze, the cool nights, the cheapy kiddie pool full of frigid water to put our feet in, and plenty of shade when the sun got to be too much, we can handle those hot days just fine. The ice cream tarts that got made the next – also hot – day didn’t hurt either.

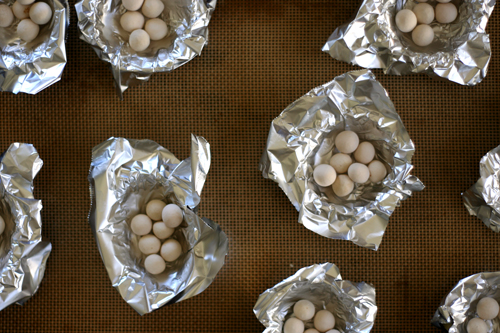
Jessica chose the Coffee Ice Cream Tart for Tuesdays with Dorie this week, and she has that recipe posted. I went a different direction with a plain tart crust and strawberry daiquiri ice cream. Because there were a few comments about the tart crust being too hard to cut once it was frozen, I increased the butter in Dorie’s Sweet Tart Dough to 10 tablespoons and added an extra egg yolk. Even frozen, this tart crust was perfectly tender.

One year ago: Mocha Walnut Marbled Bundt Cake
Two years ago: Banana Cream Pie
Three years ago: Lemon Cream Tart