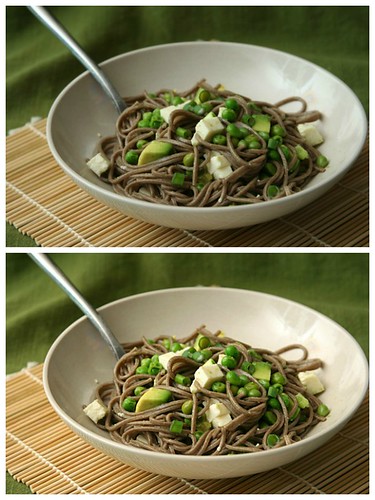
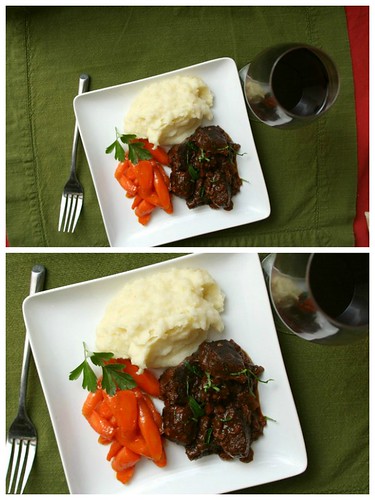
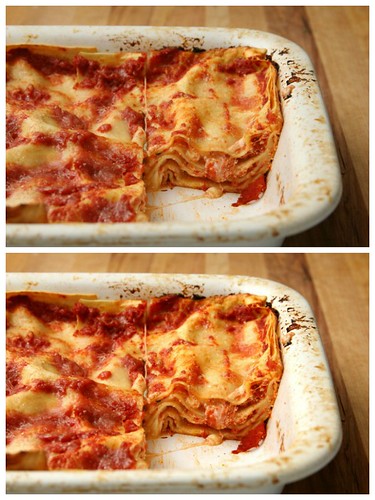
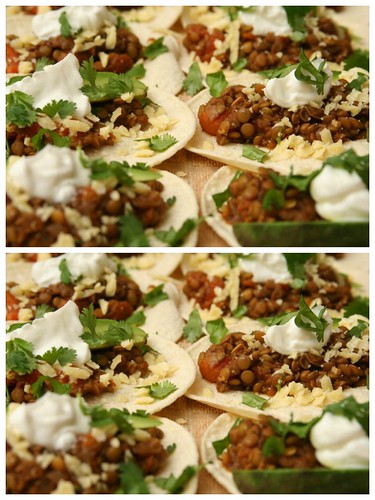
 top – before; bottom – after
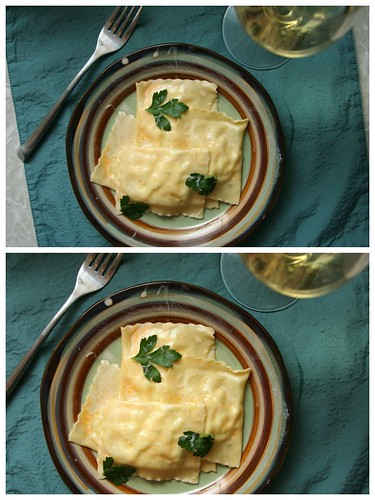
For as much as I like to look at pretty pictures of food – perfectly composed, artfully styled, brightly lit – I don’t like to spend much time taking them myself. I like to get in and get out, then get on with the eating. Sometimes this means my photos aren’t perfect; the white balance could be off, or there’s an ugly sauce drip in the shot, or my chosen background doesn’t quite fill the frame. I could spend another few minutes fussing with the styling, or I could eat my dinner and fix the photo later with software.
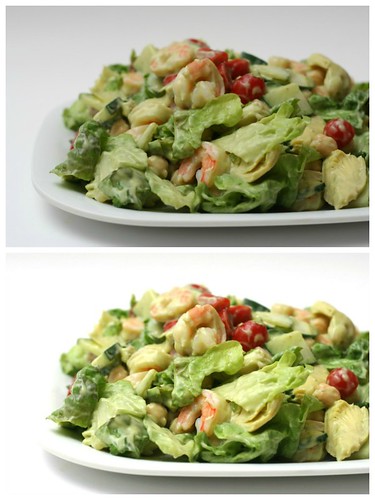
top – before; bottom – after
Years ago, when I was poor and unemployed, I started out using the free post processing software GIMP. I started using Photoshop a couple years ago when I got it as a gift, but if I edit photos on my lunch hour at work, I’ll use web-based programs, either Pixlr or PicMonkey, which are also free. The free programs are more than adequate for the simple post processing that I do. Still, each has their strengths and weaknesses, which was the subject of the talk Brady and I gave at BlogHer Food in Seattle. Brady has the downlow on the various programs, and I’ll tell you what basic steps I use to edit a photo using any of those programs. (Click on any of the photo sets to see a larger version.)
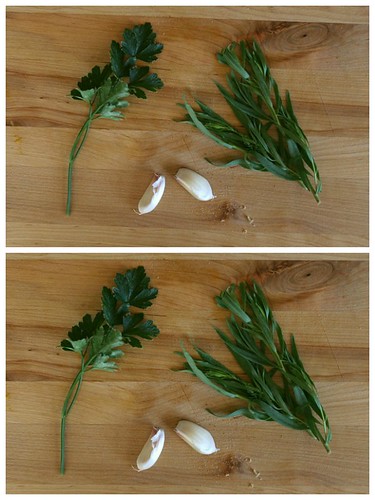
top – before; bottom – after
1) The first thing I always do is save a copy of the photo. You don’t want to go making a bunch of changes to a photo only to realize later that it looks like crap, but you can’t go back and start over because you didn’t save the original.
2) Then, if the photo is a little crooked, I rotate it slightly until it’s straight. Every program has a different method for straightening, but the best ones (and all that Brady describes in her post on free photo editing software programs) let you base the rotation on what should be a straight line in the photo.
top – before; bottom – after
3) You’ll always need to crop a photo after it’s been rotated, to square off the edges. Some programs do this automatically, but I prefer to choose my own crop after straightening a photo. I also often need to crop photos that are taken from above, because sometimes I don’t bother to look through the viewfinder for those; I just hold the camera above the subject and snap away until I capture everything I want in the frame. I almost always keep my photos the same dimensions as the original, although this is just a personal preference.
top – before; bottom – after
4) Once you have the photo framed how you want it, resize it for your blog. Photos that are being posted online don’t need resolution as high as those that are being printed, so there’s no advantage to uploading a large photo that your blog host will automatically resize. In fact, this will slow down your site. Even worse, your hosting site doesn’t have a sophisticated method of resizing and might make your photo look dull and out of focus.
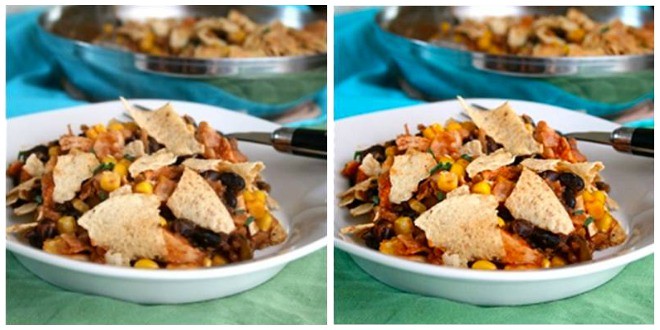
left – resized incorrectly; bottom – resized correctly (photos taken by Brady)
5) Cloning lets you stamp part of a photo over another part that you want to erase. You probably won’t use this often, but it’s a handy tool to have (especially if you realize later – much later, like after you post it on your blog and a commenter points it out – that your photo has a fly in it, not that I personally had this happen or anything…).
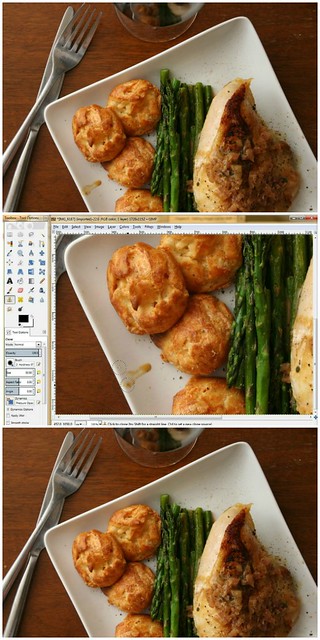
top – before; middle – process; bottom – after
6) Smudge lets you smear a portion of the photo into another part of the photo, like fingerpainting. I use this occasionally to fill in corners when my background doesn’t entirely fill the frame.

top – before; middle – process; bottom – after
7) Curves and levels are two ways of doing the same thing, adjusting the exposure of your photo. In both, most programs will show you a histogram, which represents how dark or light your photo is; the left edge of the histogram represents black pixels, the right edge white pixels. If you grab the top right end of the diagonal line and drag it toward the center of the histogram, the photo becomes brighter; but if you go too far, you risk blowing out light parts of the photo. You can also drag the bottom left end of the line to make the darks darker, and you can add as many points as you’d like in between the two ends of the line to drag up or down to adjust the brightness and contrast however you like.
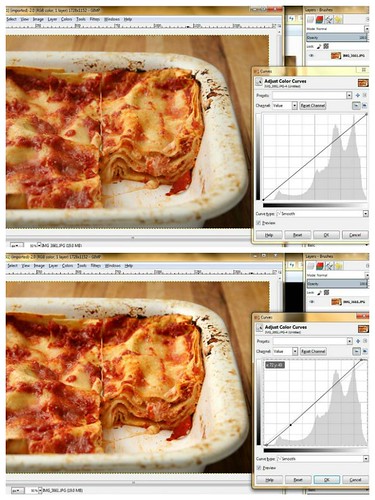
top – unadjusted histogram; bottom – adjusted histogram
8 ) Levels is largely the same – same histogram, same method of adjusting the whites and the blacks. The difference is that, in levels, you can only adjust one mid-point instead of however many points as you want to add, like you can in curves.
top – before; bottom – after
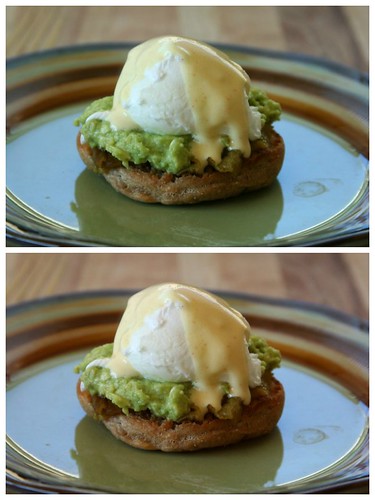
9) Color balance, or white balance, corrects slight tints in the color of the photo. Even when I set the white balance in my camera, it still tends to tint the photo just slightly blue, or cool. The final version of this poached egg with yogurt hollandaise is much closer to the true colors.
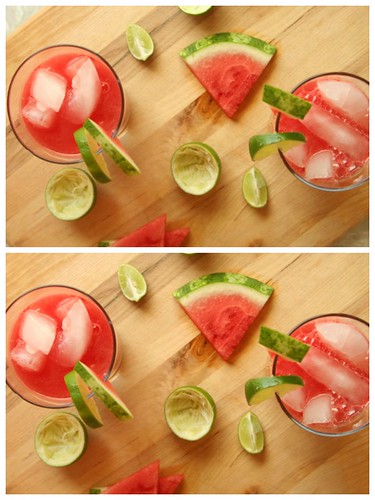
top – before; bottom – after
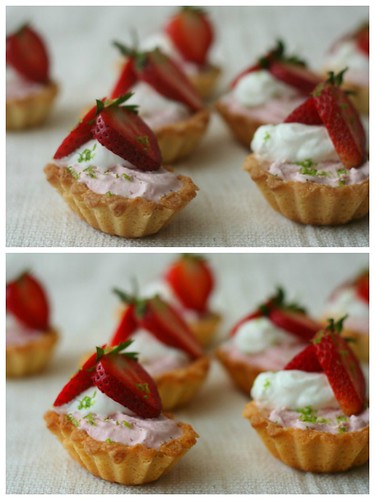
10) I don’t adjust saturation of food photos often, but if a photo has a lot of bright colors in it, a slight increase in the saturation can bring those out. You have to be careful though, because it’s easy to go overboard. I’m actually not sure what happened with the photo of the strawberry ice cream tarts to make them look so drab, but increasing the saturation was an easy solution to make them look natural again.
top – before; bottom – after
11) The last thing you should do with your photo is sharpen it up a bit. And the first thing you should know about sharpening is that it doesn’t fix unfocused photos. This photo of muffins, in which the fiber of the placemat is in focus and not the coconut garnish, cannot be fixed.
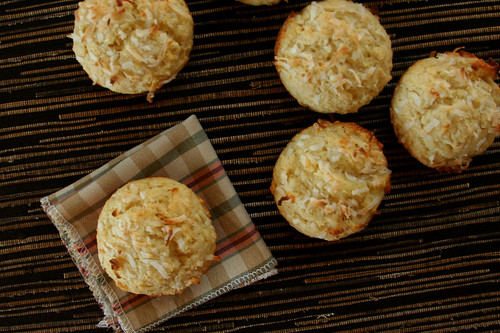
What sharpening can do is make focused photos a little more crisp. All digital photos are less sharp than film photos, because they’re based on a limited number of pixels. Sharpening corrects for this.
top – before; bottom – after
Almost certainly, you won’t use all of these steps for every photo. You might find that some of these steps aren’t useful for you at all. But, surely, every photo will need to be opened in a post processing program and changed in some way, even if it’s just resizing it for your blog. If you’re looking for free photo editing software and don’t know which is the best program for you, check out Brady’s post to help you choose.
top – before; bottom – after
One year ago: Bourbon Ice Cream
Two years ago: Rice and Peas
Three years ago: Pork Tenderloin with Rhubarb Sauce
Four years ago: Cappuccino Cream Puff Rings
PS – If you download the GIMP and find yourself overwhelmed, email me and I’ll send you some detailed instructions I wrote out a few years ago.


SO great. Bookmarking this for sure. Thanks!
Thank you for this post! As a food blogger but non-photography person, this was really helpful. I usually just kind of adjust my photos in iphoto on my very old computer at home, but I’ll definitely give the programs you recommended a shot!
Great detailed post! I just wish I could have been at Blogher to see the whole presentation. 🙂 It’s amazing what just a tiny bit of post processing can do!
I love the before and after pictures! However, all of that delicious food imagery just made me really hungry…
Thank you for this in depth post about image editing. I tend to only adjust the colour a little to brighten up darker shots, and the cropping tool. I also recently found out how to watermark my photos which was super exciting.
I just wanted to let you know I just posted this as part of my friday favourites 🙂 (http://southerninlaw.blogspot.com.au/2012/06/friday-favourites-22-june-2012.html)
Hi there. What a great resource. I wanted to get more info on different programs, but the link to Brady’s site is broken. Can you help me out?
Gayle – Thanks for calling that to my attention. I’ve fixed the links.