Search Results for: chocolate sugar cookies

chocolate sugar cookies

chocolate sugar cookies 4

Once the holidays ended and we got into the slower part of the year, I started thinking about what I wanted to do with my newfound free time. Get my garden up, which we can do early in the year where I live; fix up my house a bit; set up a recipe database; get better at Photoshop; relearn how to ride a bike; and, maybe, if there’s time after everything else, decorate sugar cookies more often.

chocolate sugar cookies 1

I haven’t decorated sugar cookies since I made these, for Valentine’s Day last year. I distinctly remember staying up long after my normal bed time, on a weeknight, using toothpicks to manipulate royal icing into hearts, then cleaning mixing bowls and squeeze bottles at midnight. I think I’m up until midnight every time I decorate sugar cookies.

chocolate sugar cookies 2

Rationally, I know that when I decorate sugar cookies with royal icing, I should think of it as a day-long project – and that’s assuming that I’ve already made the cookie dough, rolled it out, cut shapes, and baked the cookies. But every time I actually work with royal icing, I wait until the end of the day, because I can’t convince myself that a simple outline and filling of sugar cookies could really take several hours. And then it takes that long, every time.

chocolate sugar cookies 3

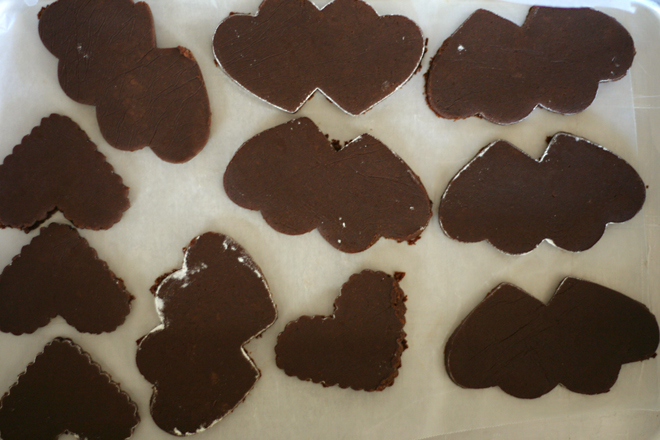
These hearts, although not any less time-consuming than regular royal icinged sugar cookies, are at least more foolproof. Instead of painstakingly (at least it’s painstaking for me) detailing on top of hardened icing, you use toothpicks to manipulate two liquid royal icing colors. All you have to do is drag a toothpick through a dot to turn it into a heart.

chocolate sugar cookies 5

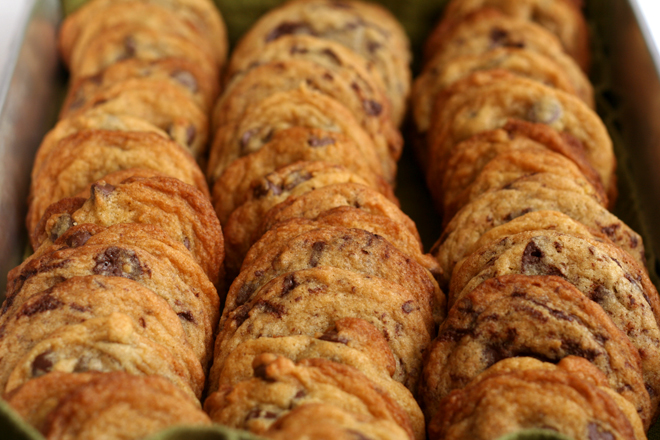
The over-the-topness of tiny hearts set into pink, red, and white icing on top of heart-shaped cookies should not detract from the chocolate cookie itself, which is soft, meltingly tender, and most importantly, intensely chocolately. It was almost worth the loss of several hours of sleep. Still, I’m not sure how often I see myself doing this, no matter how much free time I have.

chocolate sugar cookies 8

One year ago: Fettuccine Alfredo
Two years ago: Oatmeal Pancakes
Three years ago: Crispy Bagel Roll
Four years ago: Olive Oil Bread

I’m not qualified to give a royal icing tutorial. I used Karen’s tutorial for these hearts, and Annie later did one as well.

Printer Friendly Recipe
Chocolate Sugar Cookies (adapted from Smitten Kitchen)

I reduced the flour slightly from Deb’s original recipe; this increases the chocolate flavor, although it has the potential to lead to more spreading in the oven. But as you can see, the scalloped hearts retained their decorative edge after baking. Still, if you’re working with a delicate shape, freeze the dough until firm after cutting shapes, then bake the cookies directly from the freezer.

2¾ cups (13.2 ounces) all-purpose flour
⅔ cup unsweetened cocoa, sifted to remove lumps
½ teaspoon baking powder
16 tablespoons (2 sticks) unsalted butter, softened
¾ teaspoon salt
1½ cups (10.5 ounces) sugar
2 large eggs
1 teaspoon vanilla extract

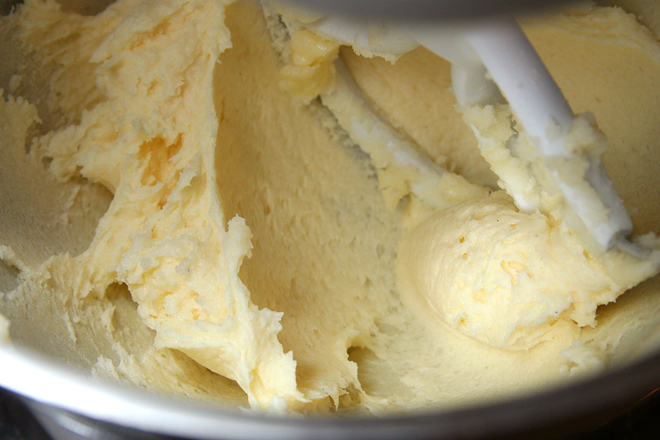
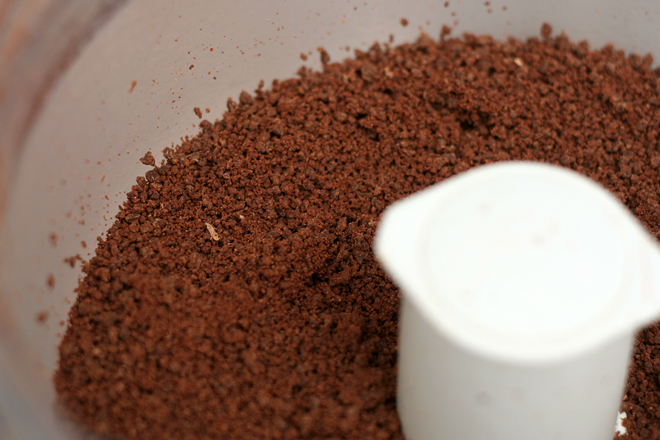
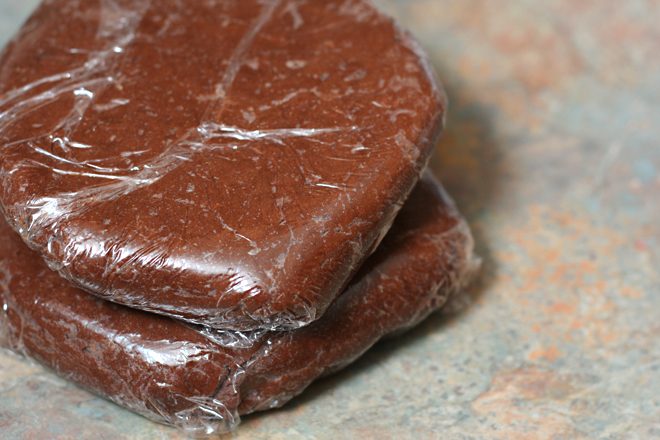
1. In a medium bowl, combine the flour, cocoa, and baking powder; set aside. In a stand mixer fitted with the paddle attachment (or in a large mixing bowl if using a hand mixer), beat the butter and salt until creamy, about 1 minute. With the mixer running, gradually add the sugar; beat on medium speed until fluffy, about 2 minutes. Add the eggs, one at a time, mixing to incorporate each one before adding the next. Beat in the vanilla. Reduce the mixer speed to low; add the dry ingredients and mix just until combined, with no dry pockets of flour. Shape the dough into a 1-inch thick disk; wrap in plastic wrap and refrigerate for at least one hour.

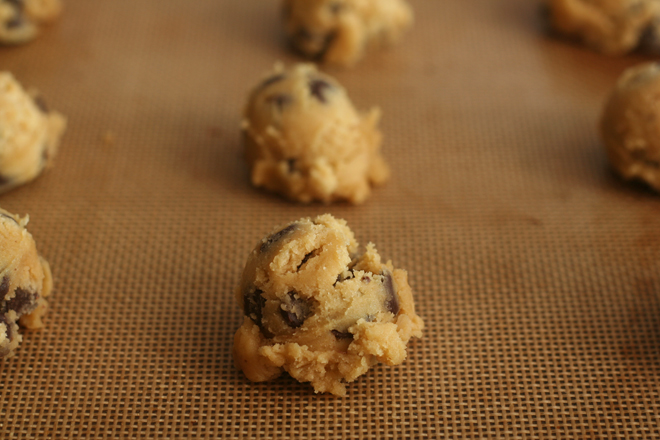
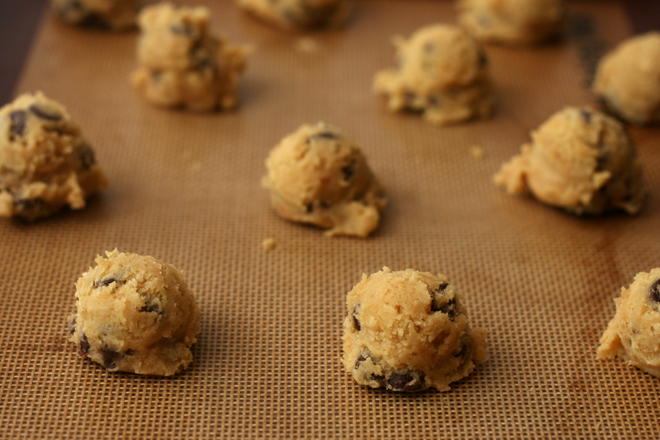
2. Adjust a rack to the middle position and heat the oven to 350 degrees. Line a baking sheet with parchment paper or a silicone mat.

3. Lightly flour a large sheet of wax (or parchment) paper. Transfer the chilled dough to the paper and top with a second sheet of wax paper. Roll the dough into ⅛-inch thickness, flouring as needed to prevent the dough from sticking to the paper. Use floured cookie cutters to cut shapes; transfer the shapes to the prepared pan. Re-roll and cut shapes from the scraps, using as little flour as possible.

4. Bake the cookies until the tops look dry but are still slightly soft, about 8 minutes. Let the cookies cool on the pan for about 2 minutes, then transfer to a wire rack.

chocolate sugar cookies 6

white chocolate macadamia nut cookies

white chocolate macadamia nut cookies 5

I’m behind on Christmas. I’ve been behind on everything since Thanksgiving. Every one of the baby’s naptimes through the weekend are currently booked with baking plans, and once that’s done, I’ll start preparing for our trip to visit family over the holidays. And at some point, I should probably buy some presents.

white chocolate macadamia nut cookies 1

These aren’t on my Christmas baking list, but maybe I should rethink that. I’d always considered white chocolate macadamia cookies bland before these – white chocolate mostly just tasting sweet, and macadamia nuts mostly just seeming rich and fatty without offering much flavor. But the addition of cream cheese adds some tanginess to counter the sweetness. The milk powder keeps the cookies soft and tender.

white chocolate macadamia nut cookies 2

They’re straightforward to make; browning the butter adds an extra step, but it isn’t a difficult one. With a long shelf-life, they can hold up to being shipped to your friends and family across the country. Most importantly, they’re one of the best cookies I made last year.

white chocolate macadamia nut cookies 4

Printer Friendly Recipe
White Chocolate Macadamia Nut Cookies
(rewritten but not adapted from Joy the Baker)

16 tablespoons (2 sticks) unsalted butter, softened
3 cups (14.4 ounces) all-purpose flour
1 cup instant milk powder
1½ teaspoon baking soda
¾ teaspoon baking powder
2 large eggs
2 teaspoons vanilla extract
8 ounces cream cheese, softened
1 cup (7 ounces) packed light brown sugar
1 cup (7 ounces) granulated sugar
1 teaspoon salt
2 cups coarsely chopped macadamia nuts
2 cups coarsely chopped white chocolate

1. In a medium not-nonstick skillet over medium heat, melt 8 tablespoons of the butter. Continue to cook the butter, swirling the pan occasionally, until the milk solids brown and sink and the butter smells nutty. Immediately remove it from the heat and pour the butter into a heatproof bowl. In a medium-sized bowl, combine the flour, milk powder, baking soda, and baking powder. Break the eggs into a small measuring cup, whisk them lightly, and mix in the vanilla.

2. Place the cream cheese and the remaining 8 tablespoons of butter in the bowl of a stand mixer fitted with the paddle attachment (or a large mixing bowl if you’re using a hand-held mixer). Beat on medium-low speed until the butter and cream cheese are smooth, then add the salt and both sugars. Continue beating on medium-low until the mixture is light and fluffy, about 2 minutes, scraping the sides of the bowl as needed. Add the browned butter and beat until evenly combined. With the mixer running, gradually add the egg mixture. Once the eggs have been added, scrape the sides of the bowl once, then continue mixing on medium speed for about 1 minute. Reduce the mixer speed to low and gradually add the flour mixture, mixing it’s mostly combined. Add the nuts and chocolate and mix until the flour is completely incorporated and the nuts and chocolate are evenly distributed. Cover and refrigerate for at least 1 hour or up to 3 days.

3. Heat the oven to 350 degrees. Line baking sheets with parchment paper or silicone mats. Scoop the dough in heaping tablespoons onto the prepared baking sheets. Bake the cookies, one sheet at a time, until they are browned around the edges and do not look wet on top, 8 to 12 minutes. Let the cookies cool on the cookie sheets for 5 minutes, then transfer to wire racks to cool completely.

white chocolate macadamia nut cookies 3

Save

bittersweet chocolate pumpkin tart

bittersweet chocolate pumpkin tart 4

This is the perfect pumpkin dessert for people who don’t like pumpkin desserts. There’s so much more chocolate than pumpkin, and chocolate has a stronger flavor than pumpkin, that this is a rich, silky chocolate tart that you can get away with serving for Thanksgiving because there’s a token scoop of pumpkin in the filling.

bittersweet chocolate pumpkin tart 2

It’s not hard to make, with a press-in crumb crust and a simple whisked filling. I made it on the spur of the moment when the baby’s nap went long. It also works out well for Thanksgiving because it can be made a couple days in advance.

bittersweet chocolate pumpkin tart 3

A friend told me that although she doesn’t like pumpkin desserts, she loved this one. Well sure, that’s because the pumpkin is buried under half a pound of chocolate. This is a pumpkin tart in name only, but that’s all you need for it to fit into your Thanksgiving menu.

bittersweet chocolate pumpkin tart 7

Printer Friendly Recipe
Bittersweet Chocolate Pumpkin Tart (adapted from Love and Olive Oil)

I chopped the chocolate in the food processor, then transferred it to a bowl, before making the crust in the food processor. I toasted the pecans by spreading them in a single layer on a plate and microwaving for about 2 minutes, stirring occasionally, until fragrant. I’m sure this can be made in a pie pan instead of a tart pan.

For the crust:
8 ounces vanilla wafer cookies
½ cup pecans, toasted
2 tablespoons packed light brown sugar
½ teaspoon ground cinnamon
⅛ teaspoon salt
4 tablespoons (½ stick) unsalted butter, melted

For the filling:
¾ cup heavy cream
¼ cup whole milk
8 ounces bittersweet (60-70%) chocolate, finely chopped
2 large eggs
1 teaspoon ground cinnamon
½ teaspoon ground ginger
¼ teaspoon ground cloves
⅛ teaspoon ground nutmeg
⅔ cup pumpkin purée
¼ cup brown sugar
¼ teaspoon salt
1 tablespoon bourbon (or 1 teaspoon vanilla extract)
cocoa (optional)

1. Heat the oven to 325 degrees. Place a 9-inch round or equivalently-sized tart pan with a removable bottom on a baking sheet.

2. In a food processor, process the cookies and pecans until finely ground. Add the sugar, cinnamon, and salt; pulse to combine. Add the melted butter and pulse until the crumbs are evenly moistened. Transfer the mixture to the tart pan; press firmly into the bottom and up the sides of the pan. Bake for 10 to 14 minutes, or until fragrant. Transfer to a cooling rack to cool slightly. Lower the oven temperature to 250 degrees.

3. In a small saucepan over medium-high, heat the cream and milk until just simmering. Pour the cream mixture over the chocolate and gently whisk until the chocolate is melted and the mixture is smooth.

4. In a large mixing bowl, whisk the eggs until broken up. Add the spices, pumpkin, sugar, and salt. Whisk in the chocolate mixture, then the bourbon or vanilla.

5. Spread the filling evenly in the baked tart shell. Transfer the tart pan on the baking sheet to the oven. Bake until the filling barely jiggles, 40 to 50 minutes. Cool on a wire rack. The tart can be covered and chilled for several days. Serve at room temperature. If desired, dust with cocoa just before serving.

bittersweet chocolate pumpkin tart 6

berry jam and chocolate mousse tart

berry chocolate tart 8

It doesn’t always rain here, but when it does, it’s on the day of the backyard party you’ve been planning for six months. Fortunately, it wasn’t my party, but by the time the host decided she had to cancel, I had already spent several hours preparing several thousand calories worth of tarts to contribute. Of course we’d had nothing but warm, sunny days for weeks beforehand.

berry chocolate tart 3

With our plans suddenly cancelled, we weren’t sure what to do with ourselves – or what to eat for dinner. We ended up inviting a few people who were also invited to the party over to our house, hoping we could cobble together a meal from everyone’s party contributions. Unfortunately, that left us with a random assortment of mushrooms, two seafood dips, two tarts, and four cocktails.

berry chocolate tart 4

I stashed the tart with the longer shelf life in the fridge to bring to work on Monday, defrosted shrimp for the dips, and sautéed the mushrooms and put them on toast with melty cheese. We ordered in chicken wings to round out the meal (and to satisfy Dave’s craving) and passed around cocktails. It wasn’t the night I’d planned, but it was fun nonetheless.

berry chocolate tart 6

I didn’t let anyone leave until they’d eaten a slice of tart, and then I foisted (most of) the leftovers on them too. After eating my way through baking, having a slice with guests, and knowing I’d be having a slice of tart #2 on Monday, I figured I should limit myself to just a sliver for Sunday. But don’t think I didn’t have regrets after I’d indulged in my tiny sliver.

berry chocolate tart 5

Yes, this is a rich dessert and should be shared with a crowd, but it’s also so good it’s hard to give it away. The berries brighten up all that chocolate, and the airy mousse layer disguises the heavy cream that makes it so fluffy. As it was, I enjoyed this much more than I would have after stuffing myself with seafood boil, so maybe it’s good that the original party was cancelled.

berry chocolate tart 11

Printer Friendly Recipe
Berry Jam and Chocolate Mousse Tart
(adapted from Love and Olive Oil)

The original recipe calls for a homemade jam made from tart cherries, but it’s been years since I’ve seen frozen tart cherries for sale, and I’ve never seen them fresh. I went to amazon to order my own tart cherry jam, but then fell down the jam rabbit hole and ended up with marionberry instead. Any good berry or cherry jam would do here.

I don’t know if baking the tart crust is necessary. It’s not called for in the original recipe, but I was worried it would be crumbly without baking. I baked it at a very low temperature to avoid burning the chocolate. I also reduced the filling because I had too much (which I happily ate with a spoon).

Crust:
5 tablespoons unsalted butter
2 ounces dark or semisweet chocolate, finely chopped
1½ cups chocolate wafer cookie crumbs (from about 7 ounces cookies)
2 tablespoons granulated sugar
⅛ teaspoon table salt

Filling:
5½ ounces bittersweet chocolate, finely chopped
1 cup heavy whipping cream, divided
3 tablespoons unsalted butter, cut into ½-inch cubes
1 teaspoon vanilla extract
1 cup (8 ounces) berry jam

1. For the crust: In a small saucepan over medium-low heat or a microwave-safe bowl in the microwave, melt the butter. Remove from the eat and add the chocolate; stir until the chocolate is melted.

2. In a food processor, process the cookies until finely ground. (Alternatively, place the cookies in a large ziploc bag and use a rolling pin to crush them, then transfer to a bowl.) Add the sugar and salt; pulse to mix. Add the melted butter and chocolate and pulse until the crumbs are evenly moistened. Transfer the mixture to a 9-inch round or equivalent tart pan with a removable bottom and press firmly into the bottom and up the sides of the pan. Refrigerate at least 30 minutes or until firm.

3. Heat the oven to 200 degrees. Transfer the crust in the tart pan to a baking sheet. Bake at 200 degrees for 12 minutes. Cool to room temperature.

4. For the filling: Transfer the chocolate to a heatproof bowl. In a small saucepan over medium heat, heat ⅔ cup of the heavy cream until it simmers but is not boiling. Pour the hot cream over the chocolate; gently stir until the chocolate and cream are evenly mixed. Add the butter in ½-tablespoon increments, stirring until each one is melted before adding another. Stir in the vanilla extract.

5. In a separate bowl, whisk (or use a hand mixer) the remaining ⅓ cup heavy cream until it forms soft peaks. Gently fold one-third of the whipped cream into the chocolate mixture, then add the remaining cream, folding until no white streaks remain.

6. To assemble, spread the jam in an even layer over the bottom of the cooled crust. Pour the chocolate mixture over the jam and spread into an even layer. Refrigerate until set, at least 2 hours or overnight.

berry chocolate tart 9

pumpkin chocolate chip bars

pumpkin chocolate chip bars 4

I try to bring something for my coworkers to snack on once a week. Sometimes I feel guilty for ruining people’s diets, but mostly people seem to appreciate it, and, honestly, I don’t do it for them. I do it so I get to do some baking without doing lots of eating.

pumpkin chocolate chip bars 1

Although squeezing baking into a weeknight isn’t always so easy. By the time we get home, work out, make and eat dinner, and maybe fold some laundry, there isn’t a lot of leftover time. I usually end up staying up later those nights, not to mention making us late for work the next morning while I garnish or cut into squares or whatever each particular dessert requires.

pumpkin chocolate chip bars 2

Recipes like this one make it easy.  It’s mixed like a basic cookie dough, butter then sugar then eggs, half a can of pumpkin, stir in a bag of chocolate chips. There are no individual cookies to scoop, no fillings or toppings, just spread the batter in a pan and bake. And, most importantly, the bars that come out of the oven are soft and tender, pumpkiny and chocolately, and perfectly sized for someone to grab a quick square with their morning coffee.

pumpkin chocolate chip bars 3

Printer Friendly Recipe
Pumpkin Chocolate Chip Bars (adapted from Martha Stewart via Sparks from the Kitchen)

2 cups (9.6 ounces) all-purpose flour
1 tablespoon pumpkin pie spice
1 teaspoon baking soda
1 cup (2 sticks) unsalted butter, room temperature
¾ teaspoon salt
1¼ cups (8.75 ounces) sugar
1 large egg
2 teaspoons vanilla extract
1 cup canned pumpkin puree
1 package (12 ounces) semisweet chocolate chips

1. Heat oven to 350 degrees. Spray a 9-by-13-inch baking pan with cooking spray. In a medium-sized bowl, combine the flour, spices, and baking soda.

2. Place the butter in the bowl of a stand mixer fitted with the paddle attachment (or a large mixing bowl if you’re using a hand-held mixer). Beat the butter on medium-low speed until it’s smooth, then add the salt and sugar. Continue beating on medium-low until the mixture is light and fluffy, about 2 minutes, scraping the sides of the bowl as needed. With the mixer running, add the egg, then the vanilla. Beat in the pumpkin until blended. Reduce the mixer speed to low and gradually add the flour mixture, mixing just until evenly combined. Stir in the chocolate chips.

3. Spread the batter evenly in the prepared pan. Bake until a toothpick inserted into the center of the pan comes out dry, 35 to 40 minutes. Transfer to a wire rack to cool completely before serving.

pumpkin chocolate chip bars 5

chocolate chip cookie dough cupcakes

chocolate chip cookie dough cupcakes 8

I might have mentioned, once or twice, that I am a fan of cookie dough. Any cookie is good, but chocolate chip is the best. And not any of those new recipes that are based on melted butter, those make greasy dough. I want the classic light and fluffy, pale, grainy dough. For me, the chocolate chips are mostly a distraction, but I figure they’re part of the package.

chocolate chip cookie dough cupcakes 3

But it’s my birthday, and I guess chocolate chip cookie dough is not an appropriate celebratory dessert to share. I figured these were the next best thing. A yellow cake adapted with extra brown sugar and chocolate chips, an eggless cookie dough filling, frosting with brown sugar and even raw flour, all topped off with the most adorable chocolate chip cookies you’ve ever seen. Do you know how many opportunities this was to eat something resembling chocolate chip cookie dough? A lot.

chocolate chip cookie dough cupcakes 5

I have to admit that my favorite part was the filling – pure dough, with none of this cake distraction. The frosting was impressive too, the raw flour and brown sugar really made it resemble cookie dough. It was pretty much the perfect birthday cake for me, especially because there’s extra filling in the fridge for the rest of the weekend.

chocolate chip cookie dough cupcakes 6

Printer Friendly Recipe
Chocolate Chip Cookie Dough Cupcakes
(adapted from Annie’s Eats and Martha Stewart’s Yellow Cake recipe)

Makes 30 cupcakes

I baked the cookies a week early and froze them. I made the filling two days early. I made the cupcakes the night before, then filled, frosted, and garnished them the morning before I served them.

For the cake:
1½ cups (7.2 ounces) all-purpose flour
1½ cups (6 ounces) cake flour
2 teaspoons baking powder
½ teaspoon baking soda
12 tablespoons (1½ sticks) unsalted butter, softened
1¼ cups (8.75 ounces) brown sugar
½ cup (3.5 ounces) granulated sugar
1 teaspoon salt
4 large eggs, at room temperature
¼ cup canola oil
2 teaspoons vanilla extract
1¼ cups buttermilk, room temperature
1 cup (6 ounces) chocolate chips

For the filling:
8 tablespoons (1 stick) unsalted butter
½ teaspoon salt
½ cup (3.5 ounces) brown sugar
¼ cup (1.75 ounces) granulated sugar
2 tablespoons milk
1 teaspoon vanilla extract
1 cup plus 2 tablespoons (5.6 ounces) cups all-purpose flour
½ teaspoon baking soda
1 cup (6 ounces) chocolate chips

For the frosting:
16 tablespoons (2 sticks) unsalted butter, at room temperature
½ teaspoon salt
½ cup (3.5 ounces) light brown sugar, packed
2 cups (8 ounces) confectioners’ sugar
⅔ cup (3.2 ounces) all-purpose flour
2 teaspoons vanilla extract

For the garnish:
mini chocolate chip cookies (optional)
chocolate chips (optional)

1. For the cake: Adjust an oven rack to the middle position; heat the oven to 350 degrees. Line 24 muffin wells with paper cups. In a medium bowl, whisk together the flours, baking powder, and baking soda.

2. In a stand mixer fitted with the paddle attachment (or a large bowl if using a hand-held mixer), beat the butter, sugars, and salt on medium speed until light and fluffy, about 2 minutes, scraping down the sides of the bowl as necessary. Add the eggs one at a time, beating well after each addition, then mix in the oil and vanilla. Reduce the mixer speed to low; add the dry ingredients in three additions, alternating with the buttermilk and ending with the dry ingredients. Beat each addition just until incorporated. Stir in the chocolate chips.

3. Divide the batter between the prepared muffin cups, filling each cup about two-thirds full. Bake for 16-20 minutes, until a toothpick inserted into the center of a cupcake comes out clean. Transfer the pan to a wire rack to cool. Remove the cupcakes from the pan after 5 minutes. Cool completely before filling and frosting.

4. For the filling: In the bowl of a stand mixer fitted with the paddle attachment (or a large bowl if using a stand mixer), beat the butter, salt, and sugars on medium speed until light and fluffy, 1-2 minutes. Add the milk, beating until incorporated, then mix in the vanilla. Reduce the mixer speed to low and gradually add the flour, mixing just until incorporated. Stir in the chocolate chips.

5. For the frosting: In a standing mixer fitted with the whisk attachment, beat the butter at medium-high speed until smooth, about 20 seconds. Add the brown sugar and salt; beat at medium speed until pale and fluffy. Reduce the speed to low and slowly add the confectioners’ sugar and flour; beat at medium-low speed until most of the sugar is moistened, about 45 seconds. Scrape the bowl, add the vanilla, and beat at medium speed until incorporated, about 10 seconds, then increase the speed to medium-high and beat until light and fluffy, about 4 minutes, scraping down the bowl once or twice.

6. To assemble: Use a paring knife to carve a cone out of the center of each cupcake, leaving at least ¼-inch of cake on the bottom of the cupcakes. Fill each divot with filling. Frost the cupcakes, completely covering the filling. Garnish with cookies and additional chocolate chips, if desired.

chocolate chip cookie dough cupcakes 7

whole wheat biscotti with pistachios, apricots, chocolate, and lavender

pistachio apricot biscotti 7

Sometimes you want the comfortable and familiar. You want brownies. You want vanilla or strawberry ice cream. And who am I to begrudge you a good ol’ chocolate chip cookie craving?

pistachio apricot biscotti 1

Sometimes, though, maybe you want something more interesting, maybe even a bit challenging. You want something more adult. But you should keep the chocolate. This is dessert we’re talking about here, a treat, not a chore.

pistachio apricot biscotti 3

For those times, you can add fruit. Nuts, maybe. Use whole grains and unrefined sugar. Add…flowers?  Why not?

pistachio apricot biscotti 4

I made a half batch of these for a gathering of myself, Dave, and two of our guy friends. They were all gone (except one, which was perfect with coffee the next morning) by the end of the evening, and I swear I didn’t eat them all myself! Grown-up food isn’t so bad.

pistachio apricot biscotti 5

One year ago: Ginger Fried Rice
Two years ago: Green Pea Ravioli with Lemon Broth
Three years ago: Pizza with Figs, Prosciutto, Gorgonzola, Balsamic, and Arugula
Four years ago: Pan-Roasted Asparagus
Five years ago: Sichuan Green Beans

Printer Friendly Recipe
Whole Wheat Biscotti with Pistachios, Apricots, Chocolate, and Lavender
(adapted from 5 Second Rule)

Makes 72 1-inch bites

You can probably choose one type of sugar and one type of flour. I was hedging my bets on the healthier additions.

I used 6 ounces of chocolate, and it was delicious but too much for the dough to hold onto, so I’ve reduced it slightly.

1 cup (4.8 ounces) whole wheat flour
½ cup plus 2 tablespoons (3 ounces) all-purpose flour
¼ cup (1.75 ounces) turbinado sugar
¼ cup (1.75 ounces) brown sugar
1 teaspoon baking powder
½ teaspoon salt
2 extra-large eggs
3 tablespoons olive oil
2 teaspoons vanilla extract
4 ounces (¾ cup) semisweet chocolate chips, chopped
½ cup finely diced dried apricots
½ cup pistachios, rough-chopped
1 teaspoon dried lavender

1. Heat the oven to 350 degrees. Line a baking sheet with a silicone baking mats or parchment paper.

2. In a large mixing bowl, whisk the flours, sugars, baking powder, and salt. In a separate bowl, whisk the eggs until well combined, then add the olive oil and vanilla extract. Pour the egg mixture into the flour mixture and use a rubber spatula to stir the ingredients until the dry ingredients are evenly moistened. Stir in the chocolate, apricots, pistachios, and lavender.

3. On a dry work surface, knead the dough until it’s no longer sticky. Transfer it to the prepared baking sheet and press into a ½-inch thick rectangle measuring about 10 by 6 inches. Bake for 22 to 25 minutes, or until the top no longer looks raw. Transfer the baking sheet with the dough to a cooling rack. Let dough cool for at least 5 minutes.
4. Transfer the dough to a cutting board. Cut each block into 6 long strips, then cut each strip at 1-inch intervals to form squares. Transfer the pieces back to the baking sheet. Bake for 10-14 minutes, until the squares just begin to brown at the edges. Transfer the cookies to a cooling rack to cool completely.

pistachio apricot biscotti 6

christmas star wars cookies

christmas all 1

I’m exceptionally proud of these cookies. Not necessarily for how they came out in the end, although I’m pleased with that too. But mostly for coming up with the idea completely on my own.

christmas vader

This is rare for me – I’m a good idea copier, and a proficient idea alterer, but a poor idea generator. I don’t even remember how I came up with the idea of Star Wars Christmas cookies, except that I wanted to send my in-laws cookies for Christmas and didn’t know how I could possibly live up to the original Star Wars cookies I sent them last spring. And, okay, maybe the picture of Darth Maul in a Santa suit on the front of the Star Wars Lego advent calendar we got our nephews for an early Christmas present helped.

christmas stormtrooper

But my creativity didn’t end with just coming up with the idea. Googling “Christmas Darth Vader”, “Christmas Yoda”, and “Christmas Stormtrooper” just showed me a few pictures of each character wearing a Santa hat. That wasn’t going to cut it, because I wanted the characters to be different.

christmas yoda

Combining the ultimate Star Wars bad guy and the ultimate Christmas good guy to make Vader Santas was a given, and the white stormtroopers would work well for snowmen. Yoda’s wide earspan would make good antlers, and hopefully the red nose would make the Rudolph idea obvious. That left Boba Fett…my least favorite of the character shapes got left with the leftover idea, and he just ended up with an elf hat.

christmas boba

It seems to have worked out, because we gave the cookies to a 4-year-old, and he identified the Star Wars/Christmas connection of each cookie immediately…except for Boba, and that’s no surprise. He’s got a red and green hat, that’s Christmassy enough. And hey, if that’s the best I can come up with, at least it was my own idea. And Rudolph Yoda’s red nose makes up for any weaknesses in the vaguely elf-like Boba.

One year ago: Herb-Roasted Pork Loin
Two years ago: Pumpkin Cinnamon Rolls
Three years ago: Twice-Baked Potatoes
Four years ago: Pumpkin Seed Brittle

christmas all 2

hot chocolate mix

hot chocolate mix 2

I’m not usually much of a Christmas baker, but I got this grand idea last month that I should send my in-laws packages of cookies for Christmas. I sort of had a bad feeling about it, like it was probably going to end up stressing me out, but once I get a hold of an idea that sounds fun, I have a hard time letting go. And so it was that a week and a half before Thanksgiving, I was mixing, forming, and freezing dough for Christmas cookies.

hot chocolate mix 5

I didn’t have much of a plan from the beginning. I love this bourbon pound cake recipe and thought it would ship well. I knew I wanted something fruity and something chocolately. Hazelnut dried cherry biscotti covered the fruit requirement, but the decorated sugar cookies I couldn’t resist adding wouldn’t help with the chocolate. And then I remembered this hot chocolate mix recipe, which I first made several years ago.

hot chocolate mix 6

It’s the perfect thing to ship off to northeastern Ohio in December, sure to be appreciated through the upcoming snowy months. There’s no worry about breaking in transit, a relief after individually wrapping 28 treat bags containing sugar cookies in bubble wrap. And it’s easy, a relief after spending the greater part of a weekend decorating elaborate sugar cookies (that had better not break in transit). I think it’s safe to say that my cookie packages were a great success – assuming those 28 bubble-wrapped sugar cookies arrive safely, at least.

hot chocolate mix 4

One year ago: Mushroom Farro Soup
Two years ago: Gingerbread Cake
Three years ago: Brussels Sprouts Braised in Cream
Four years ago: Candied Orange Peel

Printer Friendly Recipe
Hot Chocolate Mix

Makes about 36 servings

To make vanilla sugar, mix a vanilla bean into the sugar and let it set for a few days.

I used 2 cups of sugar, but the mix was two sweet for me, so I’ve reduced it in the recipe.  It might depend on how sweet your chocolate is too; mine was 72% cocao.

The amount of espresso powder you add might depend on who you plan to serve the hot chocolate to: more adds complexity and cuts the sweetness, but less is more appropriate for kids.

20 ounces bittersweet chocolate, coarsely chopped
1½ cups (10.5 ounces) vanilla sugar
2¼ cups unsweetened Dutch-processed cocoa powder
½ teaspoon salt
1-3 teaspoons instant espresso powder

Grind chocolate in a food processor until finely chopped. Add the remaining ingredients and process until mixed. Transfer to an airtight container. To serve, mix 3-4 tablespoons into 8 ounces of hot milk.

hot chocolate mix 3

chocolate chip cookie comparison 2

chocolate chip comparison 2
The Chewy

I’ve done all these comparisons and experiments with chocolate chip cookies, and yet, I don’t make any of those recipes. Usually, I make chocolate chip cookies to please myself, because I think it’s fun, so I’m more concerned with which recipe I most enjoy baking instead of which recipe has the best result. But maybe this isn’t so bad – maybe my hacked combination of recipes could stand up to the originals.

chocolate chip comparison 1
The Chewy dough

It was time to find out. For a comparison of the best of the best, I chose Alton Brown’s The Chewy recipe, winner of my last comparison; Cook’s Illustrated’s Perfect Chocolate Chip Cookie, a true standout; Kelsey’s Best Ever Chewy Chocolate Chip Cookies (adapted from Anna Olson’s original recipe), which are the most popular post on her blog; and the one I always make when I’m too lazy to follow an actual recipe.

chocolate chip comparison 3
The Chewy

What sets Alton’s recipe apart is the use of bread flour instead of regular and the replacement of an egg white with milk. Cook’s Illustrated Perfect recipe is designed to mimic the effects of the overnight rest of the dough recommended by the New York Times, which it does using melted browned butter. Compared to the traditional Tollhouse recipe, Kelsey’s recipe uses a higher ratio of flour (plus a bit of cornstarch). My recipe has some similar traits to those above, like bread flour instead all-purpose and an overnight chill to enhance the butterscotch flavor.

chocolate chip comparison 4
my recipe dough

Between the four tasters I had, there was no unanimous favorite. Dave’s favorite was CI’s Perfect cookies. My sister and her husband both chose Alton Brown’s The Chewy as their favorite; it was chewier, but, to Dave, it was too greasy. Kelsey’s recipe was drier than the others; compared to the ultra-rich versions it was being compared to, it had less flavor. My hacked together recipe was the most traditional, crispy around the edges and gooey in the middle.

chocolate chip comparison 6
Cook’s Illustrated’s Perfect

As for me, I’ll certainly keep making the version I have been, now that I know that it can hold its own with the big dogs. I love it because I don’t have to look at a recipe and the dough is perfect for snacking. The Chewy tends to come out a little too flat, and I don’t like the dough for CI’s Perfect (which makes it the recipe of choice when self-control is necessary!), plus it simply isn’t as fun to make cookies with a whisk as it is with a mixer. Slight differences aside, these were all standout recipes, but I appreciate the validation to keep being lazy with my hacked together version.

chocolate chip comparison 5
left to right: The Chewy, my recipe, Kelsey’s Best-Ever, Cook’s Illustrated’s Perfect

One year ago: Kofta
Two years ago: Grilled Corn Salad
Three years ago: Espresso Cheesecake Brownies
Four years ago: Chunky Peanut Butter and Oatmeal Chocolate Chipsters

Printer Friendly Recipe
Accidental Variation of The Chewy (adapted from Alton Brown)

As I was writing up this recipe, I realized I did not actually make The Chewy, which I now see is supposed to use melted butter. I used room temperature solid butter. The recipe below is what I did. This means that the only difference between my recipe and The Chewy is a lower ratio of brown sugar to white and the use of an egg white instead of milk.

16 tablespoons (2 sticks) unsalted butter, room temperature
2¼ cups (11.25 ounces) bread flour
1 teaspoon table salt
1 teaspoon baking soda
¼ cup granulated sugar
1¼ cups brown sugar
1 egg
1 egg yolk
2 tablespoons milk
1½ teaspoons vanilla extract
2 cups (12 ounces) semisweet chocolate chips

1. Heat oven to 375 degrees. Sift together the flour, salt, and baking soda and set aside.

2. Add the butter to the mixer’s work bowl with the sugars. Cream the butter and sugars on medium speed. Add the egg, yolk, 2 tablespoons milk, and vanilla extract, and mix until well combined. Slowly incorporate the flour mixture until thoroughly combined. Stir in the chocolate chips.

3. Scoop the dough in heaping tablespoons onto the prepared baking sheets. Bake the cookies, one sheet at a time, until they are browned around the edges and do not look wet on top, 8-12 minutes. Let the cookies cool on the cookie sheets for 5 minutes, then transfer to wire racks to cool completely.

Printer Friendly Recipe
Perfect Chocolate Chip Cookies (from Cook’s Illustrated May/June 2009)

I baked smaller cookies – tablespoon-sized dollops of dough – for about 9 minutes at 375 degrees.

1¾ cups (8¾ ounces) unbleached all-purpose flour
½ teaspoon baking soda
14 tablespoons (1¾ sticks) unsalted butter
½ cup (3½ ounces) granulated sugar
¾ cup (5¼ ounces) packed dark brown sugar
1 teaspoon table salt
2 teaspoons vanilla extract
1 large egg
1 large egg yolk
1¼ cups semisweet chocolate chips or chunks
¾ cup chopped pecans or walnuts, toasted (optional)

1. Adjust oven rack to middle position and heat oven to 375 degrees. Line 2 large baking sheets with parchment paper. Whisk flour and baking soda together in medium bowl; set aside.

2. Heat 10 tablespoons butter in 10-inch skillet over medium-high heat until melted, about 2 minutes. Continue cooking, swirling pan constantly until butter is dark golden brown and has nutty aroma, 1 to 3 minutes. Remove skillet from heat and, using heatproof spatula, transfer browned butter to large heatproof bowl. Stir remaining 4 tablespoons butter into hot butter until completely melted.

3. Add both sugars, salt and vanilla to bowl with butter and whisk until fully incorporated. Add egg and yolk and whisk until mixture is smooth with no sugar lumps remaining, about 30 seconds. Let mixture stand for 3 minutes, then whish for 30 seconds. Repeat process of resting and whisking 2 more times until mixture is thick, smooth and shiny. Using rubber spatula or wooden spoon, stir in flour mixture until just combined, about 1 minute. Stir in chocolate chips and nuts (if using), giving dough final stir to ensure no flour pockets remain.

4. Divide dough into 16 portions, each about 3 tablespoons (or use a #24 cookie scoop). Arrange 2 inches apart on prepared baking sheets, 8 dough balls per sheet.

5. Bake cookies 1 tray at a time until cookies are golden brown and still puffy, and edges have begun to set but centers are still soft, 10-14 minutes, rotating baking sheet halfway through baking. Transfer baking sheet to wire rack; cool cookies completely before serving.

Printer Friendly Recipe
Best-Ever Chocolate Chip Cookies (rewritten but not changed from Kelsey’s Apple a Day, who adapted it from Anna Olson)

2 cups (9.6 ounces) all-purpose flour
2 teaspoons cornstarch
1 teaspoon baking soda
½ teaspoon table salt
12 tablespoons (1½ sticks) unsalted butter, softened
¾ cup (5.25 ounces) brown sugar
¼ cup (1.75 ounces) granulated sugar
1 egg
2 teaspoons vanilla extract
1 cup (6 ounces) bittersweet chocolate chips

1. Heat the oven to 350 degrees. Line two baking sheets with parchment paper or silicone mats. In a medium bowl, mix the flour and baking soda.

2. In the bowl of a stand mixer fitted with the paddle attachment (or a large bowl if using a stand mixer), beat the butter, salt, and sugars on medium speed until light and fluffy, 1-2 minutes. Add the egg, beating until incorporated, then mix in the vanilla. Reduce the mixer speed to low and gradually add the flour, mixing just until incorporated. Stir in the chocolate chips.

3. Scoop the dough in heaping tablespoons onto the prepared baking sheets. Bake the cookies, one sheet at a time, until they are slightly browned around the edges, 8-10 minutes. Let the cookies cool on the cookie sheets for 5 minutes, then transfer to wire racks to cool completely.

Printer Friendly Recipe
Chocolate Chip Cookies (adapted from nearly every single chocolate chip cookie recipe I’ve ever read)

I haven’t found a dependable measurement for the weight of 1 cup of bread flour.  I used to assume 5 ounces for 1 cup of bread flour, but I think this is on the high side, so I’m changing the volume measurement in this recipe from 2¼ cups to 2⅓ cups.  Unfortunately,  it could be as high as 2½ cups, depending on how you measure your flour.  If you can, definitely measure by weight and not volume (food scales are cheap!)!

16 tablespoons (2 sticks) unsalted butter, room temperature
1 teaspoon table salt
1 cup (7 ounces) brown sugar
½ cup (3.5 ounces) white sugar
2 eggs
1 teaspoon vanilla
2¼ cups (11.25 ounces) bread flour
1 teaspoon baking soda
2 cups (12 ounces) semisweet chocolate chips

1. Heat the oven to 375 degrees. Line two baking sheets with parchment paper or silicone mats. In a medium bowl, mix the flour and baking soda.

2. In the bowl of a stand mixer fitted with the paddle attachment (or a large bowl if using a stand mixer), beat the butter, salt, and sugars on medium speed until light and fluffy, 1-2 minutes. Add the eggs, one at a time, beating until incorporated, then mix in the vanilla. Reduce the mixer speed to low and gradually add the flour, mixing just until incorporated. Stir in the chocolate chips.

3. Scoop the dough in heaping tablespoons onto the prepared baking sheets. Bake the cookies, one sheet at a time, until they are browned around the edges and do not look wet on top, 8-12 minutes. Let the cookies cool on the cookie sheets for 5 minutes, then transfer to wire racks to cool completely.