crispy bagel roll

copy-of-img_1619

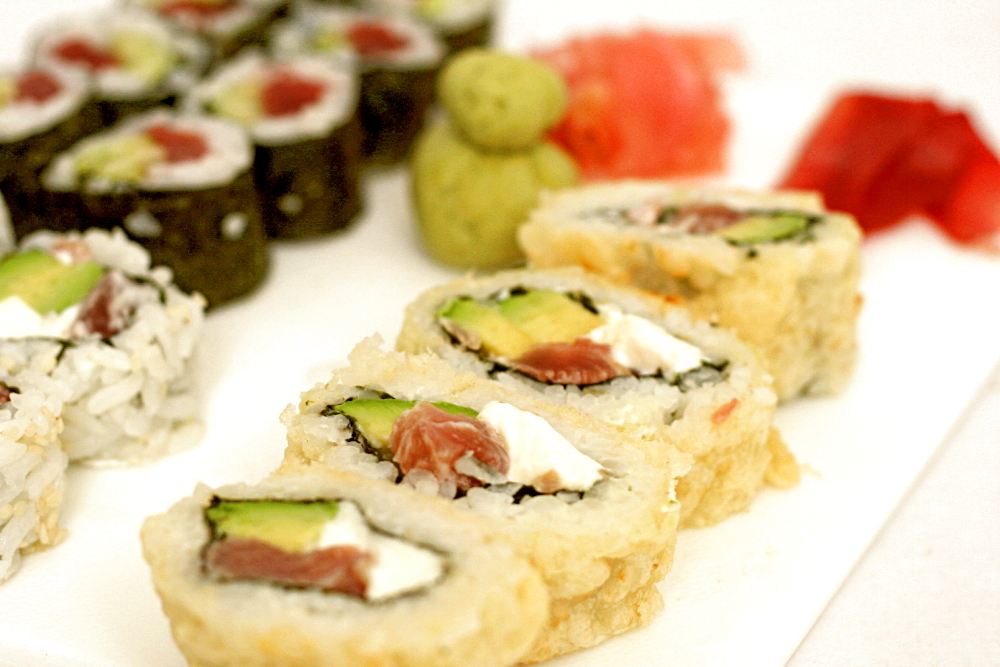
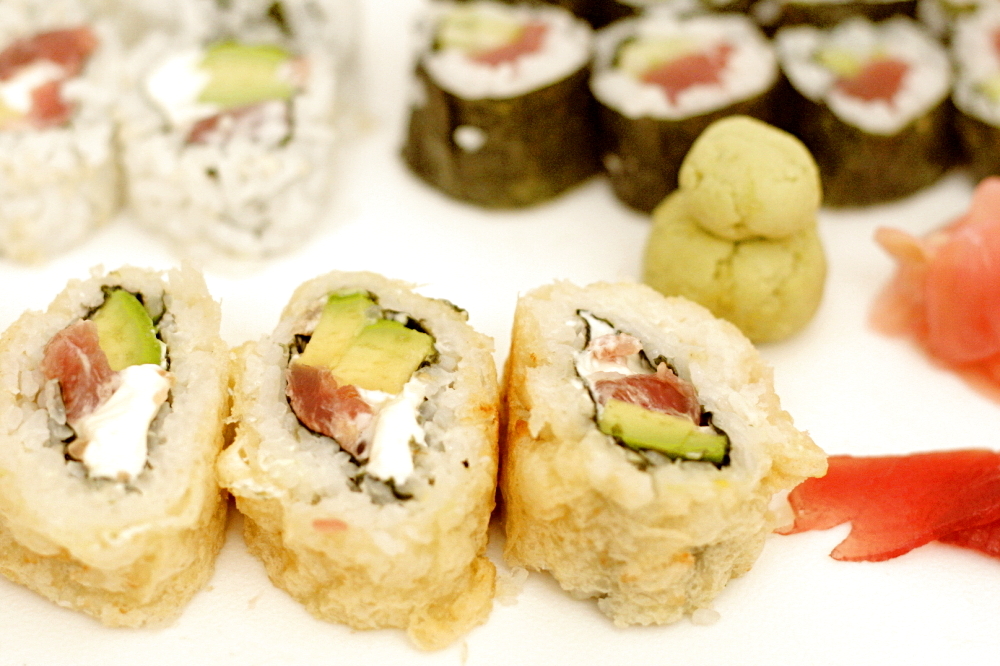
A third grader was telling me once about her favorite restaurant, and she said that it served “eggs and bagels and bacon and everything good.” That’s kind of how this sushi roll is – full of fish and cream cheese and avocado and everything good. And then it’s fried.
copy-of-img_1601

The first time Dave and I tried sushi, we were visiting friends, who took us to one of their favorite sushi restaurants. We ordered a crispy bagel roll, and it was so good! I haven’t found even one restaurant since then that serves anything similar. After almost two years of my friends mentioning that they went out for sushi and enjoyed the crispy bagel roll, I decided I’d have to try to re-create it at home.
copy-of-img_1602

I made sushi rolls a few times last year, and it wasn’t a disaster, but it was a lot of work, and I always ended up frustrated because my dull chef’s knife couldn’t cut through the nori. But since then, I’ve acquired a new knife and new inspiration from Jen, who makes homemade sushi seem so approachable.
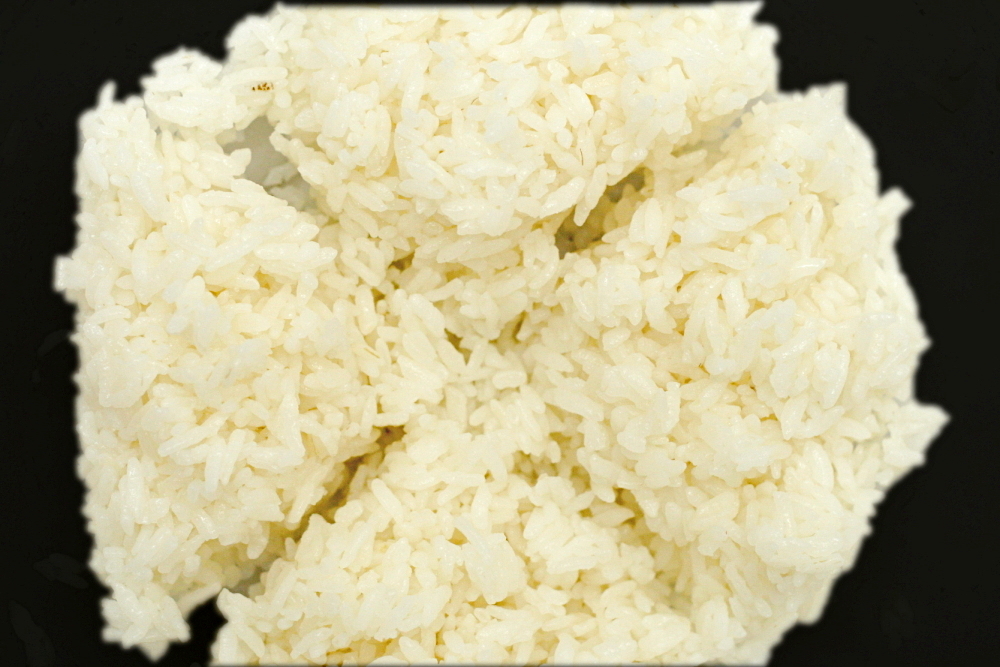
copy-of-img_1605

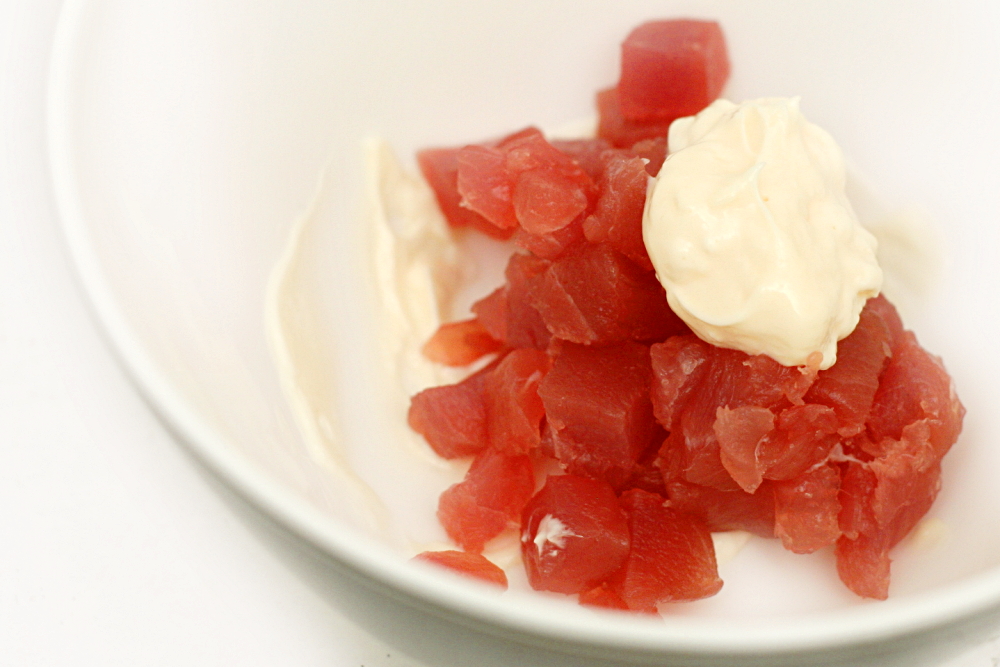
Bagel rolls aren’t original to the restaurant I had them at, but recipes differ slightly. I looked up their menu and found that their version includes pretty much all of my favorite sushi ingredients – fish, cream cheese, avocado – everything good indeed. If I recall, they serve theirs with aioli, but I opted to just mix the mayonnaise with the fish before forming the roll.
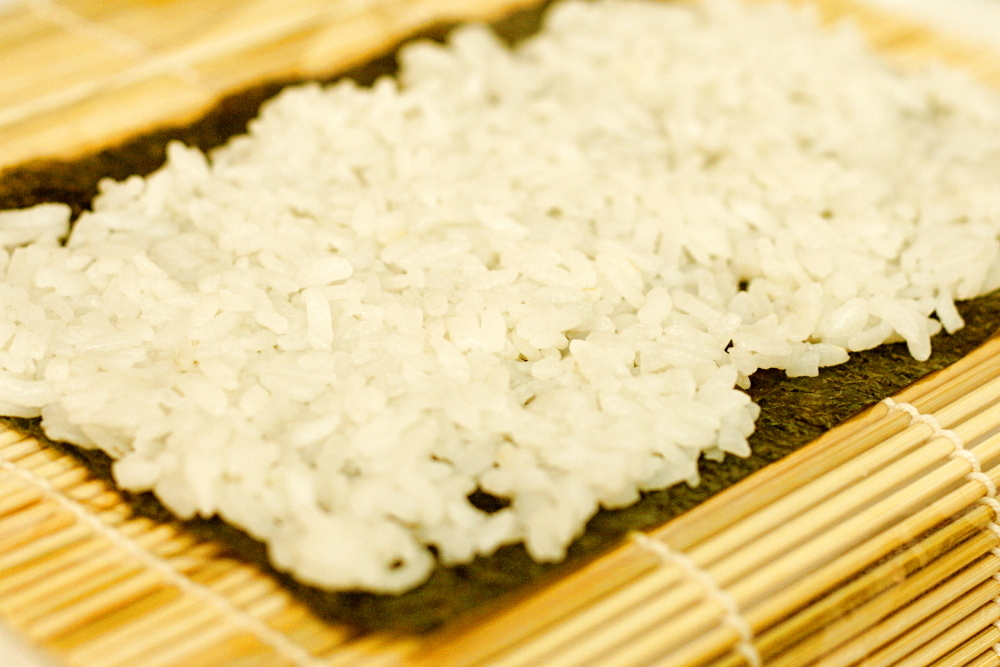
copy-of-img_1606

And then there’s the “crispy” part. The rolls are delicious without frying, so if you want to stop here, be my guest! Making tempura batter, heating oil, and deep-frying the rolls adds a significant amount of work to an already labor-intensive meal. But it’s a fun way to give this roll a different flavor profile than a lot of other sushi rolls.
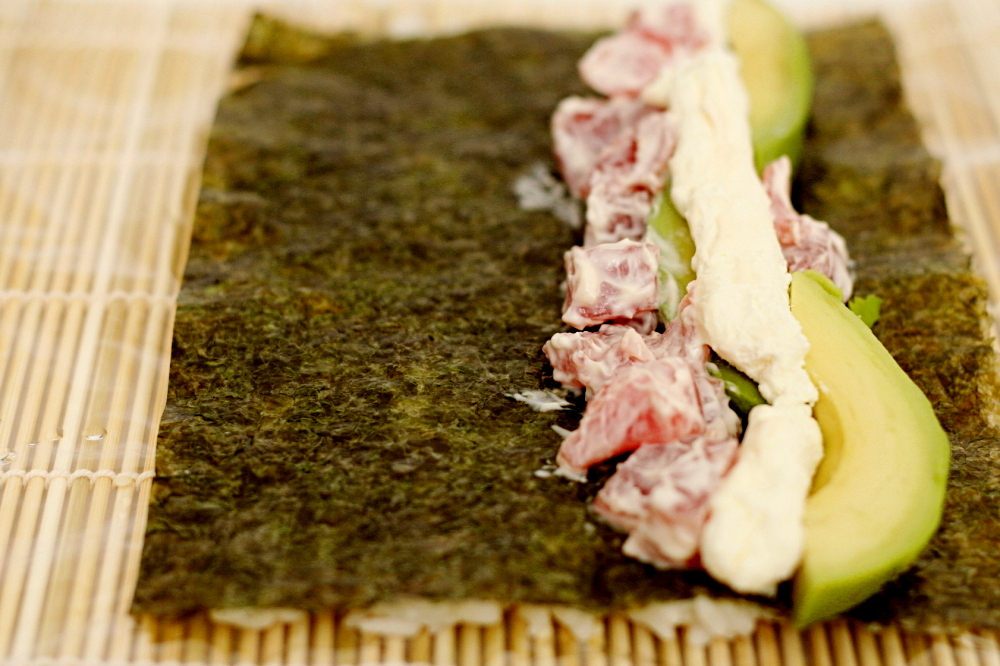
copy-of-img_1610

This roll lends itself especially well to being made at home, because it calls for smoked salmon, so there’s no worry about finding or working with quality raw fish. (Um, except that the pictures show tuna, because we love tuna. But smoked salmon makes more sense in this roll.) Plus, the roll is full of everything good. How can you go wrong?
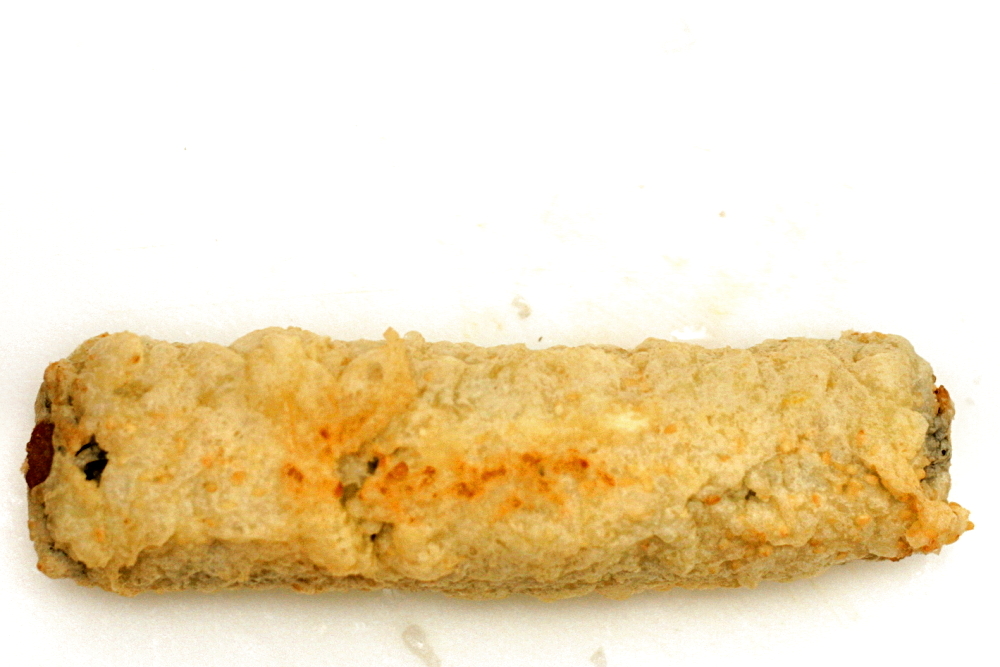
copy-of-img_1614

One year ago: Olive Oil Bread

Bagel Rolls (rice recipe adapted from Alton Brown)

Unfortunately, I can’t share the tempura batter recipe I used because it’s I recipe I tested for Cooks Illustrated, and it isn’t published yet. However, I think this one would work fine. I fried the rolls until they were just slightly browned. I didn’t want the filling to cook, or even get warm really.

The only part of making homemade sushi that I haven’t nailed down is how much of the sheet of nori to use. The whole sheet is too much and ends up forming a spiral, but a half sheet isn’t quite enough to fit the fillings. I ended up using about 3/5 of the sheet and saving the scraps for sushi bowls.

Makes 4 rolls, serving 2 people

Rice:
1 cup sushi rice
1 cup water
1 tablespoon rice vinegar
1 tablespoon sugar
½ teaspoon salt

Filling:
4 (8- by 7-inch) sheets nori (see comments above)
4 ounces smoked salmon
1 tablespoon mayonnaise
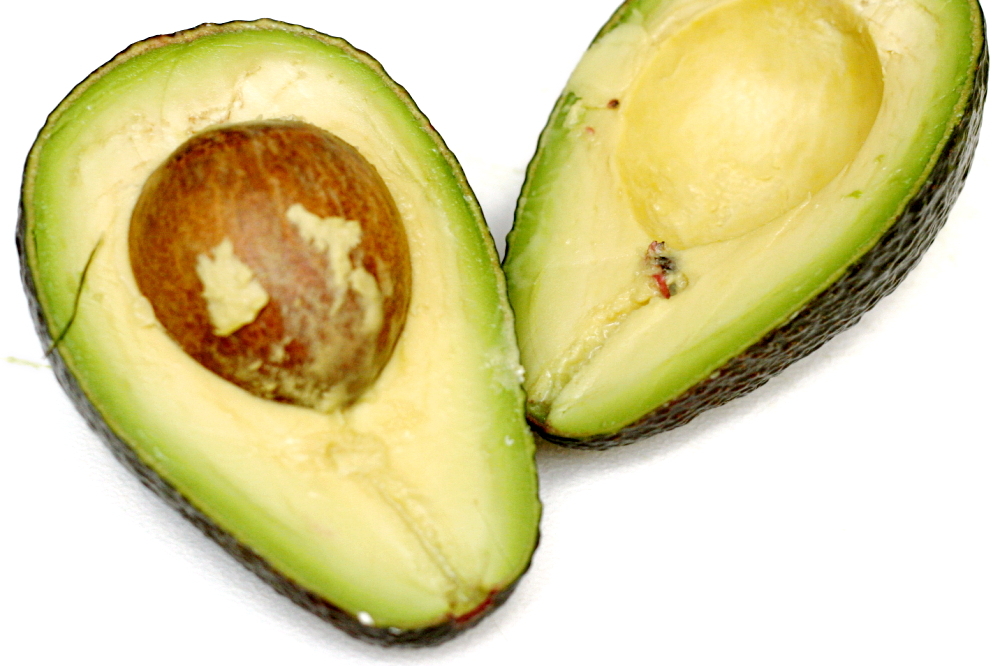
1 avocado, sliced
2 ounces cream cheese
2 teaspoons sesame seeds

For serving:
Wasabi
Pickled ginger
Soy sauce

Rice:
Rinse rice and let drain for 30-60 minutes. (I often skip this without any huge loss in quality.)

Place the rice and water into a medium saucepan and place over high heat. Bring to a boil, uncovered. Once it begins to boil, reduce the heat to the lowest setting and cover. Cook for 15 minutes. Remove from the heat and let stand, covered, for 10 minutes.

Heat the rice vinegar, sugar and salt (either in a small pot on the stove or in the microwave) until the sugar is dissolved. Transfer the rice into a large wooden or glass mixing bowl and add the vinegar mixture. Fold and cut thoroughly to combine and coat each grain of rice with the mixture. Fan until rice is near room temperature. Do not

Chop the salmon into approximately ⅛-inch pieces and mix it with the mayonnaise. Fill a small bowl with tap water and place it near where you’ll be doing the rolling.

Lay a sheet of plastic wrap over a bamboo rolling mat. Lay 1 sheet of nori, shiny side down, on the plastic wrap. Wet your fingers with water and spread ¼ of the rice evenly onto the nori. Sprinkle the rice with ½ teaspoon sesame seeds. Flip the nori over so that the rice faces down onto the plastic wrap. Place ¼ of salmon mixture, the avocado, and the cream cheese in the middle of the nori. Use the plastic wrap to roll the nori and rice around the fillings, as tight as possible without squeezing the fillings out. Use the bamboo mat to shape and compact the roll. Leave the roll covered in the plastic wrap while you use the remaining ingredients to make three more rolls.

If you’re frying the sushi rolls: Heat 2-3 quarts of canola, vegetable, or peanut oil to 400C in a Dutch oven that holds at least 5 quarts. Remove the plastic wrap from a roll. Dip the entire roll into tempera batter. Fry one roll at a time for about 2 minutes, until the batter is firm and slightly browned. Drain on a cooling rack. Repeat with the remaining rolls, making sure that the oil is at 400 degrees before adding the next roll.

Remove the plastic wrap from the rolls (if you didn’t fry them). Cut each roll in half, then half again and again to make 8 pieces for each roll. Serve with wasabi, pickled ginger and soy sauce.
copy-of-img_1615

phyllo triangles: crawfish and mushroom fillings

I have had this recipe in my “To Blog” folder for months. It has sat there, ignored, while flashier ideas or more seasonal recipes or better photos or easier stories made other entries come first. In fact, I now have 33 recipes that are ready to be written about, just waiting for me to get up the motivation. I have decided that the only way to get my To Blog folder back under control will be a commitment to publish a blog entry every day for a month – which I could easily do even if I didn’t make one new recipe for the rest of the month.

These crawfish phyllo triangles caught my eye when Jen wrote about them because I remembered really liking crawfish the one time I’d had them before. But it was a few months before I discovered a great fish market nearby where I could actually buy crawfish. I served these with Deb’s mushroom phyllo triangles, thinking that it wouldn’t be much more work to make another filling as long as I was already dealing with phyllo.

I changed the season in the filling recipe, as Jen didn’t seem completely pleased with it. I love Old Bay, which is what she recommended using instead of the paprika in the original recipe. I also left out a few ingredients that didn’t seem really necessary. The recipe is originally from Emeril, and if there’s one thing I’ve learned from the number of Emeril recipes I’ve made, it’s that they can usually be simplified.


Here’s the most important lesson I learned from this experience: You cannot skimp on the butter used to brush the phyllo layers. I was making these for dinner on a weeknight (um, back when I was unemployed – I’m a little more practical about weeknight dinners now), and it wasn’t until I already had the filling made that I noticed the 2 sticks of butter used to brush the phyllo. I’m okay with splurging once in a while, but I just wasn’t mentally prepared for that.

So I did an internet search and saw that you can spray the sheets with nonstick spray instead of brushing them with butter. I did a hybrid – I gave the sheet a quick spray, and then a light brush with butter.  The problem is that, once baked, the phyllo triangles were clearly missing something. They were a little dry and not as flavorful or crisp as they should have been. Next time I work with phyllo, I’ll be sure to keep in mind that a lot of butter is absolutely necessary to make phyllo as good as it should be.


Despite this (and crawfish tails’ creepy similarity to insect abdomens), both of these fillings made for some tasty snacks. Dave and I liked the crawfish filling more than the mushroom filling, which seemed a little flat in comparison. But hey – at least they were a little healthier than normal. And most importantly, they’re finally out of my To Blog folder.


Crawfish Phyllo Triangles (adapted from Use Real Butter, who adapted it from Louisiana Real & Rustic by Emeril Lagasse)

Makes about 24 triangles

2 tablespoons butter
1 pound crawfish tails, peeled and cooked
1 medium onion, diced small
2 stalks celery, minced
1½ teaspoon salt
1 teaspoon Old Bay seasoning
3 tablespoon parsley, chopped
½ pound phyllo dough sheets, thawed
16 tablespoons (2 sticks), melted

1. Melt 2 tablespoons butter of medium-high heat in 12-inch skillet. Add the onions, celery, salt, and Old Bay and sauté until soft and brown, about 6 minutes, stirring occasionally. Add the crawfish and cook for about 5 minutes, stirring occasionally, until the crawfish tails begin to curl. Remove from heat. Stir in parsley. Let cool.

2. To make each triangle, set one sheet of phyllo on a clean work surface and brush melted butter on half of the sheet lengthwise. Fold the phyllo on its long axis in half. Brush melted butter on half of the phyllo lengthwise again, and fold on the long axis once more. You should have a long narrow strip of phyllo with 4 layers.

3. Place a heaping tablespoon of filling on one corner of the strip and begin folding the dough over the filling like a flag. Continue folding until the dough is completely wrapped around the filling. Brush a little butter on the end to seal it down. Repeat with remaining phyllo and filling.

4. Place triangles on a baking sheet so they are not touching one another. Bake at 375F for 18-20 minutes. Serve hot.

Mushroom Strudel (from Smitten Kitchen, who adapted it from The Complete Mushroom Book, by Antonio Carluccio)

Makes 18 triangles

18 sheets phyllo
8 tablespoons (1 stick) butter, melted
1 pound mixed, fresh, wild and cultivated mushrooms
1 medium onion, minced
3 tablespoons butter
Freshly grated nutmeg
1 tablespoon dry sherry
1 tablespoon all-purpose flour
Leaves from 1 sprig marjoram or thyme
6 tablespoons freshly grated Parmesan, plus extra for sprinkling, if you wish
Salt and pepper to taste

1. Preheat the oven to 400F (200C). Line a baking sheet with parchment paper. Clear a large work surface for this, big enough for two full sheets of phyllo, your egg wash, parmesan and filling.

2. Make the filling: Make sure the mushrooms are dust- and sand-free, wash if necessary, and trim if need be. Cook the onion in the butter and, when soft, add the mushrooms with the nutmeg. Sauté for 5 to 7 minutes, until liquid has been released and has partially evaporated. Add the sherry and evaporate the alcohol by cooking over low heat for 2 to 3 minutes. Stir in the flour, herbs, and some salt and pepper, and let cool. The mixture will be moist.

3. Take one sheet of phyllo at a time from their package; cover the remaining sheets with plastic and then a damp towel, ensuring they are completely covered. Brush one half of the sheet lengthwise with butter. Fold the unbuttered side over the buttered side, carefully, smoothing out any wrinkles and bubbles but not worrying if you can’t get them all. Again, brush one half of this lengthwise with butter, and fold the unbuttered side over it again. You’ll end up with one long column.

4. Dollop a spoonful of the mushroom filling near the end and sprinkle a teaspoon of parmesan over it. Begin folding one bottom corner of the phyllo strip over the filling until it meets the opposite edge, forming a triangle, as if you were folding a flag. Place the triangle seam side down on the baking sheet, brush lightly with egg wash and sprinkle with parmesan.

5. Bake in the preheated oven for 15 minutes. Serve warm.

sushi bowls

I’m so proud of this recipe. I actually came up with the idea on my own. Whoa. Not that sushi ingredients mixed up in a bowl is a groundbreaking idea, but that isn’t the point. The point is that I didn’t know there was already a recipe out there when I came up with it. I was creative! That never happens!

The inspiration behind my big idea was that Dave and I love sushi, but making it is a pain in the ass and going out to eat all the time isn’t feasible. So I figured, why bother making cute little sushi rolls – it’s the ingredients that we like, not their shape. I decided to mix up the ingredients in a bowl and call it a day.

And that makes this a pretty darn easy meal. Sushi rice takes only a little more effort than basic long-grain rice does, and that’s the only ingredient in this recipe that needs to be cooked.

I’ve made this a few times now, and once I used smoked salmon instead of raw tuna. I used smoked salmon twice when I made sushi rolls, and I thought it was good. It’s convenient, and I thought it might be a good option for people who aren’t comfortable eating raw fish. But when I used it in the sushi bowls, it was so salty that it kind of ruined the whole dish. I’m not sure if there’s a difference between brands or if all smoked salmon is so salty. I bought the cheapest brand, because that stuff always surprises me by how expensive it is.

But, every other time I’ve made this, it’s been just so good. And healthy! Look at all that green stuff. There’s no added fat in the recipe; the only fat involved is what’s naturally in avocado, sesame seeds, and the fish. That makes this a super tasty, easy, healthy, balanced meal on its own. It’s perfect.

Printer Friendly Recipe
Sushi Bowls

I’ve used raw tuna, smoked salmon, and imitation crab in this, all with very good results.  If you’re using salty smoked salmon, reduce the salt in the rice mixture slightly.

4 servings

1⅓ cups rice, rinsed well
1⅓ cups water
¼ cup soy sauce
wasabi to taste, probably at least 2 teaspoons
4 teaspoons rice vinegar
4 teaspoons sugar
½ teaspoon salt
2 (8 by 7-inch) sheets nori, cut into strips 1½ inches long and ⅛ inch wide
1 avocado, pitted, flesh scooped from skin and cut into chunks 1 inch long and ¼ inch wide
1 cucumber, peeled and cut into matchsticks 1½ inches long and ⅛ inch wide
2 green onions, halved lengthwise and cut into strips 1 inch long
8 ounces sushi-grade fish
¼ cup sesame seeds, toasted

1. Rinse the rice. Place the rice and water in a medium saucepan and bring to a boil over high heat, uncovered. Once it begins to boil, reduce the heat to the lowest setting and cover. Cook for 15 minutes. Remove from the heat and let stand, covered, for 10 minutes.

2. Meanwhile, combine the soy sauce and wasabi in a small bowl. Combine the rice vinegar, sugar and salt in a separate small bowl and heat in the microwave on high for 30 to 45 seconds, until the sugar dissolves. Transfer the rice into a large wooden or glass mixing bowl and add the vinegar mixture. Fold and cut thoroughly to combine and coat each grain of rice with the mixture. Fan until rice is near room temperature. (If you use an electric fan, this will only take about a minute.) Do not refrigerate.

3. Combine rice, wasabi mixture, and remaining ingredients. Serve.

crawfish, roasted tomato, and farmers cheese pizza

I make pizza probably every other week, always on the weekend. About half of the time I make a traditional pizza with tomato sauce and mozzarella cheese. The other half varies – in the past few months, I’ve made shrimp scampi pizza, caramelized onion and Gruyere pizza, and spinach ricotta pizza. When I tell Dave that we’re having pizza for dinner, he always asks hopefully, “Normal pizza?”

Not this time. I’ve had crawfish tails in my freezer for months. I used a portion of the package for a recipe which I will, eventually, blog about, but I had no plans for the remainder. Cooks Illustrated’s recipe for pizza with shrimp, farmers cheese, and roasted tomatoes seemed like a great place to use some of that crawfish in place of the shrimp. Something about that combination of ingredients seemed very American to me.

I really only used CI’s recipe as a basic guide. Their recipe is developed to grill the pizza, which I wouldn’t be doing. Since I wasn’t sure if the crust recipe they provided was specially designed for grilling, I opted to use my favorite regular pizza dough recipe, tweaked to incorporate the seasonings CI uses in their recipe.  I substituted crawfish for the shrimp and used far less than they call for, and I used Deb’s recipe for slow-roasted tomatoes instead of CI’s method for roasting tomatoes

Overall, it was the same basic ingredients CI called for, but combined a little differently. It was my first time using farmers cheese, and I really liked it. The slow-roasted tomatoes, oh my gosh. I made about twice as many as I needed for the pizza, and I ate the others plain. I was greedy and barely shared with Dave.

The only step I wasn’t quite sure how to adapt was the actual grilling of the pizza to baking them on a hot pizza stone. Since all of the toppings were already cooked, I didn’t want to risk overcooking them by putting them into a 500 degree over for 8 minutes. I ended up simply putting the untopped dough in the oven for a few minutes, then taking it out, adding the toppings, and putting it back in until the crust was spotty browned like I like it. It wasn’t the perfect solution – I should have poked the dough with a fork before putting it on the hot stone, because it puffed up like a pita.

Dave and I both really liked the pizza. I should have used more cheese, but when is that not the case? (The recipe below is adjusted for the amount of cheese I wish I would have used.)  Dave thinks shrimp would have been better than crawfish, but I don’t really agree. The only problem I had was that there was that the toppings, especially the crawfish, kept falling off the pizza. More cheese might have acted like glue to hold the toppings on as well. Overall, this was my favorite of the non-traditional pizzas I’ve made recently, and a great way to use up some of that tasty crawfish.

Crawfish, Roasted Tomato, and Farmers Cheese Pizza (substantially adapted from Cooks Illustrated; Roasted Tomatoes from Smitten Kitchen)

Serves 6 as a main course

Garlic-Herb Pizza Crust:
2 tablespoons virgin olive oil
1 tablespoon minced garlic
½ teaspoon herbes de Provence
1 teaspoon ground black pepper
1¾ cups water divided, warm
2¼ teaspoons instant yeast (1 envelope)
4 cups bread flour
1½ teaspoons table salt

Roasted Tomatoes
24 cherry tomatoes (small), halved lengthwise
1 tablespoon virgin olive oil
Table salt and ground black pepper

Crawfish or (Shrimp)
1 pound crawfish tails or medium-sized shrimp
1½ tablespoons olive oil, plus additional for drizzling
½ teaspoon hot chili powder
⅛ teaspoon cayenne pepper
Table salt and ground black pepper

Toppings
12 ounces farmers cheese, crumbled
⅔ cup packed cilantro leaves, minced
⅔ cup packed fresh parsley, minced

1. For the crust: Heat olive oil in a small skillet; add next 3 ingredients and cook over low heat until garlic softens, about 5 minutes. Cool.

2. Mix flour, yeast, and salt in a food processor. Add water and herb oil to yeast mixture. With machine on, gradually pour liquid into dry ingredients; process until a rough ball forms. If dough is too sticky or dry, add flour or water, 1 tablespoon at a time. Let dough rest for 5 minutes, then continue to process until dough is smooth, about 35 seconds.

3. Knead dough by hand a few seconds to form smooth, round ball; place in a lightly oiled bowl, cover with a damp cloth and let rise until dough doubles in size, about 2 hours.

4. For the roasted tomatoes: Preheat oven to 225°F. Halve each tomato crosswise and arrange on a parchment-lined baking sheet. Drizzle with olive oil, just enough to make the tomatoes glisten. Sprinkle with salt and pepper. Bake the tomatoes in the oven for about three hours. You want the tomatoes to be shriveled and dry, but with a little juice left inside. (The tomatoes can be set aside at room temperature up to 6 hours ahead.)

5. Place a pizza stone on the lowest oven rack and heat oven to 500 degrees. Punch dough down and divide into 3 equal pieces. Roll each portion to form a smooth, round ball. Place the balls on a lightly floured surface, cover with a damp cloth, and let rest 10-30 minutes.

6. For the crawfish/shrimp: Heat a medium-sized skillet over high heat. Toss crawfish with 1½ tablespoons oil, chili powder, cayenne, and salt and pepper. Cook crawfish in hot skillet, stirring occasionally, for 3-4 minutes, until the tails curl. (Shrimp may need an additional 2-3 minutes, depending on their size; cook until opaque.)

7. Stretch and press a ball of dough until it reaches a diameter of 9-11 inches. If the dough is very resistant to being stretched, let it rest 5 minutes and then try again.

8. Brush the circle of dough with olive oil, then stab it with a fork 10-12 times. Transfer the dough to a pizza peel dusted with cornmeal. Slide the dough onto the heated stone. Bake until the crust edges begin to brown, 5-8 minutes. Remove the pizza from the oven, add ⅓ of all toppings, and return to hot stone until crust is crisp and browned, 3-4 minutes. Cut into wedges and serve immediately. Repeat steps 7 and 8 with remaining dough and toppings.

summer rolls

I am not a collector of cookbooks. I do have one full shelf of about twenty or so, but I’m not one to idly buy any book I get excited about. Unless I’m interested in a very good proportion of the recipes in the book, I won’t buy it.

Unless it’s only three dollars, and every recipe has several pictures, and a surprising number of those recipes look good. I recently found a Thai Cooking Step-by-Step book in the bargain aisle and couldn’t pass it up.

The first recipe, and probably the one I was the most excited about, is for summer rolls, rice paper wrappers rolled around vegetables, rice vermicelli, and shrimp. I checked out a few recipes before making them, but most were similar, so I only slightly adapted the one in the book.

Every recipe included shrimp, rice vermicelli, cilantro and carrots. A few also included cucumber and Boston lettuce, both of which I wanted to include. One added mint, one Thai basil, and one preferred Thai basil but offered mint as an alternative. I haven’t been able to find Thai basil (although I haven’t looked very hard), so I used mint the first time I made these. Dave and I both hated the mint. I skipped the extra herbs entirely the second time, just using cilantro, and we much preferred it that way.

I struggled with what to do with the lettuce. I really wanted it inside the roll, similar to spider rolls. I tried it, but it was so bulky that I couldn’t get the summer rolls to make a tight wrap. Leaving the lettuce on the outside was preferable.

I thought the dipping sauce made from the recipe included in the step-by-step book was too pungent. The second time I made these, I used a recipe from another recently-acquired Asian cookbook (but I thought I didn’t buy many cookbooks?), and it was very good.

Admittedly, this isn’t the quickest recipe to put together. I kept thinking it would be pretty fast, since there’s very little cooking. Of course whenever you have to individually prepare fillings and wrappers, there will be a significant time investment. But for such a healthy and delicious meal, it’s worth it to me.

As per Joelen’s suggestion, I am submitting this entry to her Asian Appetizers event.

Update 9.21.08: I made this again and decided the recipe I originally had here needed a few tweaks.  I reduced the vermicelli from 2 ounces to 1.5 ounces and cut all of the dip ingredients in half.  Also, it only took me 45 minutes to make these, so it’s not quite the “significant time investment” that I originally thought.

Summer Rolls (adapted from Fresh Spring Rolls in Thai Cooking Step-by-Step, from the Confident Cooking Series)

Makes 8 rolls

16 medium shrimp, peeled and deveined
1.5 ounces rice vermicelli
8 rice paper wrappers
½ medium cucumber, cut into matchsticks
1 medium carrot, cut into matchsticks
16 Thai basil leaves (optional)
½ cup (0.5 ounces) loosely packed cilantro leaves
8 small leaves Boston lettuce (or 4 large leaves, torn in half)

1. Fill a medium skillet with water and bring to a boil. Add 1 teaspoon salt and the shrimp and cook just until the shrimp are opaque, about 3 minutes. Remove the pan from the heat and remove the shrimp from the pan using a slotted spoon. Cut the shrimp in half lengthwise. Add the vermicelli to the hot liquid and let set until tender, about 5 minutes. Remove the vermicelli from the pan.

2. Place a rice paper wrapper in the hot liquid and leave until softened, about one minute. Remove it from the water and place it on a work surface. Place 4 shrimp halves side-by-side in center of wrapper and top with 2 basil leaves, 1 tablespoon cilantro, a few carrot and cucumber strips, and a small amount of rice noodles.

3. Fold up bottom 2-inch border of wrapper over filling. Fold left, then right edge of wrapper over filling. Roll filling to top edge of wrapper to form tight cylinder.  Lay each roll in a leaf of lettuce and place on a serving platter.  Serve with dipping sauce.

Summer Roll Dipping Sauce (adapted from Nouc Cham in Corinne Trang’s Essentials of Asian Cuisine)

1 tablespoons granulated sugar
1.5 tablespoons fish sauce
1/4 cup lime or lemon juice
1 tablespoon water
1 small garlic clove, minced
1/8 teaspoon crushed red pepper flakes

Combine all ingredients. Let stand for 30 minutes to allow the flavors to come together.

salmon clubs with avocado butter

I subscribed to Real Simple for years, but only one issue had any recipes I was interested in. It was an article on sandwiches, and I’ve made and enjoyed almost every recipe from that particular article. Some have become seasonal staples for me, but this is only the second time I’ve made this recipe, because the first time was a flop.

It was about 5 years ago, and I didn’t have the cooking experience then that I have now. The recipe calls for kosher salt, and I’m pretty sure I didn’t know that kosher salt is coarser grained than regular table salt, and a direct substitute can’t be made. I remember the sandwiches being almost inedibly salty, which makes sense because the 1¼ teaspoons kosher salt that the original recipe calls for is equivalent to only about ¾ teaspoon of table salt. I used 1¼ teaspoons table salt.

With that straightened out, these sandwiches were delicious. I had no idea that I liked pumpernickel bread so much. I reduced the butter in the avocado butter to one tablespoon, which seemed to work fine. I skipped the oregano because I didn’t have it, and I don’t really think it would match the other flavors in this anyway. With those changes, this makes for an easy, tasty, and pretty healthy meal.

Salmon Club with Avocado Butter (adapted from Real Simple magazine, August 2004)

Update 3/20/09: The salmon really needs to be sliced into 1/4 or 1/2-inch pieces.  Also, I’ve decided that double-decker sandwiches, while visually impressive, are impractical (and messy!).  I’ll have to stick to single-deckers from now on.

Makes 2 sandwiches

1 ripe avocado, pitted and peeled
Juice from half a lemon
1 tablespoon unsalted butter, at room temperature
salt
1 8-ounce salmon fillet, sliced into ¾-inch pieces
6 slices pumpernickel bread, toasted
1½ cups arugula leaves, loosely packed

Place the avocado, lemon juice, butter, and ½ teaspoon kosher salt (⅓ teaspoon table salt) in a food processor. Pulse until nearly smooth, about 30 seconds. Set aside. (Or just mash with a fork, if getting out your food processor is a pain in the butt, like it is for me.)

Place a medium nonstick skillet over medium heat. Coat with vegetable cooking spray. Sprinkle the salmon liberally with salt. Place in heated skillet. Cook until just cooked through, about 3 minutes per side. Transfer to a plate.

Assemble 2 sandwiches, alternating pumpernickel, avocado butter, salmon, and arugula. Secure with toothpicks before serving.

kung pao shrimp

I almost always ask Dave if he wants any input on our meals for the upcoming week, looking either for new ideas or for a way to limit all the ideas already swimming around in my head. Sometimes I ask just to be polite, even though I already have a nice plan forming, betting on the good chance that he won’t care. That’s what happened this time, and even though Dave wouldn’t mind one bit if I totally ignored his suggestion, I feel like a jerk for asking and then dismissing his opinion.

Not enough like a jerk to not tweak his response though. Dave simply answered “Sichuan” to my request for dinner ideas, and while I’m pretty sure he had something specific in mind, I chose to take his answer literally, opening my options up to anything Sichuan. A quick search on the Cooks Illustrated website turned up the perfect compromise – Kung Pao Shrimp, a classic Sichuan dish that also used up the red pepper I had and satisfied my craving for shrimp.

And satisfy it did. I wasn’t surprised, because it contains a lot of my favorite ingredients for Asian cooking – shrimp, soy sauce, garlic, ginger, peanuts, chiles…I’m sorry, I’m naming every single ingredient. But each is something that I love, and they worked wonderfully together in this dish.

Kung Pao Shrimp (from Cooks Illustrated)

Serves 4

You can substitute plain rice vinegar for the black rice vinegar (available in Asian markets), but we prefer the latter for its fruity, salty complexity. If you prefer roasted unsalted cashews over peanuts, substitute an equal amount. Do not eat the whole chiles in the finished dish.

1 pound extra-large shrimp (21 to 25 count), peeled and deveined
1 tablespoon dry sherry or rice wine
2 teaspoons soy sauce
3 medium cloves garlic, pressed through garlic press or minced (about 1 tablespoon)
½ inch piece fresh ginger, peeled and minced (about 2 teaspoons)
3 tablespoons peanut oil or vegetable oil
½ cup roasted unsalted peanuts
6 small whole dried red chiles (each about 1¾ to 2 inches long), 3 chiles roughly crumbled, or 1 teaspoon dried red pepper flakes
¾ cup low-sodium chicken broth
2 teaspoons black rice vinegar or plain rice vinegar
2 teaspoons toasted sesame oil
1 tablespoon oyster sauce
1 tablespoon hoisin sauce
1½ teaspoons cornstarch
1 medium red bell pepper, cut into ½-inch dice
3 medium scallions, sliced thin

1. Toss shrimp with sherry and soy sauce in medium bowl; marinate until shrimp have absorbed flavors, about 10 minutes. Mix garlic, ginger, and 1 tablespoon oil in small bowl; set aside. Combine peanuts and chiles in small bowl; set aside. Mix chicken broth, vinegar, sesame oil, oyster-flavored sauce, hoisin sauce, and cornstarch in small bowl or measuring cup; set aside.

2. Heat 1 tablespoon oil in 12-inch skillet over high heat until just beginning to smoke. Add shrimp and cook, stirring about once every 10 seconds, until barely opaque, 30 to 40 seconds; add peanuts and chiles, stir into shrimp, and continue cooking until shrimp are almost completely opaque and peanuts have darkened slightly, 30 to 40 seconds longer. Transfer shrimp, peanuts, and chiles to bowl; set aside. Return skillet to burner and reheat briefly, 15 to 30 seconds. Add remaining 1 tablespoon oil, swirl to coat pan, and add red bell pepper; cook, stirring occasionally, until slightly softened, about 45 seconds. Clear center of pan, add garlic-ginger mixture, mash into pan with spoon or spatula, and cook until fragrant, 10 to 15 seconds; stir into peppers until combined. Stir broth mixture to recombine, then add to skillet along with reserved shrimp, peanuts, and chiles; cook, stirring and scraping up browned bits on bottom of pan, until sauce has thickened to syrupy consistency, about 45 seconds. Stir in scallions; transfer to serving plate and serve immediately.

sushi

14.jpg

Sometimes I don’t know what gets into me. Last week, I became determined to make my own sushi. But what possible good could this serve? I certainly wasn’t expecting to exceed the quality of the sushi restaurants I’ve been to. I couldn’t, or at least didn’t want to, make it any healthier. And with the specialized tools and ingredients I’d need to buy, homemade sushi promised to be similar in price to eating out. Finally I realized that I wanted to make sushi for the simplest of reasons – for fun.

But I was intimidated. I had difficulty finding precise recipes for sushi rolls. I also wanted to make a variety of rolls with a minimum of ingredients. Not being a spontaneous cook, I did a lot of research and took notes on exactly what I’d need to buy and prepare.

I decided to stick to one fish type (tuna, this time) for four different rolls. I made adapted versions of Philadelphia rolls (fish, cream cheese, cucumber), California rolls (fish, cucumber, avocado), spicy tuna rolls (tuna, avocado, scallion, spicy mayonnaise), and sort of a spider roll (tuna, tempura bits, cucumber), plus a few nigiri.

I settled on Alton Brown’s sushi rice recipe. The rice is cooked similar to standard long-grain rice, except without salt, and then a mixture of rice vinegar, salt, and sugar is poured over the cooked rice and folded in. The rice must be fanned while it cools so that the starches on the surface…something. I can’t remember. Just fan it until it’s near room temperature, and be gentle with stirring. I used a paper plate to fan the rice. If you have an electric fan nearby, that would work great.

2b.jpg

Obviously the fillings must be prepared before any rolling starts. I’m not usually great at mise en place, but I didn’t have a choice this time. This picture shows, clockwise from the upper left, mayonnaise mixed with ancho chile powder, toasted sesame seeds, tempura bits, cucumber, scallion, cream cheese, and avocado. I never did mix in enough chile powder to make the mayonnaise spicy enough, plus I should have used more mayonnaise. For the tempura, I simply mixed up a bit of batter and fried it. I peeled one strip of cucumber and not the other two, and I do prefer it peeled. The avocado I brushed with lemon juice so that it wouldn’t brown.

43.jpg

Alton’s California roll recipe recommends cutting the nori (seaweed) sheets in half. At first I didn’t, which is what this picture shows. However, they should be smaller. You don’t want to spiral your fillings, you just want to enclose them. I found half a sheet to be a little too small for the amount of filling I used, but a full sheet was far too big.

51.jpg

The relatively more simple method of rolling is shown above, where everything, including the rice, is inside the nori. Slightly more complicated is the inside-out roll, where the rice is on the outside.

61.jpg

Except that, it didn’t actually end up being more complicated. I was pleasantly surprised when it actually…worked.

71.jpg

Look at that, a sushi burrito. Mmm…sushi burrito. Unfortunately, sushi isn’t, in fact, eaten in burrito form. It is cut into “bite-size” pieces. Except I don’t know whose bite-size, because sushi rolls are always way too big for me. Anyway, cutting the rolls was the only part of the process that was really frustrating, and I recognize that the problem is my dull knives, but I don’t have an immediate solution. I found that a serrated knife worked better on the inside-out rolls.

8.jpg

…My display needs some work. By this point, I was frustrated with the cutting and worried about the raw fish sitting at room temperature while I figured out how the hell to make sushi. Plus sushi rice? Is sticky. Moving around individual pieces inevitably resulted in rice stuck to my hands and the plate. I decided aesthetics be damned, it was time to eat.

Overall, it was good. Probably as tasty as a restaurant’s, although obviously not nearly as pretty. I’m sure I can improve on that with time, even though I don’t plan on buying any special platters for sushi. I’ll make it again, at least until I use up the ingredients I had to buy. As far as a cost comparison goes, Dave and I generally spend $30-40 on a sushi dinner, and including the special equipment and ingredients that I won’t need to buy again for a while, this meal was $25. Next time I’ll use a cheaper fish, and I can probably make sushi for under $10. The preparation should also be far easier now that I’ve done it once. But I don’t see this becoming a regular thing for me. I think I’ll leave sushi-making to the professionals.

Sushi recipes/method

Serves 2

Sushi rice (adapted from Alton Brown)

1 cup sushi or short grain rice
1 cup water
1 tablespoons rice vinegar
1 tablespoons sugar
½ teaspoon salt

Rinse rice.

Place the rice and water into a medium saucepan and place over high heat. Bring to a boil, uncovered. Once it begins to boil, reduce the heat to the lowest setting and cover. Cook for 15 minutes. Remove from the heat and let stand, covered, for 10 minutes.

Combine the rice vinegar, sugar and salt in a small bowl and heat in the microwave on high for 30 to 45 seconds. Transfer the rice into a large wooden or glass mixing bowl and add the vinegar mixture. Fold and cut thoroughly to combine and coat each grain of rice with the mixture. Fan until rice is near room temperature. Do not refrigerate.

Ingredient preparation

Mix ¼ teaspoon of ancho chile powder into 1 tablespoon mayonnaise
Toast and cool 2 teaspoons sesame seeds
Tempura-mix 1 tablespoon flour, 1 tablespoon ice water, 1 teaspoon egg – cook in hot oil
Seed and peel cucumber and cut 3 ¼-square strips
Cut green part of green onion
Shape ¾ ounce cream cheese into strip
Cut nori in half crosswise (or not…see text)
Peel and pit avocado, cut into 2 strips, brush with lemon juice to prevent browning
Cut fish into strips

Rolling

Fill medium-sized bowl with cold water. Cover bamboo mat with plastic wrap.

Regular rolls:
Lay 1 sheet of nori, shiny side down, on the plastic covered mat. Wet your fingers with water and spread ½ cup of the rice evenly onto the nori, leaving 1 inch of far side bare. Lay filling near edge of mat closest to you. Grab the edge of the mat closest to you, keeping the fillings in place with your fingers, and roll it into a tight cylinder, using the mat to shape the cylinder. Lay it seam side down while you form the other rolls. Cut into 6-8 pieces.

Inside-out rolls:
Lay 1 sheet of nori, shiny side down, on the plastic covered mat. Wet your fingers with water and spread ½ cup of the rice evenly onto the nori. Sprinkle the rice with sesame seeds (optional). Turn the sheet of nori over so that the rice side is down. Lay filling near edge of mat closest to you. Grab the edge of the mat closest to you, keeping the fillings in place with your fingers, and roll it into a tight cylinder, using the mat to shape the cylinder. Lay it seam side down while you form the other rolls. Cut into 6-8 pieces.

Fillings:
“Philadelphia”: cream cheese, fish, cucumber
“California”: fish, avocado, cucumber, sesame seeds
“Spicy tuna”: avocado, fish, mayonnaise (1 tbsp), green onion (1 stalk, green parts only)
“Spider”: fish, cucumber, tempura

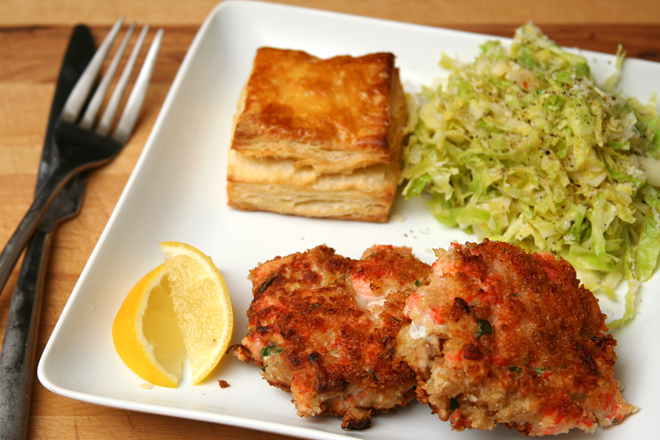
salmon cakes, flaky biscuits, hashed brussels sprouts

salmon cakes new
(Photo updated 12/30/12)

I made the best meal for dinner one Saturday a few weeks ago. It was one of those “I really want to cook something great tonight. Don’t worry, it won’t take too long” kind of meals. Famous last words. But it was worth it.

15.jpg

My favorite part of the meal was these biscuits. Look at those layers! They’re not quite the pain in the ass I remember them being from the last time I made them. They involve all of the steps required for regular biscuits, plus some extra rolling and folding. Not simple, but not a huge deal either.

25.jpg

The hashed Brussels sprout recipe comes from Orangette’s blog. I love Brussels sprouts, and my favorite way of cooking them is braised in heavy cream. I know, yikes on the health-factor of that, but it’s so good. Too heavy to go with this meal though, so I thought I’d try this recipe, in which they’re sliced, then braised in wine. I used sesame seeds instead of poppy seeds, because it’s what I had. It was good and light. It went with the rest of the meal wonderfully.

34.jpg

43.jpg

These were accompanying salmon cakes, and really, how can you go wrong? Chopped fresh salmon, mayonnaise, a few flavorings, all breaded and pan-fried. As I was breading the cakes, they seemed like they were falling apart, but once I got them into the frying pan, they become more structurally sound. I served them with a lemon-herb dipping sauce, but I think it was overkill – they would have been fine with just a wedge of lemon.

Altogether, one of the best meals I’ve eaten in a while.

Oh…there was one casualty.

51.jpg

Pan-Fried Fresh Salmon Cakes (from Cooks Illustrated January 2000)

CI note: A big wedge of lemon is the simplest accompaniment to salmon cakes, but if you decide to go with dipping sauce, make it before preparing the cakes so the sauce flavors have time to meld. If possible, use panko (Japanese bread crumbs).

Makes eight 2½- by ¾-inch cakes

1¼ pounds salmon fillet
1 slice white sandwich bread, such as Pepperidge Farm, crusts removed and white part chopped very fine (about 5 tablespoons)
2 tablespoons mayonnaise
¼ cup grated onion
2 tablespoons chopped fresh parsley leaves
¾ teaspoon table salt
1½ tablespoons lemon juice from 1 lemon
½ cup unbleached all-purpose flour
2 large eggs, lightly beaten
½ cup vegetable oil, plus 1 1/2 teaspoons vegetable oil
¾ cup fine, unflavored dried bread crumbs, preferably panko

1. Locate and remove any pin bones from salmon flesh. Using sharp knife, cut flesh off skin, then discard skin. Chop salmon flesh into ¼- to 1/3-inch pieces and mix with chopped bread, mayonnaise, onion, parsley, salt, and lemon juice in medium bowl. Scoop a generous ¼-cup portion salmon mixture from bowl and use hands to form into a patty measuring roughly 2½-inches in diameter and ¾-inch thick; place on parchment-lined baking sheet and repeat with remaining salmon mixture until you have 8 patties. Place patties in freezer until surface moisture has evaporated, about 15 minutes.

2. Meanwhile, spread flour in pie plate or shallow baking dish. Beat eggs with 1½ teaspoons vegetable oil and 1½ teaspoons water in second pie plate or shallow baking dish, and spread bread crumbs in a third. Dip chilled salmon patties in flour to cover; shake off excess. Transfer to beaten egg and, using slotted spatula, turn to coat; let excess drip off. Transfer to bread crumbs; shake pan to coat patties completely. Return now-breaded patties to baking sheet.

3. Heat remaining ½ cup vegetable oil in large, heavy-bottomed skillet over medium-high heat until shimmering but not smoking, about 3 minutes; add salmon patties and cook until medium golden brown, about 2 minutes. Flip cakes over and continue cooking until medium golden brown on second side, about 2 minutes longer. Transfer cakes to plate lined with paper towels to absorb excess oil on surface, if desired, about 30 seconds, and then serve immediately, with one of the sauces that follow, if you like.

Creamy Lemon Herb Dipping Sauce (from Cooks Illustrated January 2000)

Makes generous ½ cup

½ cup mayonnaise, preferably homemade
2½ tablespoons lemon juice from 1 lemon
1 tablespoon minced fresh parsley leaves
1 tablespoon minced fresh thyme leaves
1 large scallion, white and green part minced
½ teaspoon table salt
Ground black pepper

Mix all ingredients in small bowl; season to taste with ground black pepper. Cover with plastic wrap and chill until flavors blend, at least 30 minutes.

Flaky Buttermilk Biscuits (from Cooks Illustrated January 2006)

CI note: The dough is a bit sticky when it comes together and during the first set of turns. Set aside about 1 cup of extra flour for dusting the work surface, dough, and rolling pin to prevent sticking. Be careful not to incorporate large pockets of flour into the dough when folding it over. When cutting the biscuits, press down with firm, even pressure; do not twist the cutter. The recipe may be prepared through step 2, transferred to a zipper-lock freezer bag, and frozen for several weeks. Let the mixture sit at room temperature for 15 minutes before proceeding.

Makes 12 biscuits

2½ cups unbleached all-purpose flour (12½ ounces), plus additional flour for work surface
1 tablespoon baking powder
½ teaspoon baking soda
1 teaspoon table salt
2 tablespoons vegetable shortening, cut into ½-inch chunks
8 tablespoons unsalted butter (1 stick), cold, lightly floured and cut into 1/8-inch slices
2 tablespoons unsalted butter, melted
1¼ cups low-fat buttermilk, cold

1. Adjust oven rack to lower-middle position; heat oven to 450 degrees. Whisk flour, baking powder, baking soda, and salt in large bowl.

2. Add shortening to flour mixture; break up chunks with fingertips until only small, pea-sized pieces remain. Working in batches, drop butter slices into flour mixture and toss to coat; pick up each slice of butter and press between floured fingertips into flat, nickel-sized pieces. Repeat until all butter is incorporated; toss to combine. Freeze mixture (in bowl) until chilled, about 15 minutes.

3. Spray 24-inch-square area of work surface with nonstick cooking spray; spread spray evenly across surface with kitchen towel or paper towel. Sprinkle 1/3 cup of extra flour across sprayed area; gently spread flour across work surface with palm to form thin, even coating. Add all but 2 tablespoons of buttermilk to flour mixture; stir briskly with fork until ball forms and no dry bits of flour are visible, adding remaining buttermilk as needed (dough will be sticky and shaggy but should clear sides of bowl). With rubber spatula, transfer dough onto center of prepared work surface, dust surface lightly with flour, and, with floured hands, bring dough together into cohesive ball.

4. Pat dough into approximate 10-inch square; roll into 18 by 14-inch rectangle about ¼ inch thick, dusting dough and rolling pin with flour as needed. Following illustrations below, using bench scraper or thin metal spatula, fold dough into thirds, brushing any excess flour from surface; lift short end of dough and fold in thirds again to form approximate 6 by 4-inch rectangle. Rotate dough 90 degrees, dusting work surface underneath with flour; roll and fold dough again, dusting with flour as needed.

5. Roll dough into 10-inch square about ½ inch thick; flip dough and cut nine 3-inch rounds with floured biscuit cutter, dipping cutter back into flour after each cut. Carefully invert and transfer rounds to ungreased baking sheet, spaced 1 inch apart. Gather dough scraps into ball; roll and fold once or twice until scraps form smooth dough. Roll dough into ½-inch-thick round; cut three more 3-inch rounds and transfer to baking sheet. Discard excess dough.

6. Brush biscuit tops with melted butter. Bake, without opening oven door, until tops are golden brown and crisp, 15 to 17 minutes. Let cool on baking sheet 5 to 10 minutes before serving.

Hashed Brussels Sprouts with Poppyseed and Lemon (from Orangette)

Makes 4-6 servings

1¼ pounds Brussels sprouts
1½ tablespoon lemon juice
2 tablespoon olive oil
1 garlic clove, minced
1 tablespoon poppy seeds
¼ cup white wine
¼ teaspoon salt

Cut the stems from the Brussels sprouts and remove any blemished leaves. When all the sprouts are trimmed, you should be left with about 1 pound total. Halve each sprout lengthwise, and slice each half into thin slices, about 1/8 inch thick; or, alternatively, hash them in a food processor fitted with the slicing disc attachment.

In a large bowl, toss the hashed Brussels sprouts with the lemon juice.

In a large skillet or sauté pan, warm the olive oil over high heat, almost to the smoking point. Stir in the hashed sprouts, garlic, and poppy seeds. Add the wine, and cook for about 3-4 minutes, stirring constantly, until the sprouts are bright green and lightly softened but still barely crunchy. Reduce the heat to low, season with salt, and cook for 1 minute more. Remove the pan from the heat, and serve.

salmon pesto pasta

opener1.jpg

This is Dave’s most-requested meal, and it’s gotten to the point where I purposefully don’t make it so that it will always be a treat. Yeah, I’m a bad wife. Also, I think making pesto is sort of a pain in this ass. Back in the old days, before I took over the kitchen and we actually cooked together on occasion, Dave would prepare the fish while I worked on the pesto. Over time, I tweaked the recipe here and there without writing it down, and it became easier to just do it myself. And now I complain that Dave doesn’t like to cook with me…

Updated photo 5/27

I’ve found that if I allow my life to be easy and just buy pesto, this recipe is actually a quick weeknight-appropriate meal. We’re picky about pesto, but I’ve found that my grocery store stocks some good stuff in their olive bar. But…this was for Dave’s birthday, so I went all out and made it from scratch.

(Wait a minute…wasn’t Dave’s birthday last month? Yes yes, the problem is, I didn’t like the picture I took of the final dish, so I wanted to make it again and hope for a better picture. I made it again last weekend, but the pictures from that night aren’t any better, so I’m sticking with the original. Sorry the colors are all funky. We eat dinner at night. There’s no natural light at night. My pictures of dinner tend be funky colors.)

I am, of course, a big fan of my homemade pesto. My trick (okay, Cooks Illustrated’s trick that I stole) is to squeeze the maximum amount of flavor out of each ingredient. I toast the pine nuts, I toast the garlic so that it loses that sharpness that raw garlic has, and I bruise the basil leaves. Before I did all this, I would often end up with grassy-smelling pesto, but now I make basily-smelling pesto. Gotta love that.

garlic.jpg pine-nuts.jpg

basil.jpg process.jpg

The salmon, brushed with oil and sprinkled with lemon zest, is broiled. The sauce is made from evaporated milk that’s boiled to reduce it even further. The pasta is mixed with the milk, then the salmon, and finally, off the heat to preserve the basil’s delicate flavor (Marcella Hazan is getting to me), the pesto is stirred in. Top with a little more parmesan, and you’ve got my and Dave’s favorite way to eat salmon. And Dave’s favorite way to eat pesto…and pasta…

raw-salmon.jpg copy-of-cooked-salmon.jpg

Salmon Pesto Pasta (substantially adapted from the Pillsbury Complete Cookbook)

Serves 2

8 ounces pasta
12 ounces salmon
salt and pepper
1 teaspoon grated lemon zest
1 tablespoon olive oil
1 teaspoon lemon juice
5 ounces evaporated milk
½ cup pesto (recipe follows)
grated parmesan, for serving

1. Bring a large pot of water to a boil. When water is boiling, add 1 tablespoon salt and pasta; stir to separate pasta. Cook pasta until al dente; drain. Pour evaporated milk into empty pot and simmer over medium-high heat until reduced to ¼ cup. Add cooked pasta to pot and stir to combine.

2. Adjust oven rack to upper-middle position and heat broiler. Line a baking sheet or pan with aluminum foil. Season skinless side of salmon liberally with salt and pepper, sprinkle with zest, then rub with olive oil. Broil until salmon is no longer translucent and is firm when pressed, about 10 minutes. Remove from broiler and sprinkle with lemon juice. Use fork to flake into bite-sized pieces. Skin will stick to foil and can be discarded.

3. Add salmon to pasta mixture and stir over medium heat until hot. Remove from heat and stir in basil. Top with parmesan.

Pesto (adapted from Cooks Illustrated)

Bridget note: I haven’t found a good way to measure basil leaves by volume. I just add all of the leaves from a hydroponic basil plant or a large herb container from the grocery store.

CI note: Basil usually darkens in homemade pesto, but you can boost the green color a little by adding the optional parsley.

Update 6/18/08 – After flipping through Jamie’s Dinners, I have found a far easier and just as effective method for bruising the basil leaves.  Simply add the unbruised basil leaves to the food processor bowl and process with the plastic dough hook until they’re thoroughly bruised.  Switch back to the blade and continue with the recipe as written.

Makes ½ cup

¼ cup pine nuts, toasted (or substitute almonds or walnuts)
5 medium cloves garlic, unpeeled
2 cups packed fresh basil leaves, rinsed thoroughly
2 tablespoons fresh parsley leaves, Italian (optional)
¼ cup extra-virgin olive oil
Pinch table salt
¼ cup (½ ounce) finely grated Parmesan cheese

1. Toast nuts in small heavy skillet over medium heat, stirring frequently, until just golden and fragrant, 4 to 5 minutes. Transfer the nuts to bowl of food processor fitted with steel blade.

2. Add the unpeeled garlic to empty skillet and toast until, shaking the pan occasionally, until fragrant and the color of the cloves deepens slightly, about 7 minutes. Let the garlic cool, then peel and add to food processor bowl.

3. Place basil and parsley in heavy-duty, quart-size, zipper-lock bag; pound with flat side of meat pounder until all leaves are bruised.

4. Process nuts and garlic until finely chopped. Add remaining ingredients except cheese; process until smooth, stopping as necessary to scrape down bowl with flexible spatula.

5. Transfer mixture to small bowl, stir in cheese(s) and adjust salt. (Can be covered with a sheet of plastic wrap placed directly over the surface or filmed with oil and refrigerated up to 5 days.)