Archives for December 2007

a handful of vagueness (pasta with meyer lemon, creme fraiche, and parmesan)

dscn2150.jpg

My next Meyer lemon experiment was a savory recipe from Amanda Hesser’s Cooking for Mr. Latte. This is the type of recipe that drives me crazy – a handful of this and a few handfuls of that. Seriously? I don’t see anything wrong giving exact measurements – of course everyone adjusts recipes to their own tastes, but you want to at least give your readers a starting point. Especially when you say something like “quickly fold in the ingredients, adding more to taste.” I’m supposed to fold, taste, fold, taste, fold, when I’m in a hurry?

Anyway. Somewhere along the line when I was reading about Meyer lemons, I read that one reason that their availability is often limited is that they aren’t as hardy as regular lemons. Apparently, this is true. I bought the lemons on Saturday and figured I had plenty of time to use them, but by Tuesday, they weren’t looking so hot, so I rushed to use them that day.

dscn2141.jpg

This recipe involved another new ingredient for me – crème fraiche. Pretty good stuff. Kind of like mellow sour cream.

Not only are the ingredient amounts basically useless, but the method for this recipe didn’t really work either. Hesser instructs the reader to grate “a handful” of parmesan cheese into a bowl along with some lemon zest, then add “three handfuls” of arugula. (Grr.) The cooked pasta is added to the bowl, then the crème fraiche and some of the pasta cooking water is stirred in. The problem is that the hot pasta melted the cheese into clumps, and I couldn’t get them to melt into a smooth sauce. The lemon zest clumped with the parmesan clumps, so there really wasn’t an even distribution of flavors.

dscn2145.jpg

All that being said, the recipe has lots of potential. The flavors were good, although I needed more arugula, more parmesan (of course!), and more zest. And, unlike with the lemon bars, I think the Meyer lemons may be important to the recipe. I’m actually hesitant to try it with regular lemons, although it’s probably worth the experiment. It’s a great weeknight meal, because all of the other ingredients can be prepared while the pasta is cooking. Just don’t expect Hesser’s recipe to help you along at all!

Pasta with Meyer lemon, crème fraiche, and parmesan (adapted from Amanda Hesser’s Cooking for Mr. Latte)
Serves 4

The amounts listed for each ingredient are loosely based on Hesser’s recipe. However, it is expected that your personal tastes may vary and you may want to adjust the quantities accordingly.

1 pound pasta (any shape)
salt
3 ounces arugula, chopped
zest from 2 lemons
juice from 2 lemons
½ cup crème fraiche
½ ounce parmesan cheese, grated
ground black pepper

1. Bring 4 quarts of water to a boil. Add 1 tablespoon salt and pasta. Cook until al dente. Drain, reserving ½ cup of the water.

2. Mix hot pasta with remaining ingredients, making sure to add cheese after crème fraiche to avoid clumps. Stir in reserved water if pasta is sticky. Serve in heated pasta bowls.

dscn2151.jpg

daring bakers dec 2007: yule log

dscn1992.jpg

2007 was probably the busiest year of my life. I got engaged, then married, I moved to a new city, I finished my PhD, and I started a new, very time-consuming job. December was an appropriate finish to such a year – on top of all the holiday craziness and a visit from my parents, Dave and I are moving from Syracuse to Philadelphia at the end of the month. It’ll be a great adventure for both of us, but it means we have to pack up all of our stuff – for the second time this year for me, and the third time for Dave.

I knew all this was coming when I joined the Daring Bakers at the end of November. But I was too impatient and excited to be part of such a great group that I didn’t want to wait another month! I have to admit that I was hoping for a relatively simple first challenge. November’s Tender Potato Bread would have been perfect – one item and not hugely work-intensive.

So you can possibly imagine my trepidation when I saw the December challenge – a Yule Log, or Buche de Noel. Fancy cake, buttercream, meringue (or marzipan) mushrooms, plus the intimidating job of combining all of those components. Oh geez.

Wisely, I divided the baking up over two days. I was bushed at the end of each.

The Filling:
I didn’t want to use the coffee buttercream as the filling. It seemed like it might be, well, too much coffee buttercream. I pondered other filling ideas that would go with coffee and chocolate and decided on this recipe from epicurious.com. I had never worked with marzipan before and it’s always fun to try new ingredients.

This is the weirdest custard thing I have ever made, and I’m no stranger to custards. The heating of the milk and tempering of the egg mixture is standard, but what’s with using flour as the thickener? Also, maybe I’m not a big marzipan fan. Eaten plain, it was somehow too sweet and too bland at the same time. Mixing into the custard unfortunately didn’t help much. Uh-oh. The Yule Log wasn’t off to a great start.

The Buttercream:
Cake is possibly my favorite dessert. I love them all, but if someone cruelly forced me to choose just one, I’d go with cake. Yet I’m not experienced in buttercream. I do remember trying out a Cooks Illustrated buttercream recipe maybe a year ago. It’s hard to mess up a CI recipe, because they give such detailed instructions, but my buttercream curdled, and I threw it out and made my standard powdered sugar-butter-milk-vanilla frosting that I love.

This one didn’t go much better. I only made half the recipe since I wasn’t going to be using it as filling. I’m so spoiled by the precision of Cooks Illustrated recipes that I’m always frustrated when I see something like “whisk until the egg whites are hot.” How hot? “Whip until cooled.” How cooled are we talking about here? Room temperature? Make me use my thermometer!

The real trouble came at “beat in the softened butter.” (How soft?) It doesn’t say anything about gradually, but I figured better safe than sorry and added the butter one tablespoon at a time. It was clear early on in the butter-adding process that things weren’t going well. I tried to convince myself that my butter was just too hard and wasn’t getting beaten into the egg whites, but eventually I had to admit that the buttercream had curdled.

I was not to be discouraged. Apparently I wasn’t the first DBer to have this problem, and I’d heard that there was hope for saving a curdled buttercream. My good friend Google directed me to baking911.com, which had some great advice. Simply melt a portion of the curdled buttercream and beat that back into the mixture. No way! How wonderfully simple!

Apparently I didn’t melt enough of the buttercream the first time, because it didn’t solve the problem. So I tried melting some more, probably half the mixture, and voila! Perfectly smooth buttercream! I packed that away in the fridge until the next day.

Meringue mushrooms:
The mushrooms just seemed impossibly fussy to me at first. But at least I got to make a meringue. I love using the whisk attachment on my mixer. It’s like magic.

But wow, meringue is some sticky stuff. I scooped it into a pastry bag as best I could, but of course it was totally messy. I started piping mushroom stems and caps. Super fun actually, although it took me a bit of time to figure out the technique. “Pipe 48 mushrooms stems and tops.” Forty-eight?! Why do I need forty-eight mushrooms?! Plus, I must have made my mushrooms too big, because I only ended up with 35 or so.

“Reserve remaining meringue.” Uh…remaining meringue? I scraped up some mushrooms from the baking sheet and squished it back into the pastry bag. I put the mushrooms in the oven. “Dust with cocoa.” Doh! I took the mushrooms back out of the oven and dusted with the cocoa. I put them back in the oven.

dscn1964.jpg

Oh my gosh, an hour later, I had the cutest little mushrooms! I love them! Definitely my favorite part of the recipe. Look how much they look like real mushrooms!

dscn2029.jpg

The Cake:
What the hell is genoise? Thank god for wikipedia. And the various dictionary websites that told me how to pronounce it. (Except for this one, which got it totally wrong.) Do I pronounce the “s”? If it’s named after an Italian city, why does it have a French pronunciation? I love the internet.

Anyway, I had my doubts about the cake from the beginning because of the cornstarch. Why not just use all cake flour? I also thought that a chocolate cake would go better with the coffee buttercream, so I looked up Malgieri’s chocolate genoise variation. I also had to increase the recipe proportions because I apparently have only half-sheet pans, not a jelly roll pan. Who knew? (And if that’s the case, then why is my Silpat too big for my baking pans?)

Ah, more of the whisk attachment. So fun. I also enjoy folding, so this was all going well.

Oh, here’s a step I should have paid more attention to. “Scrape the bottom of the bowl to prevent the flour mixture from accumulating there.” I did see that I was supposed to be careful about scraping to the bottom, but I apparently didn’t finish reading the sentence. I assumed that I’d be worried about the egg mixture accumulating. I didn’t see any evidence of that, so I moved onto pouring the batter into the prepared pan.

And…wait for it…yes, a huge accumulation of flour at the bottom of the bowl! Most of the batter was already in the pan, so I desperately tried to mix the clump of dry ingredients into the little amount of available batter and then I just poured that on top of the batter already in the pan and hoped for the best.

I hate when recipes include a DO NOT OVER____ step. Overmix and you’ll end up with tough muffins, overbeat and your whipped cream turns to butter, and now overbake and your genoise will crack when you try to roll it. The genoise was supposed to bake at least 10 minutes, but I anxiously tested it after 8½ and the toothpick came out clean. Oh no. It felt too early to take it out of the oven, so I put it back in until 9 minutes and 15 seconds, all the while worrying about cracked Yule Logs.

The Assembly:
I love how the recipe keeps specifying that the cake be transferred around without any consideration for its completely unwieldy dimensions. I made one transfer – from baking pan to my biggest cutting board. It was pretty clear that something was wrong with my cake. I’m sure the little balls of cooked flour and cocoa weren’t part of Malgieri’s plan when he developed this recipe.

I spread my subpar filling over my subpar cake and followed Malgieri’s unclear instructions on “using the parchment paper to help roll the cake into a tight cylinder.” (Uh…how exactly? Also, from the long or short side?) Of course it cracked. Bake 10-12 minutes, my ass.

Then I took my nice buttercream from the day before and left it out to soften. It wasn’t softened enough when I was ready to use it, so I figured I’d soften it with the paddle attachment of my mixture. And…more broken buttercream. Geez, buttercream is the wussiest emulsion ever. Melt, remix, not enough to solve the problem, melt, remix. (For those interested, I melted the buttercream in the microwave on 30% power for just 30 seconds or so. I was paranoid about accidently cooking the egg whites in it.)

I think it’s funny that the recipe makes sure to remind us to “curve around the protruding stump” when we’re frosting the cake. Like the big stump on top of the cake wasn’t reminder enough.

So, after all of my trials and tribulations, I came out with quite the nice-looking Yule Log, if I do say so myself.

dscn1980.jpg

And how many mushrooms did I use out of the 48 the recipe plans for? Five.

Please check out more of the Daring Bakers Yule Logs here!

Yule Log (from Nick Malgieri, epicurious.com and The Williams-Sonoma Collection – Dessert)
Make 12 servings

Filling: (from epicurious.com)
2/3 cup whole milk
2 large egg yolks
2 tablespoons sugar
3 tablespoons all purpose flour
1/2 cup marzipan, cut into 1/4-inch pieces
6 tablespoons unsalted butter, cut into 6 pieces, room temperature
1 teaspoon vanilla extract
1/4 teaspoon almond extract

Bring milk to boil in medium saucepan over medium heat. Whisk yolks and sugar in small bowl until well blended; whisk in flour. Whisk hot milk into egg mixture. Return to same saucepan. Whisk over medium heat until custard thickens and boils, about 1 1/2 minutes. Transfer to processor; cool to room temperature, about 1 hour. Add marzipan; process until smooth, about 1 minute. Blend in butter 1 piece at a time, then both extracts. Cover and refrigerate filling at least 4 hours or up to 2 days.

Cake:
3 large eggs
3 large egg yolks
Pinch salt
3/4 cup sugar
1/3 cup cake flour
1/3 cup cornstarch
1/4 cup alkalized (Dutch process) cocoa

1 10-by-15-inch to 12-by-18-inch jellyroll pan

1. Set a rack in the middle level of the oven and preheat to 350 degrees.

2. Fill a medium saucepan halfway with water and bring it to a boil over medium heat. Lower the water to a simmer.

3. Whisk the eggs, yolks, salt and sugar in the bowl of a heavy-duty mixer. Place over the pan of simmering water and whisk gently until the mixture is just lukewarm, about 100 degrees. (Use your finger to test it.)

4. Place on mixer with whisk attachment and whip on high, but not highest, speed until the egg mixture is cool (touch the outside of the bowl to tell) and has increased greatly in volume.

5. While the eggs are whipping stir together the flour, cornstarch and cocoa.

6. Take the bowl off the mixer and sift 1/3 of the flour mixture over the beaten eggs. Use a rubber spatula to fold in the flour mixture, making sure to scrape all the way to the bottom of the bowl on every pass through the batter to prevent the flour mixture from accumulating there. Repeat with the next 1/3 of the flour mixture and finally with the remaining flour mixture.

7. Scrape the batter into the prepared pan and smooth the top.

8. Bake the genoise in the preheated oven for 10 to 12 minutes, or until well risen and firm. Do not let the cake bake dry.

9. Use a small paring knife to loosen the cake from the side of the pan. Invert the cake to a rack, then immediately re-invert to another rack so that the cake cools on the paper.

Coffee buttercream (half recipe)
2 egg whites
½ cup (3½ ounces) sugar
12 tablespoons (1½ sticks) unsalted butter, softened
2 tablespoons instant espresso
2 tablespoons rum or brandy

Combine the egg whites and sugar in the bowl of an electric mixer and whisk gently over simmering water until the sugar is dissolved and the egg whites are hot. Whip on medium speed until cold. Beat in softened butter and continue beating until the buttercream is smooth. Combine the instant coffee and liquor and beat into the buttercream.

Meringue mushrooms:
3 large egg whites, at room temperature
¼ teaspoon cream of tartar
½ cup (3½ ounces/105 g) granulated sugar
1/3 cup (1 1/3 ounces/40 g) powdered sugar
Unsweetened cocoa powder for dusting

1. Preheat the oven to 225 degrees F. Line 2 baking sheets with parchment. Have ready a pastry bag fitted with a small (no. 6) plain tip. In a bowl, using a mixer on medium-low speed, beat together the egg whites and cream of tartar until very foamy. Slowly add the granulated sugar while beating. Increase the speed to high and beat until soft peaks form when the beaters are lifted. Continue until the whites hold stiff, shiny peaks. Sift the icing sugar over the whites and, using a rubber spatula, fold in until well blended.

2. Scoop the mixture into the bag. On one baking sheet, pipe 48 stems, each ½ inch (12 mm.) wide at the base and tapering off to a point at the top, ¾ inch (2 cm.) tall, and spaced about ½ inch (12 mm.) apart. On the other sheet, pipe 48 mounds for the tops, each about 1-1/4 inches (3 cm.) wide and ¾ inch (2 cm.) high, also spaced ½ inch (12 mm.) apart. With a damp fingertip, gently smooth any pointy tips. Dust with cocoa. Reserve the remaining meringue.

3. Bake until dry and firm enough to lift off the paper, 50-55 minutes. Set the pans on the counter and turn the mounds flat side up. With the tip of a knife, carefully make a small hole in the flat side of each mound. Pipe small dabs of the remaining meringue into the holes and insert the stems tip first. Return to the oven until completely dry, about 15 minutes longer. Let cool completely on the sheets.

To assemble:
1. Run a sharp knife around the edges of the genoise to loosen it from the pan.

2. Turn the genoise layer over (unmolding it from the sheet pan onto a flat surface) and peel away the paper.

3. Carefully invert your genoise onto a fresh piece of parchment paper.

4. Spread with the filling.

5. Use the parchment paper to help you roll the cake into a tight cylinder.

6. Transfer back to the baking sheet and refrigerate for several hours.

7. Unwrap the cake. Trim the ends on the diagonal, starting the cuts about 2 inches away from each end.

8. Position the larger cut piece on each log about 2/3 across the top.

9. Cover the log with the reserved buttercream, making sure to curve around the protruding stump.

10. Streak the buttercream with a fork or decorating comb to resemble bark.

11. Transfer the log to a platter and decorate with your mushrooms and any other decorations.

dscn1974.jpg

operation empty freezer (risotto with peas)

rice.jpg

With our move to Philadelphia imminent, I’m desperately trying to empty our freezer and cabinets. I knew I had a bag of frozen peas in the freezer, and I was having trouble figuring out what to do with it. No way was I going to just cook up a bunch of peas to chase around my plate.

Paula of Half-Baked had this recipe for risotto with peas, and that was the perfect accompaniment to our defrosted strip steaks. Let’s try to look past the fact that I had to buy Arborio rice in order to make risotto, and I only used half of the box. The other half will be making its way to Philly with us.

I get the idea that some people think risotto is a lot of work, but I’ve actually found it to be very forgiving. It really doesn’t need constant stirring after the broth starts being added. It’s perfect for a cook like me – I don’t have to stand at the stove indefinitely, but I’m free to stir whenever I want. Dishes like long-grain rice and slow-cooker meals always stress me out because I don’t get to check on what’s happening. Occasional stirring is fun! Constant stirring is tedious.

Paula provided a recipe for her risotto with peas, but I got the impression that it was just her standard risotto recipe with peas added near the end, so I opted to follow my standard risotto recipe instead of hers.

Dave and I agreed – cheesy salty starches are good.

Risotto with Peas (adapted from Cooks Illustrated and Emeril)

6 servings

3½ cups low-sodium chicken broth
3 cups water
2 tablespoons butter
2 tablespoons olive oil
1 medium onion, diced fine
2 cloves garlic, minced
salt
2 cups Arborio rice
1 cup dry white wine
1 cup frozen peas
2 ounces (1 cup) parmesan cheese
2 tablespoons butter, optional
pepper

1. Bring the broth and water to a simmer in a medium saucepan over medium-high heat. Cover; turn the burner off but keep the pot on the burner.

2. Heat the butter and olive oil over medium heat until the foaming subsides. Add the onion and sauté until softened, about 5 minutes. Add the garlic and cook until fragrant, about 30 seconds. Add the rice and 1 teaspoon salt and cook, stirring constantly, until rice is opaque, about 2 minutes. Add the wine and cook, stirring until the rice nearly completely absorbs all the liquid, about 1 minute.

3. Add 2 cups of the hot stock and stir occasionally until it’s mostly absorbed (the spoon will leave a trail on the bottom of the pan), about 6 minutes. Continue to add stock, 1 cup at a time, stirring frequently, until each addition is absorbed. Cook until rice is creamy but still somewhat firm in center (add more water in 1/2 cup increments if broth/water mixture runs out), 10 to 12 minutes longer. Add peas in last 5 minutes of cooking.

4. Stir in cheese and optional butter. Season with salt and pepper, if necessary. Serve.

food for the snobs (lemon squares)

back.jpg

There are those that would call me a food snob. And while it’s true that I chop my own garlic and refuse to use margarine, I don’t think you can decide who’s a food snob until you’ve read Amanda Hesser’s Cooking for Mr. Latte. With all her guinea hens, haricots verts, and crème fraiche, Hesser takes the food snob cake.

Not that I didn’t enjoy her book, which I did, or that it didn’t get me interested in some fancy schmancy ingredients. Meyer lemons in particular caught my eye, because lemons are already so good. There’s a better version? I need to check that out!

So I was very excited when I saw Meyer lemons at my awesome grocery store yesterday! Of course it was a totally inconvenient week to be buying random ingredients. Since we’re moving soon, the rest of my grocery list was geared toward emptying out our freezer and cabinets. But, I had seen Meyer lemons at my grocery store once before and passed up my chance to buy them, assuming that if they carried them once, they would again. So wrong.

But what to do with my prize. I wanted something to showcase the flavor of the lemons, so I could really get a feel for the difference between these and regular lemons. My copy of Cooking for Mr. Latte was already packed, but I dug it out anyway. Hesser recommends a (fancy schmancy) recipe for lemon squares using Meyer lemons, and I so love lemon squares. I’ve tried a good number of lemon square recipes and refined them to fit my own tastes, so in the end I used Hesser’s recipe only to adjust the sugar for the difference in sweetness between Meyer and regular lemons.

I haven’t made lemon squares in years, and after I made these, it didn’t take me long to remember why – it’s my total lack of self-control. Something about them just seems so light, and I forget there’s a stick of butter in only 16 squares.

three.jpg

And what about the much-hyped Meyer lemons? I’m a bit disappointed, to be honest. I reduced the sugar in the original recipe, but I still feel like the lemon flavor is too weak. I don’t notice any extra complexity. I haven’t given up on this ingredient yet though. I’m going to try a savory recipe later this week, and we’ll see from there.

And I still can’t resist these lemon squares.

Lemon Squares
(adapted from Betty Crocker’s Best of Baking)
makes 16 (one 8 by 8 inch pan)

If you’re using Meyer lemons, reduce the sugar in the filling to ½ cup plus 2 tablespoons (4.375 ounces).

Update 12.18: I made these again (with regular lemons) soon afterwards.  I think the flour in the crust should be increased to 3/4 cup + 2 tablespoons (4 3/8 ounces).  With this amount, the crust has more structure but is still very tender.  Also, I beat the filling on high with the whisk attachment for 3 minutes, and it certainly wasn’t light and fluffy.  So just mix it until it’s mixed.  One more thing: 1/2 cup lemon juice makes for a sour lemon square.  If you’re not into that, you may want to cut that amount in half.

Crust:
¾ cup (3¾ ounces) unbleached flour
½ cup (8 tablespoons or 1 stick) unsalted butter, softened
¼ cup powdered sugar

Filling:
¾ cup (5 ¼ ounces) granulated sugar
2 eggs
zest from 1 lemon
½ cup lemon juice (from 3-4 lemons)
½ teaspoon baking powder
¼ teaspoon salt
powdered sugar for dusting baked squares

Heat oven to 350 degrees. Mix crust ingredients until dough comes together. (It shouldn’t be crumbly.) Press into ungreased 8 by 8-inch baking pan. Bake for 20 minutes, or until golden brown on top.

crust.jpg

Beat all filling ingredients until light and fluffy, about 3 minutes. (You’re going to want to cover to bowl with a towel or something, because it’s very splattery.) Pour over baked crust.

Bake at 350 degrees for about 25 minutes, or until no indentation remains when touched in center. Cool completely. Dust with powdered sugar. Cut into squares; serve.

side.jpg

a healthy choice (braised white beans with potatoes and vegetables)

dscn1968.jpg

You know those days after you’ve eaten nothing but crap when you just feel heavy and unpleasant? Usually they happen after a vacation or maybe just a particularly decadent weekend. This is my go-to meal for those days.

My parents recently visited, and it was four days of mostly eating out. Waffles for breakfast, pizza for lunch, a big plate of sausage and potatoes for dinner. Yikes. I may not generally be a vegetable-lover, but days like that make me crave something healthy.

And this meal is perfect for that. It has lots of tomatoes, garlic, and zucchini, plenty of beans, and just a bit of starch in the form of red potatoes.

Not only is it healthy, but it’s quick and forgiving as well. After a bit of chopping, there isn’t much to do except give the occasional stir while everything simmers together into deliciousness. At the end, the flavors of garlic and crushed red pepper permeate the sauce, the zucchini is softened but not mushy, and the beans and potatoes have soaked up the tomato-ey juices. This is one of my favorite ways to be healthy!

Braised White Beans with Tomatoes, Zucchini, and Garlic
(adapted from Vegetarian Classics, by Jeanne Lemlin)
Serves 2 (plus leftovers)

I’ve taken to drizzling a bit of extra-virgin olive oil over everything right before serving.

2 tablespoons extra virgin olive oil
4 garlic cloves, minced
¼ teaspoon crushed red pepper flakes
1 (14-ounce) can ready-cut diced tomatoes
¼ cup water
1 medium boiling potato (red or Yukon gold), cut into ¼-inch dice
1 zucchini, quartered lengthwise and sliced into ¼-inch slices (the size I buy depends on how healthy I want to be)
1 (14-ounce) cans small white beans, such as Great Northern or navy, rinsed well in a strainer
¼ teaspoon dried rosemary, crushed
¼ teaspoon salt

1. Heat the oil, garlic, and red pepper in a 12-inch nonstick skillet over medium heat. Cook for about 30 seconds after the garlic begins to sizzle. (It should not become at all colored). Stir in the tomatoes, water, and potatoes, and cover the pan. Cook at a lively simmer for 15 minutes, or until the potatoes are almost cooked through.

2. Mix in the zucchini, beans, rosemary, and salt. Cover the pan again and cook, stirring often, 10 minutes more, or until the zucchini and potatoes are tender. At this point check the consistency of the sauce; it should be thick and soupy, not dry or watery. Add a bit of water if the mixture doesn’t have much sauce; cook it uncovered if the juices seem watery. Serve in large pasta bowls, preferably, or on plates.

belated wishes (slice-a-fancy cookies)

dscn1929.jpg

As much as I love my friends and family, I am terrible at getting gifts out to them on time. Invariably, I won’t start looking for gift ideas until after I’ve made the call (or email or text message) to wish the person a happy birthday

And that is why my good friend Sidfaiwu, whose birthday is before Thanksgiving, got Christmas cookies along with the rest of his birthday gift.

copy-of-img_0256Updated photo 12.13.08

These cookies are as much a Christmas tradition in my family as santa or the decorated tree. Although I can’t remember a Christmas without them, this is my first time making them.

The dough itself is simple – a classic cookie dough recipe where the butter and sugars are creamed together, the eggs are beaten in, and the pre-mixed dry ingredients are added. It’s in the shaping that the recipe gets interesting. The dough is divided into equal portions, colored, patted into rectangles, then stacked and cut to form cookies. This is where the recipe really shines, because it’s an easy way to make an impressive variety of shapes.

dscn1875.jpg dscn1882.jpg

dscn1888.jpg dscn1918.jpg

I hope Sid enjoys these as much as I always have!

Yes, Dave and I got him a math calendar for his birthday.  We are the coolest friends ever.

dscn1944.jpg

Slice a Fancy Cookies (from Family Circle)

I was working from a shorthand recipe that I’d copied in a hurry a few years ago.  This is the real version (updated from my original post), although I’ve modernized it a bit.  Apparently I made the “ribbon fancies”.  I would just call them striped, but what do I know.

Makes about 12 dozen cookies

4 cups (18 ounces) unbleached flour
1 teaspoon baking powder
1 teaspoon salt
¼ teaspoon baking soda
1¼ cups (2½ sticks) butter
1 cup (7 ounces) firmly packed light brown sugar
½ cup (3 1/2 ounces) granulated sugar
2 eggs
2 teaspoons vanilla
1. Mix flour, baking powder, salt, and baking soda.
2. Beat butter with brown and granulated sugars until fluffy; beat in eggs and vanilla. Blend in flour mixture.
3. Divide evenly into 3 bowls. Flavor, shape, and decorate each variety, following recipes below.
4. Slice frozen cookie dough into 1/4-inch sections and place on ungreased cookie sheets. Bake at 350º for 8-10 minutes. Remove from cookie sheets to wire racks; cool completely.

Ribbon Fancies

Divide one bowl of dough into three equal portions. Tint one third red, one green and leave one plain. Roll out each section into a 9 x 3-inch rectangle between sheets of parchment (or wax) paper; chill in freezer 10 minutes; halve each rectangle lengthwise. Brush tops very lightly with milk. Lay one plain stripe, on top of that place a green, then red, than green again, and red, and then white layer on top of each other. Wrap in wax paper and freeze for several hours at least. When ready to bake, follow above directions.

Pinwheel Twirls

Divide second bowl of dough in half. Tint one half red or green; leave other half plain. Roll out each half to a 9×9-inch square between sheets of parchment paper; peel off top sheets. Lay tinted dough, paper side up, on top of plain dough. Peel off paper. Roll up doughs tightly, jelly-roll fashion. Wrap in wax paper; freeze at least several hours. When ready to bake, follow above directions.

Checkerboards

Divide third bowl of dough in half. Blend ½ square unsweetened chocolate, melted and cooled, into one half; leave other half plain. Roll out each half to a 9×3-inch rectangle, chill. Cut each rectangle lengthwise into 8 strips, each 3/8-inch wide. Carefully lift a chocolate strip with a long-bladed spatula and place on a clean sheet of wax paper; lay a plain strip close to it, then repeat with a chocolate and plain strip to make a four-stripe ribbon about 1½ inches wide. Brush very lightly with milk. Build a second, third, and fourth layer, alternating plain and chocolate strips each time and brushing each layer with milk before adding the next one. Wrap in wax paper; freeze. When ready to bake, follow above directions.

second chances (chicken spiedies and philly cheesesteaks)

dscn1869.jpg

There are so many mistakes in life that can’t be undone. Sharp words to a friend, a poor job interview, even a stubbed toe.

But when mistakes are made in the kitchen, there’s always the opportunity to try it until we get it right.

And thus it was that I found myself making more sandwiches this week. And this time-I nailed it.

The spiedies were made just the same as the original recipe, except I didn’t broil them until they were dry as a bone! I also saved a bit of unused marinade to toss over the cooked chicken pieces. These sandwiches were all that I had hoped for-juicy and flavorful.

And, as Sara’s advice came a bit too late, in that I’d already purchased the steak for the next set of cheesesteaks, I had to do some more pounding. However, this time I cleverly cut the steak in half crosswise, so I wasn’t trying to flatten an inch and a half thick steak down to a quarter inch thickness. This was indeed far easier. I didn’t spend 10 years in college for nothing, folks! I spent less than five minutes flattening my steak this time, and maybe it’s just me, but it didn’t sound nearly so loud and abrasive.

dscn1897.jpg

I also layered on some more onions and cheese, and this was a sandwich worth eating twice within a week!

And-the cheesesteak bonus? The next day we found at that we’re moving to Philadelphia!

dscn1909.jpg

eat your veggies (roasted onion and bacon dip)

dscn1901.jpg

There are those people who love vegetables. They want nothing more than a big plate of perfectly steamed broccoli or braised Brussels sprouts. My husband is like this, and so is my mom. These people are lucky.

I don’t hate vegetables. If they’re cooked just right, I find them pretty darn edible. But I’m always more interested in the starch or meat parts of a meal. The vegetables are just there to make me healthy.

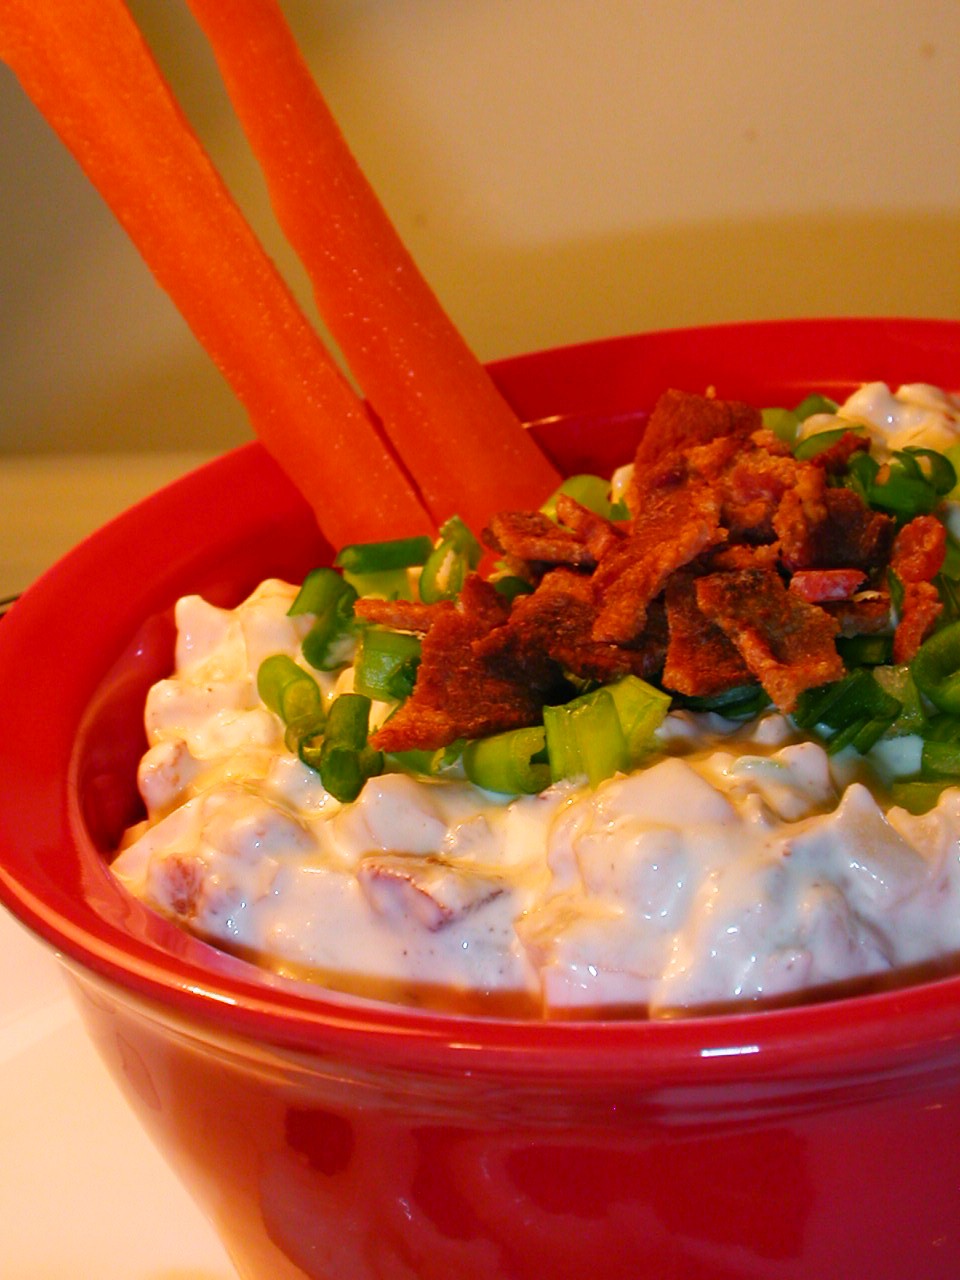
Unless, of course, you dip the healthy vegetables in some bacony, sour creamy, mayonnaisey dip. Then I’m on board.

This dip is based on roasted onions and bacon. I love caramelized onions, and roasting did the trick, and at the same time filled my kitchen with the homey smell of cooking onions.

The recipe is originally from Cooks Illustrated, but I’ve adapted it substantially. The original needed more bacon, more salt, and some mayonnaise. Also, the original called for chives, but I had green onions around instead.

Even with all the changes I needed to make, it made those veggies a whole lot more appetizing!

Roasted Onion and Bacon Dip
Makes about 1½ cups

3 medium yellow onions, unpeeled
½ tablespoon olive oil
6 slices bacon, cooked crisp and drained, crumbled
2/3 cup sour cream
1/3 cup mayonnaise
1 teaspoon Worcestershire sauce
1 teaspoon Dijon mustard
2 tablespoons scallions, chopped fine
½ teaspoon table salt
Ground black pepper

1. Adjust oven rack to lowest position and heat oven to 400 degrees. Line a baking sheet or with aluminum foil; rub foil with oil. Cut onions in half crosswise (along their equators). Cut an X, about 1-inch deep, in the root and stem ends. Place onions cut side down on baking sheet. Roast until dark brown around bottom edge, about 30 minutes. Transfer pan to rack; let onions rest for 5 minutes before peeling off the pan. Let onions cool, then peel and chop fine.

2. Mix all ingredients (including onions) in medium bowl. Serve immediately or chill.

dscn1908.jpg

the short train to philly; or, why I microwaved filet mignon (philly cheesesteaks)

dscn1783.jpg

The final installment to sandwich week didn’t go well. (Neither did the second installment, if you recall.)

The cheesesteak recipe comes from Alton Brown’s Good Eats. The Food Network’s write-up of it wasn’t very clear, so I even rewatched the segment of the show where Alton makes them.

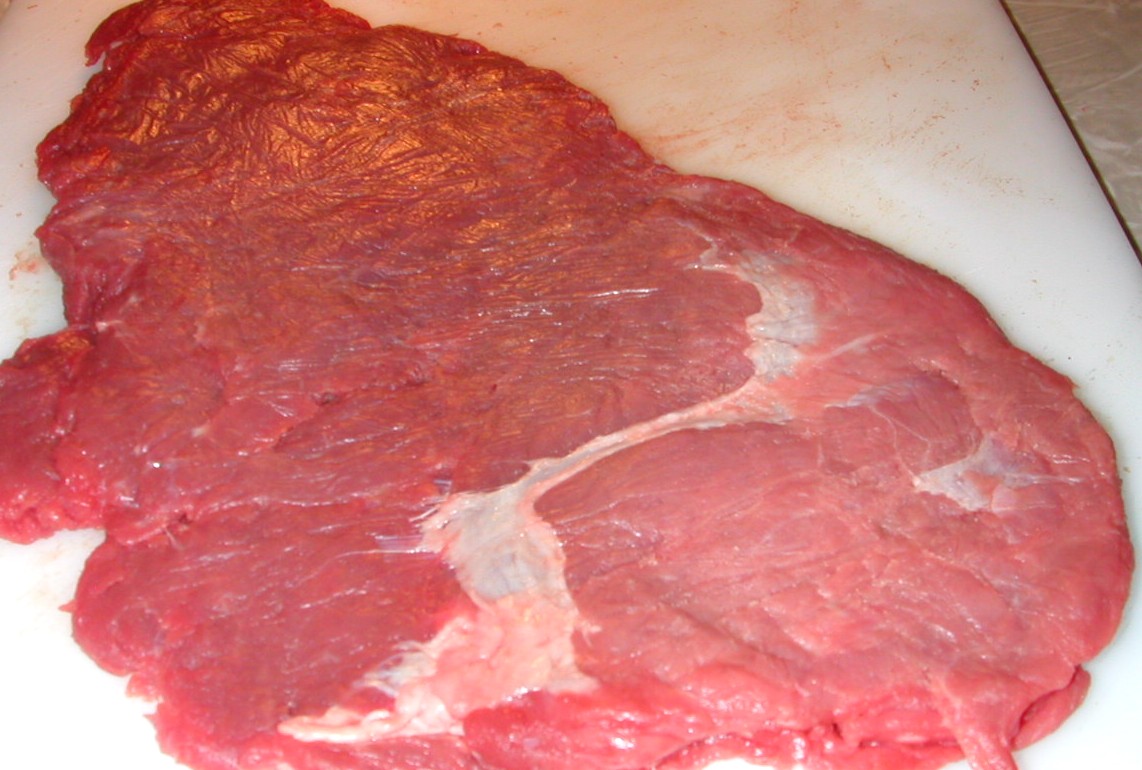
Of course, in the happy land of TV cooking, someone else takes your chunk of beef and pounds it into a sheet of beef. In the land of apartment cooking, you piss off the neighbors. And the husband.

dscn1773.jpg dscn1781.jpg

I only got my beef tenderloin steak down to about ½-inch thickness before my somewhat-ill husband beseeched me to stop with the pounding. I heated up my All-Clad stainless-steel skillet for a couple minutes on the highest heat possible, threw on my oiled steak, and rushed around the apartment turning on fans and opening windows before the fire-alarm went off. Notice that I didn’t say anything about salting the steak, which I forgot to do.

By the time I got back to the stove after trying to dissipate the smoke, the first side was turning fairly black. So I flipped the steak, then took the hot pan and stood outside to let the second side’s allotment of smoke disperse out there. When the pan got too heavy for me to hold anymore, I came inside and wrapped the steak in foil while I cooked up some onions.

After a few minutes, I unwrapped the and started cutting it up. And, it was totally uncooked on the inside. Yes, I realize that people eat steaks rare, but they don’t eat cheesesteaks rare. And that’s where the microwave came in. I’m so ashamed.

Cheesesteaks
Makes 2 sandwiches

1 beef tenderloin steak, 6-8 ounces
salt
pepper
1 tablespoon olive oil
1 yellow onion, sliced thin
2 ounces cheddar cheese, grated
2 hoagie rolls

Let the meat sit at room temperature for 1 hour.

Pound the steak to ½-inch thickness. Season liberally with salt and pepper, and rub with 1 teaspoon of oil.  Heat a heavy-bottomed skillet over medium-high heat for a few minutes. Cook until cooked through, about 3-4 minutes per side. Wrap the meat in foil. Heat the remaining 2 teaspoons oil in the same skillet. Cook the onions over medium heat until browned.

Slice the meat into small strips. Divide evenly among the rolls. Top with any remaining juice from the meat, then onions and cheese. Wrap in foil for 10 minutes to let the flavors meld; serve.