Archives for January 2008

the real deal (marcella hazan’s lasagne bolognese)

dscn2543.jpg

I’ve been kept away from cooking for too long. Between holiday traveling and moving, it’s been at least a month since I did any serious cooking or baking. Every time I have a cooking dry spell like this, I end up thinking of food constantly. I start to make lists of what I want to make. And it seems like the dish that occupies the most of my thoughts is always lasagna.

I love lasagna in all of its forms – meat, mushroom, spinach, artichoke, tomato, béchamel. This time I wanted to make a classic meat lasagna. I keep trying new recipes because I haven’t yet found one that I love. I decided it was high time to try Marcella Hazan’s recipe. I coveted Hazan’s Essentials of Classic Italian Cooking for several years before receiving it as a wedding gift from my sister-in-law. Yay! This is the first recipe I’ve made from it.

I’ve often heard about those lasagna recipes that take all day. Most modern recipes are trying to simplify and shorten the process, but I’ve always been curious about the original. If someone spends all day on a recipe, it must be worth it, right?

I was about to find out. Reading Hazan’s recipe for Baked Green Lasagne with Meat Sauce, Bolognese Style, was like the Choose Your Own Adventure books I read as a kid. Turn to page 129 for pasta made with the machine method, or page 143 for the hand-rolled method. On page 129, I was directed to page 89 for instructions on cooking the spinach. Yeesh. I took the recipe(s) one step at a time, and everything really did go without a hitch.

The recipe involves a lot of patience. Hazan is not much into modern tools that make life easier; she’s all about doing things the hard way. I’ve made béchamel sauce many times, always by melting butter, stirring in flour, whisking in cold milk, stirring until it boils. Hazan instructs this all to be done over low heat, and the milk is pre-heated, then added to the butter-flour mixture 2 tablespoons at a time. Then this mixture is stirred, of course constantly, over low heat until it thickens. Over low heat, it takes a long time to thicken. But once it does, it makes the smoothest béchamel sauce I’ve ever made, albeit one that tastes somewhat of raw flour.

The bolognese sauce is similar in that there’s a lot of “gentle simmering.” Hazan is very specific that the sauce must simmer for at least 3 hours after the tomatoes are added. What she fails to mention is that the recipe takes about an hour even before that point. One cup of milk takes quite some time to completely bubble away at a gentle simmer.

dscn2482.jpg

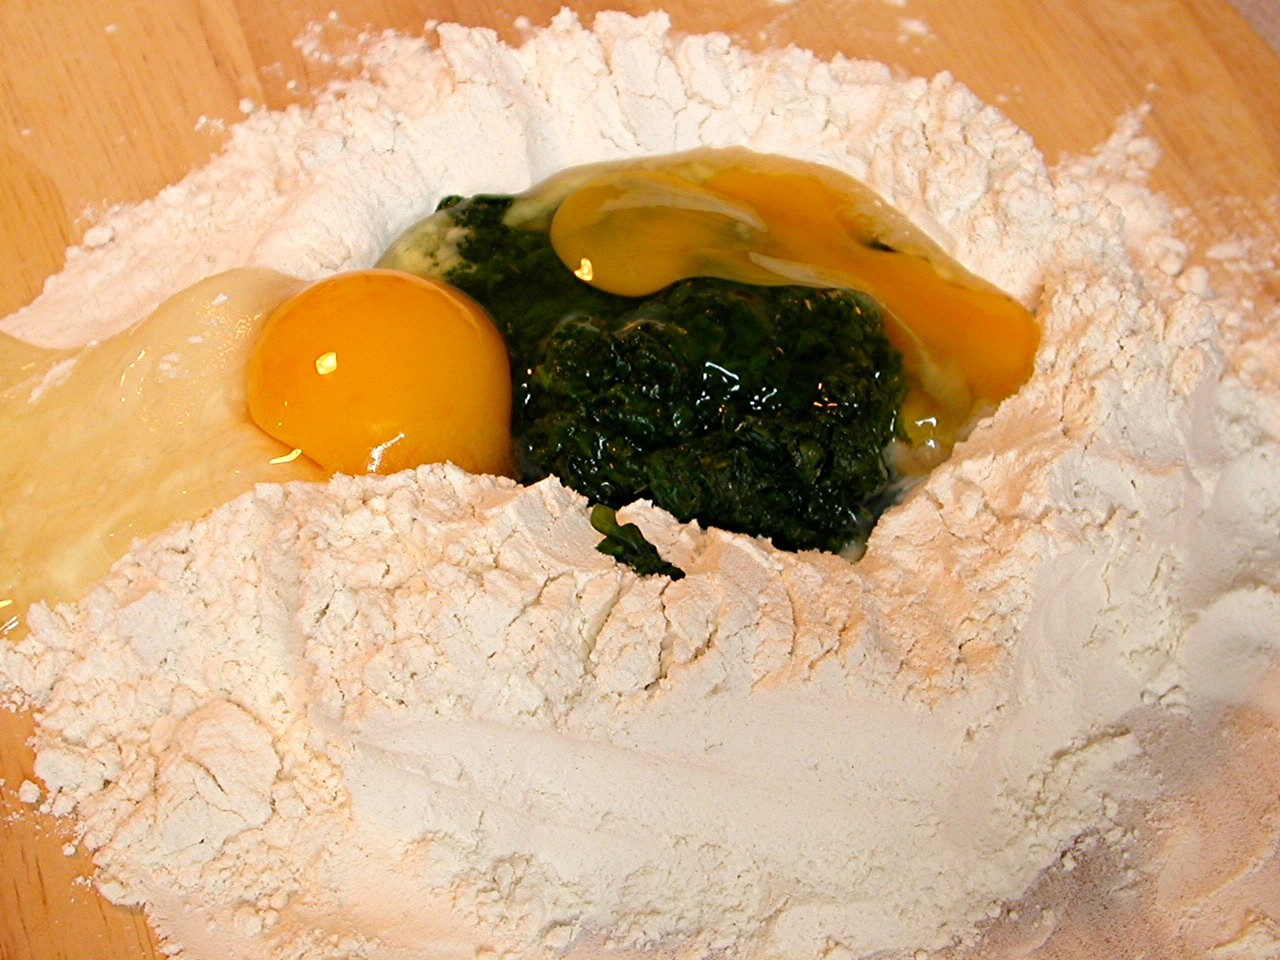
Of course the pasta dough could not be made in the food processor, it must be done by hand. I was determined to follow the recipe exactly, so I trudged on. And this is what I got…

dscn2499.jpg

Obviously the egg is supposed to stay in the well in the center of the flour, not glop out a breach in the side. Next time I’ll mix the egg and spinach together in a bowl, even add some flour to it before I move to a flat work surface to complete the additions of flour.

dscn2501.jpg

This is the first time I’ve rolled out pasta without wanting to scream! Really, rolling out the pasta just went splendidly, and I’m so glad that I finally learned a good technique for this.

dscn2529.jpg

The two sauces are mixed together and alternately layered with pasta. Hazan specifies that there should be at least 6 layers. I lost count, but I know I had more than that, and I only used probably 2/3 of the pasta sheets before I ran out of sauce.

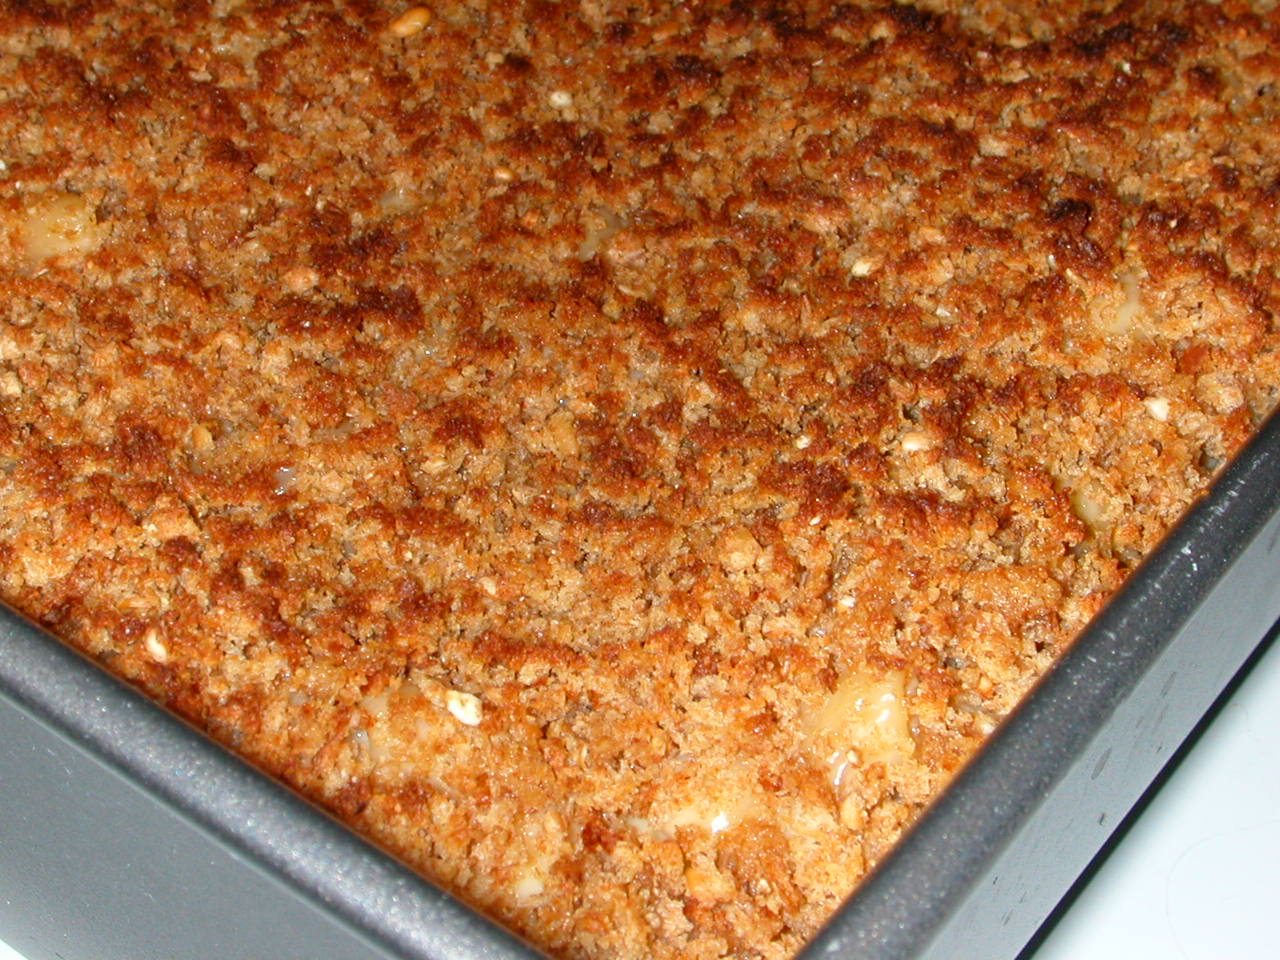
dscn2542.jpg

All in all, the lasagna took about 7 hours, keeping in mind that I was taking my time. Was the recipe worth all this? Well…the short answer is no. It was good, but not that good. Dave and I agreed that it tasted somewhat meatloaf-ish. The long answer is that I was fairly certain going in that there would be things I’d want to change in the recipe for later editions. For one thing, the only cheese in the entire recipe is 2/3 cup of parmesan. I gather (from wikipedia) that this is the traditional Bolognese method for lasagna. But I’m an all-American girl, and I want mozzarella! I’d also like less carrot and celery to counteract the “meatloafness”, and more onion. I want to try adding some flavorings to the béchamel as well.

So I will be attempting this recipe again, but probably in a less authentic Italian form. I trust that it will go much faster now that I understand the methods involved. If nothing else, I’m grateful to have learned how to roll out homemade pasta to the thinnest setting without any swearing.

I’m typing out the whole recipe for you below, so you can see for yourself the pickiness that is a Marcella Hazan recipe. I followed the recipe just about exactly.

Baked Green Lasagne with Meat Sauce, Bolognese Style

Serves 6

Bolognese Sauce
Béchamel Sauce
Green pasta dough
1 tablespoon salt
2 tablespoons butter, plus more for greasing a 9- by 12-inch bake-and-serve lasagna pan, no less than 2½ inches high
2/3 cup fresh grated parmigiano-reggiano cheese

1. Prepare the meat sauce and set aside.

2. Prepare the béchamel, keeping it rather runny, somewhat like sour cream. When done, keep it warm in the upper half of a double boiler, with the heat turned to very low. If a film should form on top, just stir it when you are ready to use it.

3. Make green pasta dough. Roll it out as thin as it will come. Leave the strips as wide as they come from the rollers, and cut them into 10-inch lengths.

4. Set a bowl of cold water near the range, and lay some clean, dry cloth towels flat on a work counter. Bring 4 quarts of water to a rapid boil, add 1 tablespoon salt, and as the water returns to a boil, slip in 4 or 5 of the cut pasta strips. Cook very briefly, just seconds after the water returns to a boil after you dropped in the pasta. Retrieve the strips with a colander scoop of slotted spatula, and plunge them into the bowl of cold water. Pick up the strips, one at a time, rinse them under cold running water, and rub them delicately, as though you were doing fine hand laundry. Squeeze each strip very gently in your hands, then spread if flat on the towel to dry. When all the pasta is cooked in the manner, 4 or 5 strips at a time, and spread out to dry, pat it dry on top with another towel.

*Explanatory note: The washing, wringing, and drying of pasta for lasagna is something of a nuisance, but it is necessary. You first dip the partly cooked pasta into cold water to stop the cooking instantly. This is important because if lasagna pasta is not kept very firm at this stage it will become horribly mushy later when it is baked. And you must afterward rinse off the moist starch on its surface, or the dough will become glued to the towel on which it is laid out to dry, and tear when you are ready to use it.

5. Preheat the oven to 400 degrees.

6. Thickly smear the bottom of a lasagna pan with butter and about 1 tablespoon of béchamel. Line the bottom of the pan with a single layer of pasta strips, cutting them to fit the pan, edge to edge, allowing no more than ¼ inch for overlapping.

7. Combine the meat sauce and the béchamel and spread a thin coating of it on the pasta. Sprinkle on some grated parmesan, then add another layer of pasta, cutting it to fit as you did before. Repeat the procedure of spreading the sauce and béchamel mixture, then sprinkling with Parmesan. Use the trimmings of pasta dough to fill in gaps, if necessary. Build up to at least 6 layers of pasta. Leave yourself enough sauce to spread very thinly over the topmost layer. Sprinkle with parmesan and dot with butter.

*Ahead-of-time note: The lasagna may be completed up to 2 days in advance up to this point. Refrigerate under tightly sealing plastic wrap.

8. Bake on the uppermost rack of the preheated oven until a light, golden crust formed on top. It should take between 10 and 15 minutes. If after the first few minutes you don’t see any sign of a crust beginning to form, turn up the oven another 50 to 75 degrees. Do not bake longer then 15 minutes altogether.

9. Remove from the oven and allow to settle for about 10 minutes, then serve at table directly from the pan.

Bolognese Sauce:
1 tablespoon oil
3 tablespoon butter
½ cup chopped onion
2/3 cup chopped celery
2/3 cup chopped carrot
3/4 pound ground beef chuck
salt
black pepper, ground fresh from the mill
1 cup whole milk
whole nutmeg
1 cup dry white wine
1½ cup canned imported Italian plum tomatoes, cut up, with their juice

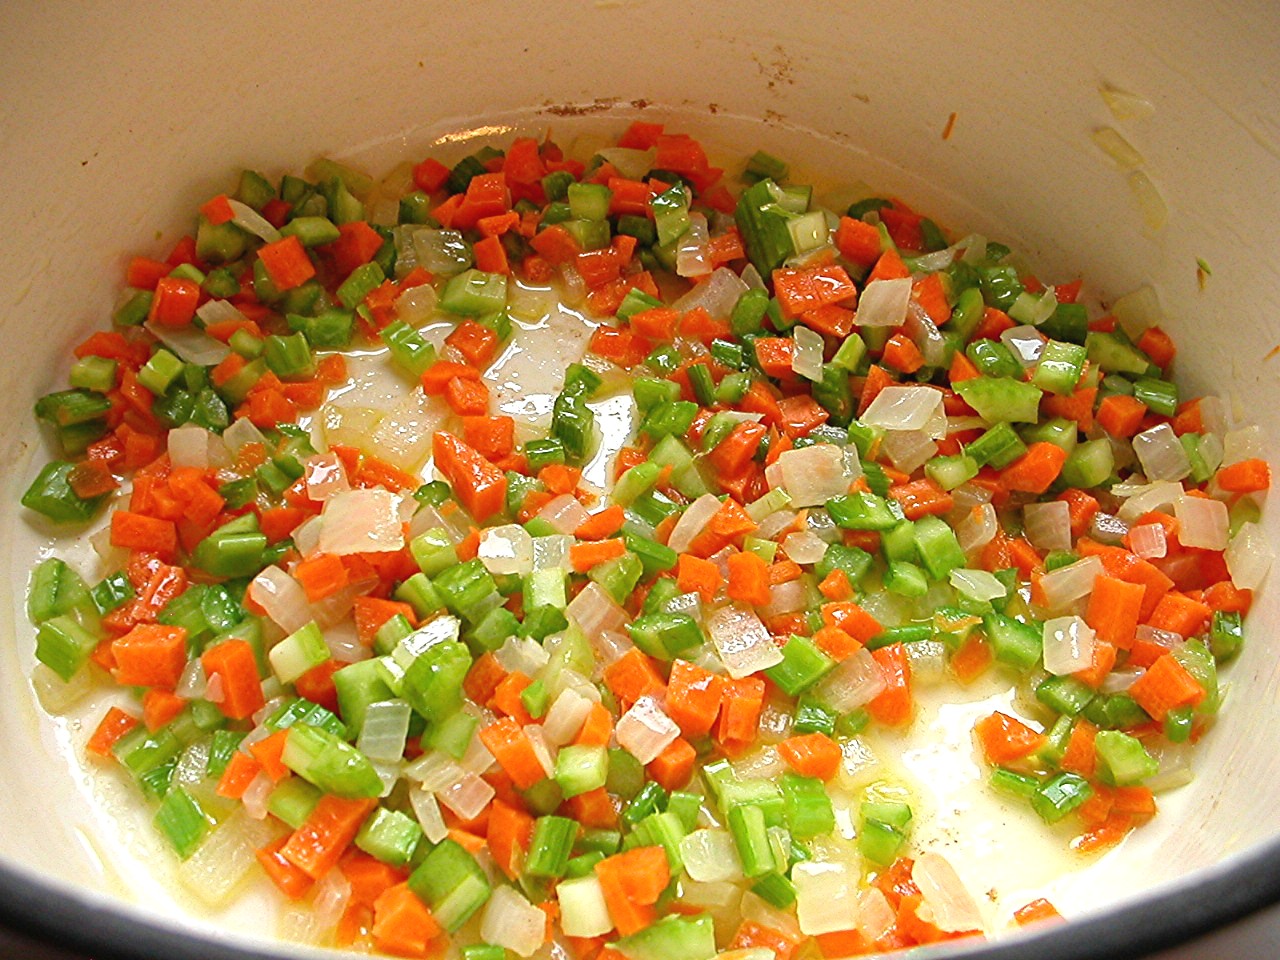
1. Put the oil, butter and onion in the pot, and turn the heat on to medium. Cook and stir the onion until is has become translucent, then add the chopped celery and carrot. Cook for about 2 minutes, stirring the vegetables to coat them well.

2. Add the ground beef, a large pinch of salt, & a few grindings of pepper. Crumble the meat with a fork and cook until beef has lost its raw, red color.

3. Add the milk and let simmer gently, stirring frequently, until it has bubbled away completely. Add a tiny grating – about 1/8 teaspoon – of nutmeg and stir.

4. Add the wine, let simmer until it has evaporated, then add the tomatoes and stir thoroughly to coat all ingredients well. When the tomatoes begin to bubble, turn the heat down so that the sauce cooks at the laziest of simmers, with just an intermittent bubble breaking through the surface. Cook, uncovered, for 3 hours or more, stirring from time to time. While the sauce is stirring, you are likely to find that it begins to dry out and the fat separates from the meat. To keep it from sticking, continue the cooking, adding ½ cup of water whenever necessary. At the end, however, no water at all must be left and the fat must separate from the sauce. Taste and correct for salt.

Béchamel Sauce:
3 cups milk
6 tablespoons butter
4½ tablespoons flour
¼ teaspoon salt

1. Put the milk in a saucepan, turn the heat to medium-low, and bring the milk just to the verge of boiling, to the point when it begins to form a ring of small, pearly bubbles.

2. While heating the milk, put the butter in a heavy-bottomed, 4- to 6-cup saucepan, and turn the heat to low. When the butter has melted completely, add the flour and stirring it with a wooden spoon. Cook, while stirring constantly, for about 2 minutes. Do not allow flour to become colored. Remove from heat.

3. Add the hot milk to the flour-and-butter mixture, no more than 2 tablespoons of it at a time. Stir steadily and thoroughly. As soon as the first 2 tablespoons have been incorporated into the mixture, add 2 more, and continue to stir. Repeat this procedure until you have added ½ cup milk; you can now put in the rest of the milk ½ cup at a time, stirring steadfastly, until all the milk has been smoothly amalgamated with the flour and butter.

4. Place the pot over low heat, add the salt, and cook, stirring without interruption, until the sauce is as dense as thick cream. If you find any lumps forming, dissolve them by beating the sauce rapidly with a whisk.

Pasta:
6 ounces fresh spinach, cooked, or 1/3 package frozen leaf spinach
2 large eggs
1½ cups unbleached flour

Pour the flour onto a work surface, shape it into a mound, and scoop out a deep hollow in its center. Break the eggs and add the chopped spinach into the hollow.

Beat the eggs and spinach lightly with a fork for about 2 minutes as though you were making an omelet. Draw some of the flour over the eggs, mixing it in with the fork a little at a time, until the eggs are no longer runny. Draw the sides of the mound together with your hands, but push some of the flour to one side, keeping it out of the way until you find you absolutely need it. Work the eggs and flour together, using your fingers and the palms of your hands, until you have a smoothly integrated mixture. If it is still moist, work in more flour.

When the mass feels good to you and you think it does not require any more flour, wash your hands, dry them, and run a simple test: Press you thumb deep into center of the mass; if it comes out clean, without any sticky matter on it, no more flour is needed. Put the egg and flour mass to one side, scrape the work surface absolutely clear of any loose or caked bits of flour and of any crumbs, and get ready to knead.

Return to the mass of flour and eggs. Push forward against it using the heel of your palm, keeping your fingers bent. Fold the mass in half, give it a half turn, press hard against it with the heel of your palm again, and repeat the operation. Make sure that you keep turning the ball of dough always in the same direction, either clockwise or counterclockwise, as you prefer. When you have kneaded it thus for 8 full minutes and the dough is as smooth as baby skin, it is ready for the machine.

Cut the ball of dough into 6 equal parts.

Spread clean, dry, cloth dish towels over a work counter near where you’ll be using the machine.

Set the pair of smooth cylinders, the thinning rollers, at the widest opening. Flatten one of the pieces of dough by pummeling it with your palm, and run it through the machine. Fold the dough twice into a third of its length, and feed it by its narrow end through the machine once again. Repeat the operation 2 or 3 times, then lay the flattened strip of pasta over a towel on the counter. Since you are going to have a lot of strips, start at one end of the counter, leaving for for the others.

Take another piece of dough, flatten it with your hand, and urn it through the machine exactly as described above. Lay the strip next to the previously thinned one on the towel, but do not allow them to touch or overlap, because they are still moist enough to stick to each other. Proceed to flatten all the remaining pieces in the same manner.

Close down the opening between the machine’s rollers by one notch. Take the first pasta strip you had flattened and run it once through the rollers, feeding it by its narrow end. Do not fold it, but spread it flat on the cloth towel, and move on to the next pasta strip in the sequence.

When all the pasta strips have gone through the narrower opening once, bring the rollers closer together by another notch, and run the strips of pasta through them once again, following the procedure described above. You will find the strips becoming longer, as they get thinner, and if there is not enough room to spread them out on the counter, you can let them hand over the edge. Continue thinning the strips in sequence, progressively closing down the opening between the rollers one notch at a time. This step-by-step thinning procedure, which commercial makers of fresh pasta greatly abbreviate or skip altogether, is responsible, along with proper kneading, for giving good pasta its body and structure.
dscn2562.jpg

happy birthday to the husband (banana cream pie)

dscn2396.jpg

Dave’s birthday is today! He’s a few years older than me, which can be nice sometimes. It’s not that I think I’m old, or that I get all “I can’t believe I’m [blank] already.” But I can’t deny that when I hit those landmark numbers, those ages when it’s hard not to think “I’m [blank], and this is where I am in life?”, that the impact is lessened a bit by the fact that my husband’s been there for a few years.

Every year on his birthday, Dave requests banana cream pie. I’ve tried a number of recipes, and so far, according to Dave, none of them have lived up to Baker’s Square Restaurant. I’m pretty sure he hasn’t had Baker’s Square pie in quite a few years, and if he were to try it now (after living with me), he’d have a different opinion. But until then, I’ll just make my own favorite recipe.

This recipe starts with a graham cracker crust, which I’m a big fan of, especially for custard pies. The crust has a bit of banana right in it, which is a really great touch.

dscn2339.jpg

The custard is undeniably rich. I have no problems with that! After both the crust and custard have cooled to room temperature, two layers of banana and three layers of custard are filled into the crust. Then the pie is covered and chilled for at least eight hours to set the custard and soften the crust. Yeah right. I wasn’t that organized. We ate it after four hours of chilling.

dscn2360.jpg

It’s so good! It may not live up to Baker’s Square fame, but Dave had a number of complimentary comments to give, including “Scrumdelilicious.”

The original recipe is from epicurious.com, but I’m going to give my own adaptations below. The original is made in a 10-inch pie pan, which seems silly, because most people, including myself, don’t have such a beast. The recipe I’ve given below is adjusted for a standard 9-inch pie pan. I also made a few tweaks to the crust.

Banana Cream Pie (adapted from epicurious.com)

Serves 8

Crust:
9 graham crackers, processed to fine crumbs (about 1 cup)
2 tablespoons sugar
½ banana
2½ tablespoons unsalted butter, melted

Filling
6½ tablespoons (2.8 ounces) sugar
¼ cup (1.1 ounces) cornstarch
1/4 teaspoon salt
1¼ cups whipping cream
1¼ cups whole milk
3 large egg yolks
½ vanilla bean, split lengthwise
1½ tablespoons unsalted butter
¾ teaspoon vanilla extract

4½ ripe bananas, peeled, cut crosswise into 1/4-inch-thick slices

For crust:
Preheat oven to 350 degrees. Process graham cracker crumbs, sugar, and banana until evenly mixed and there are no visible chunks of banana. Add unsalted butter and process to moisten evenly. Press onto bottom and up sides of 9-inch glass pie dish. Chill until firm, about 30 minutes. Bake crust until set and pale golden, about 15 minutes. Cool completely.

For filling:
Whisk sugar, cornstarch, and salt in heavy medium saucepan to blend. Gradually whisk in whipping cream and whole milk, then egg yolks. Scrape in seeds from vanilla bean; add vanilla bean. Whisk over medium-high heat until custard thickens and boils, about 6 minutes. Pour through mesh strainer into medium bowl. Whisk in unsalted butter and vanilla extract. Cool completely, whisking occasionally, about 1 hour. Remove vanilla bean.

Stir custard to loosen, if necessary. Spread ¾ cup custard over bottom of prepared crust. Top with half of sliced bananas, then ¾ cup custard, covering bananas completely. Repeat layering with remaining bananas and remaining custard. Chill banana cream pie until filling is set and crust softens slightly, at least 8 hours and up to 1 day. Cut pie into wedges and serve with sweetened whipped cream, if desired.

dscn2402.jpg

old classics (macaroni and cheese)

dscn1854.jpg

A few years ago, I did some research and then decided to stop eating processed foods. It really hasn’t been difficult, especially after the first couple of months. And I’ve found that most natural products are far tastier than processed. There is one exception, and that is macaroni and cheese. Every single time I walk down that aisle in the grocery store and see all the little blue boxes full of noodles and powdered cheese, my mouth waters.


Photo 10.30.08

Homemade macaroni and cheese is just as good. (Although not really in the same food category – to me, one is a snack and the other is a meal.) This recipe has one optional ingredient that I eschewed the first few times I made the recipe, but eventually decided to try. It’s cayenne powder, and it is such a great addition. It doesn’t make the macaroni and cheese at all spicy, but it does add just a bit of complexity to what can otherwise be a rather one-dimensional dish.

dscn1849.jpg

The recipe is from Cooks Illustrated (if you read my blog regularly, you may be seeing a pattern…). They found that the recipe worked best when the whole thing was cooked on the stove, which just a brief visit under the broiler to brown the buttered bread crumbs. Macaroni and cheese served with broccoli is such a great comforting meal.

dscn1850.jpg

Classic Macaroni and Cheese (from Cooks Illustrated – no changes)
Serves 6-8 as a main dish

Update 05/05/08 – I recently made the following changes to this recipe. I reduced the monterey jack to 7 ounces and increased the cheddar to 9 ounces. I think 6 ounces monterey jack and 10 of cheddar would be even better. I skipped the bread crumb topping and replaced it with an additional 2 ounces (4 would have been better) of cheddar before broiling.

Update 11/17/08 – I tried the changes in the previous update – using 6 ounces monterey jack and 10 ounces cheddar in the sauce, and replacing the bread crumbs with 4 ounces of cheddar.  It was great!  The sauce was still smooth, but it had a stronger cheese flavor.  I replace the bread crumbs just because I prefer my mac and chz without them.

Bread Crumb Topping:
6 slices white sandwich bread (good-quality, about 6 ounces), torn into rough pieces
3 tablespoons unsalted butter (cold), cut into 6 pieces

Pasta and Cheese:
1 pound elbow macaroni
1 tablespoon table salt
5 tablespoons unsalted butter
6 tablespoons all-purpose flour
1½ teaspoons powdered mustard
¼ teaspoon cayenne pepper (optional)
5 cups milk
8 ounces Monterey Jack cheese , shredded (2 cups)
8 ounces sharp cheddar cheese , shredded (2 cups)
1 teaspoon table salt

1. For the bread crumbs: Pulse bread and butter in food processor until crumbs are no larger than 1/8 inch, ten to fifteen 1-second pulses. Set aside.

2. For the pasta and cheese: Adjust oven rack to lower-middle position and heat broiler. Bring 4 quarts water to boil in Dutch oven over high heat. Add macaroni and 1 tablespoon salt; cook until pasta is tender. Drain pasta and set aside in colander.

3. In now-empty Dutch oven, heat butter over medium-high heat until foaming. Add flour, mustard, and cayenne (if using) and whisk well to combine. Continue whisking until mixture becomes fragrant and deepens in color, about 1 minute. Gradually whisk in milk; bring mixture to boil, whisking constantly (mixture must reach full boil to fully thicken). Reduce heat to medium and simmer, whisking occasionally, until thickened to consistency of heavy cream, about 5 minutes. Off heat, whisk in cheeses and 1 teaspoon salt until cheeses are fully melted. Add pasta and cook over medium-low heat, stirring constantly, until mixture is steaming and heated through, about 6 minutes.

4. Transfer mixture to broiler-safe 9 by 13-inch baking dish and sprinkle evenly with bread crumbs. Broil until crumbs are deep golden brown, 3 to 5 minutes, rotating pan if necessary for even browning. Cool about 5 minutes, then serve.

dscn1862.jpg

improvements (oatmeal)

dscn1804.jpg

Before we were married, everyday for breakfast my husband would mix quick oats with boiling water and just a bit of brown sugar. It was terrible – bland and mushy. At least he was eating healthy. But oatmeal doesn’t have to be bad.

The first trick is to toast the oats. Do it. Every time. It’s so much tastier. This recipe uses just a bit of butter to toast the oats on the stove, which I know makes the uber-healthy oatmeal just a tad less healthy. But one time I used quick oats to weigh down a blind-baked pie shell, and later on, those oats made some very tasty oatmeal. So no matter what kind of oats you’re using and how you toast them – get them toasted!

dscn1787.jpg

I also like to use steel-cut oats. The resulting oatmeal has a texture more like hot tapioca pudding than a bowl of mush. They do take a lot longer to cook, relegating this recipe to a weekend morning. But what better way to start out a weekend than this filling and warm bowl of goodness?

Oatmeal (from Cooks Illustrated – no changes)
Serves 3 to 4

One thing to note – if you don’t make a full recipe, you’ll want to use a bit less liquid and a tad lower temperature.

3 cups water
1 cup whole milk
1 tablespoon unsalted butter
1 cup steel-cut oats
¼ teaspoon table salt

1. Bring water and milk to simmer in large saucepan over medium heat. Meanwhile, heat butter in medium skillet over medium heat until just beginning to foam; add oats and toast, stirring constantly with wooden spoon, until golden and fragrant with butterscotch-like aroma, 1½ to 2 minutes.

2. Stir toasted oats into the simmering liquid, reduce heat to medium-low; simmer gently, until mixture thickens and resembles gravy, about 20 minutes. Add salt and stir lightly with spoon handle. Continue simmering, stirring occasionally with wooden spoon handle, until oats absorb almost all liquid and oatmeal is thick and creamy, with a pudding-like consistency, about 7 to 10 minutes. Off heat, let oatmeal stand uncovered 5 minutes. Serve immediately with brown sugar or maple syrup.

prepping and chopping and prepping… (pad thai)

dscn2233.jpg

I always seem to fool myself into thinking that pad thai is a good weeknight meal. Then I’ll get home from work and start prepping ingredients, and then I’m prepping and prepping and finally asking Dave to help because I’ve been in the kitchen over half an hour and I haven’t even started cooking yet. Fortunately, once the cooking starts, it only takes 10 minutes or so. That short cooking time is what always tricks me into making this on a weeknight.

One of the most difficult tasks with making pad thai is finding at least some of the authentic ingredients. I love tamarind, and I’m always disappointed when I order pad thai in a restaurant and find that they’ve skipped the tamarind. Tamarind is sold in several forms – the whole pods, the pulp of the pods, and a liquid concentrate. I use the pulp. If you really can’t find any, a mixture of lime juice and water can do in a pinch.

dscn2199.jpg

Pad thai has so many freakin’ ingredients, which is the only reason it takes a while to prepare. Another of my favorites, that might be hard to find, is dried shrimp. Mmm…like shrimp jerkey, so salty and good. I tried salted radish and absolutely hated it. Definitely a textural issue. I’ve seen recipes that called for salted cabbage instead of salted radish, so I want to try that too.

dscn2221.jpg

There are so many ingredients, and the cooking happens so fast, that I have to line up all of the ingredients in the order that they’re cooked, so I don‘t have to look at the recipe at all. Sometimes I have Dave read the recipe to me as I stand over the stove doing the fun part.

dscn2230.jpg

Ah, but pad thai is so worth all the chopping and prep work. It’s so good – and healthy!

Pad Thai (from Cooks Illustrated – no adaptations)
Serves 4 as a main dish

Although pad thai cooks very quickly, the ingredient list is long, and everything must be prepared and within easy reach at the stovetop when you begin cooking. For maximum efficiency, use the time during which the tamarind and noodles soak to prepare the other ingredients. Tofu is a good and common addition to pad thai. If you like, add 4 ounces of extra-firm tofu or pressed tofu (available in Asian markets) cut into ½-inch cubes (about 1 cup) to the noodles along with the bean sprouts.

If you’re using tamarind concentrate instead of pulp, mix 1 tablespoon with 2/3 cup hot water. If you can’t find any tamarind, mix 1/3 cup of water with 1/3 cup of lime juice; replace granulated sugar with brown sugar. Do not serve this version with lime wedges.

2 tablespoons tamarind paste or substitute
¾ cup water (boiling)
3 tablespoons fish sauce
1 tablespoon rice vinegar
3 tablespoons granulated sugar
¾ teaspoon cayenne pepper
4 tablespoons peanut oil or vegetable oil
8 ounces dried rice stick noodles, about 1/8 inch wide (the width of linguine)
2 large eggs
¼ teaspoon table salt
12 ounces medium shrimp (31/35 count), peeled and deveined, if desired
3 cloves garlic, pressed through garlic press or minced (1 tablespoon)
1 medium shallot, minced (about 3 tablespoons)
2 tablespoons dried shrimp, chopped fine (optional)
2 tablespoons Thai salted preserved radish (optional)
6 tablespoons chopped unsalted roasted peanuts
3 cups bean sprouts (6 ounces)
5 medium scallions, green parts only, sliced thin on sharp bias
¼ cup fresh cilantro leaves (optional)
lime wedges

1. Soak tamarind paste in 3/4 cup boiling water for about 10 minutes, then push it through a mesh strainer to remove the seeds and fibers and extract as much pulp as possible. Stir fish sauce, rice vinegar, sugar, cayenne, and 2 tablespoons oil into tamarind liquid and set aside.

2. Cover rice sticks with hot tap water in large bowl; soak until softened, pliable, and limp but not fully tender, about 20 minutes. Drain noodles and set aside. Beat eggs and 1/8 teaspoon salt in small bowl; set aside.

3. Heat 1 tablespoon oil in 12-inch skillet (preferably nonstick) over high heat until just beginning to smoke, about 2 minutes. Add shrimp and sprinkle with remaining 1/8 teaspoon salt; cook, tossing occasionally, until shrimp are opaque and browned about the edges, about 3 minutes. Transfer shrimp to plate and set aside.

4. Off heat, add remaining tablespoon oil to skillet and swirl to coat; add garlic and shallot, set skillet over medium heat and cook, stirring constantly, until light golden brown, about 1 1/2 minutes; add eggs to skillet and stir vigorously with wooden spoon until scrambled and barely moist, about 20 seconds. Add noodles, dried shrimp, and salted radish (if using) to eggs; toss with 2 wooden spoons to combine. Pour fish sauce mixture over noodles, increase heat to high, and cook, tossing constantly, until noodles are evenly coated. Scatter 1/4 cup peanuts, bean sprouts, all but 1/4 cup scallions, and cooked shrimp over noodles; continue to cook, tossing constantly, until noodles are tender, about 2 1/2 minutes (if not yet tender add 2 tablespoons water to skillet and continue to cook until tender).

5. Transfer noodles to serving platter, sprinkle with remaining scallions, 2 tablespoons peanuts, and cilantro; serve immediately, passing lime wedges separately.

dscn2239.jpg