Archives for March 2008

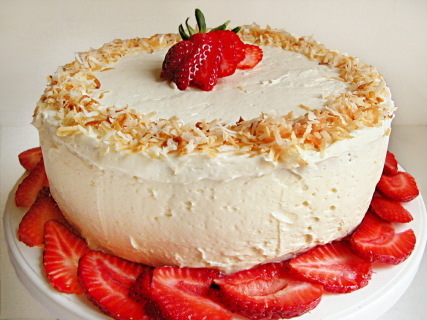
perfect party cake (daring bakers march 2008)

copy-of-dscn4743.jpg

I was excited to see that Morven chose a recipe from Dorie Greenspan’s Baking: From My Home to Yours for this month’s Daring Baker challenge. This book is extremely popular among food bloggers, but I had never made anything from it. Oh, and also, I love cake. And I had too many egg whites in the freezer left over from the pound cake experiments.

The cake came together easily. We were allowed to change the flavoring from the original lemon if we chose, but I didn’t because I was interested in the subtly-lemon flavored cake. I’m a major batter eater, and this batter tasted great, which is always a good sign.

copy-of-dscn4720.jpg

Like a few of the Daring Bakers, my cakes didn’t rise as much as I expected. This may be a result of the previously-frozen state of my egg whites, but I suspect it’s because I used a bit too much flour. Apparently the copy of the recipe I used had a mistake (oops!) in the amount of flour called for. I was a little worried about cutting the thin layers in half and probably would have skipped that step if this hadn’t been a DB challenge. However, Dorie refers to this cake as “sturdy” and I imagine the extra flour makes it more so, so I had no problems whatsoever cutting my thin layers in half.

The buttercream is my favorite of the few meringue buttercreams I’ve made. The lemon juice gave it a flavor beyond lightly sweetened butter. It came together quickly and was easy to work with.

copy-of-dscn4771.jpg

I’m glad I was able to halve each layer, because the alternating stripes of raspberry jam and buttercream is so pretty. I was a little surprised that Dorie called for one quarter of the buttercream to be used in between each layer, leaving just one quarter for both the top and the sides. I tried to use less in between the layers, so that I’d have some more to work with on the outside. In the future, if I’m serving the cake immediately, I might make just ⅔ – ¾ of the buttercream recipe, and leave the sides of the cake bare. I think it would be really pretty. Plus it would cut down on the ridiculous amount of butter involved in this dessert.

Overall, I thought the cake was delicious. The lemon, the raspberry, and the sweet cake were great compliments. The cake was easy to work with, “sturdy”, as Dorie refers to it. I thought it was maybe just a bit dry, so I was relieved to hear that I used too much flour, because now I can say that the first recipe I made from Dorie Greenspan lived up to all the hype. And in fact, I bought the book a few days later!

copy-of-dscn4758.jpg

Perfect Party Cake (from Dorie Greenspan’s Baking: From My Home to Yours)

Dorie note: Stick a bright-coloured Post-it to this page, so you’ll always know where to turn for a just-right cake for any celebration. The original recipe was given to me by my great dear friend Nick Malgieri, of baking fame, and since getting it, I’ve found endless opportunities to make it – you will too. The cake is snow white, with an elegant tight crumb and an easygoing nature: it always bakes up perfectly; it is delicate on the tongue but sturdy in the kitchen – no fussing when it comes to slicing the layers in half or cutting tall, beautiful wedges for serving; and, it tastes just as you’d want a party cake to taste – special. The base recipe is for a cake flavoured with lemon, layered with a little raspberry jam and filled and frosted with a classic (and so simple) pure white lemony hot-meringue buttercream but, because the elements are so fundamental, they lend themselves to variation (see Playing Around), making the cake not just perfect, but also versatile.

For the Cake
2¼ cups (9 ounces) cake flour
1 tablespoon baking powder
½ teaspoon salt
1¼ cups whole milk or buttermilk (I prefer buttermilk with the lemon)
4 large egg whites
1½ cups (10½ ounces) sugar
2 teaspoons grated lemon zest
1 stick (8 tablespoons or 4 ounces) unsalted butter, at room temperature
½ teaspoon pure lemon extract

For the Buttercream
1 cup sugar
4 large egg whites
3 sticks (12 ounces) unsalted butter, at room temperature
¼ cup fresh lemon juice (from 2 large lemons)
1 teaspoon pure vanilla extract

For Finishing
2/3 cup seedless raspberry preserves stirred vigorously or warmed gently until spreadable
About 1½ cups sweetened shredded coconut

Getting Ready:
Center a rack in the oven and preheat the oven to 350 degrees F. Butter two 9 x 2 inch round cake pans and line the bottom of each pan with a round of buttered parchment or wax paper. Put the pans on a baking sheet.

To Make the Cake:
Sift together the flour, baking powder and salt.

Whisk together the milk and egg whites in a medium bowl.

Put the sugar and lemon zest in a mixer bowl or another large bowl and rub them together with your fingers until the sugar is moist and fragrant. Add the butter and working with the paddle or whisk attachment, or with a hand mixer, beat at medium speed for a full 3 minutes, until the butter and sugar are very light. Beat in the extract, then add one third of the flour mixture, still beating on medium speed. Beat in half of the milk-egg mixture, then beat in half of the remaining dry ingredients until incorporated. Add the rest of the milk and eggs beating until the batter is homogeneous, then add the last of the dry ingredients. Finally, give the batter a good 2- minute beating to ensure that it is thoroughly mixed and well aerated.

Divide the batter between the two pans and smooth the tops with a rubber spatula. Bake for 30-35 minutes, or until the cakes are well risen and springy to the touch – a thin knife inserted into the centers should come out clean. Transfer the cakes to cooling racks and cool for about 5 minutes, then run a knife around the sides of the cakes, unfold them and peel off the paper liners. Invert and cool to room temperature, right side up (the cooled cake layers can be wrapped airtight and stored at room temperature overnight or frozen for up to two months).

To Make the Buttercream:
Put the sugar and egg whites in a mixer bowl or another large heatproof bowl, fit the bowl over a plan of simmering water and whisk constantly, keeping the mixture over the heat, until it feels hot to the touch, about 3 minutes. The sugar should be dissolved, and the mixture will look like shiny marshmallow cream. Remove the bowl from the heat. Working with the whisk attachment or with a hand mixer, beat the meringue on medium speed until it is cool, about 5 minutes.

Switch to the paddle attachment if you have one, and add the butter a stick at a time, beating until smooth. Once all the butter is in, beat in the buttercream on medium-high speed until it is thick and very smooth, 6-10 minutes. During this time the buttercream may curdle or separate – just keep beating and it will come together again. On medium speed, gradually beat in the lemon juice, waiting until each addition is absorbed before adding more, and then the vanilla. You should have a shiny smooth, velvety, pristine white buttercream. Press a piece of plastic against the surface of the buttercream and set aside briefly.

To Assemble the Cake
Using a sharp serrated knife and a gentle sawing motion, slice each layer horizontally in half. Put one layer cut side up on a cardboard cake round or a cake plate protected by strips of wax or parchment paper. Spread it with one third of the preserves. Cover the jam evenly with about one quarter of the buttercream. Top with another layer, spread with preserves and buttercream and then do the same with a third layer (you’ll have used all the jam and have buttercream leftover). Place the last layer cut side down on top of the cake and use the remaining buttercream to frost the sides and top. Press the coconut into the frosting, patting it gently all over the sides and top.

Serving
The cake is ready to serve as soon as it is assembled, but I think it’s best to let it sit and set for a couple of hours in a cool room – not the refrigerator. Whether you wait or slice and enjoy it immediately, the cake should be served at room temperature; it loses all its subtlety when it’s cold. Depending on your audience you can serve the cake with just about anything from milk to sweet or bubbly wine.

Storing
The cake is best the day it is made, but you can refrigerate it, well covered, for up to two days. Bring it to room temperature before serving. If you want to freeze the cake, slide it into the freezer to set, then wrap it really well – it will keep for up to 2 months in the freezer; defrost it, still wrapped overnight in the refrigerator.

Playing Around
Since lemon is such a friendly flavour, feel free to make changes in the preserves: other red preserves – cherry or strawberry – look especially nice, but you can even use plum or blueberry jam.

Fresh Berry Cake
If you will be serving the cake the day it is made, cover each layer of buttercream with fresh berries – use whole raspberries, sliced or halved strawberries or whole blackberries, and match the preserves to the fruit. You can replace the coconut on top of the cake with a crown of berries, or use both coconut and berries. You can also replace the buttercream between the layers with fairly firmly whipped sweetened cream and then either frost the cake with buttercream (the contrast between the lighter whipped cream and the firmer buttercream is nice) or finish it with more whipped cream. If you use whipped cream, you’ll have to store the cake the in the refrigerator – let it sit for about 20 minutes at room temperature before serving.

copy-of-dscn4729.jpg

spinach feta pine nut tart

copy-of-dscn4941.jpg

Dave is not so interested in food. Before we moved in together, his dinners varied between frozen pizza, microwave popcorn, and whatever leftovers I forced on him. I can’t get it through my head that he just doesn’t care, so I keep asking him for ideas when I plan our meals. When he can think of anything at all to suggest, it’s salmon pesto pasta. But this week he requested an ingredient instead of a dish, which is perfect, because he gets food he’ll enjoy, and I get to be creative with our meal planning.

The ingredient he suggested was pine nuts. (If he can’t have salmon pesto pasta, he’ll just request the ingredients in salmon pesto pasta.) I found a recipe for a Spinach Feta Pine Nut Tart on epicurious that sounded really interesting.

Wow, it was better than interesting. It was fantastic. The flavors melded together perfectly, with none bullying the others to be the star. The phyllo was flaky, the pine nuts were crunchy, and the eggs and spinach were creamy.

copy-of-dscn4950.jpg

Although I only slightly strayed from the original recipe’s ingredients, I adjusted the cooking method substantially. It called for one onion to be sautéed in 1/3 cup of olive oil. I couldn’t see any reason for that much oil, so I used about a tablespoon. I cooked my own fresh spinach, because frozen spinach is always so stemmy. And I made the whole thing on a baking sheet instead of the rectangular tart pan that the original recipe called for.

Making the tart was far easier than I was expecting. The filling was relatively simple to prepare, even with cooking my own spinach. This was my first time working with phyllo, and I found it a bit of a hassle, with the dampened towels and the brushing melted butter, but not exceptionally so.

Overall, I was very pleased with this meal. The only problem I had with it is that I wanted more.  Don’t let the original recipe fool you into thinking this is six servings – four is a more reasonable estimation.

copy-of-dscn4966.jpg

Spinach Feta Pine Nut Tart (adapted from epicurious)

Serves 4 as a main course

Filling may be made 1 day ahead and chilled, covered. Bring filling to room temperature before proceeding.

½ cup pine nuts (about 3 ounces)
1 medium onion, finely chopped
1 tablespoon olive oil
2 10-ounce packages frozen chopped spinach, thawed
2 large eggs
½ teaspoon salt
½ cup crumbled feta (about 3 ounces)
seven 17- by 12-inch phyllo sheets
5 tablespoons unsalted butter
6 tablespoons plus ¼ cup (1¼ ounce) freshly grated Parmesan

Preheat oven to 375°F.

Wet spinach leaves and place in a 12-inch nonstick skillet over medium-high heat. Cover and cook until spinach wilts, 2-3 minutes. Wring dry and roughly chop.

Toast pine nuts in small skillet over medium heat.

In the same 12-inch skillet used for the spinach, heat 1 tablespoon olive oil over medium-low heat. Add onion and cook, stirring occasionally, until softened.

In a large bowl, whisk eggs until combined and stir in spinach, onions, pine nuts, salt and feta until combined well.

Stack phyllo sheets and cover with 2 overlapping sheets plastic wrap and then a dampened kitchen towel. In a small saucepan melt butter and cool slightly. Spray a baking sheet with nonstick spray.

On a work surface lightly brush 1 phyllo sheet with butter. Sprinkle 1 tablespoon Parmesan evenly over buttered phyllo and repeat layering with 5 more phyllo sheets, butter, and 5 tablespoons Parmesan. Arrange last phyllo sheet on stack and lightly brush with butter. Spoon filling onto phyllo, spreading evenly and leaving outer 1½ inches free of filling. Fold edges of pastry over filling, leaving center uncovered, and lightly brush top of phyllo with butter. Sprinkle remaining ¼ cup Parmesan over exposed filling and bake tart in middle of oven until golden, 25 to 30 minutes. Serve tart warm or at room temperature.

copy-of-dscn4960.jpg

bagels

15.jpg

I absolutely love bagels. If it made nutritional sense, I would eat them several times each day – with butter, with cream cheese, with jam, as a breakfast sandwich with egg and cheese, as a lunch sandwich with turkey and mayonnaise. As it is, I eat one every day, half with butter, the other half with cream cheese. It’s one of my favorite meals of the day, and it never gets old.

23.jpg

I’ve been making my own for years. The first recipes I tried were fairly standard bread recipes with the added step of boiling the bagels between the second rise and baking. Once I discovered retarding the bagels – replacing the second rise with an overnight stay in the refrigerator – my bagels improved dramatically. They became even better when I started using a pre-ferment.

33.jpg

Unfortunately, all of these steps make homemade bagels a fair bit of effort. I had to take a break from making my own when my wedding became imminent, and I was moving and finishing my PhD and starting a new job. After eating perfectly good grocery store bagels for the past several months, I had to ask myself why I had bothered to make my own.

44.jpg

52.jpg

Now I remember – because mine are better. And not only are they very tasty, I can add whole wheat flour to my heart’s desire and better control the portion size. I also get to enjoy one fresh from the oven, and nothing beats that.

62.jpg

Bagels (adapted from Peter Reinhart’s The Bread Baker’s Apprentice and Cooks Illustrated)

Make 12 small or 8 large bagels

Bridget notes: I’ve found that I get the best bagels when I use Cooks Illustrated’s ingredient list and Peter Reinhart’s methods. The recipes are similar; the biggest difference is that Cook’s Illustrated uses a firmer dough (i.e., more flour).

Both recipes call for high-gluten flour, which is difficult to find. You can make your own by adding some gluten flour to bread flour. Sometimes I do that. This time, I simply used about half white bread flour and half whole wheat flour.

Update 4.14.08 – I reduced the flour in the recipe to reflect more accurately how much I’m usually able to mix in before the dough gets too dry (from 11 ounces in the dough to 8 ounces).

Sponge:
½ teaspoon instant yeast
1¾ cup (9 ounces) bread flour
1¼ cup (10 ounces) water, room temperature

Dough:
¼ teaspoon instant yeast
1 3/4 cup (8 ounces) bread flour (approximately)
1 1/2 teaspoons salt
1 tablespoon barley malt syrup
1 tablespoon cornmeal

1. To make sponge, stir the yeast into the flour in the bowl of a stand mixer. Add the water, stirring only until it forms a smooth, sticky batter (like pancake batter). Cover the bowl with plastic wrap and leave at room temperature for approximately 2 hours, or until the mixture becomes very foamy and bubbly. It should swell to nearly double in size and collapse when the bowl is tapped on the countertop.

2. To make the dough, add the additional yeast to the sponge and stir. Then add most of the remaining flour and all of the salt and malt. Mix on low speed with the dough hook until the ingredients form a ball, slowly working in the remaining flour to stiffen the dough.

3. Knead at low speed for 6 minutes. The dough should be firm and stiff, but still pliable and smooth. There should be no raw flour – all the ingredients should be hydrated. If the dough seems too dry and rips, add a few drops of water and continue kneading. If the dough seems tacky or sticky, add more flour to achieve the stiffness required. The kneaded dough should feel satiny and pliable but not be tacky.

4. Immediately divide the dough into 8-12 equal pieces. Form the pieces into smooth balls.

5. Cover the balls with plastic wrap and allow them to rest for 20 minutes. Dust a baking sheet with the cornmeal.

6. Form each dough ball into a rope 9 inches long by rolling it under your outstretched palms. Do not taper the ends of the rope. Overlap the ends of the rope about 1 inch and pinch the entire overlapped area firmly together. If the ends of the rope do not want to stick together, you can dampen them slightly. Place the loop of dough around the base of your fingers and, with the overlap under your palm, roll the rope several times, applying firm pressure to seal the seam. The bagel should be roughly the same thickness all the way around.

7. Place each of the shaped pieces about an inch apart on the prepared pan. Cover loosely with plastic wrap. Let the pan sit at room temperature for about 20 minutes.

8. Check to see if the bagels are ready to be retarded in the refrigerator by using the ‘float test.” Fill a small bowl with cool or room-temperature water. The bagels are ready to be retarded when they float within 10 seconds of being dropped into the water. Take one bagel and test it. If it floats immediately return the tester bagel to the pan, pat it dry, cover the pan, and place it in the refrigerator overnight (it can stay in the refrigerator for up to 2 days). If the bagel does not float, return it to the pan and continue to proof the dough at room temperature, checking back every 10 to 20 minutes or so until a tester floats. The time needed to accomplish the float will vary, depending on the ambient temperature and the stiffness of the dough.

9. The following day (or when you are ready to bake the bagels), adjust the rack to the middle position and preheat the oven to 450 degrees. Bring a large pot of water to a boil (the wider the pot the better). Have a slotted spoon or skimmer nearby. Line a baking sheet with parchment paper.

10. Remove the bagels from the refrigerator and gently drop them into the water, boiling only as many as comfortably fit (they should float within 10 seconds). Stir and submerge bagels with Chinese skimmer or slotted spoon until very slightly puffed, 30 to 35 seconds. Remove rings from water; transfer to wire rack, bottom side down, to drain.

11. Transfer boiled rings, rough side down, to parchment paper-lined baking sheet. Bake until deep golden brown and crisp, about 12 minutes.

12. Remove the pans from the oven and let the bagels cool on a rack for 10-15 minutes before serving.

72.jpg

whole wheat pasta with greens, beans, tomatoes, and garlic chips

copy-of-dscn4711.jpg

Dave recently told me that he’d prefer to eat less meat. Because I do all of the meal planning and cooking, we generally have an understanding that I get control over what we eat. On the other hand, Dave is so open-minded about what we eat that it’s fair for him to offer up some opinions.

And our meat intake has increased in the last few months. We used to eat meat around 1-3 times per week, and lately we’ve been eating vegetarian around 1-3 times per week. Because I have more free time lately, I’ve been more adventurous with my cooking, and because I don’t have as much experience cooking with meat, it’s more challenging for me. (In other words, I’m not very good at it.)

But Dave’s right, we should eat less meat. For our health, for our budget, for the environment.

This recipe for whole wheat pasta with greens, beans, tomatoes, and garlic chips is definitely Dave’s type of meal.

copy-of-dscn4709.jpg

This is only a quarter of the kale the recipe calls for, or just under one serving. (I cut the recipe in half, and accidentally only bought half as much kale as I needed.) Hey, he asked for more vegetables…

The pasta, wholesome though it is, is surprisingly flavorful. A dish like this lends itself well to personalization. I left out the olives, because they’re one of Dave’s few food hang-ups. Because I only made half the recipe for the two of us, I’m left with half a can of beans and half a can of tomatoes leftover. I plan on doubling those ingredients in the future so I can use the whole can. I only used half the amount of kale the recipe calls for, which was convenient because it was one bunch. I could see how more would be good, although I don’t know if I’d want twice as much.

The recipe did take longer to prepare than I prefer for a weeknight pasta dish. Using bags of pre-washed spinach would cut down on prep time and cooking time. The garlic chips are a nice addition, but could also be skipped to save time.

All in all, this was a great tasting dish with lots of vegetables and no meat, as per Dave’s request.

copy-of-dscn4716.jpg

Whole Wheat Pasta with Greens, Beans, Tomatoes, and Garlic Chips (from Cooks Illustrated November 2005)

Serves 4 to 6

CI note: If you can’t find a 13.25-ounce package of Ronzoni, the winner of our tasting, use ¾ pound of a whole wheat pasta of your choice. If you like, pass extra-virgin olive oil for drizzling over the finished pasta. For a vegetarian dish, substitute vegetable broth for chicken broth.

Variation: Spinach can be substituted for the greens. Replace kale or collards with two 10-ounce bags of crinkly-leaf spinach, trimmed, chopped into 1-inch pieces, and rinsed, water still clinging to leaves (about 16 cups), and reducing chicken broth to ¾ cup. After adding second half of spinach to pan, cook for 2 minutes, until spinach is completely wilted. Continue with recipe as directed.

3 tablespoons olive oil
8 cloves garlic, 5 cloves sliced thin lengthwise, 3 cloves minced or pressed through garlic press (1 tablespoon)
Table salt
1 medium onion, diced small (about 1 cup)
½ teaspoon hot red pepper flakes
14 cups kale (loosely packed) or collard greens (1 to 1½ pounds), thick stems trimmed, leaves chopped into 1-inch pieces and rinsed, water still clinging to leaves
1½ cups low-sodium chicken broth
1 can (14½ ounces) diced tomatoes, drained
1 can (15 ounces) cannellini beans, drained and rinsed
¾ cup pitted kalamata olives, roughly chopped
13¼ ounces whole wheat spaghetti
2 ounces Parmesan cheese, finely grated (about 1 cup), plus additional for serving
Ground black pepper

1. Heat oil and sliced garlic in 12-inch straight-sided sauté pan over medium-high heat. Cook, stirring and turning frequently, until light golden brown, about 3 minutes. Using slotted spoon, transfer garlic to plate lined with paper towels. Sprinkle lightly with salt.

2. Add onion to pan; cook until starting to brown, about 5 minutes. Add minced garlic and red pepper flakes; cook, stirring constantly, until garlic is fragrant, about 30 seconds.

3. Add half of greens to pan; using tongs, toss occasionally, until starting to wilt, about 2 minutes. Add remaining greens, broth, and ¾ teaspoon salt; cover (pan will be very full); increase heat to high and bring to strong simmer. Reduce heat to medium and cook, covered, tossing occasionally, until greens are tender, about 15 minutes (mixture will be somewhat soupy). Stir in beans and olives.

4. Meanwhile, bring 4 quarts water to boil in Dutch oven over high heat. Add spaghetti and 1 tablespoon salt; cook until pasta is just shy of al dente. Drain pasta and return to pot. Add greens mixture to pasta, set over medium-high heat, and toss to combine. Cook until pasta absorbs most of liquid, about 2 minutes. Stir in 1 cup Parmesan; adjust seasoning with salt and pepper. Serve immediately, passing garlic chips, extra-virgin olive oil, and Parmesan separately.

chocolate sandwich cookies

copy-of-dscn4429.jpg

I made these cookies without knowing what I was getting into. Based on the picture, I thought they’d be a rich, soft chocolate cookie topped with sweet vanilla icing. I didn’t bother reading the part of the description specifically referring to them as “crisp” until it was too late and I was committed.

So, they’re crisp cocoa-flavored cookies with vanilla icing. They’re Oreos. I don’t dislike Oreos, but I don’t think they’re worth making at home.

Especially with Martha Stewart’s recipe. She’s nitpicky. The recipe instructs that the dough should be flattened, chilled, rolled out, chilled, cut, chilled, and finally baked. Wow. I skipped all that. I rolled the dough into a cylinder and put it in the freezer until I was ready to bake it (which was two months later). Then I cut off slices.

Martha’s method would definitely produce more perfectly-shaped cookies. Mine weren’t nearly as uniformly round. But I’m happy with the easier method.

copy-of-dscn4432.jpg

I underbaked the cookies slightly in the hopes that they’d end up more chewy than crisp. They were softer, which was nice, but they were overwhelmingly cocoa-flavored. My kitchen smelled like a nice cup of hot cocoa when the cookies came out of the oven. Not a bad smell, but I was hoping for a deeper chocolate flavor.

So what do I do with a batch of cookies that I’m not impressed with? I make an oreo-cookie crust.

copy-of-dscn4439.jpg

Mmm…chocolate pie…I definitely enjoyed these cookies, in their proper place!

Chocolate Wafer Sandwich Cookies (from Martha Stewart’s Baking Handbook)

Makes about 2 dozen sandwich cookies

MS note: These crisp cookies can be sandwiched with Vanilla Cream Filling, freshly whipped cream, or your favorite ice cream.

Bridget note: If you’re not picky about your cookies being perfectly round, you can skip the rolling, chilling, and cutting, and simply roll the dough into a cylinder of 1½ inch diameter, wrap it in parchment paper, and freeze until firm, about 30 minutes. When you’re ready to bake, remove dough log from wrapping and, using sharp chef’s knife, slice dough into rounds 1/8 inch thick.

1¼ cups (6¼ ounces) all-purpose flour, plus more for dusting
¼ cup plus 2 (1 1/8 ounces) tablespoons Dutch-process cocoa powder
½ teaspoon baking powder
½ teaspoon baking soda
¼ teaspoon salt
1 stick (½ cup) unsalted butter, room temperature
2/3 cup (4 2/3 ounces) packed light-brown sugar
1/3 cup (2 1/3 ounces) granulated sugar
1 large egg
1 teaspoon pure vanilla extract
Vanilla Cream Filling (recipe follows)

Line two large baking sheets with parchment paper; set aside. In a large bowl, whisk together flour, cocoa, baking powder, baking soda, and salt; set aside. In the bowl of an electric mixer fitted with the paddle attachment, beat the butter and both sugars on medium sped until light and fluffy, 2 to 3 minutes. Add the egg and vanilla; beat to combine. With mixer on low speed, add flour mixture, and beat to combine, scraping down the sides of the bowl as needed.

Turn out the dough onto a piece of plastic wrap, and divide in half. With floured hands, shape each piece into a flattened rectangle, wrap with plastic wrap, and refrigerate until firm, about 30 minutes.

Place one rectangle of dough on a lightly floured work surface. Roll out dough to a scant 1/8-inch thickness, stopping every so often to release the dough by running an offset spatula underneath. You should end up with a rectangle that’s about 14 by 11 inches. Transfer dough to a prepared baking sheet, and freeze until very firm, about 30 minutes. Repeat with remaining dough.

Preheat the oven to 350 degrees. Place one rectangle of dough on a clean work surface. Working quickly, cut out rounds using a 2-inch cookie cutter. (If the dough begins to soften too much, return to the freezer for a few minutes.) Using a wide metal spatula, transfer rounds to a parchment-lined baking sheets, about 1½ inches apart. Gather together remaining scraps, reroll, and cut out more rounds. Freeze until firm, about 15 minutes. Repeat with the remaining rectangle of dough.

Bake, rotating sheets halfway through, until the centers of the cookies feel firm when lightly pressed, 12 to 14 minutes. Transfer to a wire rack to cool completely.

Using an offset spatula, spread 1 tablespoon desired filling onto the flat sides of half the cookies. Sandwich with remaining cookies, keeping the flat sides down. Unfilled cookies can be kept in an airtight container at room temperature for up to 1 week. Once filled, cookies are best eaten the day they are made, but they can be kept in an airtight container in the refrigerator for up to 3 days.

Vanilla Cream Filling

Makes enough to fill 2 dozen sandwich cookies

Bridget note: I used all butter in my filling, because butter is good.

1 1/3 (5 1/3 ounces) confectioners’ sugar
1/3 cup vegetable shortening
1/3 cup (5 1/3 tablespoons) unsalted butter, room temperature
½ teaspoon pure vanilla extract
pinch of salt

In the bowl of an electric mixer fitted with the paddle attachment, combine all ingredients. Beat on medium-high speed until fluffy and light, 3 to 4 minutes. Use immediately or refrigerate in an airtight container for up to 3 days. Let soften at room temperature before using.

copy-of-dscn4417.jpg

chocolate cream pie

copy-of-dscn4482.jpg

After weeks of pound cakes, I’d had enough of vanilla-flavored desserts. I was in the mood for chocolate! And I wanted to make a chocolate pie, which I had never done before. I wanted something rich and intensely chocolately. I had 6 ounces of unsweetened chocolate, 4 ounces of bittersweet chocolate, and cocoa. (Fun fact: so far, about 10% of the words in this blog post are “chocolate.”) My dairy options were also limited.

Chocolate Mousse Pie is exactly what I was in the mood for, but it didn’t fit my ingredient limitations. (I’m stubborn about extra trips to the grocery store.) I had to settle for Chocolate Cream Pie.

Chocolate cream pie is just pudding in a pie crust. I was starting to get disappointed that I wasn’t going to end up with a dessert as rich as I had originally intended.

copy-of-dscn4459.jpg

I needn’t have worried. This chocolate pie was plenty rich and chocolatey and delicious. See how I’ve nicely spread the filling into the pie shell here? Okay, now look at the edges, and you can see where I took a spoon around the edge of the pie to scoop up some filling. Just to taste, you know? I had to make sure it was edible. I needed several spoonfuls to really make sure.

Oh, it was edible all right. Topped with whipped cream and dusted with cocoa, this definitely fulfilled my chocolate craving.

Chocolate Cream Pie (adapted from epicurious.com and Cooks Illustrated)

8 to 10 servings

Epicurious note: Pie (without topping) can be chilled up to 1 day.

Bridget note: I made the pie on Friday and we finished it on Tuesday, and I didn’t notice any loss of quality over time. I topped each piece with whipped cream as it was served rather than spreading it on the pie. Also, I used 4 ounces semisweet chocolate and 3 ounces unsweetened chocolate, plus 2 teaspoons extra sugar.

Chocolate Cookie Crumb Crust
16 Oreo cookies (with filling), broken into rough pieces, about 2½ cups
2 tablespoons unsalted butter, melted and cooled

Chocolate Cream Filling
2/3 cup sugar
¼ cup cornstarch
½ teaspoon salt
4 large egg yolks
3 cups whole milk
5 oz fine-quality bittersweet chocolate (not unsweetened), melted
2 oz unsweetened chocolate, melted
2 tablespoons unsalted butter, softened
1 teaspoon vanilla

Whipped Cream Topping
1 cups heavy cream (cold)
1 tablespoons granulated sugar
½ teaspoon vanilla extract

1. For the Crust: Adjust oven rack to middle position and heat oven to 350 degrees. In bowl of food processor fitted with steel blade, process cookies with 15 one-second pulses, then let machine run until crumbs are uniformly fine, about 15 seconds. (Alternatively, place cookies in large zipper-lock plastic bag and crush with rolling pin.) Transfer crumbs to medium bowl, drizzle with butter, and use fingers to combine until butter is evenly distributed.

2. Pour crumbs into 9-inch Pyrex pie plate. Following illustration below, press crumbs evenly onto bottom and up sides of pie plate. Refrigerate lined pie plate 20 minutes to firm crumbs, then bake until crumbs are fragrant and set, about 10 minutes. Cool on wire rack while preparing filling.

3. For the filling: Whisk together sugar, cornstarch, salt, and yolks in a 3-quart heavy saucepan until combined well, then add milk in a stream, whisking. Bring to a boil over moderate heat, whisking, then reduce heat and simmer, whisking, 1 minute (filling will be thick).

4. Force filling through a fine-mesh sieve into a bowl, then whisk in chocolates, butter, and vanilla. Cover surface of filling with a plastic wrap and cool completely, about 2 hours.

5. Spoon filling into crust and chill pie, loosely covered, at least 6 hours.

6. For the topping: Just before serving, beat cream, sugar, and vanilla in bowl of standing mixer on low speed until small bubbles form, about 30 seconds. Increase speed to medium; continue beating until beaters leave a trail, about 30 seconds more. Increase speed to high; continue beating until cream is smooth, thick, and nearly doubled in volume and forms soft peaks, about 20 seconds. Spread or pipe whipped cream over chilled pie filling. Cut pie into wedges and serve.

copy-of-dscn4439.jpg

lemon poppy seed muffins

copy-of-dscn4303.jpg

Soon after I started dating Dave, we spent the weekend in his hometown, staying with his best friends (who are now also my best friends). Our hostess made lemon poppy seed muffins one morning for breakfast, and they were fantastic. A few months later, I asked my friend for the recipe, and she couldn’t find it. How does someone lose a recipe? I don’t get it. I have a number of recipe sources (cookbooks and websites), and if I can’t remember which one a recipe came from, I can generally figure it out with a few minutes of searching. Maybe my friend made the muffins from a mix and didn’t want to tell me. I don’t know.

Since then, I’ve tried a number of lemon poppy seed muffin recipes, looking for one that lived up to that memory. I won’t complain about any of them, because it’s an unbeatable combination of flavors, but none were as good as I was hoping for, until this recipe. These are light and tender and lemony without being sour, with a satisfying crunch from the poppy seeds. I’ll be sure not to lose this recipe.

copy-of-dscn4305.jpg

Lemon Poppy Seed Muffins (from Cooks Illustrated January 1997)

Makes 1 dozen large muffins

CI note: Remember, if you’re short on time, you can melt the butter, mix it with the eggs, and stir it into the dry ingredients. When thoroughly mixed, beat in the yogurt and proceed with the recipe.

3 cups unbleached all-purpose flour
1 tablespoon baking powder
½ teaspoon baking soda
3 tablespoons poppy seeds
½ teaspoon table salt
10 tablespoons unsalted butter, softened
1 cup granulated sugar, less 1 tablespoon
1 tablespoon grated lemon zest
2 large eggs
1½ cups plain low-fat yogurt
Vegetable cooking spray or additional unsalted butter for muffin tins
¼ cup granulated sugar
¼ cup lemon juice

1. Adjust oven rack to lower middle position and heat oven to 375 degrees. Mix flour, baking powder, baking soda, poppy seeds, and salt in medium bowl; set aside.

2. Beat butter and sugar with electric mixer on medium-high speed until light and fluffy, about 2 minutes. Add lemon zest to butter-sugar mixture. Add eggs, one at a time, beating well after each addition. Beat in one-half of dry ingredients. Beat in one-third of yogurt. Beat in remaining dry ingredients in two batches, alternating with yogurt, until incorporated.

3. Spray twelve-cup muffin tin with vegetable cooking spray or coat lightly with butter. Use large ice cream scoop to divide batter evenly among cups. Bake until muffins are golden brown, 25 to 30 minutes. Set on wire rack to cool slightly, about 5 minutes. Remove muffins from tin and glaze.

4. For Glaze: While muffins are baking, heat 1/4 cup granulated sugar and lemon juice in small saucepan until sugar dissolves and mixture forms light syrup, 3 to 4 minutes. Brush warm syrup over warm muffins and serve.

sushi

14.jpg

Sometimes I don’t know what gets into me. Last week, I became determined to make my own sushi. But what possible good could this serve? I certainly wasn’t expecting to exceed the quality of the sushi restaurants I’ve been to. I couldn’t, or at least didn’t want to, make it any healthier. And with the specialized tools and ingredients I’d need to buy, homemade sushi promised to be similar in price to eating out. Finally I realized that I wanted to make sushi for the simplest of reasons – for fun.

But I was intimidated. I had difficulty finding precise recipes for sushi rolls. I also wanted to make a variety of rolls with a minimum of ingredients. Not being a spontaneous cook, I did a lot of research and took notes on exactly what I’d need to buy and prepare.

I decided to stick to one fish type (tuna, this time) for four different rolls. I made adapted versions of Philadelphia rolls (fish, cream cheese, cucumber), California rolls (fish, cucumber, avocado), spicy tuna rolls (tuna, avocado, scallion, spicy mayonnaise), and sort of a spider roll (tuna, tempura bits, cucumber), plus a few nigiri.

I settled on Alton Brown’s sushi rice recipe. The rice is cooked similar to standard long-grain rice, except without salt, and then a mixture of rice vinegar, salt, and sugar is poured over the cooked rice and folded in. The rice must be fanned while it cools so that the starches on the surface…something. I can’t remember. Just fan it until it’s near room temperature, and be gentle with stirring. I used a paper plate to fan the rice. If you have an electric fan nearby, that would work great.

2b.jpg

Obviously the fillings must be prepared before any rolling starts. I’m not usually great at mise en place, but I didn’t have a choice this time. This picture shows, clockwise from the upper left, mayonnaise mixed with ancho chile powder, toasted sesame seeds, tempura bits, cucumber, scallion, cream cheese, and avocado. I never did mix in enough chile powder to make the mayonnaise spicy enough, plus I should have used more mayonnaise. For the tempura, I simply mixed up a bit of batter and fried it. I peeled one strip of cucumber and not the other two, and I do prefer it peeled. The avocado I brushed with lemon juice so that it wouldn’t brown.

43.jpg

Alton’s California roll recipe recommends cutting the nori (seaweed) sheets in half. At first I didn’t, which is what this picture shows. However, they should be smaller. You don’t want to spiral your fillings, you just want to enclose them. I found half a sheet to be a little too small for the amount of filling I used, but a full sheet was far too big.

51.jpg

The relatively more simple method of rolling is shown above, where everything, including the rice, is inside the nori. Slightly more complicated is the inside-out roll, where the rice is on the outside.

61.jpg

Except that, it didn’t actually end up being more complicated. I was pleasantly surprised when it actually…worked.

71.jpg

Look at that, a sushi burrito. Mmm…sushi burrito. Unfortunately, sushi isn’t, in fact, eaten in burrito form. It is cut into “bite-size” pieces. Except I don’t know whose bite-size, because sushi rolls are always way too big for me. Anyway, cutting the rolls was the only part of the process that was really frustrating, and I recognize that the problem is my dull knives, but I don’t have an immediate solution. I found that a serrated knife worked better on the inside-out rolls.

8.jpg

…My display needs some work. By this point, I was frustrated with the cutting and worried about the raw fish sitting at room temperature while I figured out how the hell to make sushi. Plus sushi rice? Is sticky. Moving around individual pieces inevitably resulted in rice stuck to my hands and the plate. I decided aesthetics be damned, it was time to eat.

Overall, it was good. Probably as tasty as a restaurant’s, although obviously not nearly as pretty. I’m sure I can improve on that with time, even though I don’t plan on buying any special platters for sushi. I’ll make it again, at least until I use up the ingredients I had to buy. As far as a cost comparison goes, Dave and I generally spend $30-40 on a sushi dinner, and including the special equipment and ingredients that I won’t need to buy again for a while, this meal was $25. Next time I’ll use a cheaper fish, and I can probably make sushi for under $10. The preparation should also be far easier now that I’ve done it once. But I don’t see this becoming a regular thing for me. I think I’ll leave sushi-making to the professionals.

Sushi recipes/method

Serves 2

Sushi rice (adapted from Alton Brown)

1 cup sushi or short grain rice
1 cup water
1 tablespoons rice vinegar
1 tablespoons sugar
½ teaspoon salt

Rinse rice.

Place the rice and water into a medium saucepan and place over high heat. Bring to a boil, uncovered. Once it begins to boil, reduce the heat to the lowest setting and cover. Cook for 15 minutes. Remove from the heat and let stand, covered, for 10 minutes.

Combine the rice vinegar, sugar and salt in a small bowl and heat in the microwave on high for 30 to 45 seconds. Transfer the rice into a large wooden or glass mixing bowl and add the vinegar mixture. Fold and cut thoroughly to combine and coat each grain of rice with the mixture. Fan until rice is near room temperature. Do not refrigerate.

Ingredient preparation

Mix ¼ teaspoon of ancho chile powder into 1 tablespoon mayonnaise
Toast and cool 2 teaspoons sesame seeds
Tempura-mix 1 tablespoon flour, 1 tablespoon ice water, 1 teaspoon egg – cook in hot oil
Seed and peel cucumber and cut 3 ¼-square strips
Cut green part of green onion
Shape ¾ ounce cream cheese into strip
Cut nori in half crosswise (or not…see text)
Peel and pit avocado, cut into 2 strips, brush with lemon juice to prevent browning
Cut fish into strips

Rolling

Fill medium-sized bowl with cold water. Cover bamboo mat with plastic wrap.

Regular rolls:
Lay 1 sheet of nori, shiny side down, on the plastic covered mat. Wet your fingers with water and spread ½ cup of the rice evenly onto the nori, leaving 1 inch of far side bare. Lay filling near edge of mat closest to you. Grab the edge of the mat closest to you, keeping the fillings in place with your fingers, and roll it into a tight cylinder, using the mat to shape the cylinder. Lay it seam side down while you form the other rolls. Cut into 6-8 pieces.

Inside-out rolls:
Lay 1 sheet of nori, shiny side down, on the plastic covered mat. Wet your fingers with water and spread ½ cup of the rice evenly onto the nori. Sprinkle the rice with sesame seeds (optional). Turn the sheet of nori over so that the rice side is down. Lay filling near edge of mat closest to you. Grab the edge of the mat closest to you, keeping the fillings in place with your fingers, and roll it into a tight cylinder, using the mat to shape the cylinder. Lay it seam side down while you form the other rolls. Cut into 6-8 pieces.

Fillings:
“Philadelphia”: cream cheese, fish, cucumber
“California”: fish, avocado, cucumber, sesame seeds
“Spicy tuna”: avocado, fish, mayonnaise (1 tbsp), green onion (1 stalk, green parts only)
“Spider”: fish, cucumber, tempura

(almost) no-knead bread

32.jpg

If it weren’t for Smitten Kitchen, I wouldn’t have known what Cooks Illustrated was referring to in their article about Mark Bittman’s No-Knead Bread recipe that “instantly won over legions of followers”, including Deb. I’ve never made the original recipe, so I can’t attest to Cooks Illustrated’s claim that it sometimes produces “flat, irregular blobs” with a flat-tasting crumb. Their Almost No-Knead Bread recipe aims to solve any problems that were encountered with the original.

I made Cooks Illustrated’s updated version, and I thought it was great. This might be the most attractive loaf of bread I have ever baked. I loved the flavor as well. I thought it had a bit of a sourdough flavor to it, but without the work involved with real sourdough. I also like the open structure of the crumb – I love breads with lots of air bubbles. Another great thing – I estimate that all of the work for the recipe, from getting out ingredients to cleaning up, took a total of about 20 minutes.

22.jpg

One thing I don’t understand about both recipes is why we need a no-knead bread recipe? I don’t know anyone who kneads bread by hand. Most people who are interested enough in food to know about this recipe own Kitchenaid mixers or bread machines that do their bread-kneading for them. I actually mixed up this dough in my Kitchenaid’s mixer bowl and considered letting the mixer stir the dough for me. Leaving the machine on for another 8 minutes while it kneads wouldn’t have been any more work. The No-Knead bread fad would make more sense to me if the bread could be mixed the night before and immediately baked upon getting home from work the next day, but both the original and CI’s revised recipe require about the same amount of babysitting on the day they’re baked as a traditional bread recipe.

On the other hand, if this recipe is popular not for its lack of kneading, but simply because it produces a lovely and tasty loaf of bread, well then I can understand.

13.jpg

Almost No-Knead Bread (from Cooks Illustrated January 2008)

Makes 1 large round loaf

CI note: An enameled cast-iron Dutch oven with a tight-fitting lid yields best results, but the recipe also works in a regular cast-iron Dutch oven or heavy stockpot. (See the related information in “Making Your Dutch Oven Safe for High-Heat Baking” for information on converting Dutch oven handles to work safely in a hot oven.) Use a mild-flavored lager, such as Budweiser (mild non-alcoholic lager also works). The bread is best eaten the day it is baked but can be wrapped in aluminum foil and stored in a cool, dry place for up to 2 days.

3 cups unbleached all-purpose flour (15 ounces), plus additional for dusting work surface
¼ teaspoon instant or rapid-rise yeast
1½ teaspoons table salt
¾ cup plus 2 tablespoons water (7 ounces), at room temperature
¼ cup plus 2 tablespoons mild-flavored lager (3 ounces)
1 tablespoon white vinegar

1. Whisk flour, yeast, and salt in large bowl. Add water, beer, and vinegar. Using rubber spatula, fold mixture, scraping up dry flour from bottom of bowl until shaggy ball forms. Cover bowl with plastic wrap and let sit at room temperature for 8 to 18 hours.

2. Lay 12- by 18-inch sheet of parchment paper inside 10-inch skillet and spray with nonstick cooking spray. Transfer dough to lightly floured work surface and knead 10 to 15 times. Shape dough into ball by pulling edges into middle. Transfer dough, seam-side down, to parchment-lined skillet and spray surface of dough with nonstick cooking spray. Cover loosely with plastic wrap and let rise at room temperature until dough has doubled in size and does not readily spring back when poked with finger, about 2 hours.

3. About 30 minutes before baking, adjust oven rack to lowest position, place 6- to 8-quart heavy-bottomed Dutch oven (with lid) on rack, and heat oven to 500 degrees. Lightly flour top of dough and, using razor blade or sharp knife, make one 6-inch-long, ½-inch-deep slit along top of dough. Carefully remove pot from oven and remove lid. Pick up dough by lifting parchment overhang and lower into pot (let any excess parchment hang over pot edge). Cover pot and place in oven. Reduce oven temperature to 425 degrees and bake covered for 30 minutes. Remove lid and continue to bake until loaf is deep brown and instant-read thermometer inserted into center registers 210 degrees, 20 to 30 minutes longer. Carefully remove bread from pot; transfer to wire rack and cool to room temperature, about 2 hours.

42.jpg

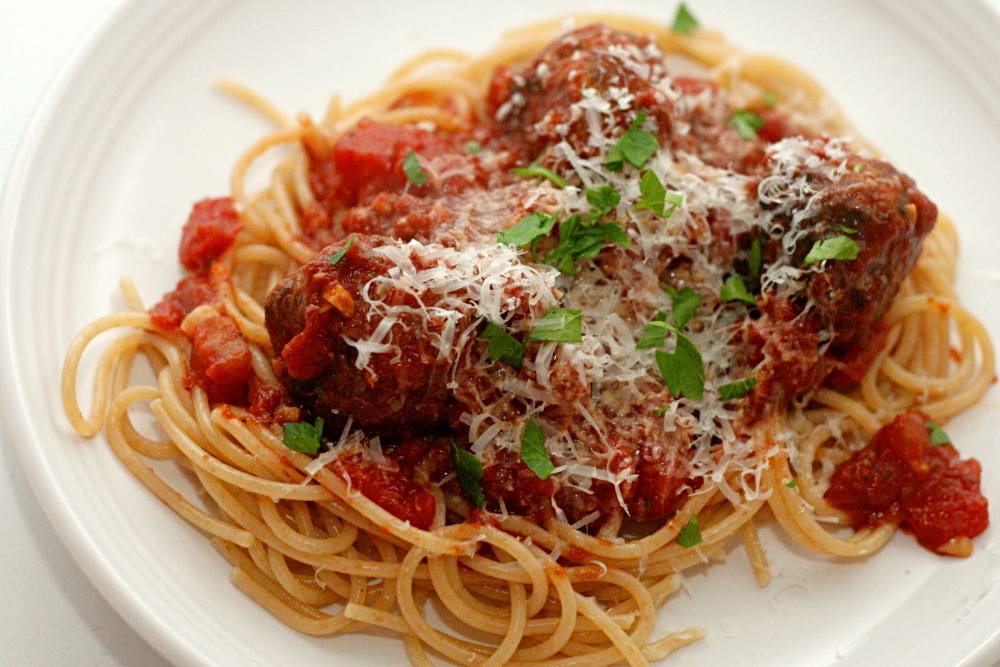
spaghetti and meatballs

I actually made this dish a couple of months ago, but never got around to putting it in my blog. There’s not much to say about it, other than that spaghetti and meatballs are delicious. What’s not to love about pasta, sauce, and dressed-up meat?

copy-of-img_8364Updated photo 11.08.08

Of course, not all spaghetti and meatballs are created equal. But I’ve had my share of meatballs, and I’ve never had any better than these. This dish is a classic that will always please.

Classic Spaghetti and Meatballs (from Cooks Illustrated January 1998)

Serves 4 to 6

CI note: This streamlined recipe can be on the table in under an hour.

Bridget note: I find that recipes almost always call for more pasta per sauce than I prefer. Therefore, I would serve this with 12 ounces pasta instead of the 1 pound that the recipe calls for.

Meatballs
2 slices white sandwich bread (crusts discarded), torn into small cubes
½ cup buttermilk or 6 tablespoons plain yogurt thinned with 2 tablespoons sweet milk
¾ pound ground beef chuck (or 1 pound if omitting ground pork below)
¼ pound ground pork (to be mixed with ground chuck)
¼ cup grated Parmesan cheese
2 tablespoons minced fresh parsley leaves
1 large egg yolk
1 small clove garlic, minced (1 teaspoon)
¾ teaspoon table salt
Ground black pepper
vegetable oil for pan-frying (about 1¼ cups)

Simple Tomato Sauce
2 tablespoons extra-virgin olive oil
1 teaspoon minced garlic
1 can (28 ounces) crushed tomatoes
1 tablespoon minced fresh basil leaves
Table salt and ground black pepper
1 pound spaghetti
grated Parmesan cheese
1. For the meatballs: Combine bread and buttermilk in small bowl, mashing occasionally with fork, until smooth paste forms, about 10 minutes.

2. Mix all meatball ingredients, including bread mixture and pepper to taste in medium bowl. Lightly form 3 tablespoons of mixture into 1½-inch round meatballs; repeat with remaining mixture to form approximately 14 meatballs. (Compacting them can make the meatballs dense and hard. Can be placed on large plate, covered loosely with plastic wrap, and refrigerated for several hours.)

3. Bring 4 quarts of water to boil in large pot for cooking pasta.

4. Meanwhile, heat ¼-inch vegetable oil over medium-high heat in 10- or 11-inch sauté pan. When edge of meatball dipped in oil sizzles, add meatballs in single layer. Fry, turning several times, until nicely browned on all sides, about 10 minutes, regulating heat as needed to keep oil sizzling but not smoking. Transfer browned meatballs to paper towel–lined plate; set aside. Repeat, if necessary, with remaining meatballs.

5. For the sauce, discard oil in pan, leaving behind any browned bits. Add olive oil along with garlic; sauté, scraping up any browned bits, just until garlic is golden, about 30 seconds. Add tomatoes, bring to boil, and simmer gently until sauce thickens, about 10 minutes. Stir in basil; add salt and pepper to taste. Add meatballs and simmer, turning them occasionally, until heated through, about 5 minutes. Keep warm over low flame.

6. Meanwhile, add 1 tablespoon salt and pasta to boiling water. Cook until al dente, drain, and return to pot. Ladle several large spoonfuls of tomato sauce (without meatballs) over spaghetti and toss until noodles are well coated. Divide pasta among individual bowls and top each with a little more tomato sauce and 2 to 3 meatballs. Serve immediately with grated cheese passed separately.