Archives for April 2008

fluted polenta and ricotta cake (twd)

When Caitlin announced her choice for this week’s TWD recipe, a few of the group members said they were put off by the unusual mix of ingredients, especially for a dessert. But I was excited – I think it’s recipes like this where Dorie’s book really shines. She has a lot of interesting and creative recipes that I’m excited to make. This cake in particular is worth making for no other reason than to find out what a ricotta polenta cake tastes like.

A few bakers who made their cake early in the week thought it was too sweet, so I reduced the sugar by 33%. There were also a lot of questions about the possibility of substituting a different fruit for the figs that the recipe called for. I was halving the recipe and baking it in tartlet pans, so I used a different fruit (figs, dates, dried cherries, and fresh strawberries) for each pan.

To me, ricotta polenta cake tastes like sweet cornbread. I wish I hadn’t reduced the sugar because I think the extra sugar would have made it seem more like a dessert. Dave and I both liked the strawberry cake the best, although it was a little too moist and delicate since strawberries are so much more wet than dried fruit. I also really enjoyed the dried cherries. The figs were okay too, but I didn’t think the dates contributed much flavor. I would have liked more fruit in the cakes as well.

I have to admit that this wasn’t my favorite dessert, but it was certainly an interesting recipe to try.

Fluted Polenta and Ricotta Cake (from Dorie Greenspan’s Baking: From my Home to Yours)

About 16 moist, plump dried Mission or Kadota figs, stemmed
1 cup medium-grain polenta or yellow cornmeal
½ cup all-purpose flour
1 teaspoon baking powder
1 cup ricotta
1/3 cup tepid water
¾ cup sugar
¾ cup honey (if you’re a real honey lover, use a full-flavored honey such as chestnut, pine, or buckwheat)
Grated zest of 1 lemon
2 large eggs
8 tablespoons butter, melted and cooled, plus 1 tablespoon, cut into bits and chilled

Getting Ready: Center a rack in the oven and preheat the oven to 325 degrees F. Butter a 10½-inch fluted tart pan with a removable bottom and put it on a baking sheet lined with parchment or a silicone mat.

Check that the figs are, indeed, moist and plump. If they are the least bit hard, toss them into a small pan of boiling water and steep for a minute, then drain and pat dry. If the figs are large (bigger than a bite), snip them in half.

Whisk the polenta, flour, baking powder, and salt together.

Working with a stand mixer fitted with the whisk attachment or with a hand mixer in a large bowl, beat the ricotta and water together on low speed until very smooth. With the mixer at medium speed, add the sugar, honey, and lemon zest and beat until light. Beat in the melted butter, then add the eggs one at a time, beating until the mixture is smooth. Reduce the mixer speed to low and add the dry ingredients, mixing only until they are fully incorporated. You’ll have a sleek, smooth, pourable batter.

Pour about one third of the batter into the pan and scatter over the figs. Pour in the rest of the batter, smooth the top with a rubber spatula, if necessary, and dot the batter evenly with the chilled bits of butter.

Bake for 35 to 40 minutes, or until a thin knife inserted into the center of the cake comes out clean. The cake should be honey brown and pulling away just a little from the sides of the pan, and the butter will have left light-colored circles in the top. Transfer the cake to a rack and remove the sides of the pan after about 5 minutes. Cool to warm, or cool completely.

cheesecake pops (daring bakers april 2008)

My first impression when I saw Elle and Deborah’s choice for this month’s Daring Bakers challenge was that it was going to be a pain in the ass. Then I convinced myself that it wouldn’t be so bad. I figured it would be a valuable recipe to have in my arsenal. It’s transportable, perfectly portioned, visually impressive, okay to sit at room temperature for a few hours, and well-liked. And how hard could it be? Scoop out some cheesecake, poke a stick in it, dunk it in melted chocolate. Easy cheesy.

Uh-huh.

Mixing up the cheesecake batter was as easy as I expected. The flour is an unusual ingredient in cheesecake which I’m assuming is there to stabilize the cake enough to form balls. I ate a lot of batter during this part. I like batter.

But after the batter-eating, things got dicey. I made half the recipe in a pan exactly half the area of the pan the recipe called for. I baked it far longer than the recipe stated and took it out when a normal cheesecake would be done – when an instant read thermometer read 150 degrees and it was a bit jiggly in the center. I let it chill overnight.

The next day, the center was far too liquidy to be formed into balls, although the outer half of the pan was more solid. I found out later that others had this problem as well. They came up with creative solutions such as piping the batter instead of rolling it and keeping the batter frozen. I just ate the too-soft middle portion with a spoon. Yum.

The rolling process was still a mess. It seemed like there was cheesecake everywhere. The dipping went similarly. Far messier than I had planned for.

But the real problem was that the balls weren’t stable outside of the freezer. Because the cake was so soft, the balls would fall right off the stick. Not good.

Tasty though. It’s hard to go wrong with cheesecake.

Cheesecake Pops

Makes 30-40 pops

5 8-oz. packages cream cheese at room temperature
2 cups (14 ounces) sugar
¼ cup (1.25 ounces) all-purpose flour
¼ teaspoon salt
5 large eggs
2 egg yolks
2 teaspoons pure vanilla extract
¼ cup heavy cream

Boiling water as needed

Thirty to forty 8-inch lollipop sticks

1 pound chocolate, finely chopped – you can use all one kind or half and half of dark,
milk, or white (Alternately, you can use 1 pound of flavored coatings, also known
as summer coating, confectionary coating or wafer chocolate – candy supply
stores carry colors, as well as the three kinds of chocolate.)
2 tablespoons vegetable shortening

(Note: White chocolate is harder to use this way, but not impossible)

Assorted decorations such as chopped nuts, colored jimmies, crushed peppermints, mini chocolate chips, sanding sugars, dragees) – Optional

Position oven rack in the middle of the oven and preheat to 325 degrees F. Set some water to boil.

In a large bowl, beat together the cream cheese, sugar, flour, and salt until smooth. If using a mixer, mix on low speed. Add the whole eggs and the egg yolks, one at a time, beating well (but still at low speed) after each addition. Beat in the vanilla and cream.

Grease a 10-inch cake pan (not a springform pan), and pour the batter into the cake pan. Place the pan in a larger roasting pan. Fill the roasting pan with the boiling water until it reaches halfway up the sides of the cake pan. Bake until the cheesecake is firm and slightly golden on top, 35 to 45 minutes.

Remove the cheesecake from the water bath and cool to room temperature. Cover the cheesecake with plastic wrap and refrigerate until very cold, at least 3 hours or up to overnight.

When the cheesecake is cold and very firm, scoop the cheesecake into 2-ounce balls and place on a parchment paper-lined baking sheet. Carefully insert a lollipop stick into each cheesecake ball. Freeze the cheesecake pops, uncovered, until very hard, at least 1 – 2 hours.

When the cheesecake pops are frozen and ready for dipping, prepare the chocolate. In the top of a double boiler, set over simmering water, or in a heatproof bowl set over a pot of simmering water, heat half the chocolate and half the shortening, stirring often, until chocolate is melted and chocolate and shortening are combined. Stir until completely smooth. Do not heat the chocolate too much or your chocolate will lose it’s shine after it has dried. Save the rest of the chocolate and shortening for later dipping, or use another type of chocolate for variety.

Alternately, you can microwave the same amount of chocolate coating pieces on high at 30 second intervals, stirring until smooth.

Quickly dip a frozen cheesecake pop in the melted chocolate, swirling quickly to coat it completely. Shake off any excess into the melted chocolate. If you like, you can now roll the pops quickly in optional decorations. You can also drizzle them with a contrasting color of melted chocolate (dark chocolate drizzled over milk chocolate or white chocolate over dark chocolate, etc.) Place the pop on a clean parchment paper-lined baking sheet to set. Repeat with remaining pops, melting more chocolate and shortening (or confectionary chocolate pieces) as needed.

Refrigerate the pops for up to 24 hours, until ready to serve.

carrot cake (twd)

I don’t really get carrot cake. I don’t hate it. But what’s the appeal? Vegetables in cake – it just ain’t right. Wouldn’t you rather have a more logical flavoring for cake – chocolate or vanilla or strawberries or butter? If it’s the spices you love, pair them with apples. If it’s the cream cheese frosting, spread it on chocolate cake. But don’t put vegetables in my dessert. It just ain’t right.

So I can’t say I was ecstatic to see Amanda’s choice for this week’s TWD recipe. Plus, while I usually enjoy the creativity that comes from having someone else choose a recipe for me, it’s a problem when I already have a similar recipe picked out to try. I’ve had my eye on Cooks Illustrated’s carrot cake recipe for years, I guess with the idea that if anyone could make me love carrot cake, it would be CI.

I thought I could kill two birds with one stone – I’d make Dorie’s recipe and CI’s, and that way I could compare them. My mom has a recipe she loves, so I threw that into the mix as well. They each call for four eggs, so it would be easy to quarter each recipe. Then I decided that that would still be too much carrot cake, so I got all OCD and decided to use one egg total, but still make all three recipes, so I made one twelfth of each recipe. It was a pain in the ass even with good math skills and a digital scale. I skipped all of the chunky ingredients (coconut, raisins, nuts) in Dorie’s recipe so that the recipes would be more equivalent and comparable.

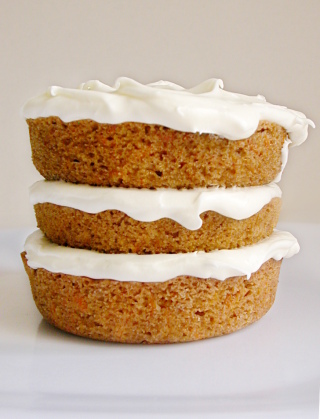
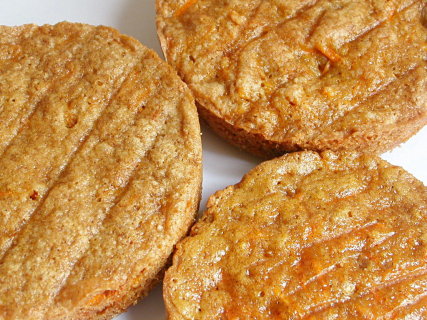
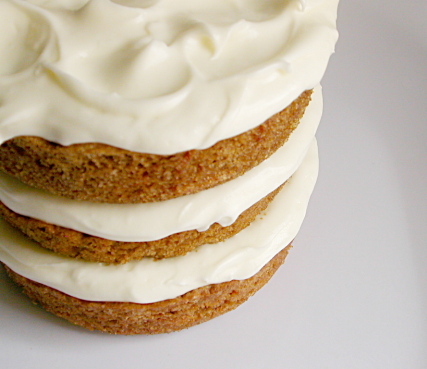
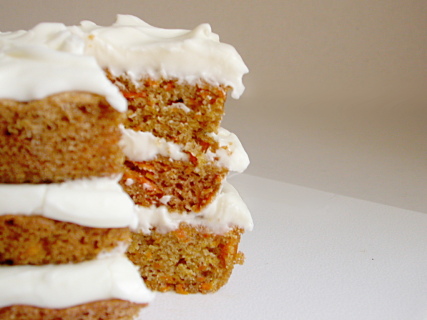
The three recipes weren’t drastically different in their ingredient lists, although the mixing method varied. After baking, Dorie’s and CI’s carrot cakes look very similar, but my mom’s recipe, which was the only one that didn’t call for baking powder, didn’t rise nearly as much. (CI’s is the bottom layer, then my mom’s recipe, then Dorie’s.)

Unfortunately, I can’t give a good comparison of the three cakes. I’ve only had one slice, and the cream cheese frosting pleasantly dominated the taste of the cake. I’ll try harder next time, scraping off the frosting and eating the cake plain. And then finishing dessert off with a spoonful of pure, unadulterated sugary cream cheese frosting.

Update/Comparison: I really didn’t eat much of this cake, so I can’t give a very good comparison.  That being said, I think Dorie’s recipe was my favorite.  My mom’s needs baking powder so it will rise higher.  Cooks Illustrated uses both brown and granulated sugar, and I think using all granulated sugar gave the cake more flavor.  I do like CI’s mixing method though.  Because most of the ingredients are similar, in the future, I’ll probably use CI’s recipe with all granulated sugar.

Bill’s Big Carrot Cake (from Dorie Greenspan’s Baking: From My Home to Yours)

10 servings

For the cake:
2 cups all purpose flour
2 teaspoons baking powder
2 teaspoons baking soda
2 teaspoons ground cinnamon
¾ teaspoon salt
3 cups grated carrots (about 9 carrots, you can grate them in food processor fitted w/ a shredding a blade or use a box grater)
1 cup coarsely chopped walnuts or pecans
1 cup shredded coconut (sweetened or unsweetened)
½ cup moist, plump raisins (dark or golden) or dried cranberries
2 cups sugar
1 cup canola oil
4 large eggs

For the frosting:
8 ounces cream cheese, room temperature
8 tablespoons (1 stick) unsalted butter, at room temperature
1 pound (16 ounces) confectioners’ sugar
1 tablespoon fresh lemon juice or ½ teaspoon pure lemon extract
½ cup shredded coconut (optional)

Finely chopped toasted nuts and/or toasted shredded coconut (optional)

Getting ready: Position the racks to divide the oven into thirds and preheat the oven to 325 degrees Fahrenheit. Butter three 9- by 2-inch round cake pans, flour the insides, and tap out the excess. Put the two pans on one baking sheet and one on another.

To make the cake:
Whisk the flour, baking powder, baking soda, cinnamon and salt. In another bowl, stir together the carrots, chopped nuts, coconut, and raisins.

Working with a stand mixer, preferably fitted with a paddle attachment, or with a hand mixer in a large bowl, beat the sugar and oil together on a medium speed until smooth. Add the eggs one by one and continue to beat until the batter is even smoother. Reduce the speed to low and add the flour mixture, mixing only until the dry ingredients disappear. Gently mix the chunky ingredients. Divide the batter among the baking pans.

Bake for 40-50 minutes, rotating the pans from top to bottom and front to back at the midway point, until a thin knife inserted into the centers comes out clean. The cakes will have just started to come away from the sides of the pans. Transfer the cakes to cooling racks and cool for about 5 minutes, then run a knife around the sides of the cakes and unmold them. Invert and cool to room temperature right side up.

The cakes can be wrapped airtight and kept at room temperature overnight or frozen for up to 2 months.

To make the frosting:
Working with a stand mixer, preferably fitted with a paddle attachment or with a hand mixer in a large bowl, beat the cream cheese and butter together until smooth and creamy. Gradually add the sugar and continue to beat until the frosting is velvety smooth. Beat in the lemon juice or extract.

If you’d like coconut in the filling, scoop about half of the frosting and stir the coconut into this position.

To assemble the cake:
Put one layer top side up on a cardboard cake round or a cake plate protected by strips of wax or parchment paper. If you added the coconut to the frosting, use half of the coconut frosting to generously cover the first layer (or generously cover with plain frosting). Use an offset spatula or a spoon to smooth the frosting all the way to the edges of the layer. Top with the second layer, this time placing the cake stop side down, and frost with the remainder of the coconut frosting or plain frosting. Top with the last layer, right side up, and frost the top- and the sides- of the cake. Finish the top with swirls of frosting. If you want to top the cake with toasted nuts or coconut, sprinkle them on now while the frosting is soft.

Refrigerate the cake for 30 minutes, just to set the frosting before serving.

Serving: This cake can be served as soon as the frosting is set. It can also wait, at room temperature and covered with a cake keeper overnight. The cake is best served in thick slices at room temperature and while it’s good plain, it’s even better with vanilla ice cream or some lemon curd.

Storing: The cake will keep at room temperature for 2 to 3 days. It can also be frozen. Freeze it uncovered, then when it’s firm, wrap airtight and freeze for up to 2 months. Defrost, still wrapped, overnight in the refrigerator.

Simple Carrot Cake with Cream Cheese Frosting (from Cooks Illustrated’s The New Best Recipe)

2½ cups unbleached all-purpose flour
1¼ teaspoons baking powder
1 teaspoon baking soda
1¼ teaspoons ground cinnamon
½ teaspoon ground nutmeg
1/8 teaspoon gound cloves
½ teaspoon salt
1 pound (6-7 medium) carrots, peeled
1½ cups granulated sugar
½ cup packed light brown sugar
4 large eggs
1½ cups safflower, canola or vegetable oil

Cream cheese frosting

8 ounces cream cheese, softened but still cool
5 tablespoons unsalted butter, softened but still cool
1 tablespoon sour cream
½ teaspoon vanilla extract
1¼ cups confectioners’ sugar

For the cake:

1. Adjust an oven rack to the middle position and heat the oven to 350 degrees. Spray a 13 by 9-inch baking pan with nonstick cooking spray. Line the bottom of the pan with parchment and spray the parchment.

2. Whisk together the flour, baking powder, baking soda, cinnamon, nutmeg, cloves and salt in a large bowl; set aside.

3. In a food processor fitted with a large shredding disk, shred the carrots (you should have about 3 cups); transfer the carrots to a bowl and set aside. Wipe out the food processor workbowl and fit with the metal blade. Process the granulated and brown sugars and eggs until frothy and thoroughly combined, about 20 seconds. With the machine running, add the oil through the feed tube in a steady stream. Process until the mixture is light in color and well emulsified, about 20 seconds longer. Scrape the mixture into a medium bowl. Stir in the carrots and the dry ingredients until incorporated and no streaks of flour remain. If you like nuts in your cake, stir 1½ cups toasted chopped pecans or walnuts into the batter along with the carrots. Raisins are also a good addition; 1 cup can be added along with the carrots. If you add both nuts and raisins, the cake will need and additional 10 to 12 minutes in the oven. Pour into the prepared pan and bake until a toothpick or skewer inserted into the center of the cake comes out clean, 35 to 40 minutes, rotating the pan halfway through the baking time. cool the cake to room temperature in the pan on a wire rack, about 2 hours.

For the frosting
1. When the cake is cool, process the cream cheese, butter, sour cream, and vanilla in a clean food processor workbowl until combined, about 5 seconds, scraping down the bowl with a rubber spatula as needed. Add the confectioners’ sugar and process until smooth, about 10 seconds.

2. Run a paring knife around the edge of the cake to loosen from the pan. Invert the cake onto a wire rack, peel off the parchment, then invert again onto a serving platter. Using an icing spatula, spread the frosting evenly over the surface of the cake. Cut into squares and serve.

Carrot Cake (from my mom, and I don’t know where she got the recipe)

1½ (10.5 ounces) cup sugar
2 cups (10 ounces) flour
2 teaspoons baking soda
1 teaspoon salt (scant)
2 teaspoons cinnamon
1 cup cooking oil
3 cups (16 ounces) finely grated carrots (raw)
4 whole eggs

Sift dry ingredients into a large mixing bowl making sure they are thoroughly mixed. Add cooking oil and blend. Add eggs ONE at a time and mix (by hand). Stir in carrots. Bake in two deep cake pans sprayed with Pam. Bake at 350 for 30 to 40 minutes until cakes spring back in center or toothpick comes clean. Cool 10-15 minutes. Remove from pans and frost while warm.

Cream cheese frosting:
1 8 ounce package cream cheese (regular, not low or non-fat)
8 tablespoons (1 stick) butter
4½ cups (16 ounces) powdered sugar
1 teaspoons vanilla
1 cup chopped pecans (optional)

Let cheese and butter sit at room temperature for half an hour, then mix thoroughly. Add powdered sugar slowly, alternating with vanilla. Stir in nuts last. Frost and enjoy.

creamy buttermilk coleslaw

It seems that creamy coleslaw has fallen out of favor. I think that if you only like vinegar-based coleslaw, then you’re eating the wrong creamy coleslaws. I didn’t like it before this recipe either. It was always too sweet or too watery or too heavy or too mushy. This recipe is none of that.

One key technique in this recipe is salting the cabbage and letting it set for an hour or so before mixing it with the dressing ingredients. The salt sucks water out of the cabbage so there’s less water to leach into the dressing. The cabbage has to be rinsed after being salted, which seems counterintuitive, but it’s easy to dry off the moisture outside of the cabbage shreds – there’s still less water in the cabbage, which is what will keep you from making a watery slaw.

Large shreds of cabbage keep this looking and feeling like a salad while eliminating any worries of mushiness. For those who think that creamy coleslaws tend to be too heavy, look at the ingredient list below – two thirds of the dressing base is low-fat buttermilk, with just a bit of mayonnaise and sour cream added for body and complexity of flavor.

I never liked creamy coleslaw growing up, and I still don’t usually like it at restaurants. But this recipe, with its creamy but not rich dressing, slight sweetness from the carrots and just half teaspoon of sugar, slight bite from the shallot, and overall balance of flavors is worth trying.

Especially if it’s an opportunity to use a fancy schmany monkey vegetable peeler. How cute is this guy? A friend got it for me, because, one could say, I have a bit of a thing for monkeys. (Or at least one.) And even better – it’s sharp. I love it.

Creamy Buttermilk Coleslaw (from Cooks Illustrated July 2002)

Serves 4

CI note: If you are planning to serve the coleslaw immediately, rinse the salted cabbage in a large bowl of ice water, drain it in a colander, pick out any ice cubes, then pat the cabbage dry before dressing.

Bridget note: The recipe says to salt the cabbage for 1-4 hours, but I’ve had better results when I err on the long side of that range.

1 pound cabbage (about ½ medium head), red or green, shredded fine (6 cups)
table salt
1 medium carrot, shredded on box grater
½ cup buttermilk
2 tablespoons mayonnaise
2 tablespoons sour cream
1 small shallot, minced (about 2 tablespoons)
2 tablespoons minced fresh parsley leaves
½ teaspoon cider vinegar
½ teaspoon granulated sugar
¼ teaspoon Dijon mustard
1/8 teaspoon ground black pepper
1. Toss shredded cabbage and 1 teaspoon salt in colander or large mesh strainer set over medium bowl. Let stand until cabbage wilts, at least 1 hour or up to 4 hours. Rinse cabbage under cold running water. Press, but do not squeeze, to drain; pat dry with paper towels. Place wilted cabbage and carrot in large bowl.

2. Stir buttermilk, mayonnaise, sour cream, shallot, parsley, vinegar, sugar, mustard, ¼ teaspoon salt, and pepper together in small bowl. Pour dressing over cabbage and toss to combine; refrigerate until chilled, about 30 minutes. (Coleslaw can be refrigerated for up to 3 days.)

breakfast strata with sausage, mushrooms, and monterey jack

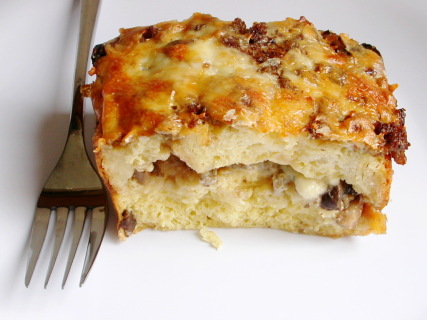
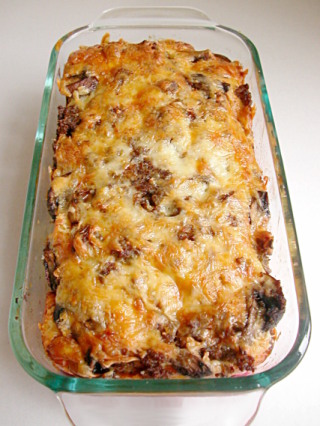
I hear a lot of requests for breakfast casserole recipes. They’re popular for good reason. Waking up to a tasty and filling breakfast that needs nothing more than to be thrown into a hot oven is a great way to start the weekend. I’ve made and loved Deb’s Boozy Baked French Toast, but it’s missing some sort of fruit to round out the nutrition. This sausage and mushroom strata has it all – protein, starch, and vegetables.

I’ve eaten a lot of different breakfast casseroles, and I’ve found that there are some tricks to making a good one. One is to use hearty bread and to dry it out so you don’t have a soggy casserole. You want to replace the moisture that’s naturally in the bread with your own flavored liquids. Also, don’t use so many eggs that they can’t be evenly mixed in and absorbed. I have a recipe for a breakfast casserole that I love the flavors of, but the original recipe calls for so many eggs that I once got a bite of nothing but unmixed egg white while eating it. Finally, of course you need to use a combination of flavors that you love, and adding lots of cheese never hurts.

Casseroles like this are perfect when you have a long day ahead of you and don’t have time to prepare a good breakfast in the morning. I’ve eaten them before skiing, hiking, and moving. They also make a great addition to a brunch menu.

Breakfast Strata with Sausage, Mushrooms, and Monterey Jack (from Cooks Illustrated November 2001)

Makes one 8 by 8-inch strata, serving 6

CI note: To weigh down the assembled strata, we found that two 1-pound boxes of brown or powdered sugar, laid side by side over the plastic-covered surface, make ideal weights. A gallon-sized zipper-lock bag filled with about 2 pounds of sugar or rice also works. This recipe doubles easily; use a 9 by 13-inch baking dish greased with only 1½ tablespoons butter and increase the baking time as directed in step 4. Feel free to substitute any good melting cheese, such as Havarti, sharp cheddar, or colby.

Bridget note: This time when I made this recipe, it ended up a bit too salty. I’m guessing the necessary salt will vary based on the sausage, so start low and add more if necessary. Pictures show a half recipe made in a loaf pan.

8-10 slices supermarket French bread (½-inch thick) or Italian bread (6 – 7 ounces)
3 tablespoons unsalted butter, softened
8 ounces bulk breakfast sausage, crumbled
3 medium shallots, minced (about 1/3 cup)
8 ounces white button mushrooms, cleaned and quartered
Table salt and ground black pepper
½ cup medium-dry white wine, such as Sauvignon Blanc
6 ounces Monterey Jack cheese, grated (about 1½ cups)
6 large eggs
1¾ cups half-and-half
2 tablespoons minced fresh parsley leaves
1. Adjust oven rack to middle position and heat oven to 225 degrees. Arrange bread in single layer on large baking sheet and bake until dry and crisp, about 40 minutes, turning slices over halfway through drying time. (Alternatively, leave slices out overnight to dry.) When cooled, butter slices on one side with 2 tablespoons butter; set aside.

2. Fry sausage in medium nonstick skillet over medium heat, breaking sausage apart with wooden spoon, until sausage has lost raw color and begins to brown, about 4 minutes; add shallots and cook, stirring frequently, until softened and translucent, about 1 minute longer. Add mushrooms to skillet, and cook until mushrooms no longer release liquid, about 6 minutes; transfer mixture to medium bowl and season to taste with salt and pepper. Add wine to skillet, increase heat to medium-high, and simmer until reduced to ¼ cup, 2 to 3 minutes; set aside.

3. Butter 8-inch square baking dish with remaining 1 tablespoon butter; arrange half the buttered bread slices, buttered-side up, in single layer in dish. Sprinkle half of sausage mixture, then ½ cup grated cheese evenly over bread slices. Arrange remaining bread slices in single layer over cheese; sprinkle remaining sausage mixture and another ½ cup cheese evenly over bread. Whisk eggs and parsley in medium bowl until combined; whisk in reduced wine, half-and-half, 1 teaspoon salt, and pepper to taste. Pour egg mixture evenly over bread layers; cover surface flush with plastic wrap, weigh down (see note, above), and refrigerate at least 1 hour or up to overnight.

4. Remove dish from refrigerator and let stand at room temperature 20 minutes. Meanwhile, adjust oven rack to middle position and heat oven to 325 degrees. Uncover strata and sprinkle remaining ½ cup cheese evenly over surface; bake until both edges and center are puffed and edges have pulled away slightly from sides of dish, 50 to 55 minutes (or about 80 minutes for doubled recipe). Cool on wire rack 5 minutes; serve.

marshmallows (twd)

Who knew making marshmallows would be so much fun? Judy chose marshmallows as our TWD recipe this week, and while I didn’t think I’d be excited about eating them, I was interested in making them. And even though I know making marshmallows is common, and I trust Dorie’s recipes, I was surprised when I took my first bite, and it was, well, marshmallowy. Spongy soft, sugary sweet, coated in fine powder.

I was wrong about not being excited about eating them. Topping off of mug of hot cocoa, lightly charred and melted on a s’more, and plain in a pillowy mound are all satisfying methods for munching marshmallows. I’ve had to resist grabbing “just one more” every time I pass them in the kitchen.

And I found them relatively easy to make. Egg whites are whipped, a sugar syrup is made, gelatin is dissolved, and everything is beaten together and allowed to set. For the first time since I joined a blog baking group, problems arose with the recipe that I didn’t have. After months of curdled coffee buttercream, soupy lemon curd, flat party cakes, not-so-gooey gooey chocolate cakes, and a lemon cream that just wouldn’t reach the recommended temperature, my marshmallows whipped up nicely and solidified without separating. There was some confusion over Dorie’s instructions to beat the egg whites until they were “firm but still glossy”, and I almost always underbeat when I see “do not overbeat” in a recipe, and I think the problems people had may be attributed to that.

The rest of us were lucky enough to create pillowy soft sweet treats that are ready for any of your favorite marshmallow applications, or just dissolving pleasantly in your mouth without any accompaniment.

Marshmallows (from Dorie Greenspan’s Baking: From My Home to Yours)

Including marshmallows as a spoon dessert may seem like cheating – after all, they’re eaten with fingers (or, by campers, from sticks picked up in the forest) – but making them at home is too much fun to miss. And in fact this dessert is related to others in this chapter: the base is meringue – sweetened and strengthened by a cooked sugar syrup and fortified by gelatin.

There’s nothing difficult about making the marshmallows, but the meringue does need a long beating. While you can use a hand mixer, a stand mixer makes the job easier.

Makes about 1 pound marshmallows

About 1 cup potato starch (found in the kosher foods section of supermarkets) or cornstarch
2 tablespoons light corn syrup
2 ¼-ounce packets unflavored gelatin
3 large egg whites, at room temperature
¾ cup cold water
1 tablespoon pure vanilla extract
1¼ cups plus 1 tablespoon sugar

GETTING READY: Line a rimmed baking sheet — choose one with a rim that is 1 inch high — with parchment paper and dust the paper generously with potato starch or cornstarch. Have a candy thermometer at hand.

Put 1/3 cup of the water, 1¼ cups of the sugar and the corn syrup in a medium saucepan over medium heat. Bring the mixture to a boil, stirring until the sugar dissolves. Once the sugar is dissolved, continue to cook the syrup — without stirring — until it reaches 265 degrees F on the candy thermometer, about 10 minutes.

While the syrup is cooking, work on the gelatin and egg whites. In a microwave-safe bowl, sprinkle the gelatin over the remaining cold water (a scant 7 tablespoons) and let it sit for about 5 minutes, until it is spongy, then heat the gelatin in a microwave oven for 20 to 30 seconds to liquefy it. (Alternatively, you can dissolve the gelatin in a saucepan over low heat.)

Working in the clean, dry bowl of a stand mixer fitted with the whisk attachment or in another large bowl with a hand mixer, beat the egg whites on medium-high speed until firm but still glossy — don’t overbeat them and have them go dull.

As soon as the syrup reaches 265 degrees F, remove the pan from the heat and, with the mixer on medium speed, add the syrup, pouring it between the spinning beater(s) and the sides of the bowl. Add the gelatin and continue to beat for another 3 minutes, so that the syrup and the gelatin are fully incorporated. Beat in the vanilla.

Using a large rubber spatula, scrape the meringue mixture onto the baking sheet, laying it down close to a short end of the sheet. Then spread it into the corners and continue to spread it out, taking care to keep the height of the batter at 1 inch; you won’t fill the pan. Lift the excess parchment paper up to meet the edge of the batter, then rest something against the paper so that it stays in place (I use custard cups).

Dust the top of the marshmallows with potato starch or cornstarch and let the marshmallows set in a cool, dry place. They’ll need about 3 hours, but they can rest for 12 hours or more.

Once they are cool and set, cut the marshmallows with a pair of scissors or a long thin knife. Whatever you use, you’ll have to rinse and dry it frequently. Have a big bowl with the remaining potato starch or cornstarch at hand and cut the marshmallows as you’d like — into squares, rectangles or even strips (as they’re cut in France). As each piece is cut, drop it into the bowl. When you’ve got 4 or 5 marshmallows in the bowl, reach in with your fingers and turn the marshmallows to coat them with starch, then, one by one, toss the marshmallows from one hand to the other to shake off the excess starch; transfer them to a serving bowl. Cut and coat the rest of the batch.

SERVING: Put the marshmallows out and let everyone nibble as they wish. Sometimes I fill a tall glass vase with the marshmallows and put it in the center of the table — it never fails to make friends smile. You can also top hot chocolate or cold sundaes with the marshmallows.

STORING: Keep the marshmallows in a cool, dry place; don’t cover them closely. Stored in this way, they will keep for about 1 week — they might develop a little crust on the outside or they might get a little firmer on the inside, but they’ll still be very good.

almond biscotti and hazelnut dried cherry biscotti

On one of our first dates, Dave and I drove two hours into Chicago to see one of his favorite musicians perform. It was a great night, one that moved our relationship from “so far, so good…” to “holy smokes this is going well.” At the beginning of every song, Dave would whisper in my ear that this one was his favorite. On the way home, we missed our exit not once, but twice, for which I still tease Dave. Fortunately, he had thought ahead and brought along some almond biscotti from his favorite bakery. It was one of my first times eating biscotti, and certainly the first time I gave it an honest chance.

It was good. I was surprised, always having likened biscotti to sweetened stale bread. But even though I enjoyed it that night, and Dave has asked me to make it several times in the past six years, I’d only bothered to once, and I sent that batch off to a friend. Dave still requested it, and I still said “yeah, of course, when I get around to it.” Deb finally convinced me that it was time with her recently published almond biscotti recipe.

And this recipe was worth getting out of my too-lazy-to-make-biscotti- for-my-boyfriend-then-fiance-then-husband habit. The biscotti are crunchy, but not rock hard. Sweet but not cloying. The almonds are a noticeable and satisfying addition.

The recipe is also adaptable. After the success I had with the almond variety, I wanted to try other flavors. I looked for good biscotti recipes on epicurious, but couldn’t find one that sounded good and had good reviews. So I decided to make the same base recipe I had before, but with different flavorings. I used dried cherries and hazelnuts, and it worked great.

Deb calls this recipe a hole in one, and I have to agree. Tasty, crunchy, straightforward, and adaptable – this recipe has it all.

Almond Biscotti (adapted from Bon Appetit, December 1999, as copied from Smitten Kitchen)

Deb note: They’re supposed to make 3 dozen, but my batch yielded at least 45.

Bridget note: The second time I skipped the egg white wash, and I recommend using it. I also substituted 1 cup of hazelnuts (toasted and chopped) and 1 cup of dried cherries for the almonds, and reduced the orange liqueur by half.  Also, my biscotti tended to be a little browner than I wanted, so I recommend reducing the baking times in the last step to 11 minutes on one side and 7 on the other.

3¼ cups all purpose flour
1 tablespoon baking powder
1/3 teaspoon salt
1½ cups sugar
10 tablespoons (1 ¼ sticks) unsalted butter, melted
3 large eggs
1 tablespoon vanilla extract
1 tablespoon Grand Marnier or orange liqueur
1 tablespoon orange zest
1 cup whole almonds, toasted, coarsely chopped or sliced almonds
1 large egg white

Position rack in center of oven and preheat to 350°F. Line baking sheet with parchment paper. Sift flour, baking powder and salt into medium bowl. Mix sugar, melted butter, 3 eggs, vanilla extract, orange liqueur and zest in large bowl. Add flour mixture to egg mixture and stir with wooden spoon until well blended. Mix in almonds.

Divide dough in half. Using floured hands, shape each dough half into 13½-inch-long, 2 ½-inch-wide log. Transfer both logs to prepared baking sheet, spacing apart. Whisk egg white in small bowl until foamy; brush over top and sides of each dough log.
Bake logs until golden brown (logs will spread), about 30 minutes. Cool logs completely on sheet on rack, about 25 minutes. Maintain oven temperature.

Transfer logs to work surface; discard parchment paper. Using serrated knife, cut logs on diagonal into ½-inch-wide slices. Arrange slices, cut side down, on same baking sheet. Bake 12 minutes. Turn biscotti over; bake until just beginning to color, about 8 minutes. Transfer to rack and cool.

Can be prepared 1 week ahead. Store in airtight container at room temperature.

sichuan green beans

I’m not very good at mise en place. I know that isn’t a sign of a particularly good cook, but I must be getting better lately because the kitchen isn’t so messy when I’m done cooking. I didn’t do a good job with this recipe though. I read “cook beans for 5-8 minutes” and I think Perfect! I’ll have just enough time to mince garlic, chop ginger, get the pork out of the fridge, measure out 3 liquids and 5 powders for the sauce, and slice the scallions! While stirring frequently. Dork.

Sichuan green beans was one of my favorite meals to make when I lived alone, and I still make it fairly often for me and Dave. It’s a quick, easy, balanced, healthy one pot meal. The recipe (according the Cooks Illustrated article) is based on a traditional Chinese meal involving deep-fried green beans. This recipe gets the same effect with just a couple tablespoons of oil over very high heat. The beans are cooked until they’re shriveled and blackened. It sounds like they’d be overcooked and soggy, but I swear they’re not. They’re crisp and sweet. It’s similar to what you get when you roast vegetables.

I did a quick scan on the internet of similar recipes, but I can see immediately that they’re not going to get the same sweet crunchiness out of the green beans. One steams the beans separately, one adds water to the pan to steam/boil them in the pan, one sautés them for a few minutes over medium heat. Bland (and extra work and dishes), boring, raw. No good. The high heat searing is necessary to get the most flavor out of the beans. I tried using Chinese long beans for this recipe once, but I actually didn’t like it as much. Besides costing far more than regular green beans, they weren’t as sweet.

The rest of the recipe is no problem. Cook some ground pork, add garlic and ginger, stir in some sauce ingredients, serve over white rice. You can leave the pork out and add shiitakes instead. This would make a nice side dish, but doesn’t have any protein source for a full meal. Either way, just make sure you do your chopping and measuring before you do your cooking. Otherwise you’ll be scrambling around like a dork, like I was.

Stir-Fried Sichuan Green Beans (from Cooks Illustrated January 2007)

Serves 4 as a side dish or 2 as a main course

CI note: To make this dish vegetarian, substitute 4 ounces of shiitake mushrooms, stemmed and minced, for the pork. If using mushrooms, you will need to add a teaspoon of oil to the pan in step 3 before adding the mushrooms. The cooking of this dish goes very quickly, so be sure to have all of the ingredients prepped before you start. Serve this dish with steamed white rice.

2 tablespoons soy sauce
1 tablespoon dry sherry
1 teaspoon sugar
½ teaspoon cornstarch
¼ teaspoon ground white pepper
¼ teaspoon red pepper flakes
¼ teaspoon dry mustard
2 tablespoons water
2 tablespoons vegetable oil
1 pound green beans, ends trimmed, cut into 2-inch pieces
¼ pound ground pork
3 medium cloves garlic, minced or pressed through a garlic press (about 1 tablespoon)
1 tablespoon minced fresh ginger
3 scallions, white and light green parts sliced thin
1 teaspoon toasted sesame oil

1. In small bowl, stir together soy sauce, sherry, sugar, cornstarch, white pepper, pepper flakes, mustard, and water until sugar dissolves; set aside.

2. Heat oil in 12-inch nonstick skillet over high heat until just smoking. Add beans and cook, stirring frequently, until crisp-tender and skins are shriveled and blackened in spots, 5 to 8 minutes (reduce heat to medium-high if beans darken too quickly). Transfer beans to large plate.

3. Reduce heat to medium-high and add pork to now-empty skillet. Cook, breaking pork into small pieces, until no pink remains, about 2 minutes. Add garlic and ginger; cook, stirring constantly, until fragrant, 15 to 20 seconds. Stir sauce to recombine and return beans to pan with sauce. Toss and cook until sauce is thickened, 5 to 10 seconds. Remove pan from heat and stir in scallions and sesame oil. Serve immediately.

Per Serving:
Cal 200; Fat 14 g; Sat fat 3 g; Chol 20 mg; Carb 12 g; Protein 8 g; Fiber 4 g; Sodium 680 mg

lemon cream tart (twd)

I don’t deal well with lemon desserts. I lose self-control. Lemon tastes so light and fresh that I have trouble wrapping my mind around all the butter that’s usually paired with it. The Extraordinary Lemon Cream Tart that Mary chose for this week’s Tuesdays With Dorie recipe is extreme in the amount of butter called for – just shy of a full pound for a 9-inch tart.

With only Dave to share it with, I had to consider my options concerning this dessert. Unless I planned to serve nothing but salads or do nothing but exercise for several days, I was going to have to find a way to control my lemon tart intake. I decided that I needed tartelette pans so I could cut the recipe in half. Plus tartelette pans are super cute.

One of the fun aspects of being in a group like TWD is the opportunity to troubleshoot recipes. When my gooey chocolate cakes were a bit overcooked the first time I made them, my first thought was that my oven temperature was off, but with 100 other people making the recipe and most having the same problem, it seemed like it was the recipe that was off.

This week the problem that popped up involved the temperature that our lemon mixture was supposed to reach while being stirred over a double boiler. Dorie wanted our mixture to get to 180 degrees, which she said would take about 10 minutes. That seemed accurate for about half of us, but for the other half (myself included), the temperature topped out around 155 degrees and stayed there. In our ongoing discussion of the recipe, it seemed like there might be a correlation between the material of the mixing bowl used and the temperature reached – metal bowls were more likely to reach 180 degrees than glass bowls (although there were a couple outliers). I’m interested in trying the recipe again with a metal bowl instead of the pyrex bowl I used.

But I doubt I’ll be making this again. Not that it wasn’t good, because it was – very good in fact. But there’s just so much butter in it. I don’t generally shy away from rich foods, but they have to be worth it. And with over 600 calories per slice at the serving size that Dorie suggests, this tart has a lot to live up to.

The lemon cream was delicious – smooth with just the right balance of sweet and tart. But lemon curd is delicious too, and it only takes 4 tablespoons to make enough curd for a 9-inch tart, as opposed to 21 tablespoons that this cream needed. I’ll have to settle for rich-but-not-ridiculous lemon curd in the future.

The Most Extraordinary Lemon Cream Tart (from Dorie Greenspan’s From My Home To Yours)

The filling in this tart is everything. It is the lemon cream I learned to make from Pierre Hermé, and it is the ne plus ultra of the lemon world. The tart is basic-a great crust, velvety lemon cream-and profoundly satisfying. It is also profoundly play-aroundable. You can add a fruit topping (circlets of fresh rasp-berries are spectacular with this tart) or a layer of fruit at the bottom; you can finish the tart with meringue; or you can serve it with anything from whipped cream to raspberry coulis.

1 9-inch tart shell made with Sweet Tart Dough, fully baked and cooled
1 cup sugar
Finely grated zest of 3 lemons
4 large eggs
½ cup fresh lemon juice (from 4-5 lemons)
2 sticks plus 5 tablespoons (10½ ounces) unsalted butter, cut into tablespoon-size
pieces, at room temperature

Getting Ready: Have an instant-read thermometer, a strainer and a blender (first choice) or food processor at hand. Bring a few inches of water to a simmer in a saucepan.

Put the sugar and zest in a large heatproof bowl that can be set over the pan of simmering water. Off the heat, rub the sugar and zest together between your fingers until the sugar is moist, grainy and very aromatic. Whisk in the eggs, followed by the lemon juice.

Set the bowl over the pan, and start stirring with the whisk as soon as the mixture feels tepid to the touch. Cook the lemon cream until it reaches 180 degrees F. As you whisk-you must whisk constantly to keep the eggs from scrambling-you’ll see that the cream will start out light and foamy, then the bubbles will get bigger, and then, as it gets closer to 180 degrees F, it will start to thicken and the whisk will leave tracks. Heads up at this point-the tracks mean the cream is almost ready. Don’t stop whisking or checking the temperature, and have patience-depending on how much heat you’re giving the cream, getting to temp can take as long as 10 minutes.

As soon as it reaches 180 degrees F, remove the cream from the heat and strain it into the container of the blender (or food processor); discard the zest. Let the cream stand, stirring occasionally, until it cools to 140 degrees F, about 10 minutes.

Turn the blender to high (or turn on the processor) and, with the machine going, add the butter about 5 pieces at a time. Scrape down the sides of the container as needed as you incorporate the butter. Once the butter is in, keep the machine going-to get the perfect light, airy texture of lemon-cream dreams, you must continue to blend the cream for another 3 minutes. If your machine protests and gets a bit too hot, work in 1-minute intervals, giving the machine a little rest between beats.

Pour the cream into a container, press a piece of plastic wrap against the surface to create an airtight seal and refrigerate for at least 4 hours or overnight. (The cream will keep in the fridge for 4 days and, or tightly sealed, in the freezer for up to 2 months; thaw it overnight in the refrigerator.)

When you are ready to assemble the tart, just whisk the cream to loosen it and spoon it into the tart shell. Serve the tart, or refrigerate ‘until needed.

Serving: It’s a particular pleasure to have this tart when the cream is cold and the crust is at room temperature. A raspberry or other fruit coulis is nice, but not necessary; so is a little crème fraîche. I know it sounds odd to offer something as rich as crème fraîche with a tart like this, but it works because the lemon cream is so light and so intensely citric, it doesn’t taste or feel rich.

Storing: While you can make the lemon cream ahead, once the tart is constructed, it’s best to eat it the day it is made.

Sweet Tart Dough:
Makes enough for one 9-inch crust

Storing: Well wrapped, the dough can be kept in the refrigerator for up to 5 days or frozen for up to 2 months. While the fully baked crust can be packed airtight and frozen for up to 2 months, I prefer to freeze the unbaked crust in the pan and bake it directly from the freezer-it has a fresher flavor. Just add about 5 minutes to the baking time.

In French, this dough is called pâte sablée because it is buttery, tender and sandy (that’s what sablée means). It’s much like shortbread, and it’s ideal for filling with fruit, custard or chocolate.

The simplest way to make a tart shell with this dough is to press it into the pan. You can roll out the dough, but the high proportion of butter to flour and the inclusion of confectioners’ sugar makes it finicky to roll. I always press it into the pan, but if you want to roll it, I suggest you do so between sheets of plastic wrap or wax paper or inside a rolling slipcover.

1½ cups all-purpose flour
½ cup (2 ounces) confectioners’ sugar
¼ teaspoon salt
1 stick plus 1 tablespoon (9 tablespoons) very cold (or frozen) unsalted butter, cut into small pieces
1 large egg yolk

Put the flour, confectioners’ sugar and salt in a food processor and pulse a couple of times to combine. Scatter the pieces of butter over the dry ingredients and pulse until the butter is coarsely cut in-you should have some pieces the size of oatmeal flakes and some the size of peas. Stir the yolk, just to break it up, and add it a little at a time, pulsing after each addition. When the egg is in, process in long pulses-about 10 seconds each-until the dough, which will look granular soon after the egg is added, forms clumps and curds. Just before you reach this stage, the sound of the machine working the dough will change-heads up. Turn the dough out onto a work surface and, very lightly and sparingly, knead the dough just to incorporate any dry ingredients that might have escaped mixing.

To press the dough into the pan: Butter a 9-inch fluted tart pan with a removable bottom. Press the dough evenly over the bottom and up the sides of the pan, using all but one little piece of dough, which you should save in the refrigerator to patch any cracks after the crust is baked. Don’t be too heavy-handed-press the crust in so that the edges of the pieces cling to one another, but not so hard that the crust loses its crumbly texture. Freeze the crust for at least 30 minutes, preferably longer, before baking.

Center a rack in the oven and preheat the oven to 375 degrees F.

Butter the shiny side of a piece of aluminum foil and fit the foil, buttered side down, tightly against the crust. (Since you froze the crust, you can bake it without weights.) Put the tart pan on a baking sheet and bake the crust for 25 minutes. Carefully remove the foil. If the crust has puffed, press it down gently with the back of a spoon.

Bake for another 8 minutes or so, or until it is firm and golden brown. (I dislike lightly baked crusts, so I often keep the crust in the oven just a little longer. If you do that, just make sure to keep a close eye on the crust’s progress-it can go from golden to way too dark in a flash.) Transfer the tart pan to a rack and cool the crust to room temperature before filling.

To patch a partially or fully baked crust, if necessary: If there are any cracks in the baked crust, patch them with some of the reserved raw dough as soon as you remove the foil. Slice off a thin piece of the dough, place it over the crack, moisten the edges and very gently smooth the edges into the baked crust. If the tart will not be baked again with its filling, bake for another 2 minutes or so, just to take the rawness off the patch.

cinnamon rolls

On one of my first trips to meet Dave’s family, his mom mentioned her plan to buy cinnamon rolls from the grocery store, and Dave insisted that I make fantastic cinnamon rolls that she needed to try. We were staying with friends, I didn’t have the recipe or any ingredients or equipment, but I didn’t want to pass up this chance to impress my boyfriend’s parents. I made the cinnamon rolls, and the in-laws were duly impressed. Six years later, my mother-in-law still talks about how good they were.

But I make better cinnamon rolls now. I’ve tried a few recipes and taken my favorite parts of each, and now I can say for certain that this is the best cinnamon roll that I have ever eaten. Dead serious.

Most cinnamon roll recipes are similar. The original recipe I used, the one that Dave’s mom raved about, is one my mother taught me. It’s the dough for country crust bread with softened butter and cinnamon sugar spread over the flattened dough and a simple powdered sugar glaze on top of the baked rolls. I used this recipe for years and can’t complain – it’s damn good.

But that didn’t stop me from trying new things. The next recipe I tried was published in the back of Knit One, Kill Two, a mystery novel about a knitter. I liked that the dough was richer, melted butter was spread over the dough instead of softened, and brown sugar was mixed with cinnamon for the filling instead of granulated. But the frosting in this recipe contained four ounces of cream cheese, and it was way too rich for me.

The next recipe I tried was Cooks Illustrated’s. Their dough is even richer, and the resultant rolls are therefore more tender. They don’t call for any butter in the filling, which I thought made the baked rolls too sticky. Their icing contains a whopping eight ounces of cream cheese, even though they refer to their rolls as “reserved” and “civilized”. Yikes. I also tried their Quick Cinnamon Buns, a recipe for chemically leavened cinnamon rolls. This recipe calls for a small amount of butter to be mixed in with the other filling ingredients. I like this method, as it reduces the amount of filling that spills out of the rolls when they’re rolled and cut, and it eliminates the stickiness I’d disliked in the other recipe without adding as much butter as my first two recipes had called for.

The recipe I currently use is hobbled together from all of these, although most of it comes from Cooks Illustrated. I follow their dough recipe almost exactly. I reduce the cinnamon in their filling recipe a bit because I found that the original amount was so spicy that it reminded me of Red Hots. I add a tablespoon of melted butter to the filling to hold the powder together. Rather than add more butter to an already decadent breakfast, I reduce the butter in the dough to compensate. For the glaze, I’ve gone back to my original powdered sugar and milk combination, with just one tablespoon of cream cheese mixed in to provide some extra flavor.

Like most bread recipes, cinnamon rolls require kneading, rising, shaping, proofing, baking, and cooling before they can be eaten. No one wants to wait for all this to happen before they can eat breakfast. Take heart – you can do everything up until the baking the night before. After the rolls are shaped and cut, put the pan in the refrigerator. In the morning, the rolls will need to warm up and they may need a bit more time to rise. You can speed this up by doing it in a warm oven. Heat your oven to its “warm” setting, then turn it off and put the rolls in the oven. They should be warm and ready to bake in half and hour or so. With minimal waiting time and almost no work at all, you can have a fantastic treat for breakfast.

Update 3/16/10: I’ve successfully used this method to make these cinnamon rolls whole wheat.  I made the pre-dough out of 10 ounces whole wheat flour, ½ teaspoon salt, and 7/8 cup (1 cup minus 2 tablespoons) water.  After letting that sit overnight, I mixed it with the rest of the ingredients – 2 tablespoons milk, 7 tablespoons unsalted butter, 2¼ teaspoons yeast, ¼ cup sugar, 1 egg and 2 yolks, 1 teaspoon salt, and about 10 ounces flour.

Cinnamon Rolls (adapted from Cooks Illustrated’s The New Best Recipe)

This was the first time I’ve used dental floss to cut the rolled and filled dough into rolls. It worked wonderfully, but a serrated knife will get the job done as well.

The pictures are showing a half recipe.

Dough:
½ cup milk
7 tablespoons unsalted butter
½ cup warm water (about 110 degrees)
1 envelope (2¼ teaspoons) yeast
¼ cup (1¾ ounce) sugar
1 large egg, plus 2 large egg yolks
1½ teaspoons salt
4-4 ½ cups (20 to 21¼ ounces) unbleached all-purpose flour, plus more for dusting the work surface

Filling:
¾ cup packed (5¼ ounces) light brown sugar
2 tablespoons ground cinnamon
1/8 teaspoon salt
1 tablespoon melted butter

Glaze:
1 cup (4 ounces) confectioners sugar, sifted to remove lumps
1 ounce cream cheese, softened
½ teaspoon vanilla extract
1-2 tablespoons milk

1. Heat the milk and butter in a small saucepan or in the microwave until the butter melts. Remove the pan from the heat and set aside until the mixture is lukewarm (about 100 degrees).

2. In the bowl of a standing mixer fitted with the paddle, mix together the water, yeast, sugar, egg, and yolks at low speed until well mixed. Add the salt, warm milk mixture, and 2 cups of the flour and mix at medium speed until thoroughly blended, about 1 minute. Switch to the dough hook, add another 2 cups of the flour, and knead at medium speed (adding up to ¼ cup more flour, 1 tablespoon at a time, if necessary) until the dough is smooth and freely clears the sides of the bowl, about 10 minutes. Shape the dough into a round, place it in a very lightly oiled large bowl, and cover the bowl with plastic wrap. Leave in a warm, draft-free spot until doubled in bulk, 1½ to 2 hours.

3. Mix together the filling ingredients in a small bowl. Grease a 13 by 9-inch baking dish.

4. After the dough has doubled in bulk, press it down and turn it out onto a lightly floured work surface. Using a rolling pin, shape the dough into a 16 by 12-inch rectangle, with a long side facing you. Mix together the filling ingredients in a small bowl and sprinkle the filling evenly over the dough, leaving a ½-inch border at the far edges. Roll the dough, beginning with the long edge closest to you and using both hands to pinch the dough with your fingertips as you roll. Moisten the top border with water and seal the roll. Lightly dust the roll with flour and press on it ends if necessary to make a uniform 16-inch cylinder. Cut the roll in 12 equal pieces and place the rolls cut-side up in the prepared baking dish. Cover with plastic wrap and place in a warm, draft-free spot until doubled in bulk, 1½ to 2 hours.

5. When the rolls are almost fully risen, adjust an oven rack to the middle position and heat the oven to 350 degrees. Bake the rolls until golden brown and an instant-read thermometer inserted into the center of one reads 185 to 188 degrees, 25 to 30 minutes. Cool for 10 minutes. Meanwhile, stir the glaze ingredients together until smooth. Glaze the rolls and serve.