Archives for September 2008

creme brulee (twd)

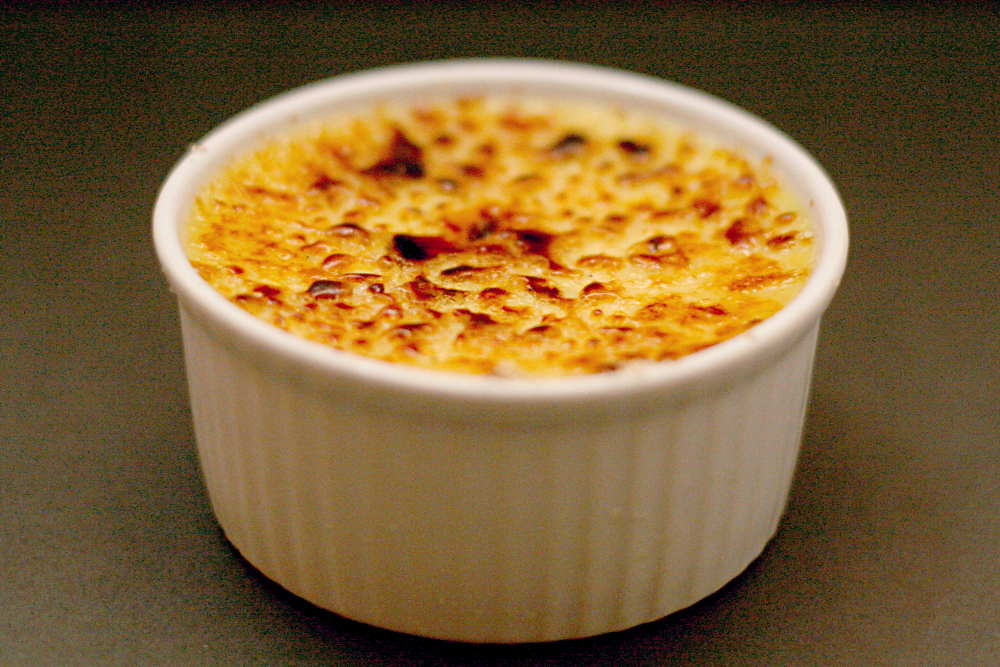
I love Dorie’s creative recipes, but I tend to turn to Cooks Illustrated for classics. So when I saw that Mari had chosen crème brulee for TWD, my first thought was to compare the two. But I’ve already compared Dorie and CI’s recipes a couple times, so instead, I decided I would play with some of the different flavors Dorie recommends.

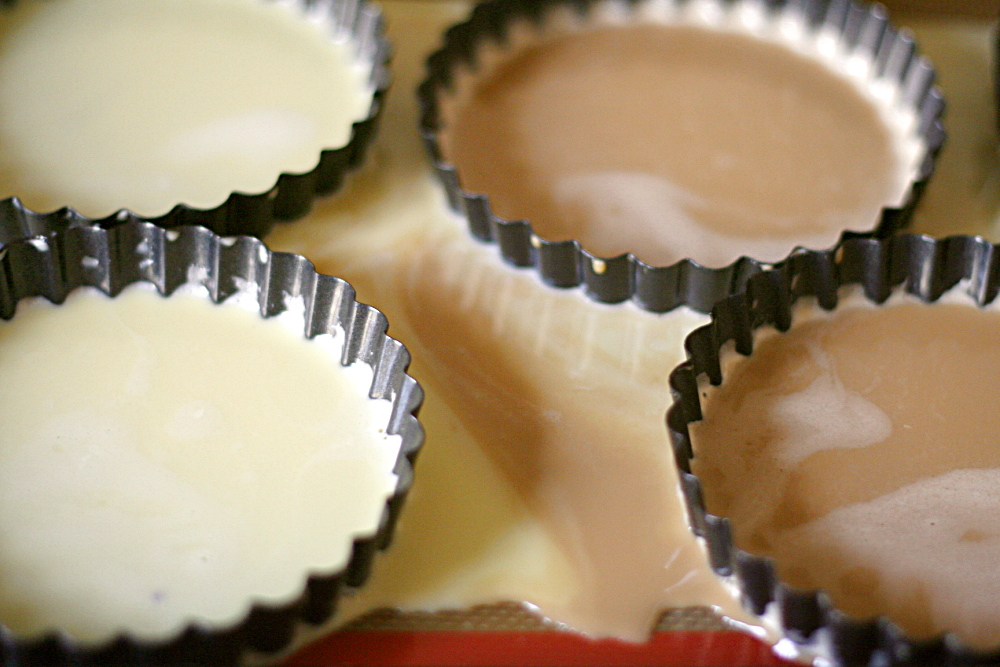
I made vanilla, Earl Grey, and ginger variations. I thought I could combine some of the steps for the variations, but that didn’t work out, so it was really like making the recipe three separate times. I didn’t have enough of the right sized ramekins, so I put the custard mixes in mini-tart pans instead. I was worried that the custard would leak because the tart pans have removable bottoms, but it worked out okay. Until I dropped the baking pan with the six full tartelette pans on it and everything spilled. Being clumsy is a pain in the ass.

Frustrated with that, I went back to my original plan to compare Dorie’s recipe to CI’s. (My freezer is full of egg whites now.) I was curious about this comparison anyway, because the recipes were significantly different. Dorie uses almost half the number of egg yolks compared to the amount of dairy, and she also uses a combination of heavy cream and milk instead of just heavy cream. That makes CI’s recipe much richer.

Whoa. Dorie’s also makes tiny servings. I wouldn’t expect that from her.

I assumed we’d like the richer crème brulee better, but Dave and I both preferred Dorie’s softer custard. However, Dave liked the flavor of CI’s better, which may be the pinch of salt added, or the lower amount of sugar used in CI’s, which could bring out the flavor of the other ingredients more. I used vanilla beans instead of vanilla extract in both recipes.

This is my most successful brulee job. (That goes for Dave too – this is the only kitchen task he’s excited about helping with.) I used a mixture of brown sugar and granulated, and in the past I used pure granulated. Apparently the mixture is more forgiving, because I used to end up with a combination of charcoaly burned areas and raw areas.

It’s crème brulee, so you really can’t go wrong. Unless you spill it all over the oven. Check Mari’s blog for Dorie’s recipe.

Classic Creme Brulee (from Cooks Illustrated)

Serves 8

CI note: Separate the eggs and whisk the yolks after the cream has finished steeping; if left to sit, the surface of the yolks will dry and form a film. A vanilla bean gives custard the deepest flavor, but 2 teaspoons of extract, whisked into the yolks in step 4, can be used instead. The best way to judge doneness is with a digital instant-read thermometer. The custards, especially if baked in shallow fluted dishes, will not be deep enough to provide an accurate reading with a dial-face thermometer. For the caramelized sugar crust, we recommend turbinado or Demerara sugar. Regular granulated sugar will work, too, but use only 1 scant teaspoon on each ramekin or 1 teaspoon on each shallow fluted dish.

4 cups heavy cream, chilled
⅔ cup granulated sugar
pinch table salt
1 vanilla bean, halved lengthwise
12 large egg yolks
8 – 12 teaspoons turbinado sugar or Demerara sugar

1. Adjust oven rack to lower-middle position and heat oven to 300 degrees.

2. Combine 2 cups cream, sugar, and salt in medium saucepan; with paring knife, scrape seeds from vanilla bean into pan, submerge pod in cream, and bring mixture to boil over medium heat, stirring occasionally to ensure that sugar dissolves. Take pan off heat and let steep 15 minutes to infuse flavors.

3. Meanwhile, place kitchen towel in bottom of large baking dish or roasting pan and arrange eight 4- to 5-ounce ramekins (or shallow fluted dishes) on towel. Bring kettle or large saucepan of water to boil over high heat.

4. After cream has steeped, stir in remaining 2 cups cream to cool down mixture. Whisk yolks in large bowl until broken up and combined. Whisk about 1 cup cream mixture into yolks until loosened and combined; repeat with another 1 cup cream. Add remaining cream and whisk until evenly colored and thoroughly combined. Strain through fine-mesh strainer into 2-quart measuring cup or pitcher (or clean medium bowl); discard solids in strainer. Pour or ladle mixture into ramekins, dividing it evenly among them.

5. Carefully place baking dish with ramekins on oven rack; pour boiling water into dish, taking care not to splash water into ramekins, until water reaches two-thirds height of ramekins. Bake until centers of custards are just barely set and are no longer sloshy and digital instant-read thermometer inserted in centers registers 170 to 175 degrees, 30 to 35 minutes (25 to 30 minutes for shallow fluted dishes). Begin checking temperature about 5 minutes before recommended time.

6. Transfer ramekins to wire rack; cool to room temperature, about 2 hours. Set ramekins on rimmed baking sheet, cover tightly with plastic wrap, and refrigerate until cold, at least 4 hours or up to 4 days.

7. Uncover ramekins; if condensation has collected on custards, place paper towel on surface to soak up moisture. Sprinkle each with about 1 teaspoon turbinado sugar (1½ teaspoons for shallow fluted dishes); tilt and tap ramekin for even coverage. Ignite torch and caramelize sugar. Refrigerate ramekins, uncovered, to re-chill, 30 to 45 minutes (but no longer); serve.

lavash crackers (daring bakers)

This is the first Daring Baker recipe that has not only been from a cookbook I own, but was a recipe that I had planned to make soon anyway. Since football season started a few weeks ago, I’ve made Sunday into a snack day instead of serving an actual meal, which gives me a chance to play around with appetizer and dip recipes that I normally can’t (healthily) work into our routine.

The recipe itself was pretty simple. This is a rare recipe for Peter Reinhart in that it doesn’t require a pre-ferment, so the recipe can be completed in one day. The dough was easy to work with. I rolled it out right on my silicone baking mat, and then just moved the mat to a baking pan to bake it, so I never had to transfer just the sheet of dough.

I think Reinhart’s directions on rolling out the dough are off. I rolled the dough out to exactly the dimensions he recommends, but my “crackers” ended up far too thick. Reinhart refers to the rolled-out dough as “paper-thin” at one point, and mine certainly wasn’t. In the future, I’ll roll the dough out possibly twice as thin, so they’re more like crackers and less like little toasts.

I cheated on the dip. After I made it, I saw in the rules that we were supposed to make something that was gluten-free and vegan, but my pesto dip is based on goat cheese. But it’s so good! I have no regrets on breaking the rules if I get something so tasty out of it.

This challenge was a fun one – I always enjoy making yeast breads, and as I said, I’d been interested in this recipe for a while. The hosts this month, Natalie and Shel, also give directions for a gluten-free version, which I may try for my gluten-intolerant grandmother next time I see her. I’m always on the lookout for good gluten-free recipes.

Lavash Crackers (from Peter Reinhart’s The Bread Baker’s Apprentice)

Makes 1 sheet pan of crackers

1½ cups (6.75 ounces) unbleached bread flour
½ tsp salt
½ tsp instant yeast
1 tablespoons sugar
1 tablespoon vegetable oil
⅓ to ½ cup + 2 tablespoons (3 to 4 ounces) water, at room temperature
Poppy seeds, sesame seeds, paprika, cumin seeds, caraway seeds, or kosher salt for toppings

1. In a mixing bowl, stir together the flour, salt yeast, sugar, oil, and just enough water to bring everything together into a ball. You may not need the full ½ cup + 2 tablespoons of water, but be prepared to use it all if needed.

2. Sprinkle some flour on the counter and transfer the dough to the counter. Knead for about 10 minutes, or until the ingredients are evenly distributed. The dough should pass the windowpane test and register 77 degrees to 81 degrees Fahrenheit. The dough should be firmer than French bread dough, but not quite as firm as bagel dough (what I call medium-firm dough), satiny to the touch, not tacky, and supple enough to stretch when pulled. Lightly oil a bowl and transfer the dough to the bowl, rolling it around to coat it with oil. Cover the bowl with plastic wrap.

3. Ferment at room temperature for 90 minutes, or until the dough doubles in size. (You can also retard the dough overnight in the refrigerator immediately after kneading or mixing).

4. Mist the counter lightly with spray oil and transfer the dough to the counter. Press the dough into a square with your hand and dust the top of the dough lightly with flour. Roll it out with a rolling pin into a paper thin sheet about 15 inches by 12 inches. You may have to stop from time to time so that the gluten can relax. At these times, lift the dough from the counter and wave it a little, and then lay it back down. Cover it with a towel or plastic wrap while it relaxes. When it is the desired thinness, let the dough relax for 5 minutes. Line a sheet pan with baking parchment. Carefully lift the sheet of dough and lay it on the parchment. If it overlaps the edge of the pan, snip off the excess with scissors.

5. Preheat the oven to 350 degrees Fahrenheit with the oven rack on the middle shelf. Mist the top of the dough with water and sprinkle a covering of seeds or spices on the dough (such as alternating rows of poppy seeds, sesame seeds, paprika, cumin seeds, caraway seeds, kosher or pretzel salt, etc.) Be careful with spices and salt – a little goes a long way. If you want to precut the cracker, use a pizza cutter (rolling blade) and cut diamonds or rectangles in the dough. You do not need to separate the pieces, as they will snap apart after baking. If you want to make shards, bake the sheet of dough without cutting it first.

5. Bake for 15 to 20 minutes, or until the crackers begin to brown evenly across the top (the time will depend on how thinly and evenly you rolled the dough).

6. When the crackers are baked, remove the pan from the oven and let them cool in the pan for about 10 minutes. You can then snap them apart or snap off shards and serve.

Pesto Goat Cheese Spread (from Gourmet September 2002, but really epicurious.com)

4 ounces soft mild goat cheese at room temperature
2 ounces cream cheese at room temperature
¼ cup pesto

Stir together all ingredients with salt and pepper to taste until smooth.

pan-seared steak with red wine pan sauce

I try not to participate in many blog events, since about a third of my entries are already committed to Tuesdays with Dorie and the Daring Bakers. But Elly’s Eat to the Beat is such a great idea, and I thought it could be a fun way to meld my favorite hobby with Dave’s, which is music.

Bustle

Dave learned to play guitar from his uncle, who plays lead guitar in this song. His best friend, Sid Faiwu, does the drums and synthesizer in this song. The three of them played together for years until Dave and Sid both moved away from their home town as well as from each other. Now they try to send around mp3’s of new songs, but that obviously doesn’t work well.

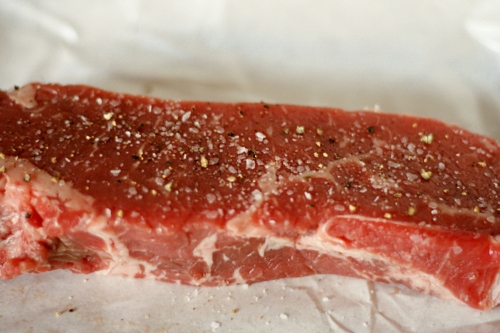
Dave wrote this song, Bustle, in grad school after a particularly stressful test. It’s one of my favorites. The song is very dark, and really not about food in any way. The only line that I could think to apply to food was “dripping red.” Because of the nature of the song, I wanted something that would look as bloody as possible. And what’s bloodier than red wine sauce dripping down animal flesh?

I know I’ve been overdoing the Cooks Illustrated recipes lately, but I can’t seem to stop myself. I turn to their recipes for classics, like this steak with pan sauce. I feel like their recipes are less mass-produced and therefore more carefully developed than a lot of those from the Food Network or epicurious. And I’m generally bad at cooking steak, so I needed as much detail as possible.

The steak came out really well. I only undercooked it a little, and at least I didn’t burn the outside like I often do. The sauce was good as well. I think next time I’ll reduce the sugar by half, but other than that, it was perfect with the steak. And it certainly looks as gory as the song sounds.

Pan-Seared Steak with Red Wine Pan Sauce for Two (from Cooks Illustrated)

Serves 2

CI note: Pan sauces cook quickly, so prepare the ingredients before you begin cooking the steaks. Use a heavy skillet with a nonreactive cooking surface.

Bridget note: I used strip steak, because it’s my favorite.

2 boneless 8-ounce rib-eye steaks or top loin steaks, 1 to 1¼ inches thick, thoroughly dried
Table salt and ground black pepper
1 small shallot, minced (about 2 tablespoons)
1 teaspoon brown sugar
¼ cup dry red wine , such as Cabernet Sauvignon
¼ cup low-sodium chicken broth
1 bay leaf
1½ teaspoons balsamic vinegar
½ teaspoon Dijon mustard
1½ tablespoons unsalted butter , cut into 3 pieces
½ teaspoon minced fresh thyme leaves

1. Heat heavy-bottomed, 10-inch skillet over high heat until very hot, about 3 minutes. Meanwhile, season both sides of steaks with salt and pepper.

2. Lay steaks in pan, leaving ¼-inch of space between each; reduce heat to medium-high, and cook without moving until well browned, about 4 minutes. Using tongs, flip steaks; cook 4 minutes more for rare, 5 minutes more for medium-rare, and 6 minutes more for medium. Transfer steaks to large plate and tent with foil to keep warm.

3. Off heat, add shallot and sugar to empty skillet; using pan’s residual heat, cook, stirring frequently, until shallots are slightly softened and browned and sugar is melted, about 45 seconds. Return skillet to high heat, add wine, broth, and bay leaf; bring to boil, scraping up browned bits on pan bottom with wooden spoon. Boil until liquid is reduced to 3 tablespoons, about 4 minutes. Stir in vinegar and mustard; cook at medium heat to blend flavors, about 1 minute longer. Off heat, whisk in butter until melted and sauce is thickened and glossy. Add thyme and season to taste with salt and pepper. Remove bay leaf, spoon sauce over steaks and serve immediately.

dimply plum cake (twd)

Deb from Smitten Kitchen recently recommended the cake that Michelle chose for TWD this week, and since I’m a Smitten Kitchen junkie, I’d been wanting to make it since then. I didn’t even realize it was Dorie Greenspan’s recipe at first, so I was excited when I saw that it was the assigned recipe. Plus, I just happened to have all of the ingredients the day it was chosen for TWD, including a bunch of plums. That never happens.

I baked the recipe in a muffin pan because muffins are more convenient to store in the freezer and grab before going to work. And I overfilled the muffin cups because I have an annoying lazy tendency. I put what seemed like an appropriate amount of batter in each cup, but I could tell after I pushed the first plum into the batter that the cups were overfilled. How hard would it have been, really, to re-portion the dough into extra muffin cups, especially considering that I only used 10 sections of the 12-cup muffin pan, and I had extra plums. And then I would have avoided making a mess of some of the muffins/cupcakes.

Not that I minded those broken bits. They gave me a great excuse to snack on cake while I finished making breakfast. I thought the cake was really good. I used lemon zest and cinnamon, but I think orange zest would be a lot better. I’m still fighting fall, but this was a good compromise between late summer and fall flavors.

Michelle has posted the recipe.

banana and peanut butter stuffed french toast

Up until very recently, whenever someone mentioned Elvis’ favorite sandwich, I thought to myself “well, no wonder he died young!” Once I actually took a moment to consider it though, the sandwich really isn’t so bad. The basic Elvis sandwich is just bananas and peanut butter, fried like a classic grilled cheese. I’d say that the grilled cheese sandwich is far worse for you. Oh, except sometimes Elvis liked to add bacon, which, okay, is a little over the top.

I realized a few months ago that I like bananas a lot more if they’re served with a bit of peanut butter (or Nutella). That reminded me of Elvis’s favorite sandwich, but I wasn’t interested in pan-frying it. Instead, I thought it would be great as French toast.

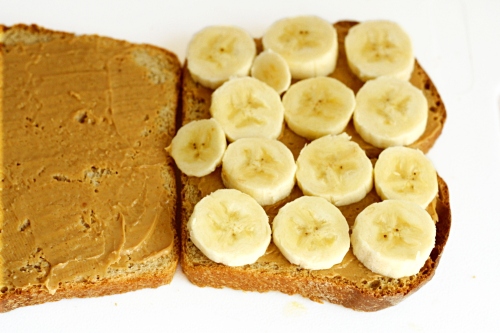
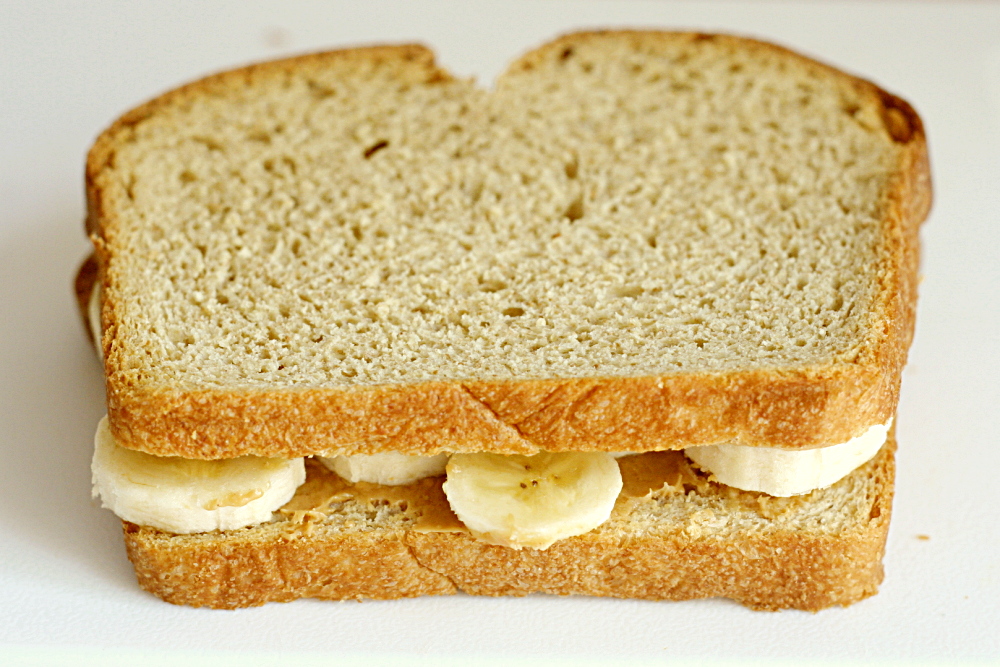
I had never made stuffed French toast, but there are plenty of recipes for different versions of it, so I was confident that it would work. First I made the basic sandwich by smearing one side of each bread slice with a thin layer of peanut butter. I wanted peanut butter on both slices so it would glue the bananas to the bread, keeping the sandwich together. I recommend a very thin layer because peanut butter can be overpowering, as well as sticky in your mouth. I used my favorite French toast recipe for the batter, but made it a little thinner because it would only be absorbed through the non-peanut butter side of the bread slices.

It worked out pretty well. I should have let the sandwich soak in the batter a little longer, and I should have cooked them on higher heat, but the flavors were really good. And there’s really nothing unhealthy about it except for a bit of butter to fry the sandwiches. I’m guessing the drug dependency was a bigger influence on Elvis’ early demise than banana sandwiches.

Elvis French Toast (adapted from Cooks Illustrated’s French Toast recipe)

4 slices sandwiches bread (I used Country Crust Bread)
2 tablespoons peanut butter (approximately)
1-2 bananas, sliced ¼-inch thick
1 large egg
1 cup milk
2 teaspoons vanilla extract
2 tablespoons granulated sugar
¼ teaspoon table salt
1 tablespoon butter

1. Spread a thin layer of peanut butter on one side of each slice of bread. Place slices of banana in a single layeron peanut butter-covered sides of two bread slices. Top with the remaining bread, peanut butter side down.

2. Heat medium nonstick skillet over medium heat for 5 minutes. Meanwhile, beat egg lightly in shallow pan or pie plate; whisk in milk, vanilla, sugar, and salt and salt, continuing to whisk until smooth. Soak sandwiches without oversaturating, about 1 minute per side. Pick up bread and allow excess batter to drip off; repeat with remaining sandwiches.

3. Swirl 1 tablespoon butter in hot skillet. Transfer prepared sandwiches to skillet; cook until golden brown, about 2 minutes on first side and 1 minute 15 seconds on the second. Serve immediately, dusting with powdered sugar.

chocolate chunkers

Just about every week, I’m reminded of why I enjoy being a member of TWD so much. The Chocolate Chunkers Claudia chose this week are no exception. I am always impressed by Dorie’s creativity.

That being said, Dorie and I do often differ on taste preferences. For example, what is with all the raisins? She puts them in everything. I do not approve. Also, peanuts. I like them, but I rarely want them in dessert. Also, this phrase: “You’ll have more crunchies than dough.” But…I love dough. Even more than crunchies.

This recipe is far more involved than my normal cookie recipes. It has quite the substantial ingredient list, and a good number of those ingredients need to be prepped in some way. At least I was able to use up my little-bits-of-leftover-chocolate stash.

She doesn’t call these “chunkers” for nothing. More crunchies than dough indeed. There’s just enough of the brownie-like batter to hold the mix-ins together. But – it works. Yes, I’d rather have a plain, rich, moist, perfect brownie, but for something super-fun and different, I like these cookies.

Claudia has the recipe posted. I substituted dried cherries (which I chopped up a bit) for the raisins and walnuts (not toasted, but they should have been) for the peanuts.

gazpacho

While everyone else has been getting excited about fall, publishing recipes with pumpkin and apples and cranberries, I’ve been desperately holding on to summer. Not only do I just plain like being warm, but I didn’t get my fill of summer produce this year. I only ate corn on the cob one time – just one! I’m a disgrace. And I can never get enough of flavorful seasonal tomatoes.

Gazpacho, to me, is the quintessential summer dish, putting the spotlight on tomatoes, with cucumbers and peppers singing backup. I served this gazpacho to a friend of mine from Spain, and he said that it was as good as any gazpacho he’d had over there. This is good stuff.

I’ve always been a big fan of traditional hot tomato soup, and I didn’t understand the allure of gazpacho when I was young – cold tomato soup? Yuck. But gazpacho made correctly isn’t anything like a smooth tomato soup. I like gazpacho to have more in common with salad than soup. That means that the vegetables have to be chopped by hand instead of in the food processor. It takes more time, but it’s worth it to eat real gazpacho instead of the vegetable smoothie that you’d end up with if you used the food processor.

Another great aspect of gazpacho is that it lasts for several days in the fridge. And it’s absolutely healthy, so it makes a really good snack. I love to keep some around for when I get home from work and I’m starving and dinner won’t be ready for a while.

Right after I finished dicing the vegetables for this, I inhaled deeply – it was pure summer. I felt better about letting the season go and moving into fall once I had made a batch of gazpacho. But don’t expect to see pumpkin recipes here for a while!

Gazpacho (from Cooks Illustrated)

CI note: Welch’s and Fresh Samantha’s are our favorite brands of tomato juice for this recipe — not too thick, with a bright, lively flavor. This recipe makes a large quantity because the leftovers are so good, but it can be halved if you prefer. Traditionally, diners garnish their gazpacho with more of the same diced vegetables that are in the soup, so cut some extra vegetables when you prepare those called for in the recipe. Additional garnish possibilities include simple garlic croutons, chopped pitted black olives, chopped hard-cooked eggs, and finely diced avocados. For a finishing touch, serve in chilled bowls.

Bridget note: I’ve found that the brand of tomato juice is extremely important. I’m never been able to find Welch’s or Samantha’s tomato juice, but Campbell’s works fine. And I never use ice cubes, I just add 1 cup of cold water.

Makes about 3 quarts, serving 8 to 10

3 ripe medium beefsteak tomatoes (about 1½ pounds), cored and cut into ¼-inch cubes (about 4 cups)
2 medium red bell peppers (about 1 pound), cored, seeded, and cut into slices, then into ¼-inch cubes (about 2 cups)
2 small cucumbers (about 1 pound), one peeled and the other with skin on, both seeded and cut into ¼-inch cubes (about 2 cups)
½ small sweet onion (such as Vidalia, Maui, or Walla Walla) or 2 large shallots, peeled and minced (about ½ cup)
2 medium cloves garlic, minced or pressed through a garlic press (about 2 teaspoons)
2 teaspoons table salt
⅓ cup sherry vinegar
ground black pepper
5 cups tomato juice
1 teaspoon hot pepper sauce (optional)
8 ice cubes
extra-virgin olive oil for serving

1. Combine the tomatoes, bell peppers, cucumbers, onions, garlic, salt, vinegar, and pepper in a large (at least 4-quart) nonreactive bowl. Let stand until the vegetables just begin to release their juices, about 5 minutes. Stir in the tomato juice, hot pepper sauce, if using, and ice cubes. Cover tightly and refrigerate to blend flavors, at least 4 hours and up to 2 days.

2. Adjust the seasonings with salt and pepper and remove and discard any unmelted ice cubes. Serve cold, drizzling each portion with about 1 teaspoon extra-virgin olive oil and topping with the desired garnishes, (see top note).

lemon pancakes with blueberry syrup

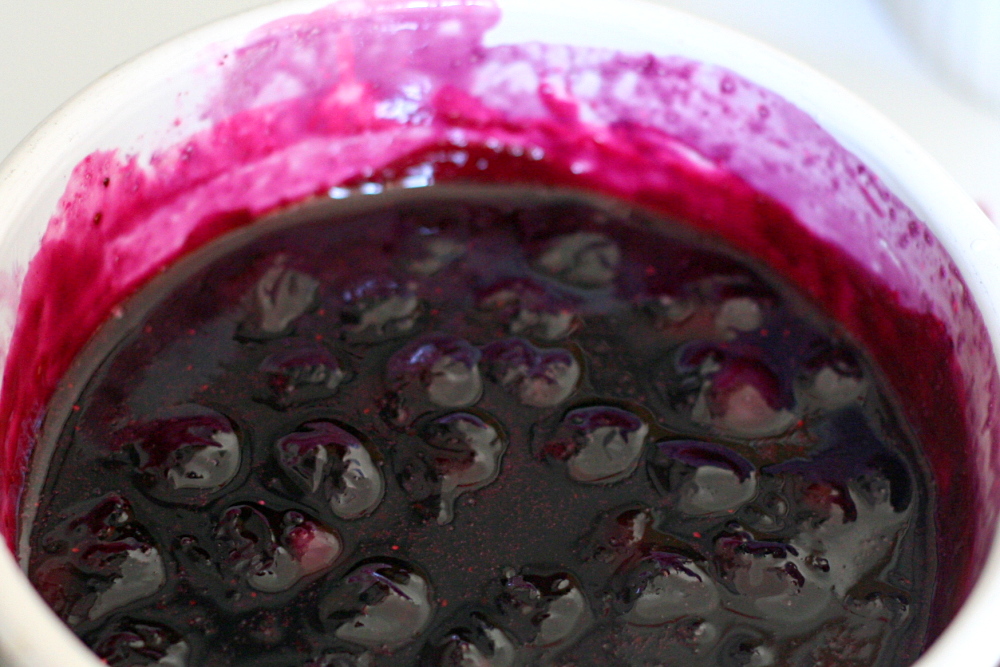
I haven’t made plain pancakes in a very long time. I guess, to me, it’s like eating bread – sure it’s good plain, but it’s so much better with Stuff. For pancakes, that Stuff mostly involves fruit. You could make lemon pancakes and put the blueberries right in them, but why not do something different with those blueberries and make a syrup out of them?

This is another Emeril breakfast recipe, and this one, I made more complicated instead of simplifying it. Emeril’s blueberry syrup is just a combination of blueberries and corn syrup, which I think sounds too one-dimensionally sweet. I have a recipe for blueberry syrup that I’ve been making for a long time that I’m really happy with, so I made that one instead, even though it involves a few more ingredients.

You can see that my pancakes came out a little thin. I’ve been experimenting with Saco powdered buttermilk, since I don’t generally keep liquid buttermilk around. The recipe uses the same ratio of flour to milk that most pancake recipes do, so I don’t think the pancakes are thin because there’s too much liquid. I think the powdered buttermilk reconstituted with water as per the instructions on the container create a thinner liquid than regular buttermilk.

But I don’t mind thin pancakes, and you really can’t go wrong with a lemon-blueberry combination. The syrup is great – the sweetness is balanced by a spritz of lemon juice and pinch of salt, so the flavor of the blueberries can shine.

Lemon Pancakes with Blueberry Syrup (adapted from Emeril Live)

Serves 3-4

Pancakes:
1 cup all-purpose flour
2 tablespoons sugar
1 teaspoon baking powder
½ teaspoon baking soda
¼ salt
1 cup buttermilk
1 large egg
2 tablespoons butter, melted
2 tablespoons fresh lemon zest, finely chopped
½ stick (4 tablespoons) butter, cut into 10 equal slices

Blueberry Syrup:
1 cup sugar
½ cup water
pinch salt
1 tablespoon cornstarch
2 tablespoons water
1 cup blueberries
½ teaspoon lemon juice
1 tablespoon butter

For the pancakes:
In a small mixing bowl, sift the flour, sugar, baking powder, baking soda and salt. In a medium mixing bowl, whisk the buttermilk, egg, and butter until fully incorporated. Add the sifted ingredients to the milk mixture and whisk until it is slightly smooth, but still has some lumps. Fold in the lemon zest and allow the batter to sit for a couple of minutes. Lightly grease a griddle over medium heat. Cooking in batches, pour ¼ cup of the batter onto the hot griddle for each pancake. Cook for about 2 to 3 minutes or until the batter bubbles and is golden brown, flip over and continue to cook until golden brown. Repeat the above process with the remaining batter. Stack the pancakes on each serving plate. Place a pat of butter between each layer. Drizzle the pancakes with the syrup and garnish with the confectioners’ sugar.

For the syrup:
Bring ½ cup water, sugar, and salt to a boil in a small saucepan. In a small bowl, mix 2 tablespoons water and cornstarch until cornstarch dissolves. Add cornstarch mixture to sugar mixture and stir to blend. Stir in blueberries and boil over medium heat until berries start to pop and syrup turns blue, 5-6 minutes. Remove from heat and add lemon juice and butter.

chocolate whopper malted drops (twd)

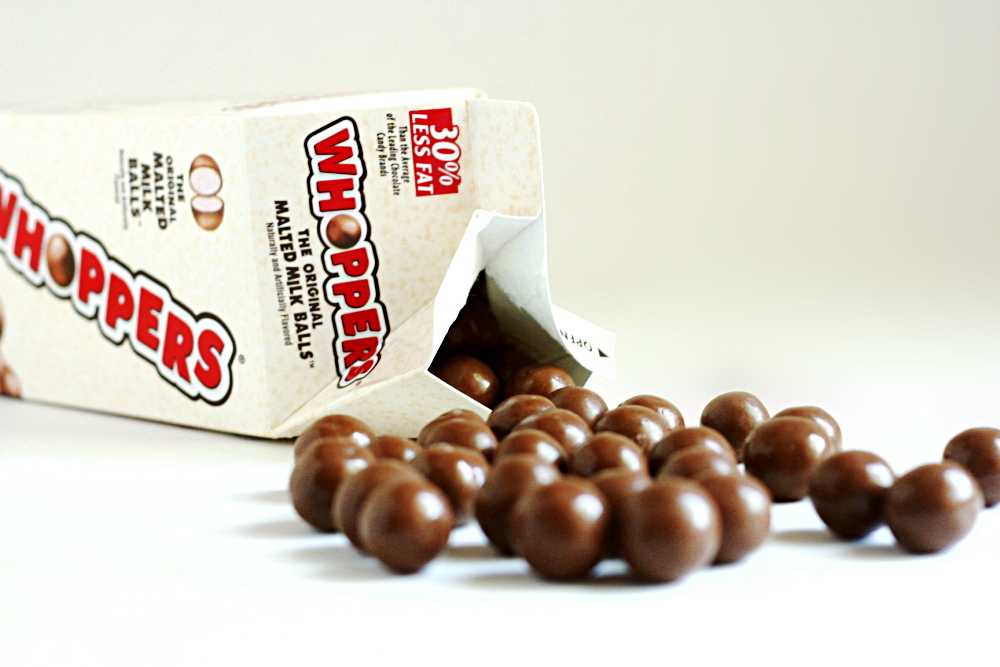
The Whopper cookies that Rachel chose for TWD are such a fun idea, and I think you’d be hard-pressed to find a recipe like this from any other source. With cocoa and malted milk powder in the dough and chopped Whoppers and chocolate chips as mix-ins, this recipe is pure Dorie.

It became clear to me right off the bat that chopping something as small and perfectly spherical as Whoppers would drive me to distraction. So instead, I dumped them in the food processor. It was risky, because food processors are far better at pulverizing than chopping, but it seemed worth it.

I was a little worried by the texture of the cookies right after they came out of the oven, because they seemed gummy. Had my partially powdered Whoppers ruined an entire batch of cookies? Fortunately, they improved greatly once they cooled, becoming pleasantly chewy and rich.

I compared batches baked right after the dough was made and baked the next day. Dave and I agreed that the batch chilled overnight was oh-so-slightly chewier with a more even texture, but that the difference was so subtle that the wait wasn’t worth it.

I thought it was a fun cookie – definitely a different idea, and a good one. Dave said they were nice, but not thrilling. Damned by faint praise.

Rachel has the recipe in her blog.

crawfish, roasted tomato, and farmers cheese pizza

I make pizza probably every other week, always on the weekend. About half of the time I make a traditional pizza with tomato sauce and mozzarella cheese. The other half varies – in the past few months, I’ve made shrimp scampi pizza, caramelized onion and Gruyere pizza, and spinach ricotta pizza. When I tell Dave that we’re having pizza for dinner, he always asks hopefully, “Normal pizza?”

Not this time. I’ve had crawfish tails in my freezer for months. I used a portion of the package for a recipe which I will, eventually, blog about, but I had no plans for the remainder. Cooks Illustrated’s recipe for pizza with shrimp, farmers cheese, and roasted tomatoes seemed like a great place to use some of that crawfish in place of the shrimp. Something about that combination of ingredients seemed very American to me.

I really only used CI’s recipe as a basic guide. Their recipe is developed to grill the pizza, which I wouldn’t be doing. Since I wasn’t sure if the crust recipe they provided was specially designed for grilling, I opted to use my favorite regular pizza dough recipe, tweaked to incorporate the seasonings CI uses in their recipe.  I substituted crawfish for the shrimp and used far less than they call for, and I used Deb’s recipe for slow-roasted tomatoes instead of CI’s method for roasting tomatoes

Overall, it was the same basic ingredients CI called for, but combined a little differently. It was my first time using farmers cheese, and I really liked it. The slow-roasted tomatoes, oh my gosh. I made about twice as many as I needed for the pizza, and I ate the others plain. I was greedy and barely shared with Dave.

The only step I wasn’t quite sure how to adapt was the actual grilling of the pizza to baking them on a hot pizza stone. Since all of the toppings were already cooked, I didn’t want to risk overcooking them by putting them into a 500 degree over for 8 minutes. I ended up simply putting the untopped dough in the oven for a few minutes, then taking it out, adding the toppings, and putting it back in until the crust was spotty browned like I like it. It wasn’t the perfect solution – I should have poked the dough with a fork before putting it on the hot stone, because it puffed up like a pita.

Dave and I both really liked the pizza. I should have used more cheese, but when is that not the case? (The recipe below is adjusted for the amount of cheese I wish I would have used.)  Dave thinks shrimp would have been better than crawfish, but I don’t really agree. The only problem I had was that there was that the toppings, especially the crawfish, kept falling off the pizza. More cheese might have acted like glue to hold the toppings on as well. Overall, this was my favorite of the non-traditional pizzas I’ve made recently, and a great way to use up some of that tasty crawfish.

Crawfish, Roasted Tomato, and Farmers Cheese Pizza (substantially adapted from Cooks Illustrated; Roasted Tomatoes from Smitten Kitchen)

Serves 6 as a main course

Garlic-Herb Pizza Crust:
2 tablespoons virgin olive oil
1 tablespoon minced garlic
½ teaspoon herbes de Provence
1 teaspoon ground black pepper
1¾ cups water divided, warm
2¼ teaspoons instant yeast (1 envelope)
4 cups bread flour
1½ teaspoons table salt

Roasted Tomatoes
24 cherry tomatoes (small), halved lengthwise
1 tablespoon virgin olive oil
Table salt and ground black pepper

Crawfish or (Shrimp)
1 pound crawfish tails or medium-sized shrimp
1½ tablespoons olive oil, plus additional for drizzling
½ teaspoon hot chili powder
⅛ teaspoon cayenne pepper
Table salt and ground black pepper

Toppings
12 ounces farmers cheese, crumbled
⅔ cup packed cilantro leaves, minced
⅔ cup packed fresh parsley, minced

1. For the crust: Heat olive oil in a small skillet; add next 3 ingredients and cook over low heat until garlic softens, about 5 minutes. Cool.

2. Mix flour, yeast, and salt in a food processor. Add water and herb oil to yeast mixture. With machine on, gradually pour liquid into dry ingredients; process until a rough ball forms. If dough is too sticky or dry, add flour or water, 1 tablespoon at a time. Let dough rest for 5 minutes, then continue to process until dough is smooth, about 35 seconds.

3. Knead dough by hand a few seconds to form smooth, round ball; place in a lightly oiled bowl, cover with a damp cloth and let rise until dough doubles in size, about 2 hours.

4. For the roasted tomatoes: Preheat oven to 225°F. Halve each tomato crosswise and arrange on a parchment-lined baking sheet. Drizzle with olive oil, just enough to make the tomatoes glisten. Sprinkle with salt and pepper. Bake the tomatoes in the oven for about three hours. You want the tomatoes to be shriveled and dry, but with a little juice left inside. (The tomatoes can be set aside at room temperature up to 6 hours ahead.)

5. Place a pizza stone on the lowest oven rack and heat oven to 500 degrees. Punch dough down and divide into 3 equal pieces. Roll each portion to form a smooth, round ball. Place the balls on a lightly floured surface, cover with a damp cloth, and let rest 10-30 minutes.

6. For the crawfish/shrimp: Heat a medium-sized skillet over high heat. Toss crawfish with 1½ tablespoons oil, chili powder, cayenne, and salt and pepper. Cook crawfish in hot skillet, stirring occasionally, for 3-4 minutes, until the tails curl. (Shrimp may need an additional 2-3 minutes, depending on their size; cook until opaque.)

7. Stretch and press a ball of dough until it reaches a diameter of 9-11 inches. If the dough is very resistant to being stretched, let it rest 5 minutes and then try again.

8. Brush the circle of dough with olive oil, then stab it with a fork 10-12 times. Transfer the dough to a pizza peel dusted with cornmeal. Slide the dough onto the heated stone. Bake until the crust edges begin to brown, 5-8 minutes. Remove the pizza from the oven, add ⅓ of all toppings, and return to hot stone until crust is crisp and browned, 3-4 minutes. Cut into wedges and serve immediately. Repeat steps 7 and 8 with remaining dough and toppings.